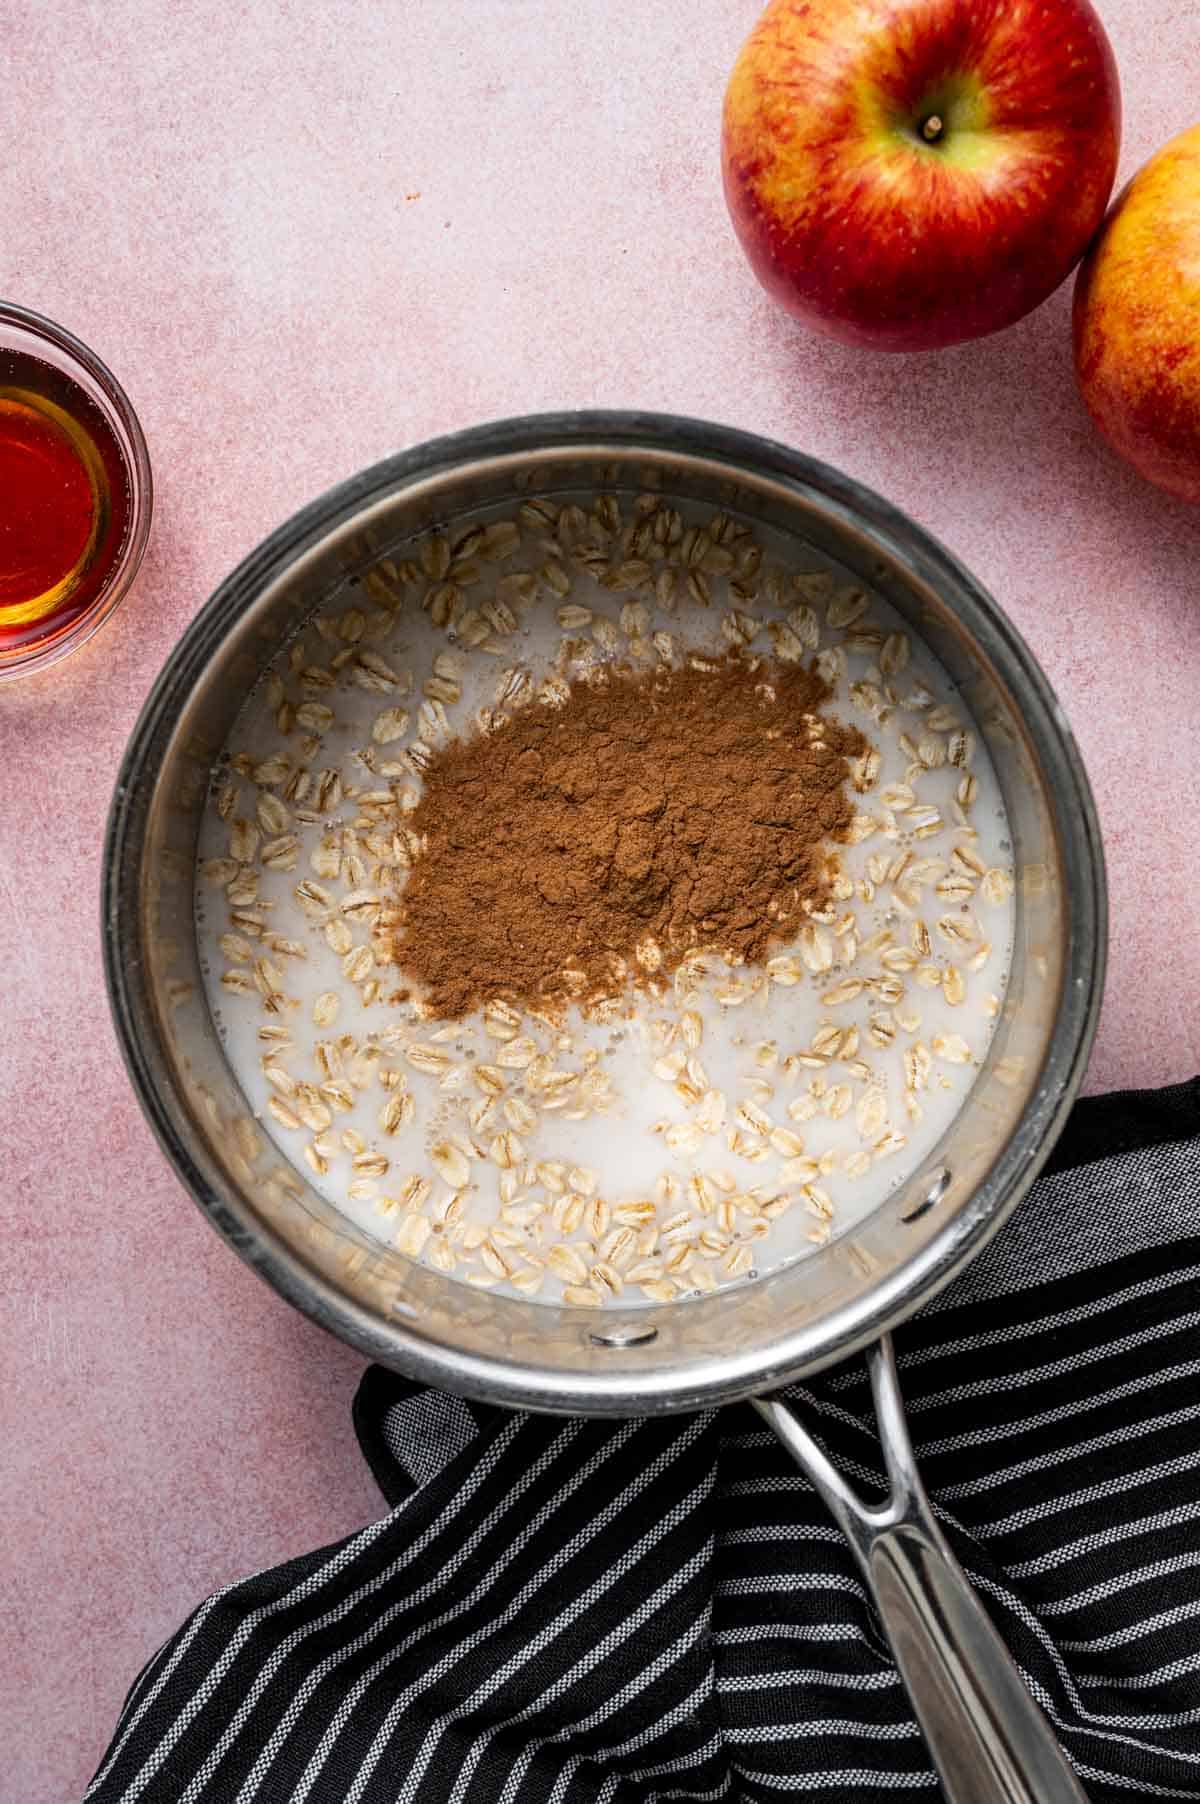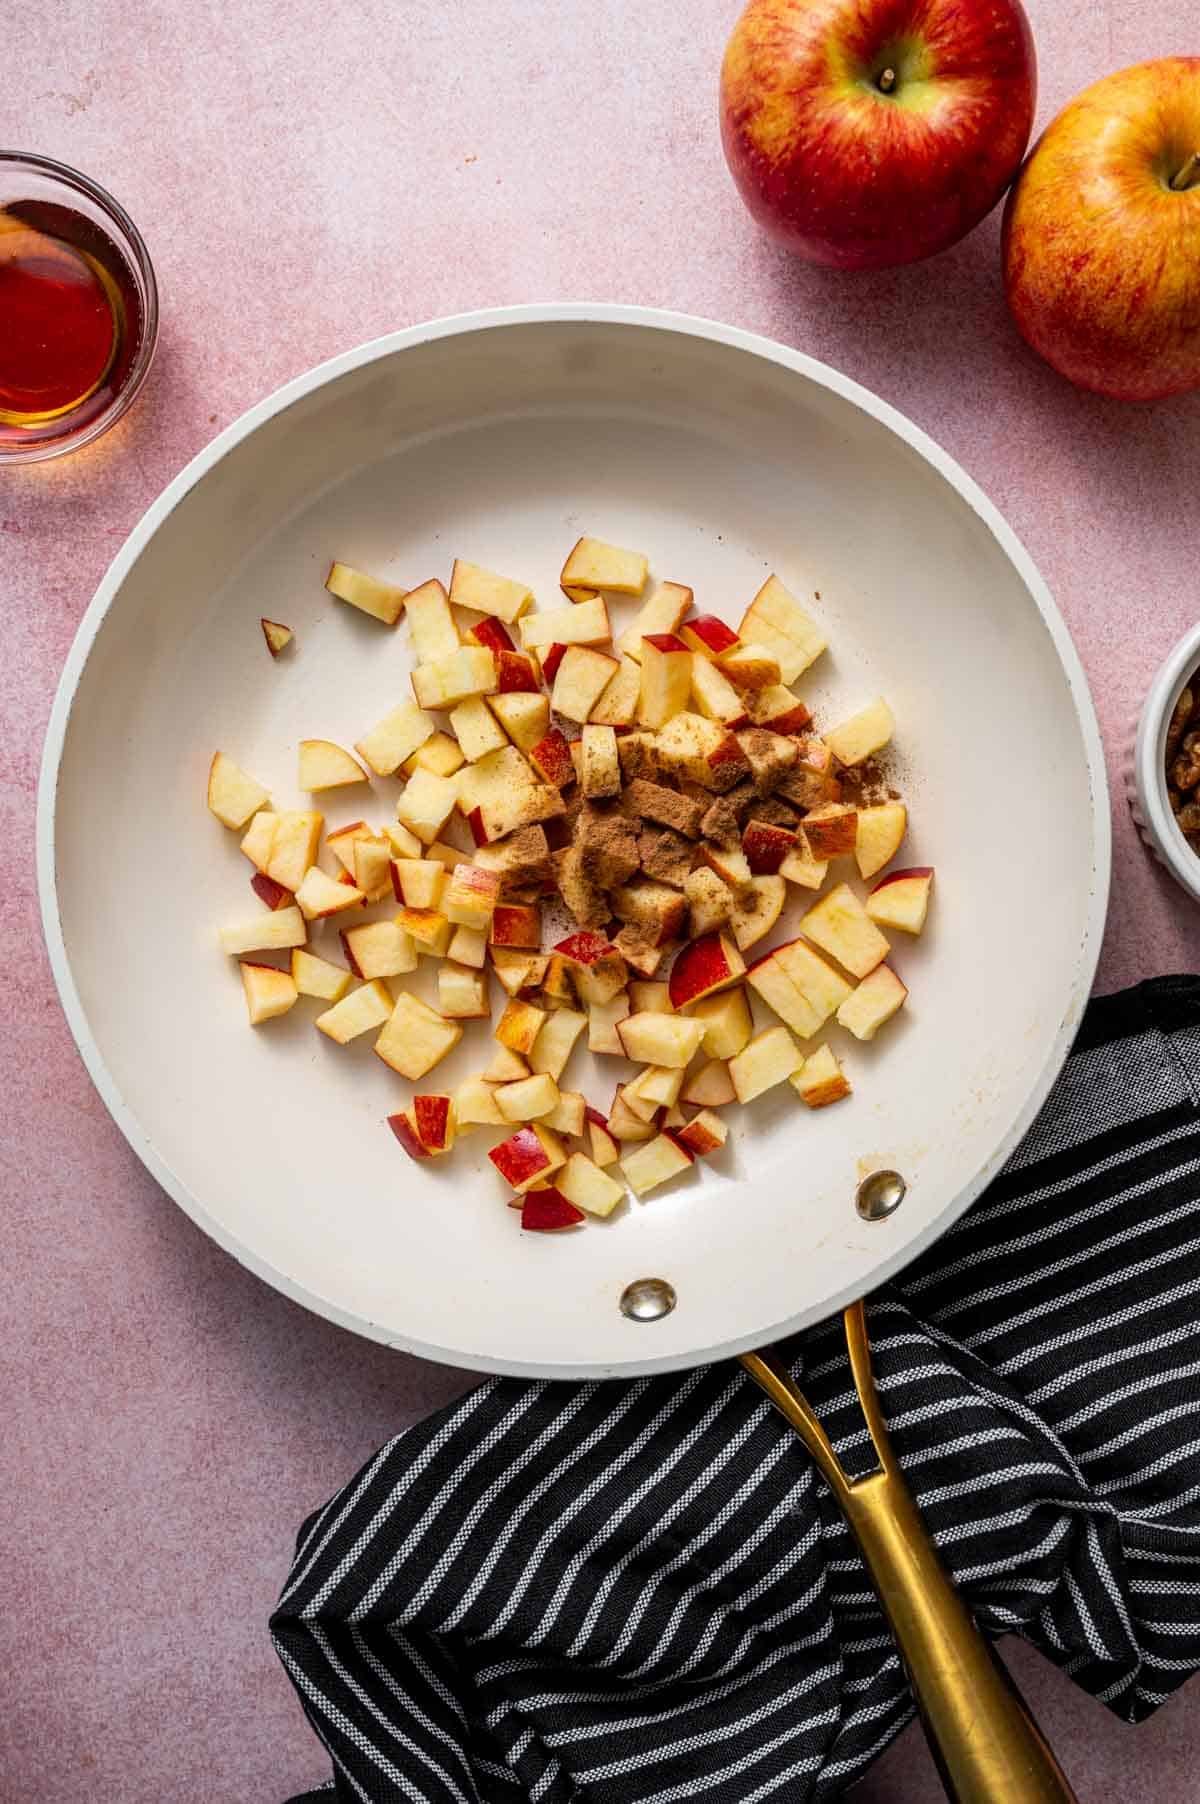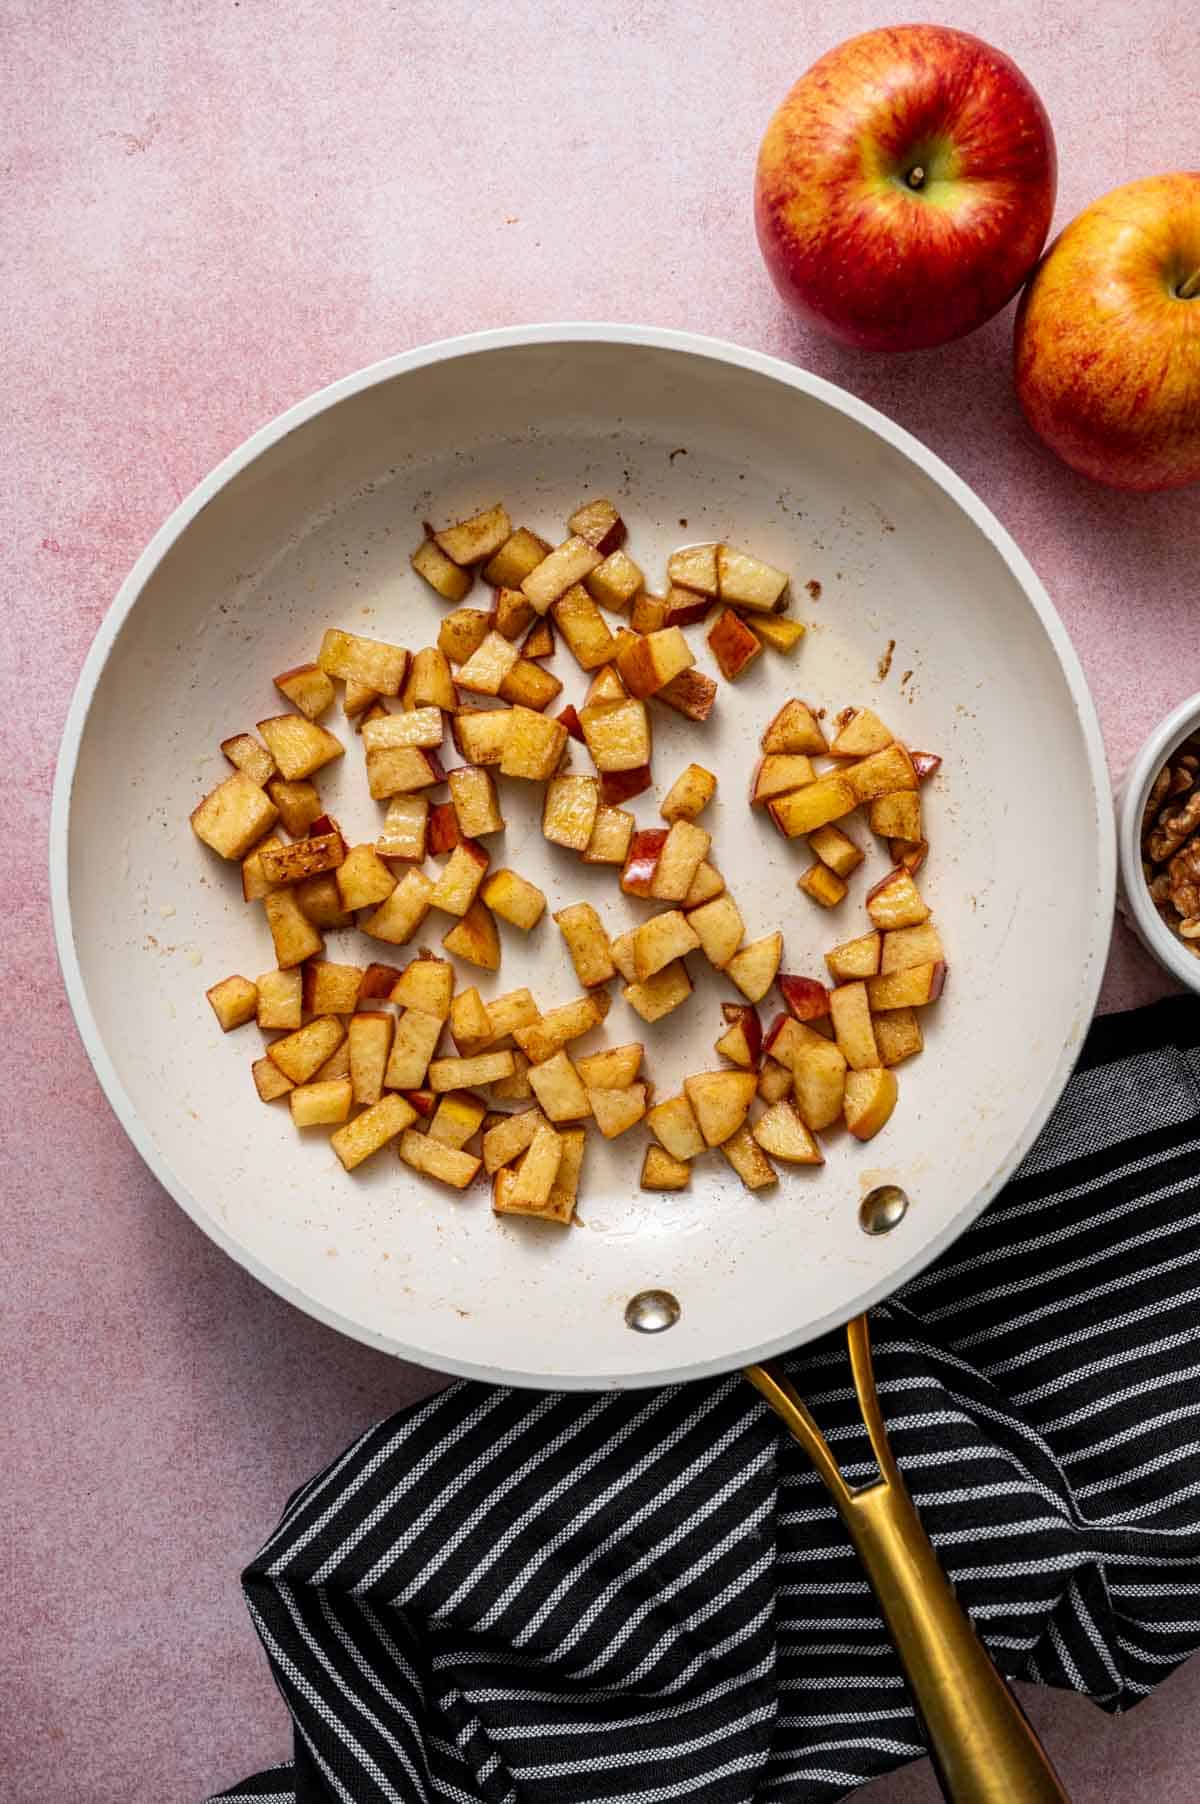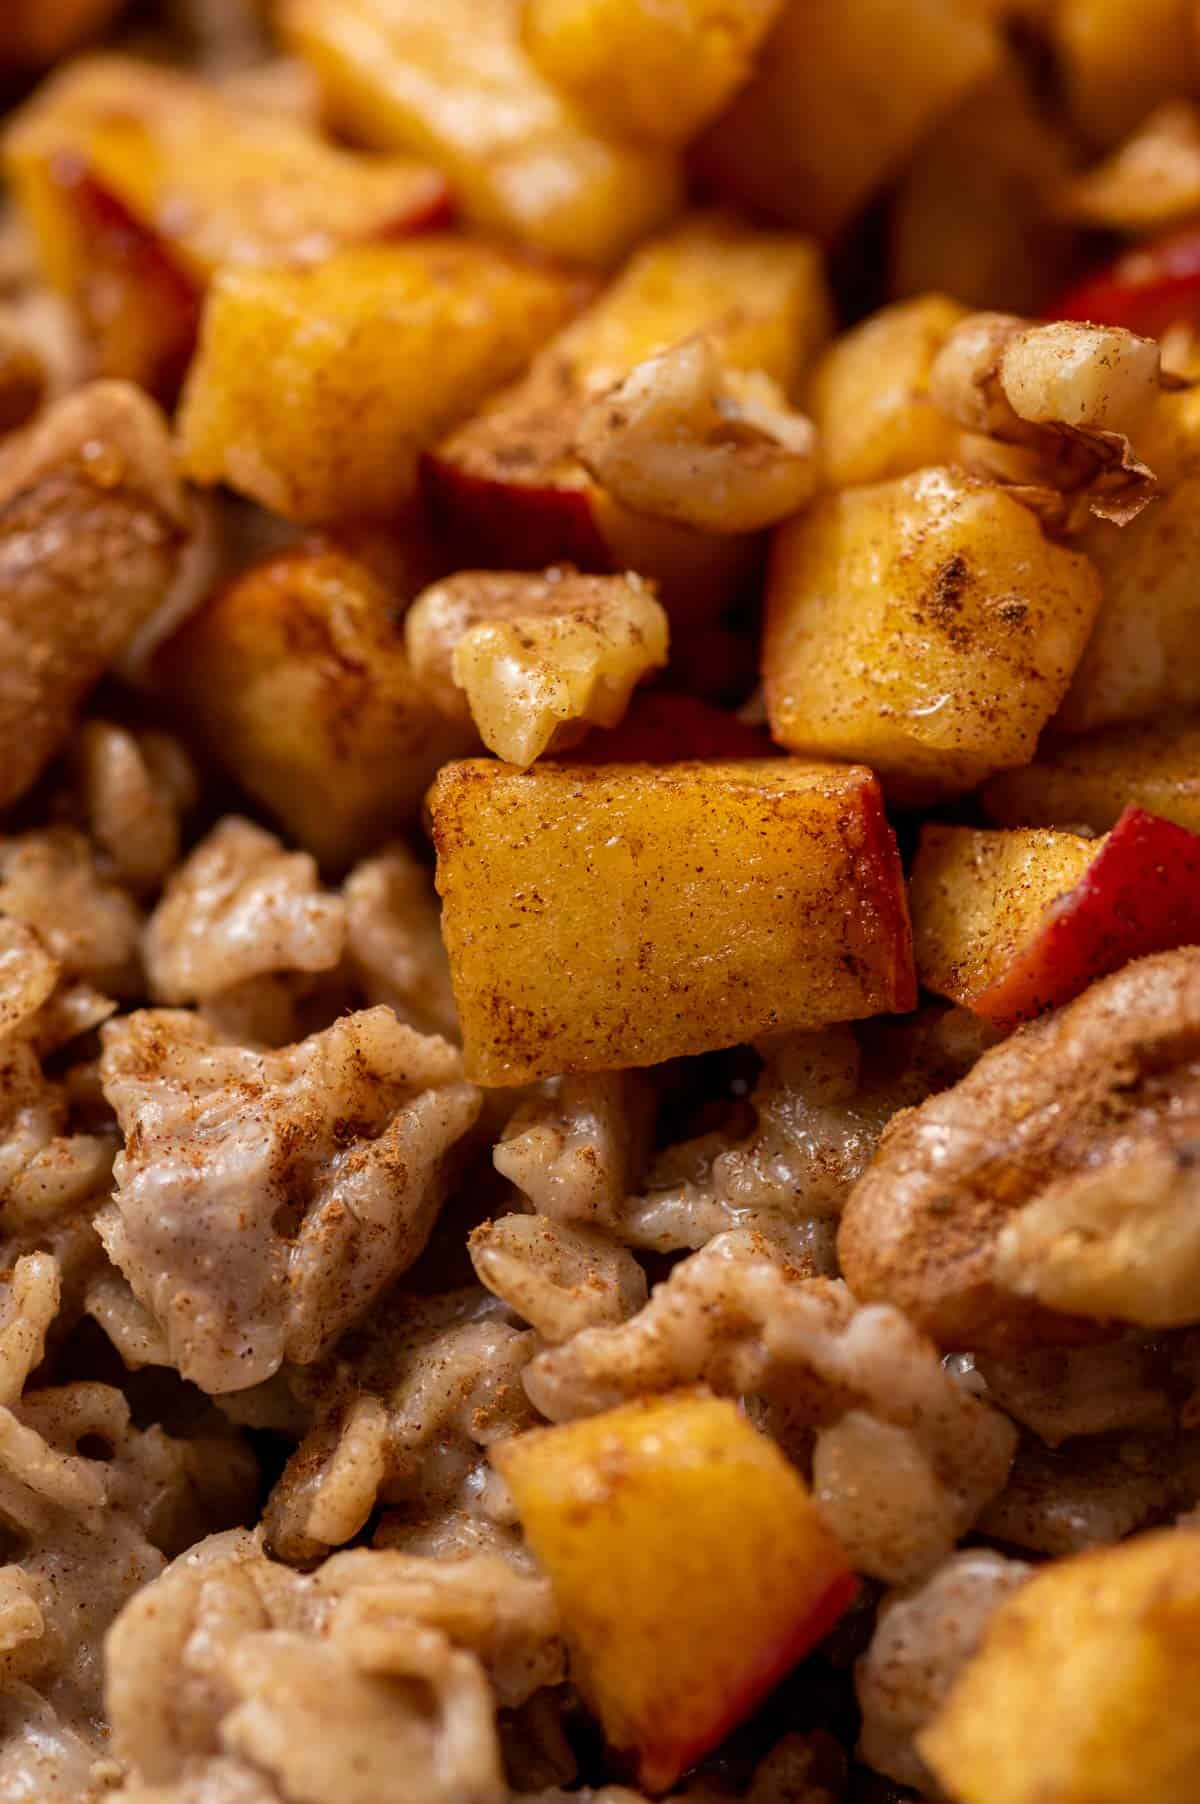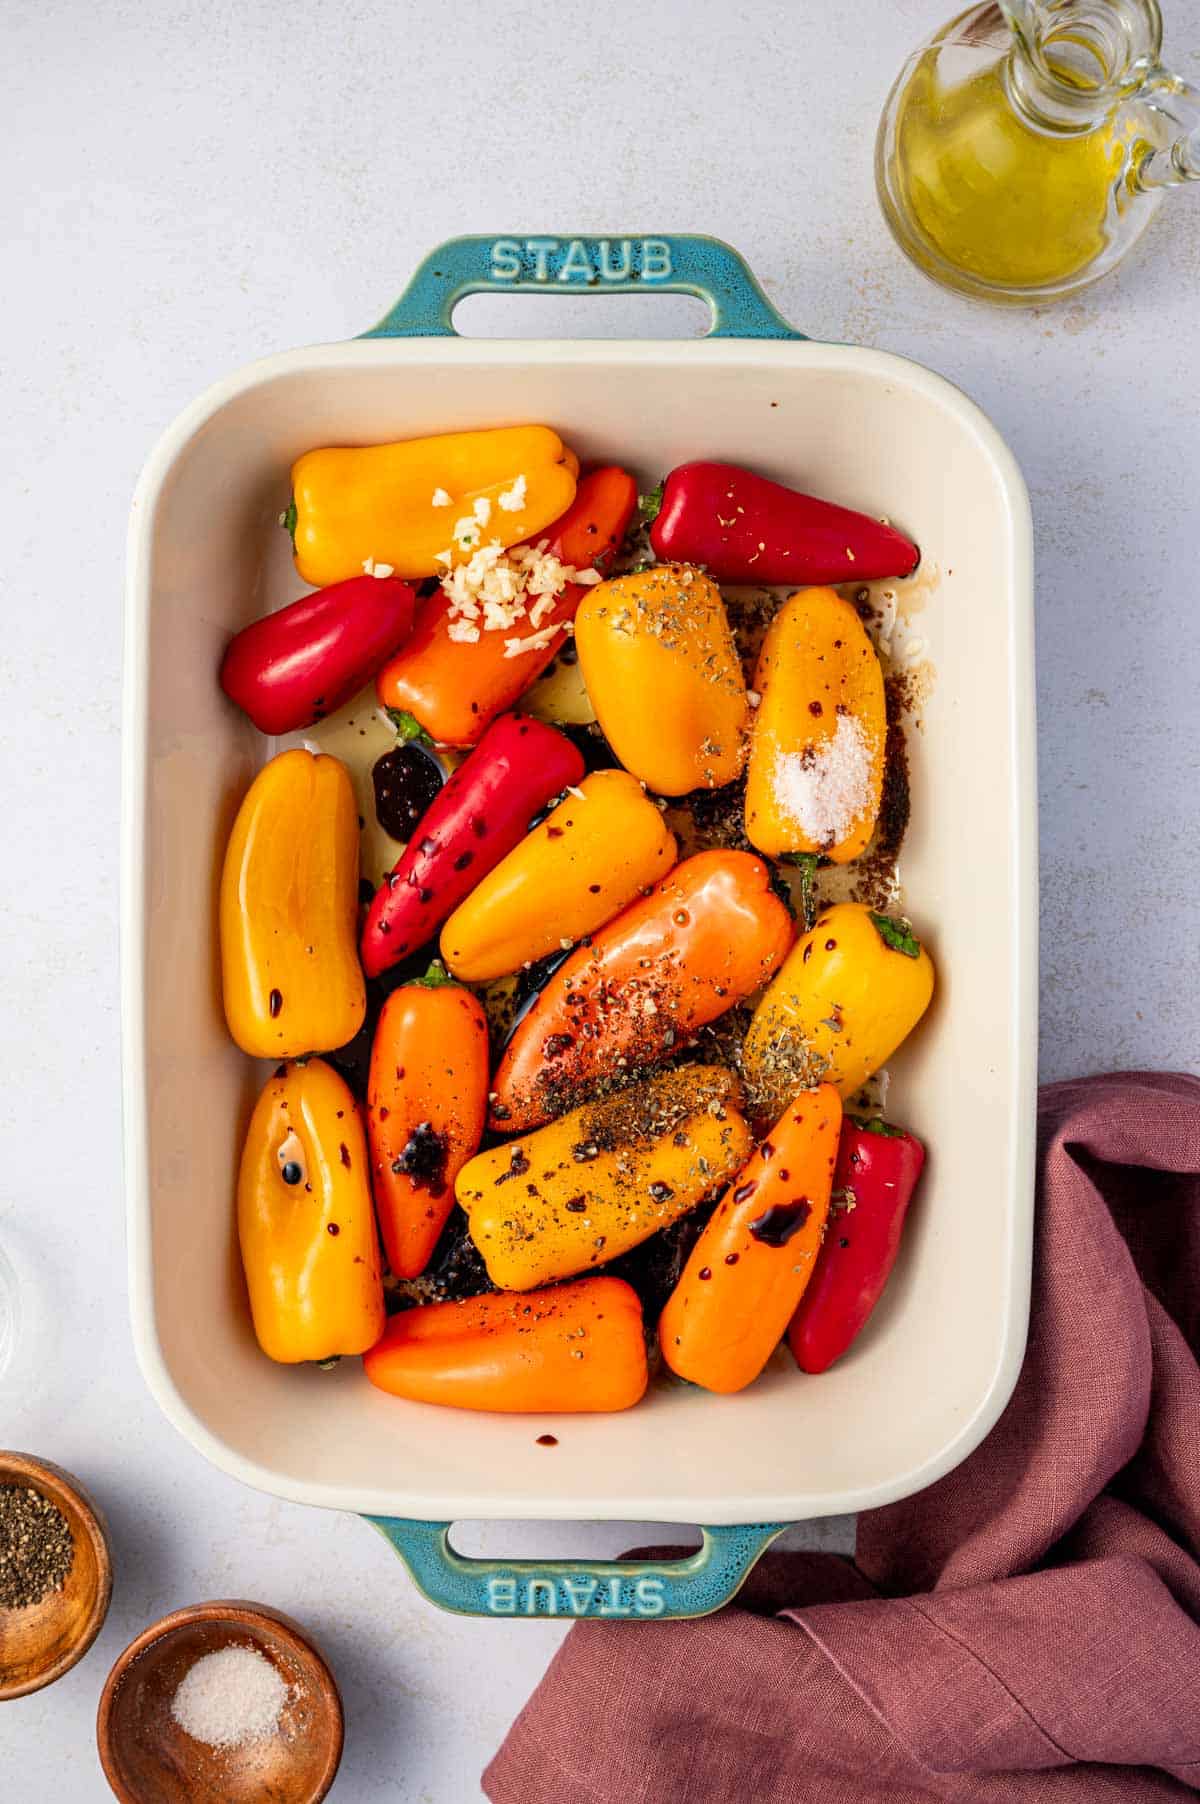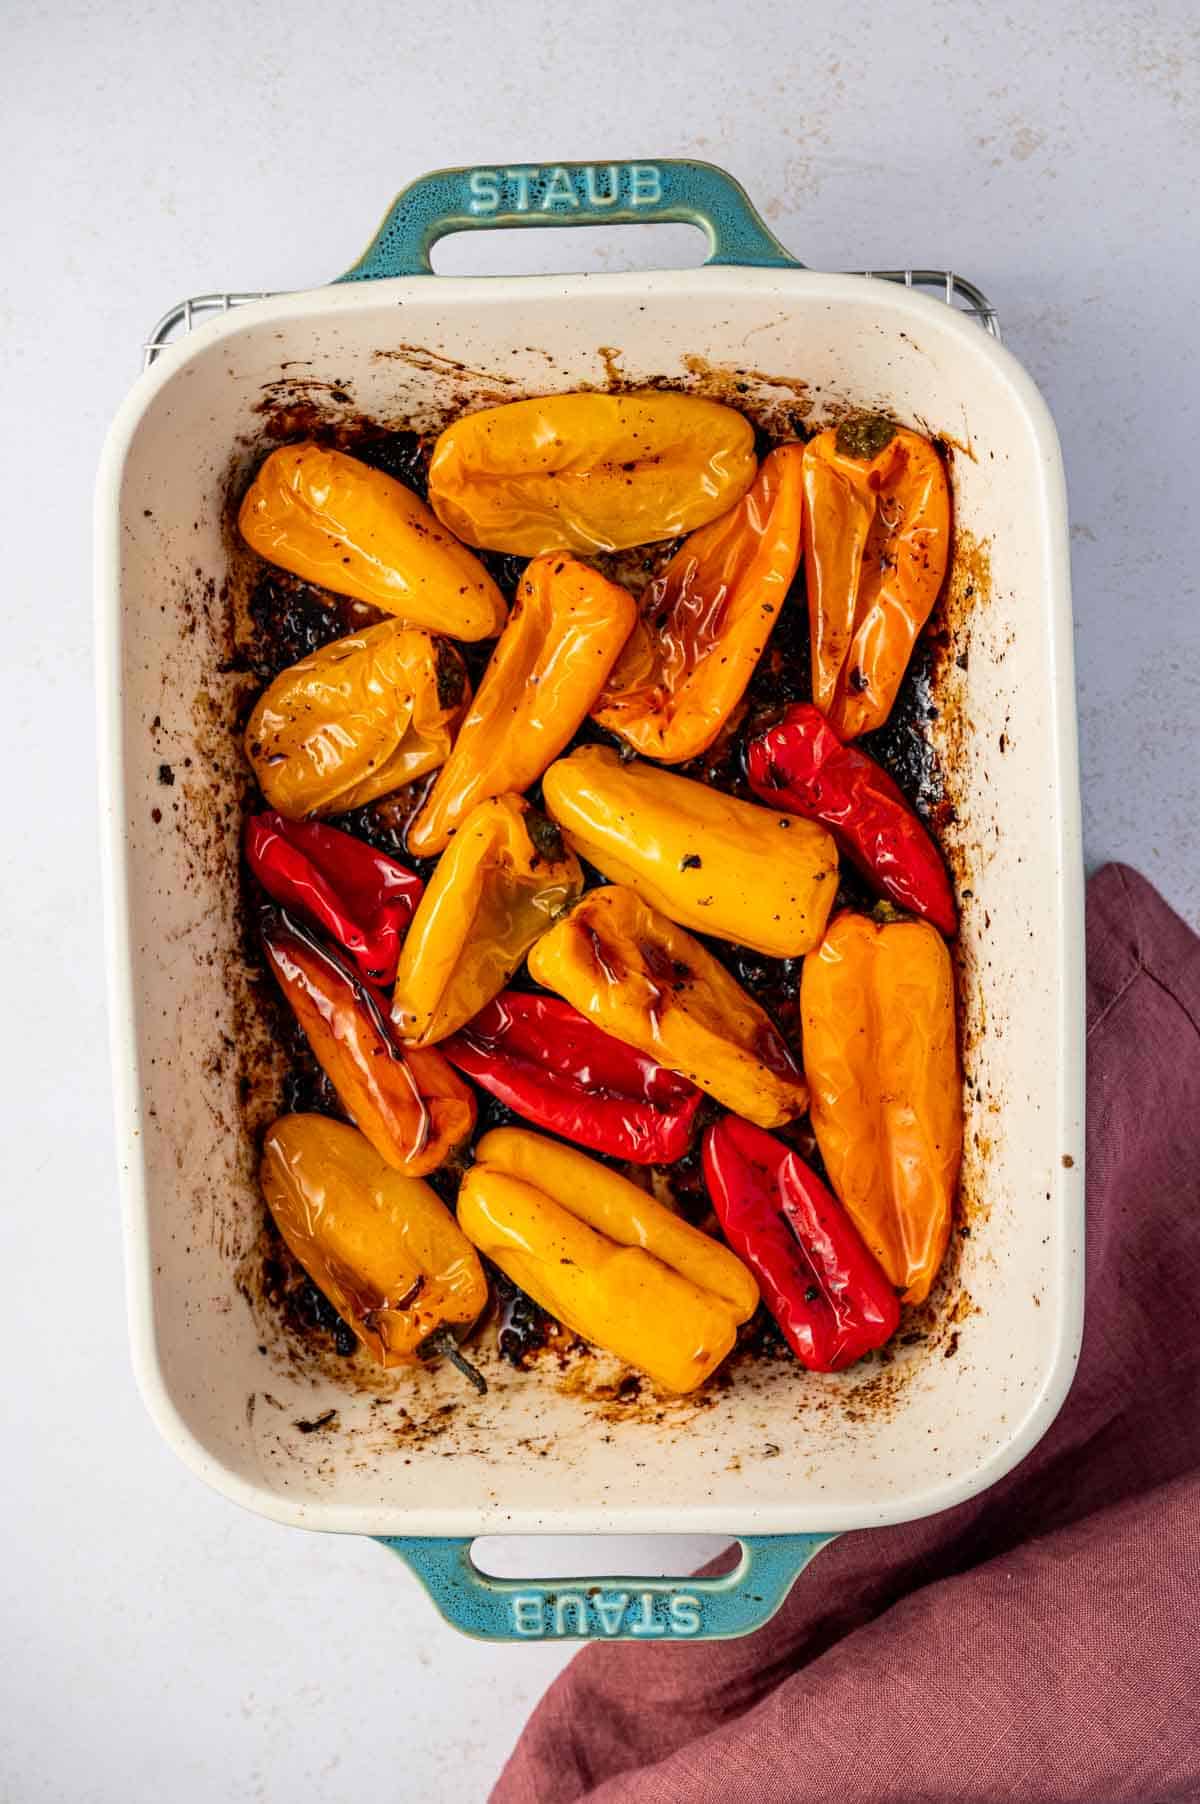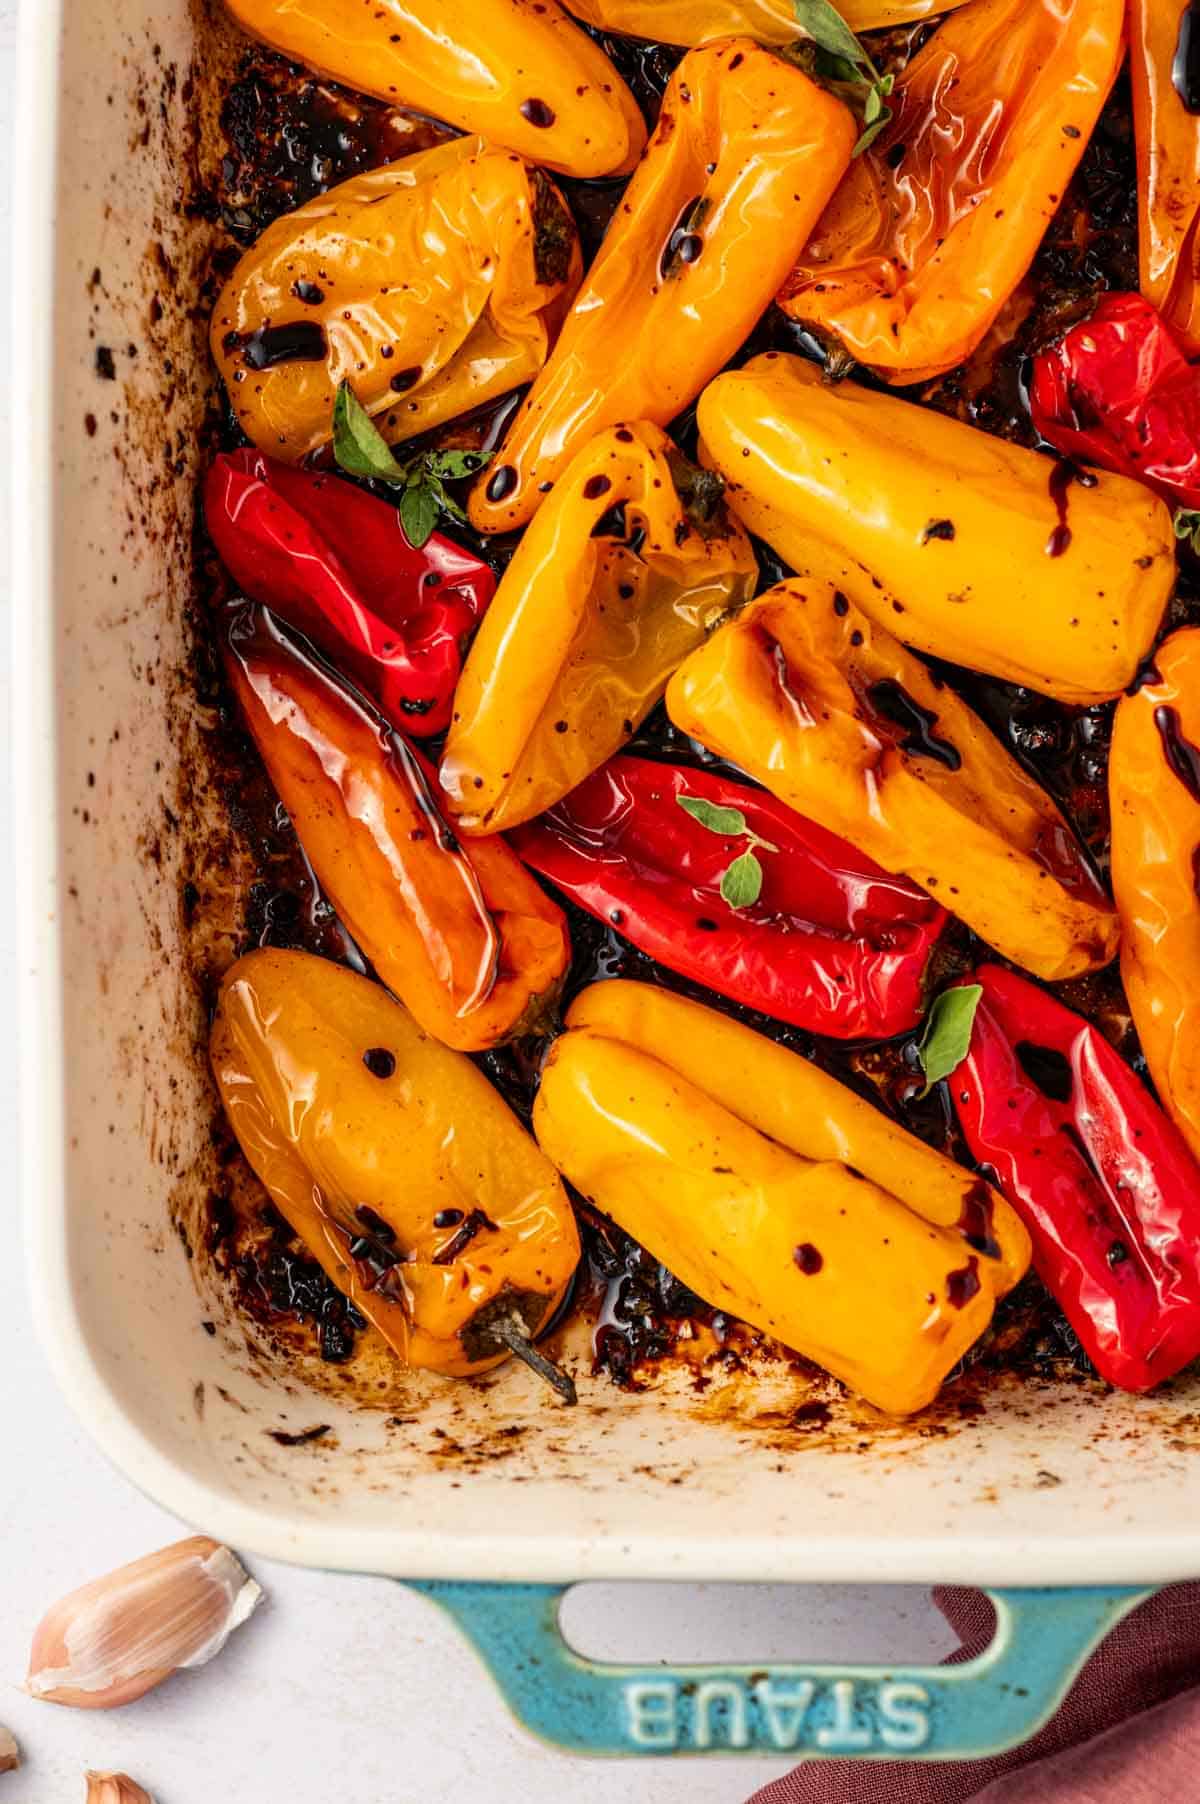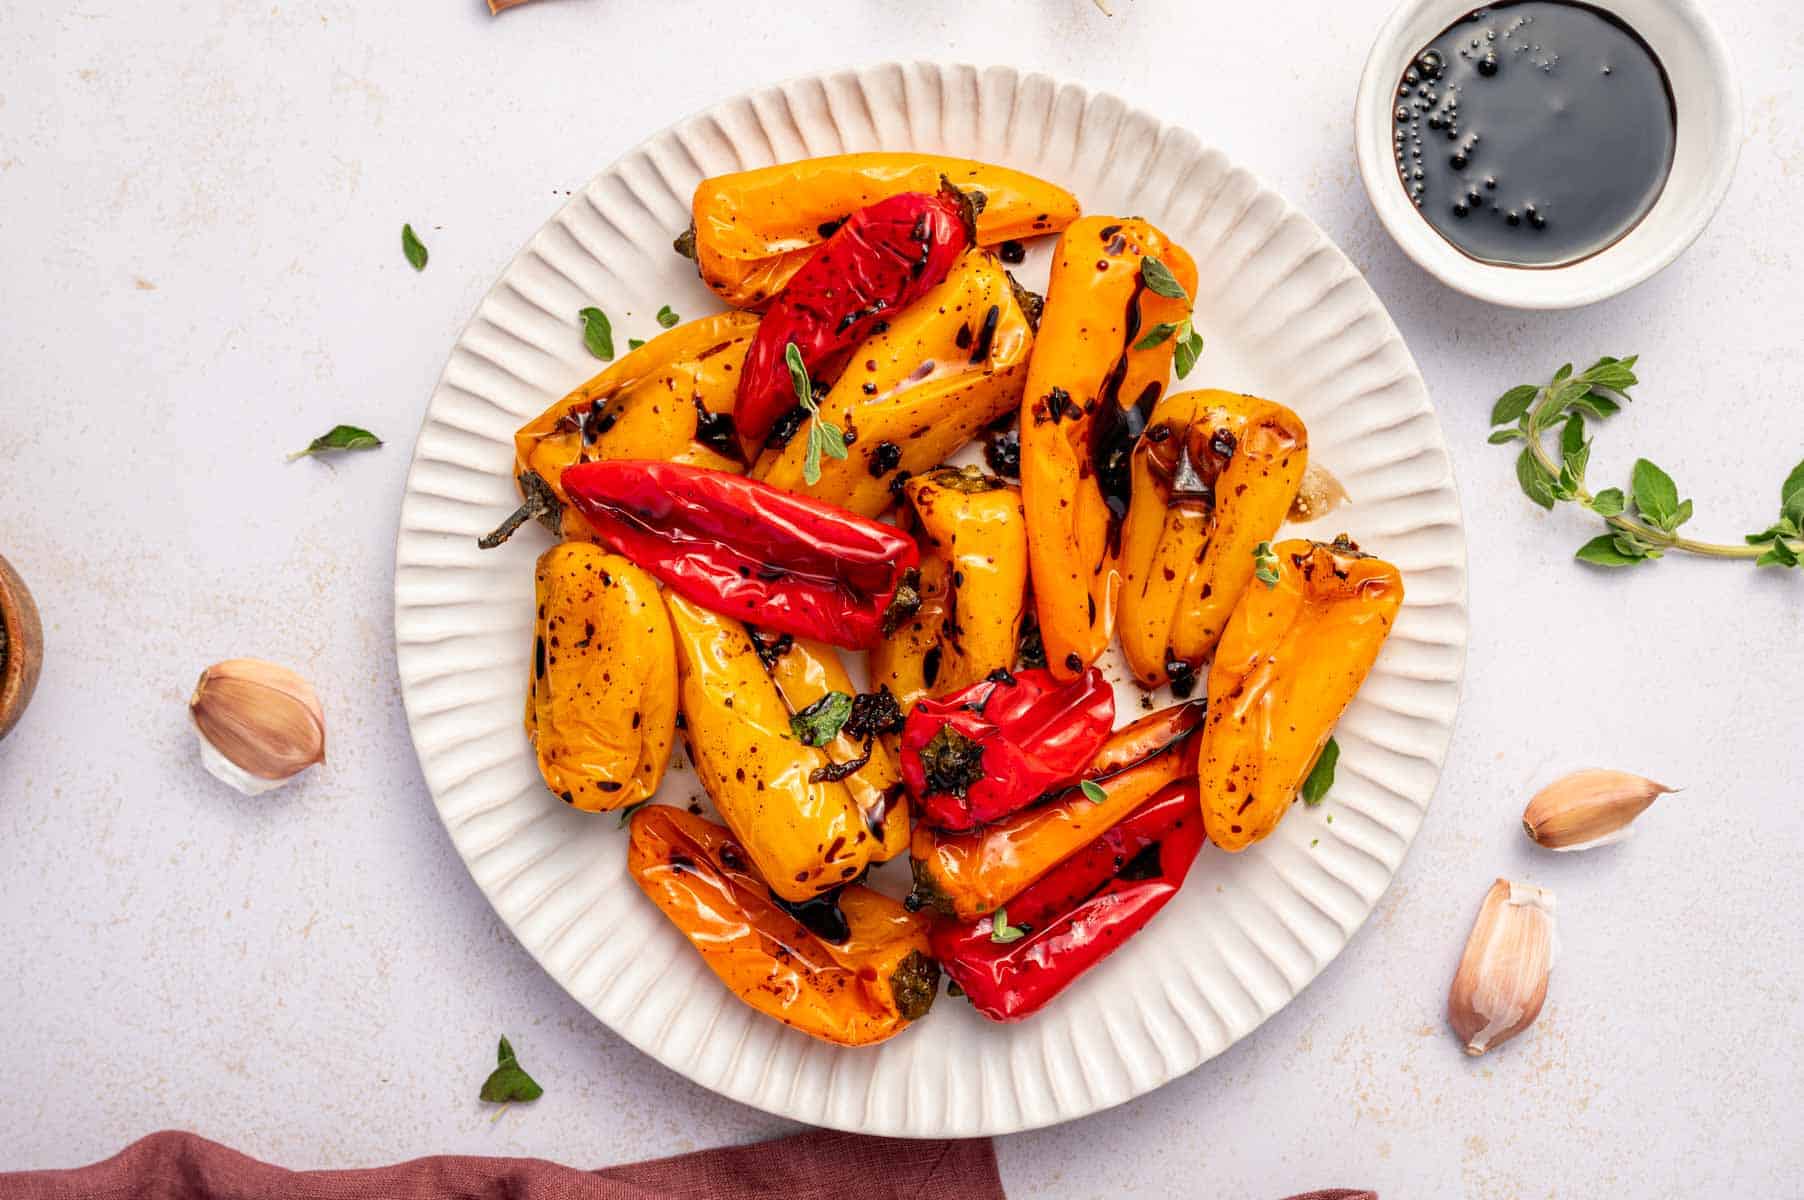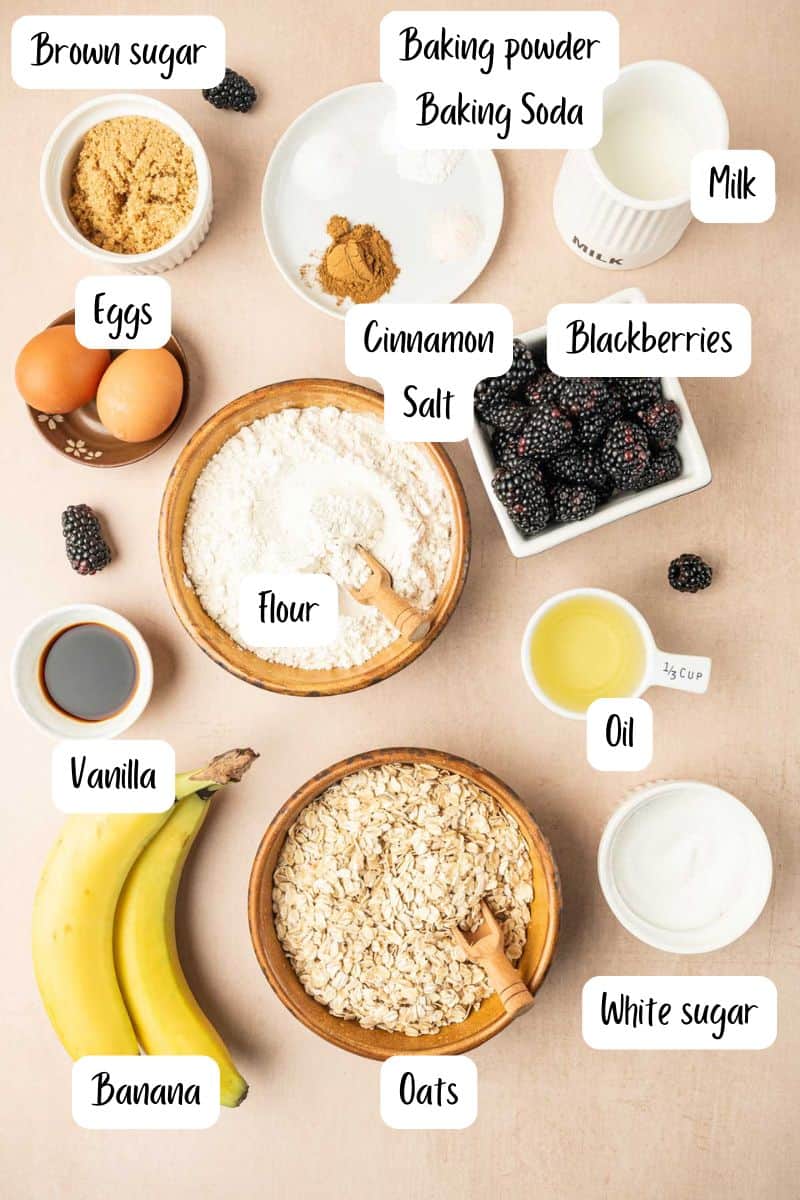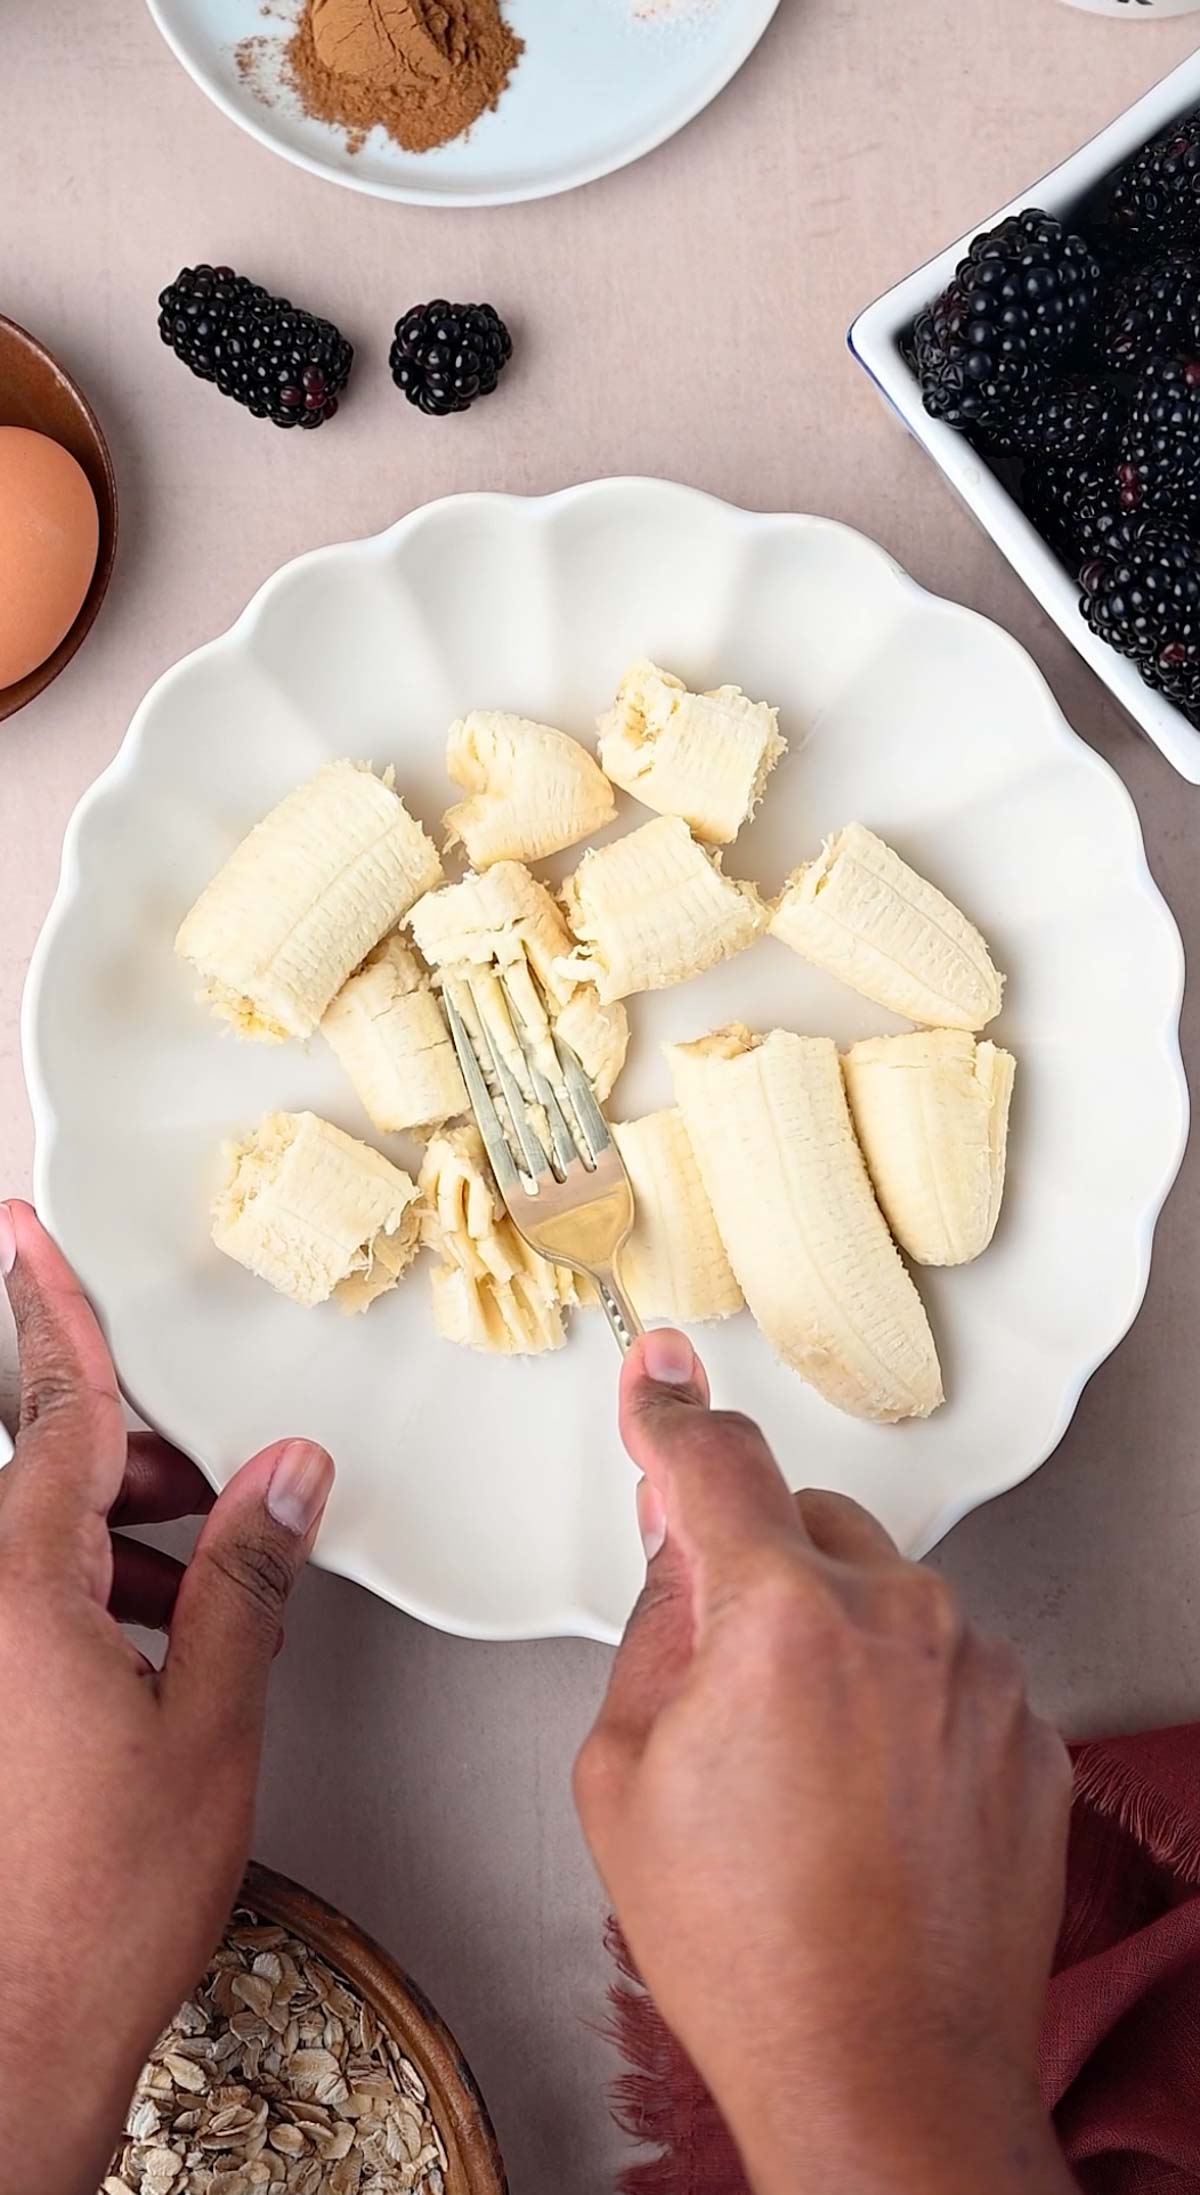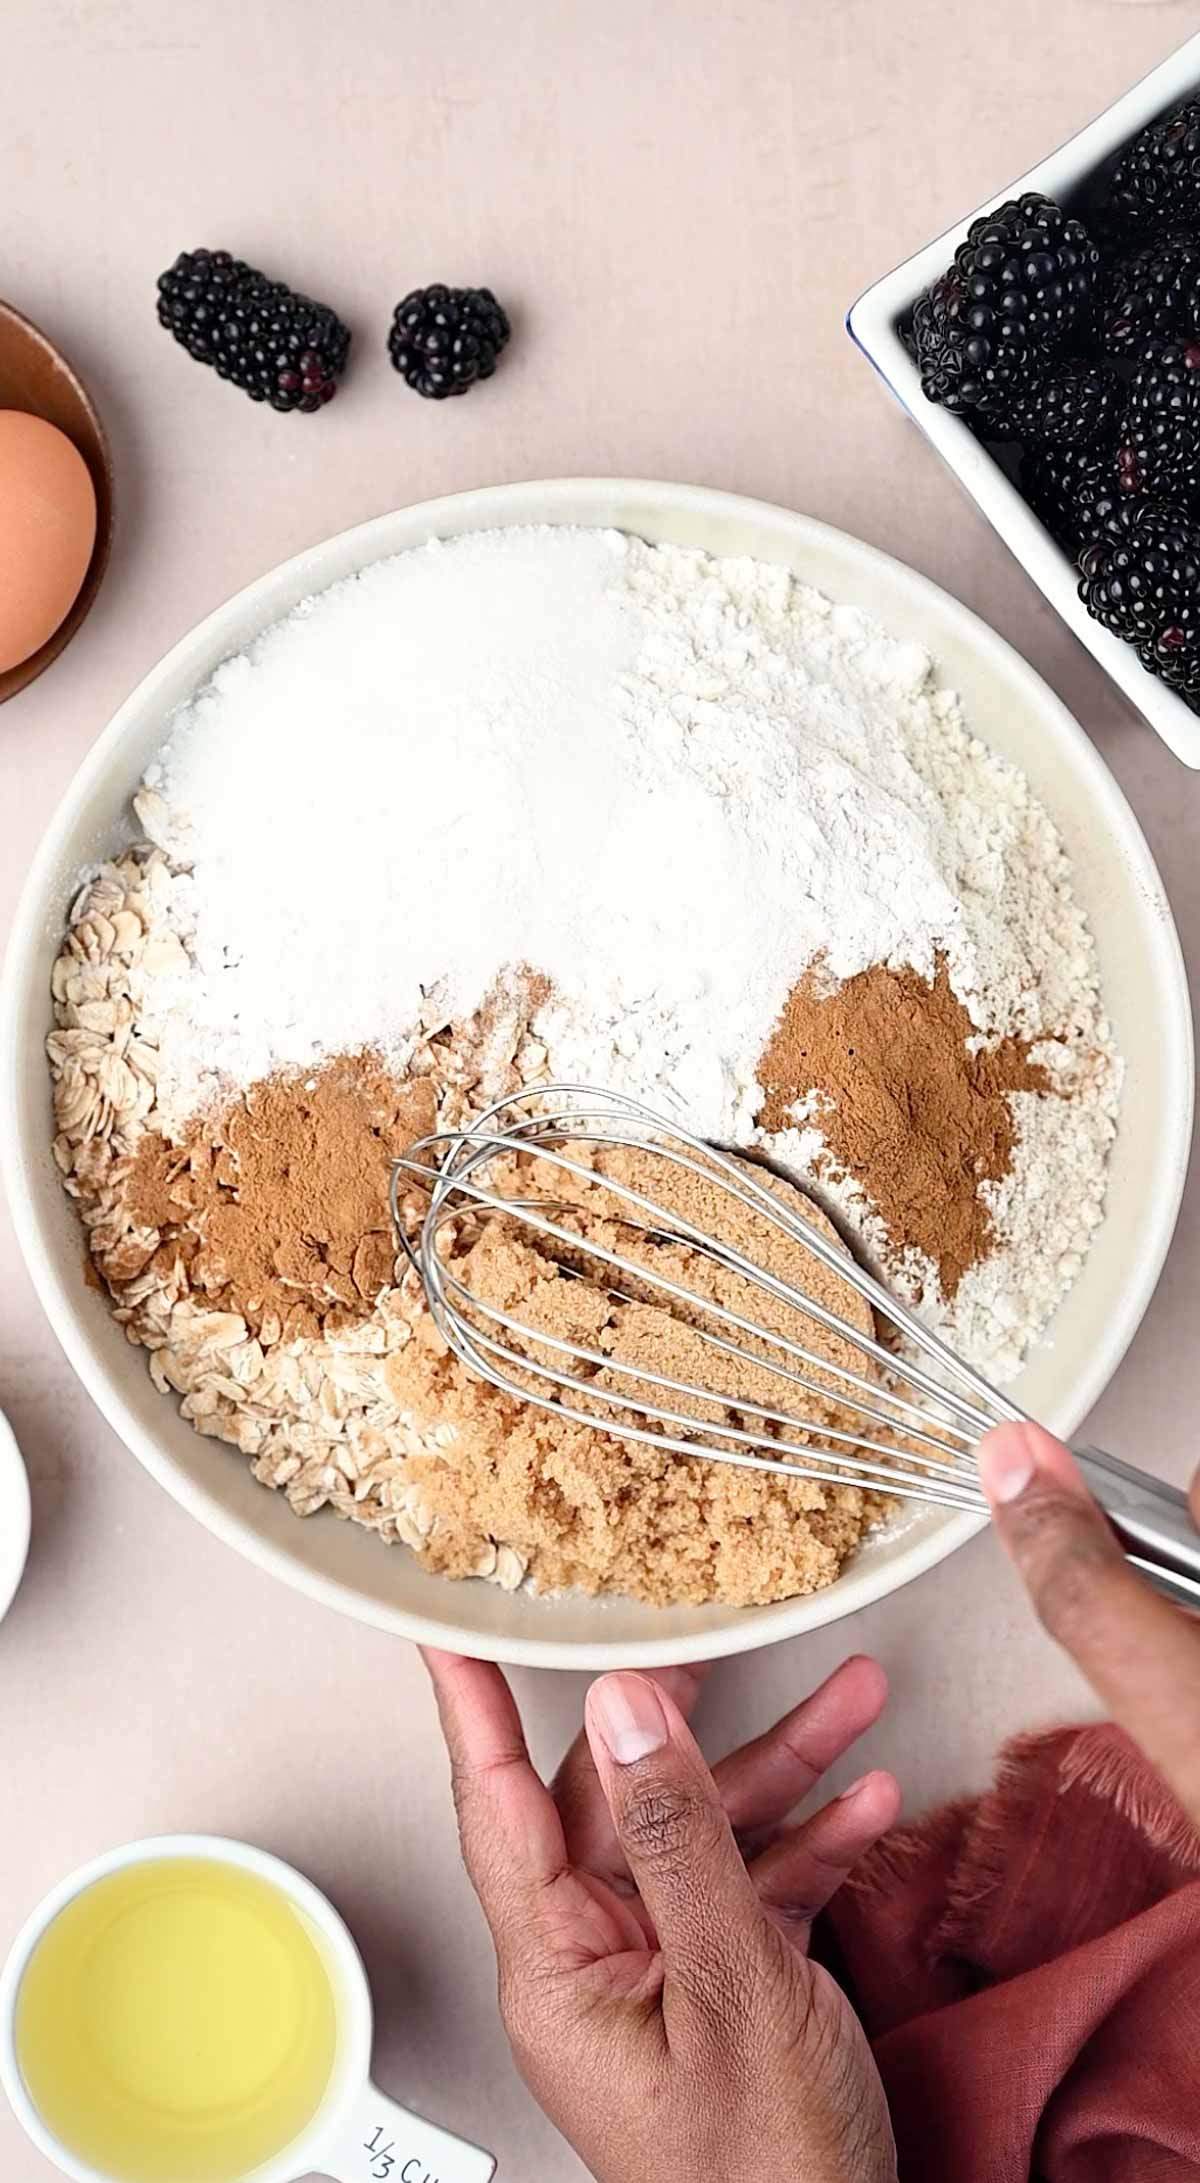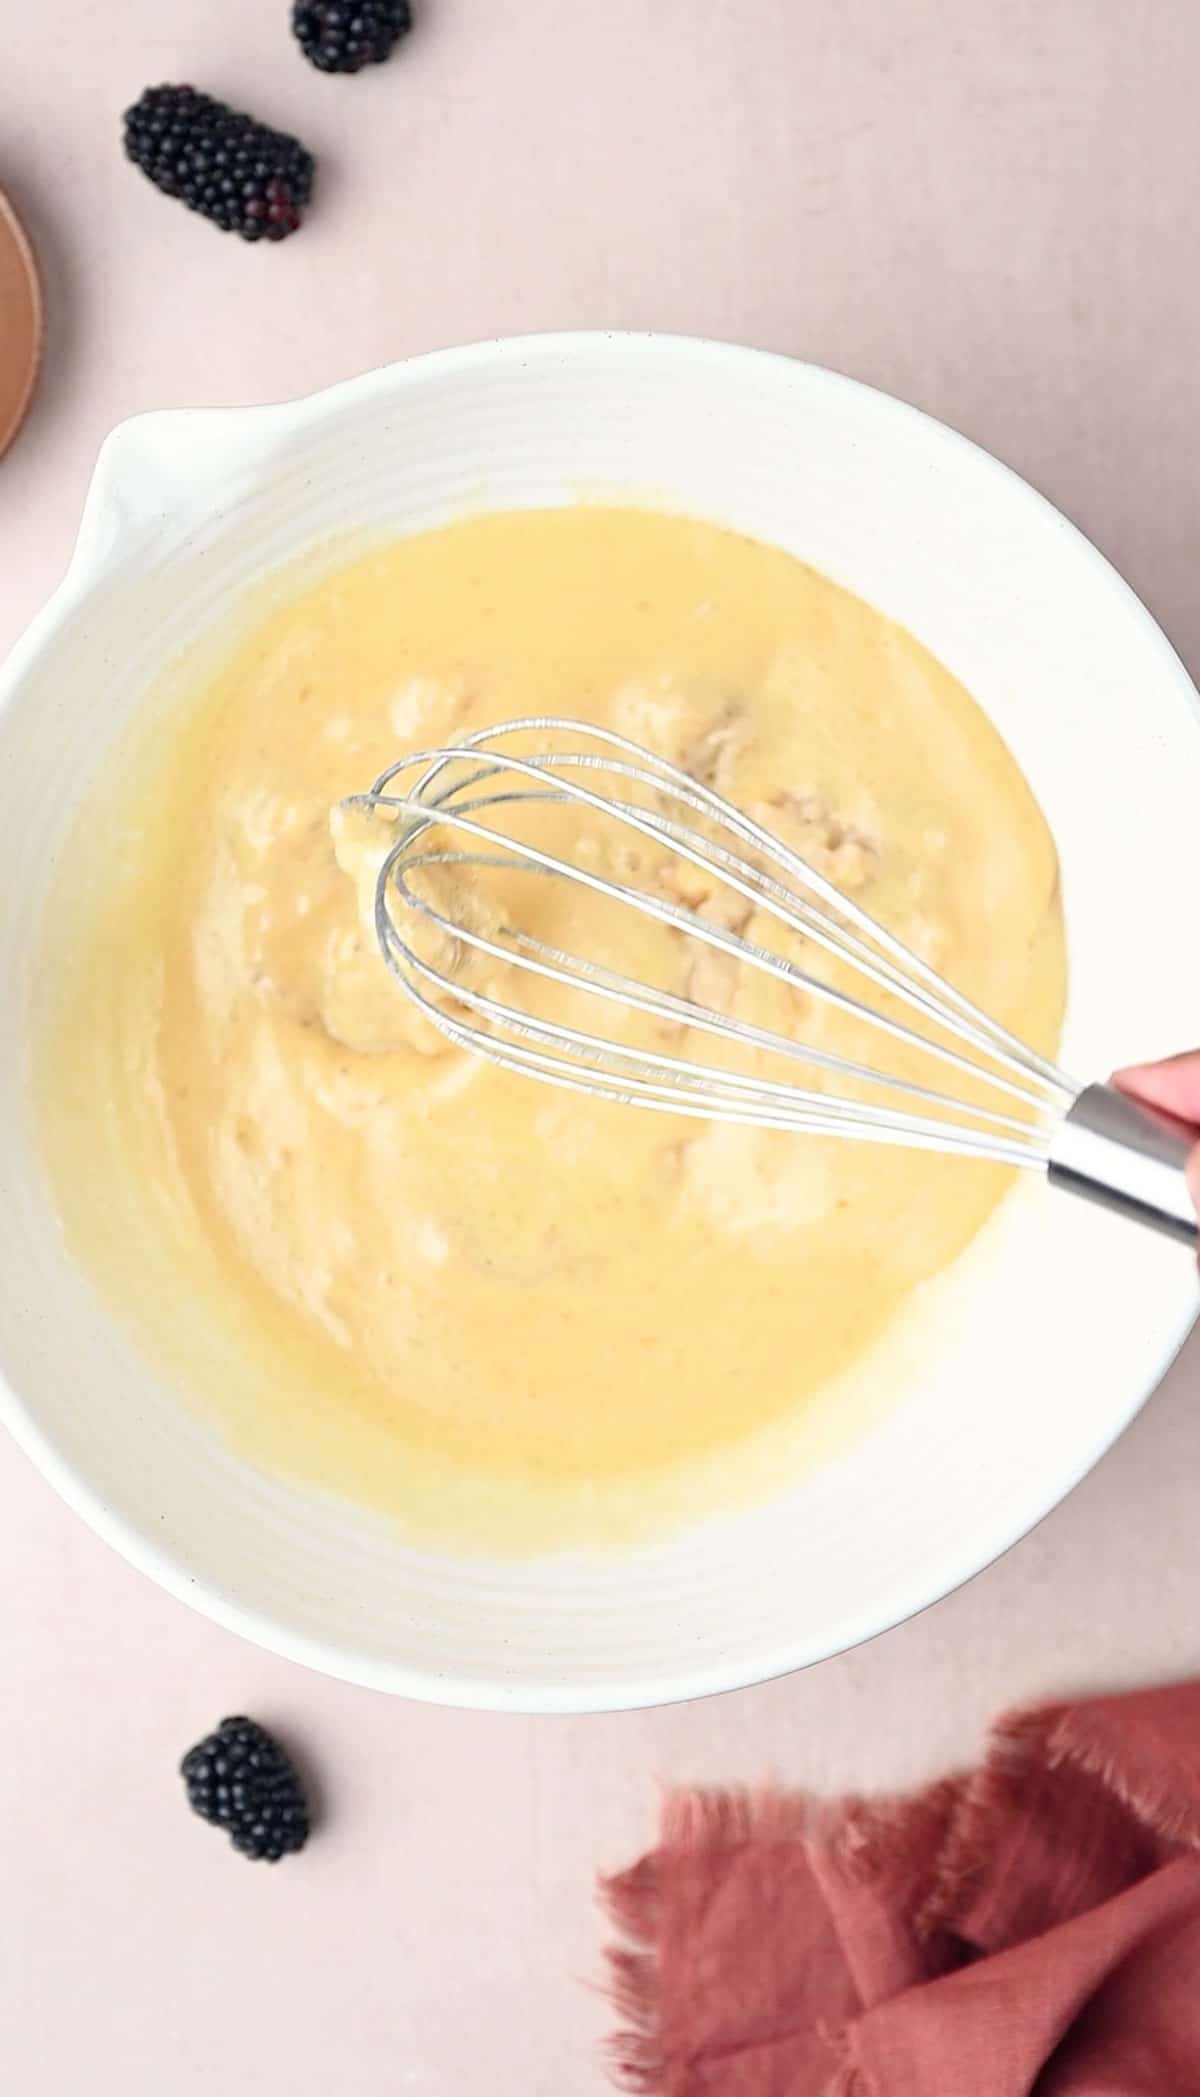
Food Exit Recipes

menu icon
go to homepage
  • Recipes
  • Contact
  • About

subscribe
search icon
Homepage link
  • Recipes
  • Contact
  • About

×
Home

Homemade apple pie filling with brown sugar recipe

August 5, 2025 by Abi Guna 19 Comments

Apple pie filling with brown sugar - When life gives you lots of apples, make apple pie filling. This apple pie filling is sweet, tart, soft and delicious. It doesn’t cost you a fortune and takes less time than you might think. The recipe is really easy and made with simple ingredients.

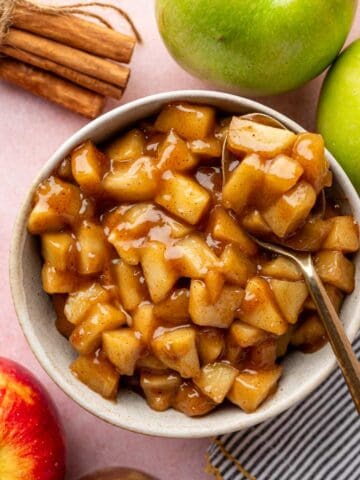
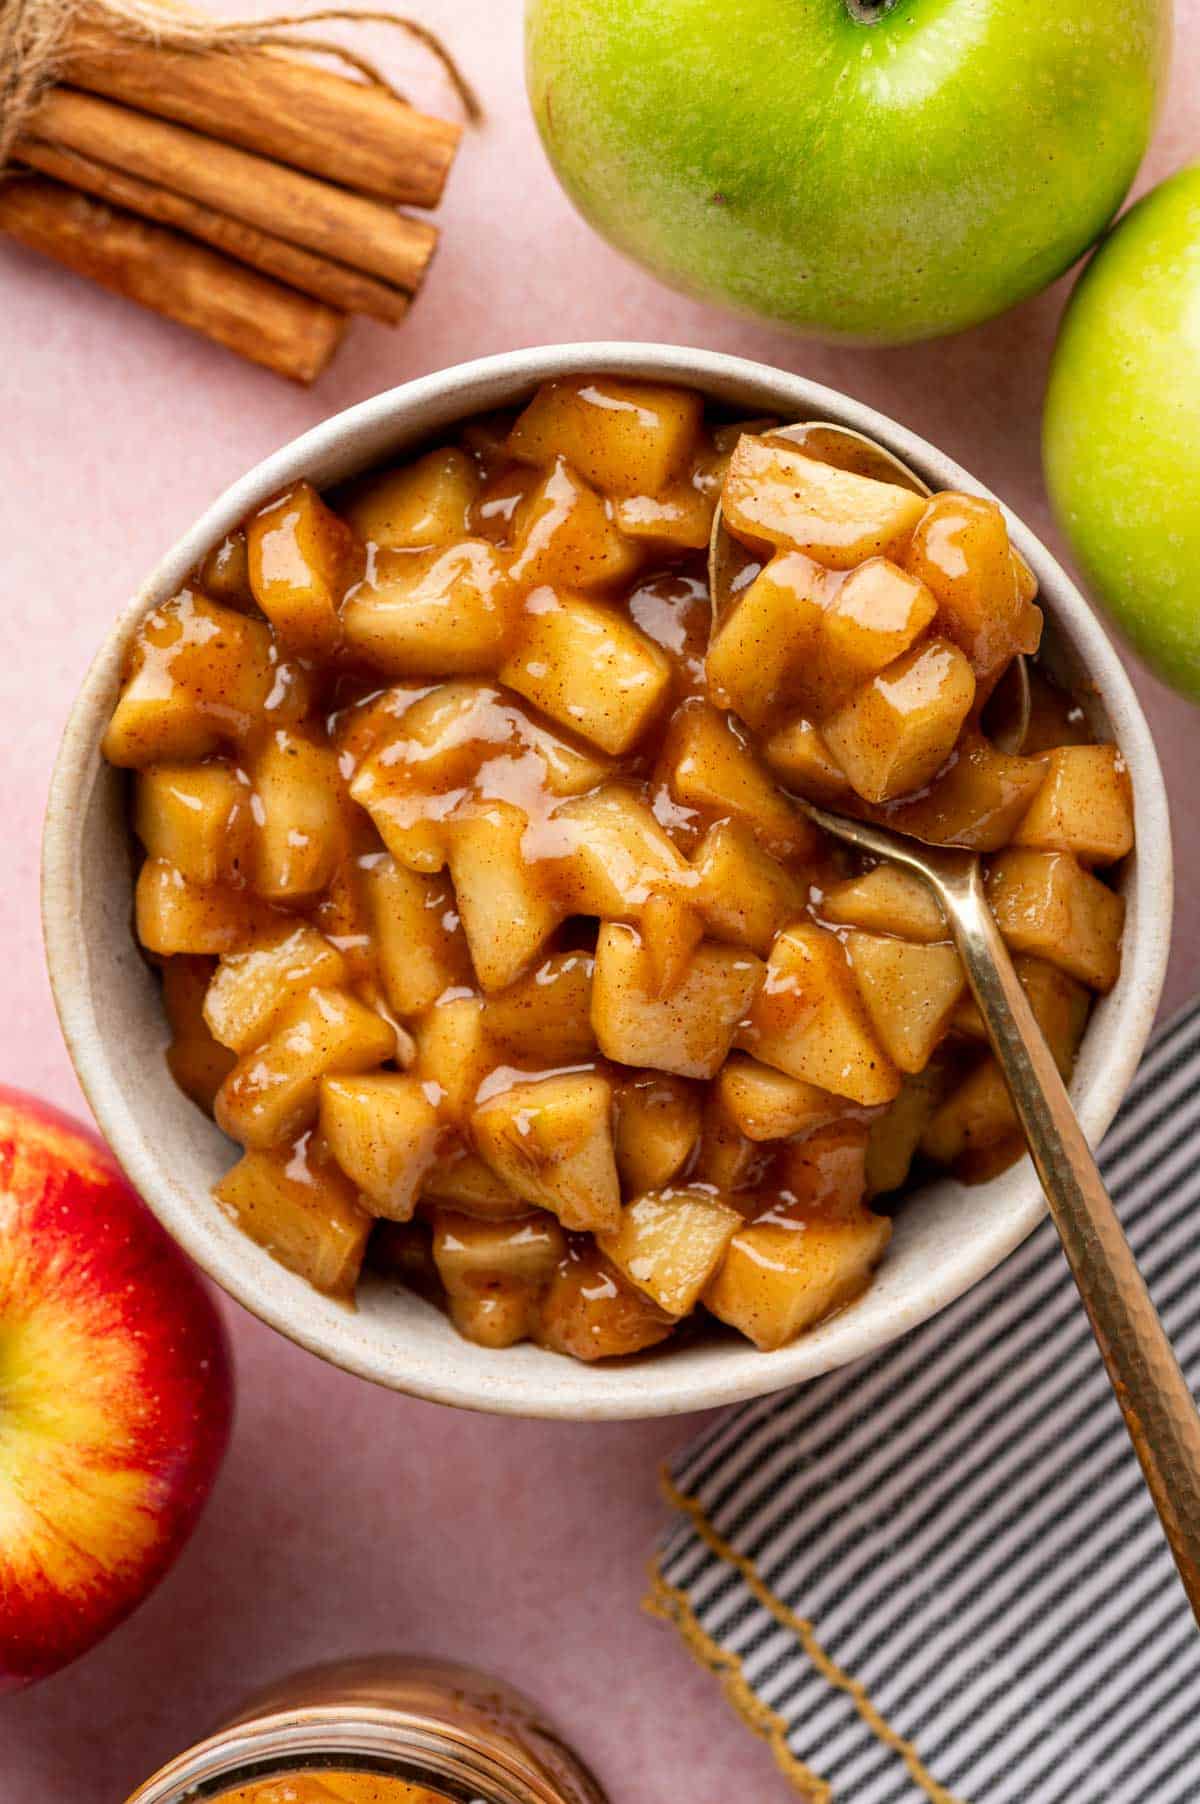
Fresh apple pie filling cooling in a bowl with a spoon on it.

This apple pie filling recipe can be used in so many recipes like apple tarts, apple pie, apple strudel, apple turnovers and topping for cinnamon waffles. Making a big batch of this filling will save you a lot of time when making other dishes.

Also, homemade apple pie filling just tastes better than canned. It’s fresh and you can add variations to it as well. The recipe I’m sharing is beginner friendly and chef approved.

[feast_advanced_jump_to]

WHY YOU WILL LOVE THIS EASY APPLE PIE FILLING RECIPE

  • Budget Friendly: To make this apple filling, you don’t need any fancy ingredients. The list is short and simple. Everything you need is already lying around in your kitchen. Apples are the main ingredient in this recipe and in fall season they’re in abundance.
  • Fruity and Woody Aroma: This apple pie filling with brown sugar is made with fresh apples, so it smells better than the canned one. The cinnamon in the filling gives a nutty, warm, and woody aroma to this filling.
  • Great Flavor: Not only does it smell like Autumn magic, it tastes good too. The apples are cooked to a tender perfection, which brings out the tartness of the apples. Sweet and tart, along with the cinnamony taste, this homemade apple pie filling has a delicious flavor.
  • Minimal Ingredients: The best thing about this filling is that it does not require too many spices or essences. All the taste is derived from apples and a few simple ingredients. Apple spice is the main ingredient besides apples in this apple pie filling recipe.

Ingredients and Substitutions

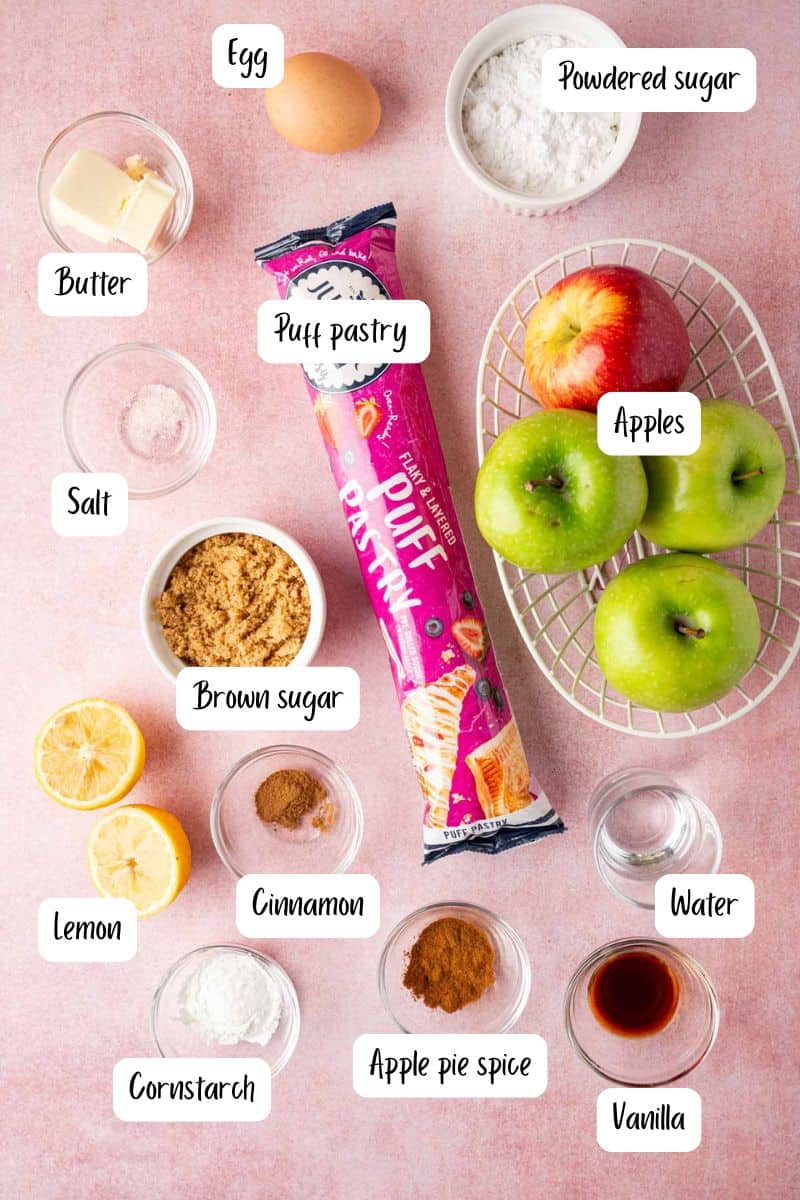
The ingredients you need for making this recipe:

Ingredients being laid out to make cinnamon apple pie filling recipe
  • Apples: You can use Granny Smith apples or Honeycrisp apples. Both are perfect for this recipe. Peel and core the apples once they’re washed. Dice them in the same size.
  • Unsalted Butter: You can use either dairy butter or plant-based butter. However, make sure you use unsalted butter at room temperature .
  • Light Brown Sugar: Light brown sugar works best for this apple pie filling recipe. You’ll get a golden color. You can use other alternatives like coconut sugar if you like.
  • Ground Cinnamon: Add a teaspoon of cinnamon to your apples when cooking them.
  • Apple Pie Spice: For this homemade filling, use apple pie spice.
  • Water: Add 2 tablespoons of water to the apples so that they get tender.
  • Lemon juice: Lemon juice balances out the sweetness of the apple. It adds a citrusy punch and helps bring out the tartness.
  • Cornstarch and Water: You’ll need cornstarch to make a slurry that will help your homemade apple pie filling thicken up and stick together.

See recipe card for quantities.

Instructions (How to Make Homemade Apple Pie Filling with brown sugar)

Fresh chopped apples being added to the skillet.

In a skillet over medium heat, melt butter. Add the diced apples and cook it for a minute.

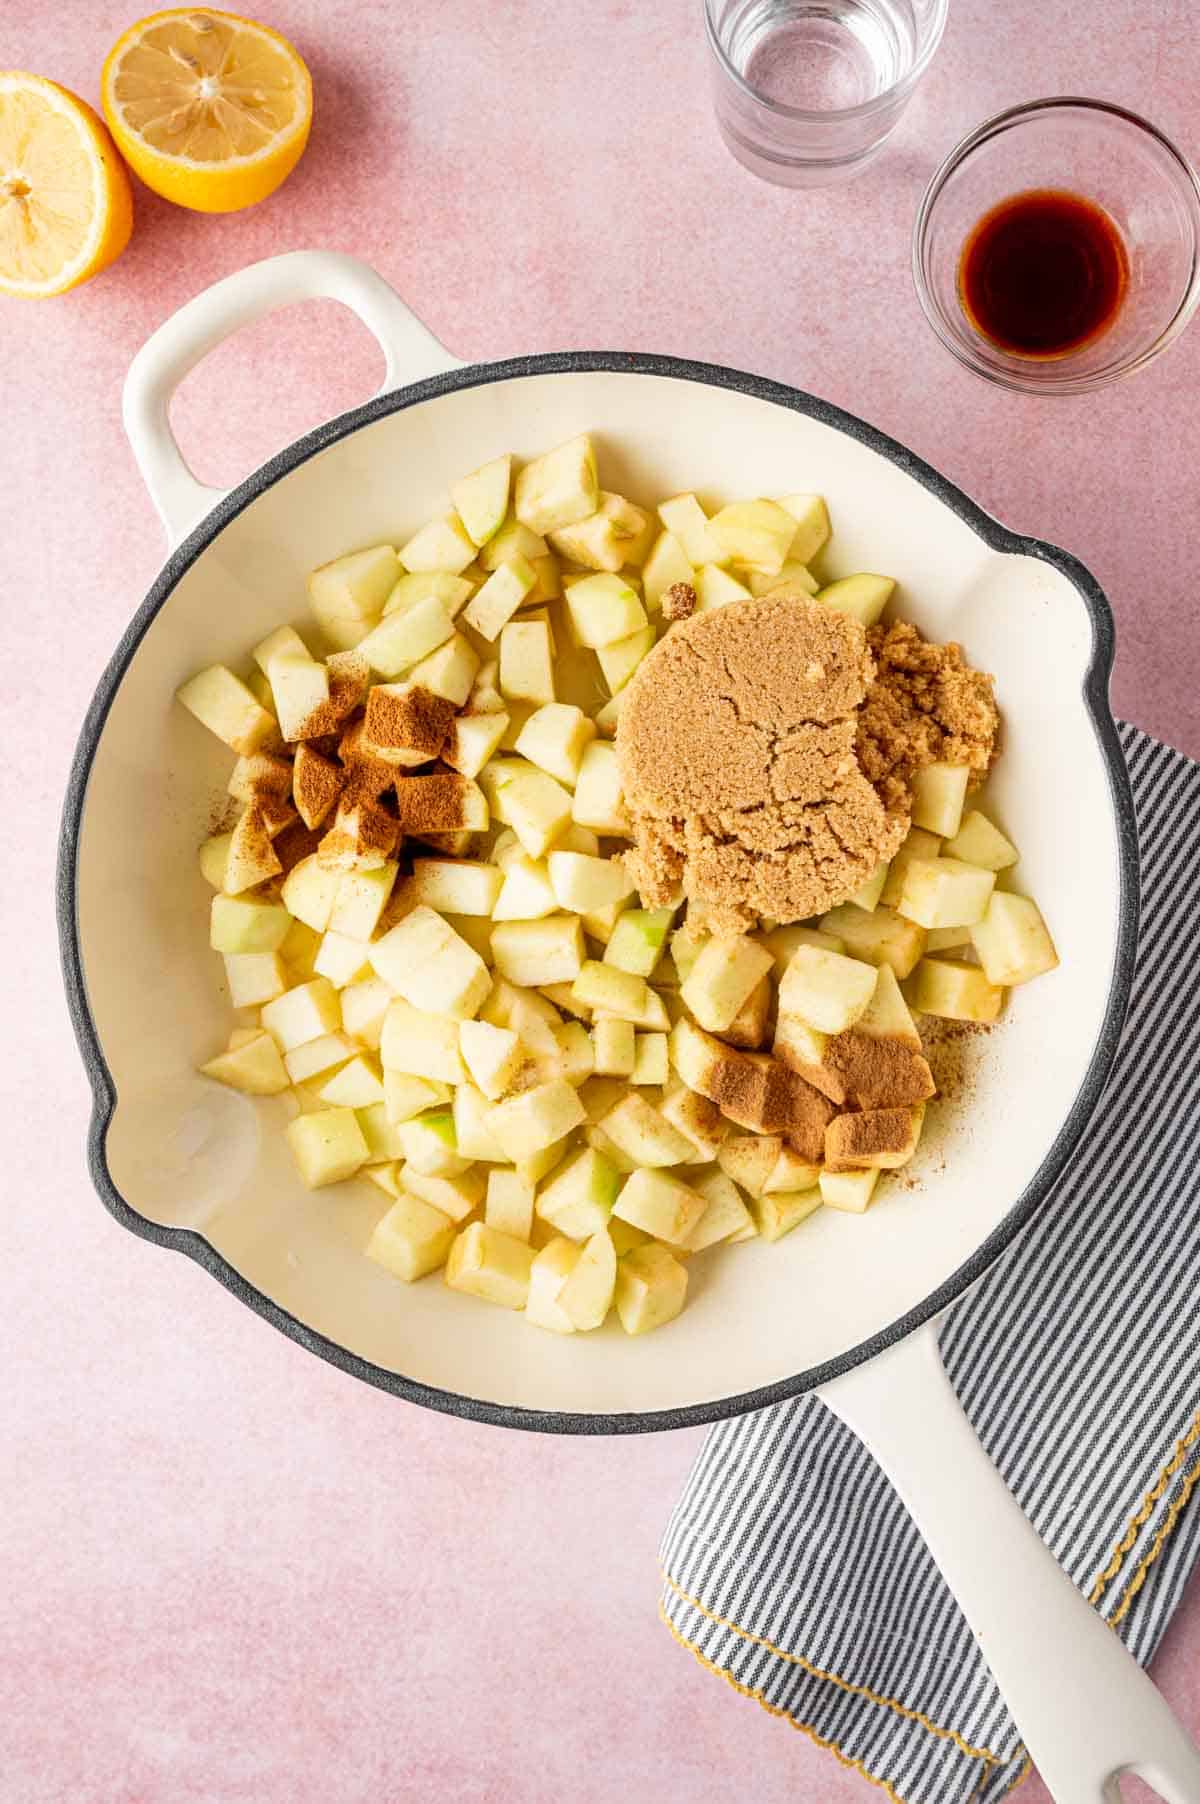
Brown sugar, cinnamon , apple pie spice being added to the apples.

Add brown sugar, cinnamon, apple pie spice, water and lemon juice. Cook for 5–7 minutes until the apples soften.

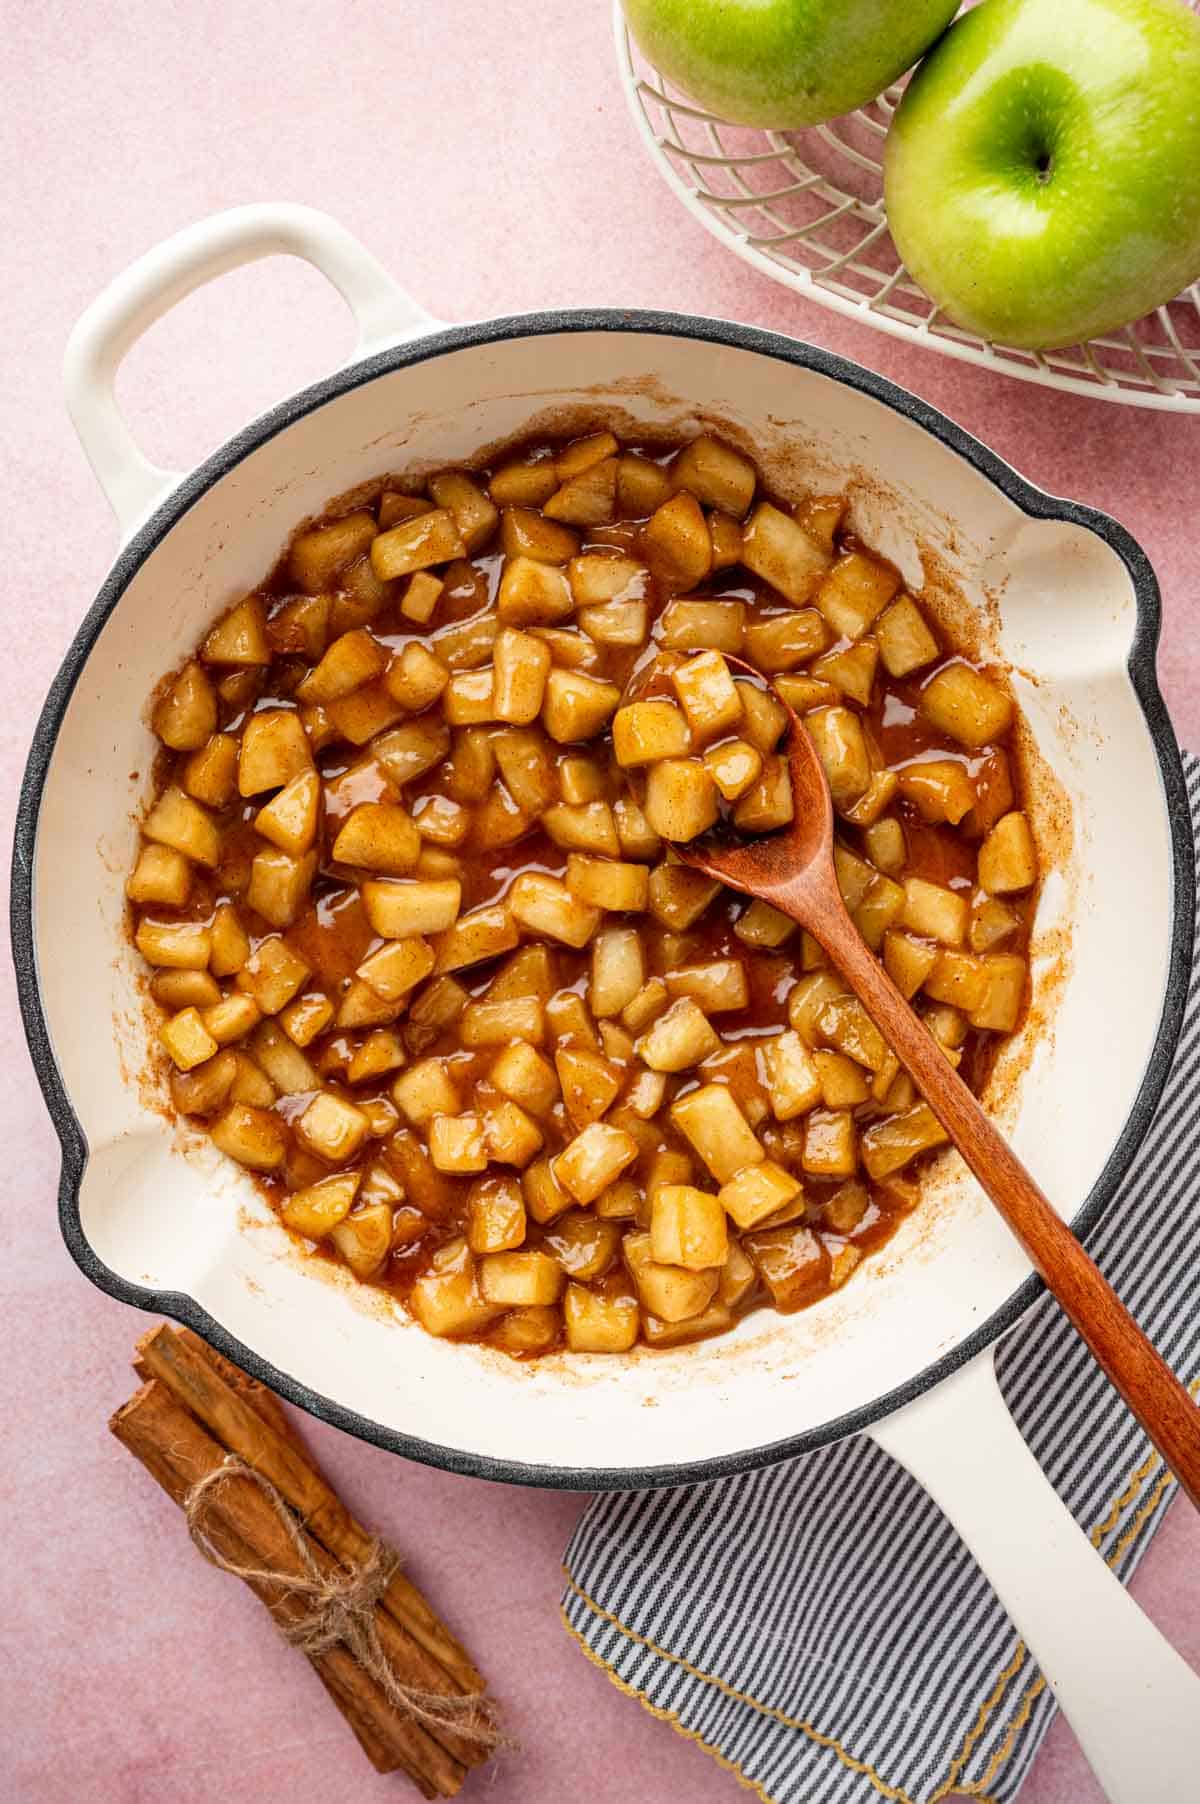
Spatula stirring glossy apple pie filling with tender apple slices.

Stir in cornstarch slurry (cornstarch + water) and cook for another 1–2 minutes until slightly thickened.

Golden apple slices coated in cinnamon-sugar syrup.

Remove from heat and let the cinnamon apple pie filling cool.

Hint: Use tart apples for the pie filling, they add a bright, balanced flavor to apple desserts.

Variations Of Apple Pie Filling

Although this apple pie filling with brown sugar recipe is delicious and complete in itself, you can make a few tweaks here and there. You can add some extra ingredients like nuts, other fruits, or seeds. I’ll share a few variations below.

  • Apple Pecan Filling: Apples and nuts are a good combination. You can add them to your apple pie filling after toasting them. Preheat the oven to 350°F and bake the nuts for 10 minutes. Chop them and add to your homemade apple pie filling.
  • Apple Walnut Pie Filling: Instead of pecans, you can choose walnuts. They have sweet, buttery flavor that enhances the apple flavor. Toast them in a preheated oven at 350°F for ten minutes. Chop them and add to your filling.
  • Apple Pumpkin Seeds Filling: You can add roasted pumpkin seeds (or any other seeds you like) once your filling is ready. Just mix the seeds into your filling and you’re good to go.
Close-up of spiced apple pie filling.

Equipment

Cutting board and sharp knife: For peeling, coring, and chopping the apples.

Vegetable peeler: Makes peeling apples quick and easy.

Large saucepan: To cook the apple filling on the stovetop.

Wooden spoon or silicone spatula: For stirring the filling as it cooks.

Measuring cups and spoons: For accuracy with your sugar, spices, and liquids.

SERVING SUGGESTIONS FOR HOMEMADE APPLE PIE FILLING

Our apple pie filling recipe is best for stuffing. You can make so many things out of this one simple yet delicious filling. It can also be used as a topping.

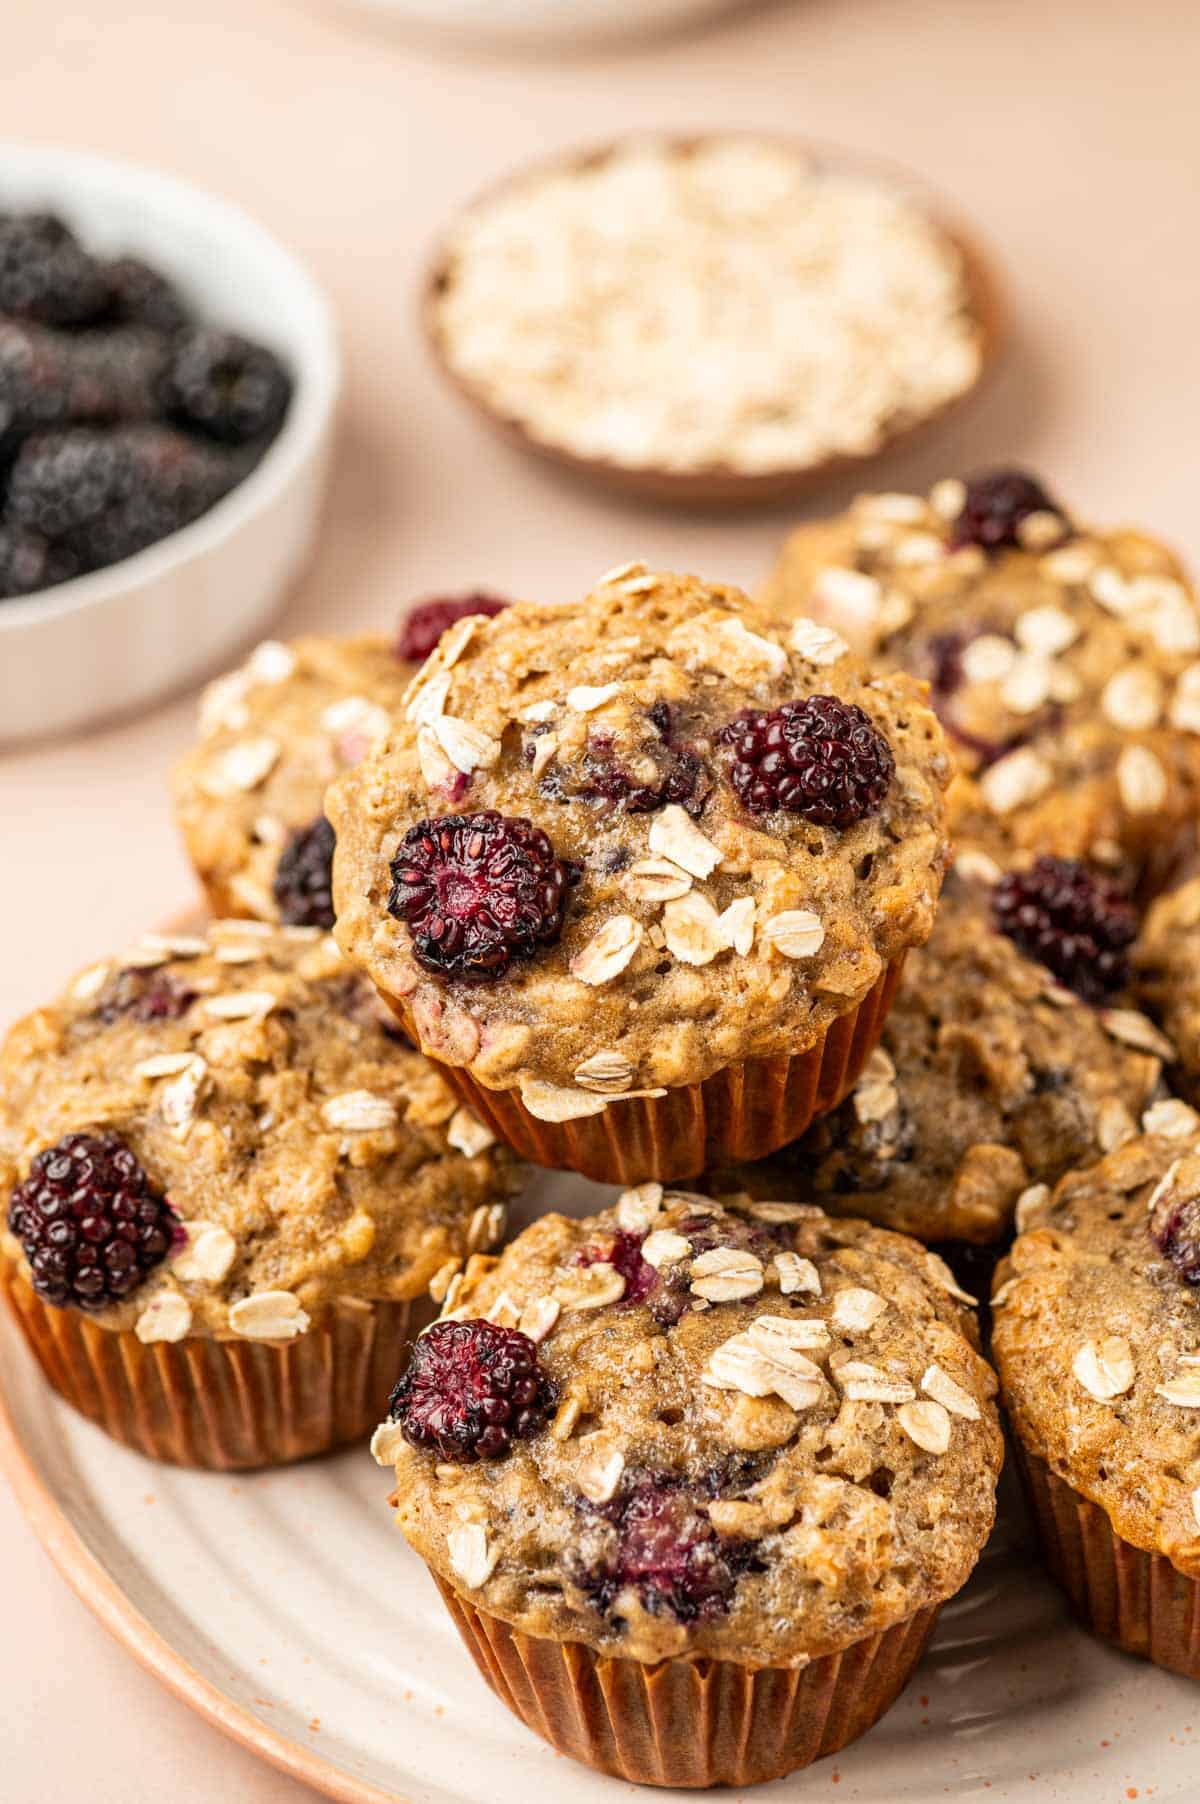
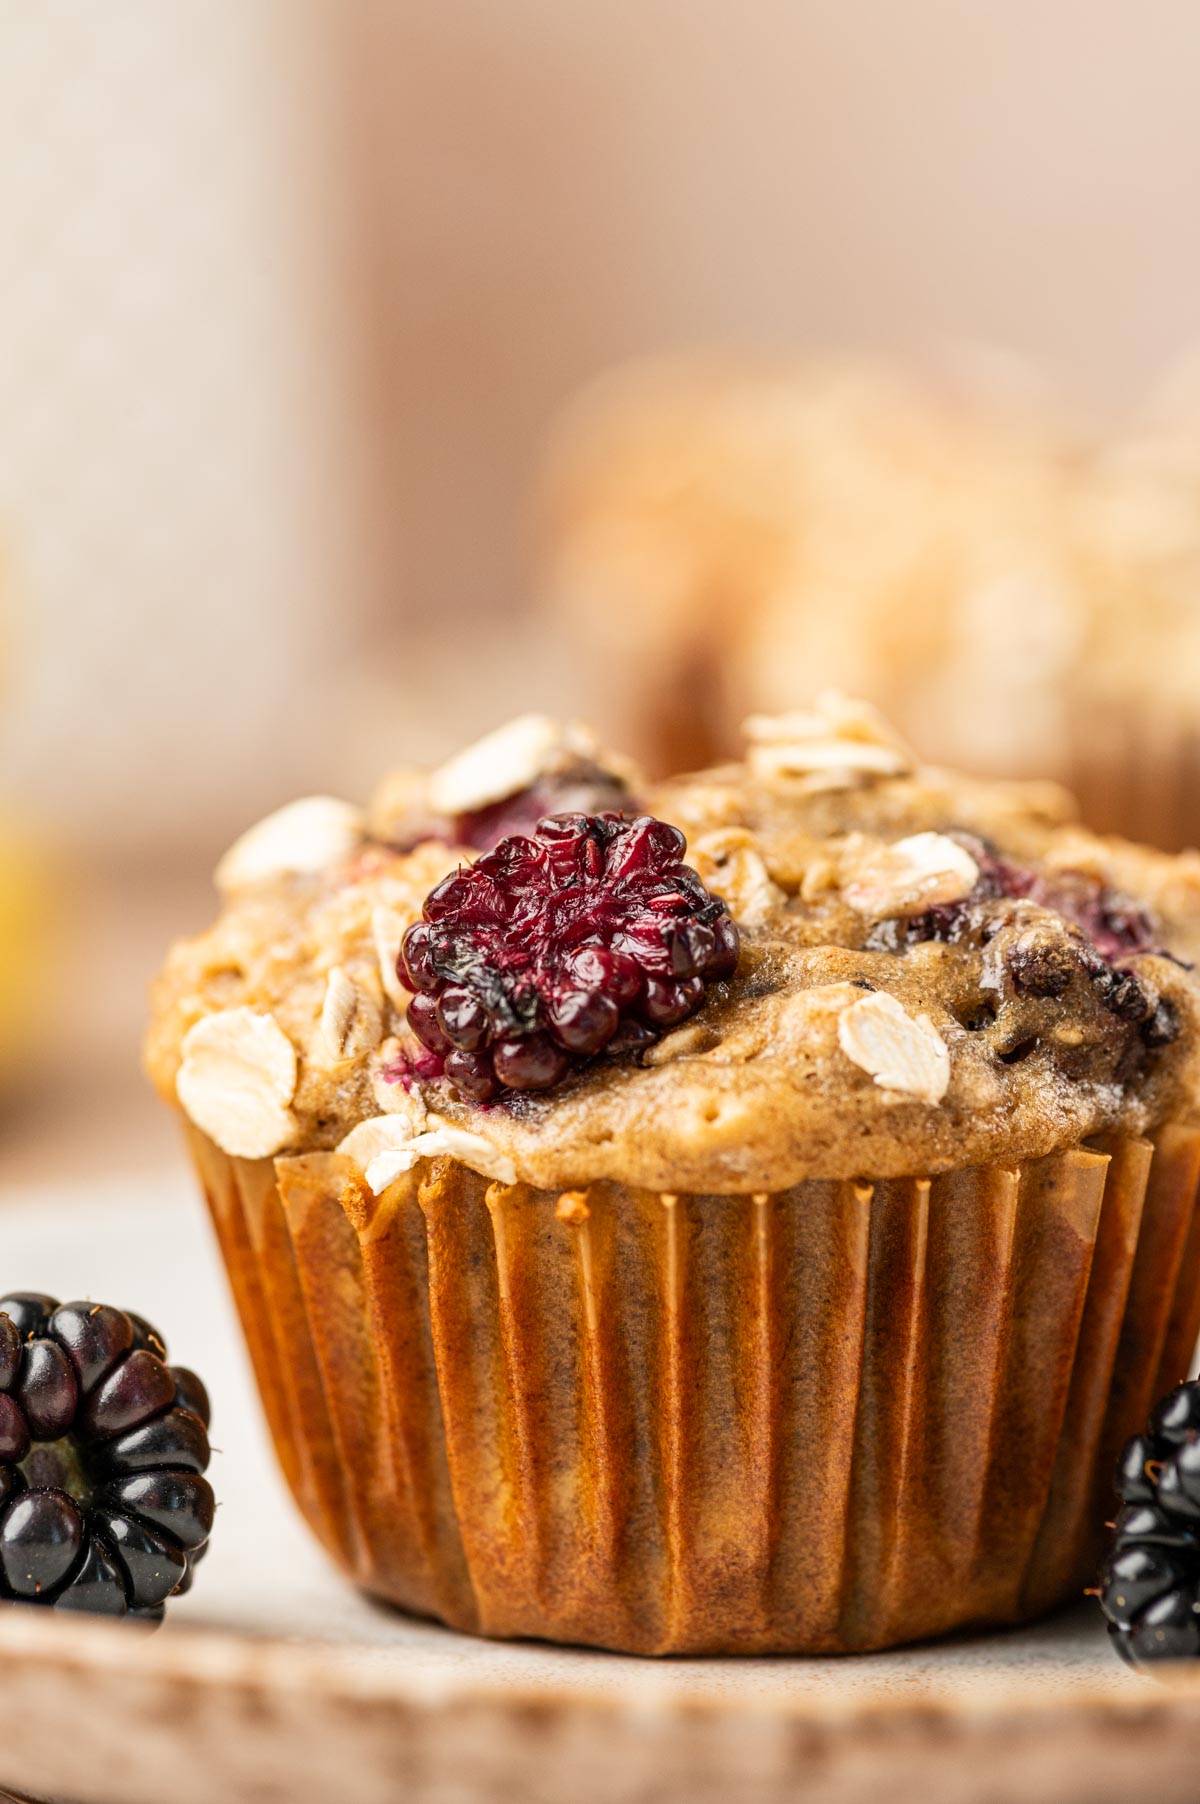
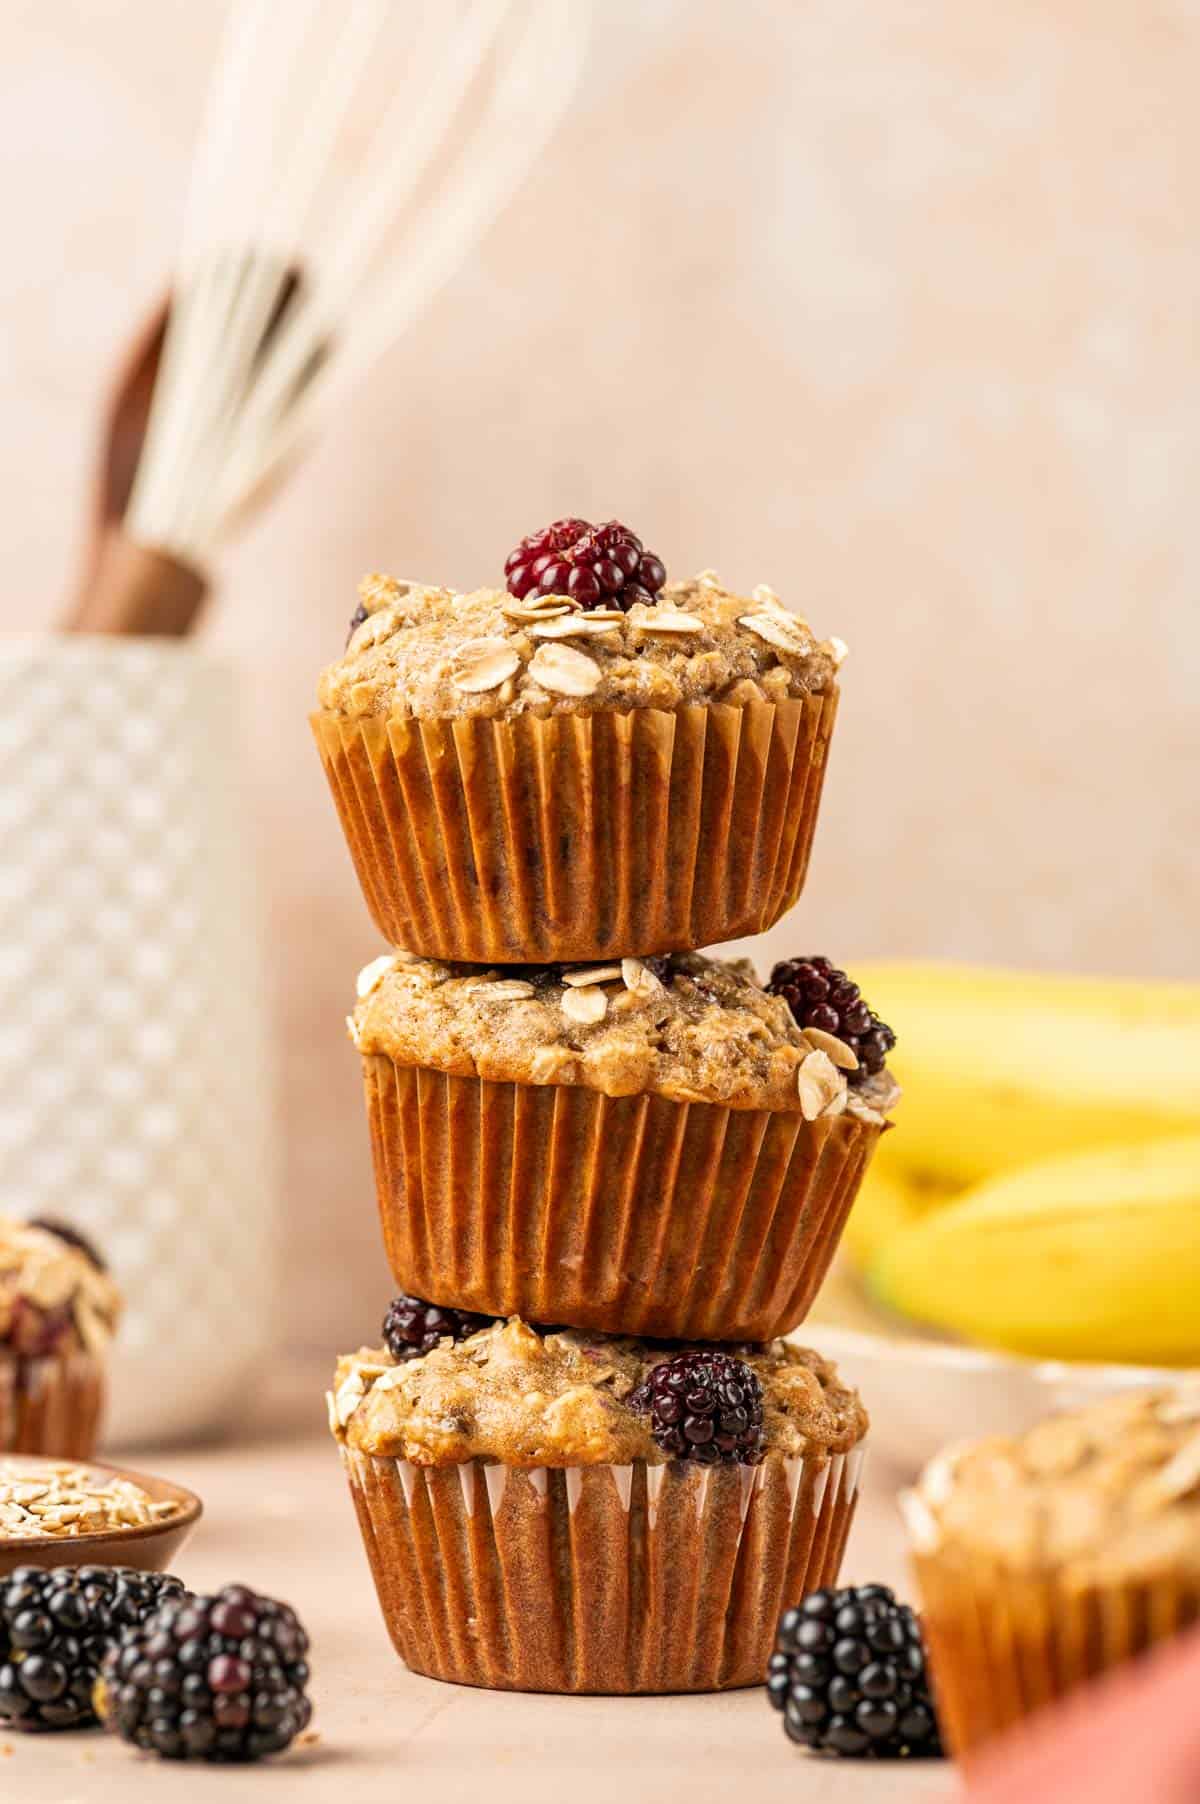
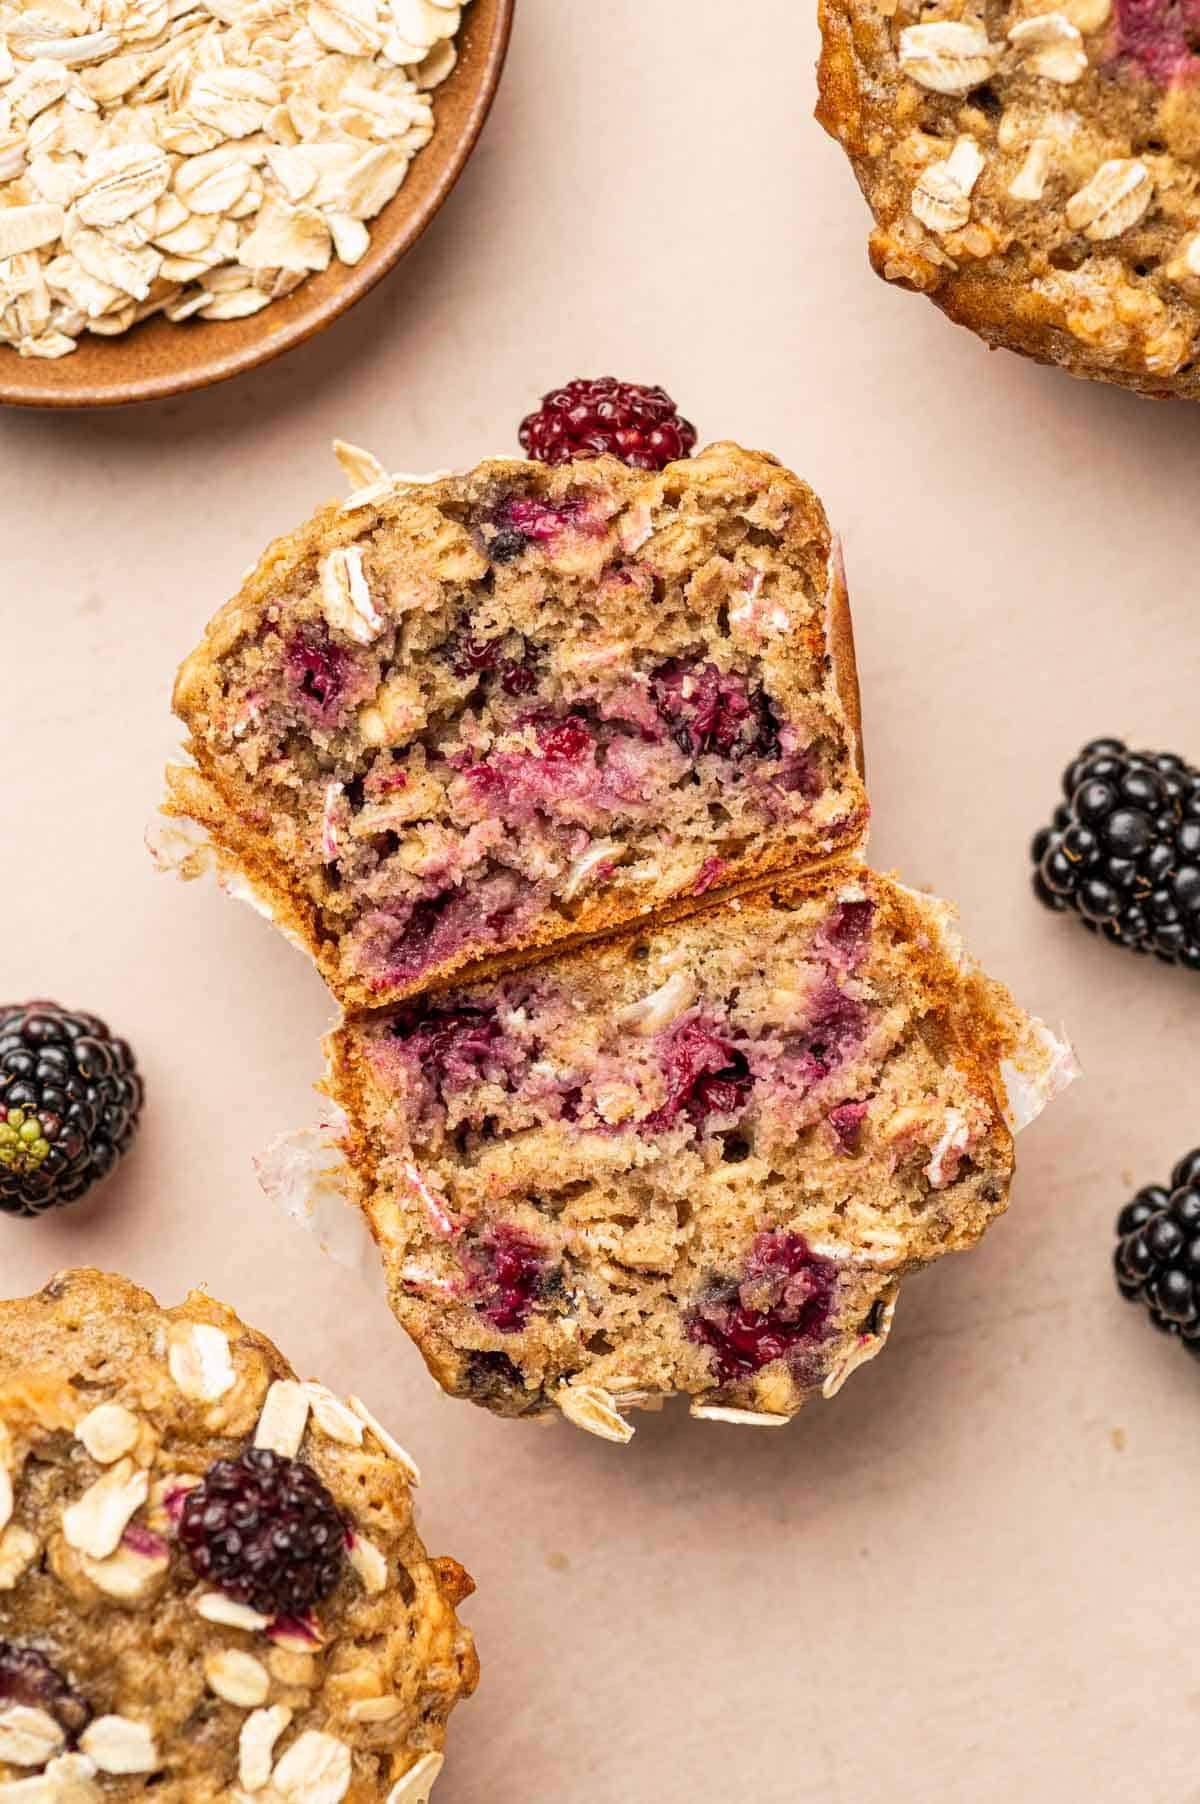
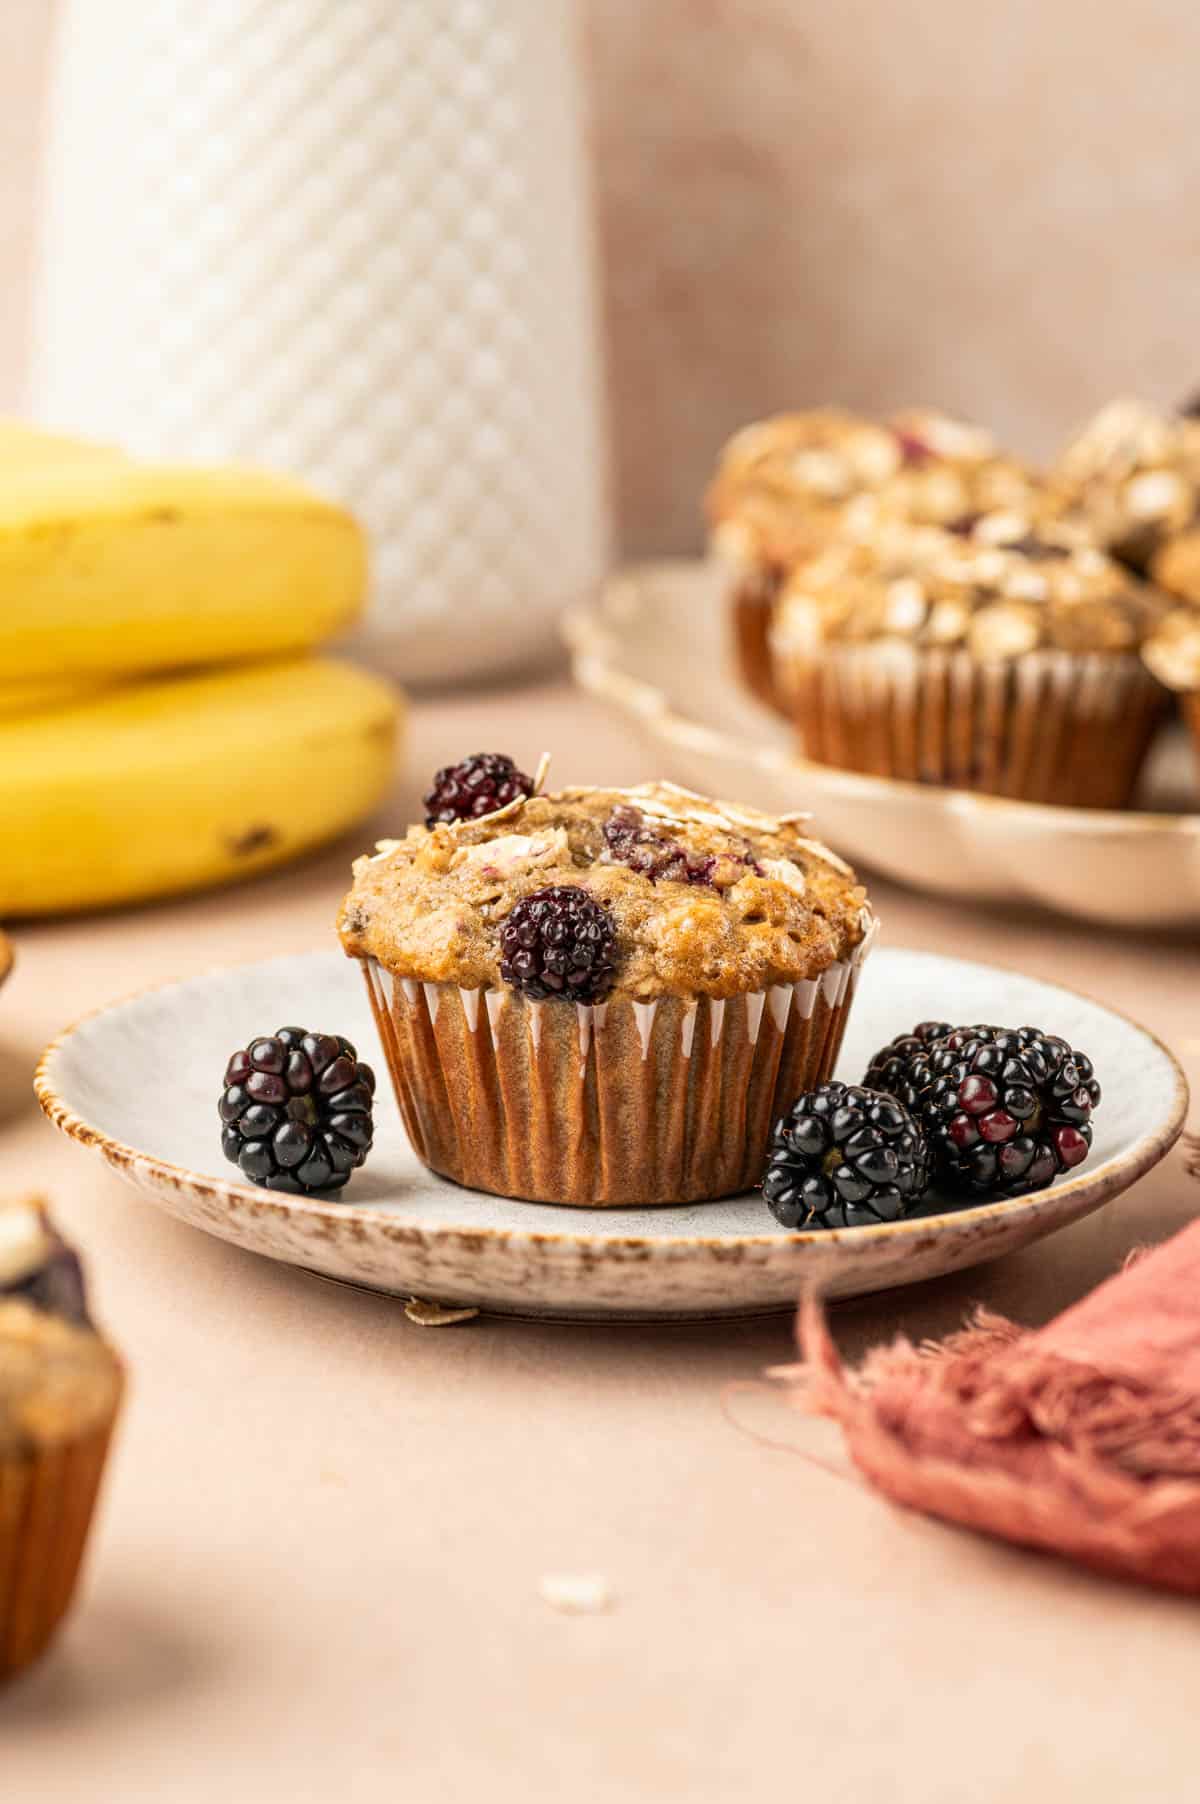
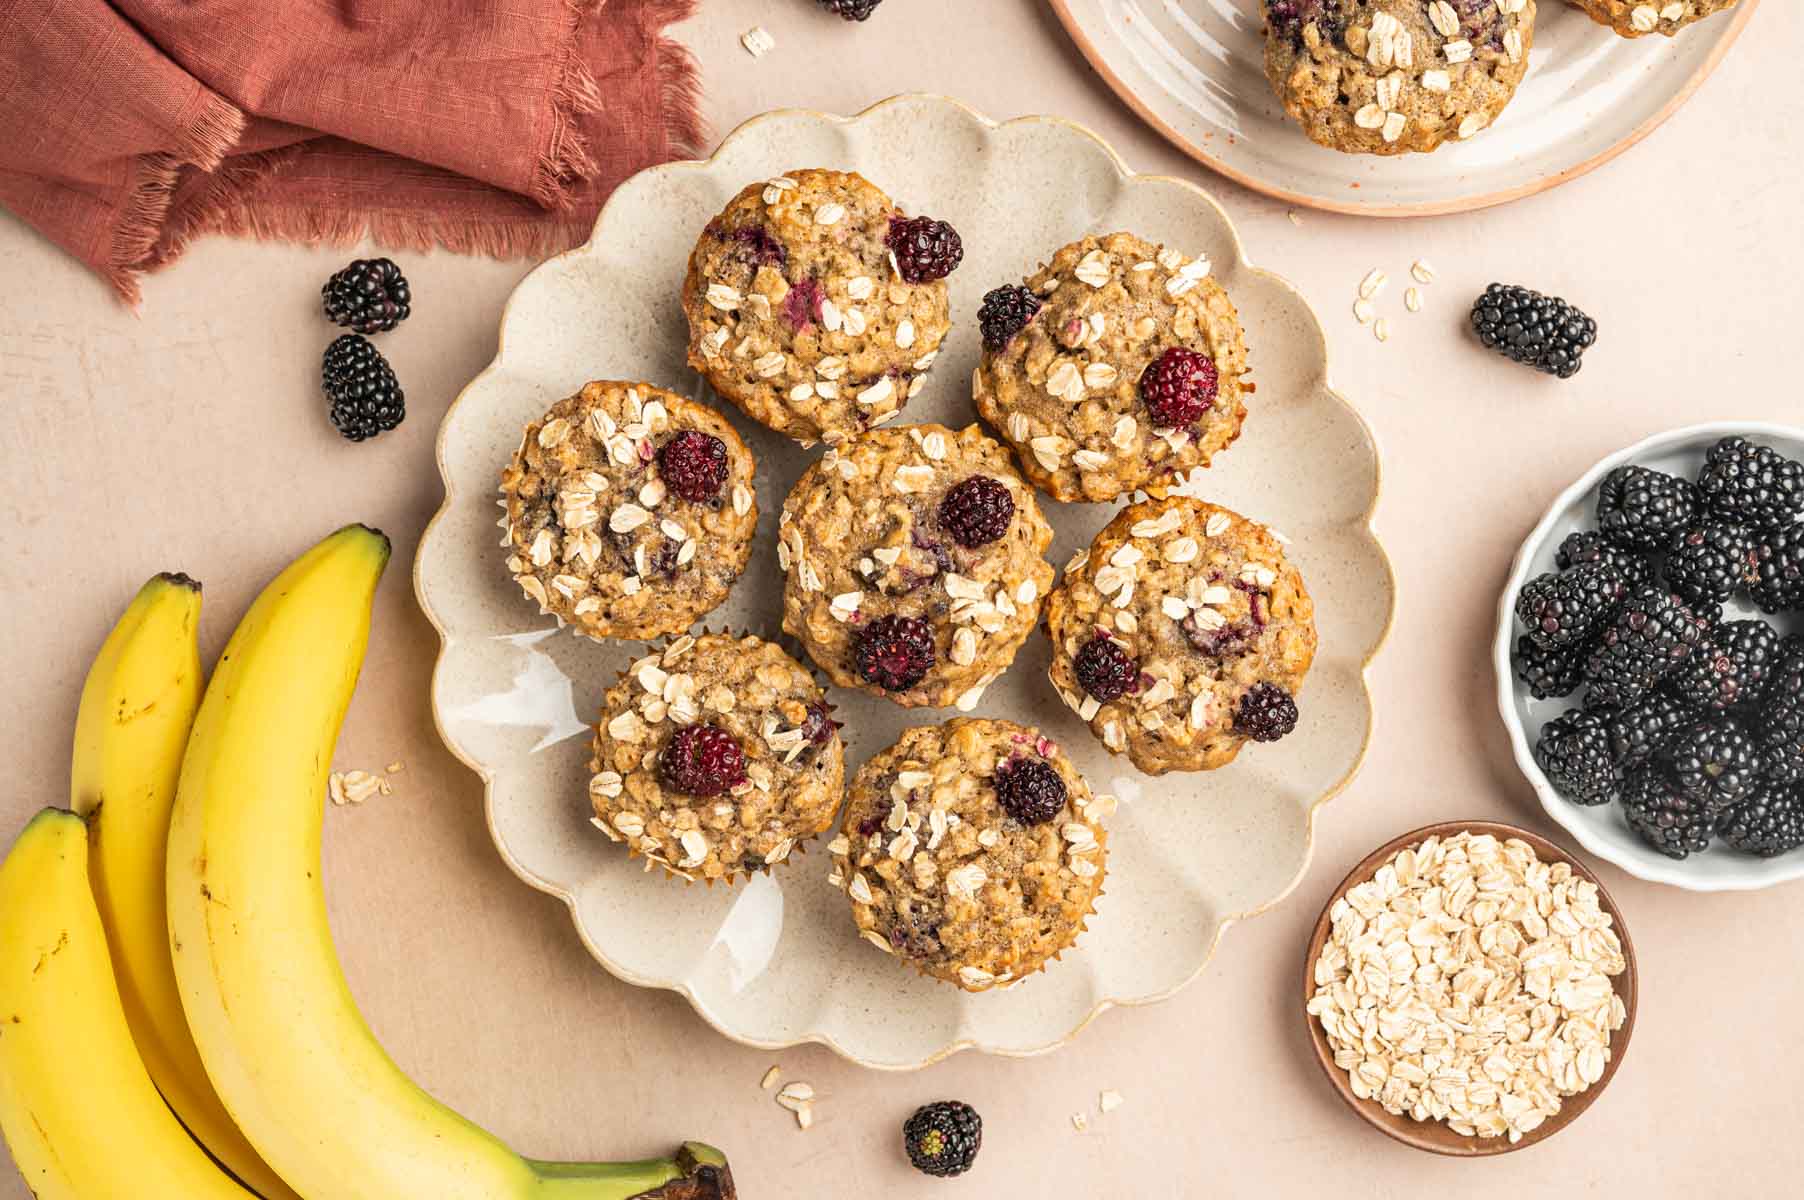
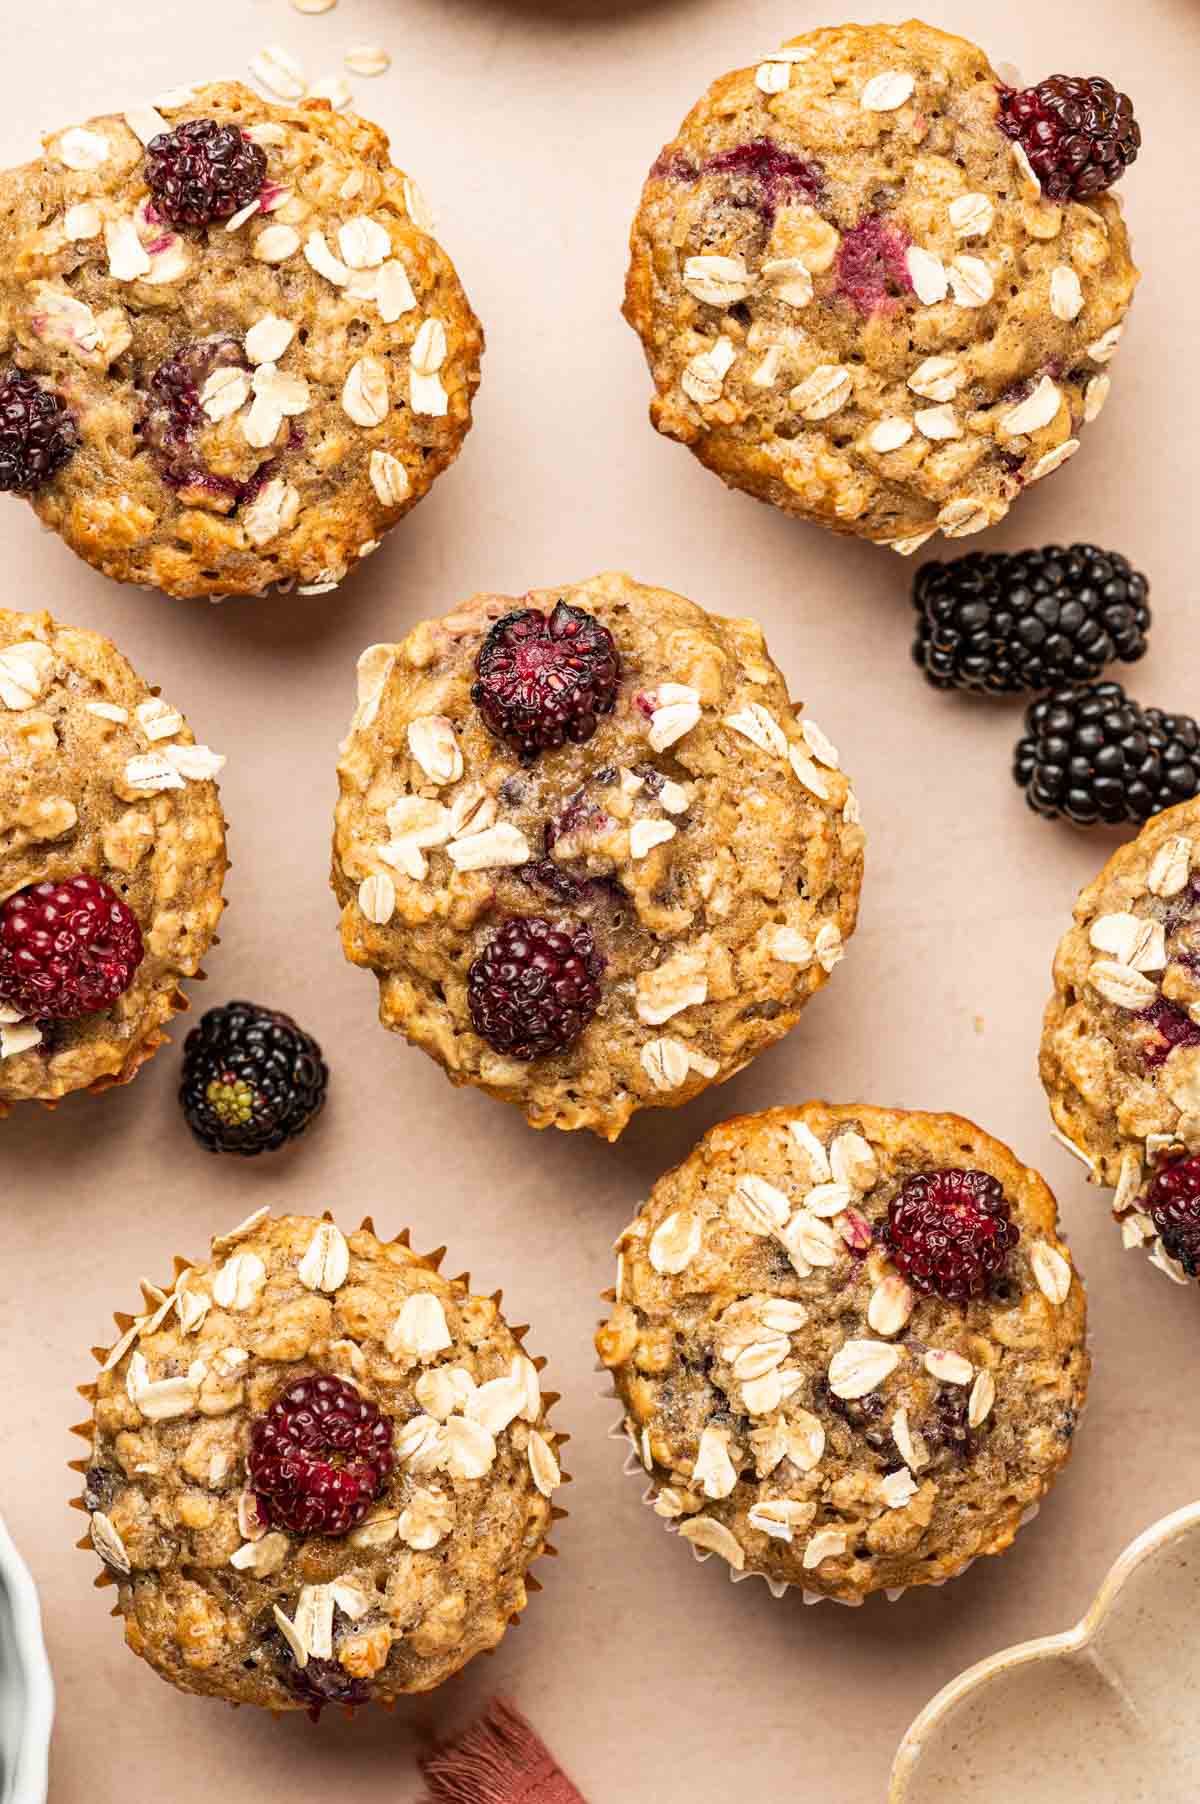
As a topping: You can pour a spoonful of this filling over your ice cream or layered in between cake or Blackberry Oatmeal Muffins for a fruity twist.

Pancakes: Just pour some apple pie filling over your pancakes instead of the same old bananas. You’ll love it.

Cookies: If you’ve tried something with your cookies, try taking a bite of oatmeal cookies with apple pie filling.

Waffles: You can use it as topping for apple cinnamon waffles or pumpkin pecan waffles.

Yogurt Bowl: A bowl of yogurt and granola tastes much better with apple filling. Try adding it to your chia seed pudding.

Overnight Oats: Top up your overnight oats with this sweet-tart-woody filling. Stir it into your favorite Oatmeal Mug Cake for extra fall flavor.

Close up shot of the best homemade apple pie filling.

STORAGE AND REHEATING TIPS

This apple pie filling can be used when fresh (and cool), however, if you want to store it for later that can also be done.

Storage Tips: Let the filling cool down on the counter. It can be stored in the fridge for 2 to 3 days. Put it in an airtight jar or freezer bag and freeze for up to a month.

Reheating Tips: Thaw the frozen filling in the fridge overnight and use the next day.

TOP TIPS FOR HOMEMADE APPLE PIE FILLING RECIPE

  • Use the right apples. Granny Smith, Honeycrisp, Gala, and Pink Lady are the best apple types for this recipe.
  • Don’t use overripe apples because they lose some of their tartness.
  • Dice the apples evenly for even tenderness.
  • Don’t add too much sugar because apples are already sweet.
  • Cook on medium heat and keep stirring so that nothing sticks to the pan.
  • Don’t omit the cornstarch or else your filling will not thicken up.

FAQ

How to get apple pie filling to thicken?

Mix cornstarch with water to make a slurry. Add it to the pan after the apples have softened. Stir for 1-2 minutes and remove from heat.

What's the best apple for apple pie filling?

The best apples for an apple pie filling recipe are Granny Smith, Gala, Honeycrisp, and Pink Lady apples.

Why is my apple pie filling so liquidy?

Using the wrong type of apples can cause the filling to be liquidy. They release excess water.

Why is my apple pie filling mushy?

Overripe apples cause the filling to be mushy because they lose water too quickly don’t hold their shape.

Fresh homemade apple pie filling cooling in a bowl.

Related

Looking for other recipes like this? Try these:

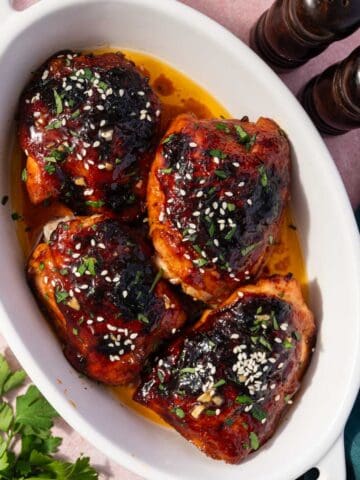
  • Oven baked honey garlic chicken thighs with sticky glaze in a baking dish
    Baked Honey Garlic Chicken Thighs (Sticky, Juicy & Ready in 40 Minutes)
  • July Meal Plan for Families: 30 Days, No Repeat Recipes
  • Crispy air fryer chicken drumsticks served on a platter with fresh parsley garnish.
    Crispy Air Fryer Chicken Drumsticks (25 Minutes!)
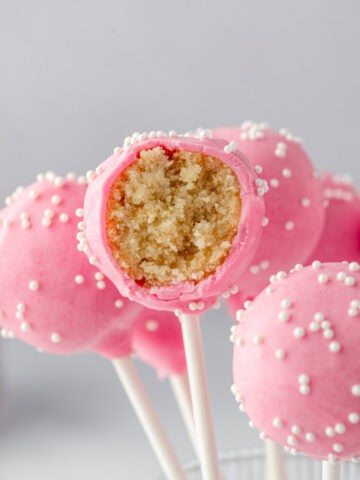
  • Inside of a birthday cake pop showing moist vanilla cake and frosting mixture
    Birthday Cake Pops (Easy Starbucks Copycat Recipe)

Pairing

These are my favorite dishes to serve with this apple pie filling with brown sugar recipe:

  • images of varies recipes collage for 30 day june meal plan
    June Meal Plan for Families (30 Days, No Repeat Recipes)
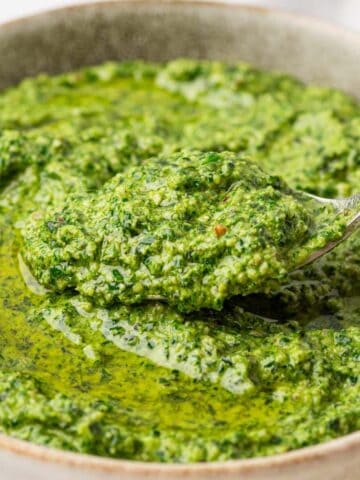
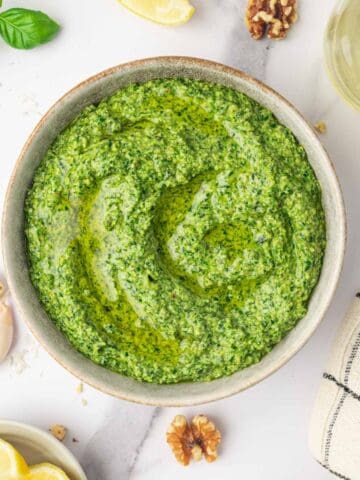
  • a spoon taking the creamy pesto sauce without pine nuts from a bowl.
    Substitute for Pine Nuts in Pesto (Best Easy Alternatives)
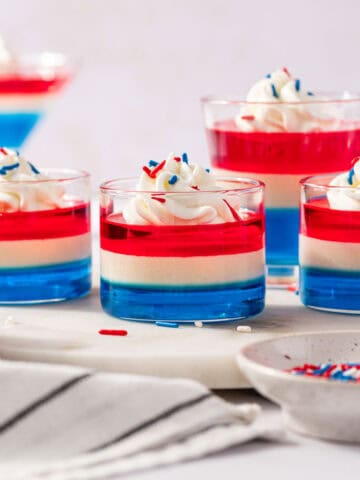
  • Festive red white and blue jello shots for summer holidays party table
    4th Of July Jello Shots (Red, White and Blue layers)
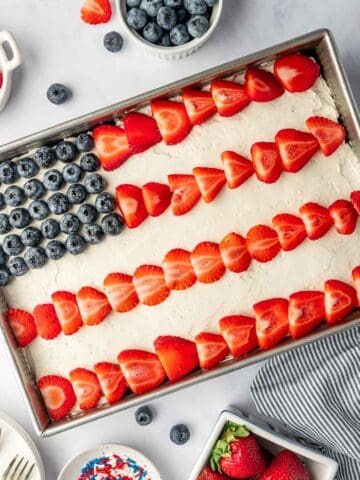
  • Patriotic flag cake recipe decorated with fresh strawberries and blueberries on top of the cake
    4th of July Flag Cake (Easy American Flag Sheet Cake)

If you tried this Apple Pie Filling with Brown Sugar recipe or any other recipe from my blog, I’d love to hear your thoughts! ⭐ Please leave a STAR rating and share your experience in the COMMENTS below. Your support means so much and helps me continue creating delicious recipes. Thank you for being part of this journey!

Homemade apple pie filling with cinnamon and brown sugar in a bowl.

Homemade apple pie filling with brown sugar recipe

Abi Guna
This homemade apple pie filling with brown sugar is made with fresh apples, warm spices, and a touch of sweetness for a classic, cozy flavor. It’s perfect for pies, turnovers, waffles, or as a topping for breakfast and desserts, very easy to make fall recipe!
5 from 9 votes
Print Recipe Pin Recipe
Prep Time 15 minutes mins
Cook Time 20 minutes mins
Total Time 35 minutes mins
Course Dessert
Cuisine American
Servings 3 cups apple pie filling

Equipment

  • Cutting board and sharp knife
  • Vegetable peeler
  • Large Skillet
  • Wooden spoon or silicone spatula
  • Measuring cups and spoons

Ingredients
  

  • 4 medium apples Granny Smith or Honeycrisp, peeled, cored, and diced
  • 2 tablespoons unsalted butter
  • ⅓ cup light brown sugar
  • 1 teaspoon ground cinnamon
  • ½ teaspoon apple pie spice
  • 2 tablespoons water
  • 1 tablespoon lemon juice
  • 2 teaspoon cornstarch + 2 teaspoon water for thickening

Instructions
 

  • Place a skillet or medium saucepan over medium heat. Add the butter and let it melt completely, swirling the pan gently so the butter coats the bottom.
  • Add the diced apples to the skillet, followed by the brown sugar, ground cinnamon, apple pie spice, water, and lemon juice. Stir everything together so the apples are evenly coated with the sugar and spices.
  • Let the mixture cook for about 5–7 minutes, stirring occasionally. The apples will start to release their juices and soften, while the sugar melts into a syrupy sauce.
  • In a small bowl, mix the cornstarch with a little water to make a slurry (this prevents lumps). Pour the cornstarch slurry into the skillet with the apples. Stir well to combine.
  • Continue cooking for another 1–2 minutes, stirring constantly, until the filling thickens slightly and becomes glossy. The sauce should coat the apples and have a jammy consistency.
  • Remove the skillet from the heat. Allow the apple pie filling to cool to room temperature before using it in pies, turnovers, or as a topping.

Notes

  • Choose firm, tart apples like Granny Smith or Honeycrisp for the best texture and balanced sweetness.
  • Dice apples evenly so they cook at the same rate and the filling is consistent.
  • Let the filling cool before using it in pies or pastries to prevent soggy crusts.
  • Adjust sugar and spice to taste, depending on your apple variety and personal preference.
  • Store leftovers in an airtight container in the refrigerator for up to a week, or freeze for longer storage.
Keyword apples, easy desserts, fall, Holiday Desserts

Puff pastry apple turnovers with apple pie filling

August 1, 2025 by Abi Guna 21 Comments

Nothing hits better than an apple and cinnamon combination when fall gives you the best apples. The sweet and woody aroma fills up the house on a quiet evening and suddenly everyone comes looking for the source. These easy puff pastry apple turnovers with homemade apple pie filling are crispy on the outside and gooey on the inside.

Close-up of warm puff pastry turnovers with glossy apple pie filling inside.

Making this recipe for the first time might look daunting, but if you follow the instructions I’m sharing, you’ll be surprised at how quick and easy it is. I promise you, these delicious apple treats are worth it! These apple turnovers can be made with store bought puff pastry dough. As for the filling, you can make your own apple pie filling (shared below) or use store bought. 

After enjoying these flaky puff pastry apple turnovers, you’ll want to try my Apple Cinnamon Waffles for breakfast! They’re packed with warm spices and fresh green apples, perfect for a weekend brunch or an autumn-inspired treat.

Looking for more puff pastry recipes? Try my Puff pastry hearts and Nutella puff pastry swirls , my favorite desserts!

[feast_advanced_jump_to]
A single Flaky apple turnovers on a pink background with cinnamon apple filling in it.

WHY YOU WILL LOVE THESE PUFF PASTRY APPLE TURNOVERS

  • Freezer Friendly:  Making apple turnovers is very easy and simple, but if you have a busy schedule, you can make a batch and freeze them for up to two weeks. I’ve shared details in the storage and reheating tips at the bottom. 
  • Fruity and Woody Aroma: These apple turnovers have a strong fruity smell because of the apples. The cinnamon in the filling hits the right spots when you bake them. It gives you fall vibes instantly.  
  • Great Texture: The flaky and crispy puff pastry crumbles in your mouth and the gooey apple filling melts. Kids love it. It’s not chewy at all. The texture of this apple turnovers recipe is best enjoyed when it’s fresh. 
  • Simple Ingredients: For this apple turnovers recipe you don’t need any fancy ingredients. You can find the puff pastry dough at any store. The apple pie filling is also really easy to make. You can use any type of apples for this recipe, but I personally prefer Granny Smith or Honeycrisp apples.

INGREDIENTS AND SUBSTITUTIONS FOR APPLE TURNOVERS RECIPE

The ingredients you need for making this recipe:

Ingredients to make puff pastry apple turnovers are being laid out.

For the Apple pie Filling:

  • Apples (Granny Smith or Honeycrisp): Peel and core the apples once they’re washed. Dice them in the same size.
  • Unsalted Butter: Use unsalted butter because apple pie spice is already slightly salty. You can use plant based butter instead of dairy.
  • Light Brown Sugar: Use light brown sugar instead of brown so that the filling is not too dark. You can also use other alternatives like agave nectar or coconut sugar.  
  • Ground Cinnamon: You need a teaspoon of cinnamon for the signature nutty and woody flavor for this apple pie filling recipe.
  • Apple Pie Spice: Use apple pie spice for making your filling for apple turnovers with puff pastry. 
  • Water: You’ll need two tablespoons of water to soften the apples.
  • Lemon juice: Add a tablespoon of lemon juice for a citrusy punch to balance the sweetness.
  • Cornstarch: Mix two tablespoons of cornstarch with 2 teaspoons of water for thickening.

For the Turnovers:

  • Puff Pastry: You’ll need 1 sheet of frozen puff pastry. Let it thaw on the counter or in the fridge before using.
  • Egg: For that golden color of the crispy pastry, you’ll need one egg. 
  • Water: Water is required for making the eggwash.

To make Glaze:

  • Powdered Sugar: You can also substitute it with powdered coconut sugar.
  • Milk: Both dairy and plant-based milk options are suitable for this apple turnovers recipe.

See recipe card for quantities.

INSTRUCTIONS (How to Make Apple Turnovers with Puff Pastry )

Make the Apple Filling

In a skillet apples are added to make apple pie filling along with cinnamon , brown sugar, etc.,

In a saucepan, cook apples with butter, sugar, cinnamon, and a splash of lemon juice until soft and syrupy for about 8–10 minutes.

Cinnamon apple pie filling is ready in a skillet.

Let the filling cool completely.

Prepare the Puff Pastry

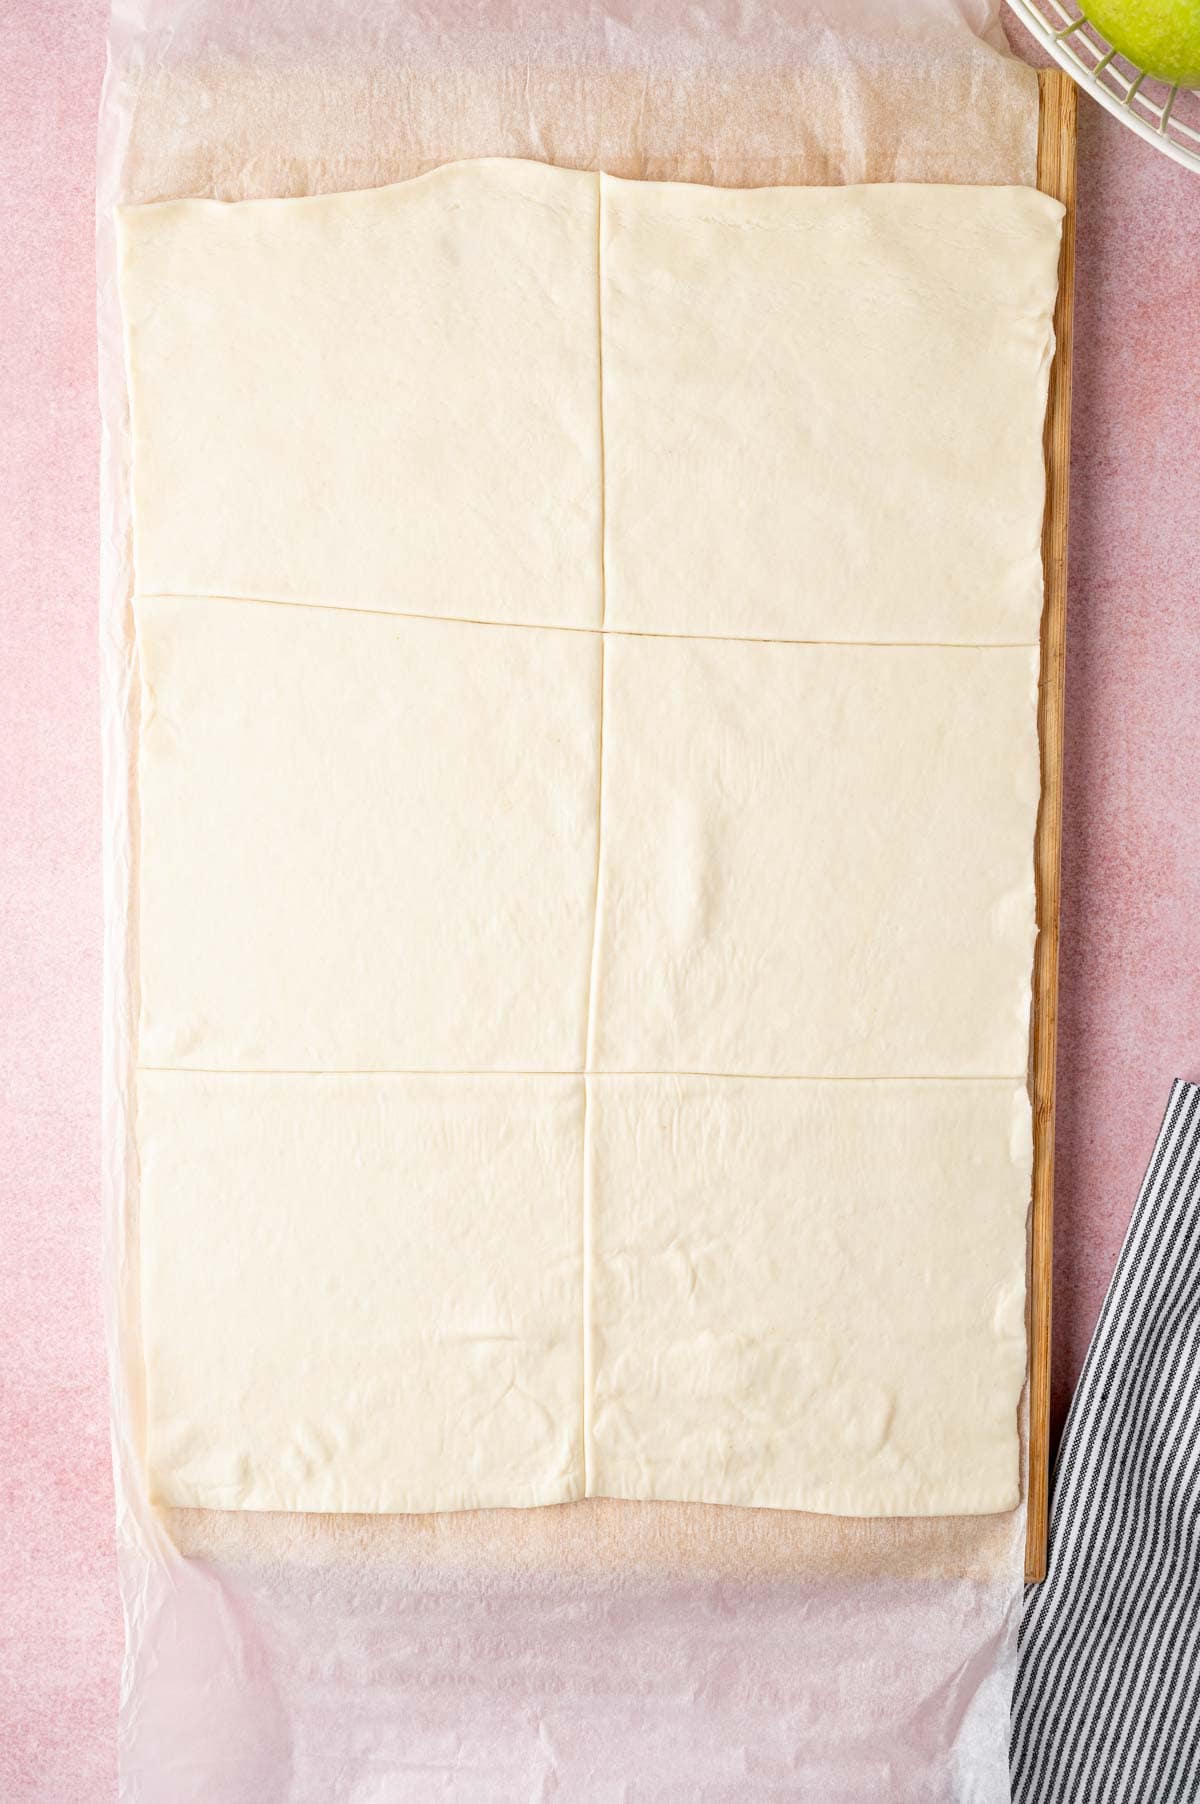
Puff pastry being divided.

Thaw the puff pastry sheets according to package instructions. On a lightly floured surface, roll out the pastry and cut into even squares (6 squares)

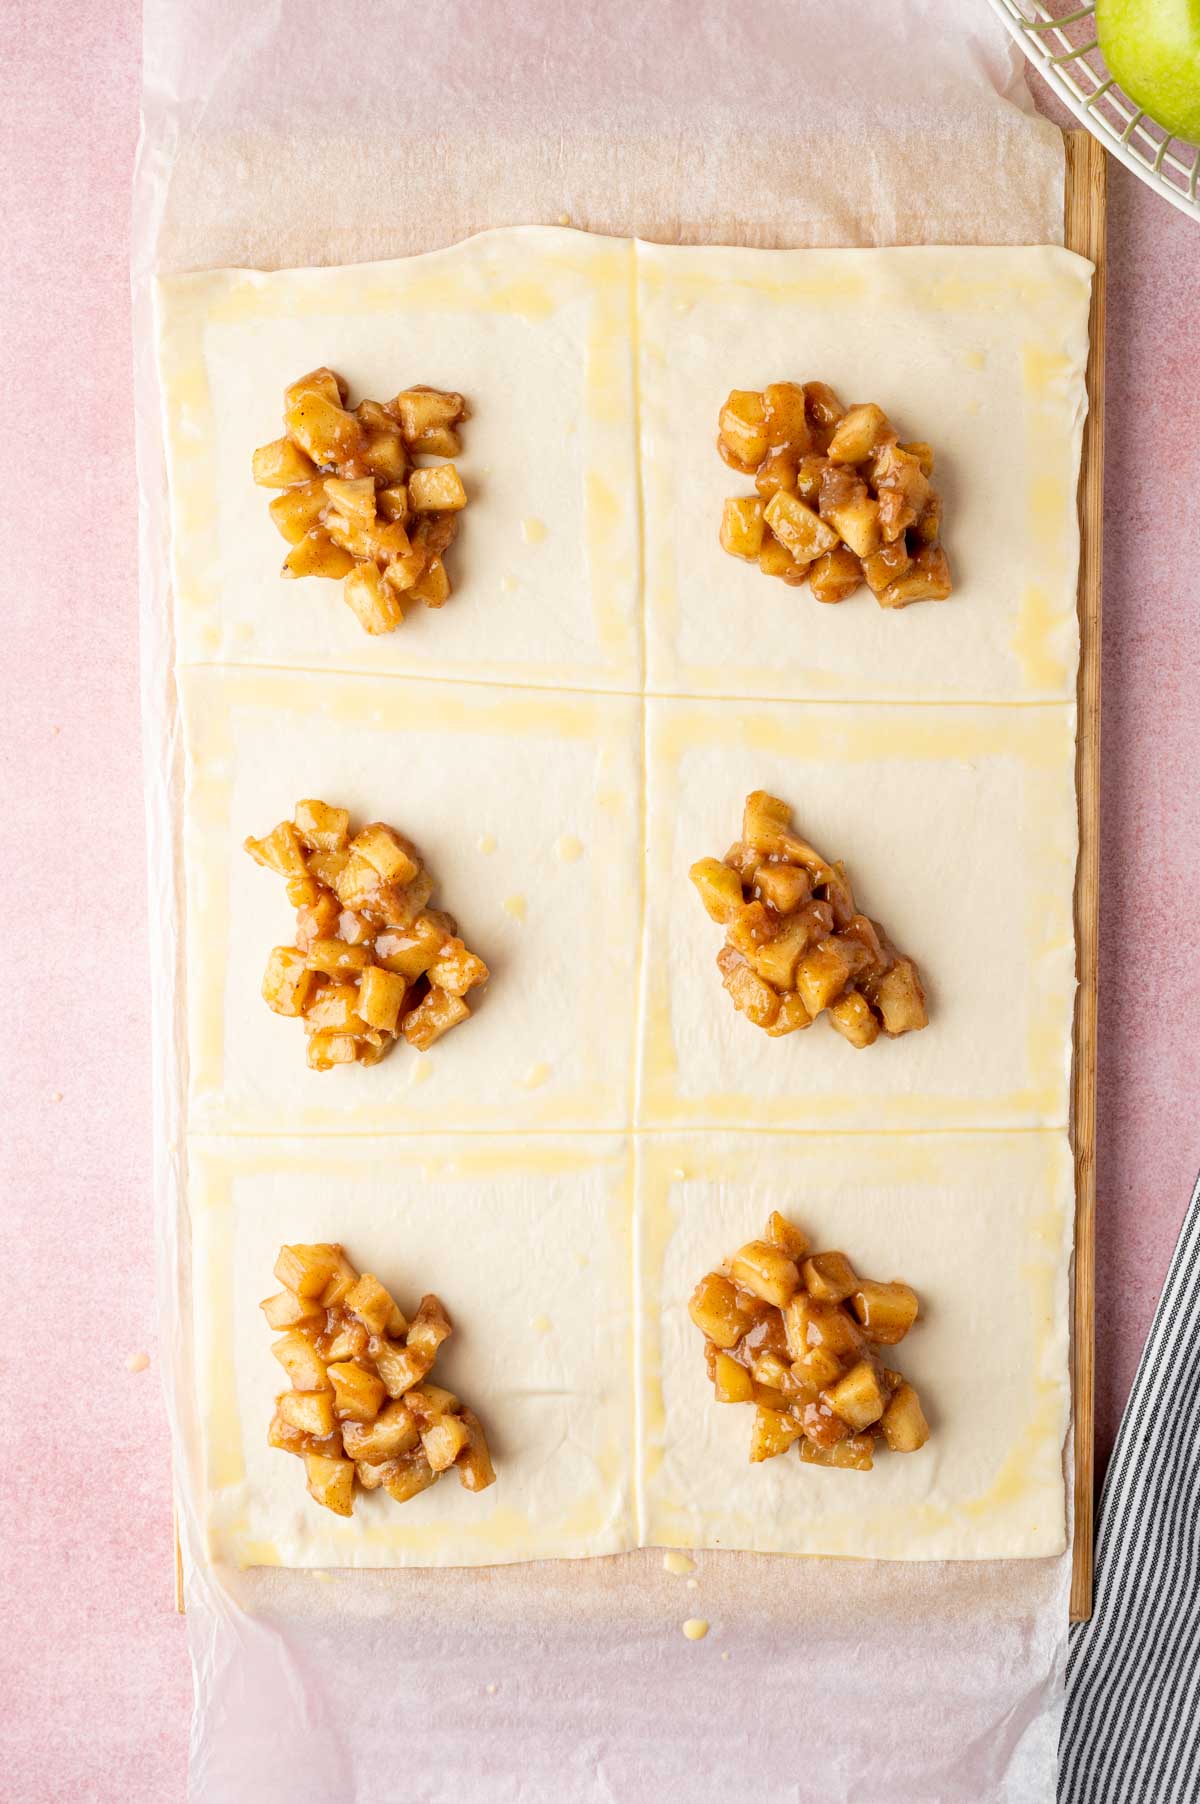
Apple pie filling being placed in the center of the puff pastry.

Place a spoonful of cooled apple filling in the center of each puff pastry square.

Assemble the Turnovers

Close the puff pastry triangle.

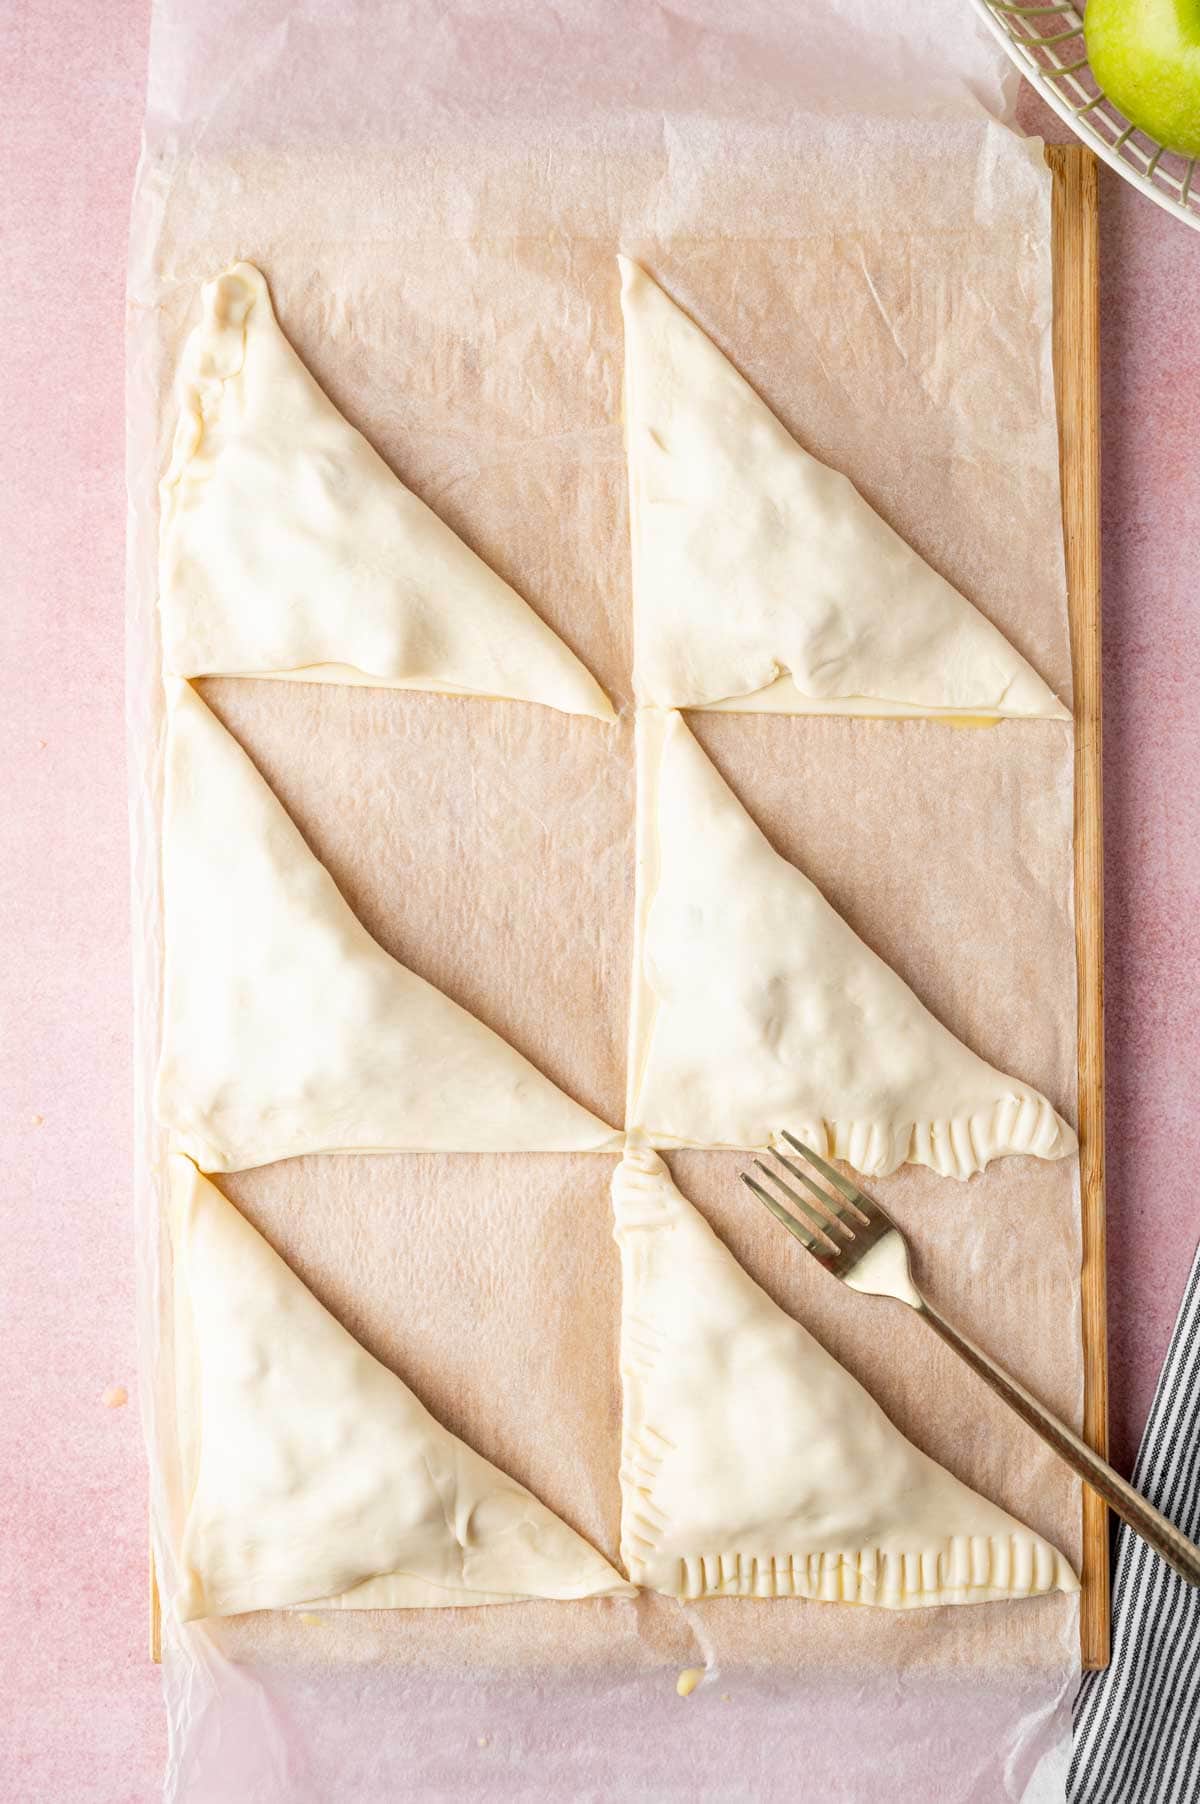
Fold each square diagonally to form a triangle. Seal the edges with a fork.

Apple pie turnovers are ready to bake.

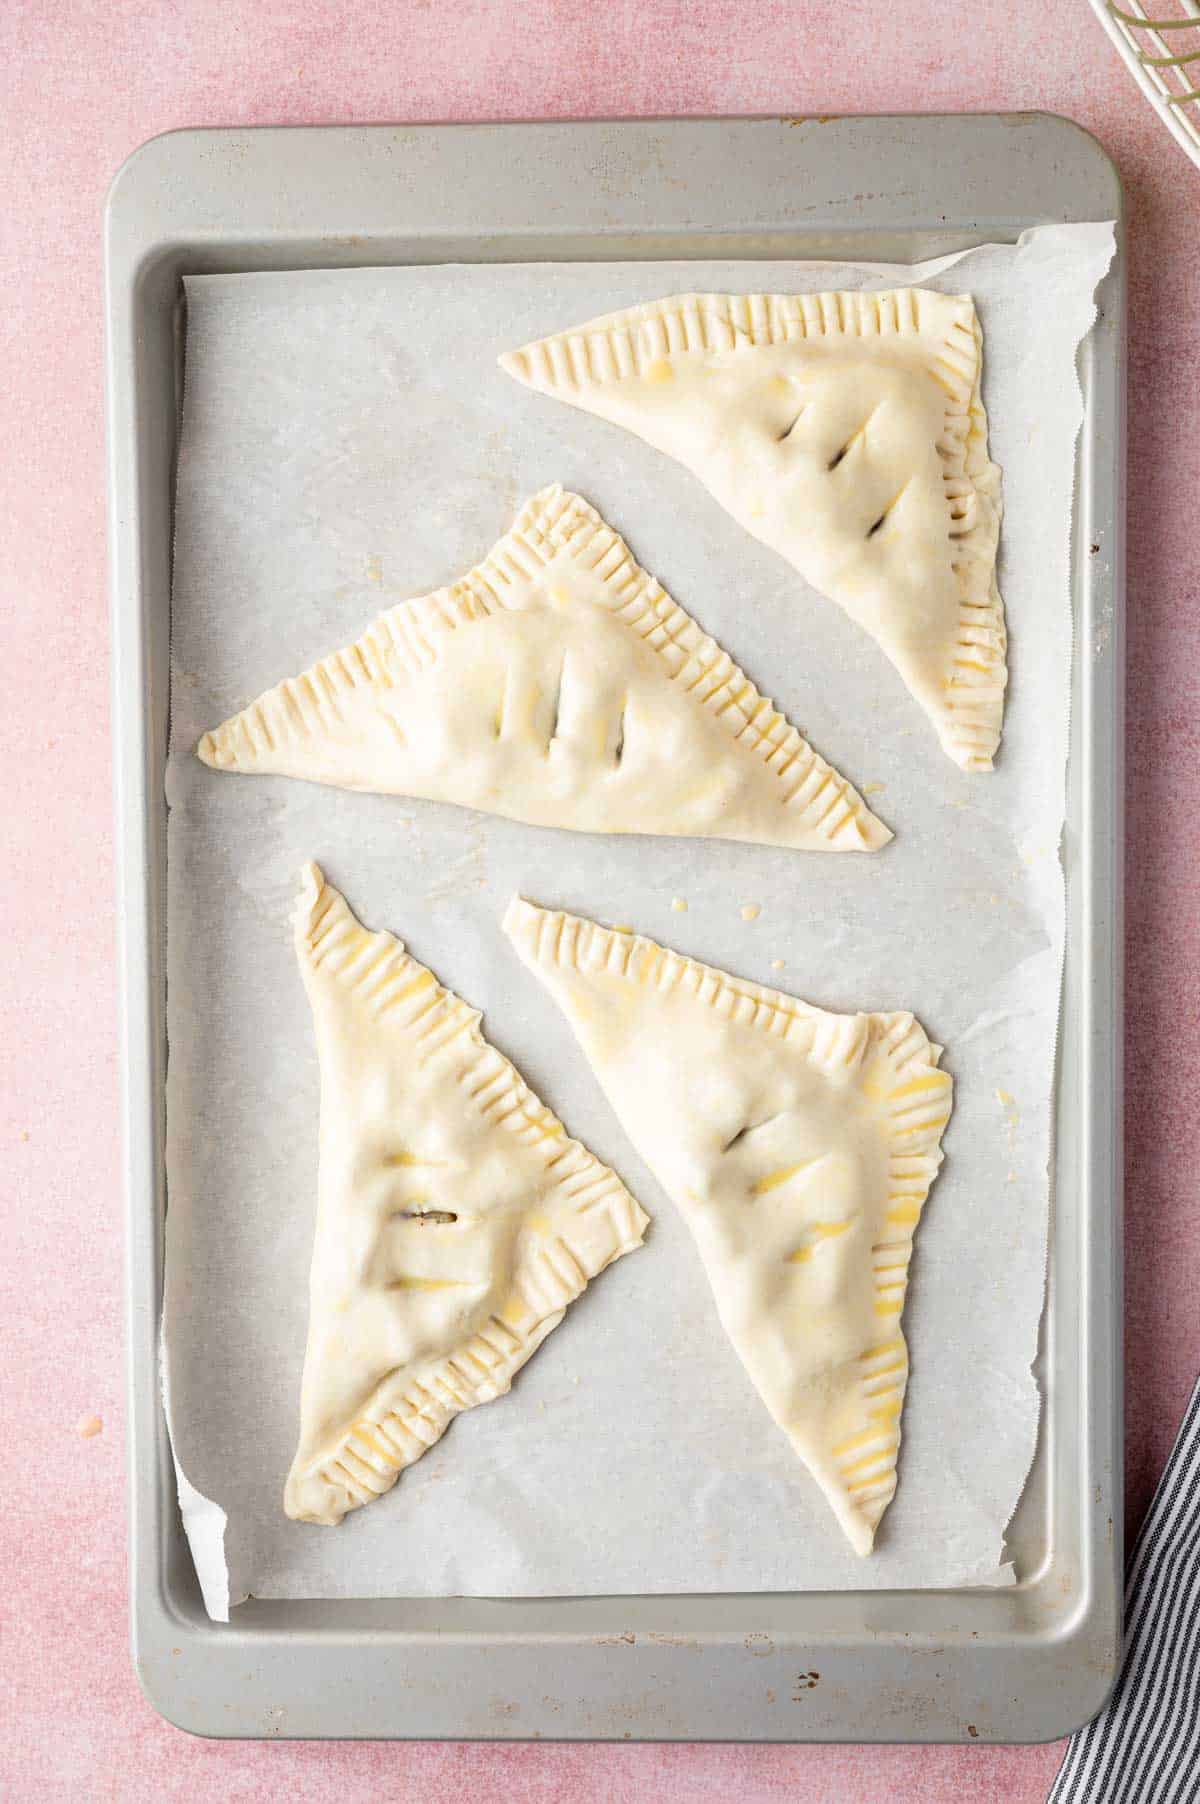
Cut a small slit or poke a hole in the top for steam to escape. Brush each turnover with beaten egg for a golden finish.

Bake and serve

Flaky apple turnovers on a wire rack with cinnamon apple filling spilling out

Bake at 400°F (200°C) for 18–22 minutes, or until golden brown and puffed. Let turnovers cool on a wire rack for a few minutes.

Freshly baked apple turnovers with crisp pastry and caramelized apple chunks.

Drizzle with icing and enjoy once the icing is set.

Hint: Don't forget to brush the egg wash on top of the pastries before baking to get that golden and crispy color on top of the turnovers.

VARIATIONS FOR PUFF PASTRY APPLE TURNOVERS

There are quite many variations you try with this recipe. All of the versions are simple and easy.

  • Apple Pecan Turnovers: Apples go really well with pecan nuts. Preheat the oven to 350°F and bake the nuts for 10 minutes. Chop them and add to your apple pie filling.
  • Apple Coconut Turnovers: Add a twist to this apple turnovers recipe by adding desiccated shredded coconut to the apple pie filling. You can also sprinkle it on top of the pastry.
  • Apple Pear Turnovers: Apples and Pears taste great together. Simply peel, core and dice the pear just like apples. Mix diced pear and apple to make the filling. The rest of the recipe will be the same.
Baked apple turnovers with puff pastry served for dessert.

SERVING SUGGESTIONS FOR APPLE TURNOVERS WITH PUFF PASTRY

Coffee/Tea: These delicious turnovers can be a perfect breakfast, served with a hot cup of coffee or  vanilla bean latte or salted caramel latte. 

Waffles and Scones: You can make this recipe and serve it along with apple cinnamon waffles and scones at hi-tea or brunch. 

Fruit-forward treats: Try my Blackberry Oatmeal Cookies or Berry chia seed pudding for a delicious and satisfying pairing. 

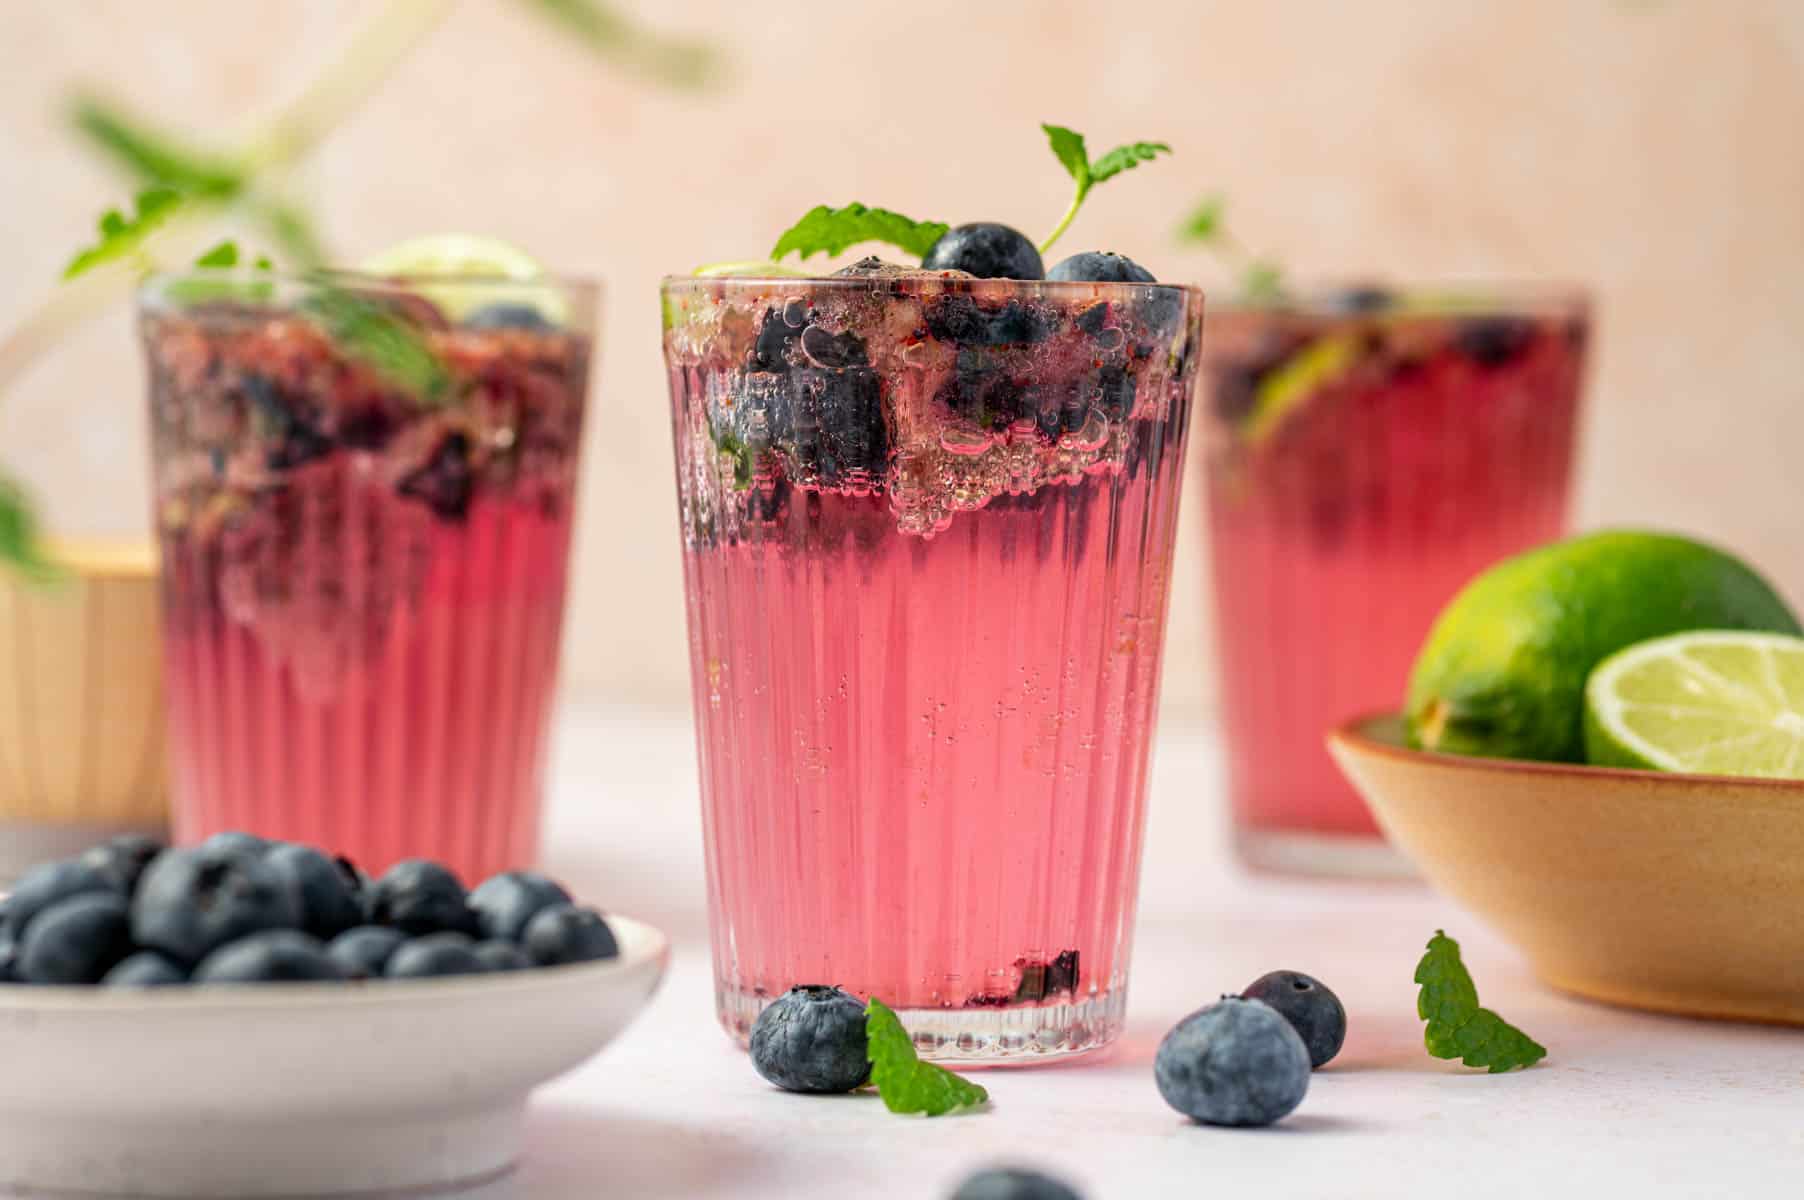
With Mocktails: These flaky and crispy turnovers are perfectly paired with evening mocktails like blueberry mojito.

With Ice Cream: Just like waffles, you can serve apple turnovers with a scoop of ice cream after lunch or dinner. It can make a good dessert.

Equipment

  • Baking Sheet: For baking the turnovers.
  • Parchment Paper or Silicone Baking Mat: Prevents sticking and makes cleanup easy.
  • Medium Saucepan: To cook the apple filling.
  • Pastry Brush: For brushing egg wash on the turnovers.
  • Measuring Cups & Spoons: For accuracy in ingredients.
  • Cooling Rack: To cool the turnovers after baking.
Homemade apple turnovers with puff pastry layers and spiced apple filling.

STORAGE AND REHEATING TIPS

Storage Tips:

  • You can store apple turnovers with puff pastry in the fridge for 2 to 3 days.
  • You can prepare and freeze the turnovers in the freezer for two weeks. Use an airtight container or freezer bag.

Reheating Tips:

  • Thaw the frozen turnovers in the fridge. Bake the raw ones for 20-25 minutes. Pre-baked only need 5-7 minutes in the oven.

TOP TIPS FOR APPLE TURNOVERS RECIPE

  • Drizzle the glaze over slightly cooled turnover, otherwise they’ll get soggy.
  • To keep them crisp and flaky, place the turnovers on a cooling rack in a single layer. 
  • Don’t over do the filling. 
  • Use cooled filling or else it will get mushy after baking.

FAQ

How do I keep turnovers from getting soggy?

Let the filling cool completely before assembling. Avoid overfilling, and make a small vent in each turnover so steam can escape while baking.

How to seal puff pastry turnovers?

Apple the egg wash around the corners of the square and use a fork, apply light pressure to the edges of the pastry. This will seal the puff pastry without tearing the dough.

What’s the difference between apple turnovers and apple strudel?

Apple turnovers are made with pastry dough, whereas apple strudel is made with stretched dough that’s extremely thin. The layers in turnovers are from the puff pastry while the strudel is made by rolling the dough over the filling many times.

What is another name for apple turnover?

Apple turnover is called “Chaussons aux pommes” in French, meaning French Apple Turnovers. They're the same thing as apple turnovers with puff pastry.

Can I make apple turnovers ahead of time?

Yes! You can assemble the turnovers, place them on a baking sheet, and refrigerate for up to 24 hours before baking. Baked turnovers can also be stored at room temperature for up to 2 days or refrigerated for up to 4 days.

Why is my puff pastry not puffing up?

Make sure your puff pastry is cold when it goes into the oven and that your oven is fully preheated. Warm pastry or a cool oven can prevent those flaky layers from rising.

What apples are best for turnovers?

Tart, firm apples like Granny Smith, Honeycrisp, or Braeburn hold their shape and balance the sweetness of the filling perfectly.

Easy puff pastry turnovers with sweet apple filling and golden crust.

Related

Looking for other recipes like this? Try these:
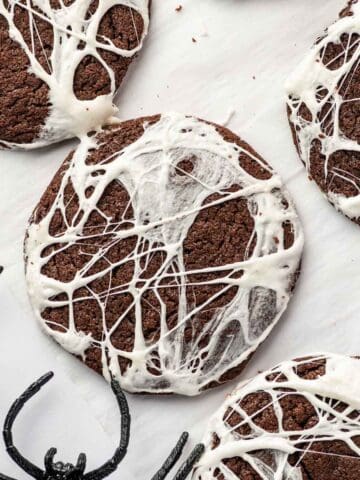
  • Close-up shot of orange poppy seed muffin topped with fresh orange glaze stacked one above the other.
    Orange Poppy Seed Muffins With Orange Icing - Moist
  • Juicy grilled chicken and pineapple skewers with colorful vegetables
    Pineapple Chicken Kabobs (Grilled Hawaiian skewers)
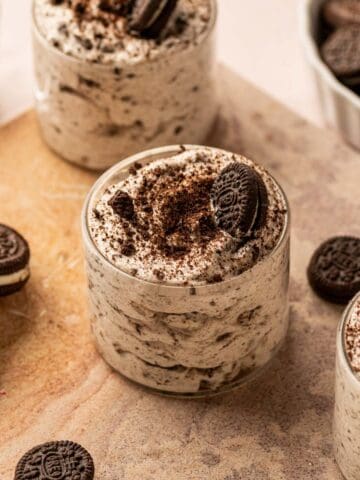
  • Creamy Oreo mousse dessert with cookie crumbs on top.
    Oreo Mousse - Quick And Easy No-Bake Dessert
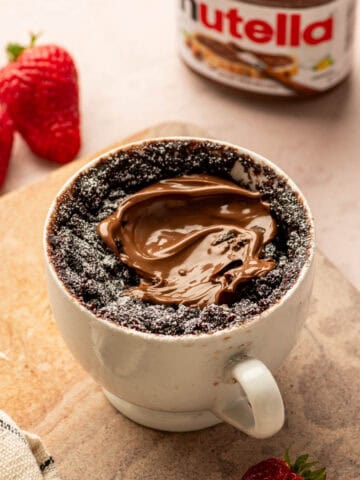
  • Chocolate Nutella mug cake in a mug with gooey middle, quick microwave dessert.
    Nutella Mug Cake Without Egg (Microwave Recipe)

Pairing

These are my favorite dishes to serve with this Homemade Puff Pastry Apple Turnovers recipe:

  • Air fryer orange chicken and rice served in a bowl with sesame seeds and green onions
    Orange Chicken and Rice (Air Fryer Recipe)
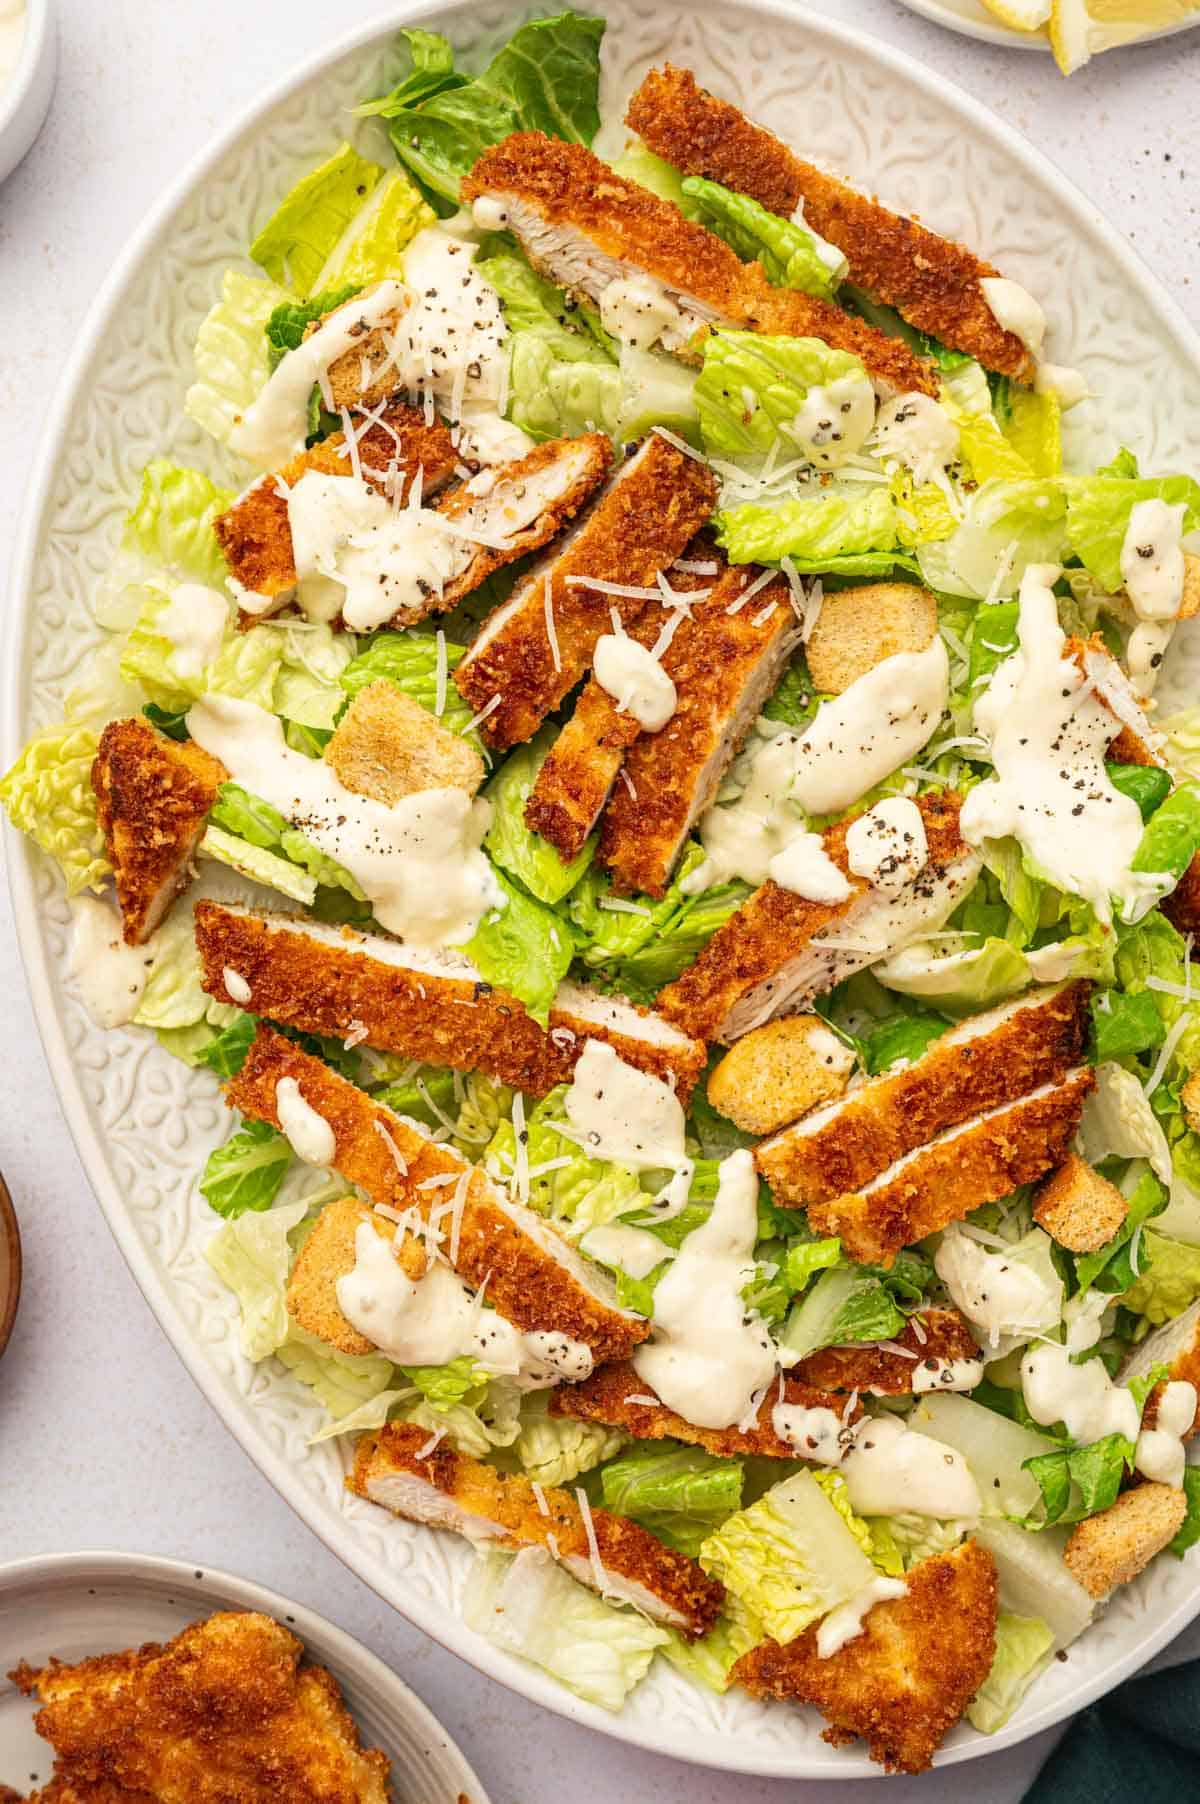
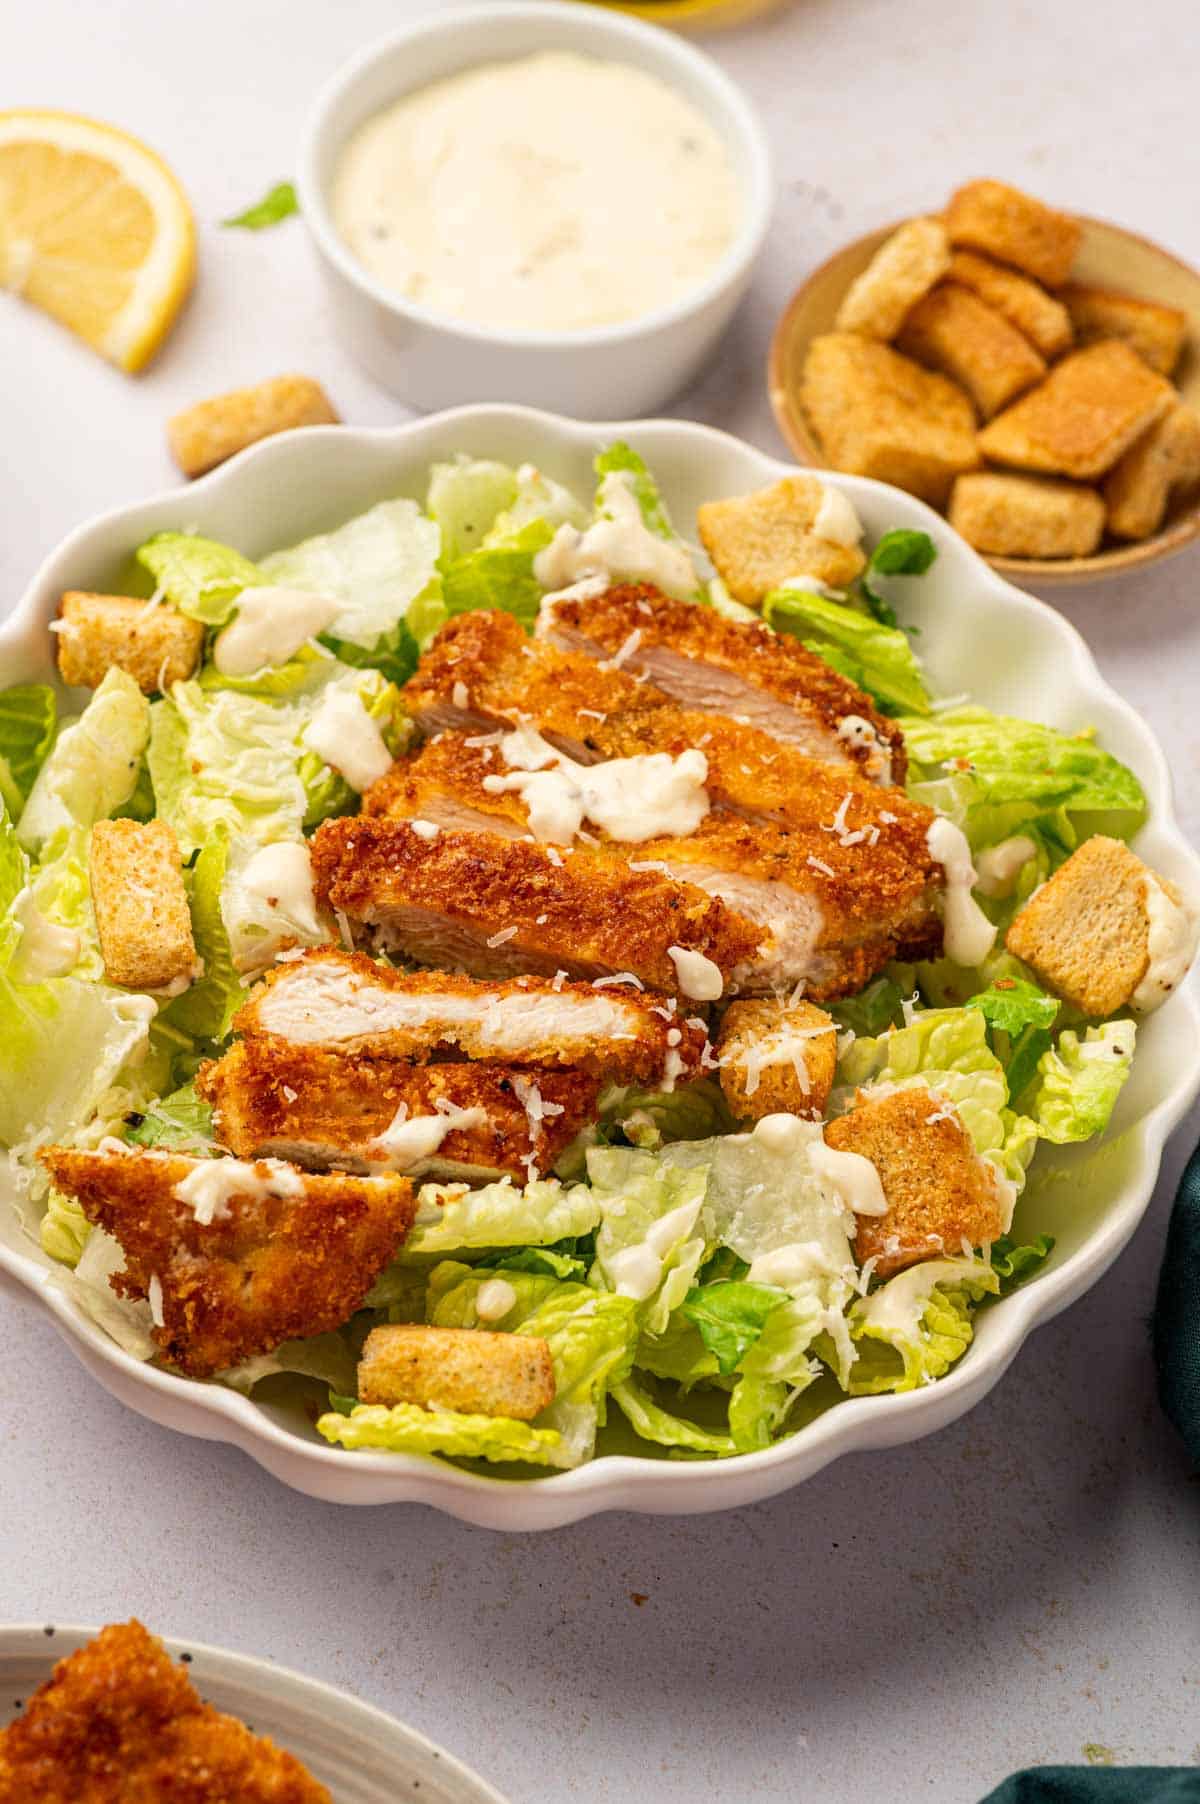
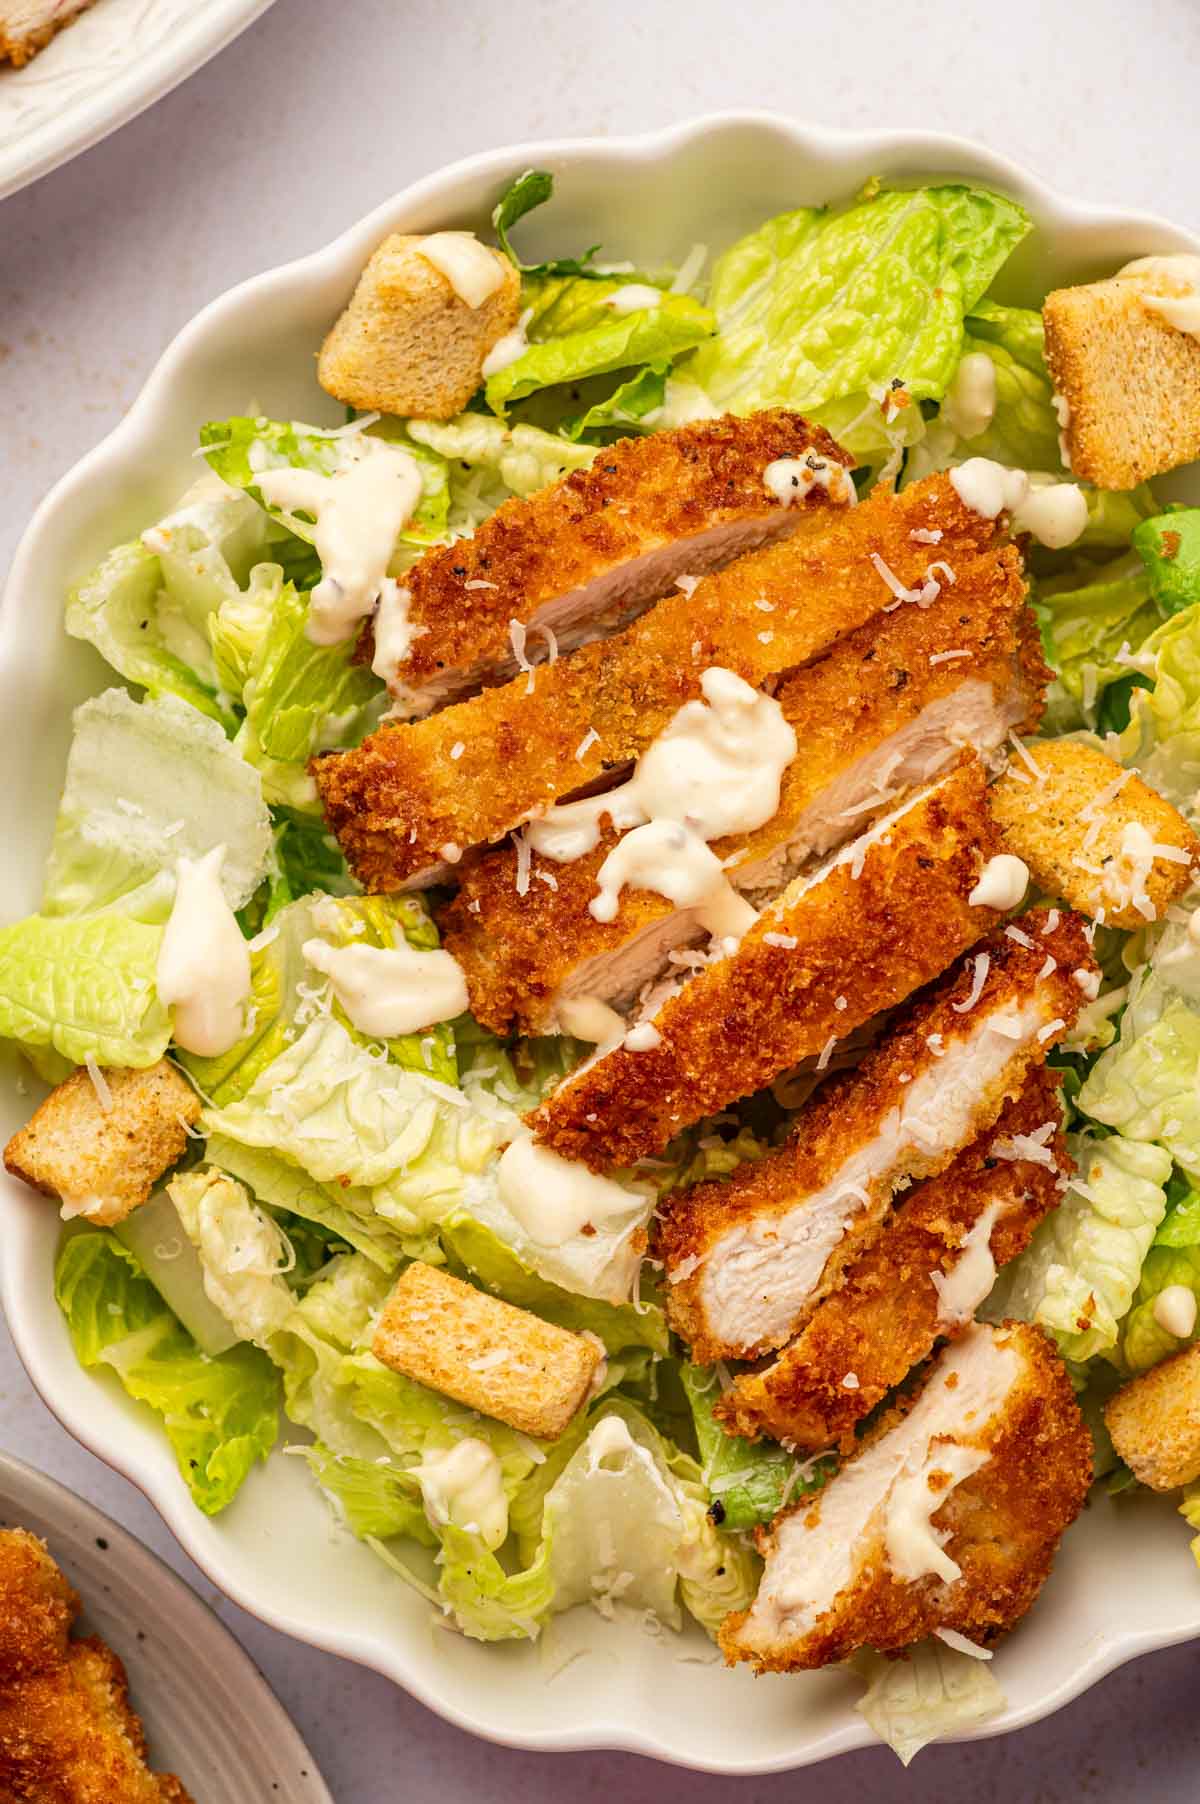
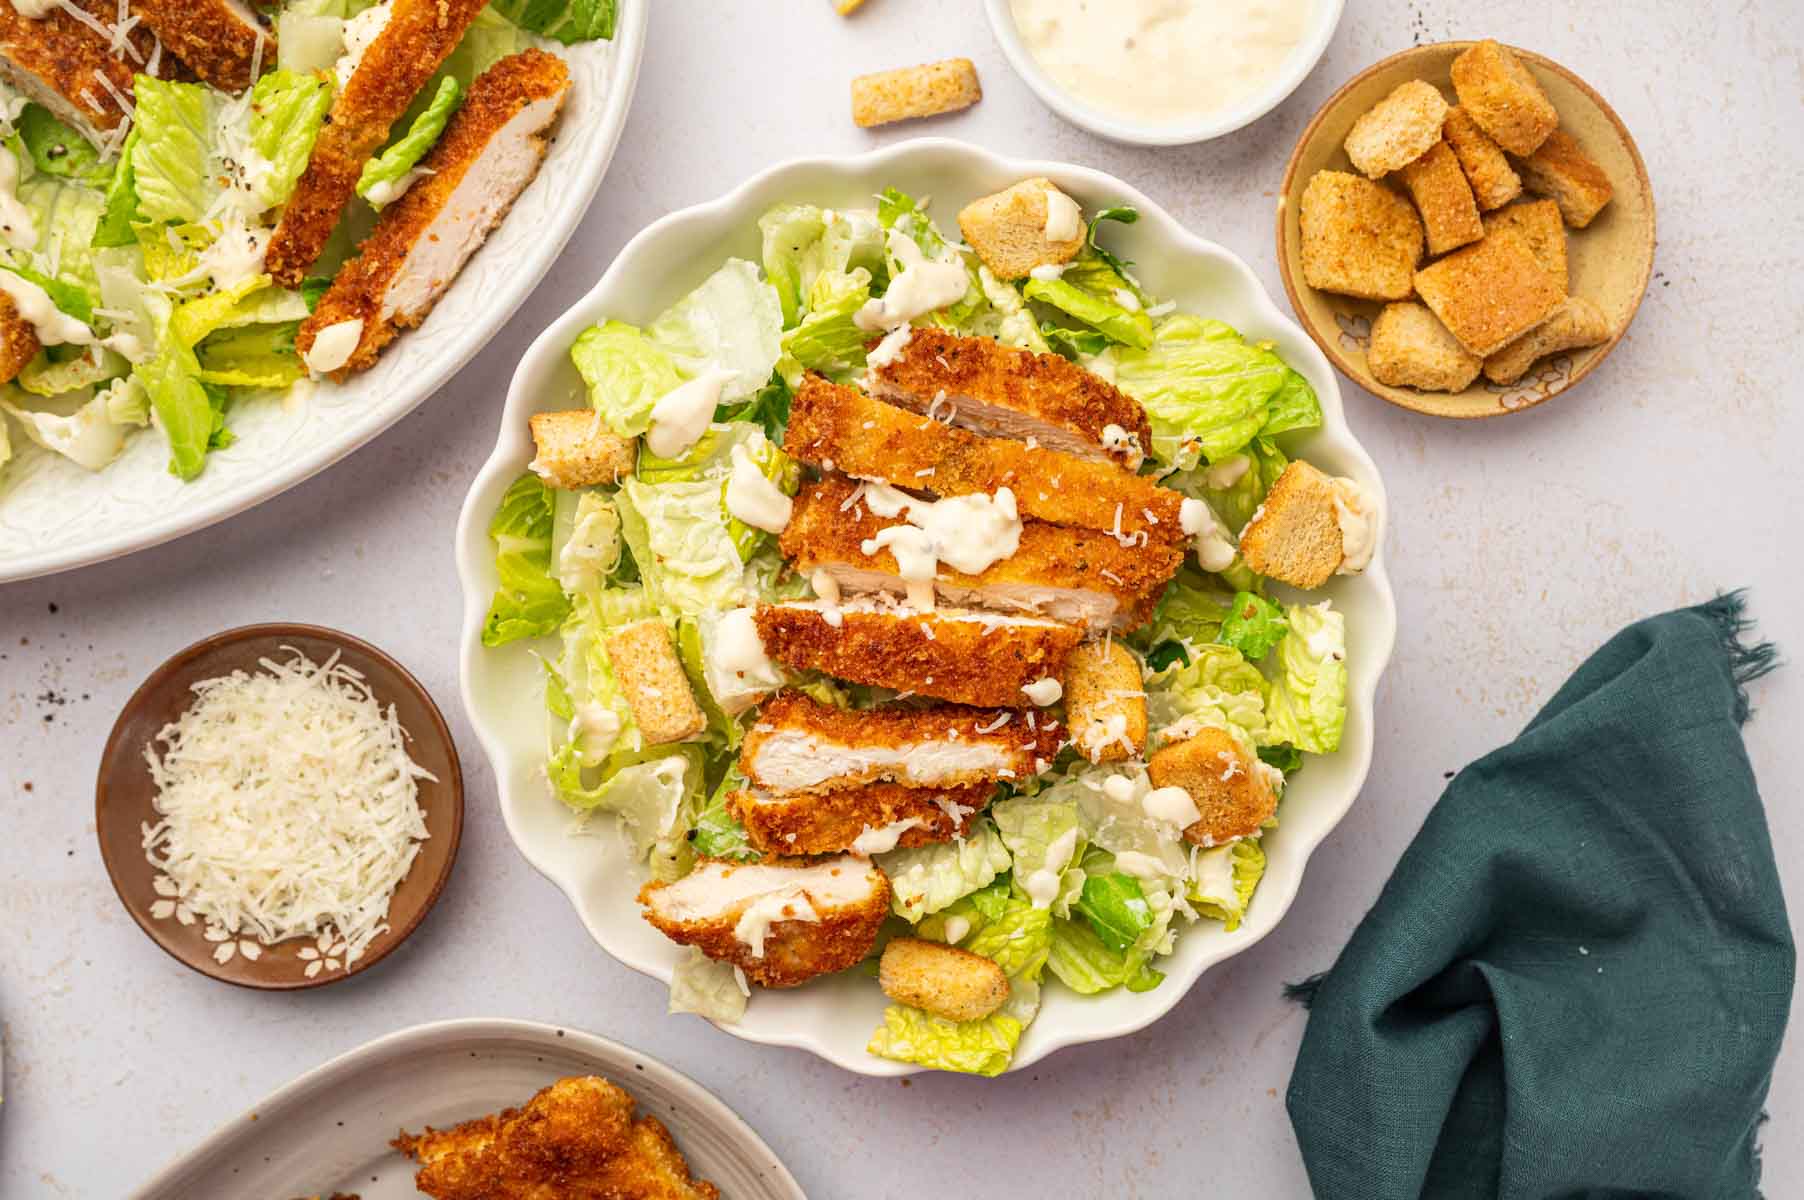
  • Overhead shot of Chicken Caesar Salad with crispy croutons and low calorie greek yogurt dressing.
    Chicken Caesar Salad (No-Mayo Greek Yogurt Dressing)
  • Baked puff pastry hearts with flaky, layered edges.
    Puff Pastry Hearts with Raspberries (Valentine’s Day)
  • Salmon Scampi Pasta (Garlic Butter & Lemon)

If you tried this Easy Puff Pastry Apple Turnovers recipe or any other recipe from my blog, I’d love to hear your thoughts! ⭐ Please leave a STAR rating and share your experience in the COMMENTS below. Your support means so much and helps me continue creating delicious recipes. Thank you for being part of this journey!

Flaky and crispy apple turnovers using storebought puff pastry.

Puff pastry apple turnovers with apple pie filling

Abi Guna
Enjoy flaky puff pastry apple turnovers filled with sweet, cinnamon-spiced apple pie filling. This easy homemade recipe bakes up golden and crisp—perfect for breakfast, dessert, or a cozy fall treat.
5 from 10 votes
Print Recipe Pin Recipe
Prep Time 20 minutes mins
Baking Time 20 minutes mins
Total Time 40 minutes mins
Course Breakfast, Dessert
Cuisine American, French
Servings 6 Apple Turnovers
Calories 310 kcal

Equipment

  • Baking Sheet
  • Parchment paper
  • Skillet
  • Rolling Pin
  • Fork
  • Pastry Brush
  • Cooling rack

Ingredients
  

For the Apple pie Filling:

  • 4 medium apples Granny Smith or Honeycrisp, peeled, cored, and diced
  • 2 tablespoons unsalted butter
  • ⅓ cup light brown sugar
  • 1 teaspoon cinnamon
  • ½ teaspoon apple pie spice
  • 2 tablespoons water
  • 1 tablespoon lemon juice
  • 2 teaspoon cornstarch + 2 teaspoon water for thickening

For the Apple Turnovers:

  • 1 sheet frozen puff pastry thawed
  • 1 egg
  • 1 tablespoon water

For the Glaze:

  • ½ cup powdered sugar
  • 1–2 tablespoons milk

Instructions
 

Make the Apple Filling

  • In a skillet over medium heat, melt butter.
  • Add diced apples, brown sugar, cinnamon, apple pie spice, water and lemon juice. Cook for 5–7 minutes until the apples soften.
  • Stir in cornstarch slurry (cornstarch + water) and cook for another 1–2 minutes until slightly thickened.
  • Remove from heat and let the filling cool.

Prepare the Puff Pastry

  • Preheat the oven to 400°F (200°C). Line a baking sheet with parchment paper.
  • On a lightly floured surface, roll out the puff pastry and cut into 6 equal squares.
  • Meanwhile, whisk the egg with 1 tablespoon of water. Set it aside.
  • Spoon about 1–2 tablespoons of apple filling onto the center of each square.
  • Brush the outer corners of the square with egg wash and fold each square diagonally to form a triangle. Press edges with a fork to seal.
  • Transfer to the prepared baking sheet. Brush over the tops of each turnover. Cut small slits in the center.
  • Bake for 20–25 minutes, or until golden brown and puffed.
  • In a small bowl, whisk together powdered sugar and milk.
  • Drizzle over slightly cooled apple turnovers. Serve warm or at room temperature.

Notes

  1. Work quickly and keep the puff pastry dough chilled to ensure the flakiest layers.
  2. Make sure your apple filling is completely cooled before assembling to prevent soggy pastry.
  3. Fill the pastry with just enough filling so the turnovers seal well and don’t burst open in the oven.
  4. Don't forget to cut a small slit in each turnover to allow steam to escape during baking.
Keyword apples, breakfast, fall, puff pastry

Pumpkin Pecan Waffles (Homemade waffle recipe)

August 1, 2025 by Abi Guna 11 Comments

Whether it's autumn, summer, or winter, our pumpkin pecan waffles recipe will take you back to fall. It is sweet, has a warm nutty smell, and a great texture. This desert option is great for guests, kids, movie night with friends, and even a late night craving.

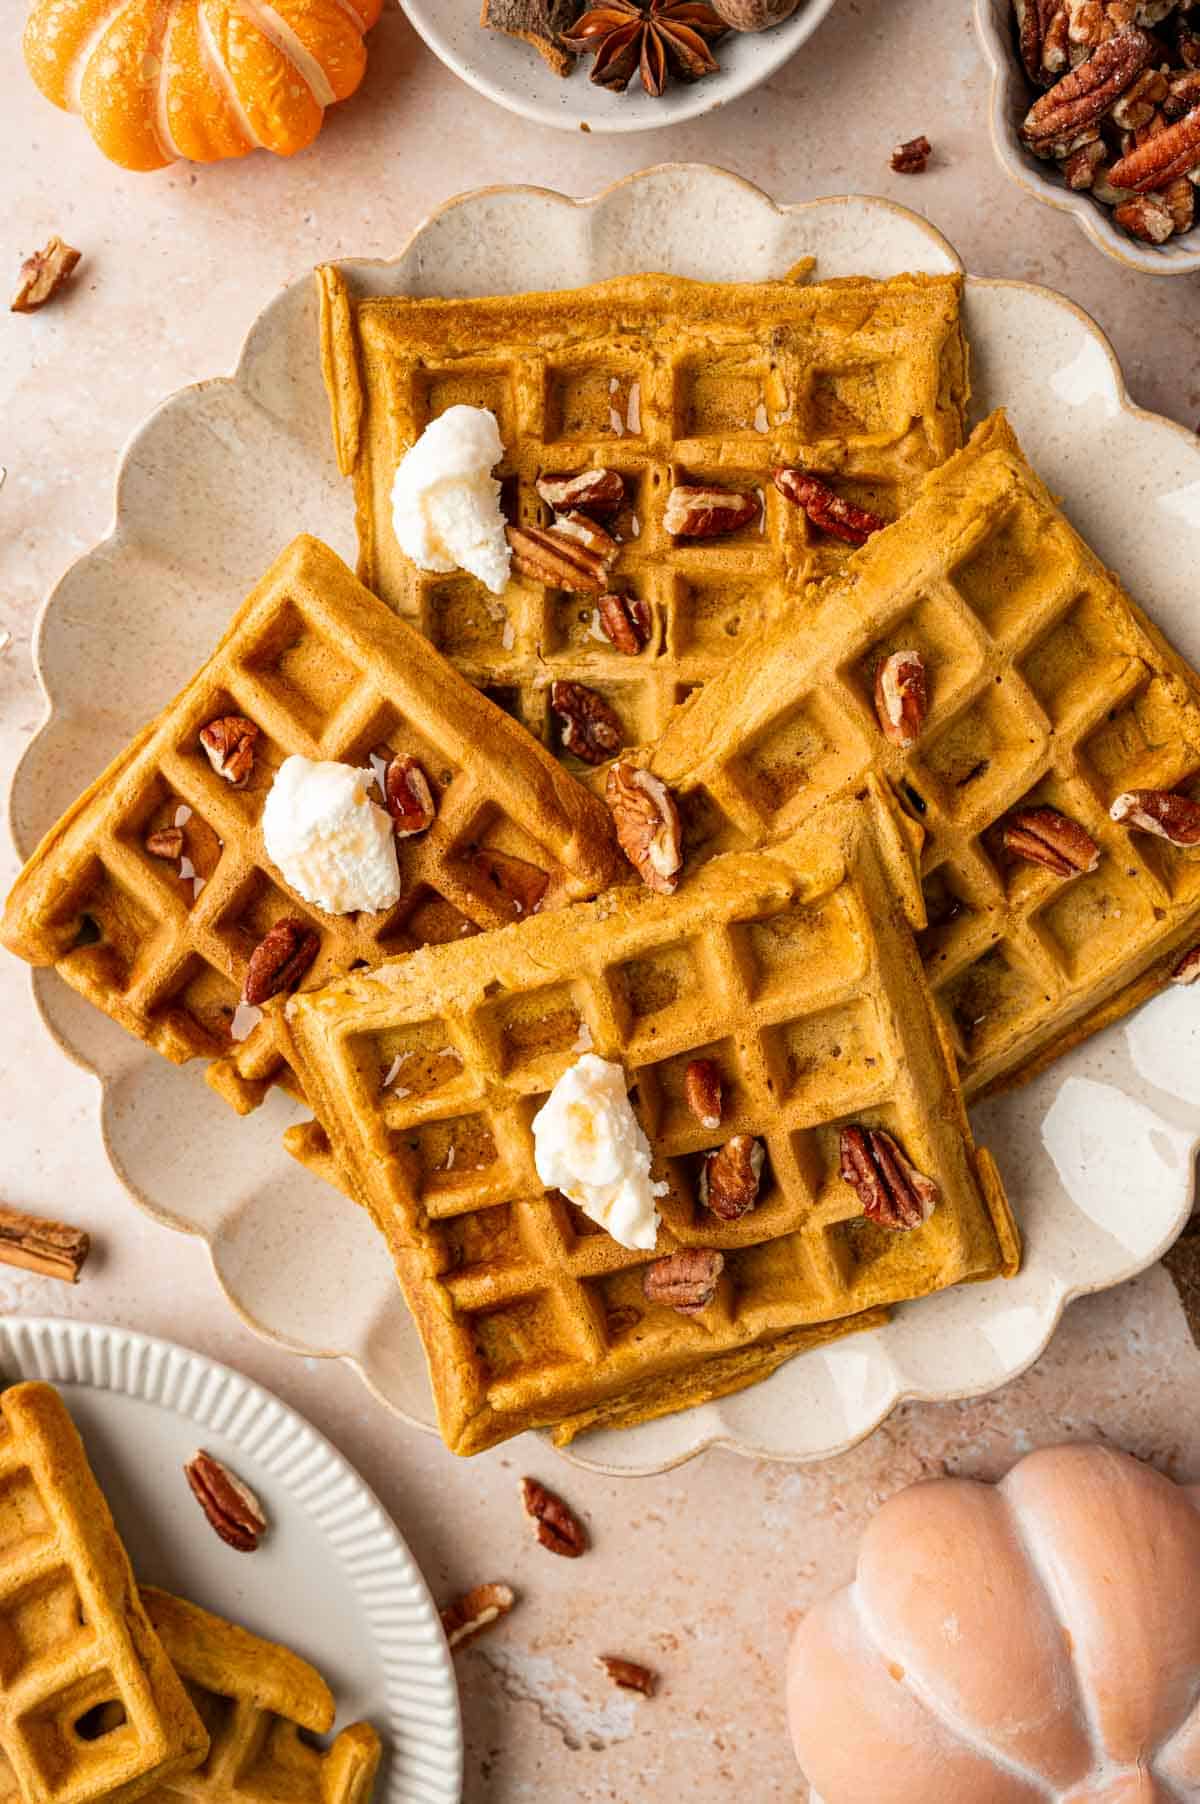
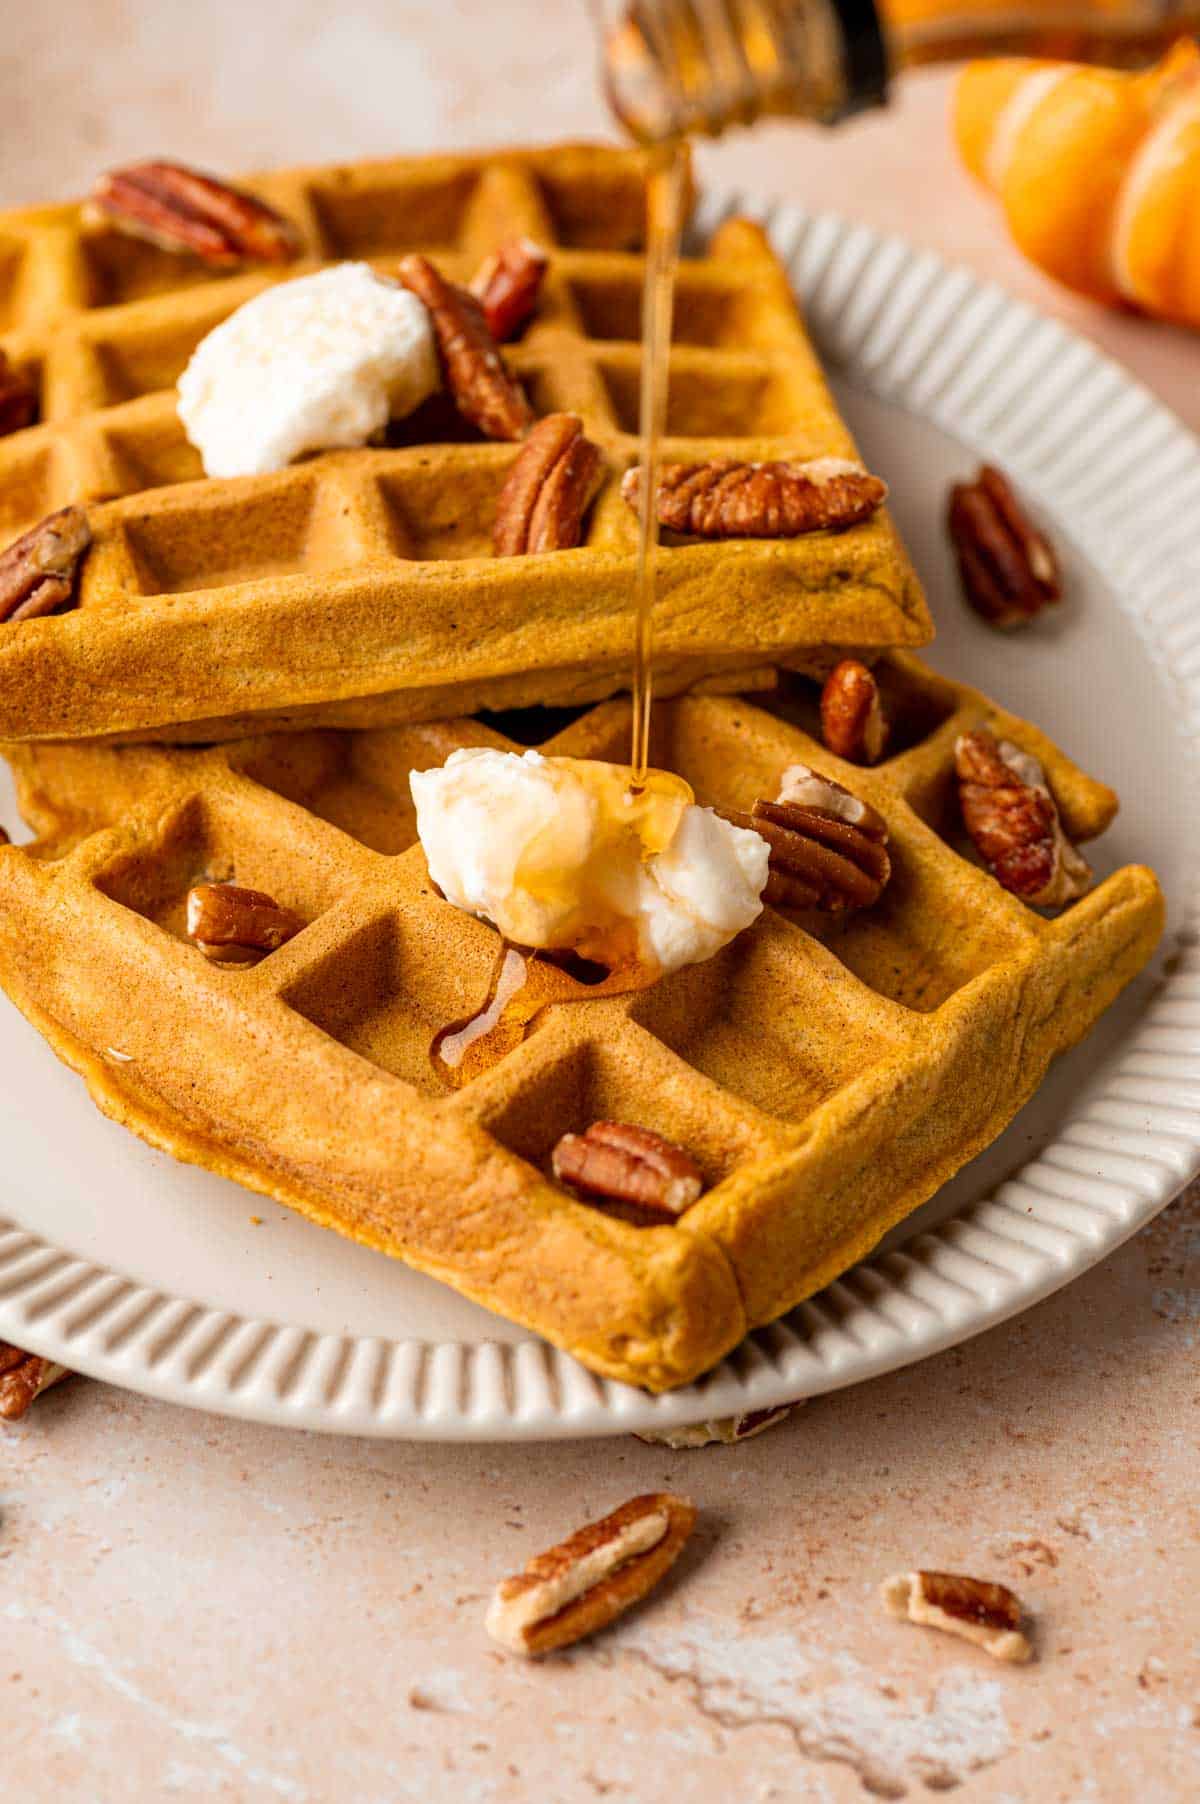
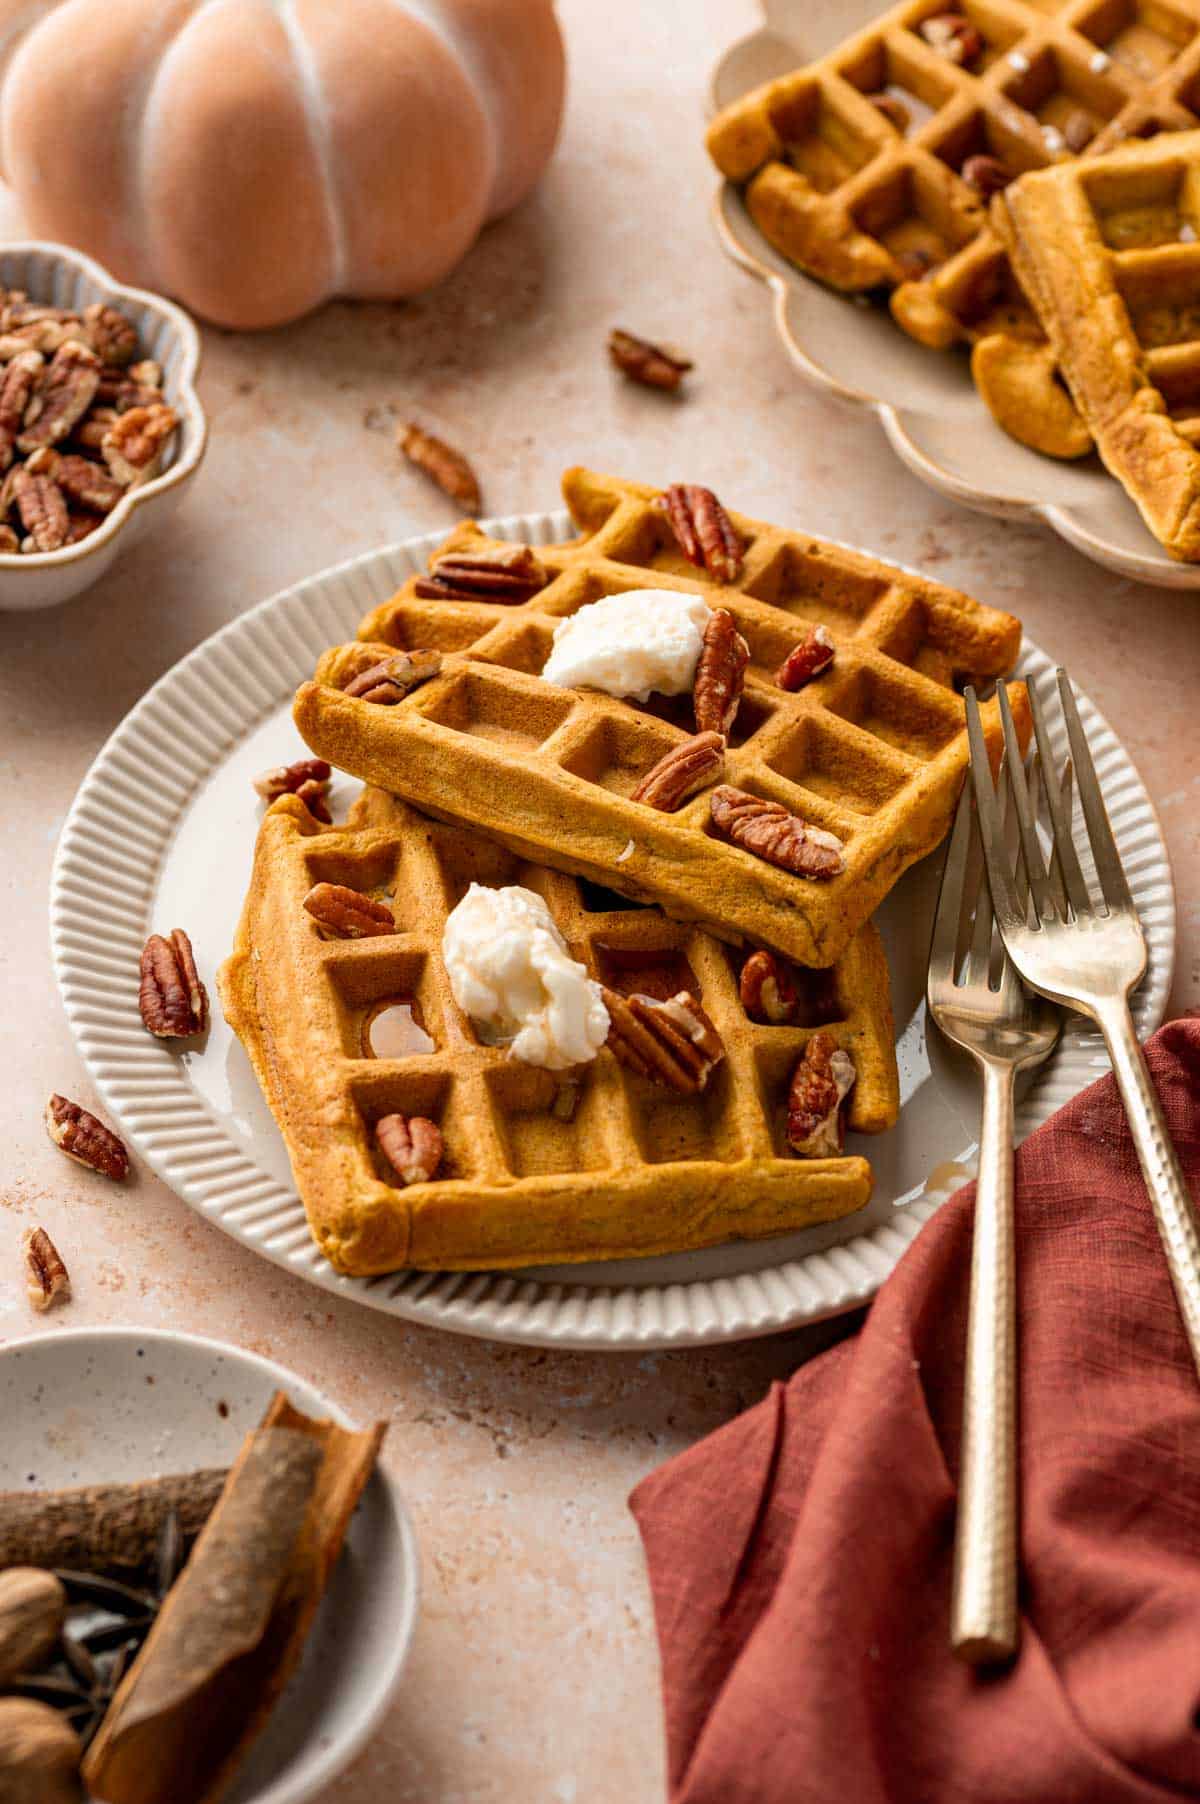
Golden brown pumpkin pecan waffles on a plate with whipped cream and cinnamon.

If you have a sweet tooth, you’ll find yourself making it every other day if not everyday. The best thing about this easy homemade recipe is that it has simple and easy to find ingredients. You can still make it at home even when the pumpkins are out of season. With leftover pumpkin puree I make a single serving dessert for myself like my Moist pumpkin mug cake.

If you love cozy breakfast treats like these pumpkin pecan waffles, you’ll want to try more of my favorite waffle recipes! For a fruity twist, check out my Apple Cinnamon Waffles — they’re packed with fresh apple flavor and warm spices topped with homemade cinnamon apple pie filling. Chocolate lovers will adore the gooey goodness of my Nutella Waffles, and if you’re craving something festive, don’t miss my Red Velvet Cake Waffles for a special occasion brunch.

[feast_advanced_jump_to]
Homemade pumpkin pecan waffles with a side of butter and syrup being drizzled over.

WHY YOU WILL LOVE THESE PUMPKIN PECAN WAFFLES

  • Great Flavour and Texture:  This easy waffle recipe has a rich flavor. The pumpkin spice, the cinnamon, the vanilla extract make it a delicious dessert. The light and soft texture of the waffles with the crunchy pecan nuts make a great combo.
  • Great Smell: The smell of this waffles recipe will make anyone want to try them. It has a pumpkiny scent that makes your house smell like autumn in any season of the year. 
  • Easy to Make: With simple ingredients, pumpkin pecan waffles are very easy to make. The prep time is 10 minutes and the banking time is 20 minutes. Within half an hour, you have a tasty treat ready for your family.
  • Great Nutritional Value: Pumpkin and pecan nuts have a great nutritional profile. Additionally, using brown sugar instead of white, you’re keeping your waffle healthy yet sweet.
  • Kid Friendly: Kids love sweet treats. This pumpkin pecan waffles recipe is nutritious, healthy, and kid friendly. You can give it to all kids over the age of 12 months. 

INGREDIENTS AND SUBSTITUTIONS FOR PUMPKIN PECAN WAFFLES

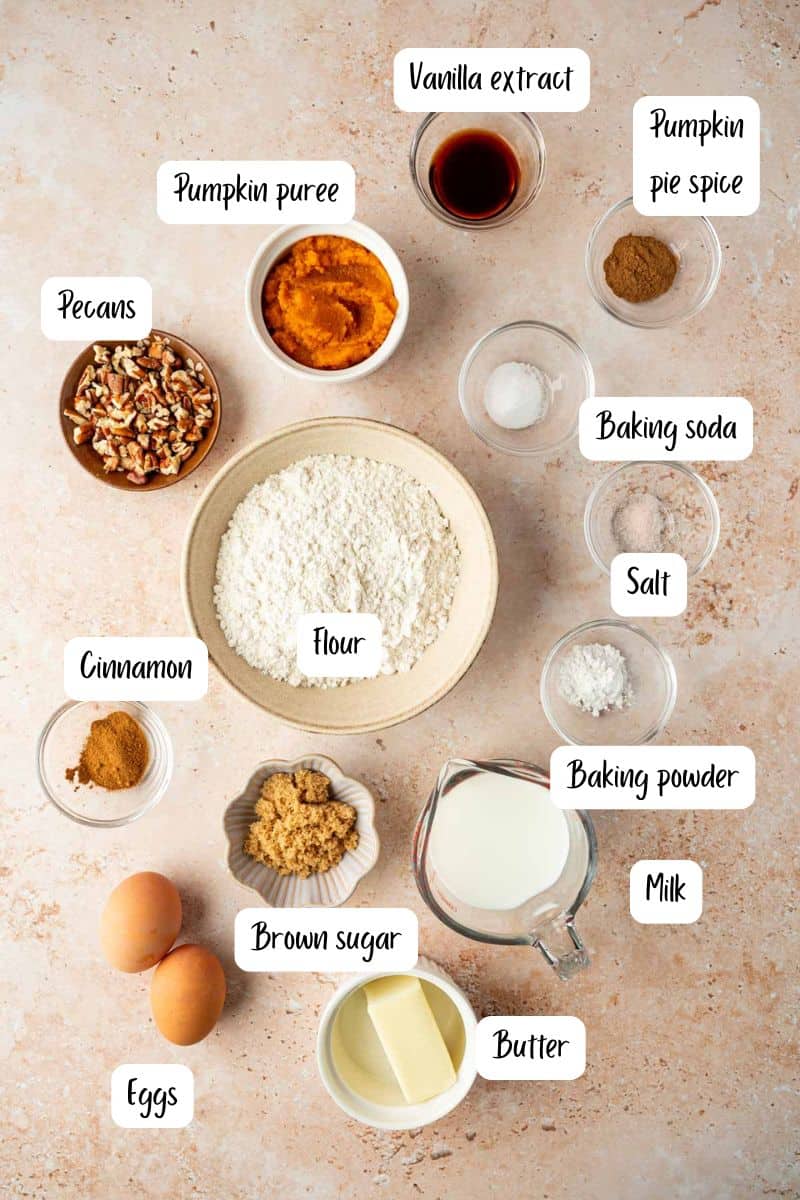
Ingredients laid put for making homemade pumpkin pecan waffles.
  • All-Purpose Flour: Flour is the base for this waffles recipe. It binds everything together and gives these waffles shape and structure. You can also use gluten free flour, oat flour, or wheat flour as a substitute.
  • Brown Sugar: Brown sugar is the major sweetener for this recipe. Without it, the waffles will not even be called a desert.  You can use coconut sugar as an alternative.
  • Baking Powder and Baking soda: Baking powder works as a puffing agent. Without it, waffles will be hard and extremely chewy.  Baking soda creates little pockets of air, making your pumpkin pecan waffles light and velvety.
  • Pumpkin Pie Spice: This is the main flavor ingredient. If you don’t have pumpkin pie spice, you can use pumpkin pie filling instead of puree because it already has the spice.
  • Cinnamon: cinnamon will enhance the nutty flavor of the waffles. Ground or powdered cinnamon can be used.  
  • Salt: Salt helps bring out other flavors and balances the sweetness as well.
  • Eggs: alongside baking soda and baking powder, eggs work to enhance the fluffy and soft texture of your homemade waffle recipe. 
  • Milk (or Buttermilk): Milk keeps the waffles moist and helps with the consistency of the batter. If you want to make your waffles dairy-free, you can use plant based butter. Swap dairy milk with plant based milk if you want.
  • Canned Pumpkin Puree: This waffle recipe is simply not possible without pumpkin puree. You can use homemade pumpkin puree as well.
  • Melted Butter: Butter will add moisture and prevent the waffles from being too dry or too soggy. 
  • Vanilla Extract: Add vanilla extract to add more depth to the flavor and aroma.
  • Chopped Pecans (plus extra for topping): Chopped pecans are the star of this recipe. The nutty flavor and the crunchy bits make these pumpkin pecan waffles extra delicious.

See recipe card for quantities.

INSTRUCTIONS (How to Make Pumpkin Pecan Waffles )

Preheat waffle iron and lightly grease with oil or nonstick spray.

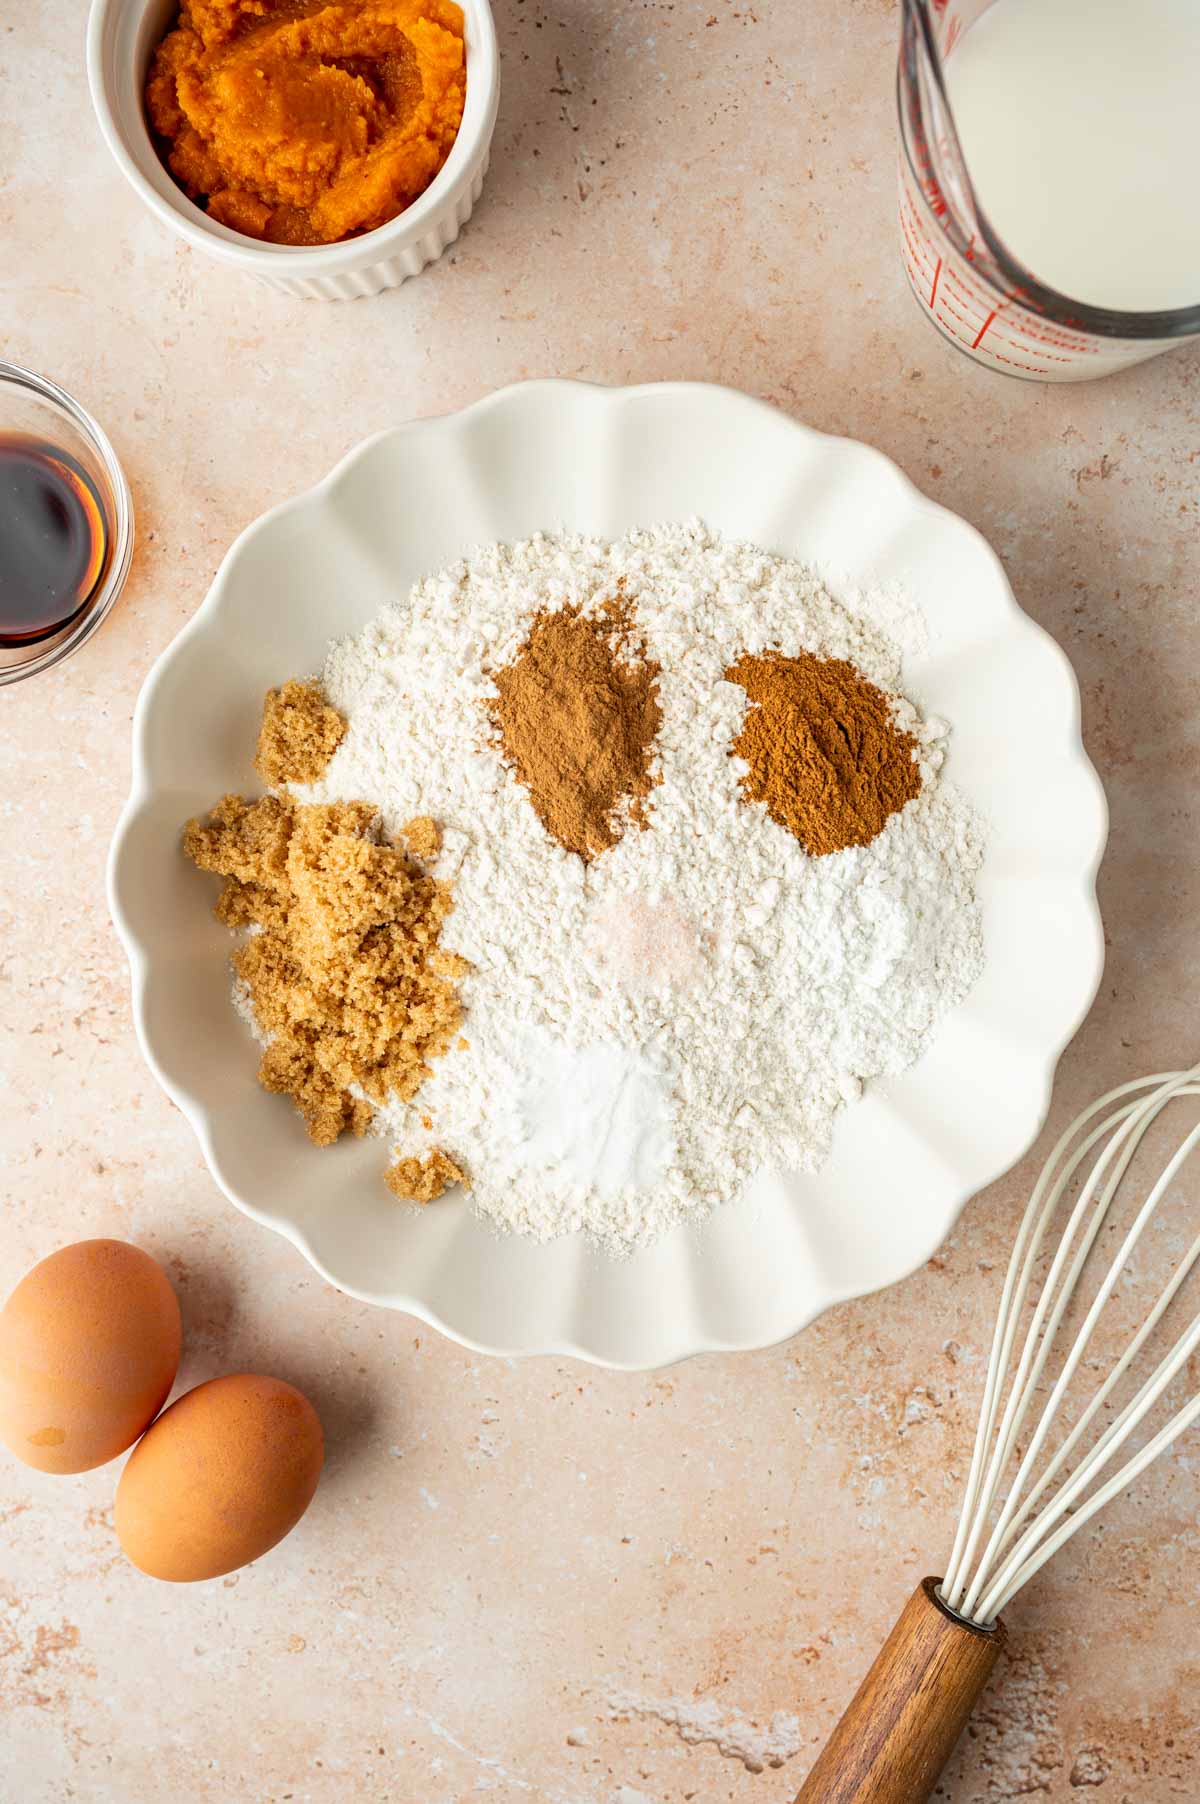
Combine the dry ingredients to make pumpkin pecan waffles.

In a large bowl, whisk together flour, brown sugar, baking powder, baking soda, pumpkin pie spice, cinnamon, and salt.

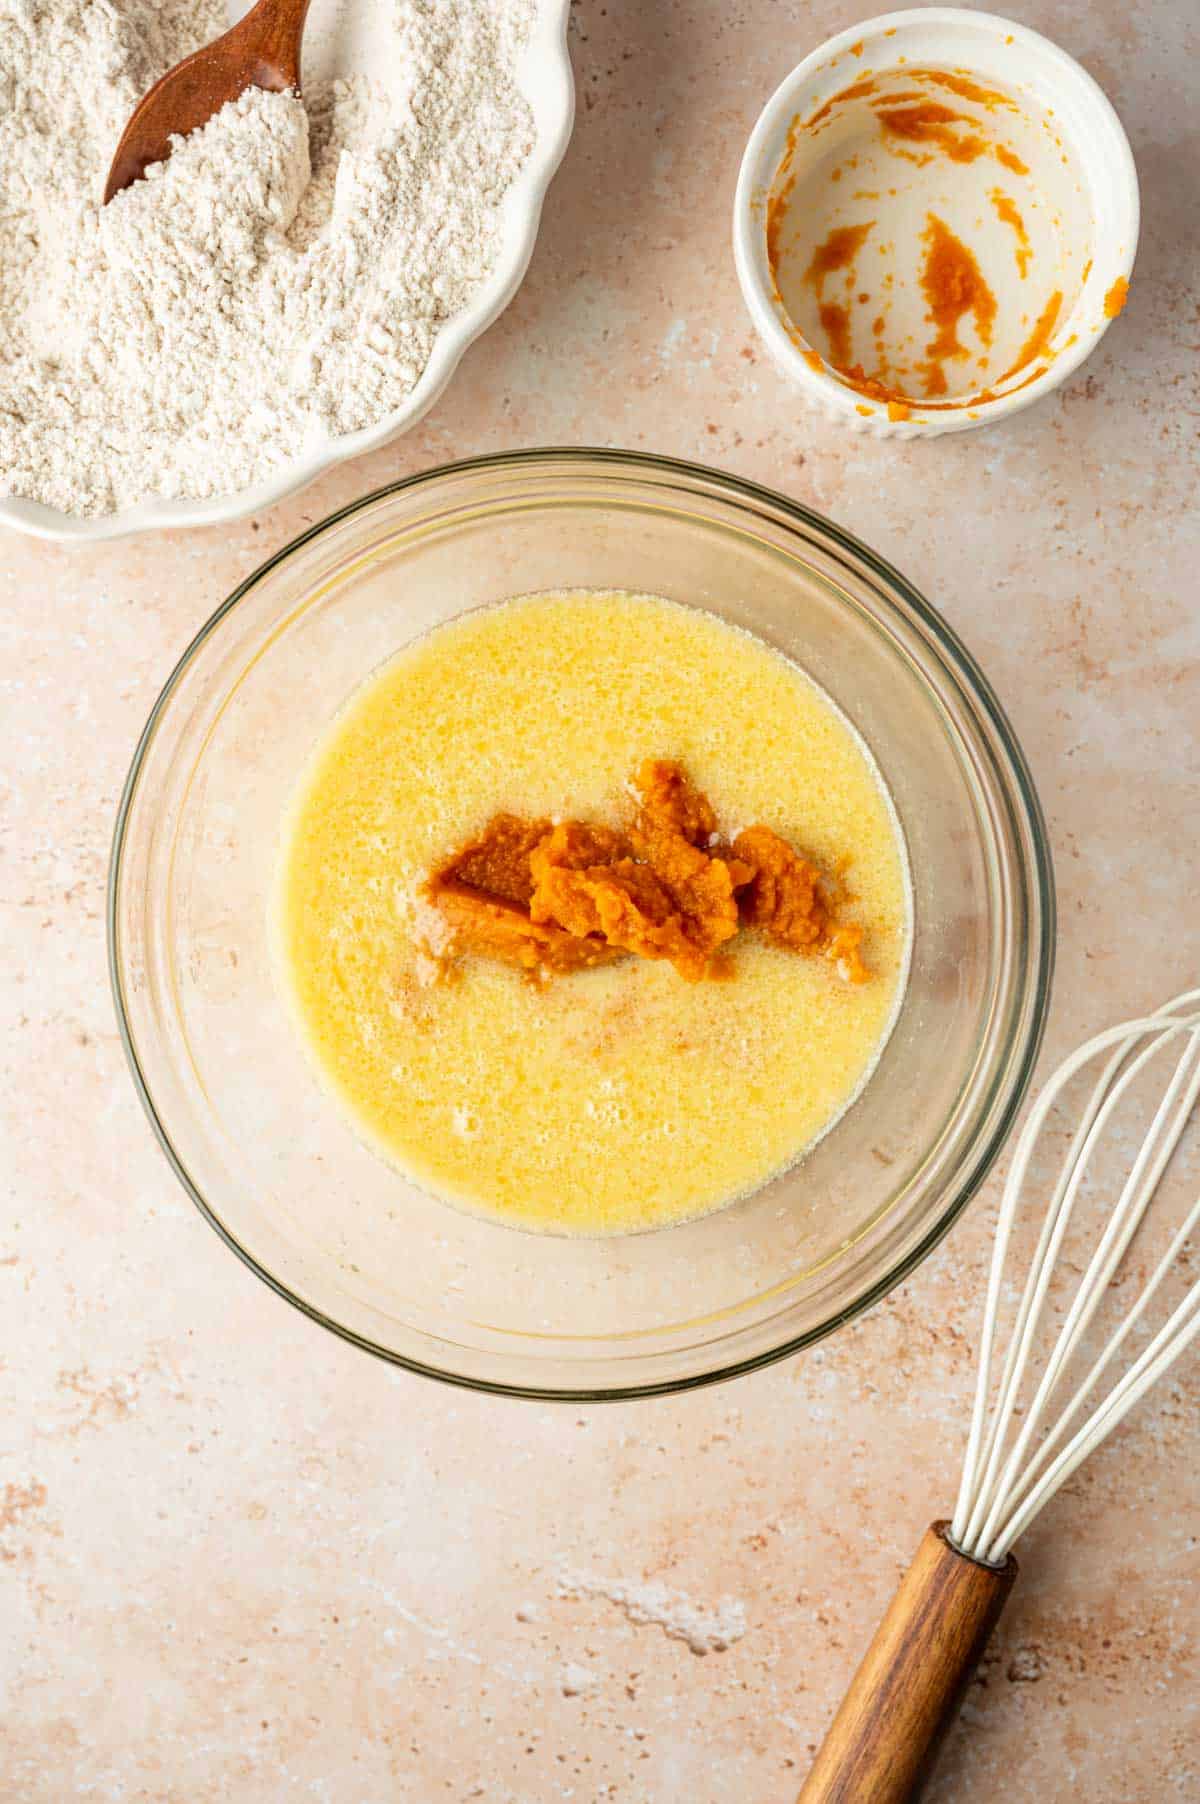
Combine the wet ingredients to make homemade pumpkin waffles with pecans

In another bowl, whisk the eggs, milk, pumpkin puree, melted butter, and vanilla until smooth.

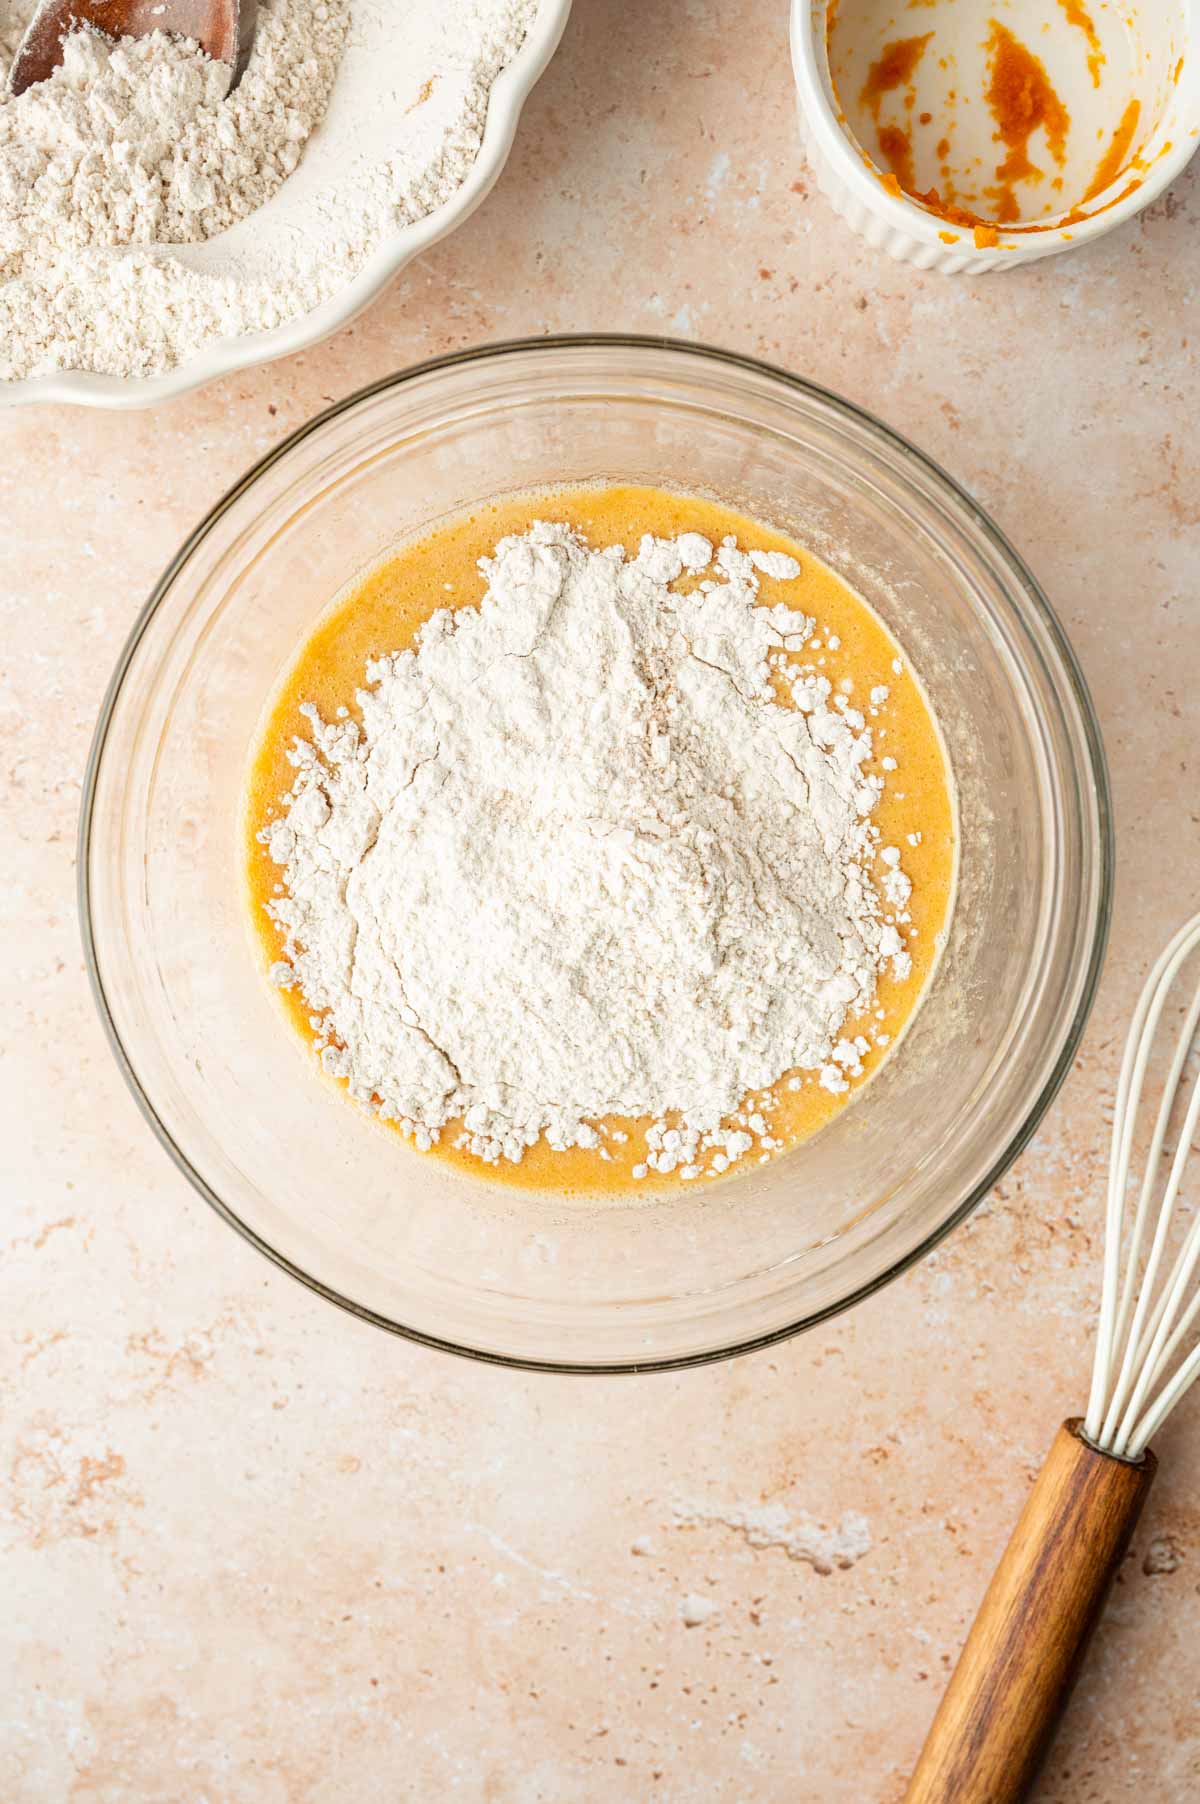
Dry ingredients being added to the wet mixture.

Pour the wet mixture into the dry ingredients and mix until just combined.

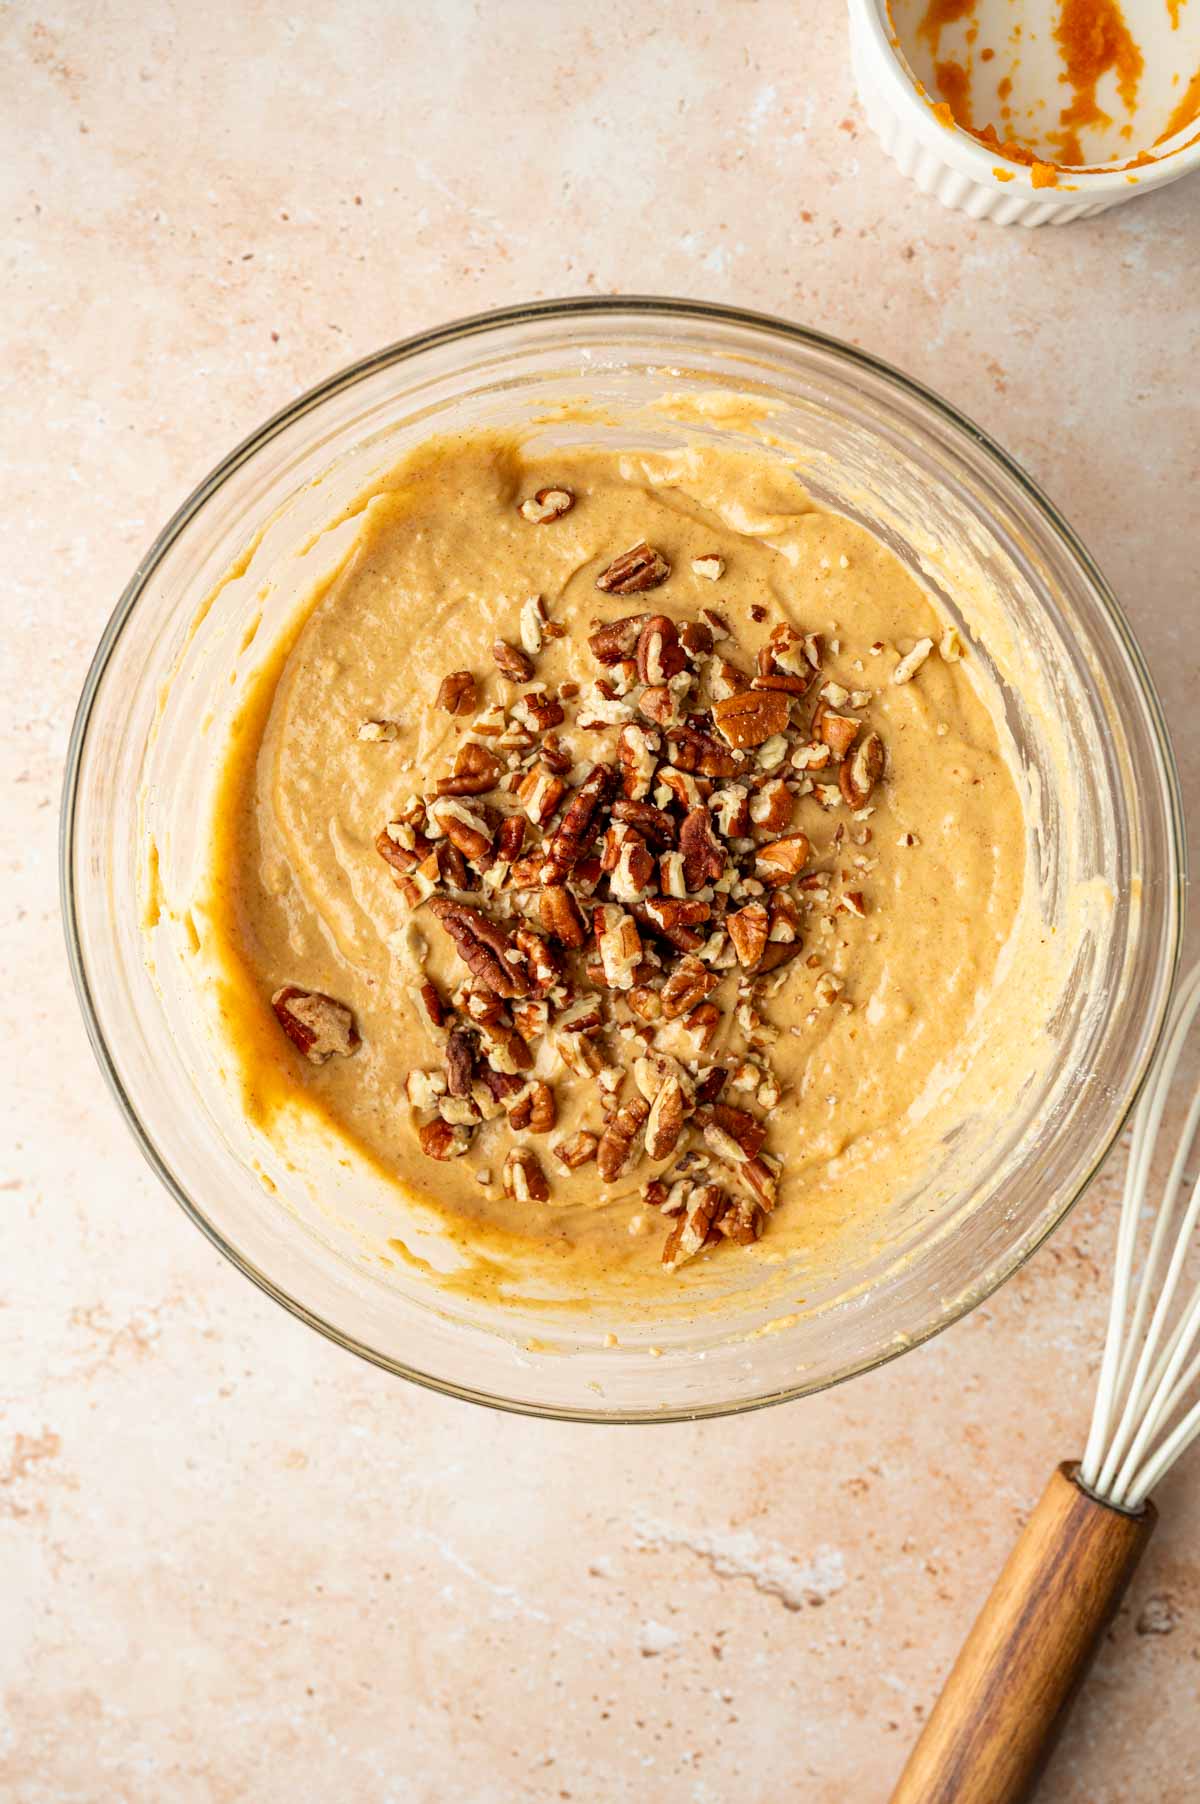
Adding chopped pecans to the pumpkin waffle batter.

Fold in chopped pecans. Do not overmix.

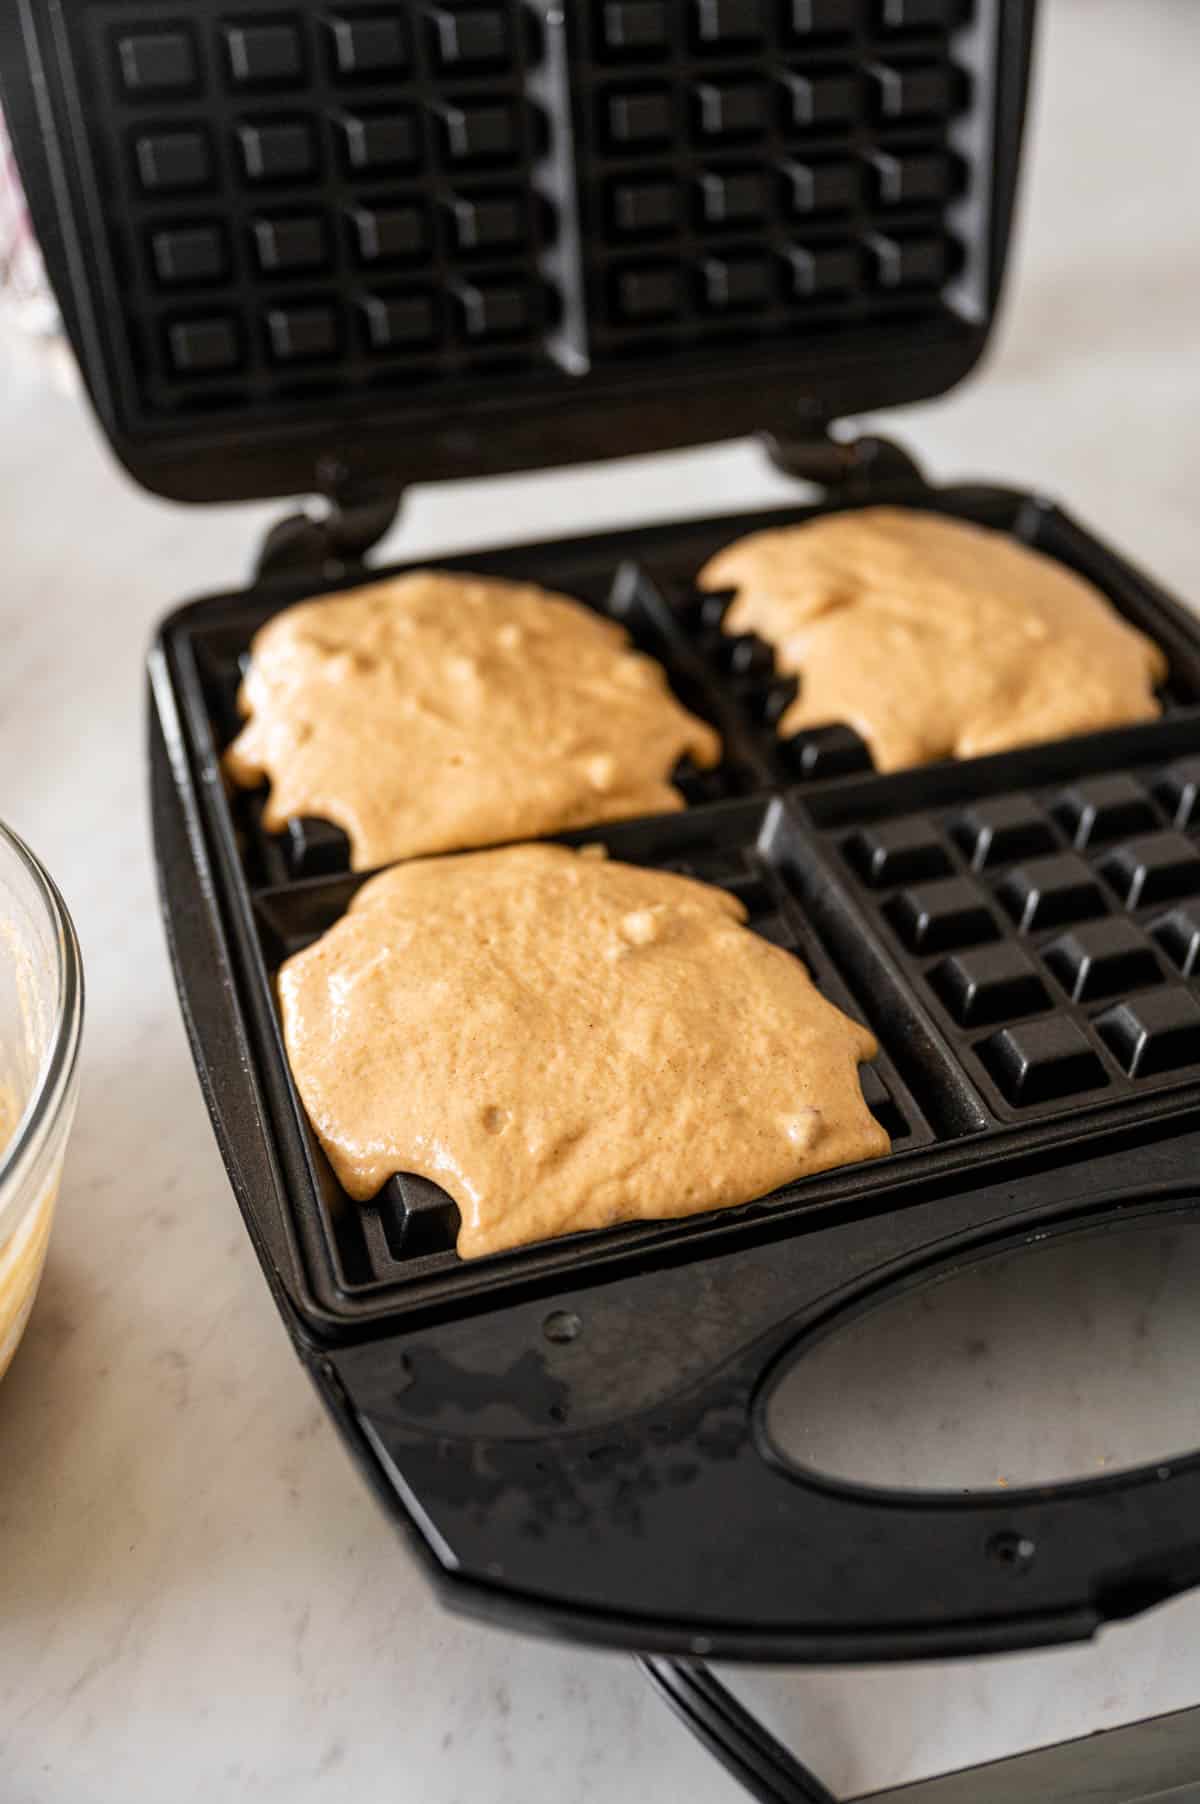
Waffle batter being poured in the waffle maker.

Pour batter into preheated waffle iron.

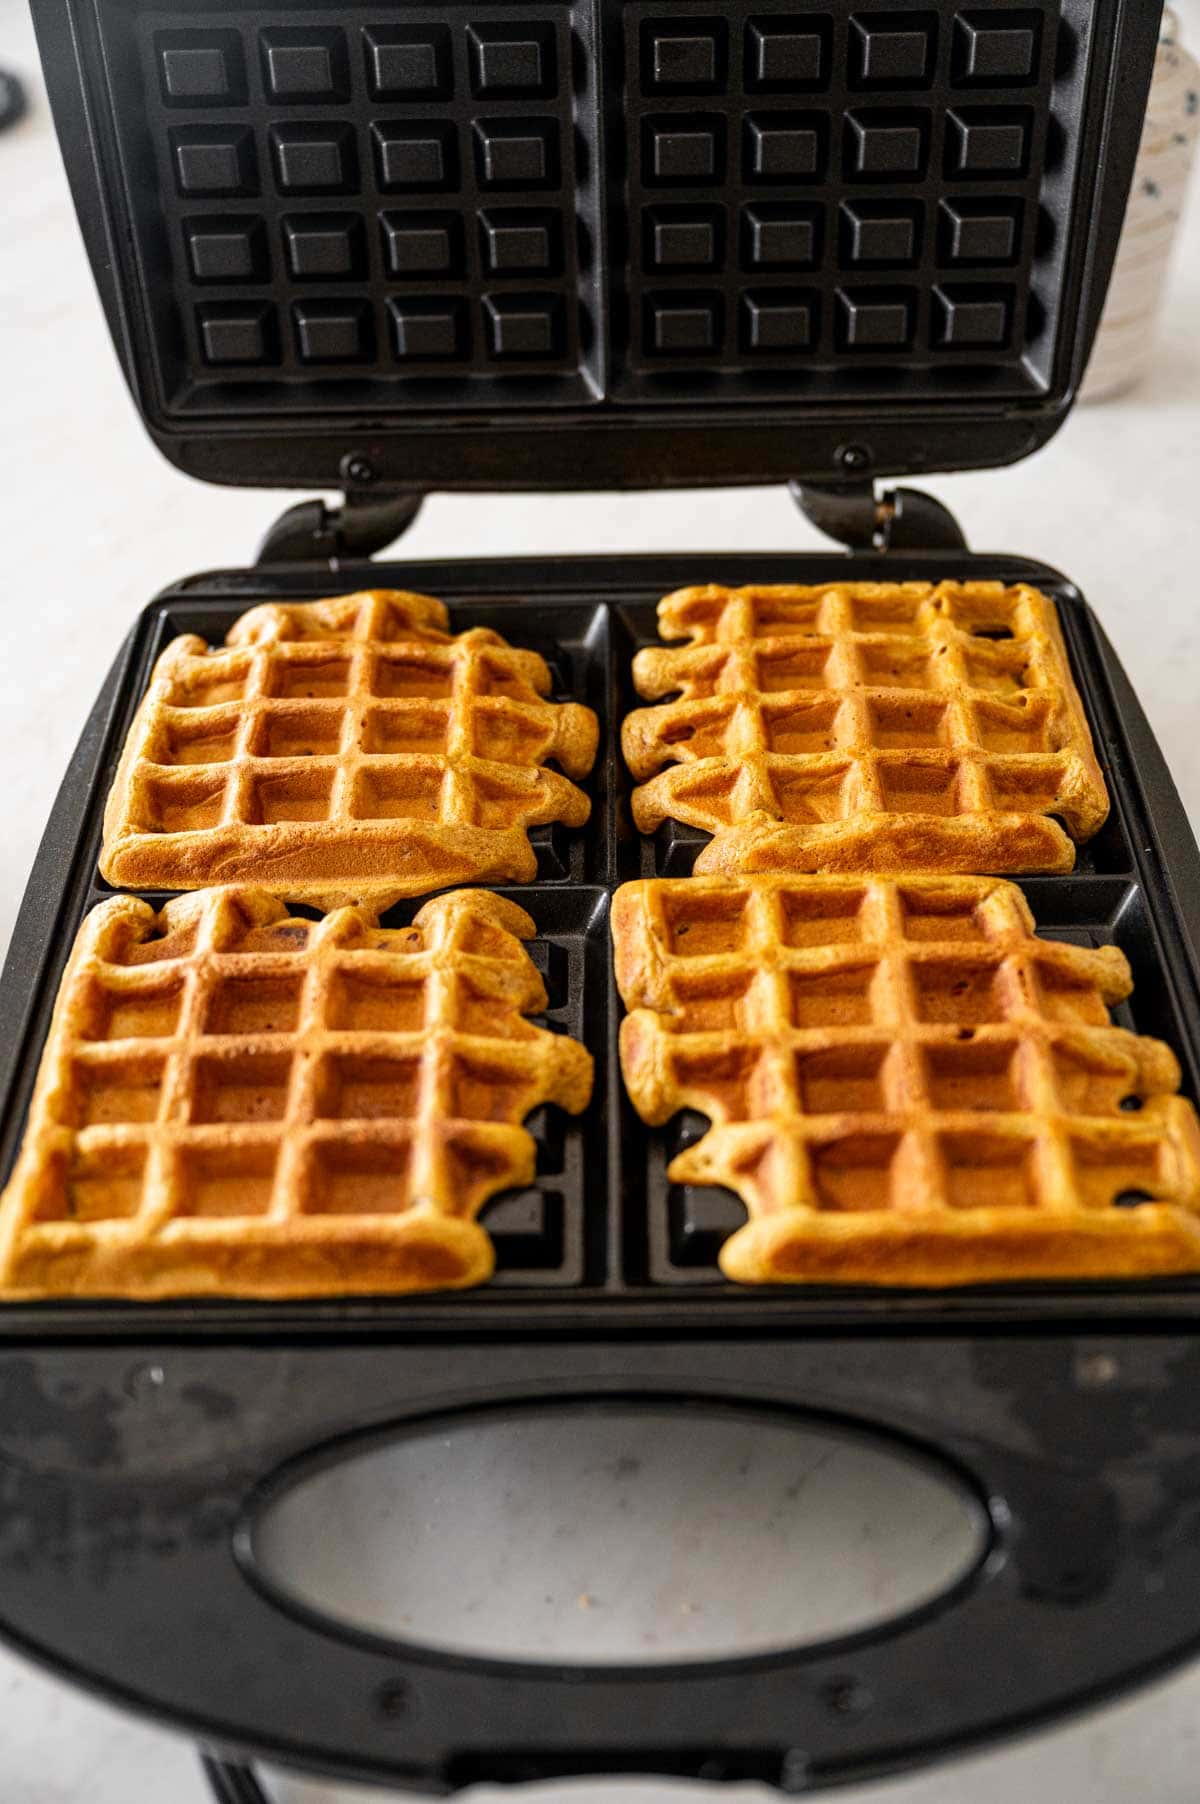
Golden cripy pumpkin pecan waffles in the waffle iron.

Cook according to your machine’s instructions until golden brown and crisp..

Once done, transfer the pumpkin waffles to a serving platter and top with maple syrup, butter, whipped cream, and  pecans to enjoy while its still warm!

Hint: You can use the same method to make the batter and create delicious pumpkin pecan pancakes!

VARIATIONS WITH THIS EASY WAFFLE RECIPE

If you love the pumpkin pecan waffles, but want to add a little extra flavor, you can try the following variations. Trust me, they’re as good as the original version.

  • Maple Syrup Pumpkin Pecan Waffles: You can use maple syrup instead of brown sugar. When serving the waffles, drizzle a generous amount of maple syrup on top.
  • Chocolate Chip Pumpkin Pecan Waffles: You can add chocolate chunks to this easy waffles recipe  if you love chocolate. Using chocolate chunks will create gooey, chocolaty pockets in your waffles.
  • Pumpkin Walnut Waffles: You can use walnuts instead of pecan nuts  If you’re bored with pecans, or you prefer walnuts over pecans. They change the flavor profile a bit, but not too much.
Golden brown pumpkin pecan waffles on a plate with whipped cream and cinnamon in a plate.

SERVING SUGGESTIONS FOR PUMPKIN PECAN WAFFLES

  • You can serve these delicious waffles with maple syrup, cream cheese frosting, or a dusting of powdered sugar. For an extra special treat, add a scoop of your favorite ice cream, the combination of warm waffles and cold ice cream is simply irresistible.
  • This easy waffle recipe is a great breakfast option. You have it in the morning with a cup of espresso or a classic americano. They’re easy and quick to make. You can even take them on the go.
  • Serve like fall platter along with Pumpkin cheese ball, Apple puff pastry turnovers, pumpkin mini hand pies, brownie cake pops, etc.,
  • A hot cup of vanilla bean latte or Caramel latte are very well served with these easy homemade waffles. 
  • You can also add pumpkin pecan waffles to a traditional charcuterie board with Vanilla bean coffee syrup. It’s a great option for small gatherings, family evenings, or friends’ meetups.
  • If you’re planning a brunch spread, add a side of Air Fryer Sweet Potato Wedges for a sweet-and-savory balance.
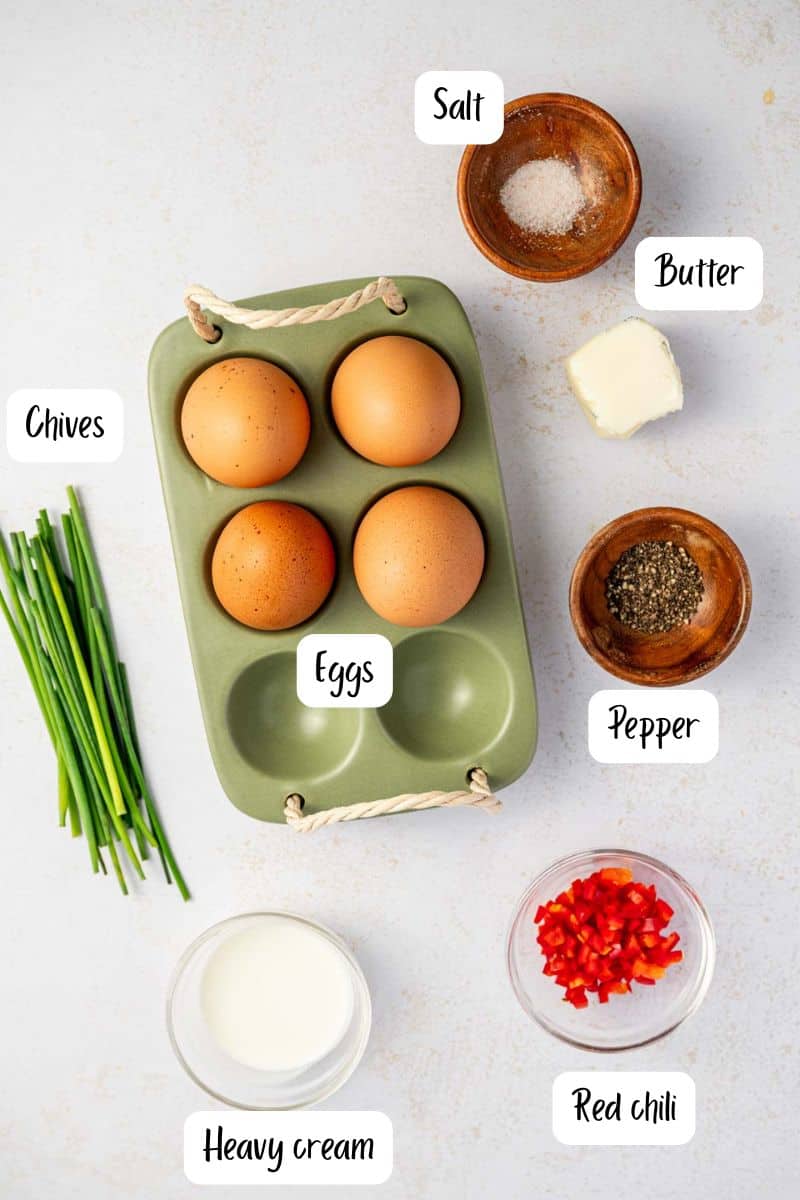
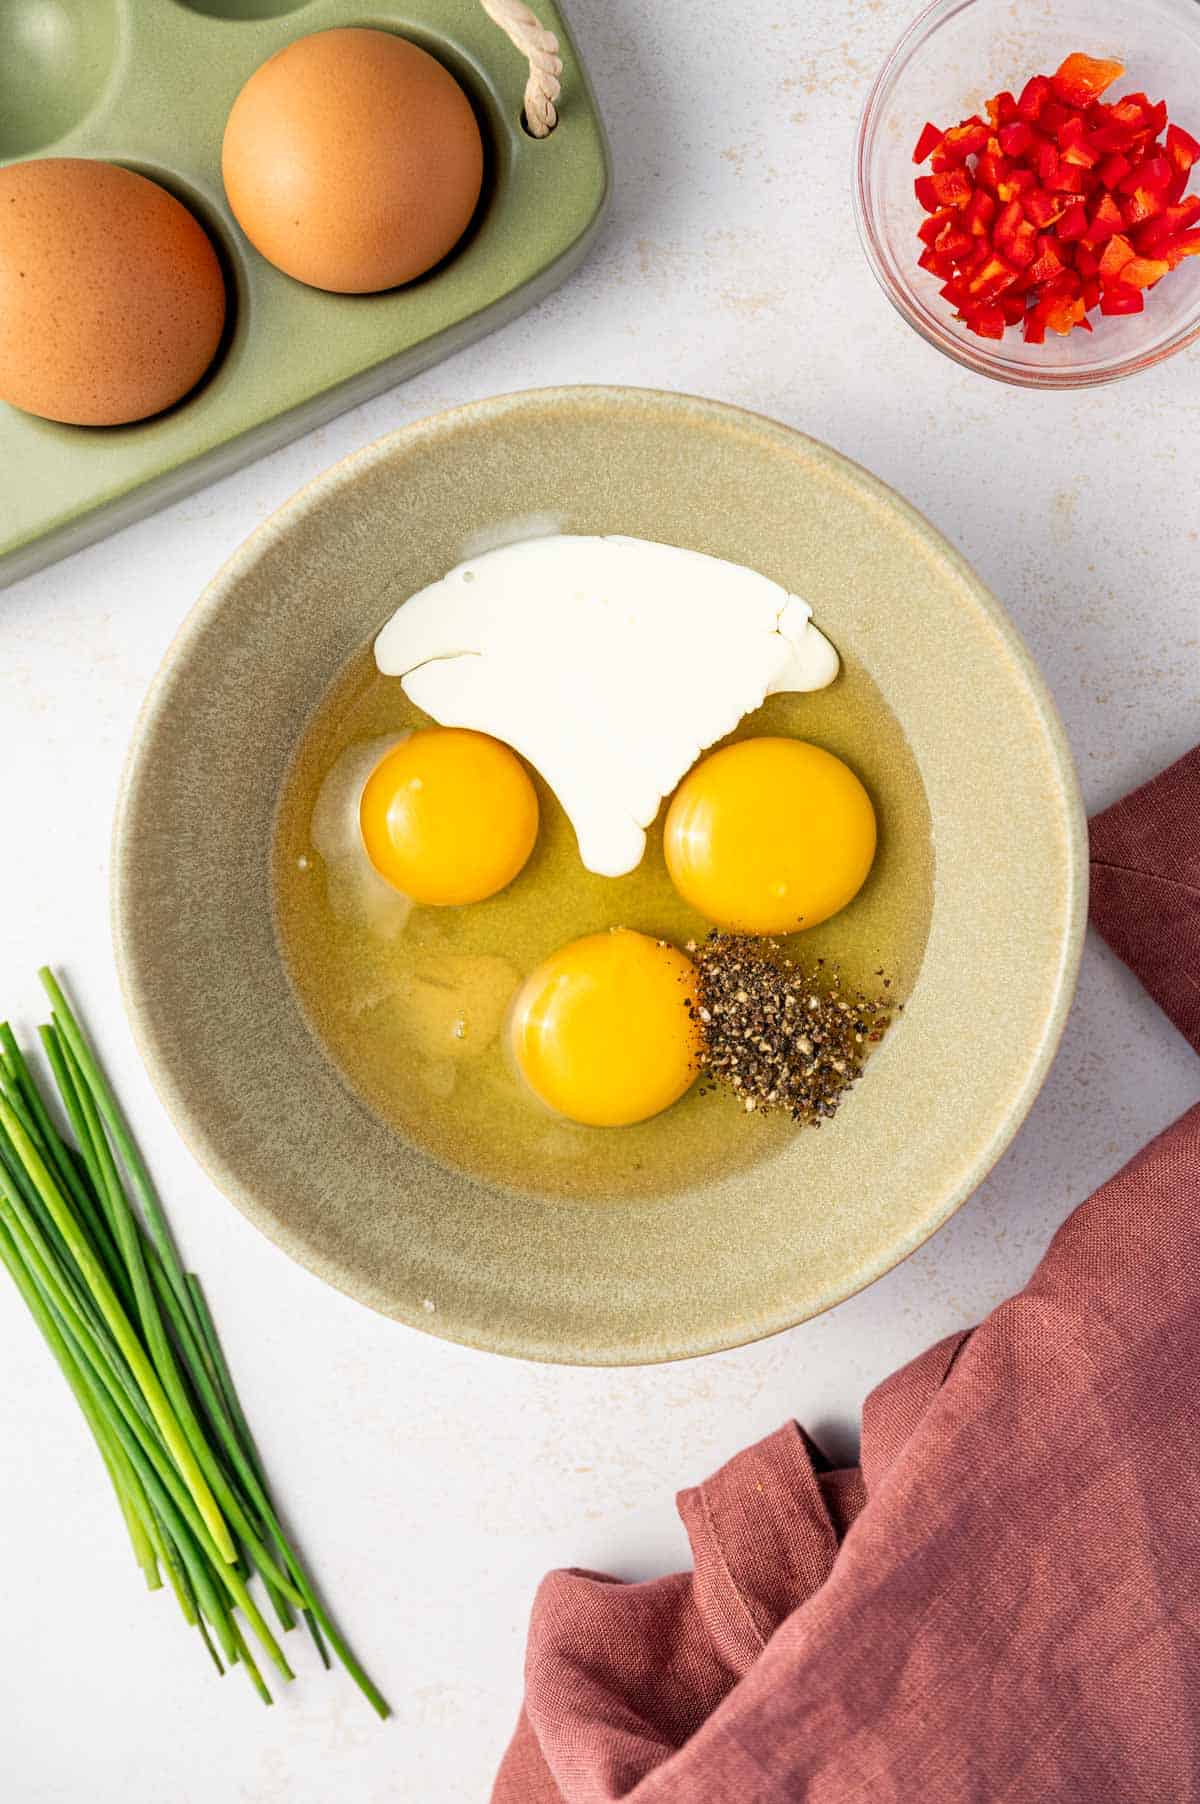
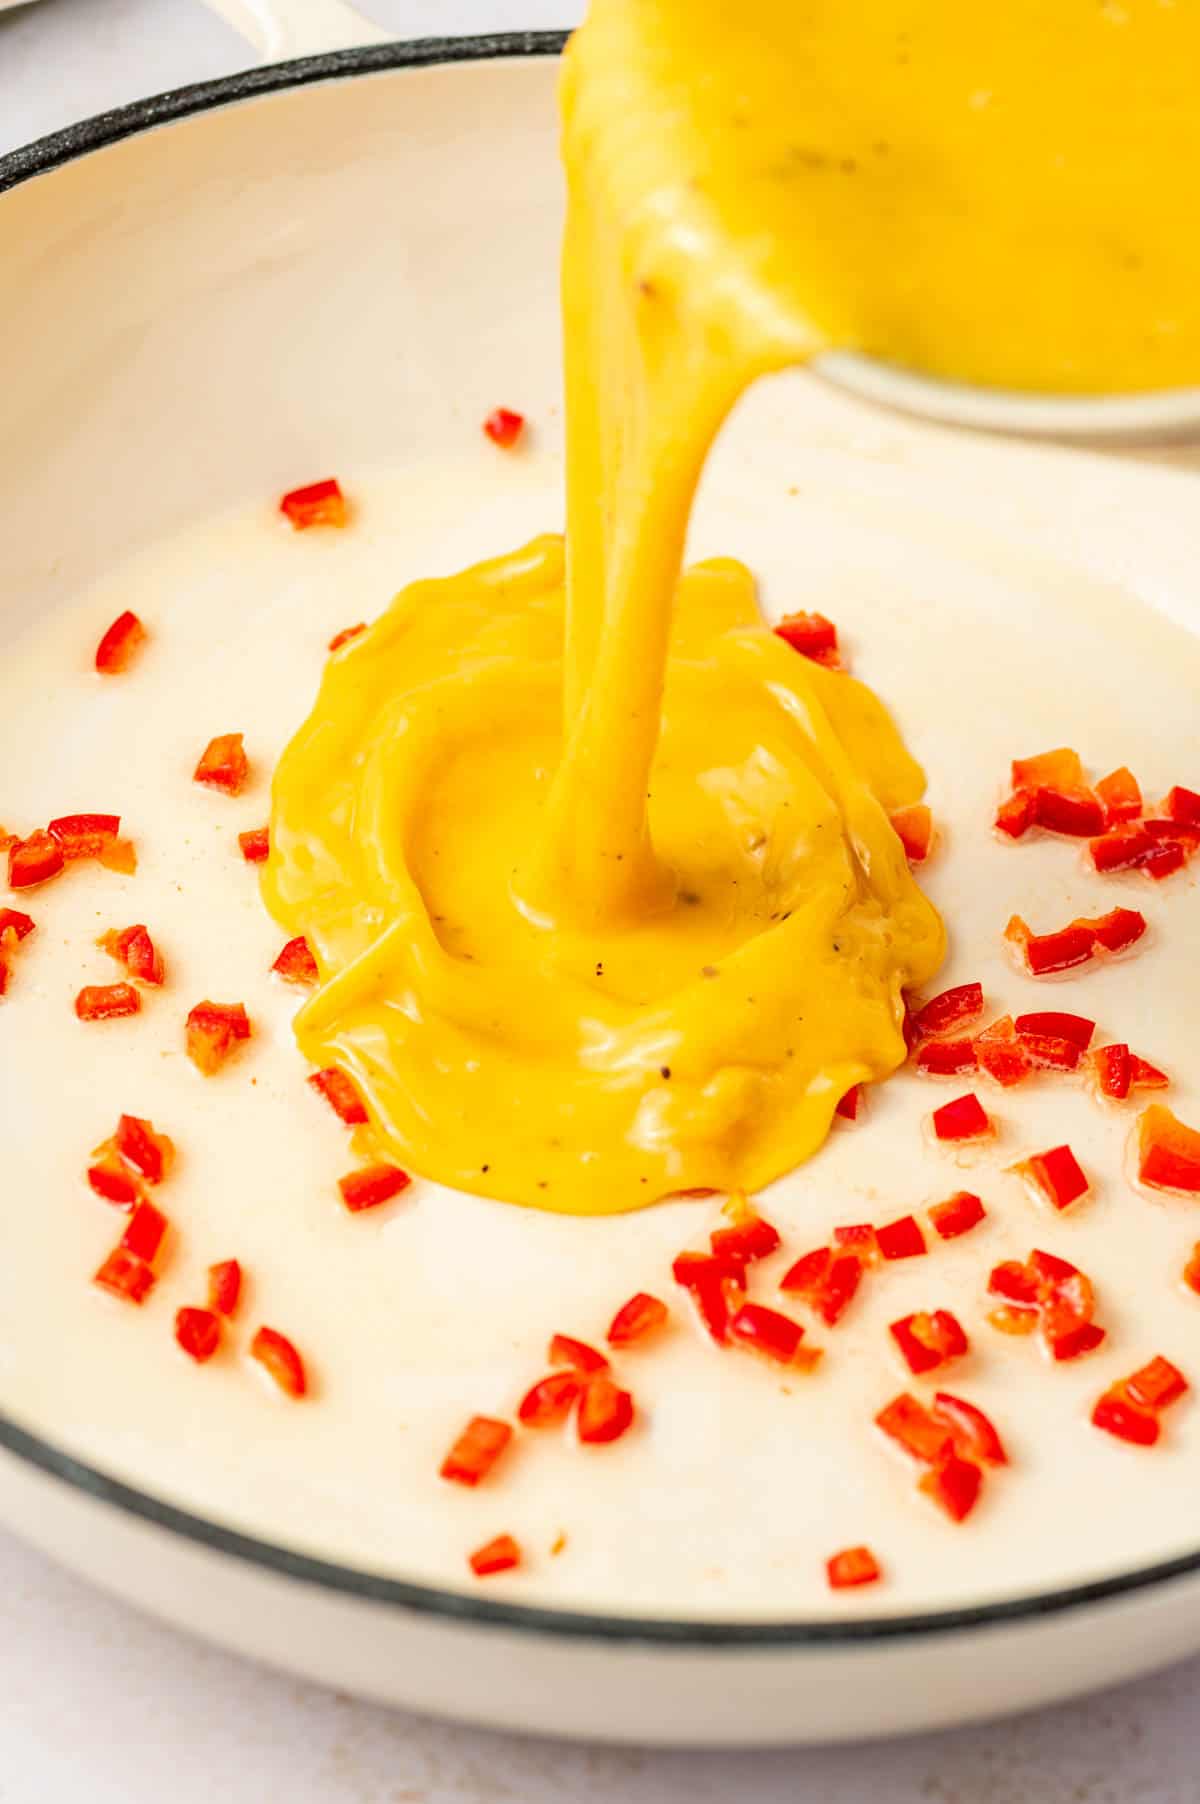
  • For a savory twist, pair the waffles along with some Chili scrambled eggs for a sweet-savory combo that’s super satisfying.

Equipment

  • Waffle Maker - A good-quality waffle iron ensures crispy edges and a fluffy interior. 
  • Mixing Bowls – One for dry ingredients and another for wet ingredients, making it easier to mix everything smoothly.
  • Whisk or Hand Mixer – Helps combine ingredients evenly.
  • Measuring Cups & Spoons – Ensures accurate measurements for the perfect waffle texture.
  • Spatula – Great for folding the wet and dry ingredients together without overmixing.
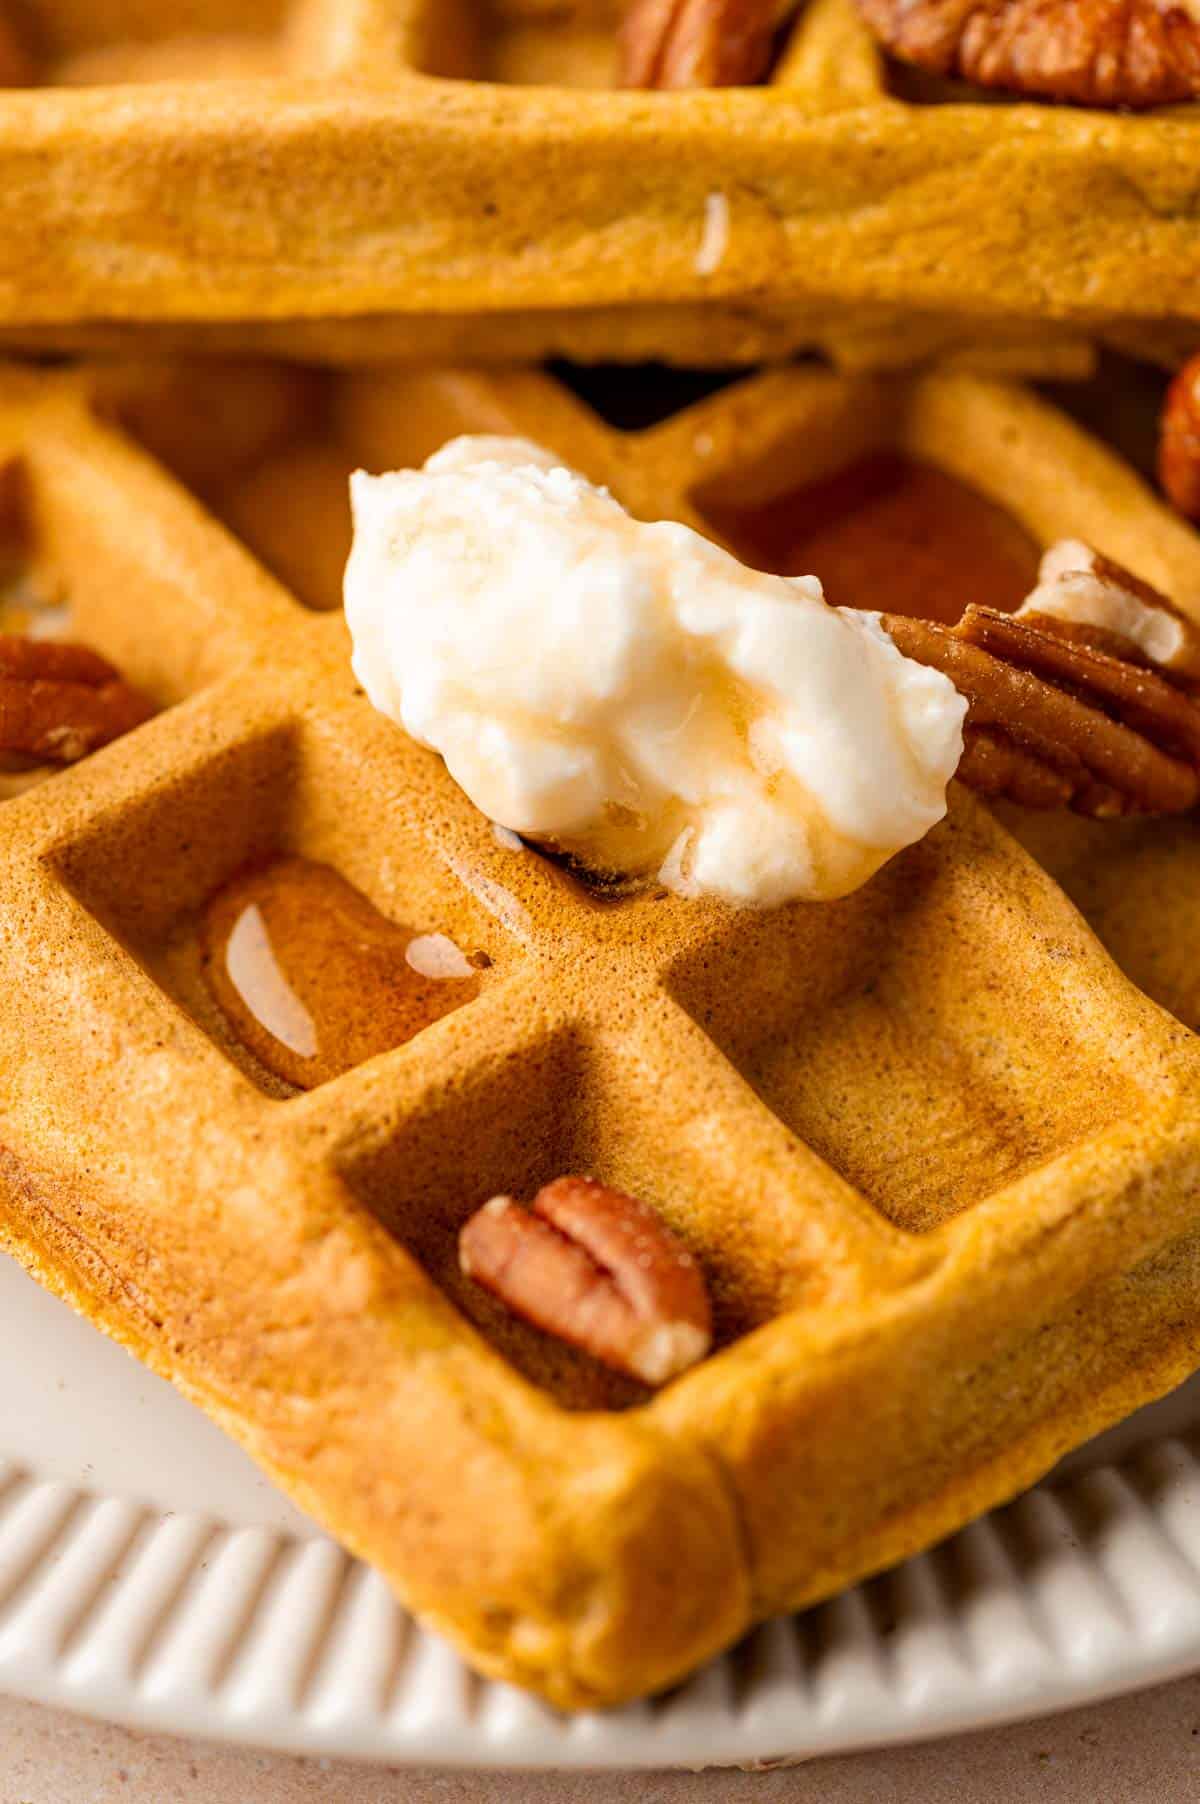
Close-up of fluffy pumpkin waffles with chopped pecans top of the waffles.

STORAGE AND REHEATING TIPS

Storing these pumpkin pecan waffles the right way can guarantee freshness and softness for longer. Here are a few storage and reheating tips for you:

Storage Tips:

In the Refrigerator: You can keep these pumpkin pecan waffles, batter or cooked, in the refrigerator for 2-3 days. Make sure you use an airtight container or bag to keep them dry.

In the Freezer: These homemade waffles are freezer friendly. You can make a big batch and freeze them for later. To maintain the texture and shape, use an airtight container.

Reheating Tips:

In the Microwave: Warm the waffles in the microwave for 10–15 seconds for soft, fresh, and light texture.

In the oven: To heat in the oven, a preheated oven at 300°F (150°C). Bake the reheat the waffles for 5–7 minutes for a crispy outside and soft inside.

TOP TIPS FOR PUMPKIN PECAN WAFFLES RECIPE

  • Do not overmix the batter or else it will get too dense and the waffles will be hard.
  • If your batter is too sticky and gooey, pop it in the fridge for 30 minutes.
  • Preheat and lightly grease the iron before pouring the batter. If you don’t, your waffles will stick to the waffle iron.

FAQ

What do homemade pumpkin pecan waffles smell like?

They have a sweet and nutty smell. Pumpkin and pecans make these waffles smell like an autumn treat.

Are pumpkin waffles healthy?

Pumpkin and Pecan have a great nutritional value. You can use healthier alternatives such as gluten free flour and natural sweeteners for an even healthier pumpkin pecan waffle.

What is the secret ingredient for fluffy waffles?

If you like your waffles extra fluffy, mix the egg whites till they form firm peaks and then add it to the waffle batter.

Can I make the batter ahead of time?

Yes, you can prepare the batter a few hours in advance and store it covered in the refrigerator. Give it a gentle stir before using.

Can I use homemade pumpkin puree?

Absolutely! Just be sure your homemade puree isn’t too watery, pat it dry with paper towels if needed.

Can I freeze leftover waffles?

Yes, these waffles freeze beautifully. Let them cool completely, then freeze in a single layer. Reheat in the toaster or oven for a quick breakfast.

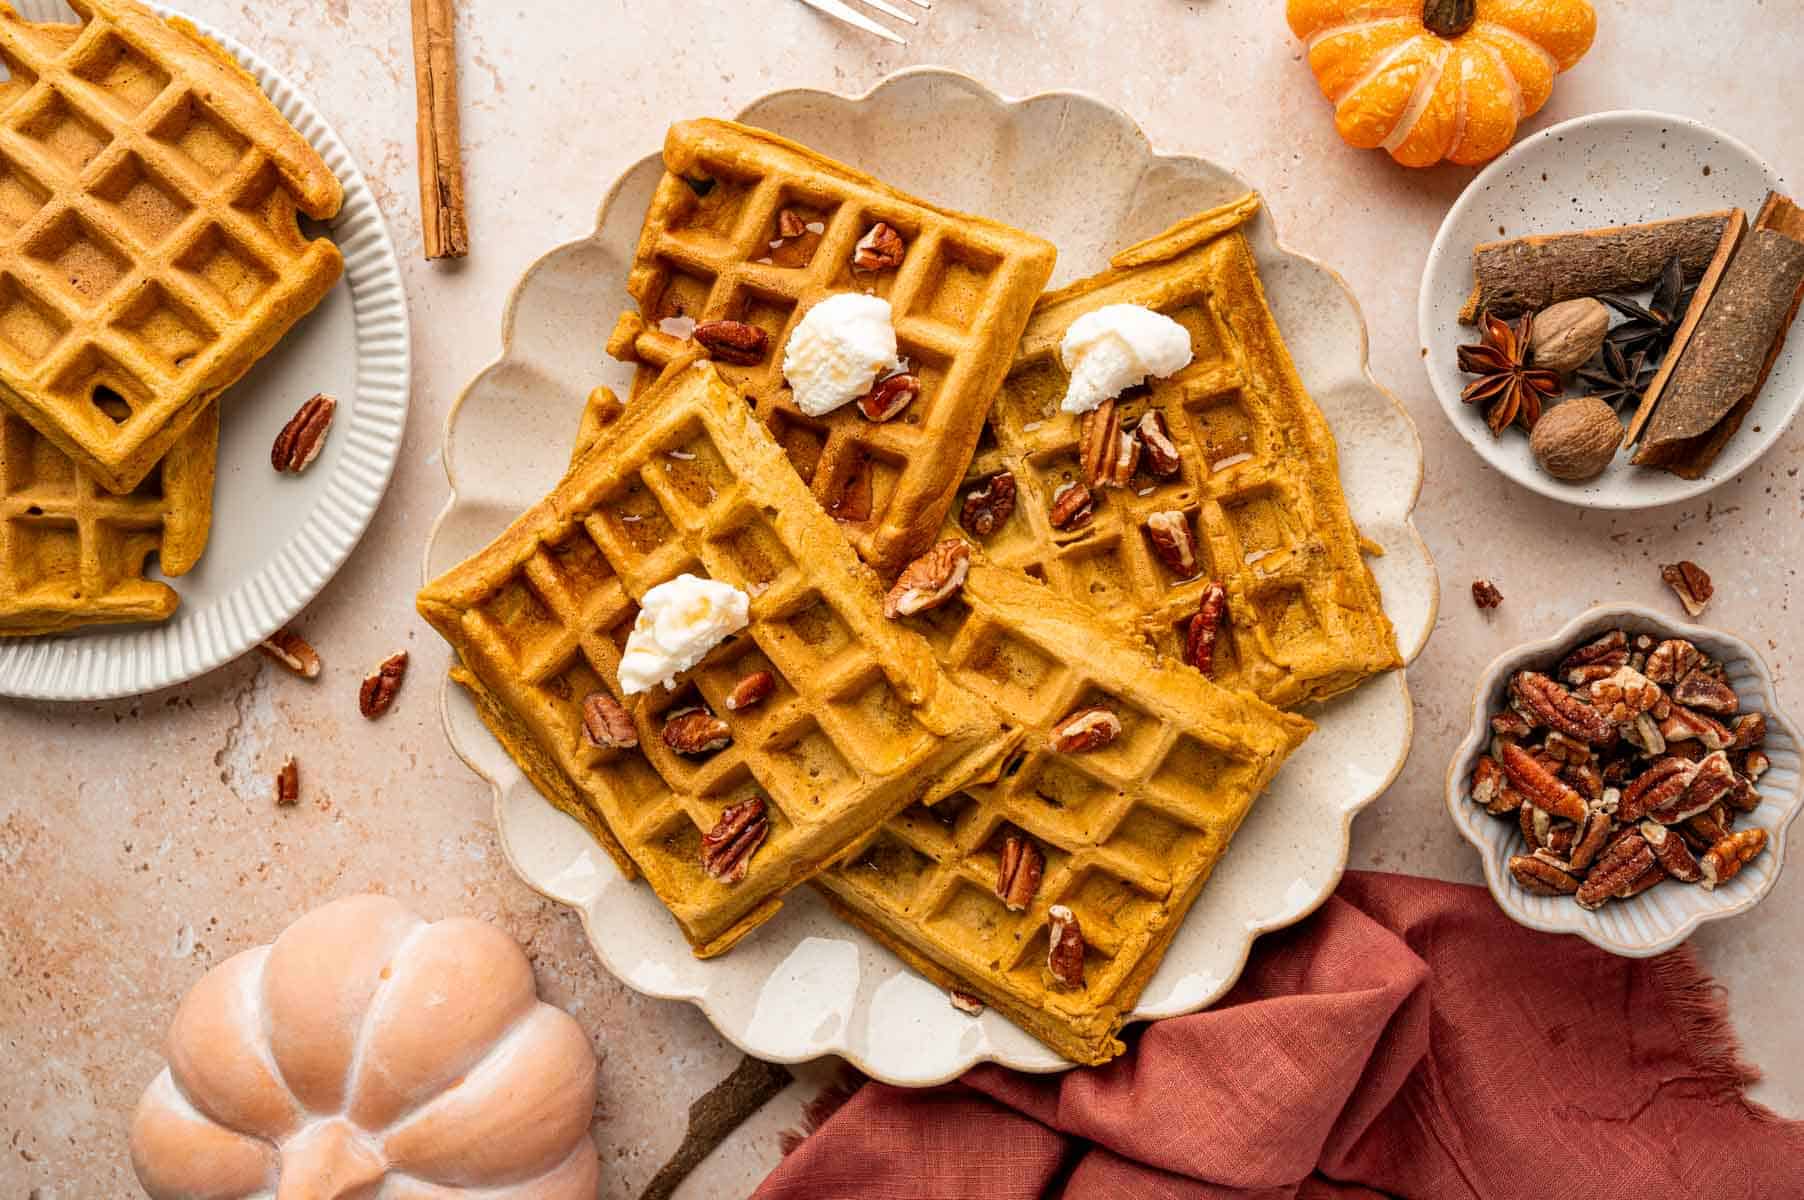
Overhead shot of pumpkin pecan waffle served in a platter topped with pecans, whipped cream and maple syrup.

Related

Looking for other recipes like this? Try these:

  • Plated air fryer chicken parmesan in a white oval plate with gold rim.
    Air Fryer Chicken Parmesan (Crispy & Ready in 20 Minutes)
  • Chocolate covered strawberries arranged on a white platter.
    Easy Chocolate Covered Strawberries (3 Ingredients)
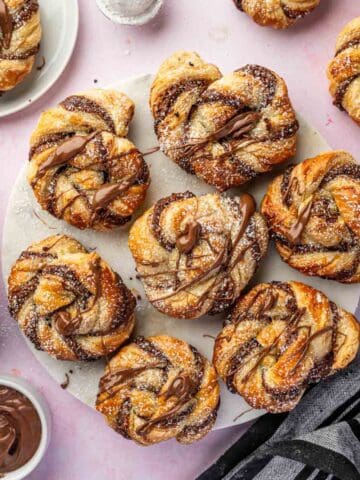
  • Overhead shot of flaky puff pastry filled with Nutella, dusted with powdered sugar on a marble tray.
    Nutella Puff Pastry Twists (Easy 4-Ingredient Recipe)
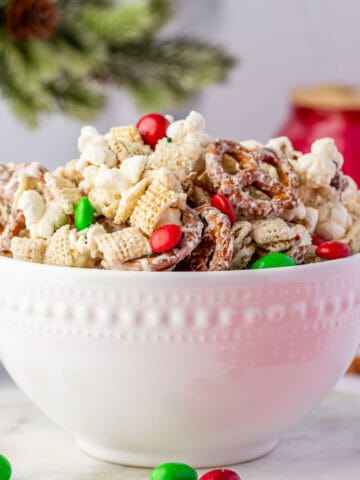
  • Festive bowl of Christmas Crunch mix surrounded by ornaments and candy canes — ideal for holiday parties and gift ideas.
    Christmas Crunch Recipe (Easy Holiday Snack Mix)

Pairing

These are my favorite dishes to serve with this homemade pumpkin waffles with pecans recipe:

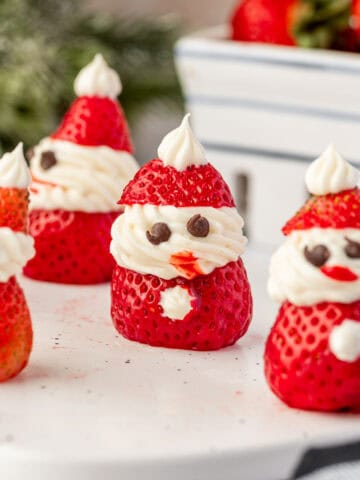
  • Close-up of Strawberry Santas made with fresh strawberries, cream cheese frosting, and mini chocolate chip eyes — cute and festive Christmas dessert.
    Strawberry Santas (Easy No-Bake Christmas Dessert)
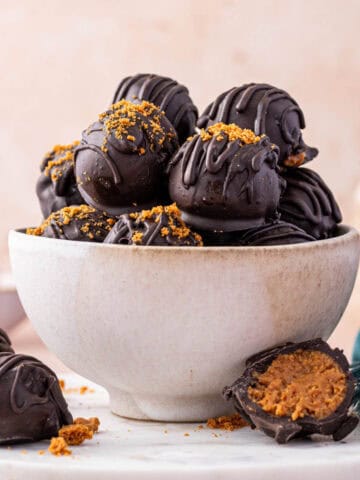
  • No-bake Biscoff truffles on a white bowl, coated in dark chocolate and drizzled with melted chocolate for a festive look. One truffle being cut opened.
    Biscoff Truffles Recipe (Easy No Bake Cookie Truffles)
  • A collage image of best thanksgiving side dishes image
    10+ Easy Thanksgiving Side Dishes for the Holiday Season
  • Frosted funfetti birthday cookie on marble top with extra sprinkles scattered.
    Funfetti Birthday Cake Cookies with sprinkles recipe

If you tried this Pecan Pumpkin Waffles  recipe or any other recipe from my blog, I’d love to hear your thoughts! ⭐ Please leave a STAR rating and share your experience in the COMMENTS below. Your support means so much and helps me continue creating delicious recipes. Thank you for being part of this journey!

Overhead shot of pumpkin pecan waffles topped with maple syrup and pecans.

Pumpkin Pecan Waffles (Homemade waffle recipe)

Abi Guna
These Pumpkin Pecan Waffles are the best healthy homemade waffles for fall! Made with real pumpkin and crunchy pecans, this easy recipe delivers warm, cozy flavors in every bite. Perfect for breakfast or brunch, these homemade waffles are quick to make and packed with wholesome ingredients for a delicious and nutritious start to your day.
5 from 6 votes
Print Recipe Pin Recipe
Prep Time 10 minutes mins
Cook Time 20 minutes mins
Total Time 30 minutes mins
Course Breakfast
Cuisine American
Servings 8 Waffles

Equipment

  • Waffle Maker
  • Mixing Bowls
  • Whisk
  • Spatula

Ingredients
  

  • 1¾ cups all-purpose flour
  • 2 tablespoons brown sugar
  • 2 teaspoons baking powder
  • ½ teaspoon baking soda
  • 1½ teaspoons pumpkin pie spice
  • ½ teaspoon cinnamon
  • ¼ teaspoon salt
  • 2 large eggs at room temperature
  • 1 cup milk or buttermilk
  • ¾ cup canned pumpkin puree
  • ¼ cup melted butter
  • 1 teaspoon vanilla extract
  • ½ cup chopped pecans plus extra for topping

Instructions
 

  • Preheat waffle iron and lightly grease with oil or nonstick spray.
  • In a large bowl, whisk together flour, brown sugar, baking powder, baking soda, pumpkin pie spice, cinnamon, and salt.
  • In another bowl, whisk the eggs, milk, pumpkin puree, melted butter, and vanilla until smooth.
  • Pour the wet mixture into the dry ingredients and mix until just combined. Fold in chopped pecans. Do not overmix.
  • Pour batter into preheated waffle iron and cook according to your machine’s instructions until golden brown and crisp.
  • Top with maple syrup, butter, whipped cream, and pecans.

Notes

  • Use pure pumpkin puree (not pumpkin pie filling) for best results and authentic flavor.
  • Lightly toast the pecans before adding them to the batter to bring out extra nutty flavor and crunch. (optional step)
  • Don’t overmix the batter, mix just until the ingredients are combined for tender, fluffy waffles.
  • Cooked waffles can be kept warm in a low oven (200°F/95°C) until ready to serve, or freeze extras for a quick, healthy breakfast later.
Keyword fall, holiday breakfast, Holiday Desserts, pumpkin, waffles

Apple Cinnamon Waffles (Easy Homemade Waffle Recipe)

July 29, 2025 by Abi Guna 9 Comments

Apple cinnamon waffles are a must-have during apple season. The combination of apple and cinnamon is so good that you would want more of these homemade waffles than your tummy can fit. Top it with homemade apple pie filling to make the waffles next level!

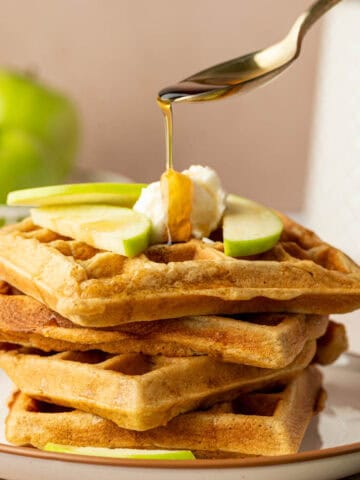
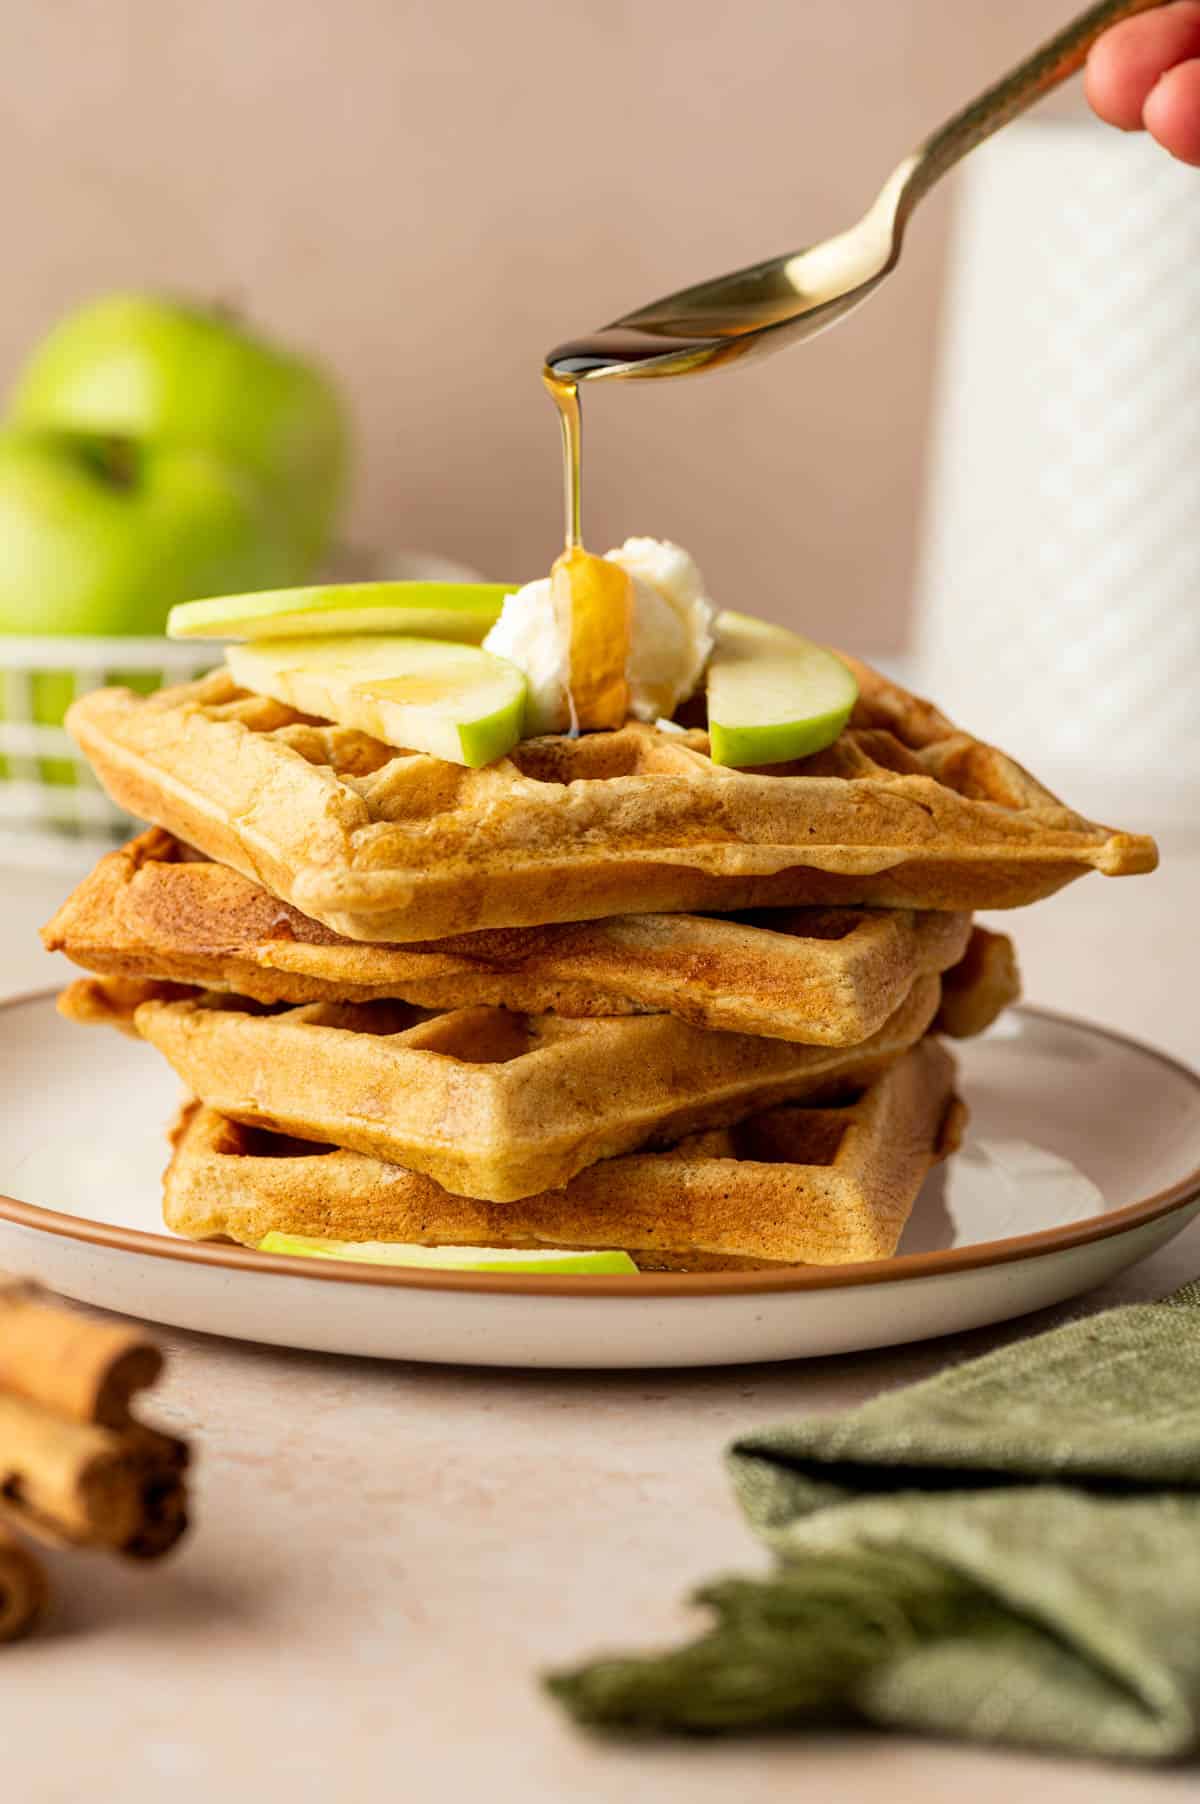
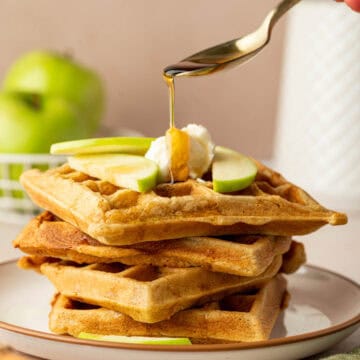
Stack of cinnamon apple waffles topped with fresh apple slices and maple syrup.

Whenever I make these quick, easy, and delicious waffles, my home smells like fall. Smell triggers memory. This apple cinnamon waffle smell brings up beautiful memories shared together at the dining table, filled with laughter and warmth.

This easy waffle recipe is one of my favorites because my whole family loves it. You should try it too! If you love waffles as much as I do, these apple cinnamon waffles are just the beginning! For a rich and indulgent twist, try my Nutella Waffles, a perfect for chocolate lovers. Craving something festive and colorful? These Red Velvet Cake Waffles are as stunning as they are delicious. And if you’re in a fall baking mood, don’t miss my cozy Pumpkin Pecan Waffles — they’re warm, spiced, and full of seasonal flavor. Pin or save your favorites for your next brunch day!

[feast_advanced_jump_to]
Warm cinnamon apple waffles served with whipped cream and sliced apples

WHY YOU WILL LOVE APPLE CINNAMON WAFFLES

  • Crowd Pleaser:  Apple cinnamon waffles, fresh from the iron, are hard to resist. Everyone likes them, from adults to babies. I make them at least twice a week, and no one ever gets bored of them. 
  • Great Smell: The smell of cinnamon apples is nutty, warm, and fruity. It’s inviting and appetizing. One sniff and everyone will want to have a bite. 
  • Easy to Make: Granny smith apples are very easy to find. Cinnamon is a staple ingredient in every home. Bringing together these two simple ingredients, you can make delicious waffles in under thirty minutes. The easy waffle recipe is quick, simple, and easy. Read instructions for details.
  • Great Nutritional Value: “An apple a day keeps the doctor away”, well, who hasn’t heard this before? Apples are a good source of vitamins and minerals. When made using natural and healthy ingredients, you don’t have to feel guilty about eating too many apple cinnamon waffles! 
  • Kid Friendly: If your kids don’t eat fruits, you can sneak grated apple into this apple waffle recipe.

INGREDIENTS AND SUBSTITUTIONS FOR APPLE CINNAMON WAFFLES

As good as these waffles smell and taste, the ingredients used are simple and easily found in any household.

Golden brown cinnamon apple waffles ingredients laid out.
  • All-Purpose Flour: You need a base for your cinnamon apples to shine. Flour gives your waffles structure and shape. You can substitute it with a gluten-free flour blend.
  • Light Brown Sugar: You can also use other natural sweeteners like coconut sugar, or even maple syrup. 
  • Baking Powder: Baking powder helps the batter rise. It also creates a soft and fluffy texture.
  • Baking Soda: Baking soda helps keep your batter light and makes fluffy waffles. Without it, they won’t be as airy as they should be. 
  • Cinnamon: Cinnamon is essential for this recipe. It adds a nutty smell to your waffles and pairs up really well with apples.
  • Nutmeg (optional): Nutmeg will give a woody smell to your waffles and bring out the sweetness of the apples. 
  • Apple Pie Spice (optional): This will give your apple cinnamon waffles the best aroma and taste. If using apple pie filling, omit the spice.
  • Salt: Add a bit of salt to balance out the sweetness and make other flavors pronounced. 
  • Eggs: Eggs work as a binding agent in the batter.
  • Whole Milk (or Buttermilk ): You can use either full fat milk, buttermilk, or non-dairy milk.
  • Unsalted Butter: Use unsalted melted butter. Salted butter will make the waffles too salty. 
  • Vanilla Extract: Add one teaspoon only. Don’t overdo it because we already have a lot of flavorings in this waffles recipe. 
  • Granny Smith Apples: Use fresh green apples. You can also use red apples or frozen apples if you have them.

See recipe card for quantities.

INSTRUCTIONS (How to Make Apple Cinnamon Waffles )

Preheat the waffle iron according to the manufacturer's instructions and lightly grease it with oil or nonstick spray.

Dry ingredients in a bowl.

In a large bowl, whisk together flour, brown sugar, baking powder, baking soda, cinnamon, apple pie spice, and salt.

Wet Ingredients in a bowl.

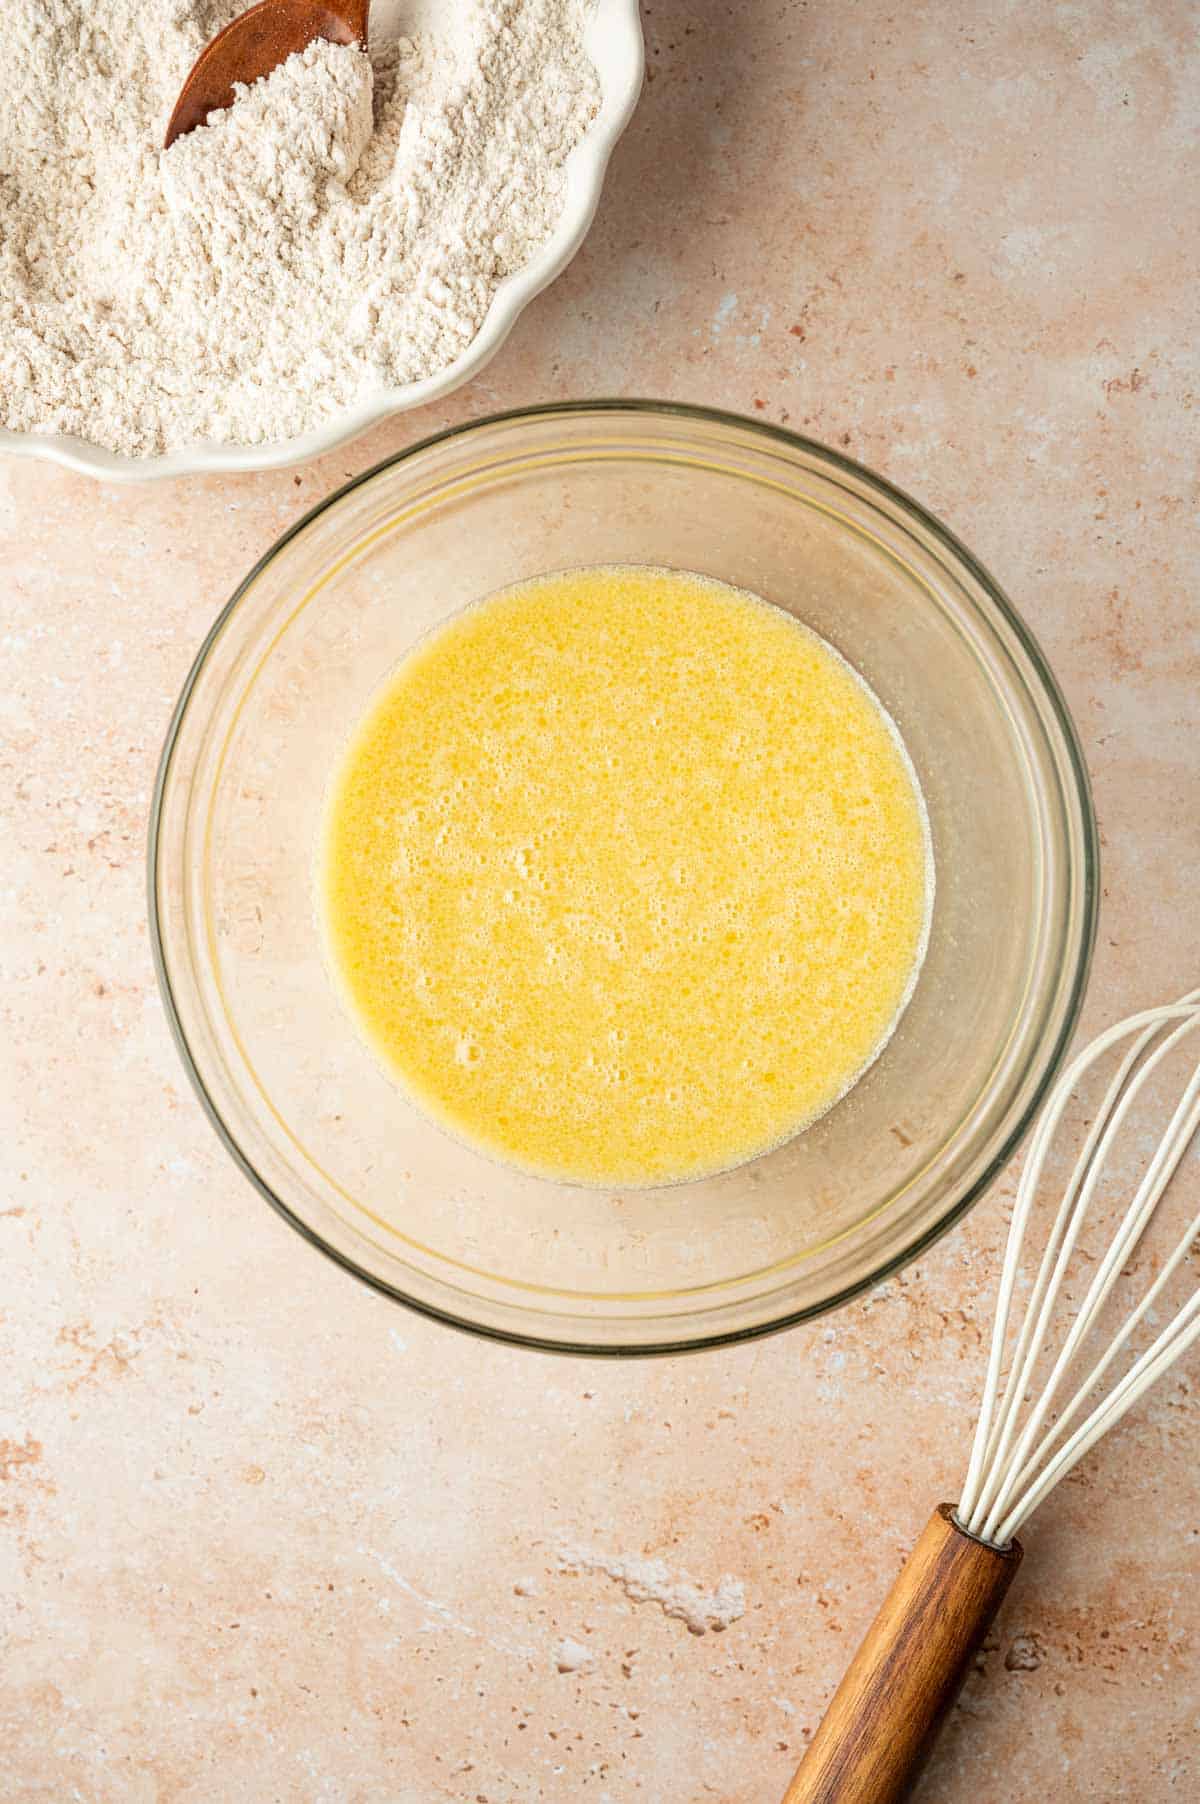
In another bowl, whisk the eggs, buttermilk, melted butter, and vanilla extract until smooth.

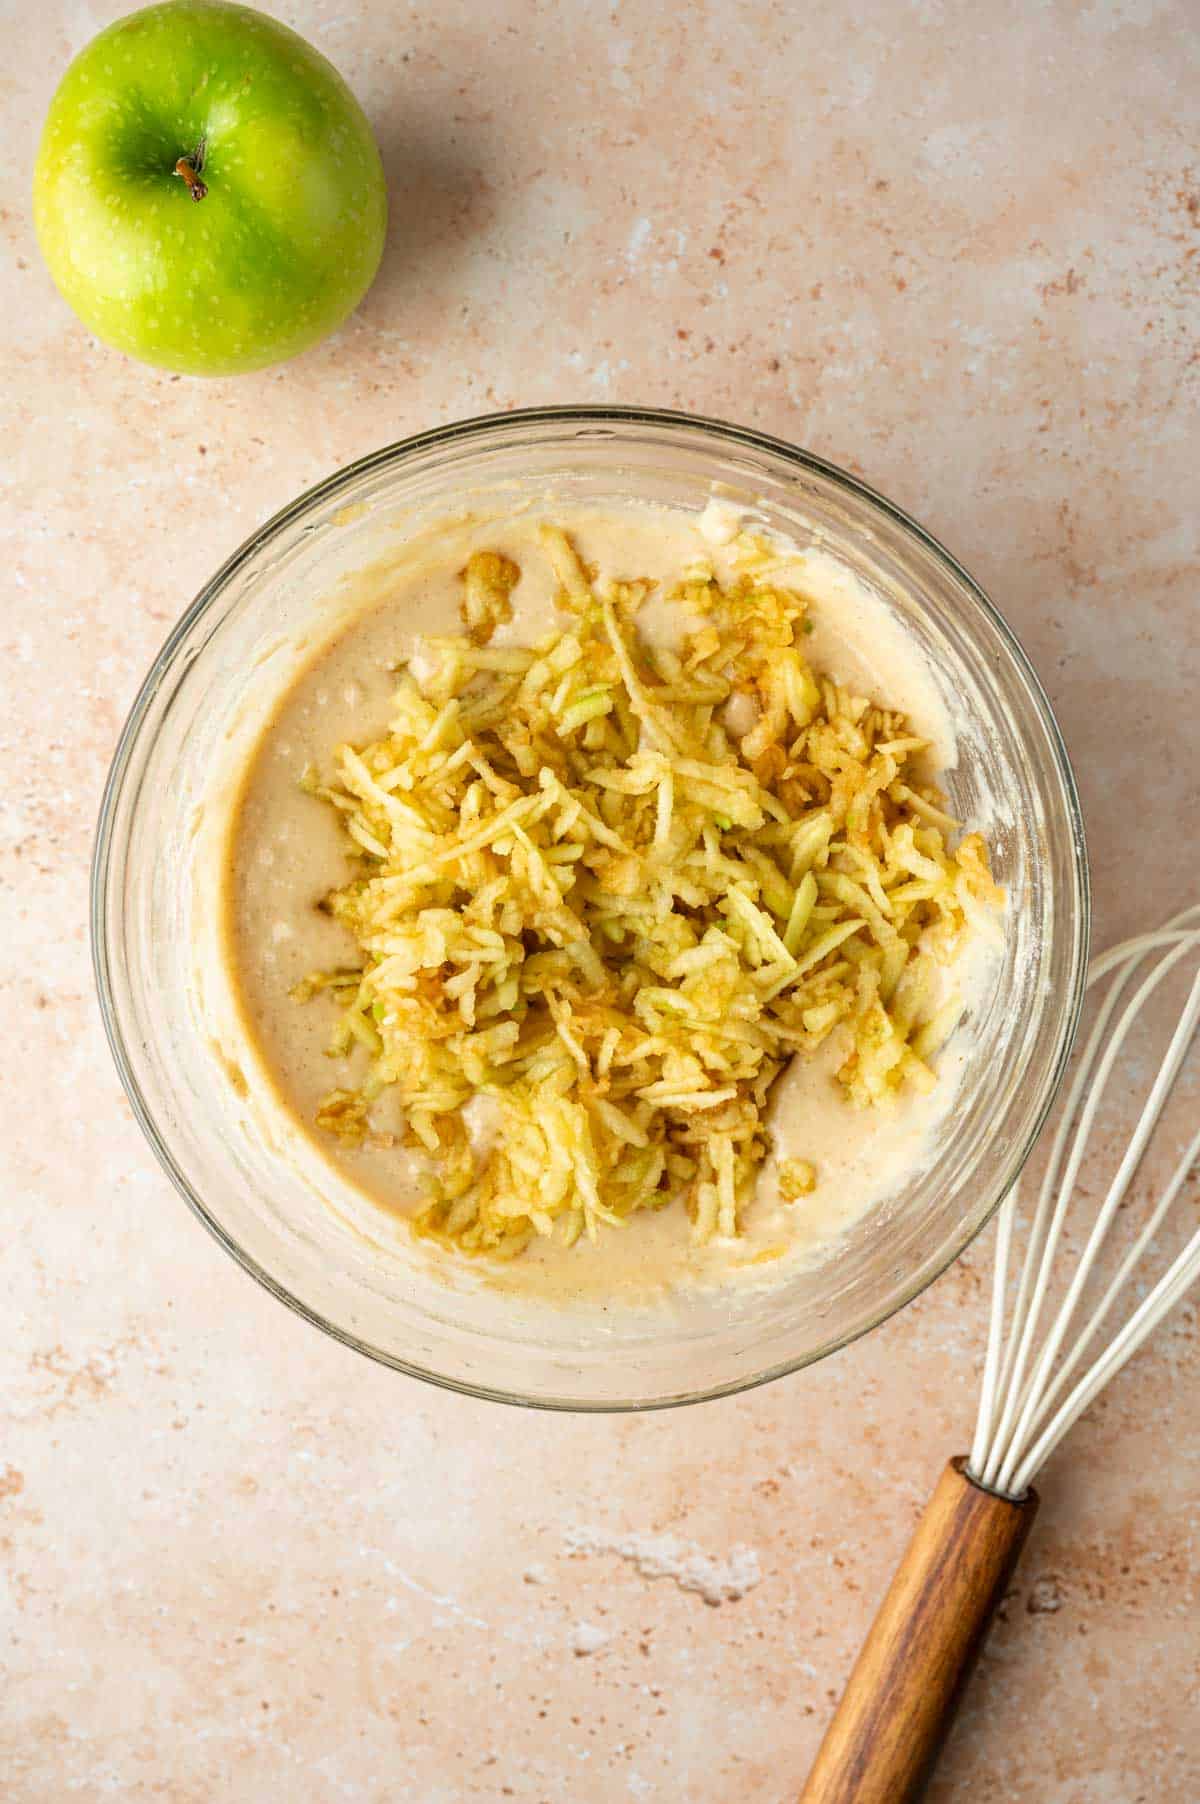
Grated apple added to the waffle batter.

Pour the wet mixture into the dry ingredients and stir until just combined. Gently fold in the grated apples. Do not overmix.

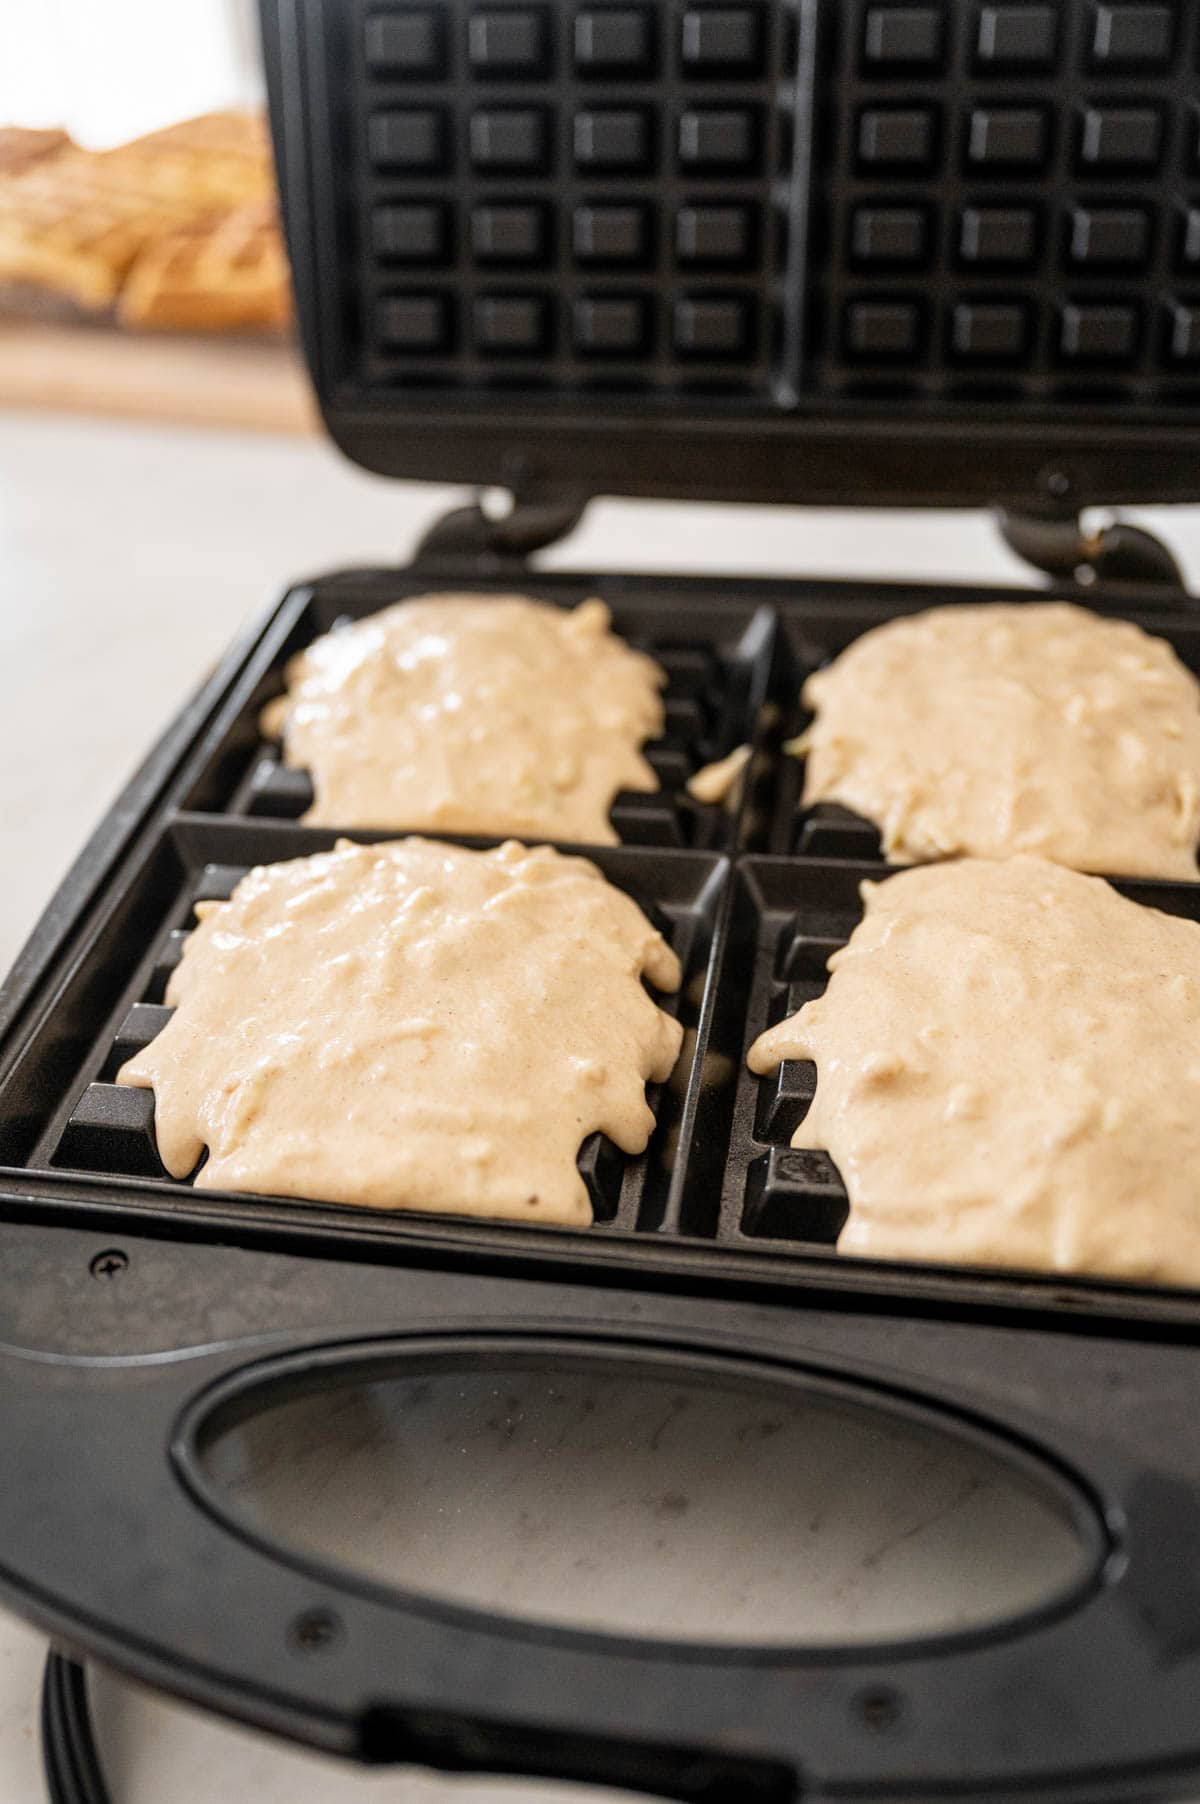
Batter being poured in the waffle maker to make apple waffles.

Scoop waffle batter into the preheated waffle iron and cook according to your machine’s directions until golden brown and crisp.

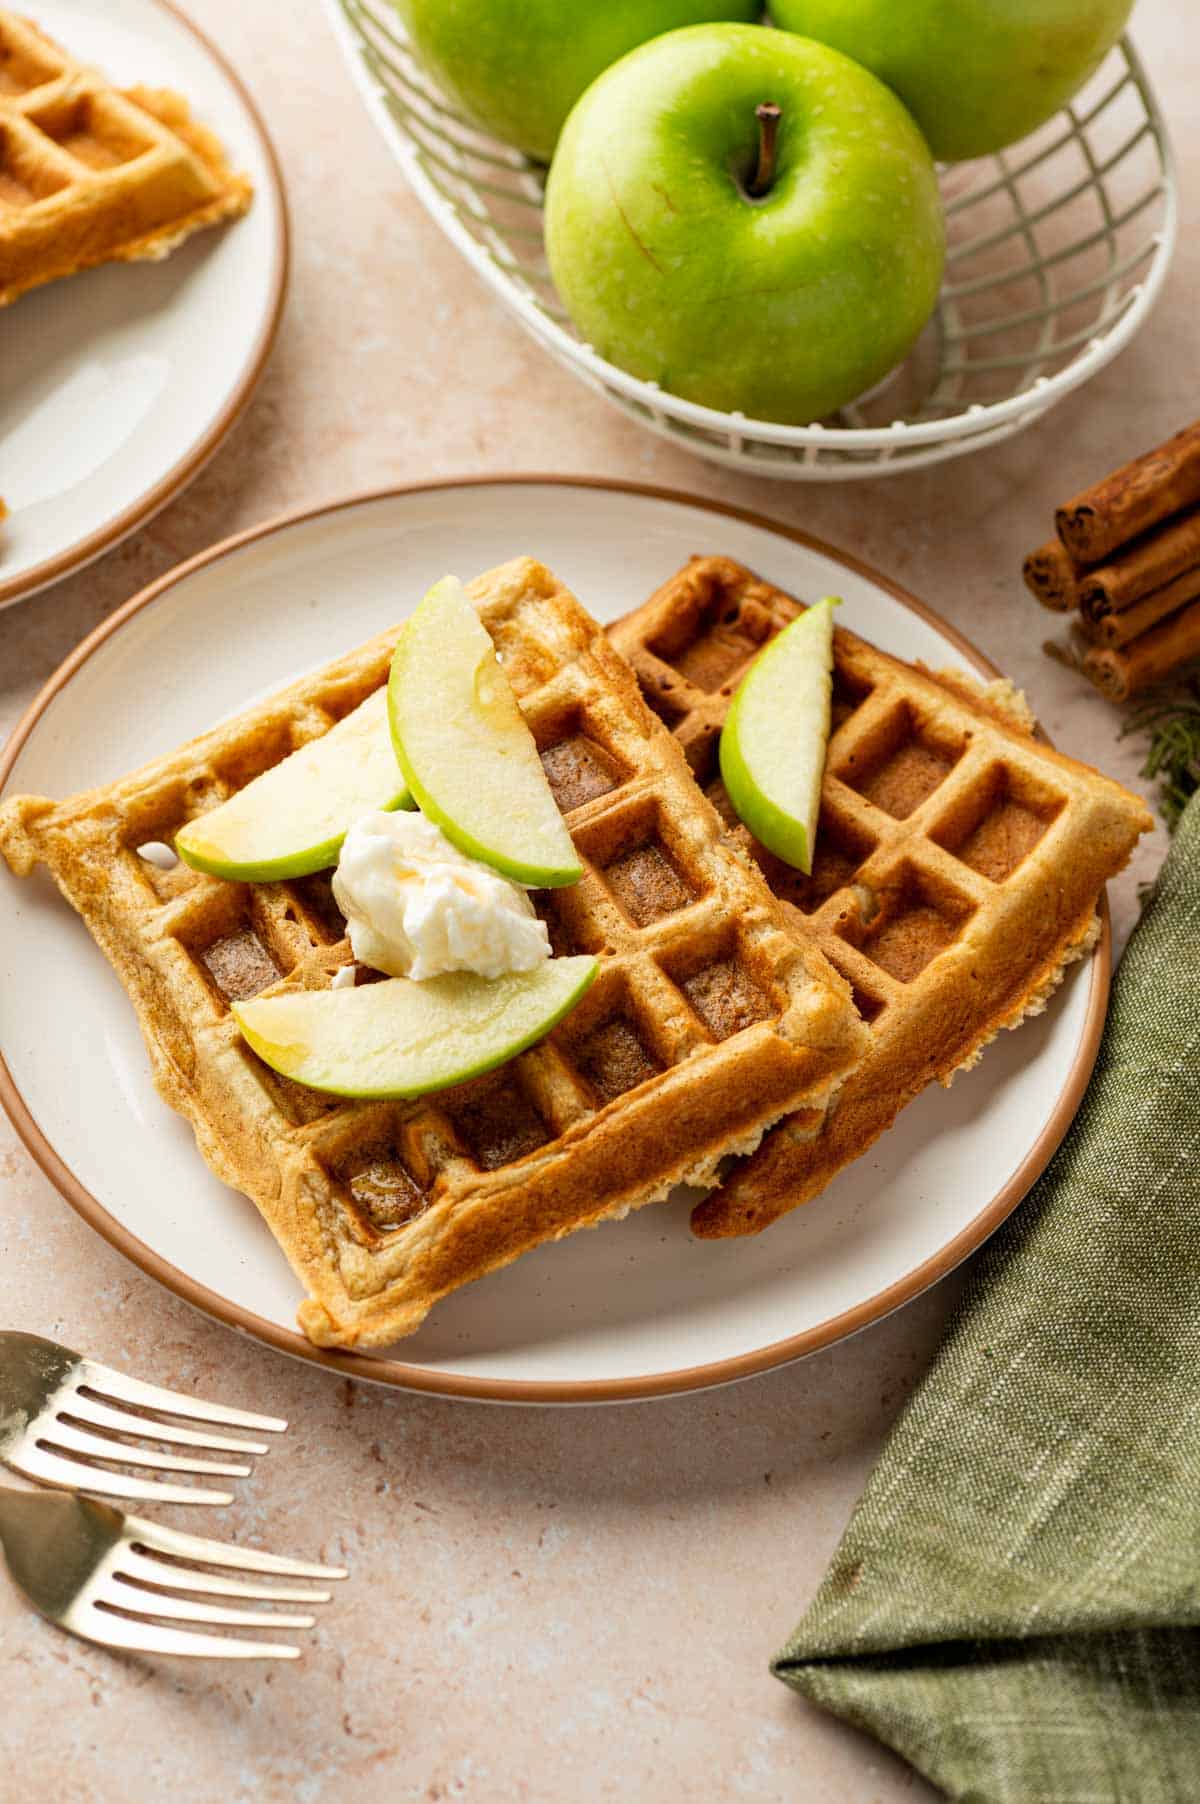
Top with maple syrup, powdered sugar, whipped cream, or more fresh apples if desired.

VARIATIONS WITH THIS EASY HOMEMADE WAFFLE RECIPE

Although apple cinnamon waffles are a super hit breakfast and snack option, doing them everyday can be too much. Here are a few variations that you can try at home for a delicious and easy waffle recipe:

  • Belgian Chocolate and Apple Waffles: If you’re making these homemade waffles for kids, you can use big, generous chunks of belgian chocolate. They’ll love the gooey texture and the sweetness.
  • Coffee Cinnamon Waffles: Sometimes I need an extra kick to wake myself up in the morning. On such days, you can add coffee to your waffle batter. This is a delicious breakfast option on weekdays.
  • Apple Cinnamon Oats Waffles: For this variation, you only need to switch all purpose flour with oat flour. The rest of the recipe will be the same.
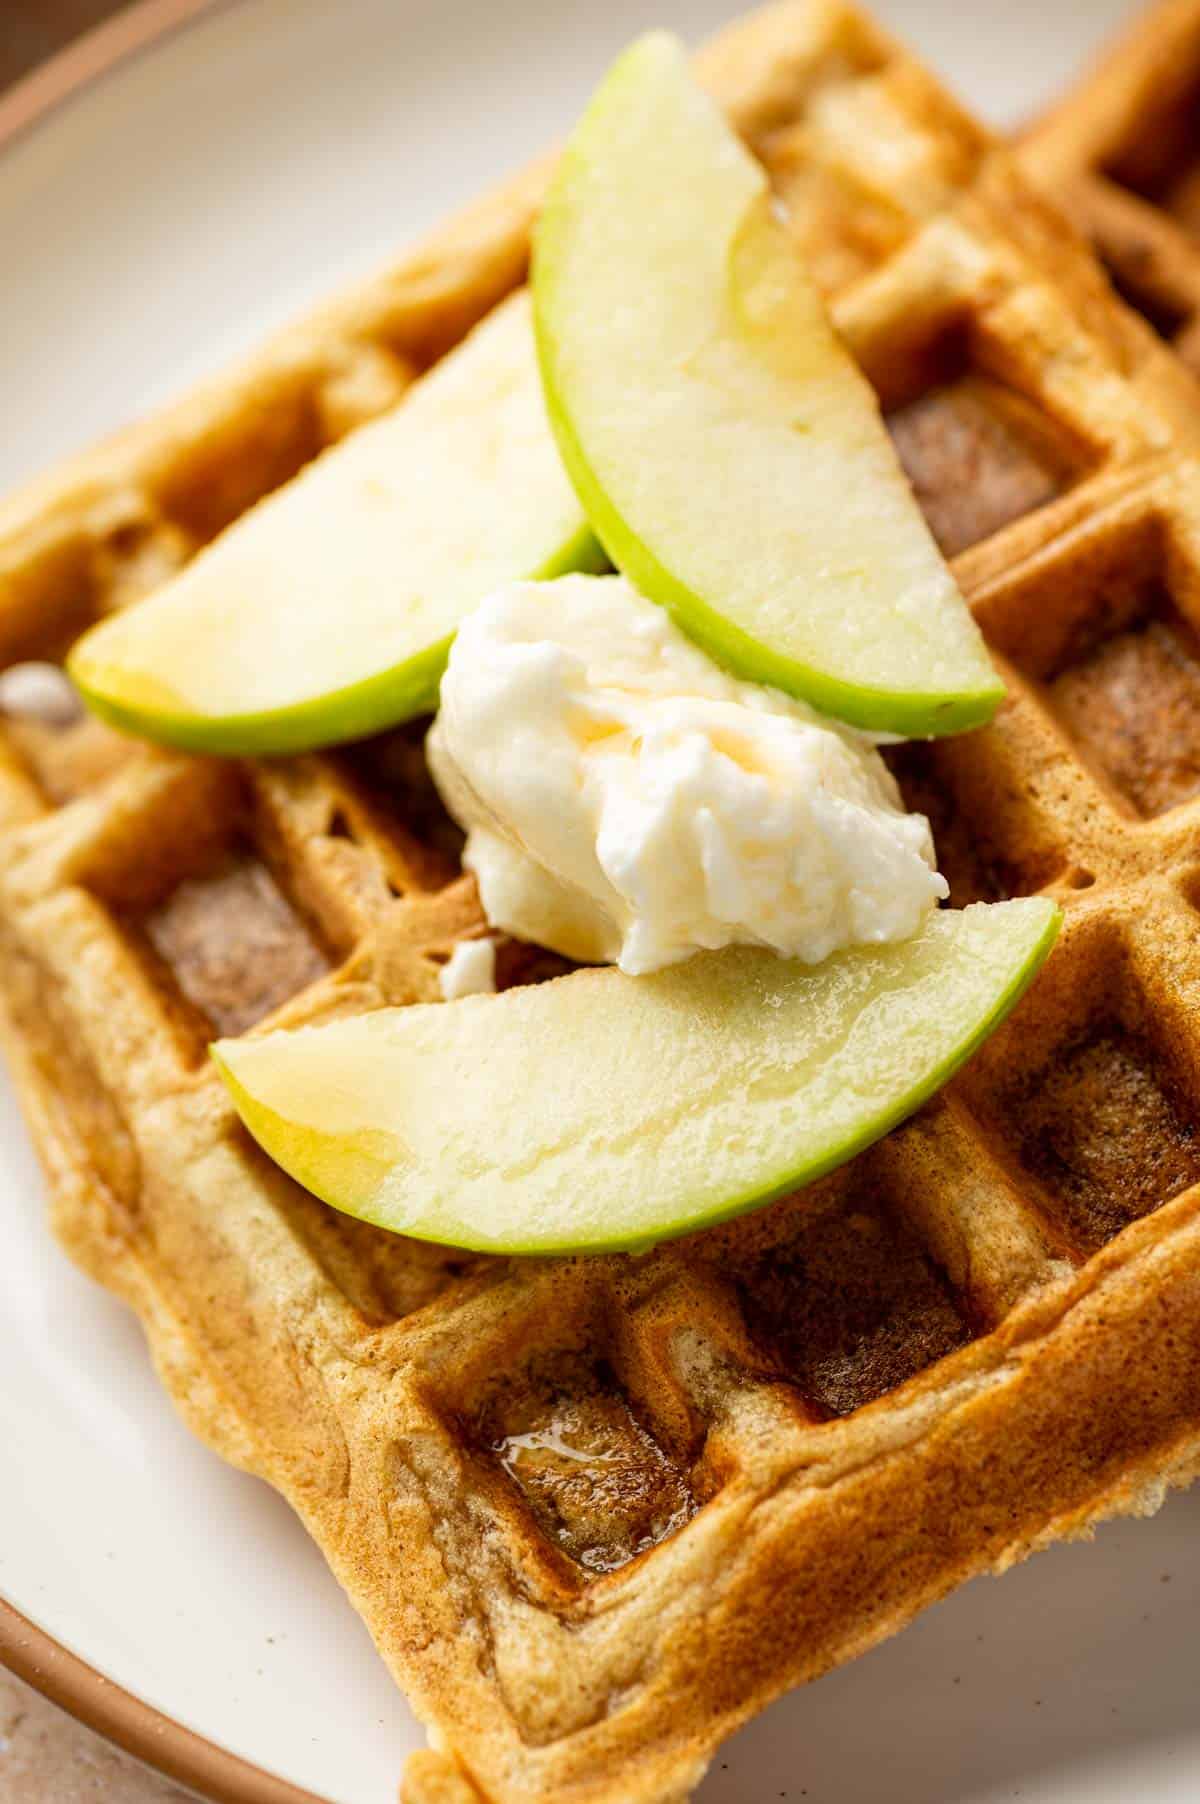
Golden brown cinnamon apple waffles on a white plate with fresh apple slices, whipped cream and maple syrup

SERVING SUGGESTIONS FOR APPLE CINNAMON WAFFLES

Always serve the waffles hot. Drizzle with warm maple syrup and add a pat of butter or whipped cream for a comforting, simple finish. There are so many things you can serve them with, like drinks, snacks, and hot beverages. I’ll give you a few options:

Hot Beverages: Fresh, warm, and nutty waffles are best served with a hot coffee. You serve them with vanilla bean latte or salted caramel latte. 

Fresh Fruits: You serve these delicious apple cinnamon waffles with some fresh fruits like pear, banana, strawberry, nutella strawberries, and blueberries. You can use fresh apple pieces for apple toppings as well.

Scrambled Eggs: For a savory twist, pair the waffles along with some Chili scrambled eggs for a sweet-savory combo that’s super satisfying.

Charcuterie Board: A charcuterie board is the best way to welcome the fall season. You can make apple cinnamon waffles to bring the best fall flavors to the board. Make some pumpkin spread as well! 

Equipment

  • Waffle Maker - A good-quality waffle iron ensures crispy edges and a fluffy interior. 
  • Mixing Bowls – One for dry ingredients and another for wet ingredients, making it easier to mix everything smoothly.
  • Whisk or Hand Mixer – Helps combine ingredients evenly.
  • Measuring Cups & Spoons – Ensures accurate measurements for the perfect waffle texture.
  • Spatula – Great for folding the wet and dry ingredients together without overmixing.
Overhead shot of homemade apple cinnamon waffles with butter and syrup

STORAGE AND REHEATING TIPS

Storage Tips:

In the Refrigerator:  You can store the cinnamon apple waffles in the fridge for 2-3 days in batter form as well as waffle form.

In the Freezer: You can freeze these apple cinnamon waffles for up to two months. Make sure you use an airtight container or sealed freezer bag.

Reheating Tips:

The perfect way to reheat the waffles is in a preheated oven. They’ll turn out crispy on the outside and soft and fluffy on the inside. You can also use a toaster oven.

TOP TIPS FOR APPLE CINNAMON WAFFLES

  • Use a hot waffle iron to pour your batter so that the waffles will not stick to the pan.
  • If you’re making these homemade apple cinnamon waffles using a stovetop, cook them on medium heat for even cooking.
  • Always use a large mixing bowl so that the batter is evenly mixed.
  • Always fill the waffle iron about ¾ full to allow the batter to rise. Overfilling will make them hard and chewy. 
  • If you’re making a big batch of waffles, don't pile them on top of each other or they’ll get soggy.

FAQ

Do apples and cinnamon go together?

Yes! In fact, cinnamon balances the sweetness and fruity scents of apple with warm, woody, nutty notes.

Can you use apple pieces instead of grated apples in waffles?

Yes. You can use small pieces instead of grated apple into the batter if you prefer that way!

Can I use pancake mix or cake mix for this recipe?

Absolutely! If your waffle mix or cake mix does not have cinnamon added to it, you can add cinnamon yourself. Always check the ingredients before adding it and follow the instructions accordingly.

What is the secret to good waffles?

Mix just until the dry ingredients are incorporated. Overmixing makes waffles dense instead of light and airy.

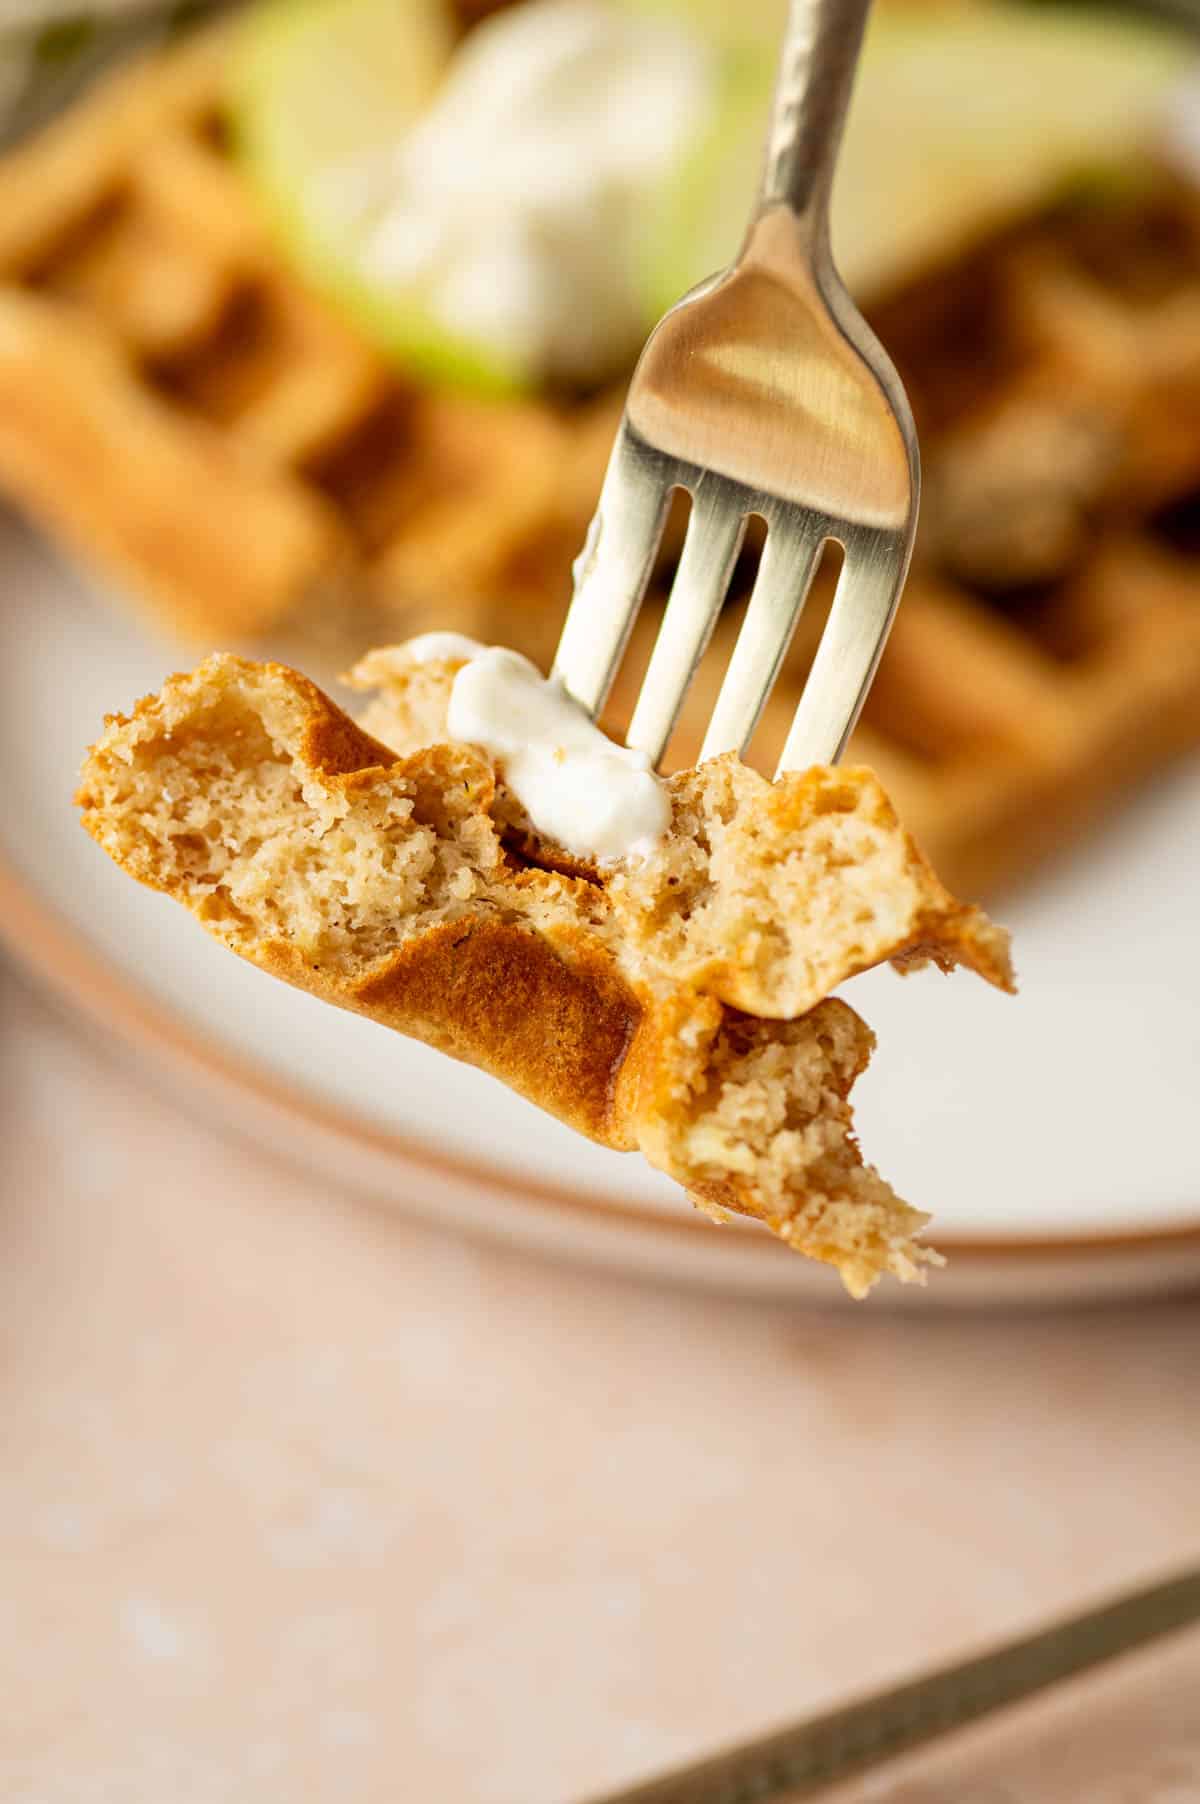
Close-up of crispy waffles with grated apple and cinnamon in a fork showing inside part.

Related

Looking for other recipes like this? Try these:
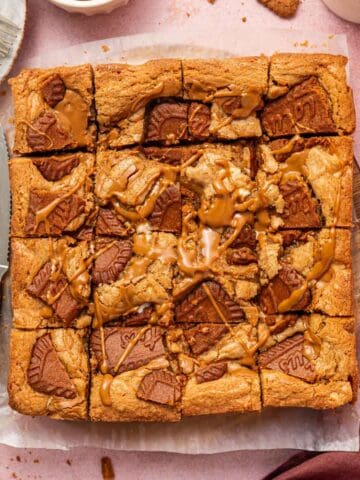
  • Freshly baked biscoff blondies cooling on parchment paper with nice golden edges.
    Biscoff Blondies with White Chocolate & Cookie Butter
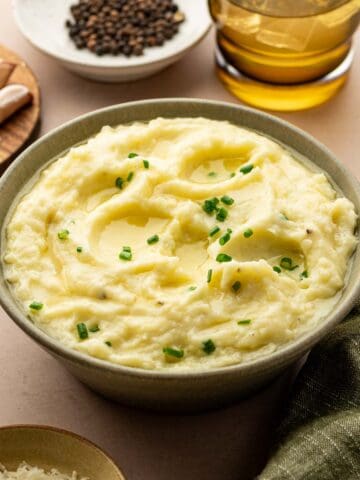
  • Creamy mashed potatoes topped with melted butter, garnished with fresh chives in a rustic green bowl.
    Cheesy Mashed Potatoes with Garlic & Sour Cream (Easy)
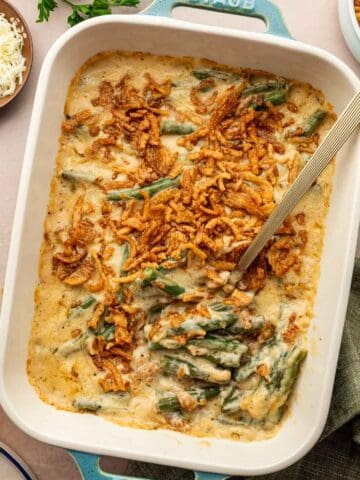
  • Holiday cheesy green bean casserole with golden brown top, perfect for Thanksgiving dinner.
    Cheesy Green Bean Casserole Recipe Without Mushroom Soup
  • Easy oven roasted chicken and potatoes, perfectly browned and ready to serve for dinner.
    Oven roasted chicken and potatoes with garlic & herbs

Pairing

These are my favorite dishes to serve with this apple waffles recipe:

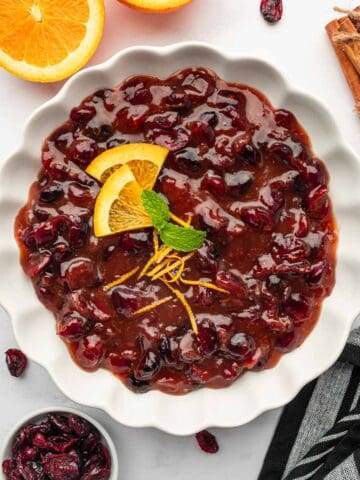
  • Festive cranberry sauce with dried cranberries, ideal for Christmas dinner or any holiday meal.
    Cranberry Sauce From Dried Cranberries - Easy Holiday Recipe
  • Comfort food chicken and dumpling casserole baked until golden brown and bubbling.
    Easy Chicken and Dumpling Casserole with Biscuit Dough
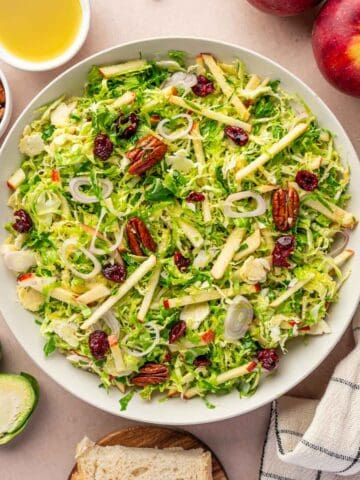
  • Healthy Brussels sprouts salad with maple Dijon vinaigrette, cranberries, and shallots.
    Shaved brussels sprouts salad with maple dijon dressing
  • Close-up of turkey melt sandwich with cranberry relish and melted cheese, air-fried to crispy perfection.
    Turkey Melt Sandwich with Cranberry Relish (Airfryer)

If you tried this Cinnamon Apple Waffles  recipe or any other recipe from my blog, I’d love to hear your thoughts! ⭐ Please leave a STAR rating and share your experience in the COMMENTS below. Your support means so much and helps me continue creating delicious recipes. Thank you for being part of this journey!

Freshly made apple cinnamon waffles with maple syrup drizzle.

Apple Cinnamon Waffles (Easy Homemade Waffle Recipe)

Abi Guna
These Apple Cinnamon Waffles are soft, golden, and packed with warm fall flavors from fresh grated apples and cozy spices. This easy homemade waffle recipe is perfect for breakfast, brunch, or holiday mornings. Made with simple pantry ingredients and ready in under 30 minutes, these waffles are crisp on the outside, fluffy inside, and delicious with maple syrup, whipped cream, or fresh apples on top.
5 from 5 votes
Print Recipe Pin Recipe
Prep Time 10 minutes mins
Cook Time 20 minutes mins
Total Time 30 minutes mins
Course Breakfast
Cuisine American
Servings 8 Waffles

Equipment

  • Waffle Maker
  • Mixing Bowls
  • Measuring cups and spoons
  • Whisk or Hand mixer
  • Spatula

Ingredients
  

  • 1 ½ cups all-purpose flour
  • 2 tablespoons brown sugar
  • 2 teaspoons baking powder
  • ½ teaspoon baking soda
  • 1 teaspoon cinnamon
  • ½ teaspoon apple pie spice optional
  • ¼ teaspoon salt
  • 2 large eggs
  • 1 cup whole milk or buttermilk
  • ¼ cup unsalted butter melted
  • 1 teaspoon vanilla extract
  • 1 cup grated Granny Smith apples about 1 large apple

Instructions
 

  • Preheat the waffle iron according to the manufacturer's instructions and lightly grease it with oil or nonstick spray.
  • In a large bowl, whisk together flour, brown sugar, baking powder, baking soda, cinnamon, apple pie spice(optional), and salt.
  • In another bowl, whisk the eggs, milk, melted butter, and vanilla extract until smooth.
  • Pour the wet mixture into the dry ingredients and stir until just combined. Gently fold in the grated apples. Do not overmix.
  • Scoop batter into the preheated waffle iron and cook according to your machine’s directions until golden brown and crisp.
  • Top with maple syrup, powdered sugar, whipped cream, or more fresh apples if desired.

Notes

  1. Squeeze out excess moisture from the grated apples if they’re very juicy, to avoid soggy waffles.
  2. Add a tablespoon of apple cider to the batter for extra apple flavor.
  3. Use a hot waffle iron to pour your batter so that the waffles will not stick to the pan.
  4. Always fill the waffle iron about ¾ full to allow the batter to rise.
  5. If you’re making a big batch of waffles, don't pile them on top of each other or they’ll get soggy.
Keyword apples, breakfast, fall, holiday breakfast, waffles

Sautéed Broccoletti (How to Cook Broccolini in 10 Minutes)

July 20, 2025 by Abi Guna 17 Comments

Broccoletti (aka broccolini) is a perfect side dish that’s quick, healthy, and bursting with garlicky goodness. If you’re looking for more easy options like this, be sure to explore my side dish recipes collection for plenty of quick and flavorful ideas. Those who have never tried broccolini before will be pleasantly surprised by its flavor and tender texture.

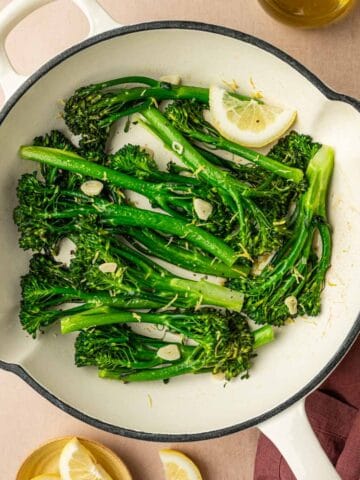
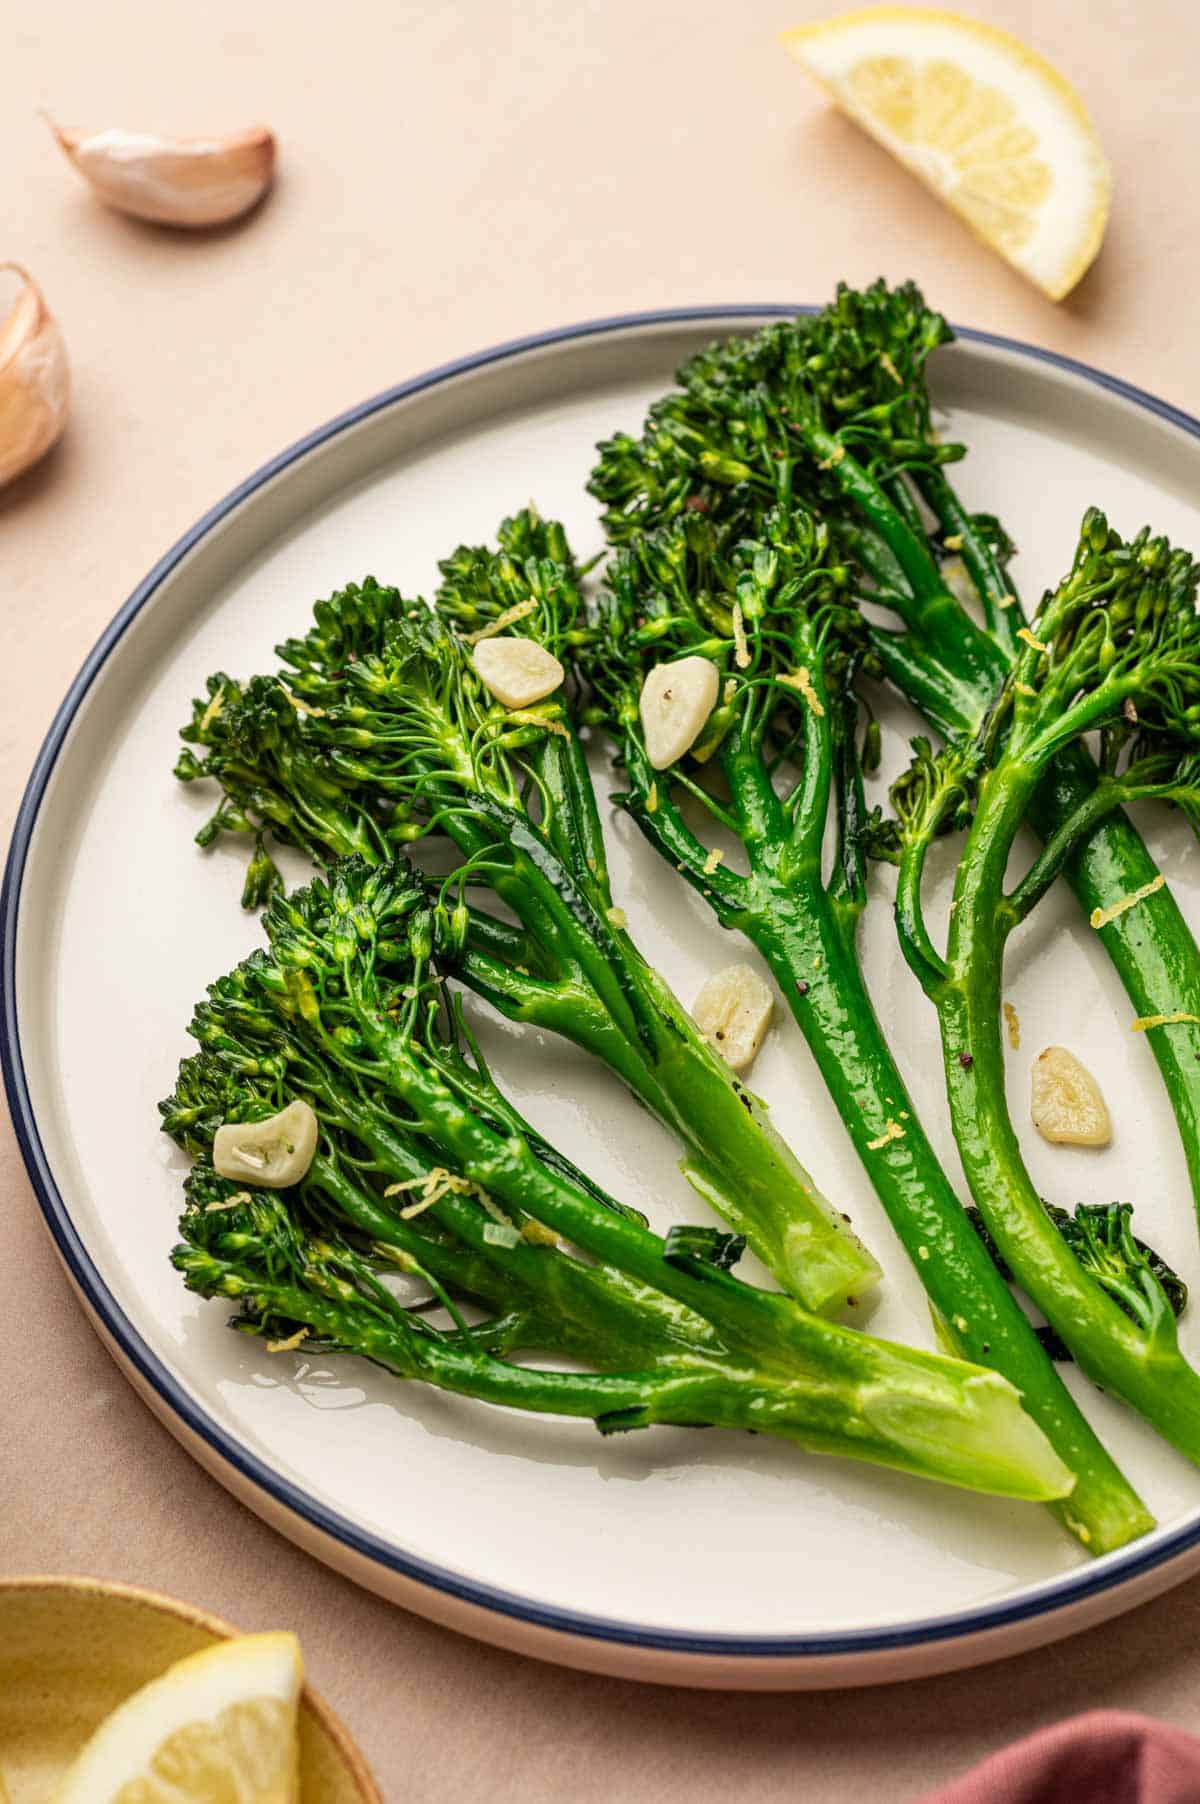
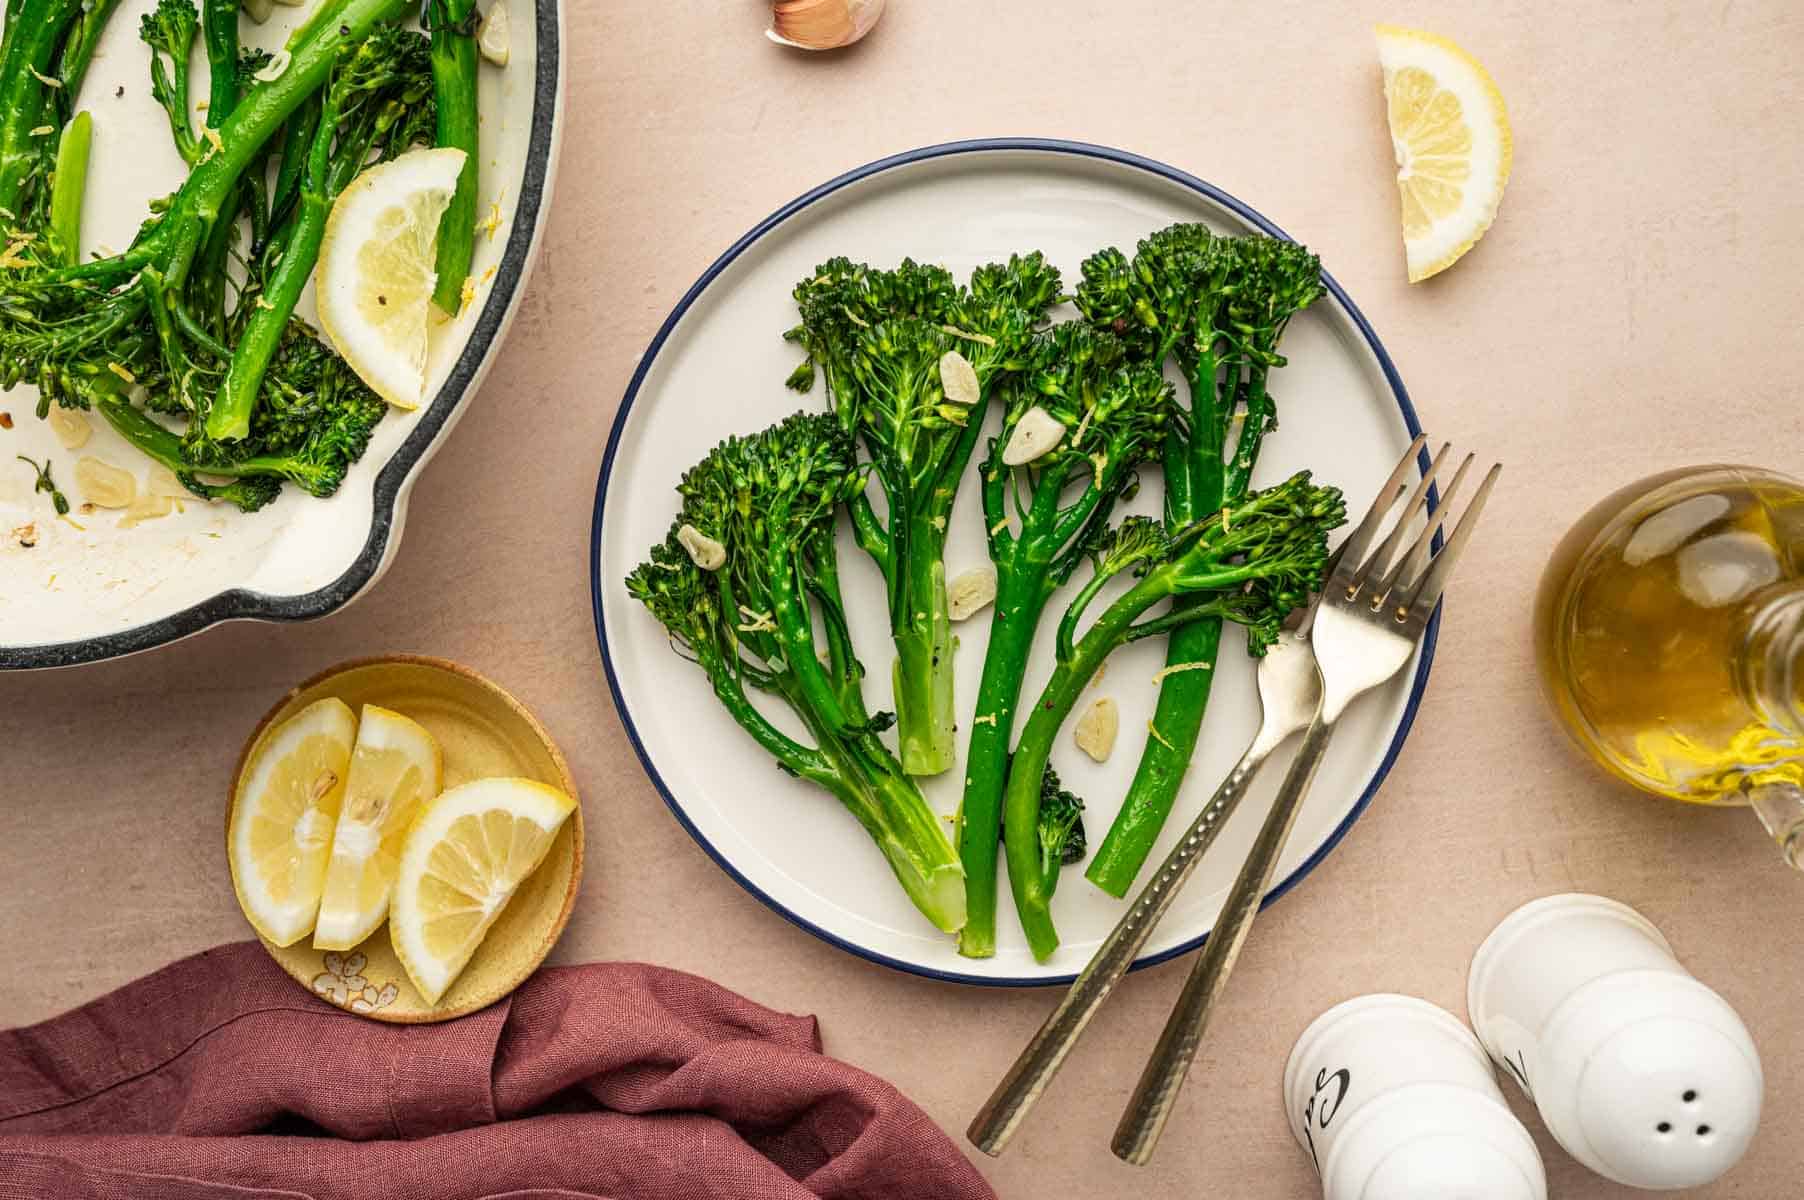
Italian-style broccoletti served on a white plate with lemon wedges

It's versatile. It’s delicious. And it’s nutritious. Your kids don’t eat regular broccoli? Try this broccoletti recipe and they’ll ask for more. You can even add it to your pasta dishes for a pop of colour, earthy-sweet flavor, and extra nutrition. 

Did I mention, it’s SUPER EASY to cook as well? You can literally do all the prep work for this recipe in 5 to 10 minutes with few simple ingredients . The cooking time is not more than 10 minutes. It’s so convenient and quick, you can make this broccolini recipe even for your snacks. Or, you can try roasted broccolini if you want an extra crunchy snack.  In short, Broccolini is a great green vegetable to have in your refrigerator.

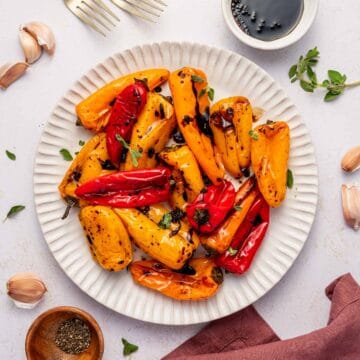
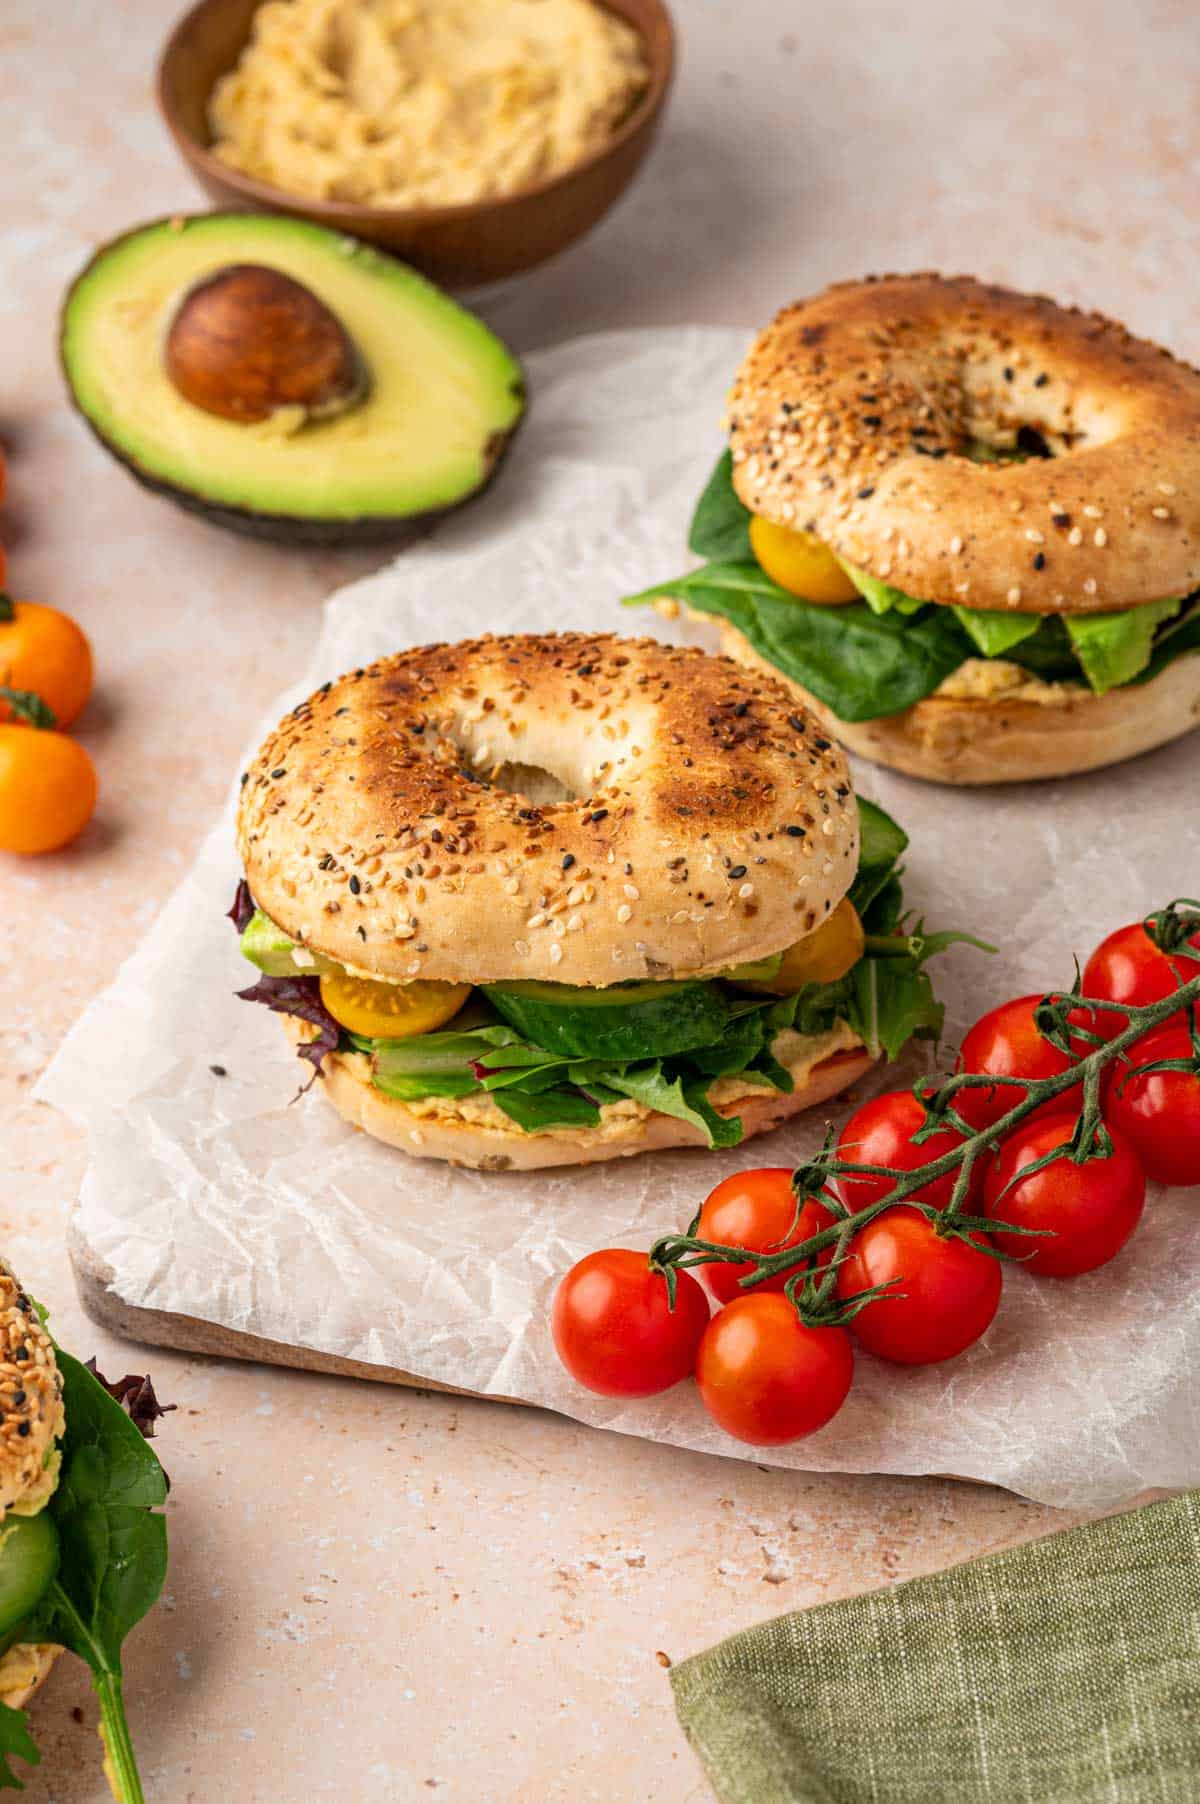
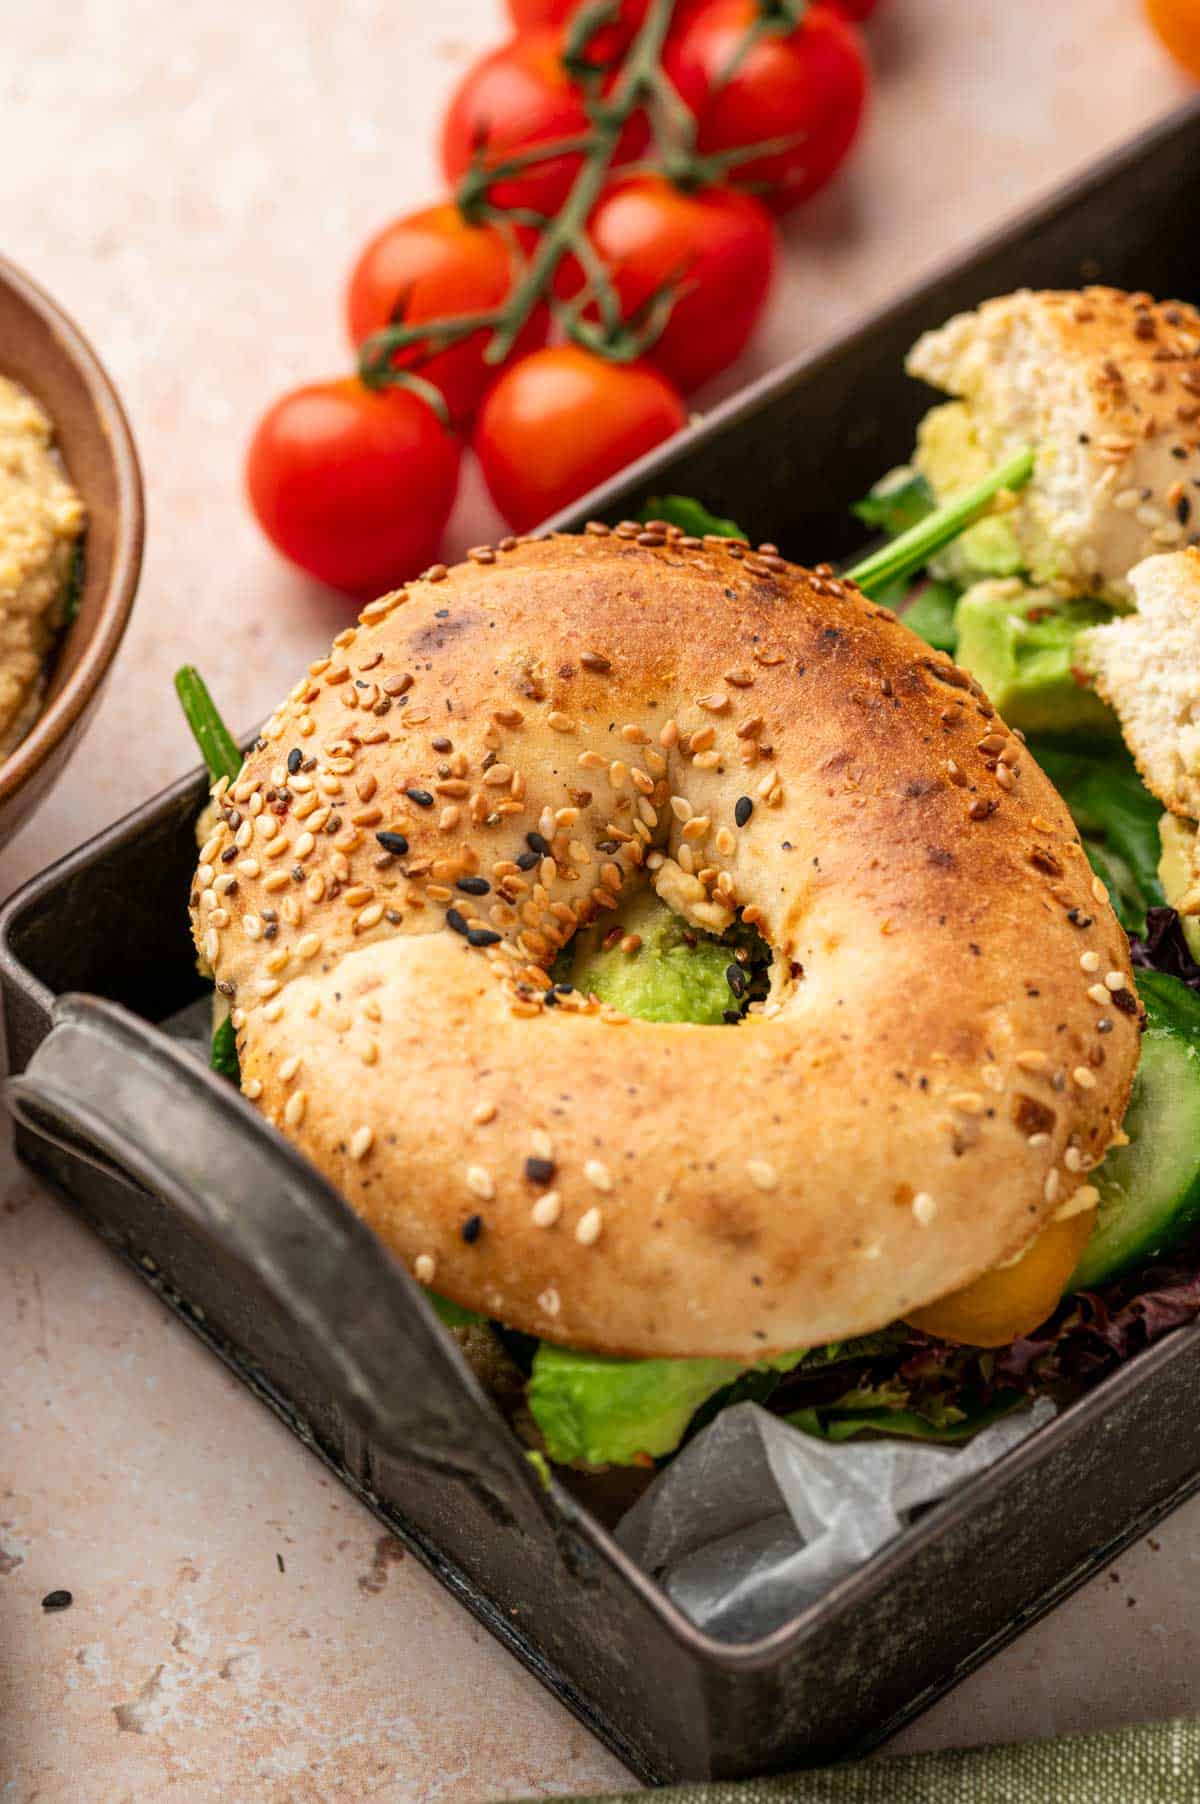
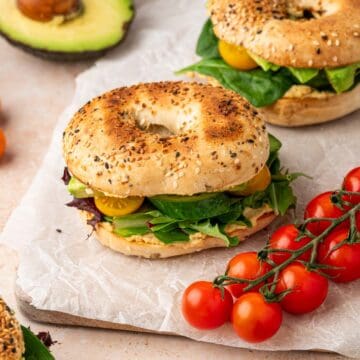
If you love easy, flavorful vegetable sides like this sautéed broccoletti, be sure to explore more in my side dish recipes collection for plenty of delicious ideas like roasted mini peppers , roasted carrots and asparagus , roasted cauliflower and carrots combo. These veggie sides pair beautifully with mains like Oven Baked Shrimp Skewers or Blackened Salmon Bites, and you can round out the meal with something satisfying like a Chicken Salad Melt Sandwich or a lighter option like a Hummus Bagel Veggie Sandwich.

[feast_advanced_jump_to]
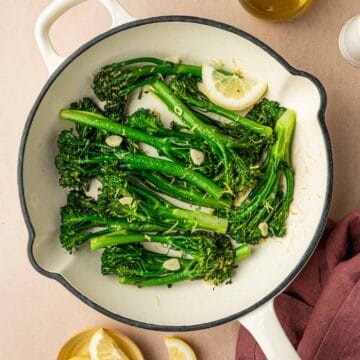
Overhead shot of cooked broccoletti with golden garlic slices in a skillet.

Why You’ll Love This Broccoletti Recipe

There is not one, but many reasons why you (the cook or the eater) will love this recipe. Before you learn how to cook broccolini, it’s important to know why it’s worth your time.

  • Great Flavour and Texture - For starters, it has a great flavor profile. It’s sweeter, milder, and a bit mustard-y when eaten raw. When sautéed in garlic, the broccolini gives off a beautiful aroma and a great crunchy, tender texture. This broccolini recipe is a great substitute for recipes with kale, bok choy, broccoli, and gai-lan. 
  • Versatile Side Dish - Broccolini sautéed with garlic is a versatile side dish. You can also make roasted broccolini instead of sautéed. You can pair it with so many dishes, including steaks, steamed rice, roasted chicken, hot wings, pastas, you name it! 
  • Easy to Make - This broccolini recipe is very easy to make. You just need to trim the woody ends of broccolini, chop some garlic, and voila! It’s ready to be sautéed.  
  • Great Nutritional Value - Broccolini is packed with vitamins, minerals, and fiber. It’s rich in iron, zinc, calcium, potassium, Vitamin A, C, and K. It supports heart health, bone health, and improves digestion. Due to low carbs and low fats, you can eat it in big portions without worrying about gaining pounds.  
  • Kid Friendly - Broccoletti is loved by all, kids, tweens, and adults. Its sweet flavor, crunchy yet tender texture is loved by kids. This broccolini recipe is a crowd pleaser. 
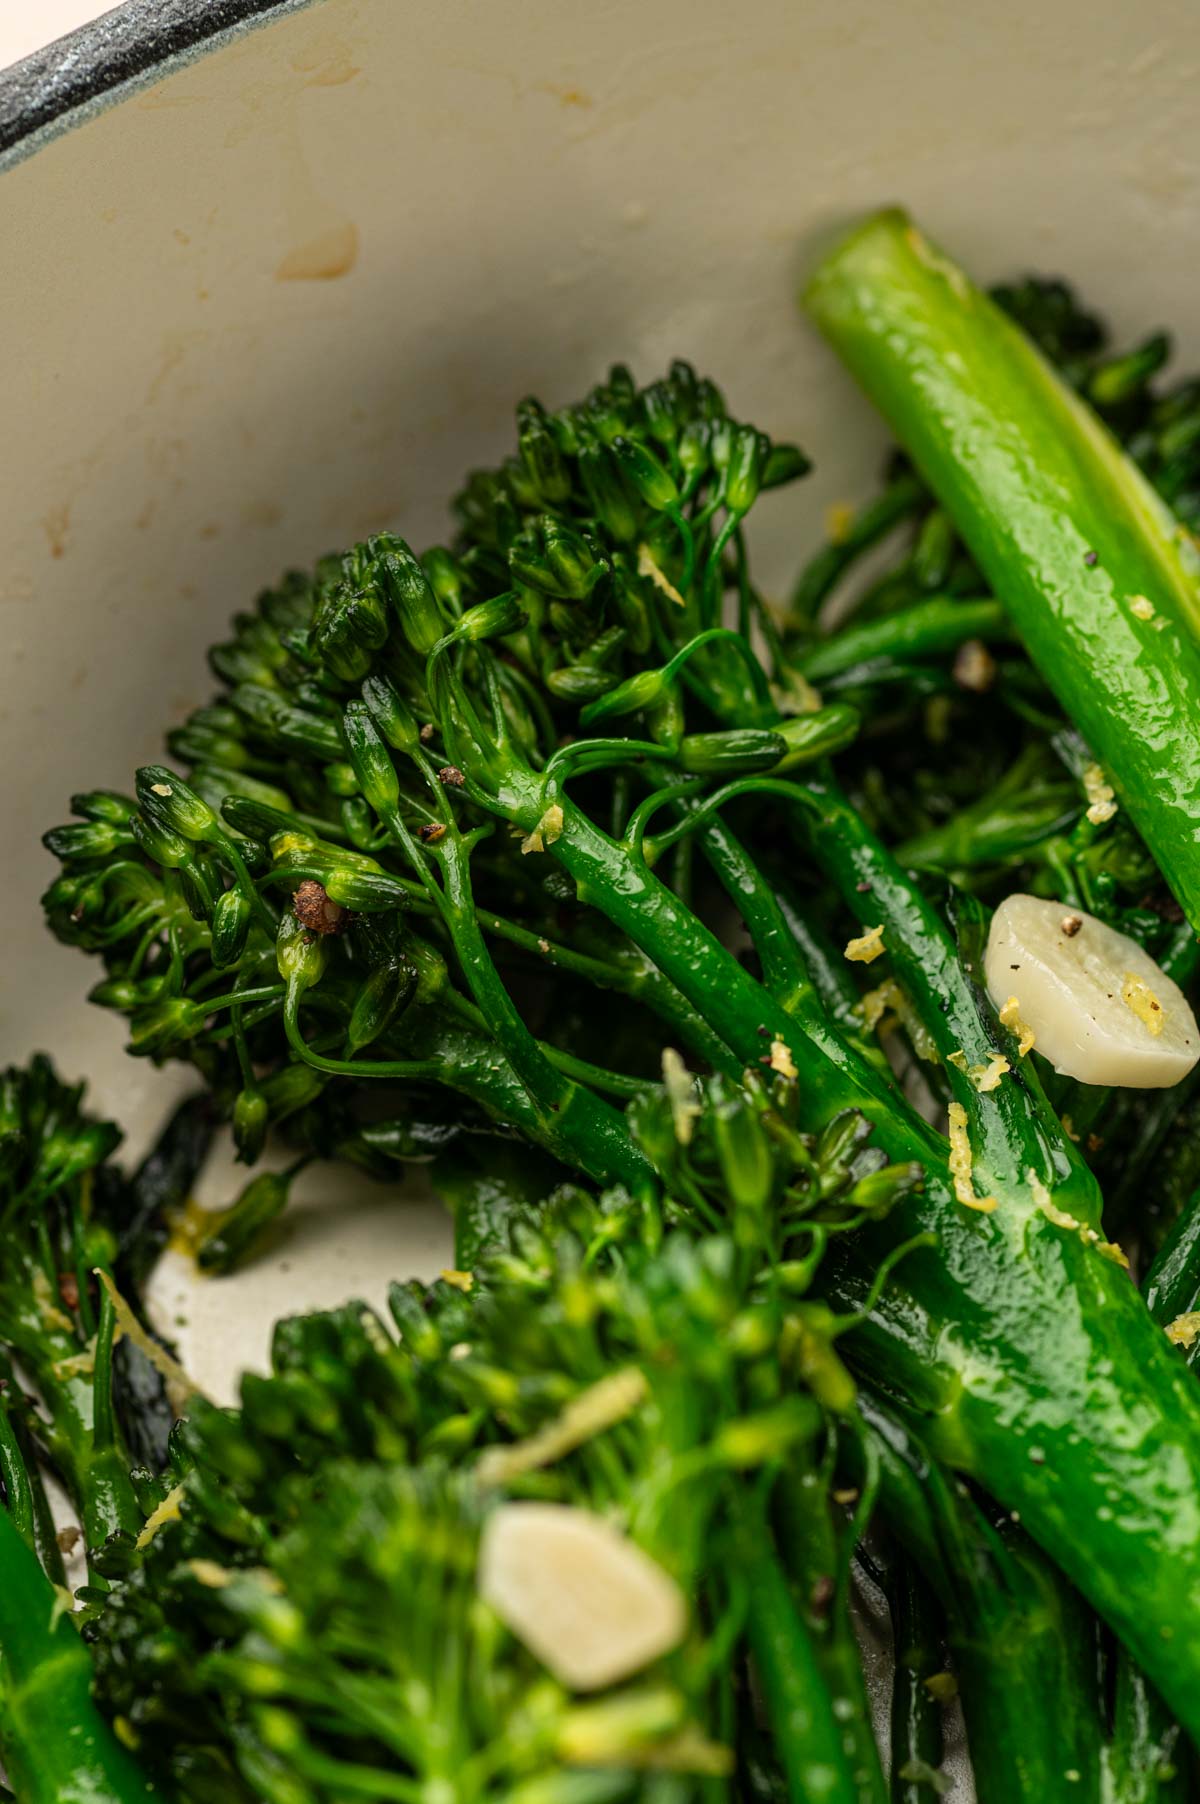
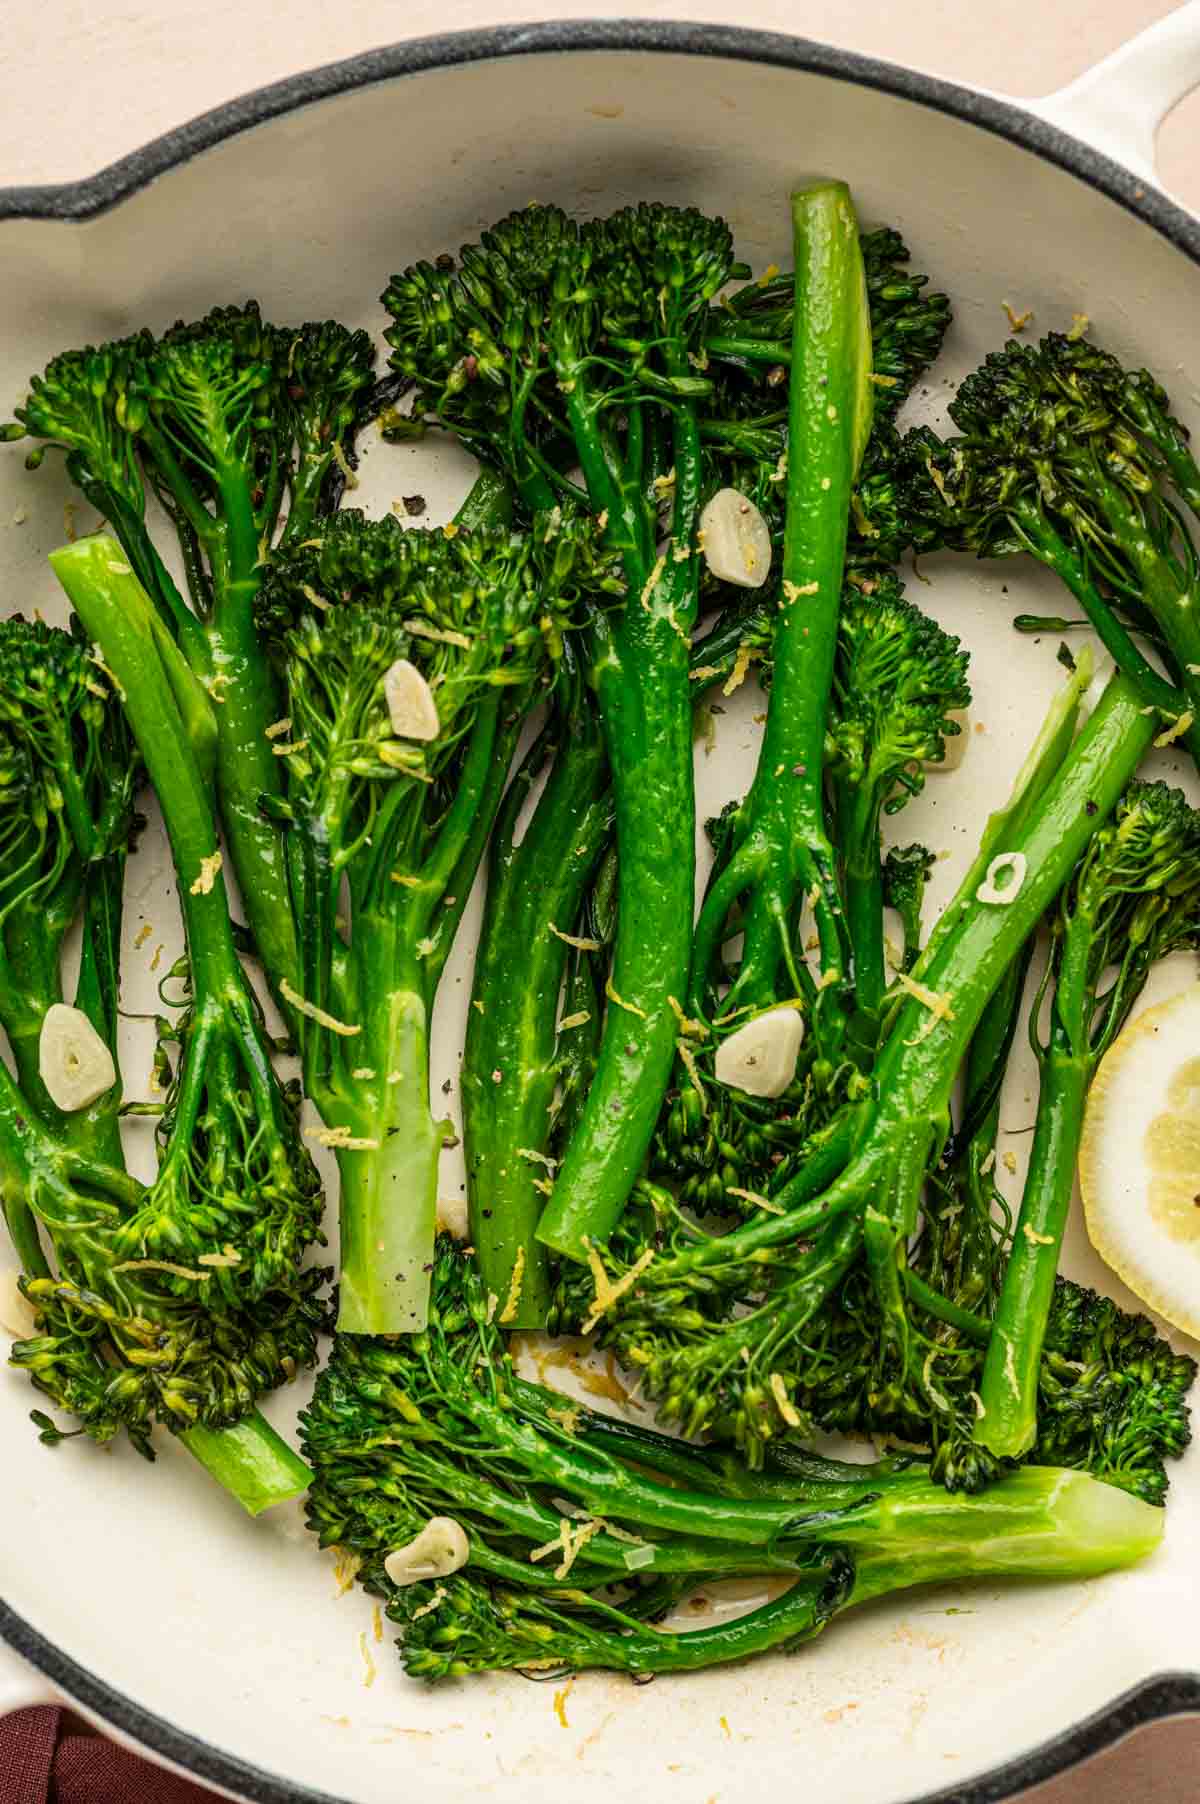
Close-up of tender broccoletti cooked with olive oil in a skillet.

What is Broccoletti aka BROCCOLINI?

Broccoletti is an Italian term that typically refers to a few different types of green vegetables, depending on the region. It often refers to rapini (broccoli rabe),  a leafy green with small florets, a slightly bitter flavor, and edible stems and leaves. In Americanized Italian recipes, broccoletti may be used to mean broccolini.  For the ones wondering, “What on earth is Broccolini?” I see you! If you’ve eaten broccoli before, but never heard of Broccoletti, your confusion is genuine. You might have thought this is just broccoli, but it’s not. It looks a lot like broccoli, hence sometimes wrongly labeled as “baby broccoli”. 

Time to end the mystery, Broccolini is a cross between Broccoli and Gai-Lan. Gai Lan is chinese broccoli or sometimes called chinese kale. 

Broccolini’s flavor is not as strong as gai-lan's. It has a milder and sweeter flavor than both broccoli and gai-lan, making it perfect for a lot of dishes. Now let’s learn how to cook broccolini! A perfect side dish that’s quick, healthy, and bursting with garlicky goodness.

Ingredients You’ll Need

Simple broccoletti side dish ingredients being laid out!
  • Broccolini: Take a bunch of broccolini, wash it, and trim the woody ends. If you could't find baby broccoli, use broccoli or tenderstem broccoli by cutting them into smaller florets.
  • Olive Oil: Use olive oil to saute the garlic and broccoletti. It will help crisp up the veggies while adding more flavor to the dish.  
  • Garlic: Thinly slice 4 garlic cloves and saute them in olive oil. Garlic adds a rich flavor and aroma to the veggie. 
  • Seasonings: For this broccolini recipe, we don’t need to do much. However, to balance the sweetness of broccoletti, you need to add salt and a little freshly cracked black pepper.
  • Water: You’ll need two tablespoons of water to soften the broccoletti stems. Water will also prevent the florets from burning.
  • Lemon Juice: Lemon juice will give a citrusy punch to this broccolini recipe. 
  • Fresh Lemon Zest: Take a fresh lemon and grate the zest for an enhanced citrusy flavour and aroma. 

See recipe card for quantities.

INSTRUCTIONS (How to Cook Broccolini)

For this broccolini recipe, follow the steps given below:

  • Rinse the broccolini and trim the woody ends. Pat dry with a clean towel.
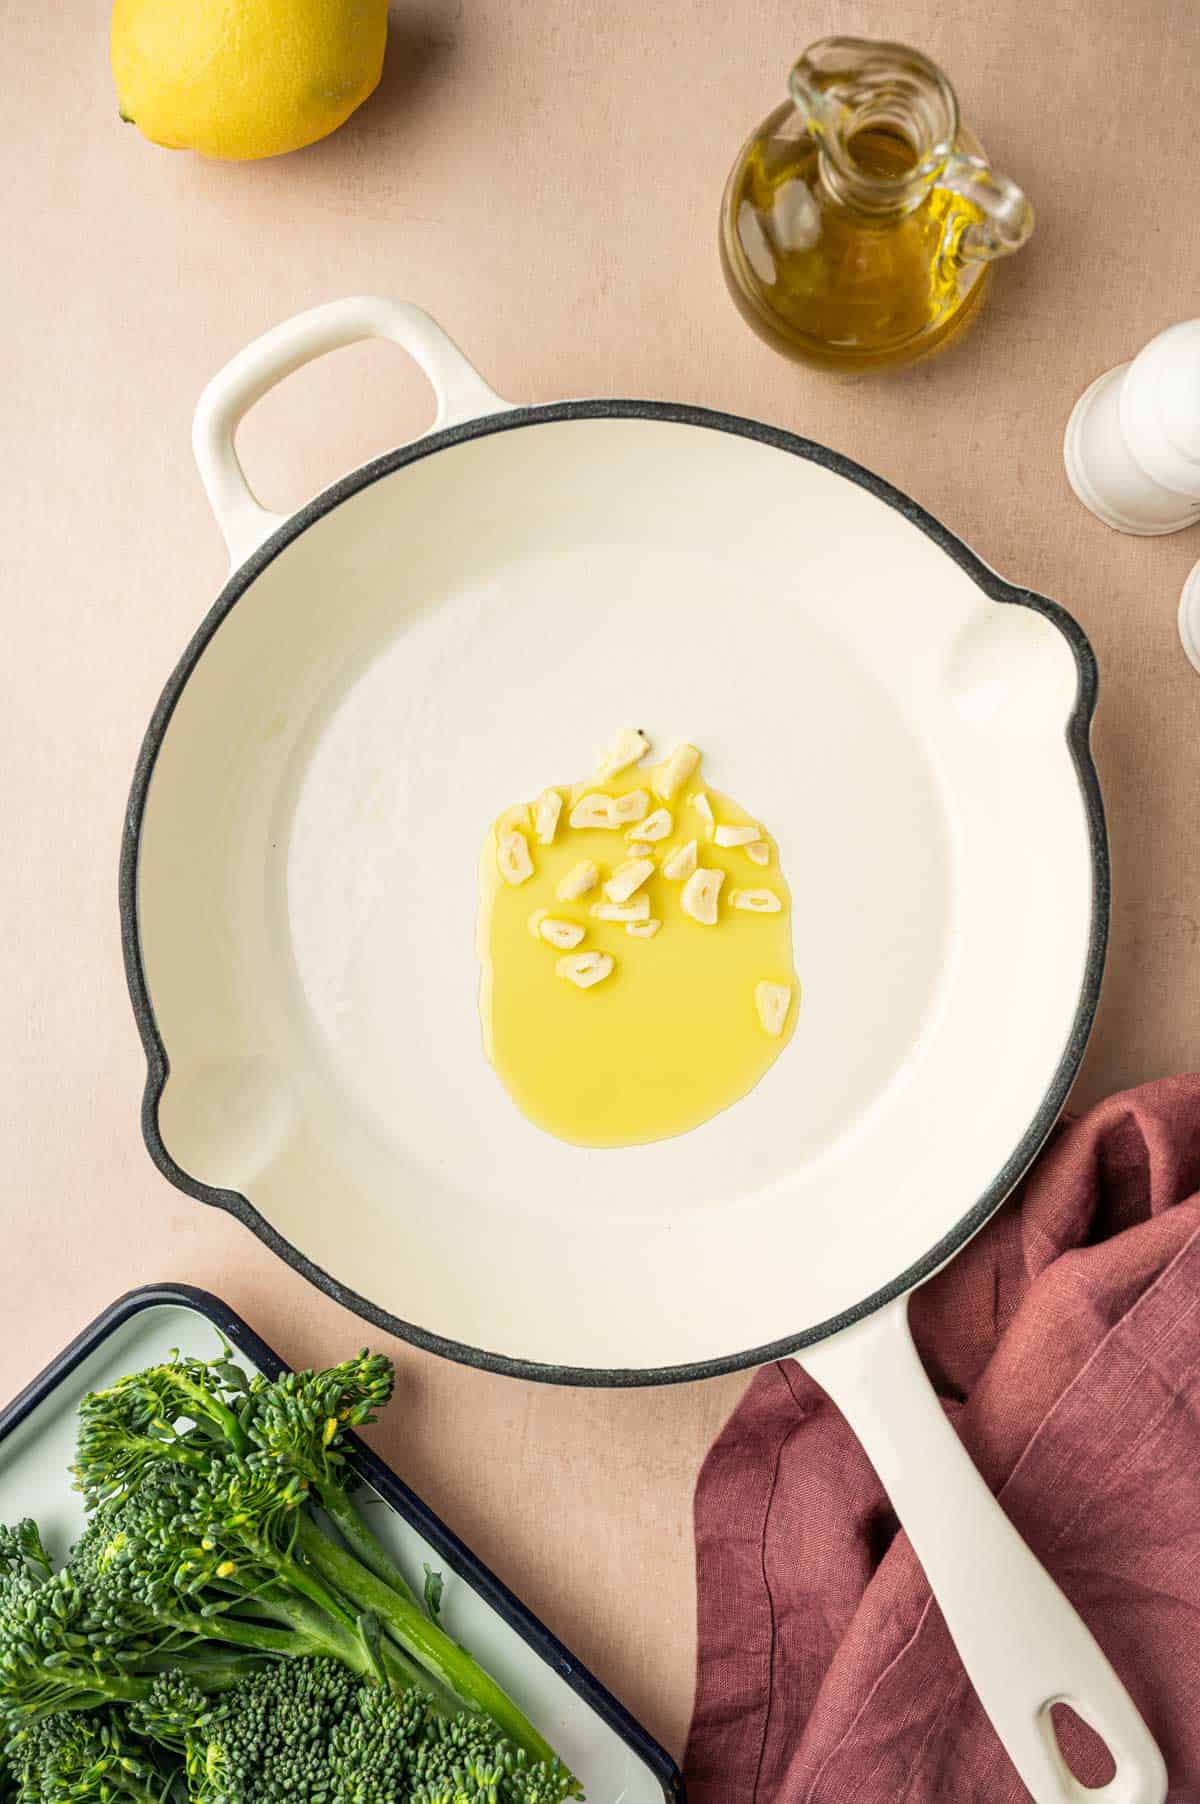
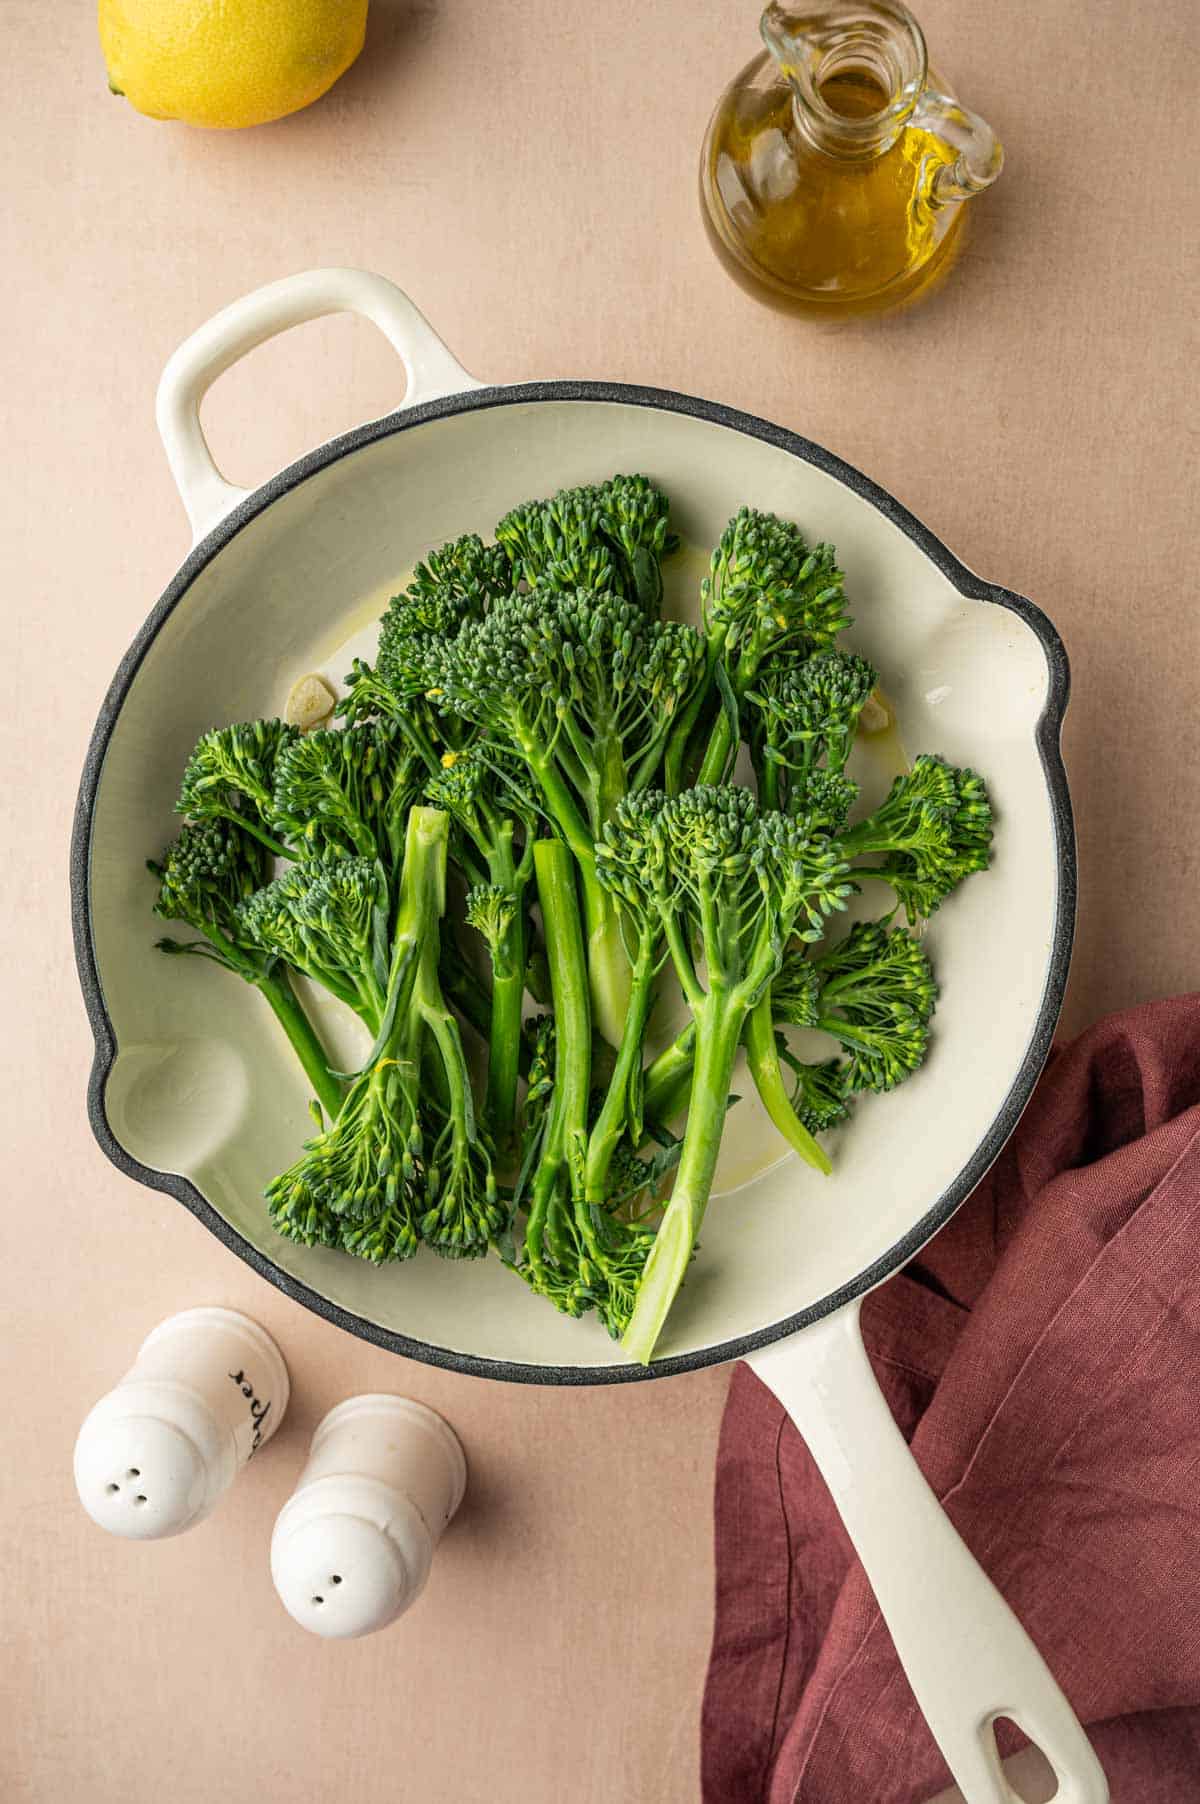
In a white enamel coated skilled olive oil is added along with garlic slices.
  1. Heat olive oil in a large skillet over medium heat. Add the sliced garlic and sauté for about 1–2 minutes until golden and fragrant, be careful not to burn it.
Baby broccoli is added to the skillet.
  1. Toss in the broccoletti and sauté for 2-3 minutes, sprinkle the 2 tablespoons of water, and close with the lid. 
  • Cook for 4-5 minutes on a medium-high heat , turning occasionally, until tender and slightly crispy at the edges.
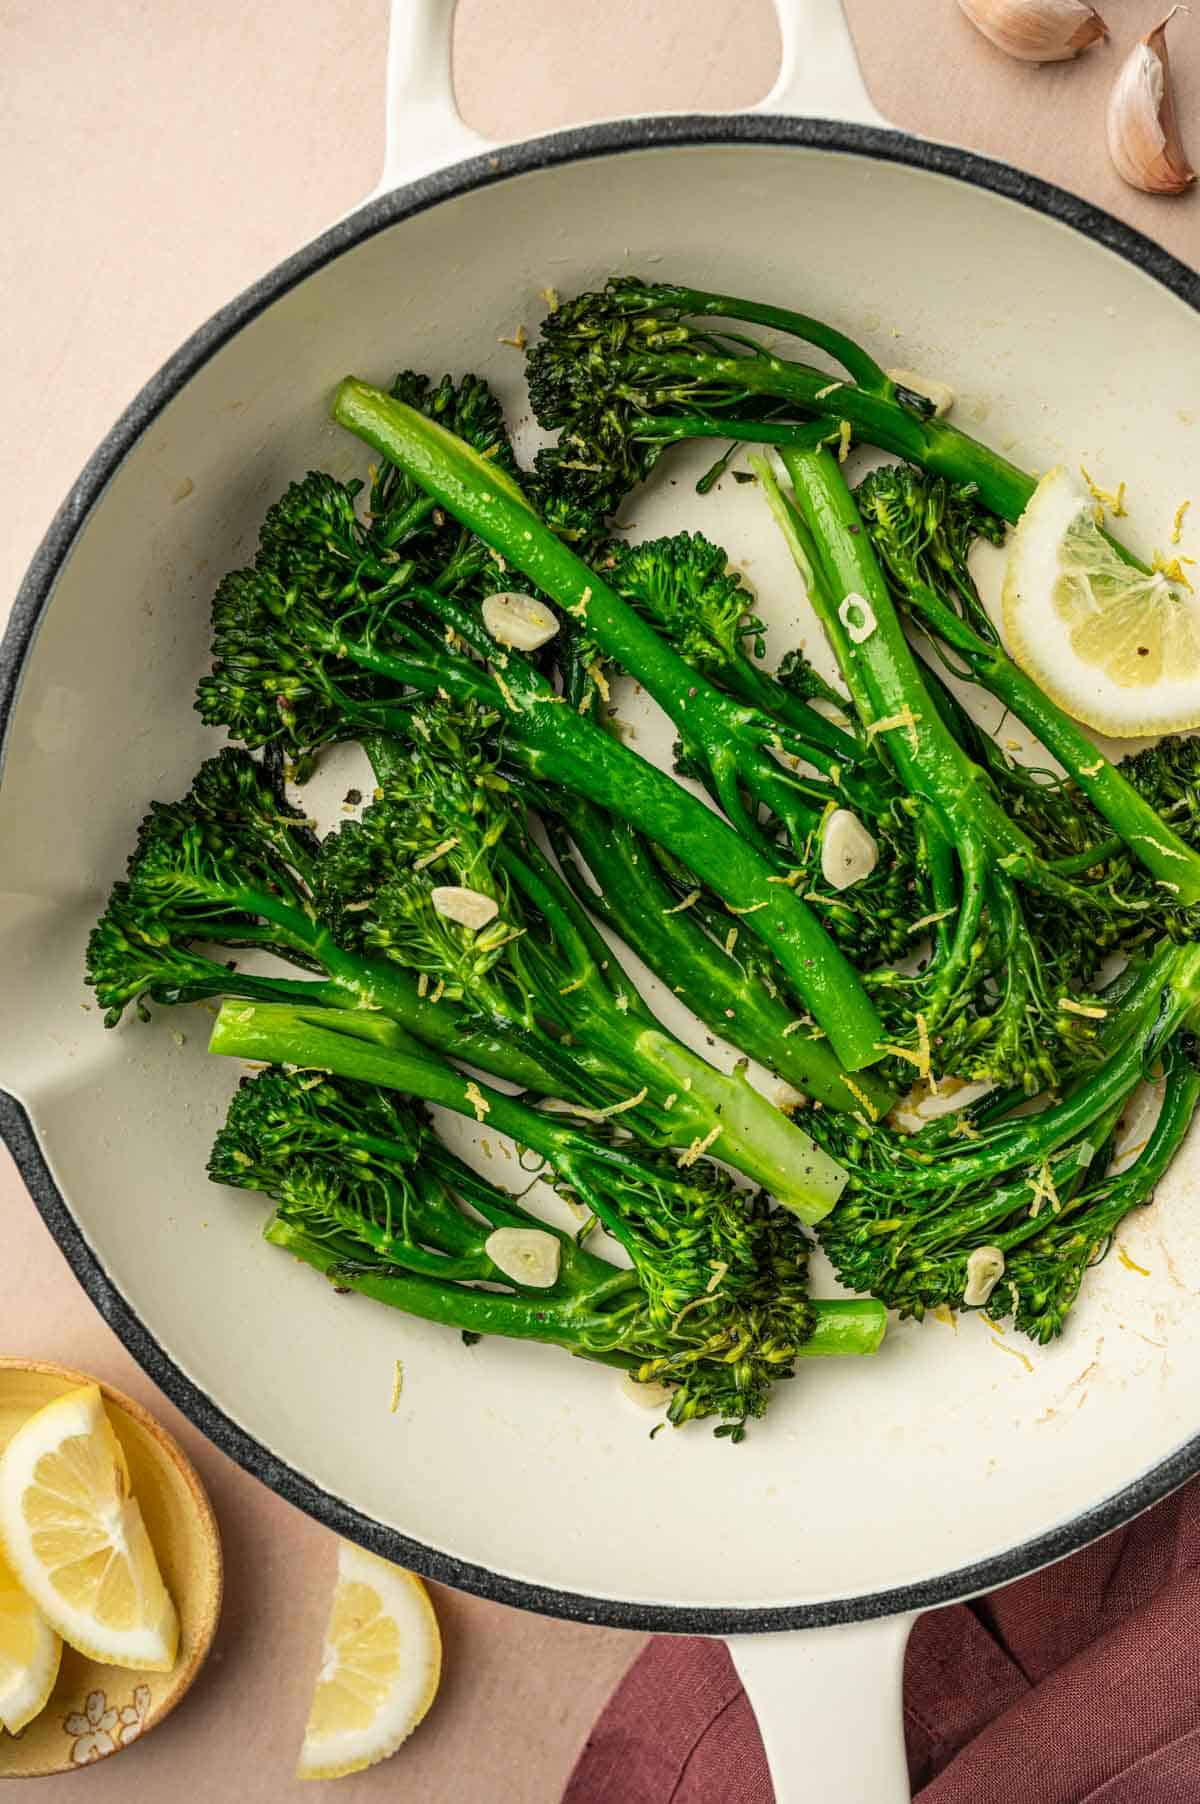
  • Sprinkle it with salt and black pepper. Drizzle lemon juice over the top along with lemon zest. You can also garnish with parmesan cheese as an optional step.
  • Transfer to a serving dish and serve warm as an easy side dish to enjoy.

Substitutions

  • Olive Oil: For this broccoletti recipe, you can use avocado oil or coconut oil if you don’t have olive oil.
  • Fresh Garlic: If you don’t have fresh garlic, you can use garlic powder instead. 
  • Black Pepper: If you want to add a bit more heat to this broccolini recipe, you can use red chili flakes instead of black pepper.

What to Serve with Broccoletti

You can serve this aromatic and delicious Broccoletti as a side dish with the following:

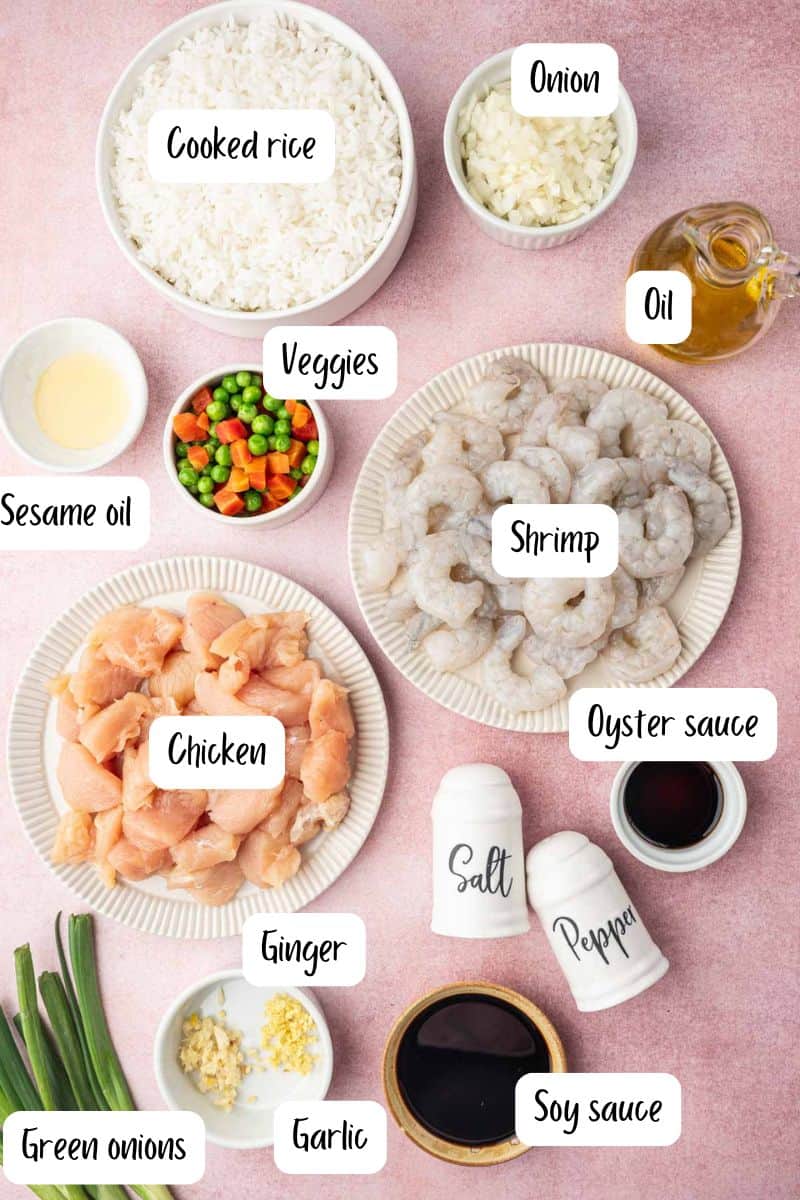
  • Chicken and Shrimp Fried Rice
  • Air Fryer BBQ Chicken Thighs
  • Teriyaki Chicken Thighs
  • Baked Lemon Pepper Chicken Thighs
  • Blackened Salmon Bites
Vibrant green broccoletti sautéed in olive oil with caramelized garlic.

Variations

You can make this broccolini recipe in many ways by swapping ingredients and equipment. Here are some ideas:

  • Balsamic Broccolini Recipe: If you want more umami flavors, you can use balsamic vinegar instead of lemon juice. When the broccolini is crisp, add a teaspoon of balsamic vinegar, stir for 30 seconds, and turn off the flame.
  • Hot Broccoletti: If you’re more of a spicy food lover, you can add red pepper flakes or peri peri sauce for the heat.
  • Air Fryer / Roasted Broccolini Recipe: For an air fryer version of this dish, you need to finely chop the garlic, mix it in olive oil and let it sit for 10 minutes. Brush the broccolini with garlic infused olive oil, arrange the broccolini in a single layer and cook in the air fryer. For roasted broccolini, switch to the oven instead of the air fryer following the same process and roasting the broccoli in baking sheet.

Equipment

  • Measuring Spoons - For precise measurement of ingredients like olive oil, salt, and pepper.
  • Large Skillet - To saute the broccoli.
Healthy sautéed broccoletti served as a side dish with pasta in a skillet

STORAGE AND REHEATING TIPS

Refrigerator - You can store the leftover Broccolett in an airtight container in the fridge for up to 3 days. Make sure to keep it in an air-tight jar.

Freeze - Do not freeze or it will lose the crunch and the crisp.

Reheat - You can reheat it on the stove or in the microwave. I recommend reheating it on the stove, in a skillet, for a crispy texture.

Top Tips for making perfect broccoletti

  • For this broccolini recipe, use a large skillet for this recipe so that you can saute the broccolini nice and crisp.
  • Do not overcrowd the pan or else the steam will make the broccoletti soggy
  • Do not overcook the garlic. Burnt taste from garlic will ruin the flavors and sweetness of broccoletti.
  • The finer you slice the garlic the more flavor it will release. Do not use garlic paste as it will stick to the pan and the broccoletti, becoming the dominant flavor of the dish.

FAQ

What’s the difference between broccoli and broccolini?

Broccolini has a milder and sweeter flavor as compared to broccoli. It's a cross between broccoli and gai-lan. 

How do you cook broccolini the tastiest way?

The tastiest way to cook broccolini is to sauté it with garlic or roast it in the oven. You can try the broccolini recipe given above for a tasty treat.

What does broccolini pair well with?

Broccolini is rich in fiber. So, it’s best paired with proteins like chicken dishes, beef steaks, pasta, quinoa bowls and other meat based dishes.

Is broccolini healthier than broccoli?

Both broccoli and broccolini have almost the same nutritional value.

What is broccoletti and is it the same as broccolini?

Broccoletti is often used interchangeably with broccolini, a hybrid vegetable that combines broccoli and Chinese broccoli. While the names can vary by region, they are generally the same for cooking purposes.

How do you cook broccolini on the stovetop?

To cook broccolini on the stovetop, sauté it in olive oil over medium heat for about 6–10 minutes until tender and slightly crispy. Adding garlic enhances the flavor.

Do you need to blanch broccolini before sautéing?

No, blanching is not required. You can sauté broccolini directly, but blanching for 1–2 minutes can help soften thicker stems if needed.

How do you know when broccolini is done cooking?

Broccolini is done when it is tender-crisp, bright green, and lightly browned on the edges.

What does broccolini taste like?

Broccolini has a mild, slightly sweet flavor with less bitterness than regular broccoli, making it a versatile and easy-to-enjoy vegetable.

Overhead shot of cooked broccoletti with golden garlic slices in a white plate.

Related

Looking for other recipes like this? Try these:

  • Pumpkin mug cake topped with melted chocolate chips in a white mug, quick fall dessert recipe
    Easy Pumpkin Mug Cake Recipe with chocolate chips
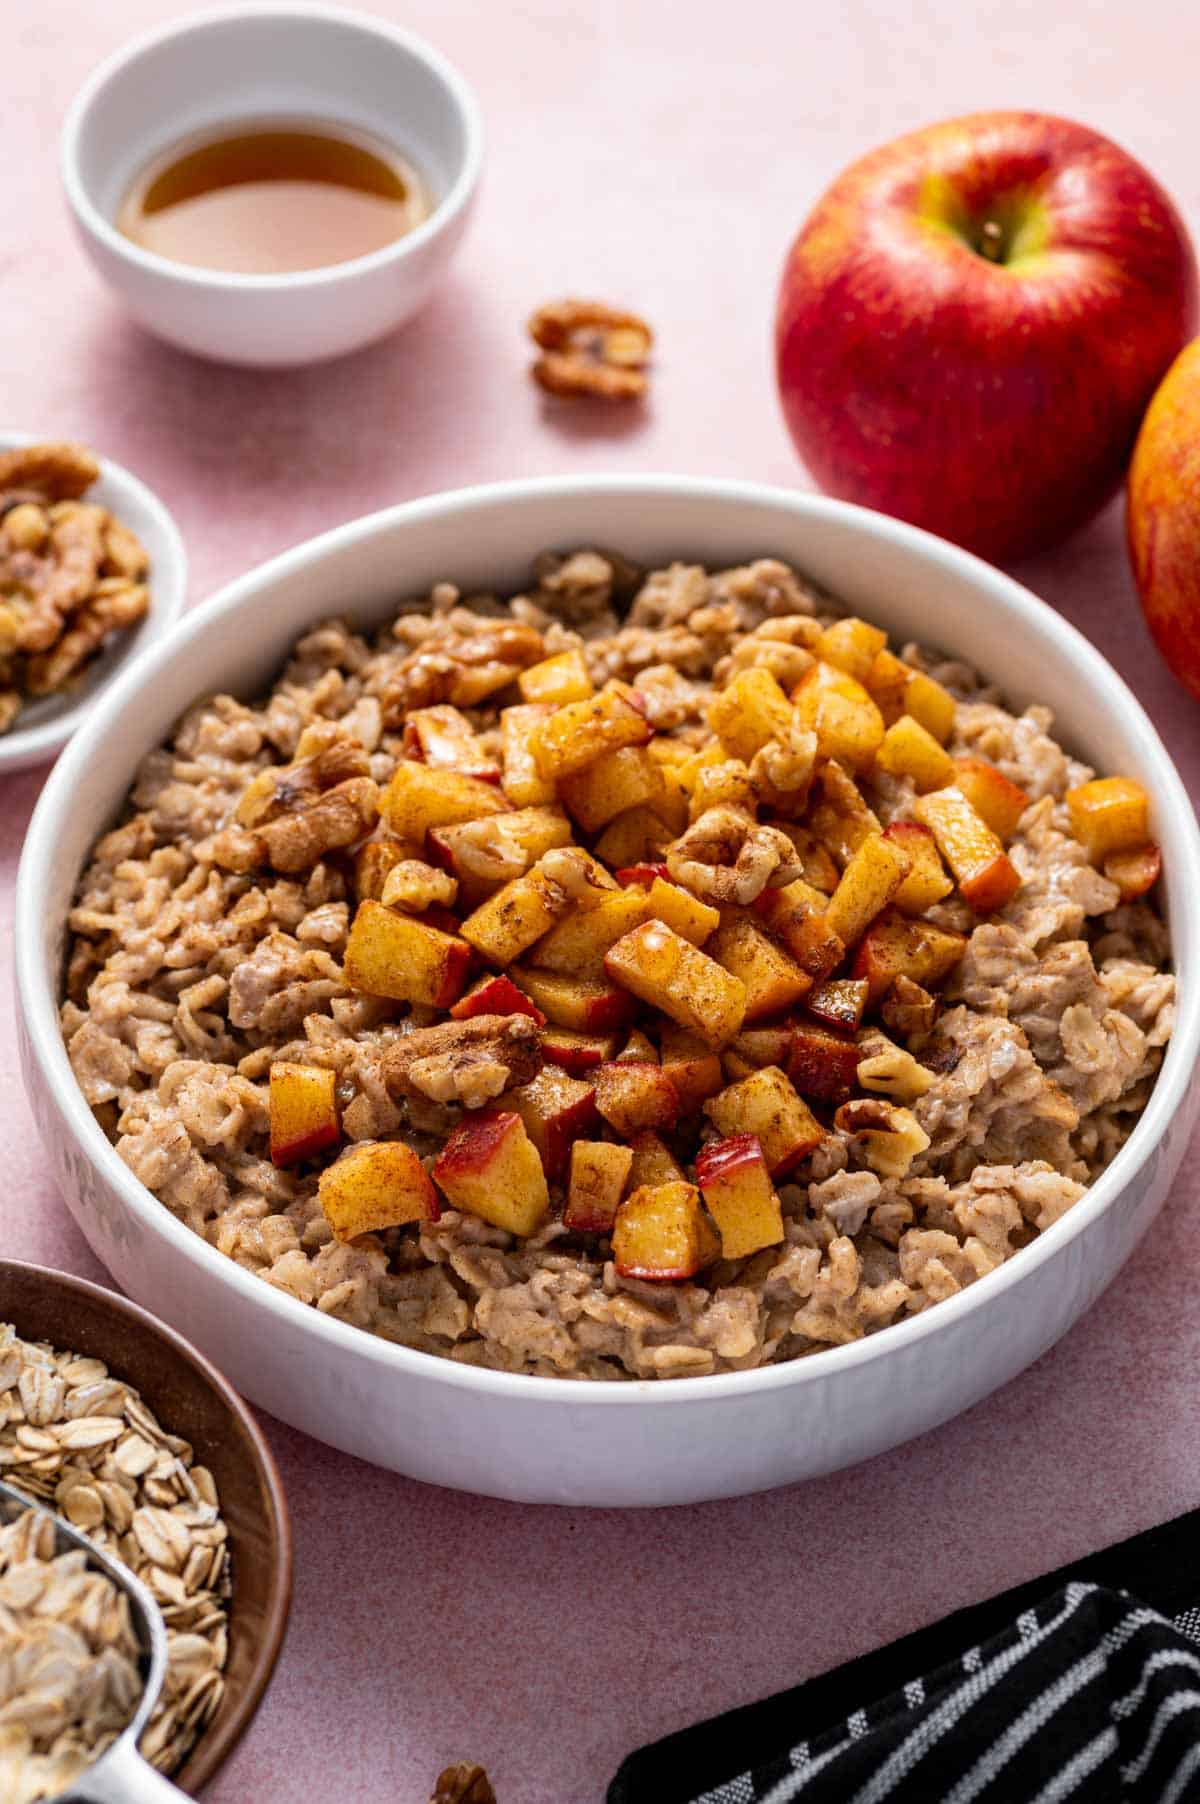
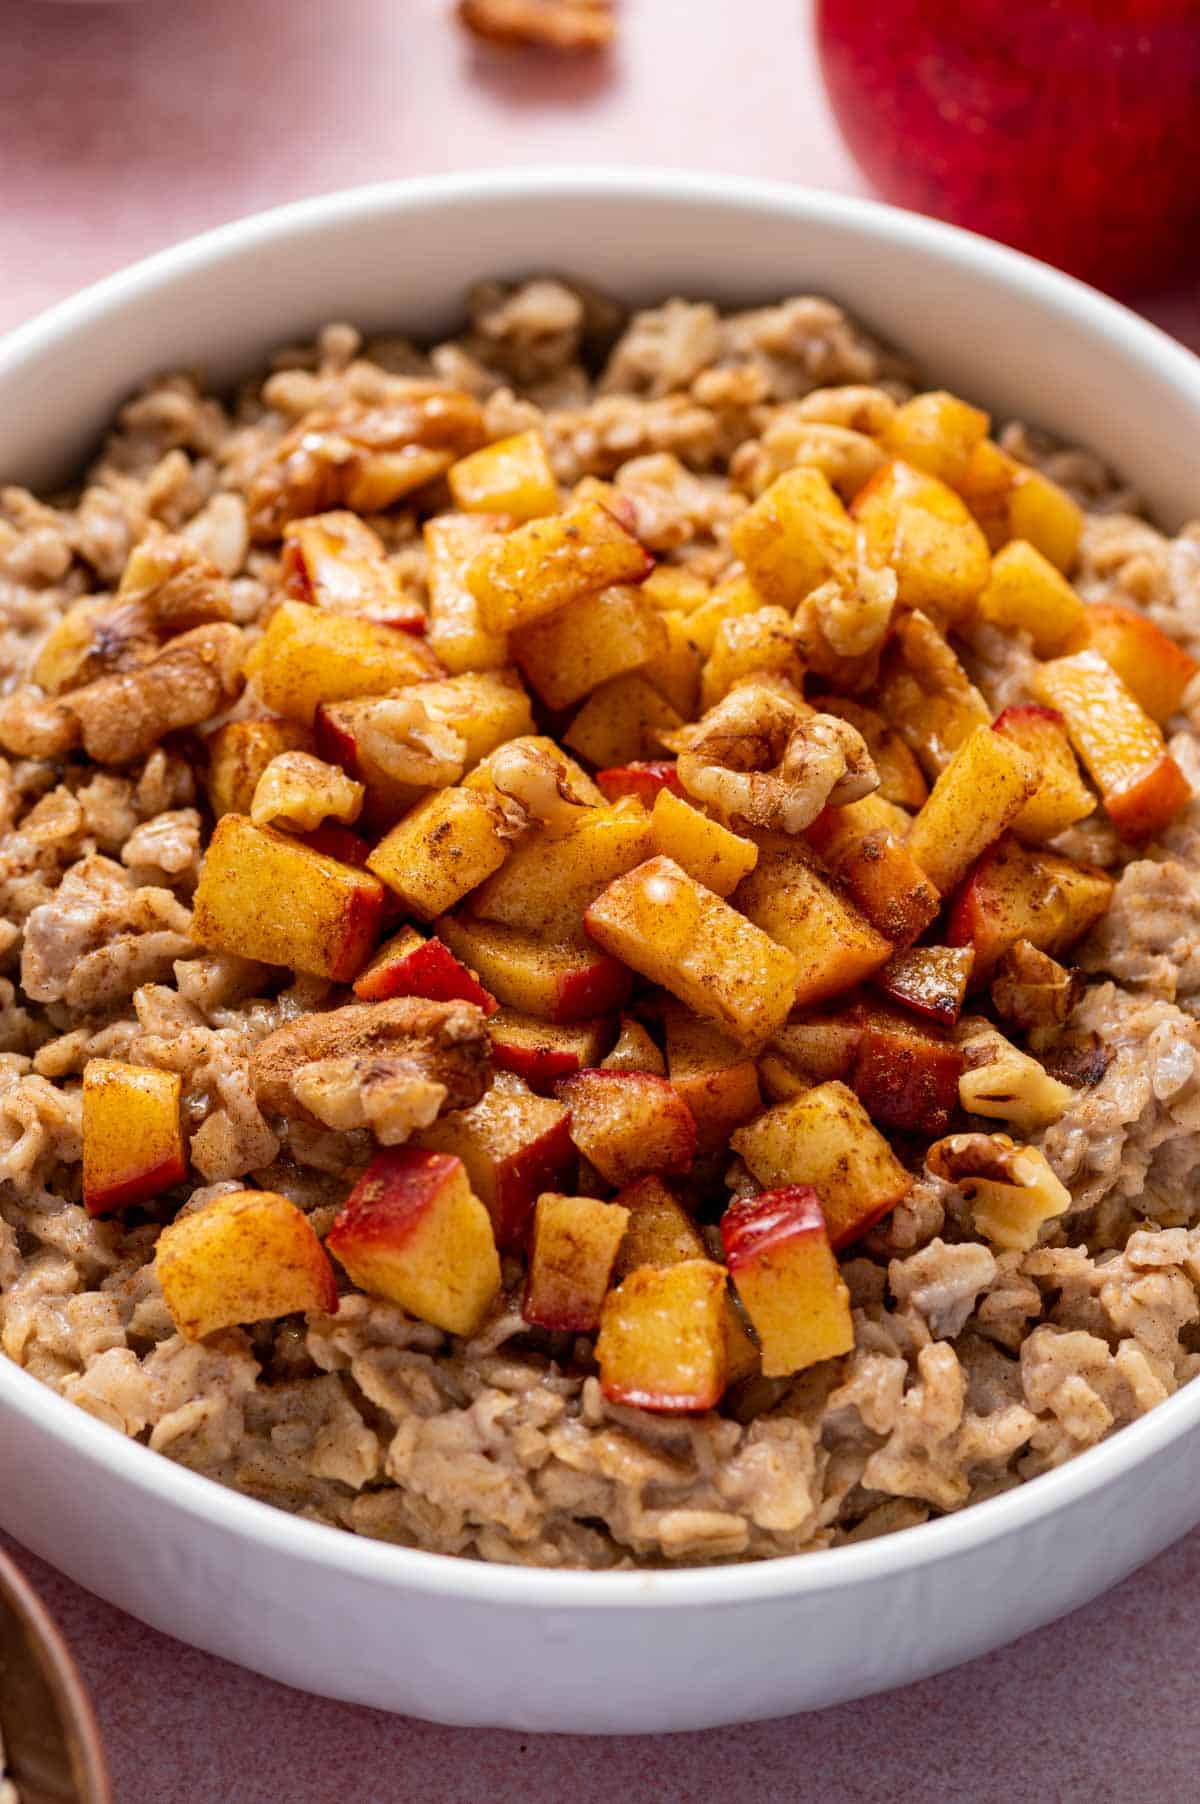
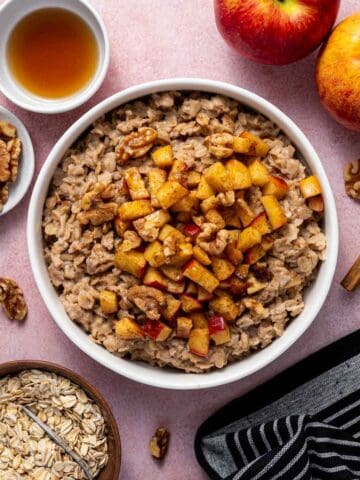
  • Overhead shot of apple cinnamon oatmeal with maple drizzle, walnuts, apples, etc.,
    Apple Cinnamon Oatmeal Recipe (Stovetop, 10 Minutes)
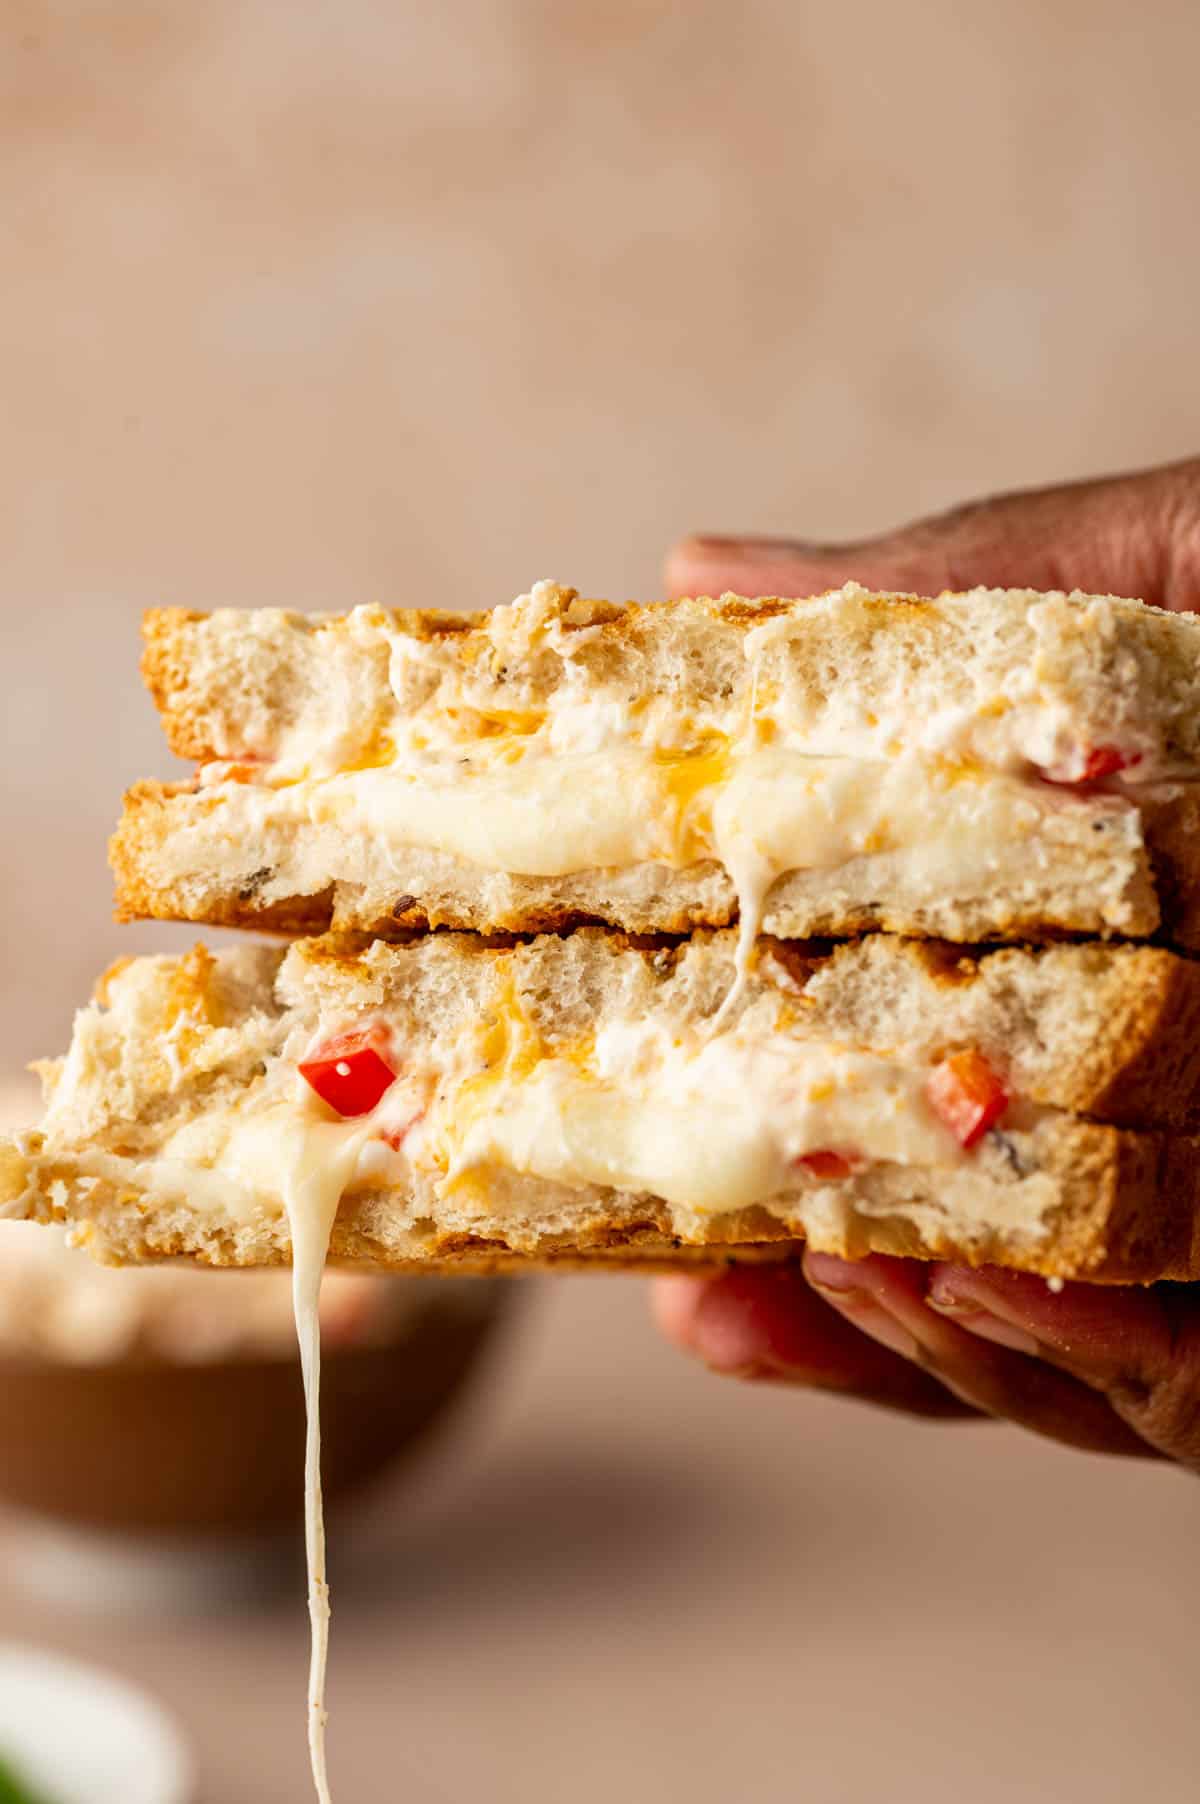
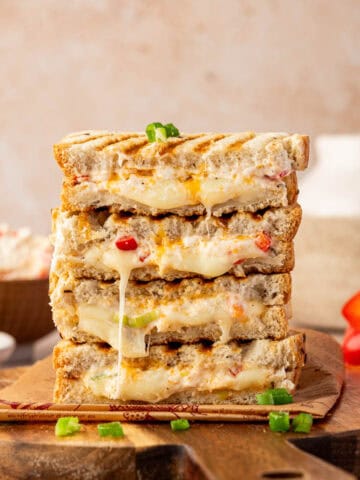
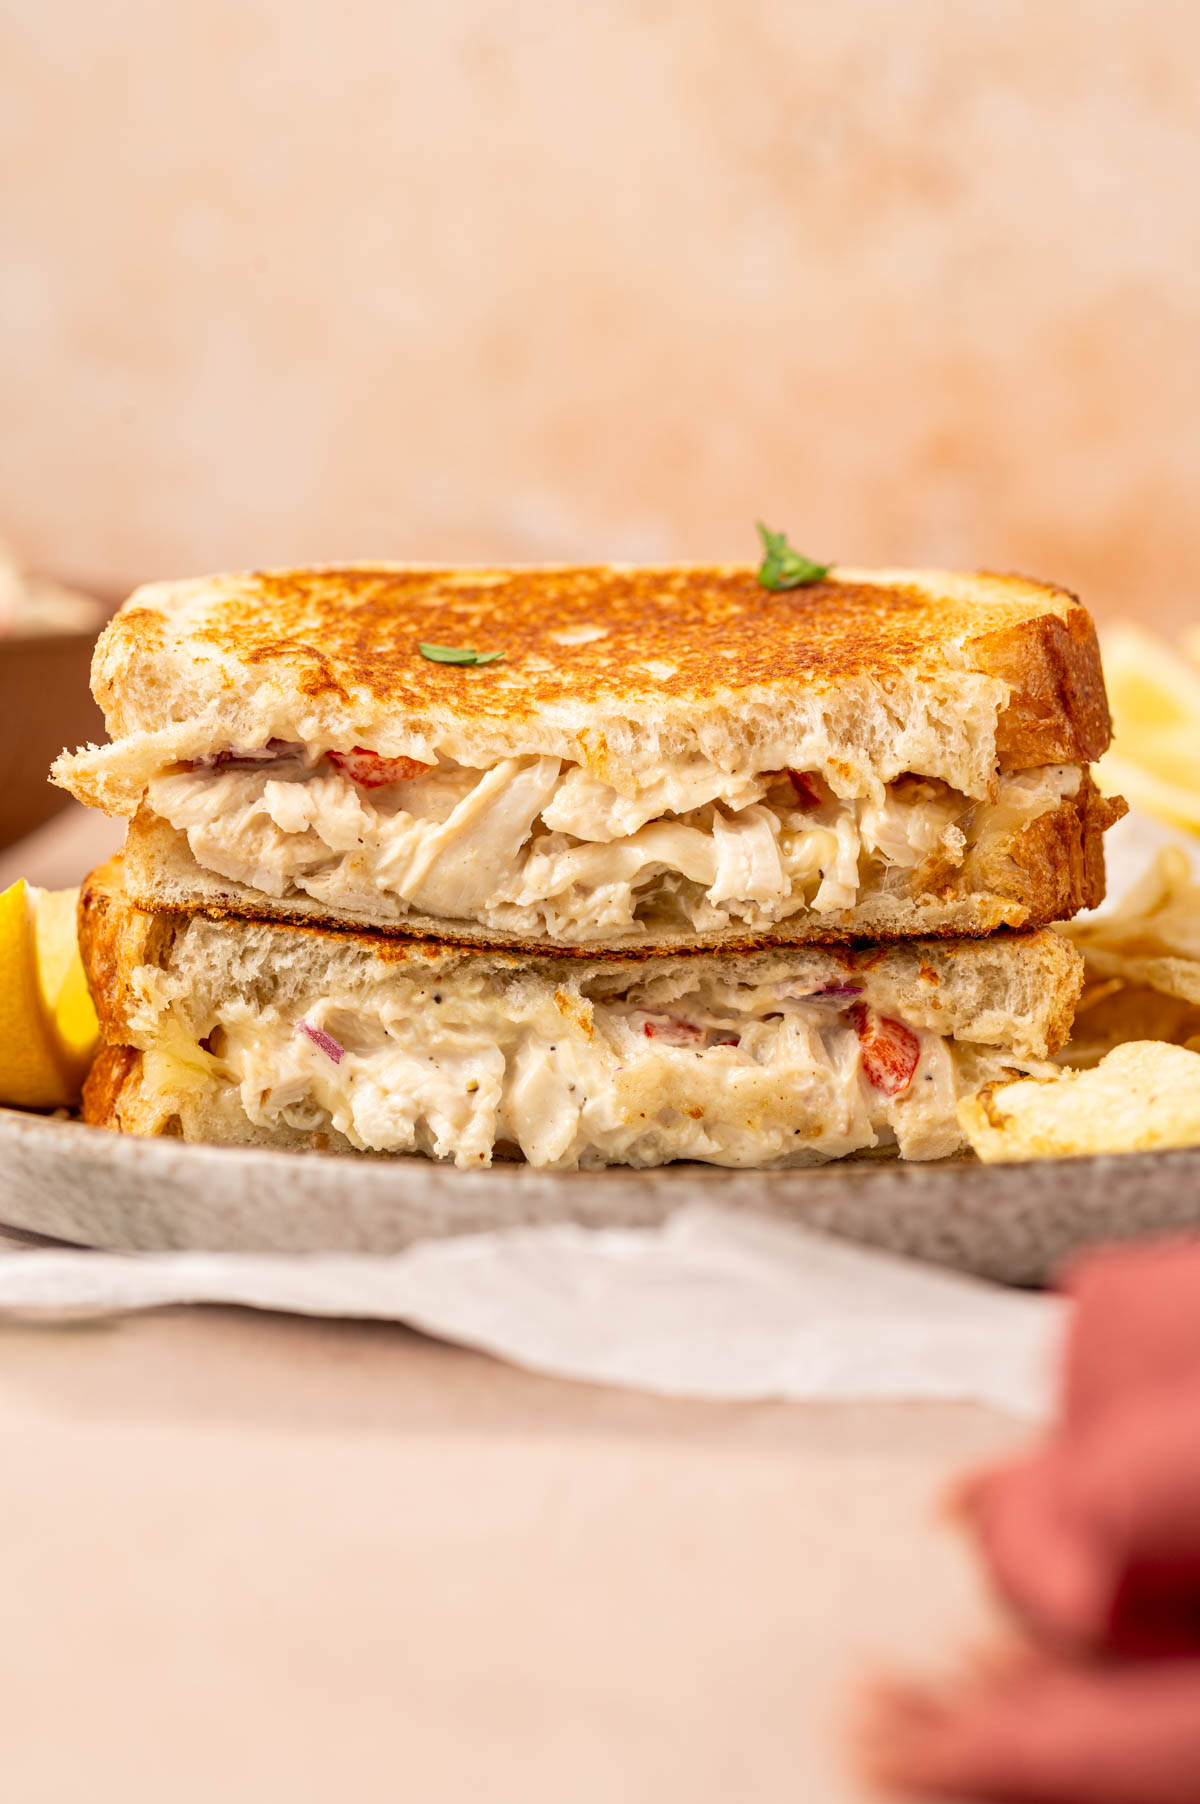
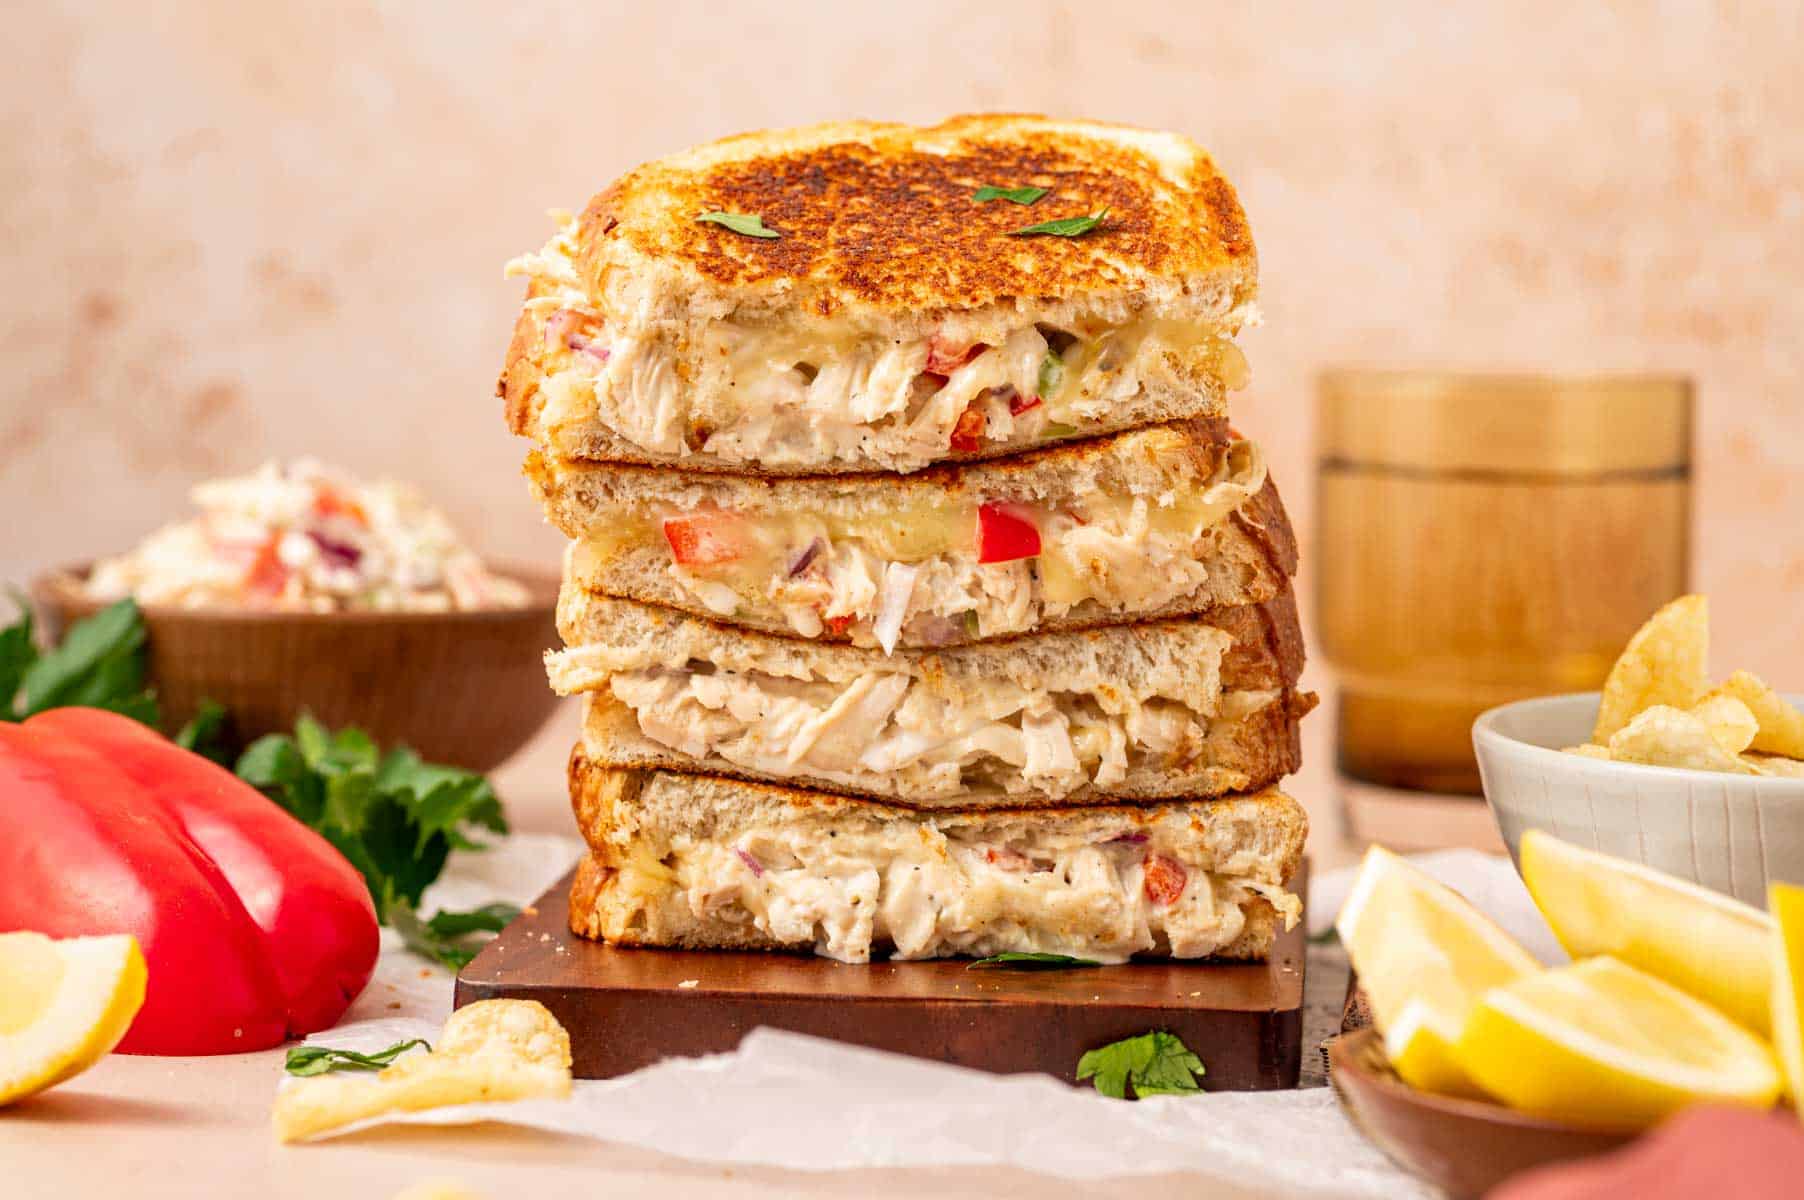
  • Crispy toasted bread sandwich filled with melted cream cheese and diced bell peppers.
    Grilled Cream Cheese Sandwich With Bell Peppers
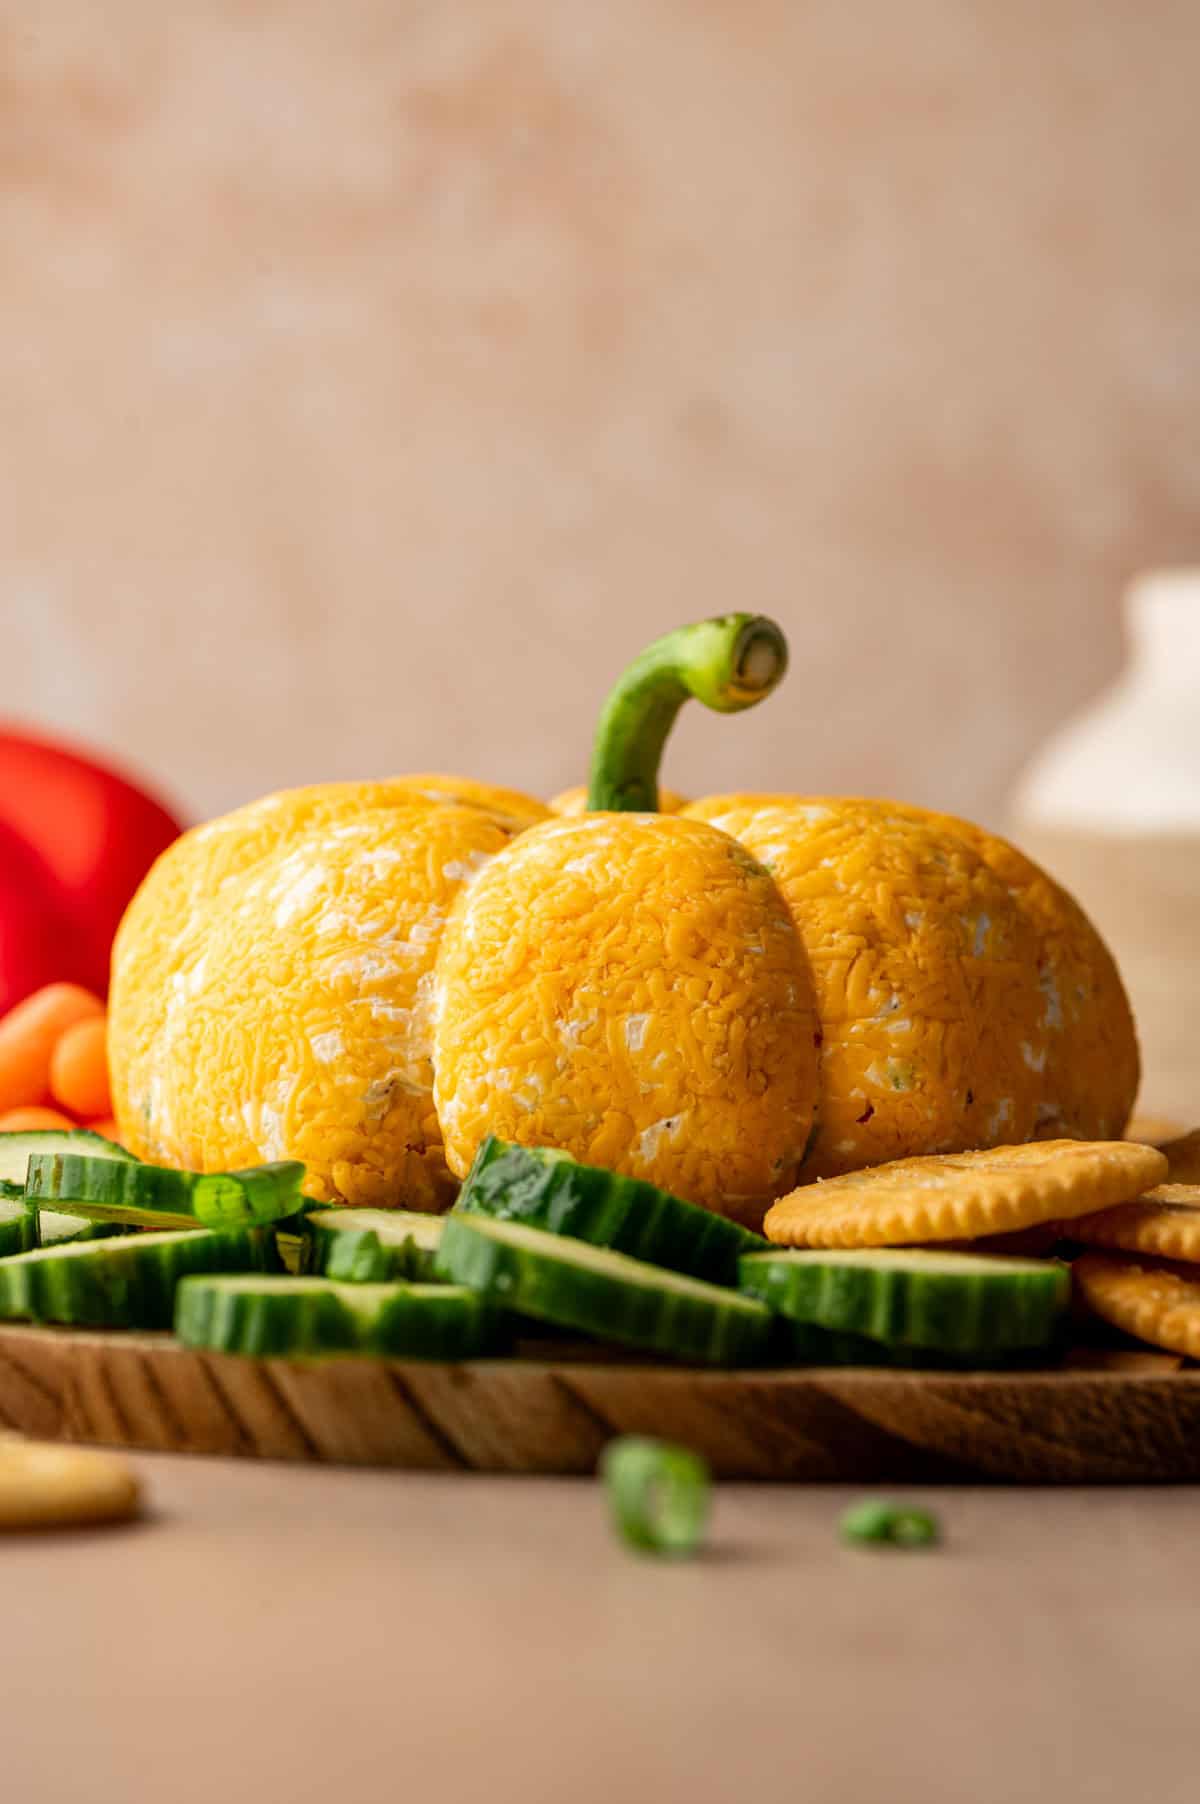
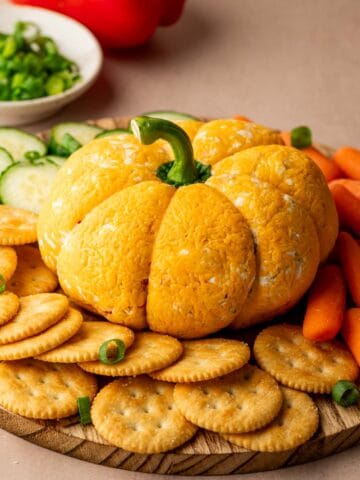
  • A festive pumpkin-shaped cheese ball coated in cheddar cheese, served on a platter with crackers.
    Pumpkin Cheese Ball Best Appetizer (Pumpkin-Shaped)

Pairing

These are my favorite dishes to serve with this sauteed broccoletti recipe:

  • Several Halloween brownies topped with marshmallow ghosts, chocolate drizzle, and black eyes on a rustic marble tray.
    Halloween Brownies (Easy Ghost Brownies)
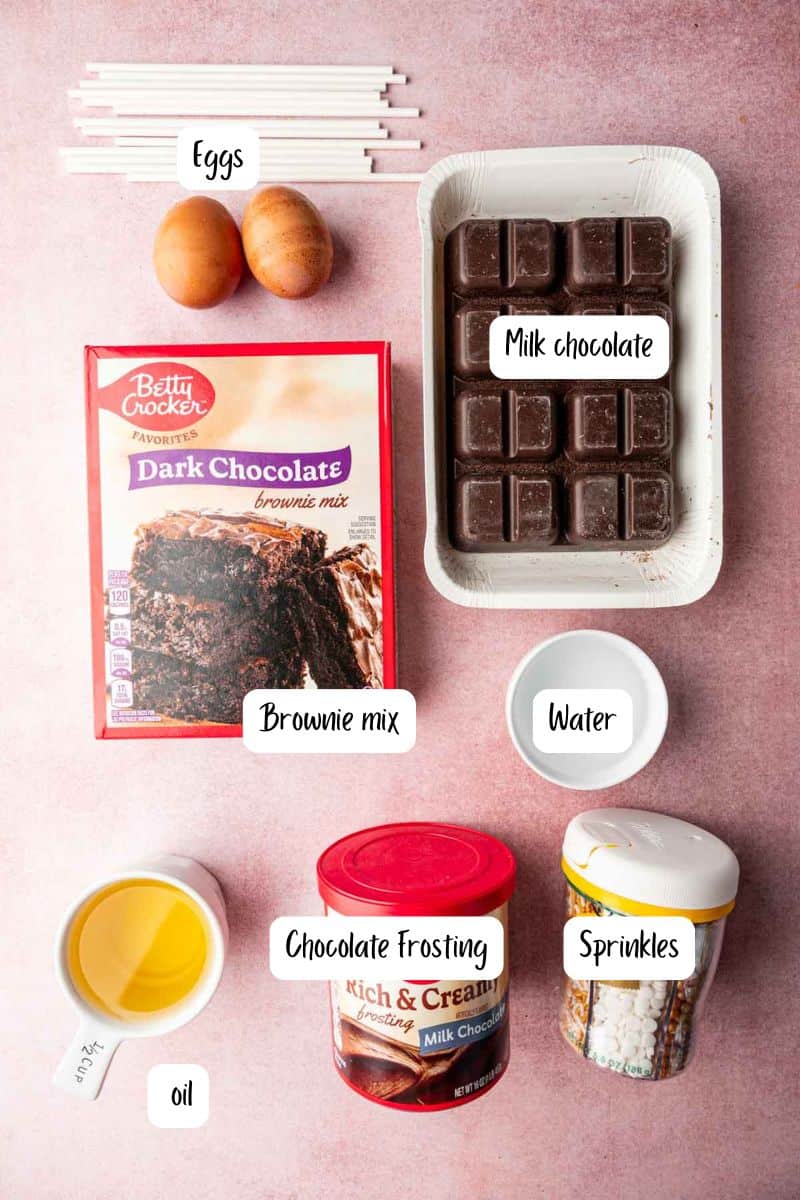
  • Brownie cake pops with festive drizzle and sprinkles displayed upright with sticks.
    Brownie Cake Pops Recipe (Easy chocolate treat)
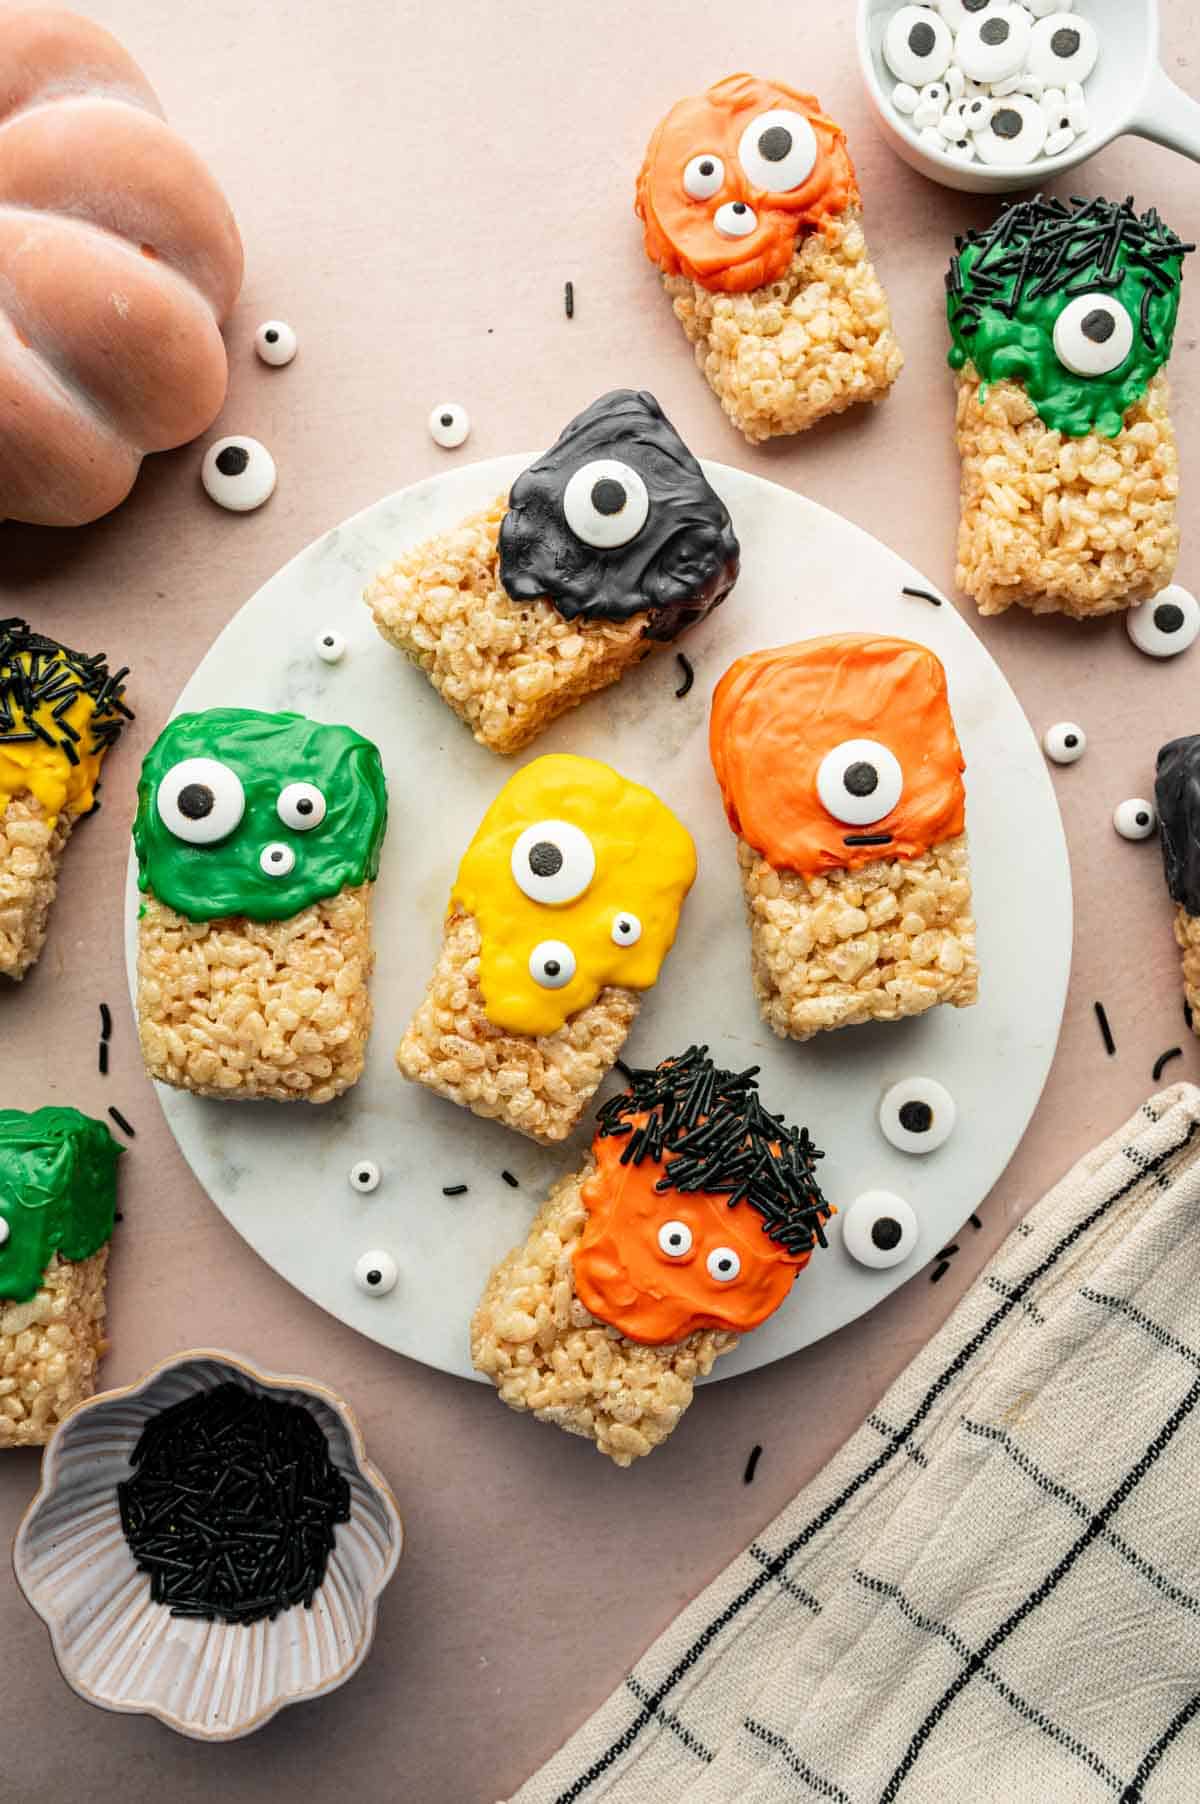
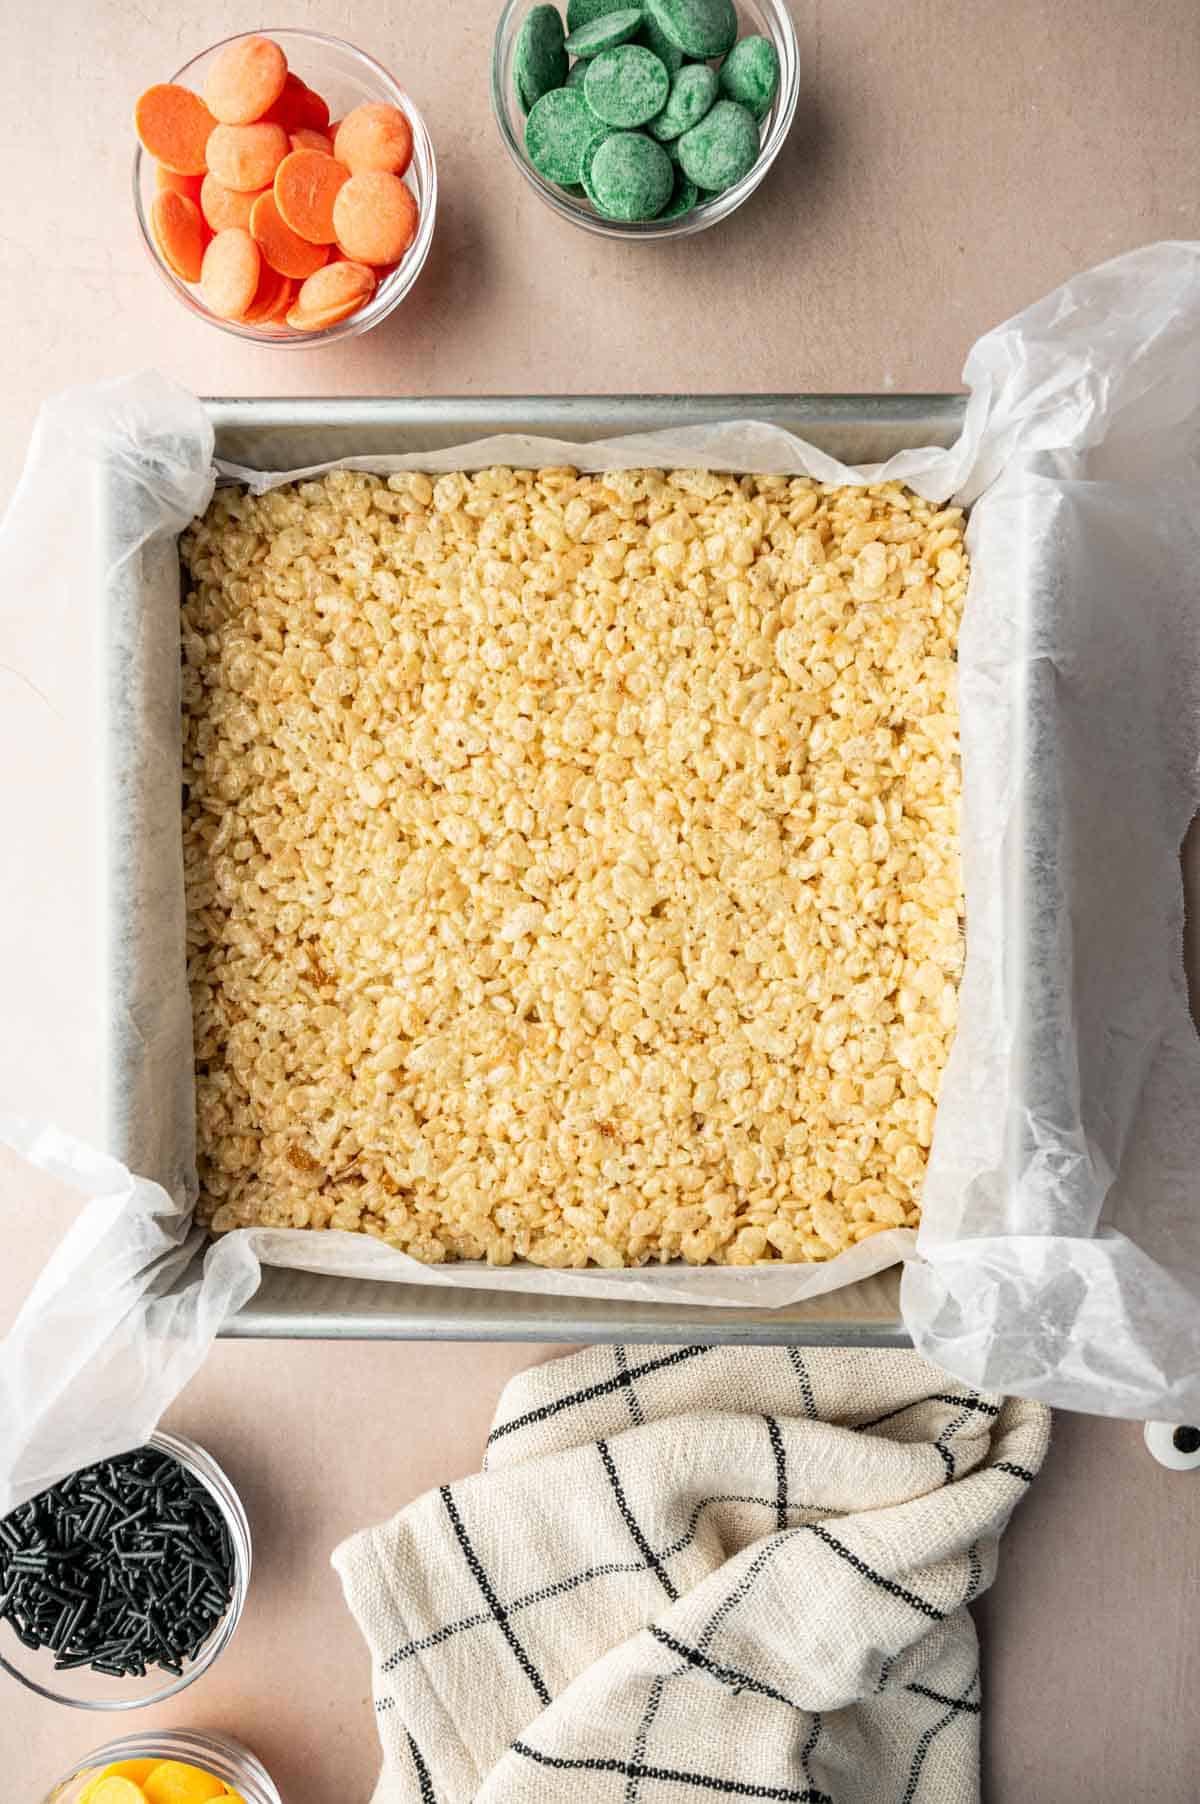
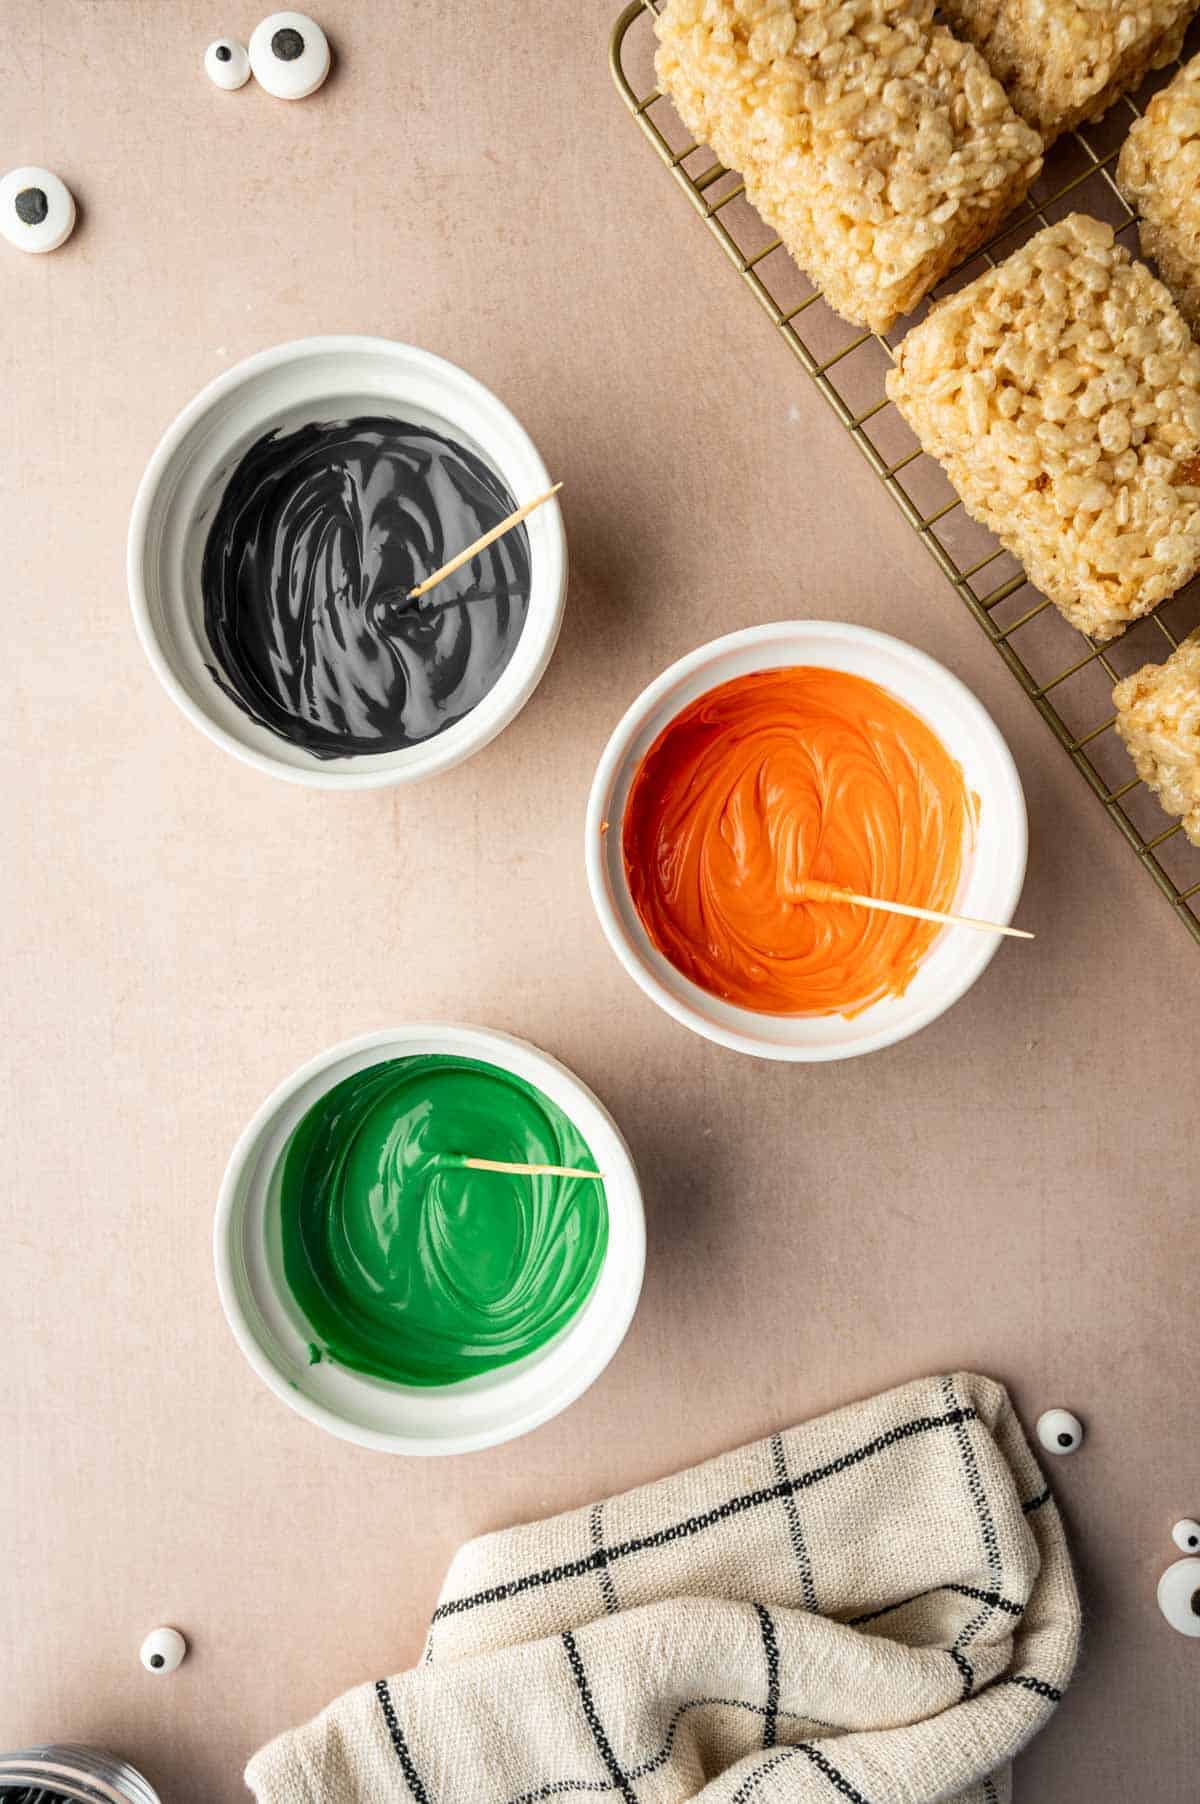
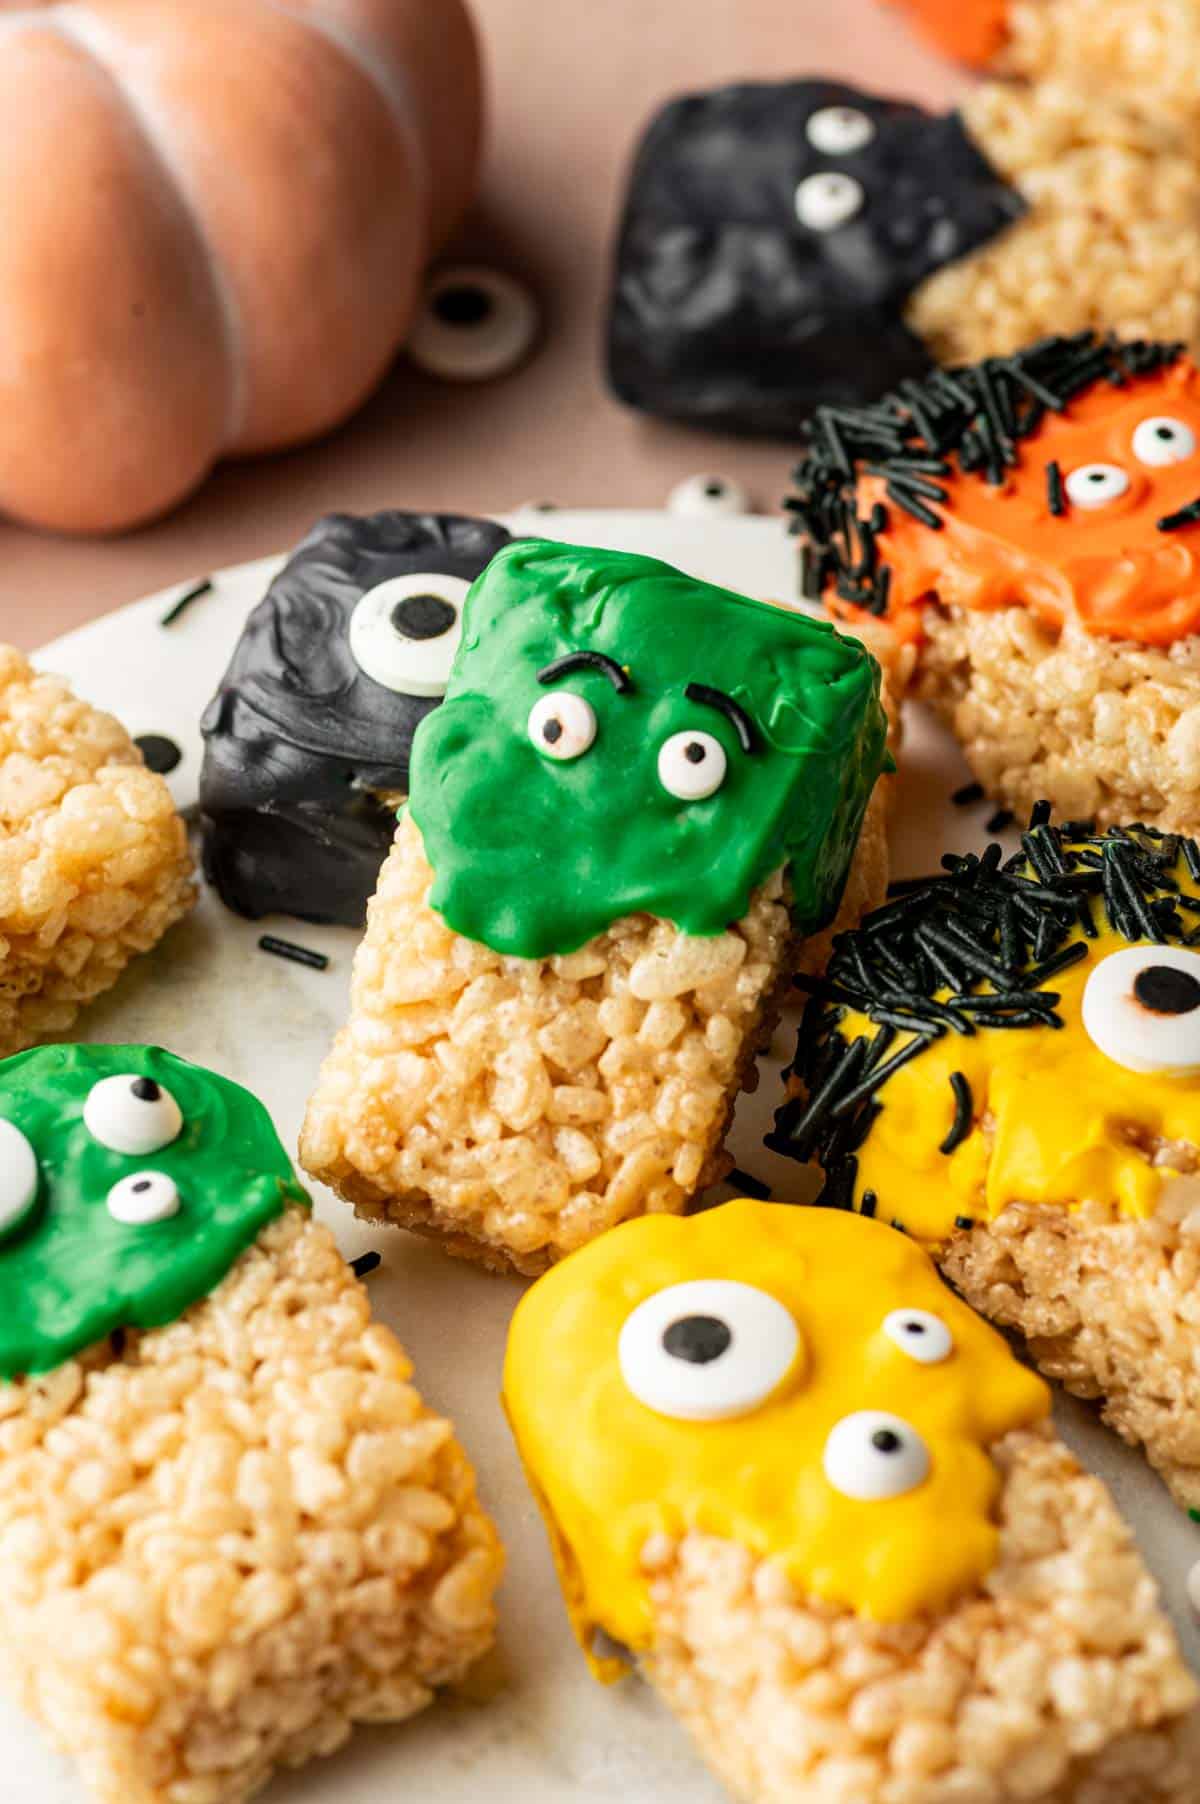
  • Close-up of Halloween Rice Krispie Treats decorated with candy eyes and drizzled with orange and black chocolate.
    Halloween Rice Krispie Treats (Easy Homemade Treat)
  • Mini pumpkin-shaped hand pies with a golden crust, arranged on a marble plate.
    Pumpkin Hand Pies with pumpkin cream cheese filling

If you tried this Broccoletti Recipe (sautéed broccolini with garlic)  recipe or any other recipe from my blog, I’d love to hear your thoughts! ⭐ Please leave a STAR rating and share your experience in the COMMENTS below. Your support means so much and helps me continue creating delicious recipes. Thank you for being part of this journey!

Sautéed broccoletti with garlic in a white cast iron skillet

Sautéed Broccoletti with garlic and lemon

Abi Guna
This easy Broccoletti recipe features tender broccolini sautéed with garlic and olive oil for a simple, flavorful Italian side dish. Ready in under 15 minutes, it’s the perfect healthy vegetable pairing for pasta, chicken, or seafood.
5 from 9 votes
Print Recipe Pin Recipe
Prep Time 5 minutes mins
Cook Time 10 minutes mins
Total Time 15 minutes mins
Course Side Dish
Cuisine American, Italian
Servings 4 people

Equipment

  • Sharp Knife
  • Measuring Spoons
  • Large Skillet

Ingredients
  

  • 1 bunch broccolini aka broccoletti, ends trimmed
  • 2 tablespoons olive oil
  • 4 garlic cloves thinly sliced
  • ½ teaspoon salt
  • ½ teaspoon freshly cracked black pepper
  • 2 tablespoons water
  • 1 tablespoon lemon juice
  • ½ teaspoon fresh lemon zest

Instructions
 

  • Rinse the broccolini and trim the woody ends. Pat dry with a clean towel.
  • Heat olive oil in a large skillet over medium heat. Add the sliced garlic and sauté for about 1–2 minutes until golden and fragrant, be careful not to burn it.
  • Toss in the broccoletti and sauté for 2-3 minutes, sprinkle the 2 tablespoons of water and close with the lid. Cook for 4-5 minutes, turning occasionally, until tender and slightly crispy at the edges.
  • Sprinkle it with salt, and black pepper. Drizzle lemon juice over the top along with lemon zest.
  • Transfer to a serving dish and serve warm.

Notes

  1. Trim the ends of the broccolini to remove any tough or woody stems for better texture.
  2. Don’t overcook the garlic, sauté just until golden to avoid bitterness.
Keyword Healthy, side dish

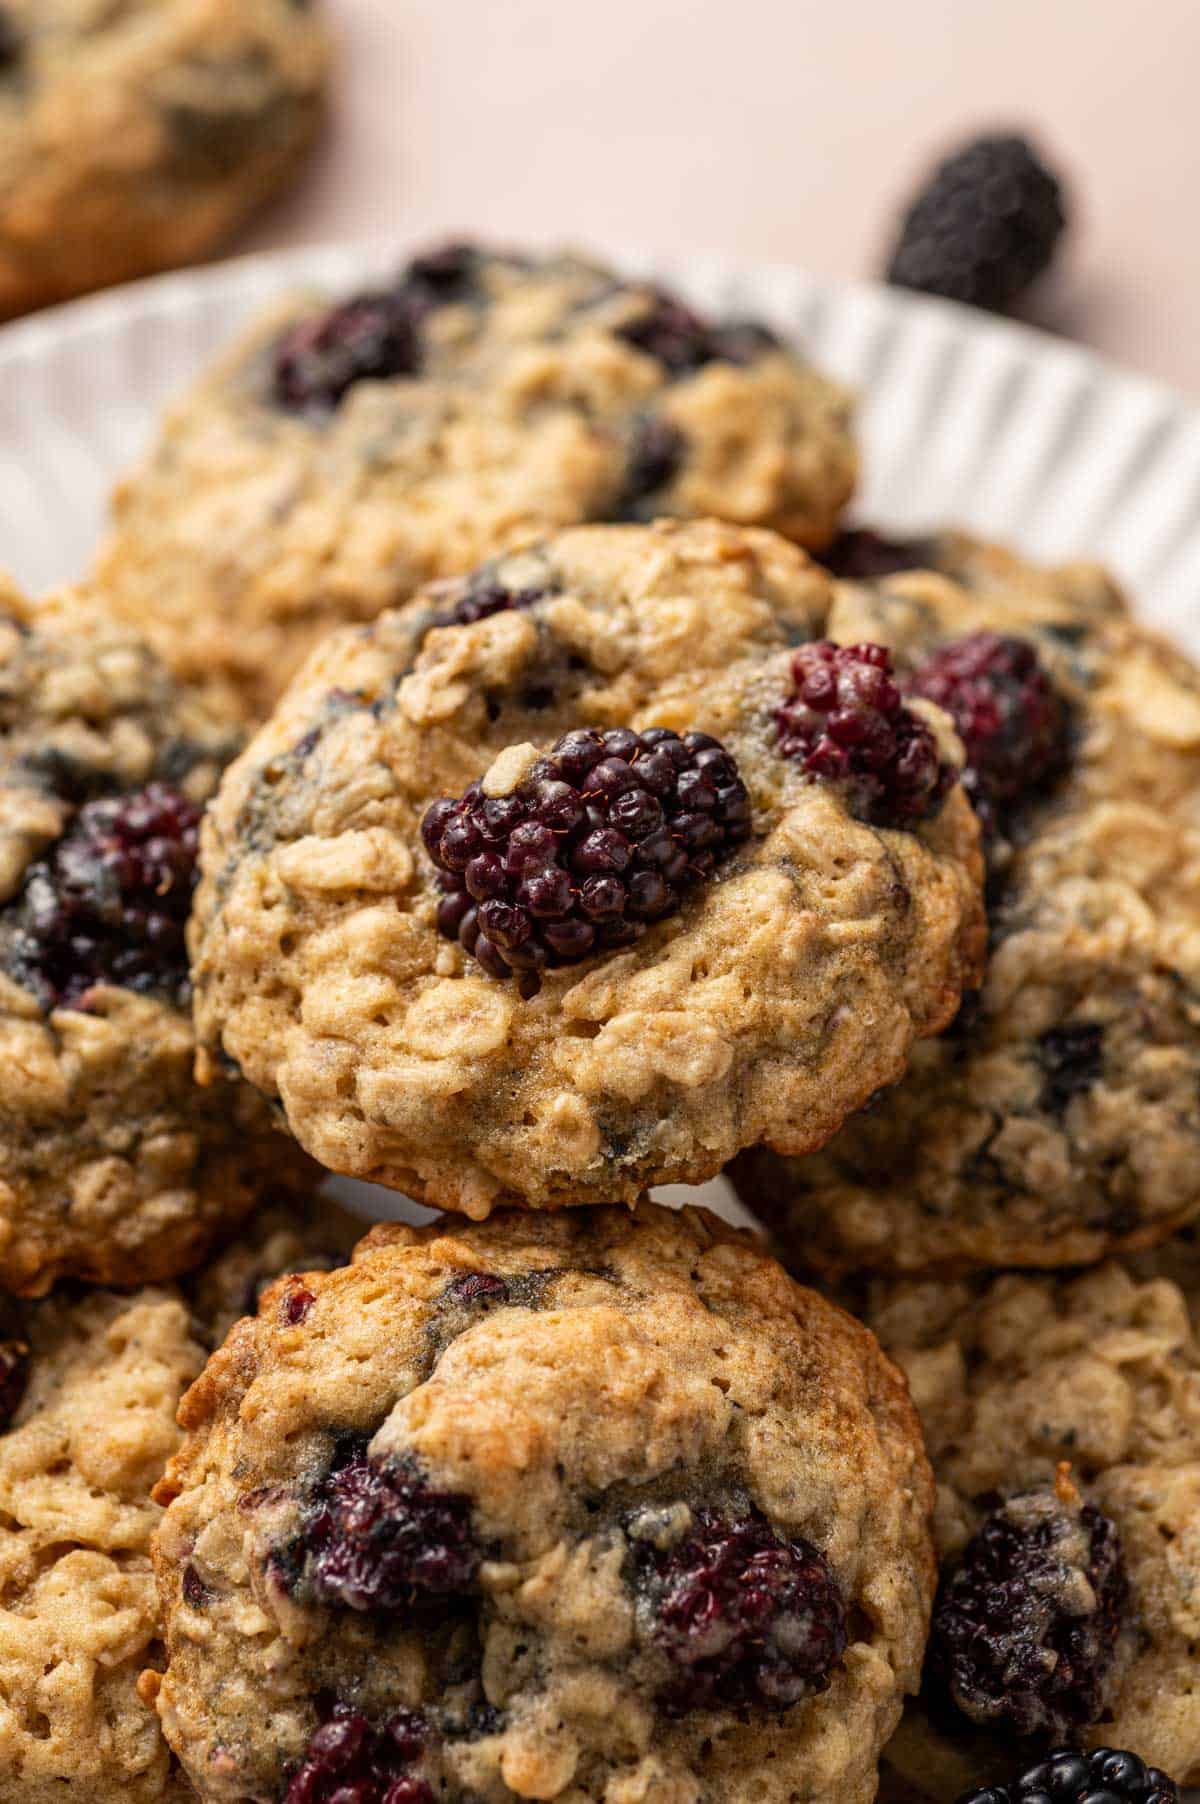
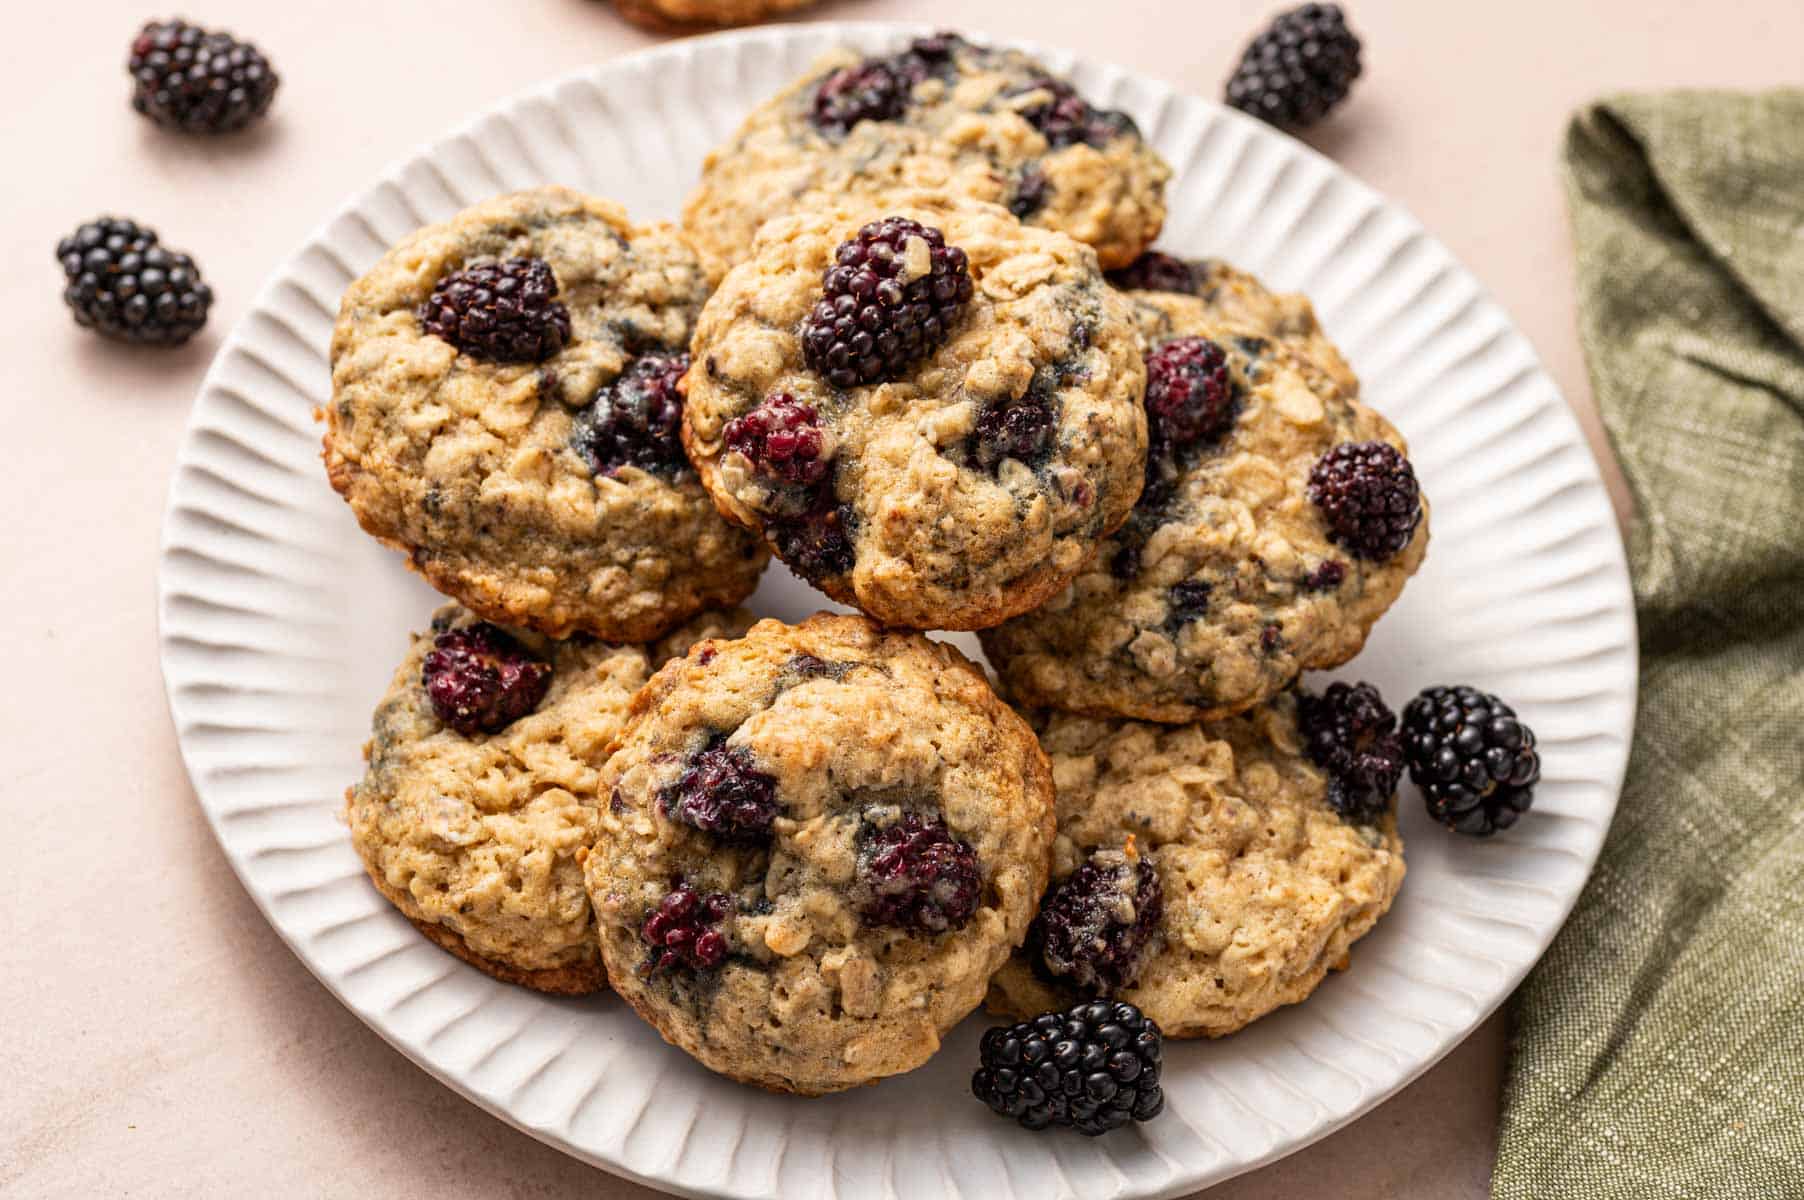
Blackberry Oatmeal Cookies recipe with fresh berries

July 14, 2025 by Abi Guna 15 Comments

If you're looking for a soft-baked, wholesome cookie that doubles as a grab-and-go breakfast, these Blackberry Oatmeal Cookies are a must-try! Made with hearty rolled oats and juicy fresh blackberries, they’re naturally sweet, lightly crisp on the edges, and tender in the center. Berries and oats are such a wonderful combination!

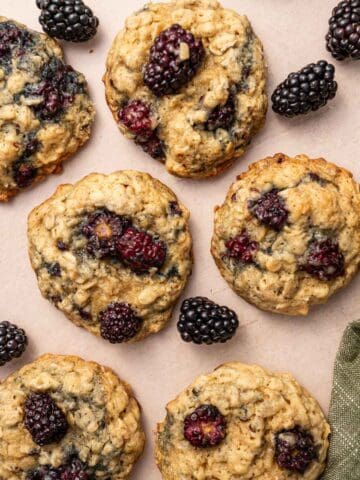
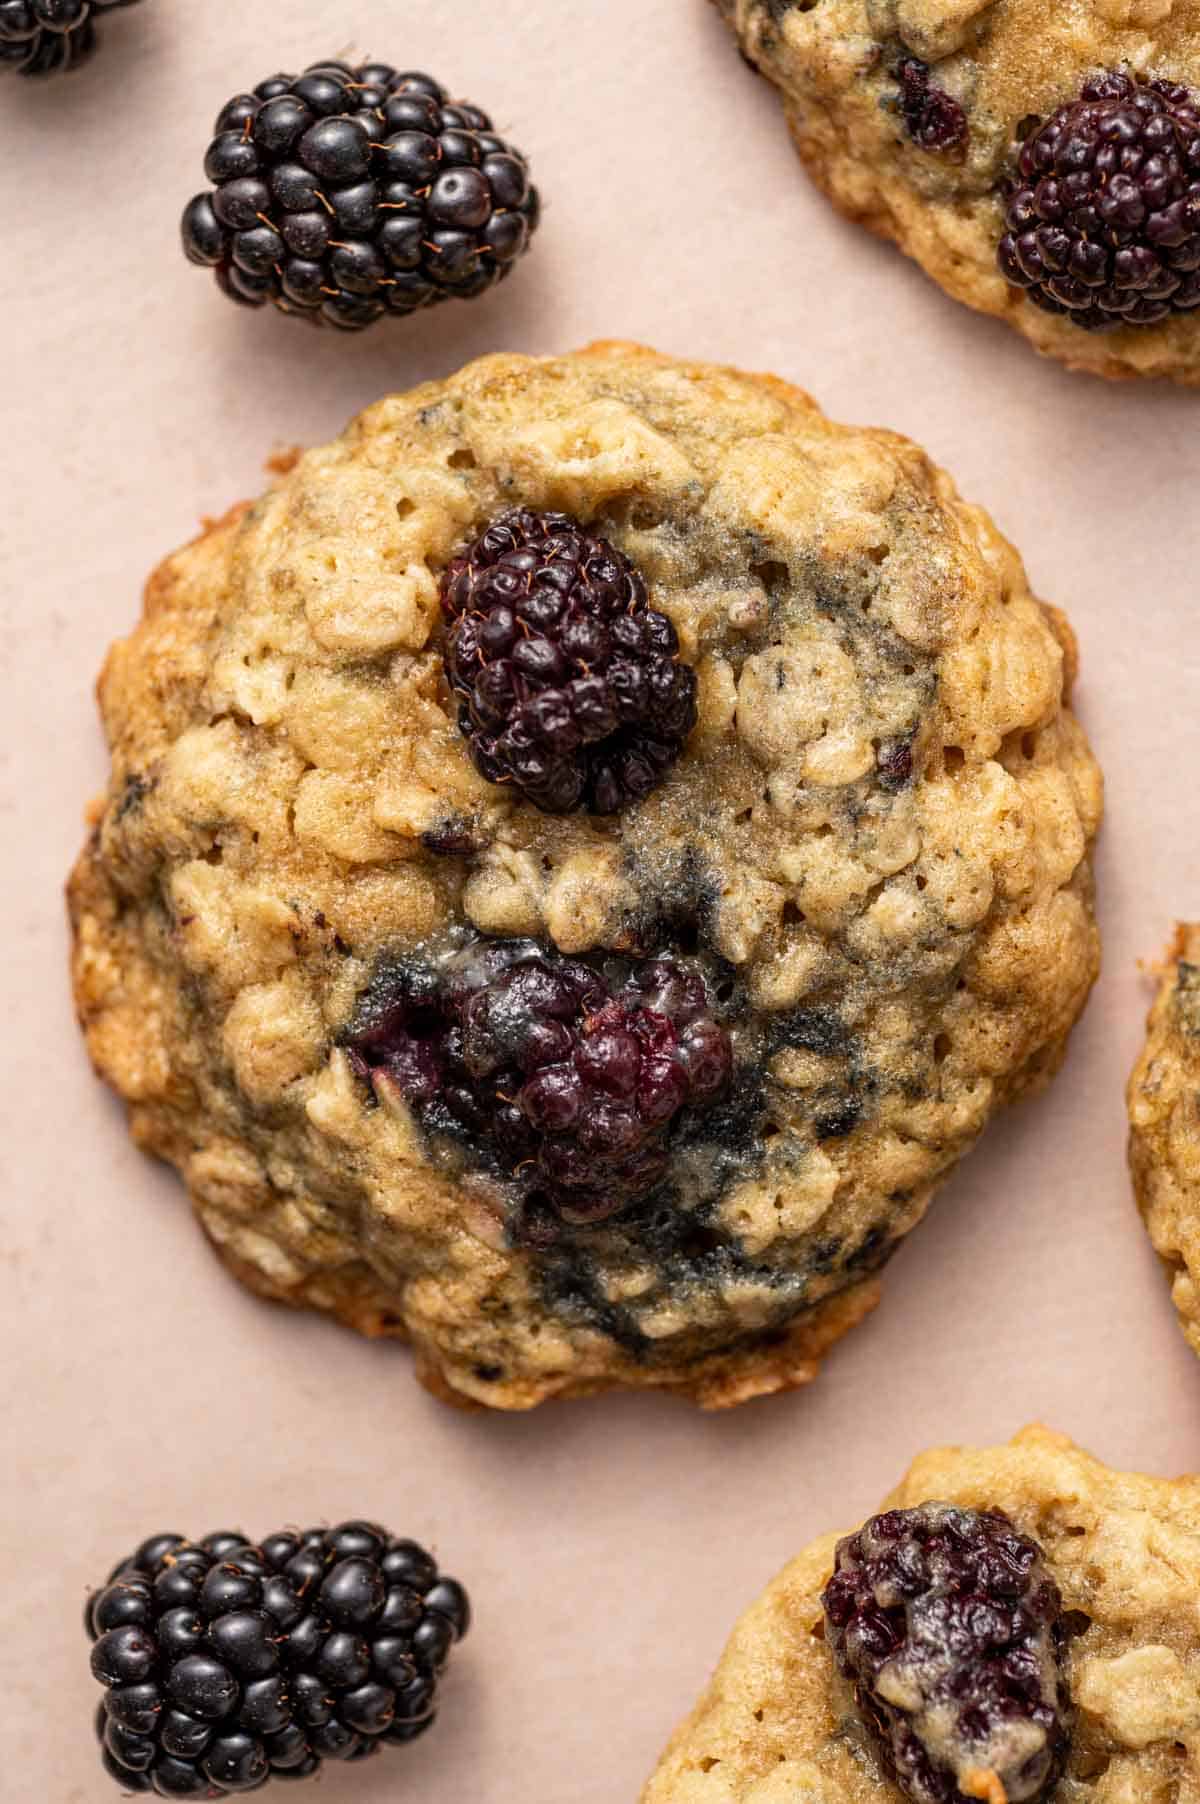
Overhead shot of homemade blackberry oatmeal cookies with fresh berries around.

 I might just need to start a whole section dedicated to my love for oats, they’ve become a pantry staple in so many of my breakfast and baking recipes here on the blog! These cookies are just perfect as a snack or a morning bite with your coffee, they’re a lovely way to enjoy seasonal berries.

If you're an oatmeal lover like me, don’t stop with just cookies! These Blackberry Oatmeal Muffins are another berry-packed favorite, soft, fluffy, and perfect for breakfast or a snack. For something quick and warm, try my 2-minute Oatmeal Mug Cake, it’s cozy, satisfying, and made right in the microwave. And when you’re craving something sweet and chewy, my Oatmeal Butterscotch Cookies bring the perfect blend of hearty oats and gooey caramel-like bites. These recipes prove oats are far from boring and they’re incredibly versatile and always delicious!

[feast_advanced_jump_to]
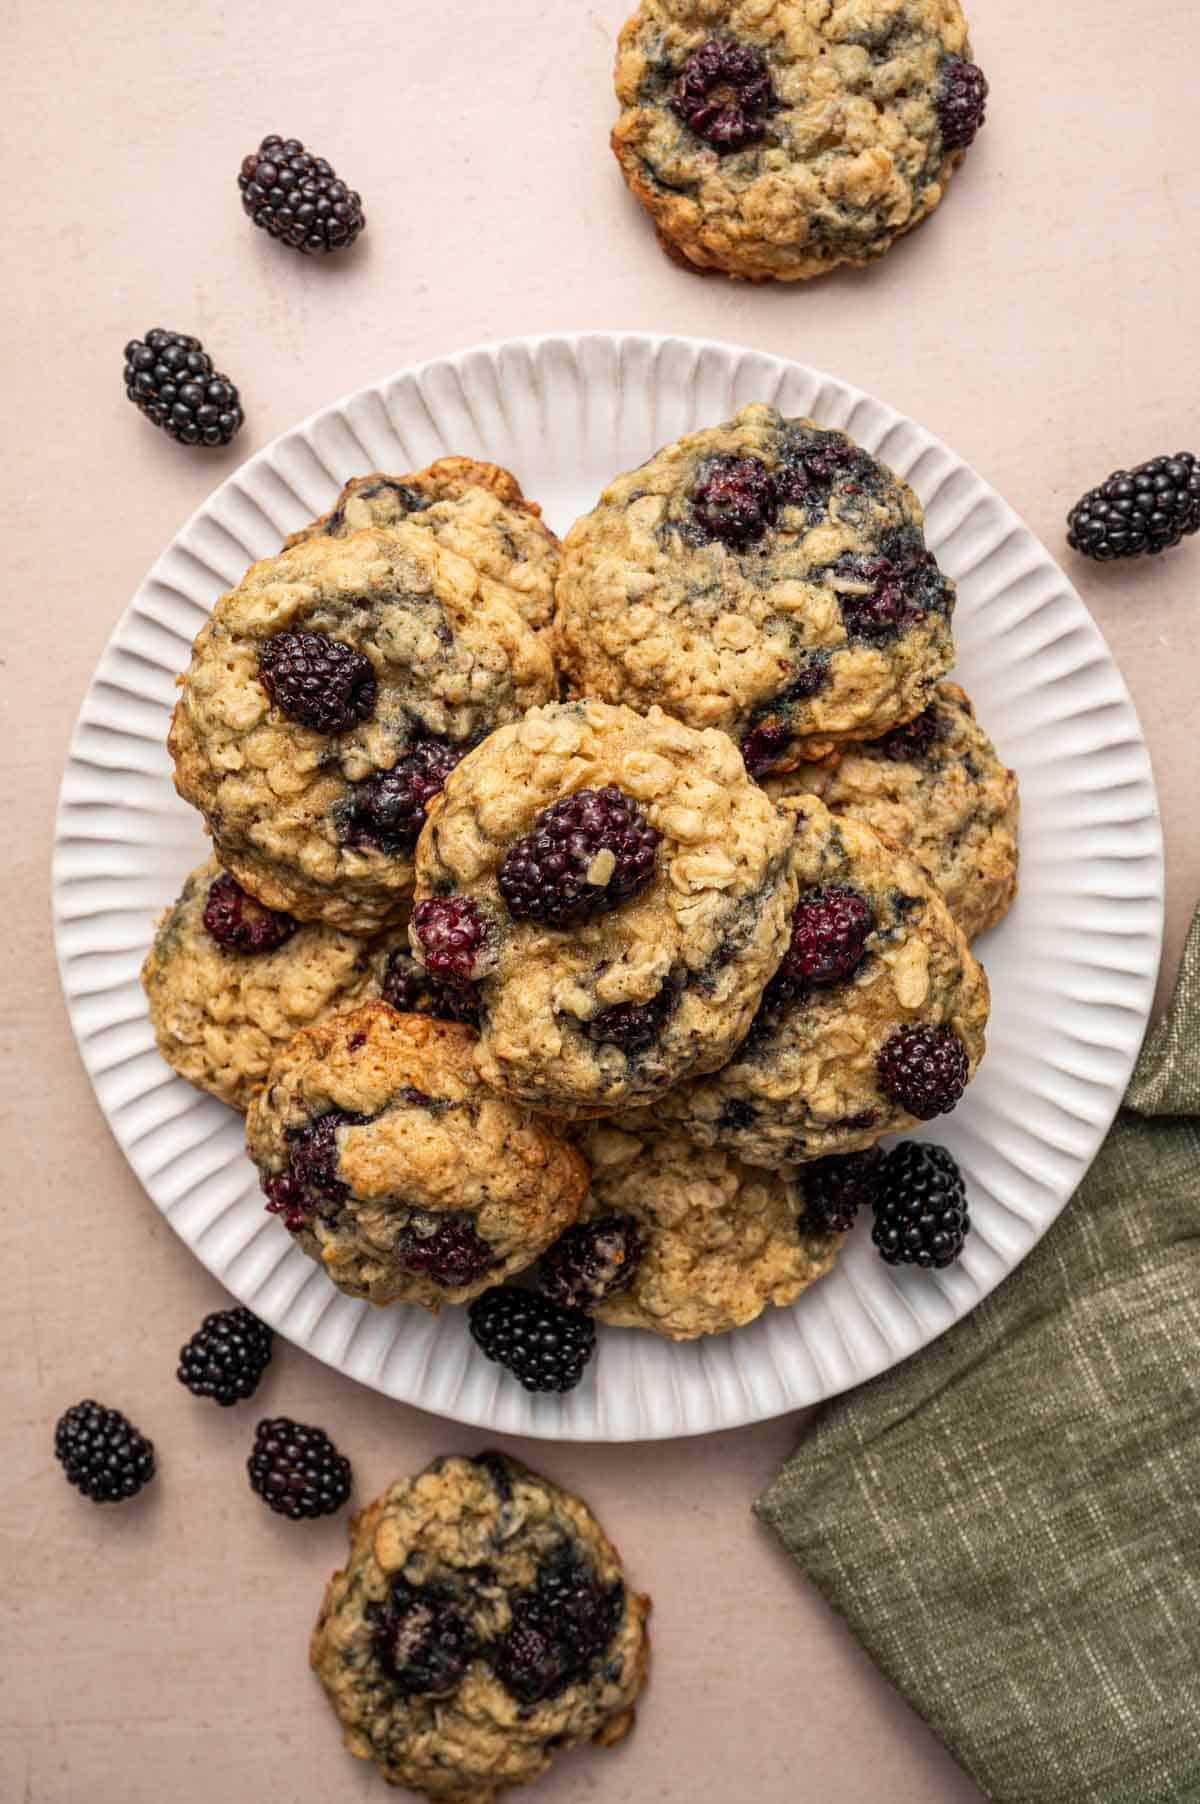
Stack of blackberry oatmeal cookies on a white plate.

Why You’ll Love These Blackberry Oatmeal Cookies

  • Quick & Easy: No chill time required! Just mix, scoop, and bake in under 30 minutes.
  • Soft & Chewy Texture: These cookies strike the perfect balance, crisp edges with a tender, oat-filled center.
  • Wholesome Ingredients: Made with rolled oats and pantry staples, they’re a nourishing choice for snacking or breakfast.
  • Freezer-Friendly: Make a double batch and freeze extras and they reheat beautifully for a quick treat.
  • Kid & Grown-Up Approved: A fun way to sneak in fruit and fiber, even picky eaters love them!

Ingredients and Substitutions for Oatmeal balckberry cookies

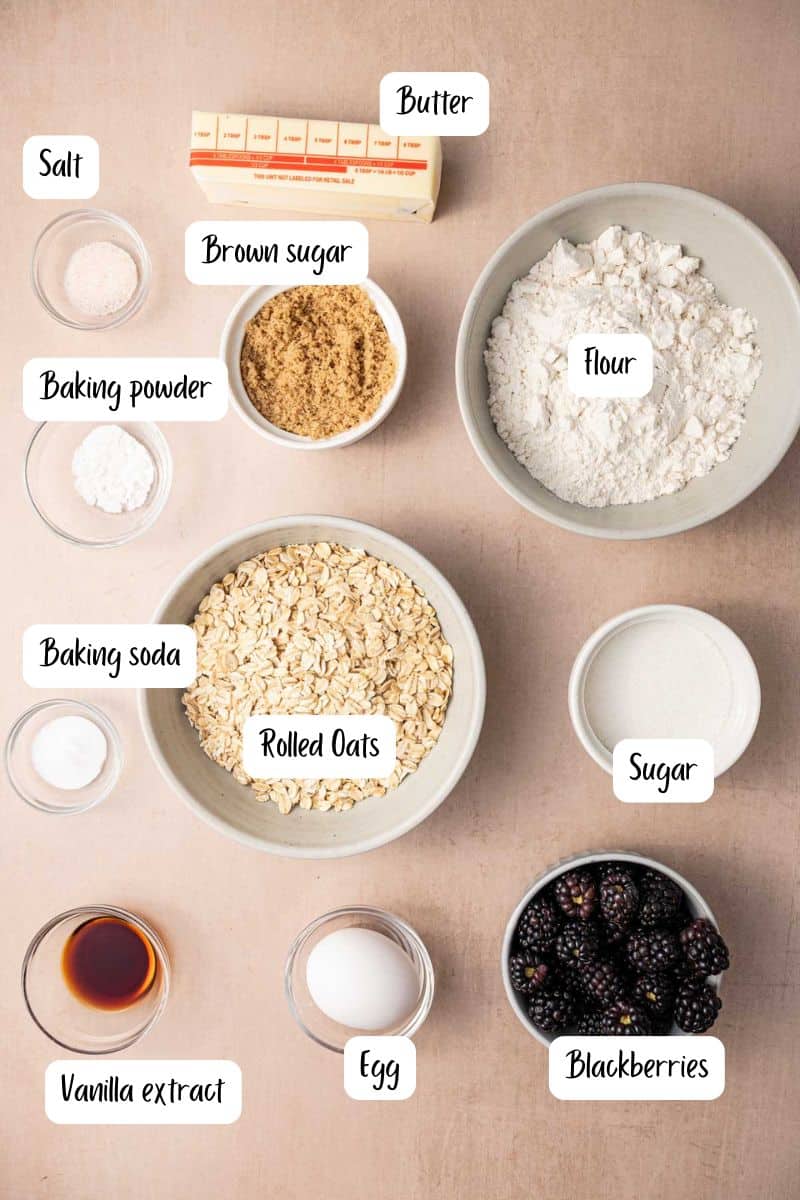
Ingredients laid out for making blackberry oatmeal cookies.
  • Flour: All-purpose flour gives these cookies structure. You can swap with white whole wheat flour for a slightly nuttier flavor or use a 1:1 gluten-free flour blend if needed.
  • Rolled Oats: Old-fashioned rolled oats provide that chewy, hearty texture. Quick oats can work in a pinch, but avoid instant oats, which can make the cookies too soft.
  • Baking Powder & Baking Soda: This combo ensures lift and spread. Don't skip them, they're key for that soft-in-the-middle texture.
  • Salt: Just a pinch enhances all the flavors and balances the sweetness.
  • Butter: Use unsalted butter for best control over saltiness. You can substitute with plant-based butter for a dairy-free version.
  • Brown Sugar: Adds moisture and depth thanks to the molasses. You can use coconut sugar as a more natural alternative.
  • White Sugar: Lightens the sweetness and helps with crisp edges. 
  • Fresh Blackberries: Use fresh for best texture, but frozen blackberries (thawed and drained) can work too, just pat them dry to avoid excess moisture or just use them frozen in the cookies.

See recipe card for quantities.

How to make the BEST blackberry oatmeal cookies

Whether you enjoy them warm out of the oven or pack them for the week, these blackberry oatmeal cookies are the perfect mix of wholesome, fruity, and sweet. They also freeze well, but fair warning: they disappear fast! Lets see how to make these cookies with step wise instructions below!

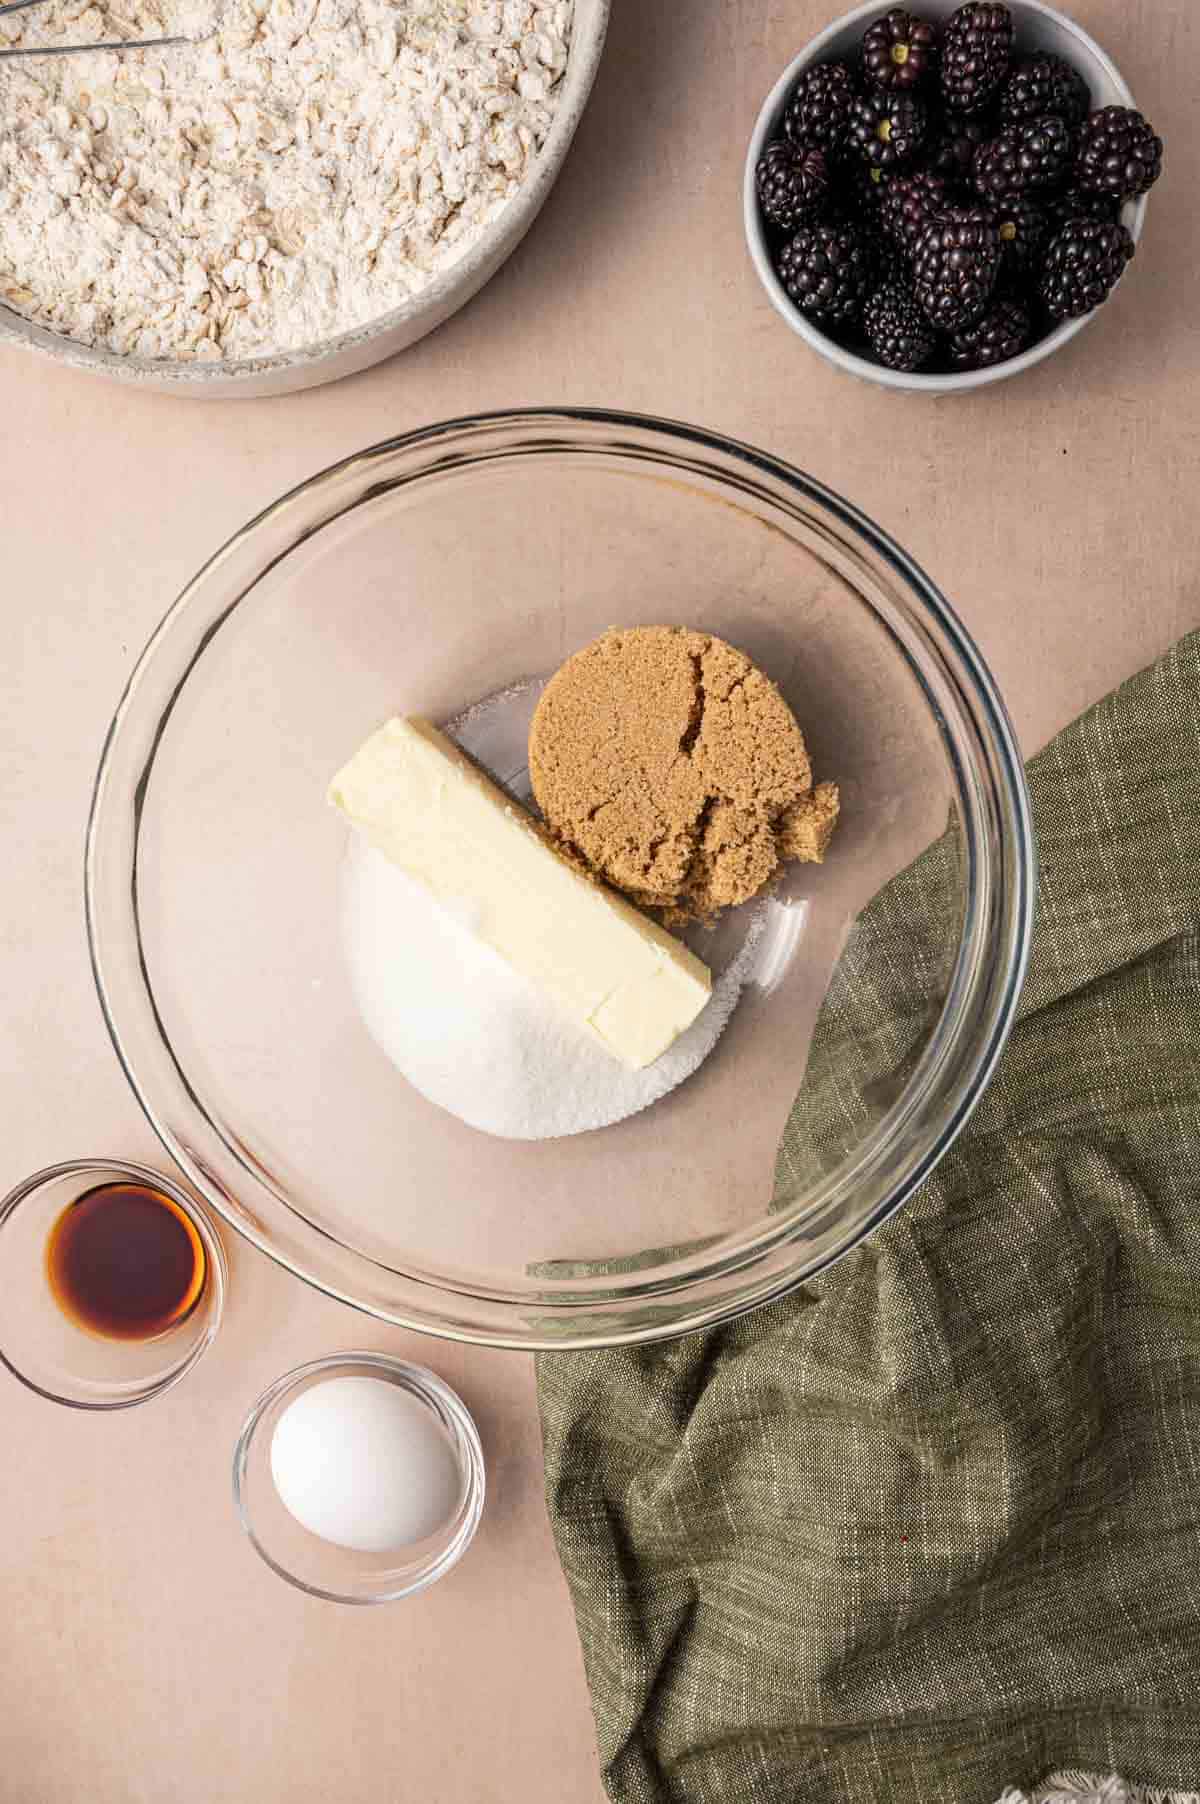
In a bowl butter, brown sugar and white sugar is ready for mixing.
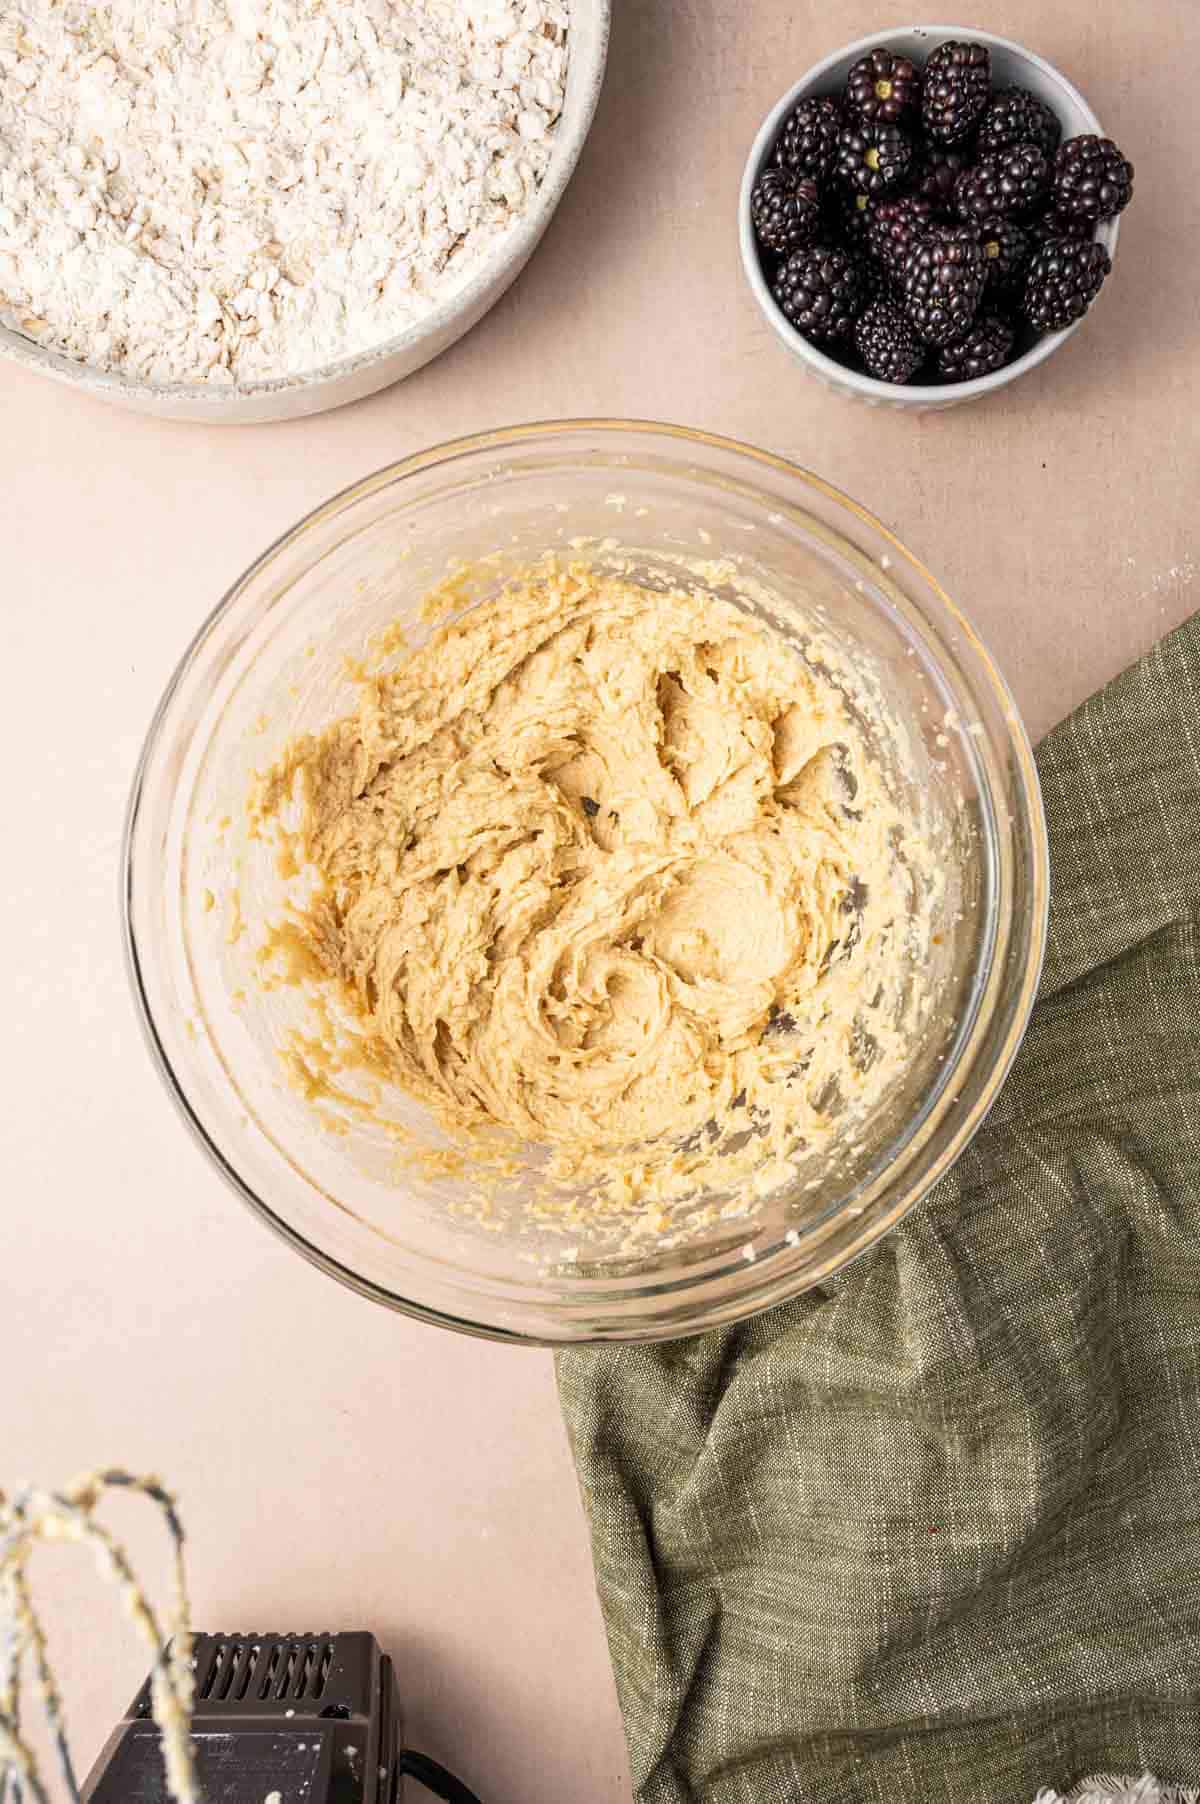
Creamed butter sugar mixture in a bowl.

Start by creaming softened butter with brown sugar and white sugar until light and fluffy in a large bowl. This gives the cookies a soft texture and lovely caramel-like flavor.

Mix in your egg and vanilla extract. Beat just until everything is smooth and combined.

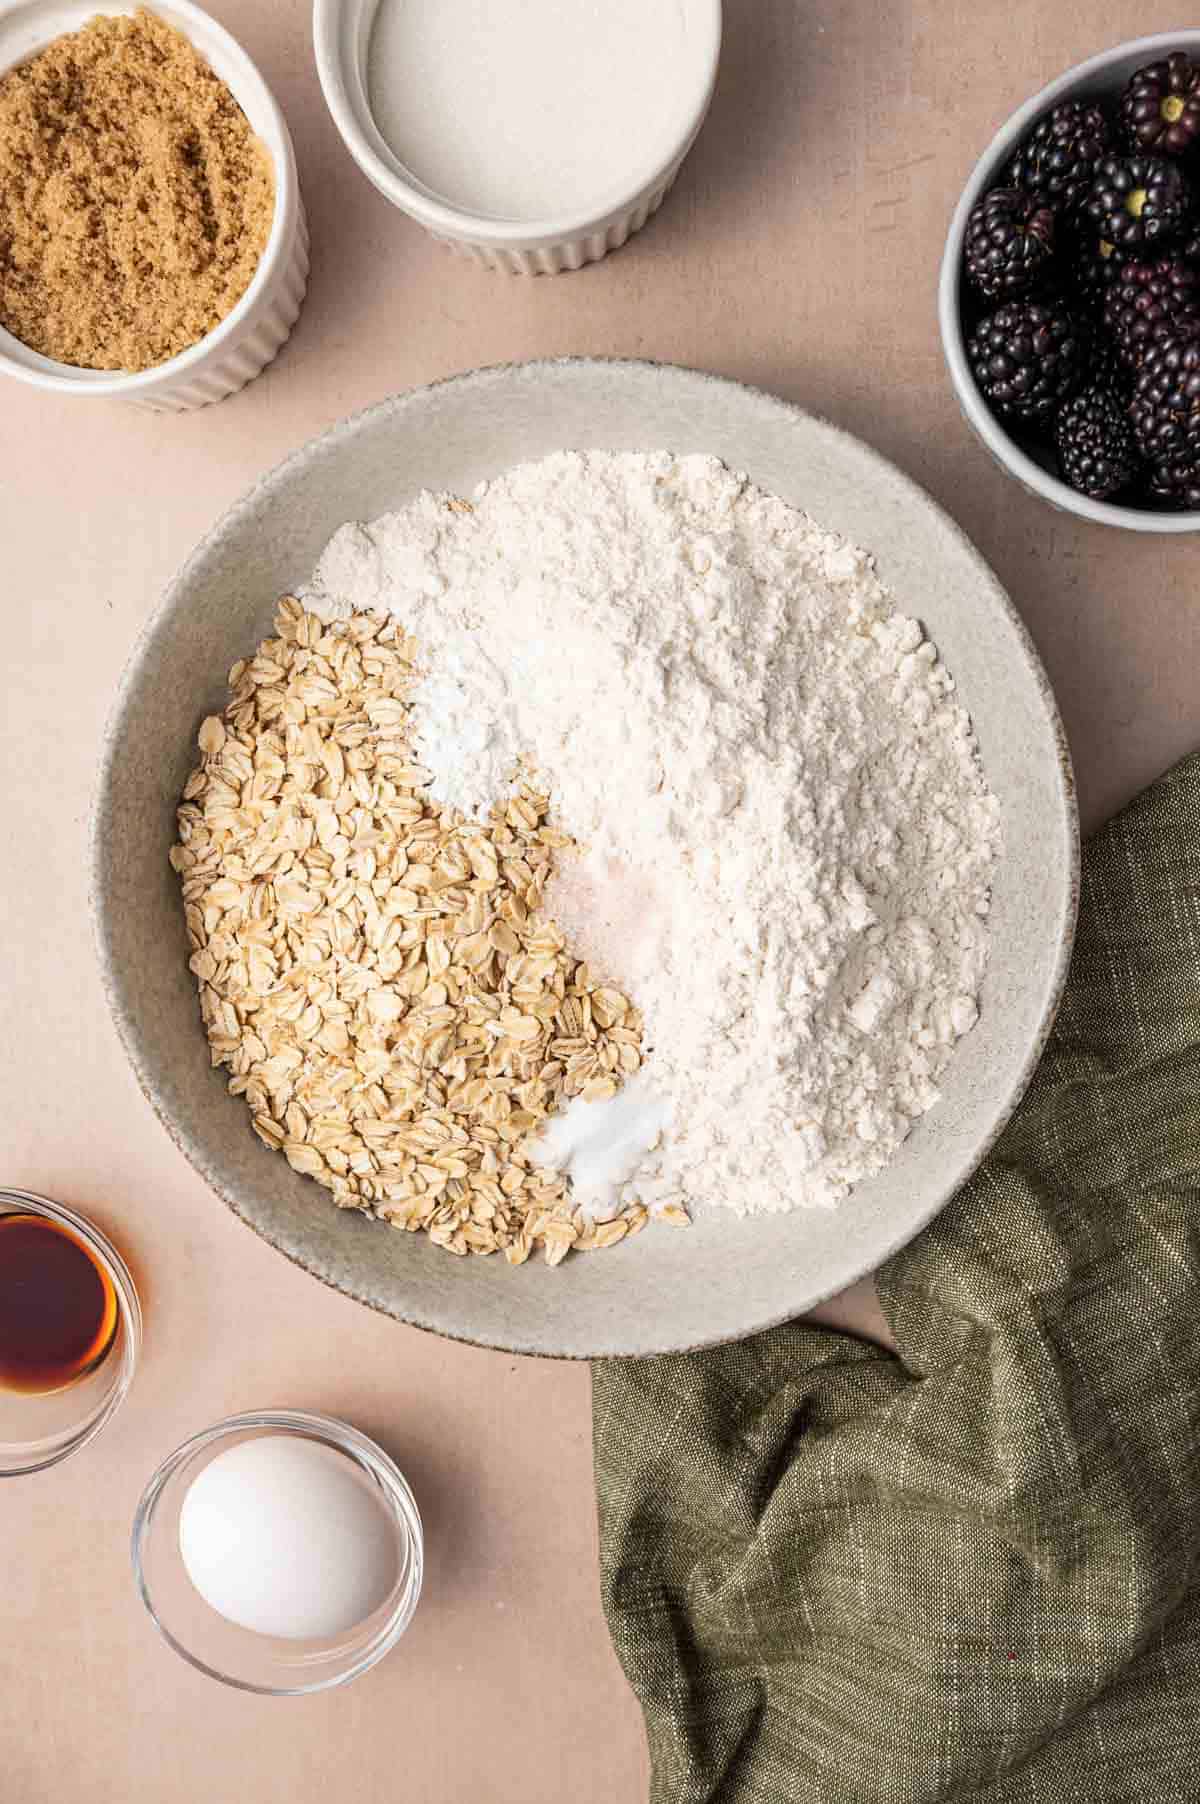
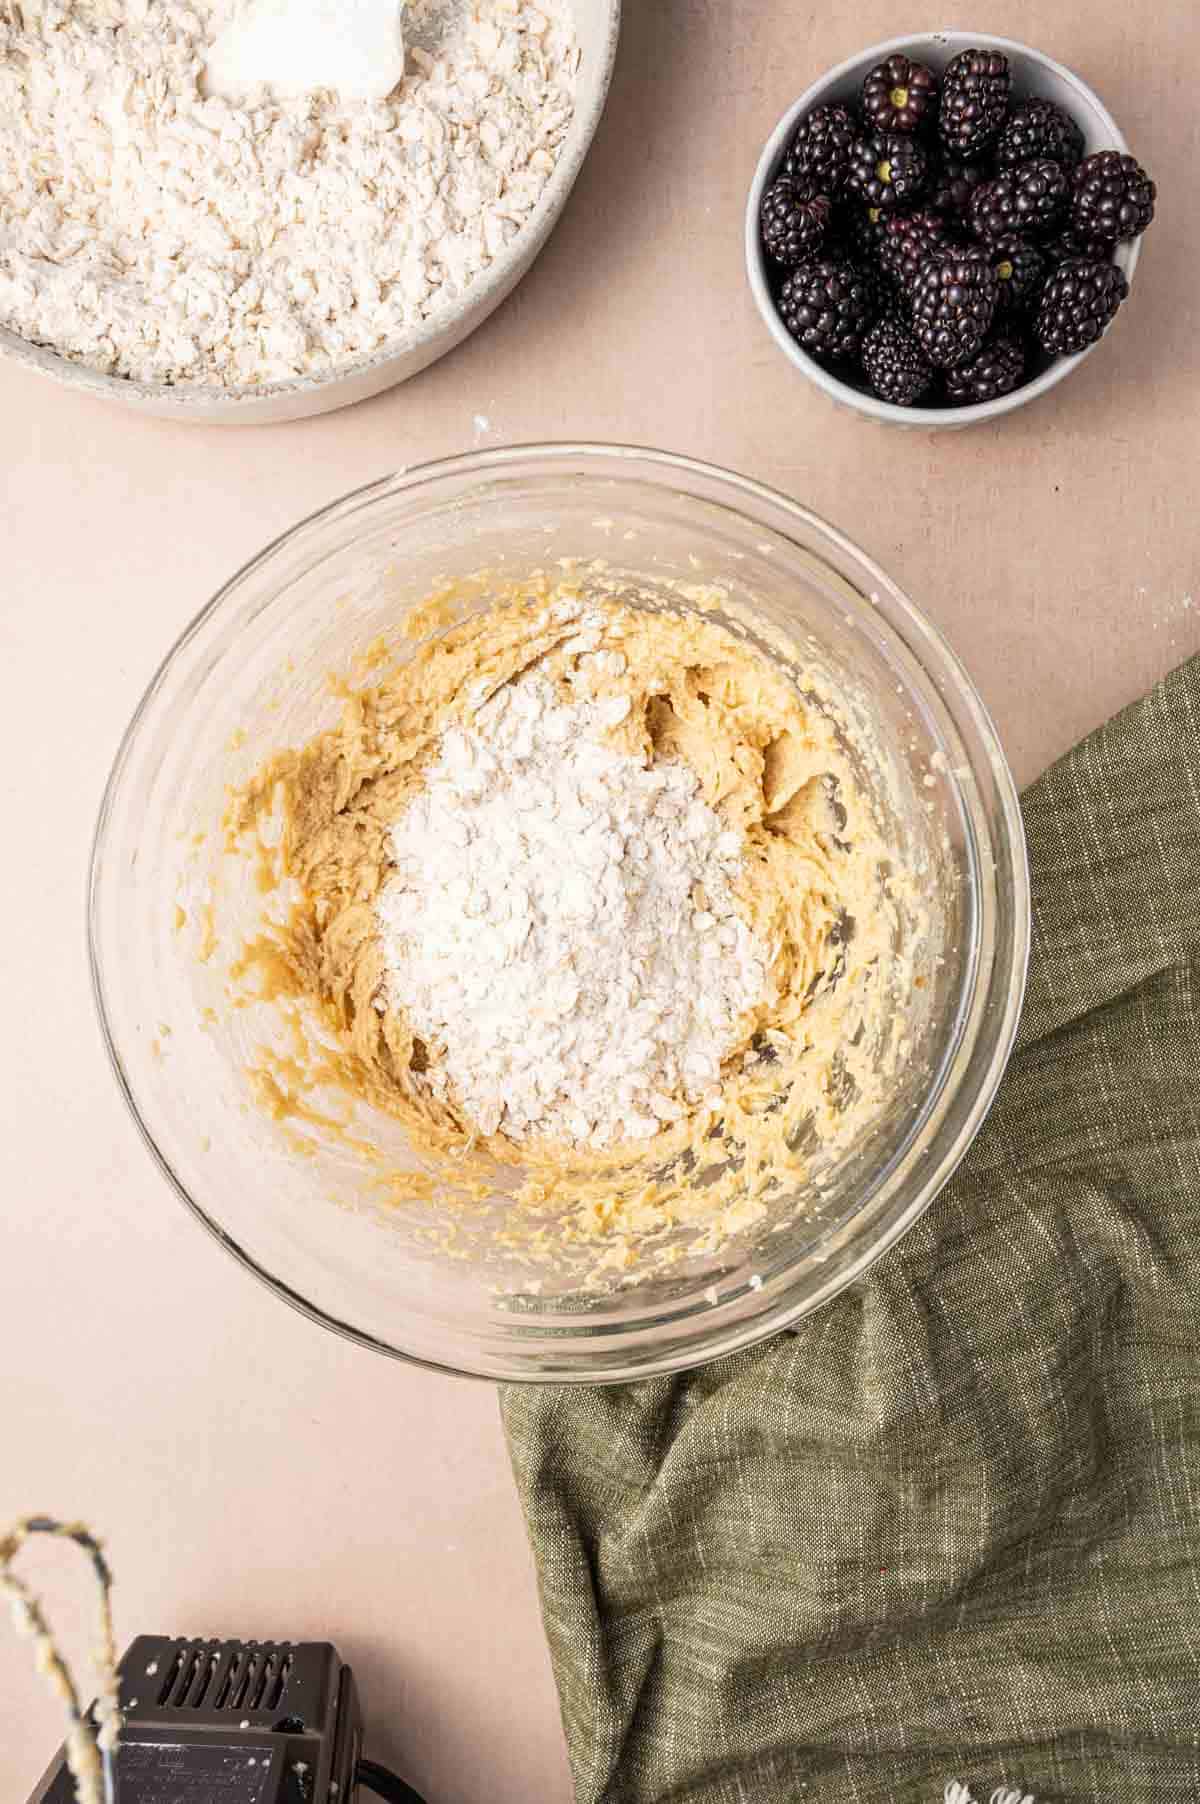
Oats and flour mixed in a bowl.
Dry ingredients being added to the butter mixture.

In a seperate bowl, whisk together the all-purpose flour, baking powder, baking soda, salt, and rolled oats. This ensures even distribution and helps your cookies rise just right.

Gradually mix the dry ingredients into the butter mixture — don’t overmix! You want to keep that tender, chewy texture.

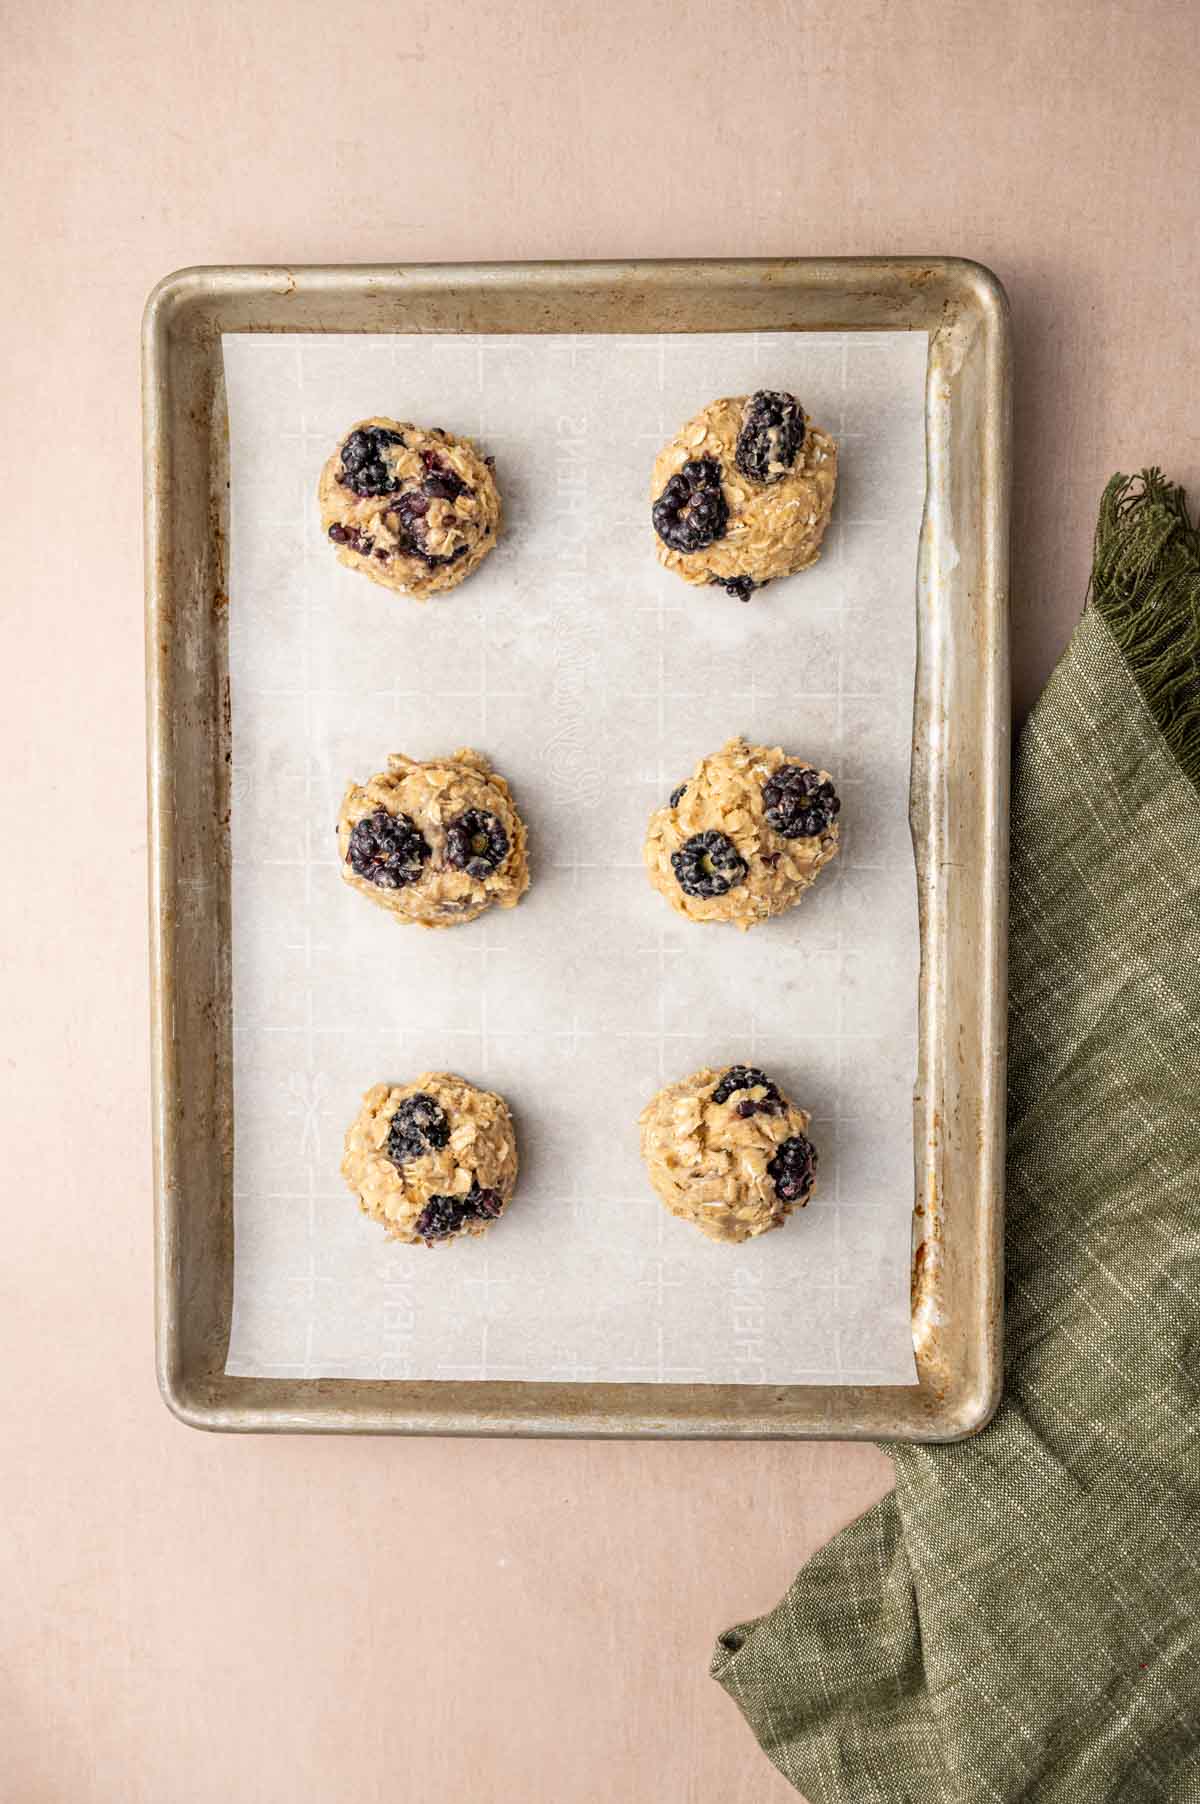
Blackberries added other the cookie batter.
Cookies being scooped into the baking sheet.

Use a spatula to gently fold in fresh blackberries. If they’re large, you can cut them in half. Be gentle to avoid squishing, this keeps beautiful berry pockets in every bite.

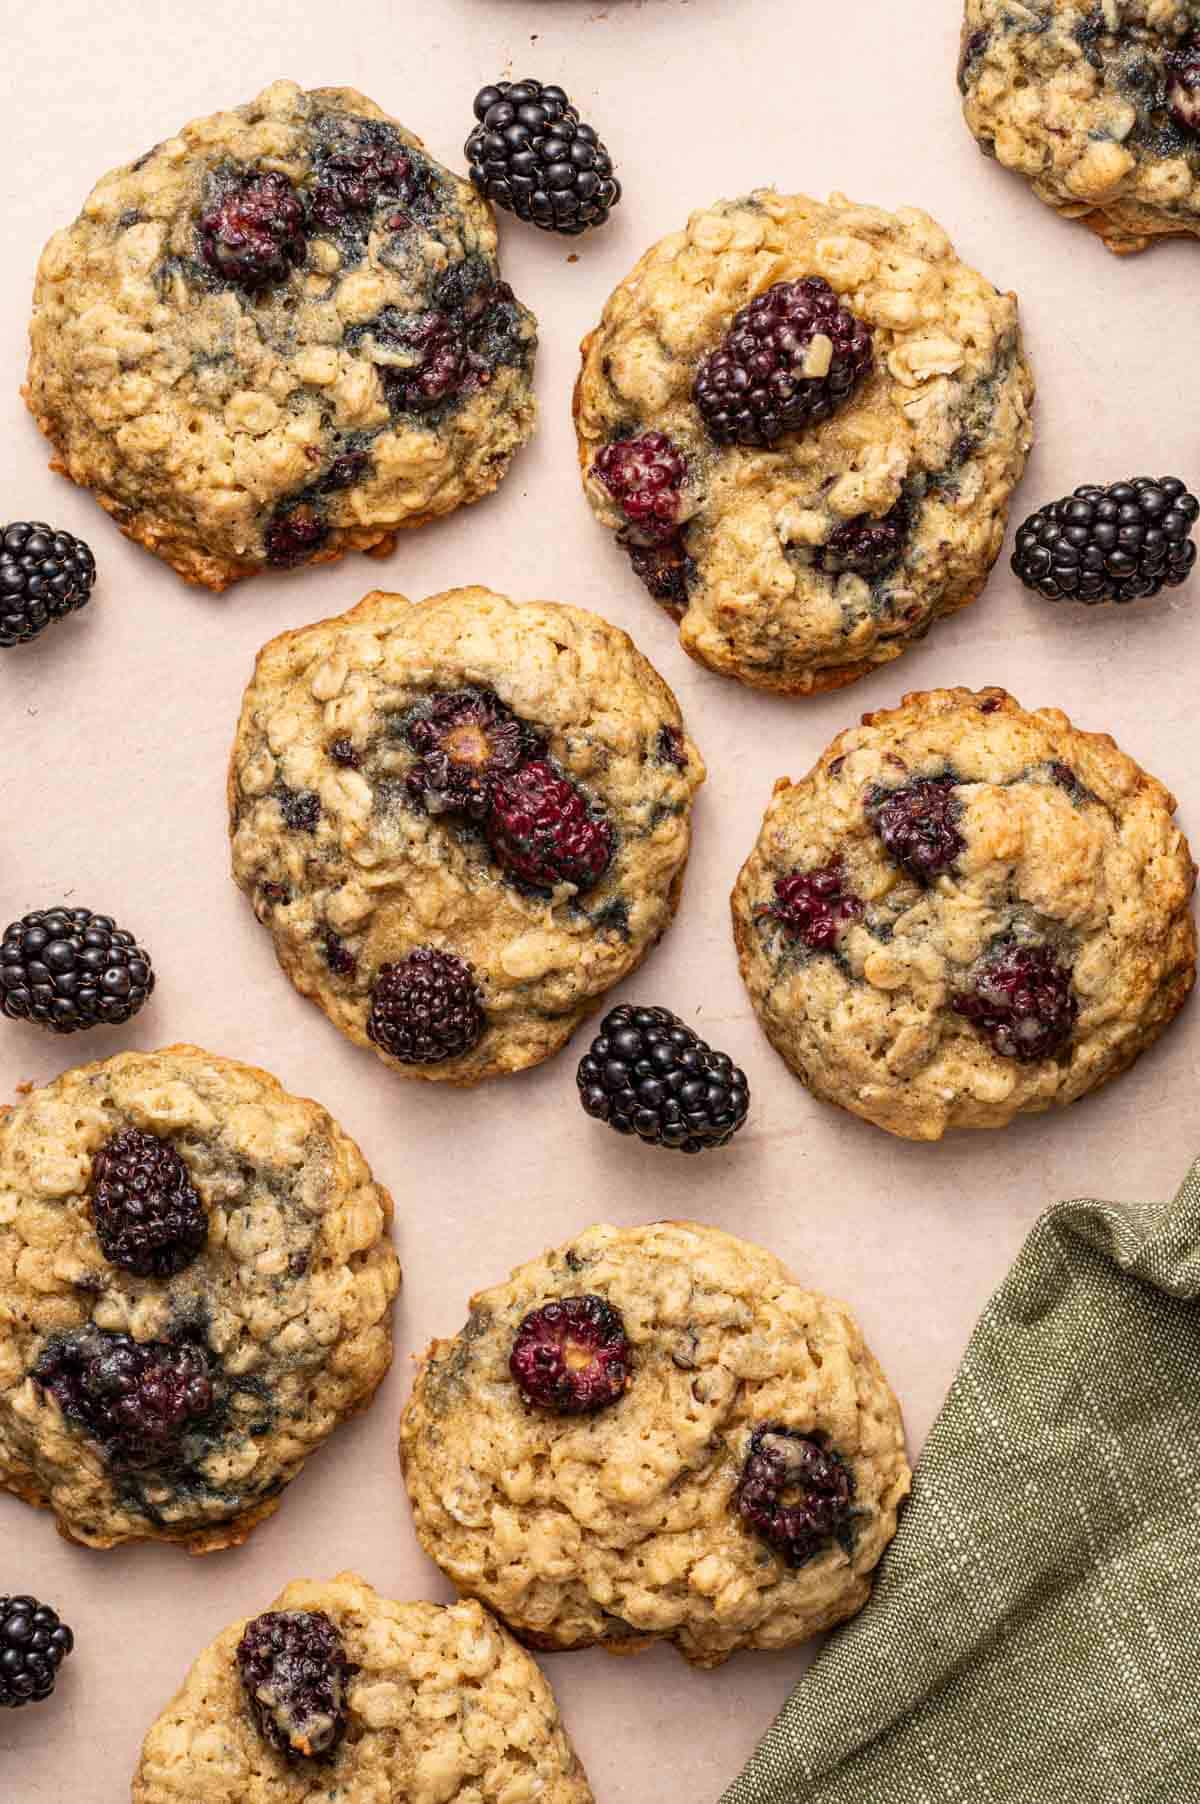
Scoop the cookie dough onto a parchment-lined baking sheet and bake at 350°F (175°C) for about 12–14 minutes, or until the edges are lightly golden. The centers will look a little soft, that’s perfect!

Let the cookies sit on the pan for 5–10 minutes before transferring to a wire rack. This helps them set without overbaking.

Whether you enjoy them warm out of the oven or pack them for the week, these blackberry oatmeal cookies are the perfect mix of wholesome, fruity, and sweet. They also freeze well, but fair warning: they disappear fast!

Hint: Chill the dough for 20–30 minutes before baking for thicker cookies with less spread!

Overhead shot of Golden brown oatmeal cookies with juicy blackberries inside.

Variations

If you love this classic cookie, wait until you try these delicious twists! Whether you're feeling indulgent or trying to use what's in your pantry, these fun ideas will help you customize your batch:

  • Chocolate Chip Blackberry Oatmeal Cookies - Add ½ cup of semi-sweet chocolate chips or white chocolate chips for a rich, dessert-like upgrade.
  • Coconut Blackberry Oatmeal Cookies - Fold in ⅓ cup of unsweetened shredded coconut to add a nutty, chewy texture and subtle tropical flavor that pairs beautifully with the tart berries.
  • Lemon Zest Twist - Grate in 1 teaspoon of fresh lemon zest to brighten the flavor and bring out the fresh, fruity notes of the blackberries.
  • Blackberry Oatmeal Cookie Bars - Instead of scooping into cookies, press the dough into a greased 8x8 baking pan and bake at 350°F for 20–25 minutes for easy oatmeal cookie bars!

Equipment

  • Mixing Bowls: For combining wet and dry ingredients.
  • Electric Mixer (stand mixer or hand mixer): Helps cream the butter and sugars together for the right texture. I have used hand mixer for this recipe.
  • Measuring Cups and Spoons: For accurately measuring flour, sugar, and other ingredients.
  • Spatula : Useful for folding in the blackberries.
  • Baking Sheet: A sturdy, nonstick baking sheet ensures even baking.
  • Parchment Paper: Prevents cookies from sticking and makes cleanup easier.
  • Cookie Scoop: For evenly sized cookies that bake consistently. I have used 2 tablespoon sized ice cream scoop.
  • Wire Cooling Rack: Allows cookies to cool properly.
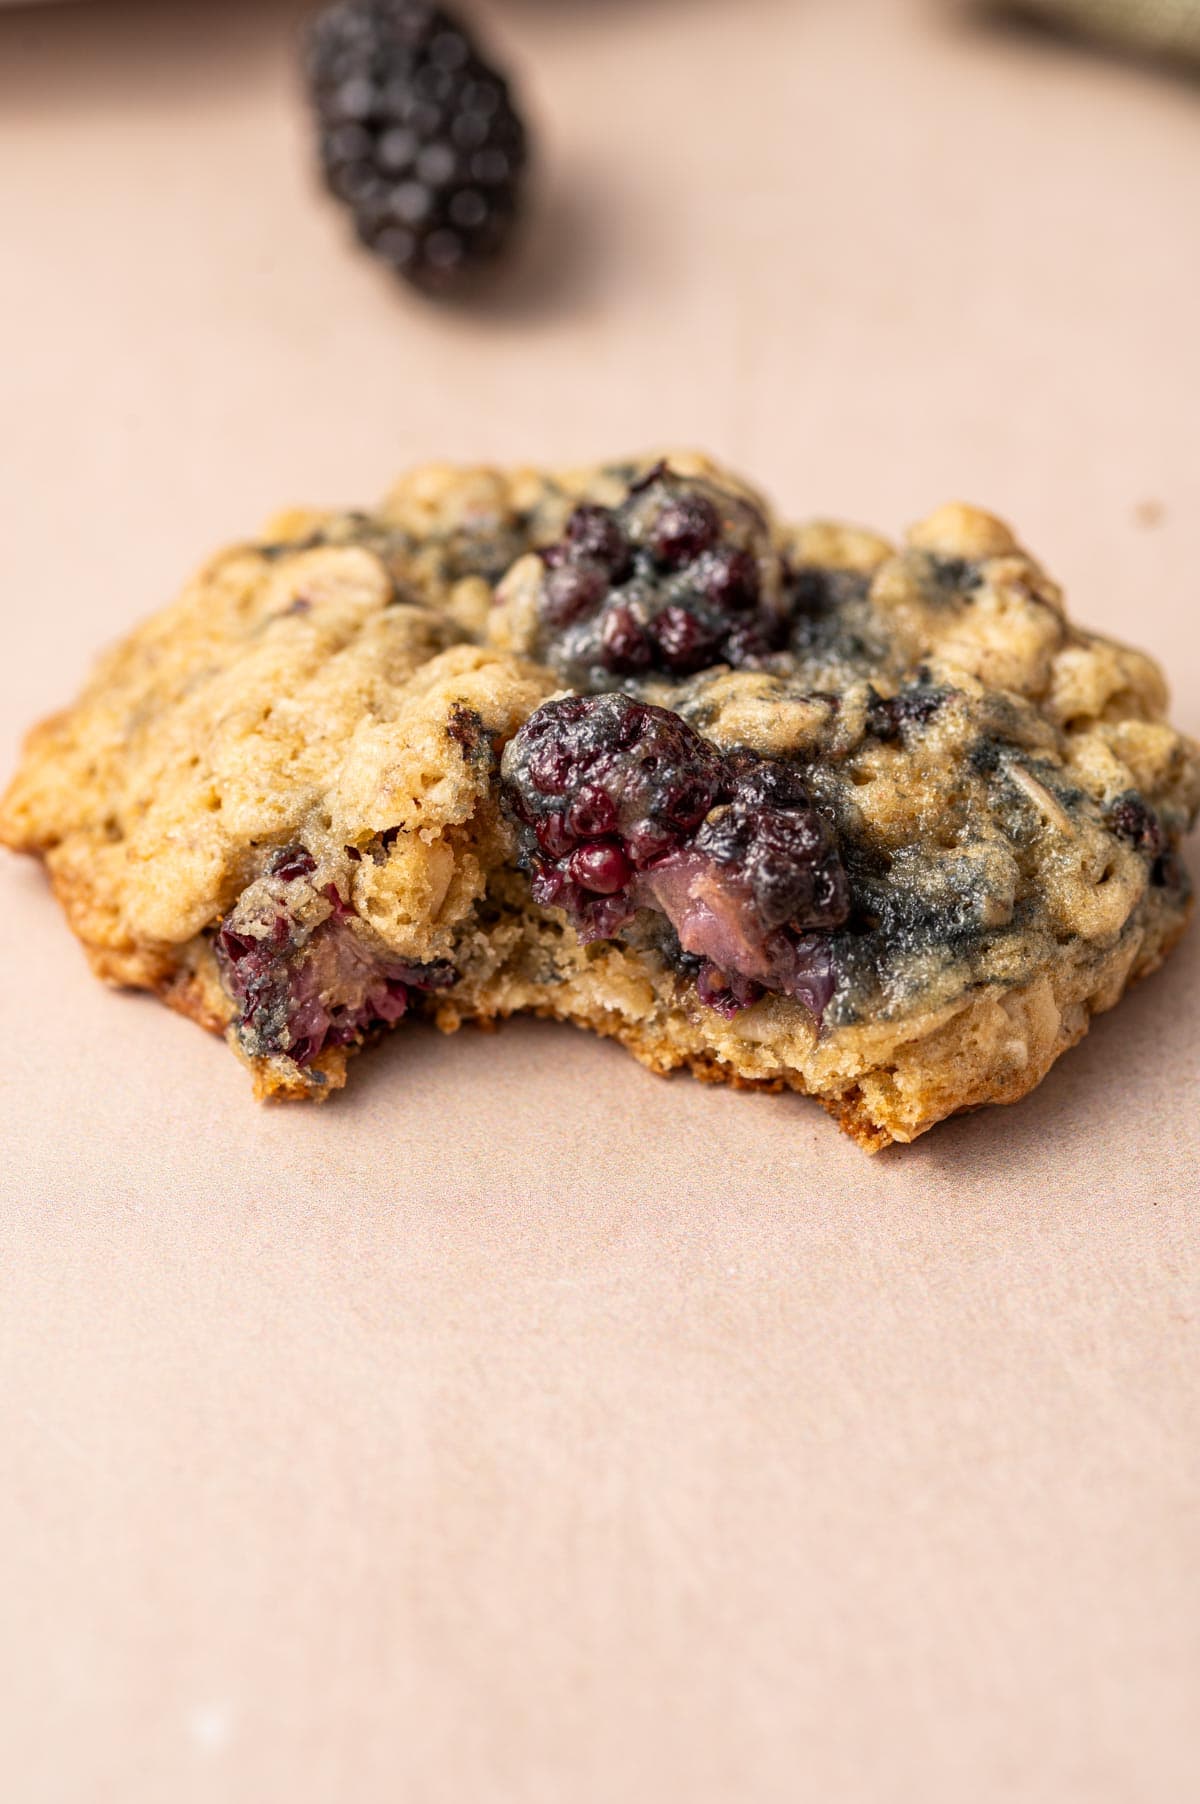
Moist and crumbly blackberry oatmeal cookies with visible oat texture.

Storage and Reheating Tips for blackberry oatmeal cookies

To keep your Blackberry Oatmeal Cookies soft, chewy, and as fresh as the day you baked them, here are some simple storage and reheating tips:

At Room Temperature: Store cooled cookies in an airtight container lined with parchment paper. Keep them at room temperature for up to 3–4 days.

In the Refrigerator: If your cookies have extra juicy blackberries, refrigerating can help prolong freshness. Store in a sealed container for up to 1 week. Let them sit at room temperature for a few minutes before serving.

In the Freezer: Place them in a single layer on a baking sheet and freeze for 1 hour. Then transfer to a freezer-safe bag or container. They’ll keep for up to 2 months.

Reheating Tips:

Warm cookies in the microwave for 10–15 seconds for soft, fresh-out-of-the-oven texture.

For crispy edge cookies, heat in a preheated oven at 300°F (150°C) for 5–7 minutes.

Serving Suggestions

  • Pair these cookies with a spoonful of Greek yogurt or a side of my berry chia seed pudding for a refreshing, protein-packed morning.
  • They’re also great with a warm cup of vanilla bean latte or salted caramel latte to start the day right.
  • Serve the cookies with a scoop of vanilla ice cream and fresh blackberries, or even alongside my popular Oatmeal butterscotch cookies for a fun cookie platter at parties or gatherings.
  • These cookies are sturdy and wholesome — perfect for lunchboxes or post-swim snacks. Add a couple next to a thermos of Pesto Ricotta Pasta for a well-balanced meal.
  • These cookies hold up well in travel. I like to pack them with a batch of Air Fryer Sweet Potato Wedges and some blueberry mocktails — the perfect summer picnic combo.
  • Add these to your next brunch board along with Blackberry Oatmeal Muffins, fruit, and scones. They bring a cozy, homemade touch to any spread.
Close-up of soft and chewy blackberry oatmeal cookies with rolled oats.

Top Tips for the Best Blackberry Oatmeal Cookies

  1. Use fresh and firm blackberries for this cookie recipe. Avoid using soft or overripe berries as they tend to release too much juice, making the dough wet and the cookies spread more than you want. 
  2. If your dough feels too soft or sticky, a quick chill in the fridge (15–30 minutes) helps control spreading and gives a chewier texture.
  3. Overmixing can make the cookies tough. Mix until just combined to keep the cookies tender and moist.
  4. Always use parchment paper or a silicone baking mat to prevent sticking and promote even baking.
  5. Use a cookie scoop or tablespoon to portion the dough evenly so all cookies bake at the same rate.
  6. These cookies are soft when hot. Let them cool on the baking sheet for 5–10 minutes before transferring to a wire rack.

FAQ

Can I use frozen blackberries instead of fresh?

Yes! Use them straight from the freezer (do not thaw), and gently fold into the dough to prevent excess moisture and streaking.

Can I make these cookies gluten-free?

Absolutely. Substitute the all-purpose flour with a 1:1 gluten-free baking blend. Make sure your oats are certified gluten-free too.

How do I store these blackberry cookies?

Store in an airtight container at room temperature for up to 3–4 days, or refrigerate for up to a week.

Can I freeze the cookie dough?

Yes. Scoop dough into balls and freeze raw for up to 2 months. 

Can I add nuts or chocolate chips?

Definitely! Walnuts, pecans, or white chocolate chips pair beautifully with the tart berries and oats.

Stack of blackberry oatmeal cookies on a white plate.

Related

Looking for other recipes like this? Try these:

  • Homemade apple pie filling with cinnamon and brown sugar in a bowl.
    Homemade apple pie filling with brown sugar recipe
  • Flaky and crispy apple turnovers using storebought puff pastry.
    Puff pastry apple turnovers with apple pie filling
  • Overhead shot of pumpkin pecan waffles topped with maple syrup and pecans.
    Pumpkin Pecan Waffles (Homemade waffle recipe)
  • Freshly made apple cinnamon waffles with maple syrup drizzle.
    Apple Cinnamon Waffles (Easy Homemade Waffle Recipe)

Pairing

These are my favorite dishes to serve with [this recipe]:

  • Sautéed broccoletti with garlic in a white cast iron skillet
    Sautéed Broccoletti (How to Cook Broccolini in 10 Minutes)
  • Overhead shot of homemade blackberry oatmeal cookies with fresh berries
    Blackberry Oatmeal Cookies recipe with fresh berries
  • Easy roasted sweet peppers on a platter garnished with parsley in a white plate.
    Roasted Mini Peppers with Balsamic and Garlic (Oven-Baked)
  • Overhead view of creamy scrambled eggs with red chili and chives garnish.
    Chili Scrambled Eggs Recipe (quick, easy & spicy)

If you tried this Blackberry Oatmeal Cookies recipe or any other recipe from my blog, I’d love to hear your thoughts! ⭐ Please leave a STAR rating and share your experience in the COMMENTS below. Your support means so much and helps me continue creating delicious recipes. Thank you for being part of this journey!

Overhead shot of homemade blackberry oatmeal cookies with fresh berries

Blackberry Oatmeal Cookies recipe with fresh berries

Abi Guna
These Blackberry Oatmeal Cookies are soft, chewy, and packed with juicy fresh berries and hearty rolled oats are perfect for a wholesome snack, quick breakfast, or summer dessert. Made with simple pantry ingredients, these cookies come together easily and are a great way to use up seasonal blackberries. Enjoy them with coffee, tea, or as part of your summer brunch spread!
5 from 8 votes
Print Recipe Pin Recipe
Prep Time 15 minutes mins
Cook Time 18 minutes mins
Total Time 30 minutes mins
Course Dessert
Cuisine American
Servings 18 cookies

Equipment

  • Hand Mixer
  • Mixing Bowls
  • Baking Sheet
  • Cooling rack
  • Ice cream scoop

Ingredients
  

  • ½ cup unsalted butter at room temperature
  • ½ cup brown sugar
  • ¼ cup white sugar
  • 1 large egg at room temperature
  • 1 teaspoon vanilla extract
  • 1 ½ cups rolled oats
  • 1 cup all-purpose flour
  • ½ teaspoon baking powder
  • ½ teaspoon baking soda
  • ¼ teaspoon salt
  • ¾ cup fresh blackberries cut in half if large

Instructions
 

  • ​​In a large mixing bowl, add ½ cup of softened unsalted butter, ½ cup of brown sugar, and ¼ cup of white sugar. Using a hand mixer or stand mixer, beat on medium speed for 2–3 minutes until the mixture is light, fluffy, and creamy. This step is key for a soft and tender cookie base with that classic caramelized flavor.
  • Crack in 1 large egg and add 1 teaspoon of vanilla extract. Beat again just until everything is fully combined and smooth. Avoid overbeating, as that can make your cookies dense instead of soft.
  • In a separate bowl, whisk together; oats, flour, baking powder , baking soda and salt.
  • Rolled oats bring a hearty texture, while the leaveners help the cookies puff up gently while baking. A little salt balances the sweetness and enhances the berry flavor.
  • Gradually add the dry ingredients to the butter mixture, mixing on low speed or with a spatula just until no flour streaks remain. Be gentle here — overmixing can toughen the cookies.
  • Add ¾ cup of fresh blackberries, and gently fold them into the dough. If the berries are large, you can cut them in half — but do it gently to avoid too much bleeding into the dough.
  • Using a medium cookie scoop or tablespoon, scoop the cookie dough onto a parchment-lined baking sheet. Leave about 2 inches of space between each cookie. If you want extra bakery-style charm, press a few extra berry pieces on top.
  • Bake in a preheated 350°F (175°C) oven for 12–14 minutes, or until the edges are lightly golden and the centers are still soft but set. Don’t overbake — they’ll continue cooking slightly as they cool on the pan.
  • Let the cookies rest on the baking sheet for 5–10 minutes before transferring them to a wire rack to cool completely. This helps them set up without falling apart. Enjoy!

Notes

  1. Gently fold in the blackberries to avoid crushing them and turning the dough purple.
  2. If the dough feels too wet from the berries, chill it for 20–30 minutes before baking.
  3. Use a cookie scoop for evenly sized cookies and consistent baking.
Keyword blackberries, cookies, oatmeal

Roasted Mini Peppers with Balsamic and Garlic (Oven-Baked)

May 9, 2025 by Abi Guna 15 Comments

A colorful side dish that’s as effortless as it is flavorful, these Roasted Mini Peppers with Balsamic and Garlic are the kind of recipe you’ll keep coming back to. Oven-roasted until tender and slightly blistered, the sweet peppers get a savory boost from minced garlic and a tangy drizzle of balsamic.

If you've ever walked past those vibrant little peppers at the grocery store and wondered what to do with them, this is your sign to roast them! Roasting brings out their natural sweetness, making them the perfect way to turn a humble ingredient into a delicious side dish or an easy summer appetizer. It’s a one-pan, no-fuss side that’s perfect for busy weeknights, holiday platters, or anything in between. With just a few ingredients and big flavor payoff, this is one of those easy oven-baked vegetable recipes that belongs in your regular rotation.

If you love oven-roasted veggies as much as we do, these Roasted Mini Peppers are just the beginning. Pair them with our creamy Homemade Hummus for a Mediterranean-inspired snack board, or serve alongside Roasted Carrots and Asparagus for a vibrant, veggie-packed side spread. Looking for more oven-roasted goodness? Don’t miss our Roasted Cauliflower and Carrots or Roasted Brussels Sprouts — both are easy, flavorful additions to any meal and work beautifully with these sweet and garlicky peppers.

All you need is just place the peppers on a baking sheet, season with olive oil, salt, pepper, and a touch of onion powder if you prefer , and you’re halfway to one of the tastiest sweet peppers recipes you'll ever try.

[feast_advanced_jump_to]
Colorful roasted red, yellow, and orange peppers served with fresh herbs in a white plate along with a small bowl of balsamic vinegar.

Why You'll Love This Roasted Sweet Mini Peppers Recipe

  • Flavorful: Roasting brings out the mini peppers' natural sugars, making every bite tender, caramelized, and delicious.
  • Simple ingredients: All you need are peppers, olive oil, balsamic vinegar, and garlic — yet the result tastes like something restaurant quality!
  • Minimal preparation: Just toss everything on a sheet pan or a baking dish and let the oven do the magic. Minimal prep, minimal cleanup.
  • Gluten-free, dairy-free, and vegan: Great for entertaining a variety of dietary needs with one crowd-pleasing dish.
  • Perfect for any meal: Serve them as a side, toss into salads, layer into sandwiches, or pair with dips like our Roasted Carrot Hummus.

Ingredients and Substitutions

Ingredients being laid out for roasting mini sweet peppers in oven.
  • Mini sweet peppers: Naturally colorful and slightly sweet, they roast beautifully and become tender with caramelized edges. You can also substitute with a colorful mix of mini bell peppers if mini peppers aren’t available.
  • Olive oil: Helps the peppers roast evenly and adds richness. Avocado oil will be a great substitute.
  • Balsamic vinegar: Adds tangy sweetness and depth of flavor that pairs beautifully with roasted veggies. You can substitute red wine vinegar with a drizzle of honey or maple syrup instead.
  • Salt: Enhances the natural flavor of the peppers. You can also use sea salt, kosher salt, or a pinch of garlic salt for a twist.
  • Black pepper: Adds a subtle heat and balances the sweetness. For extra heat add crushed red pepper flakes if needed.
  • Fresh garlic: Brings savory, aromatic depth to the dish. Use ½ teaspoon garlic powder if fresh garlic isn't on hand.
  • Dried oregano: Adds an earthy, herbaceous note that pairs well with balsamic. Use Italian seasoning, thyme, or dried basil for a flavor variation.

See recipe card for quantities.

How to make oven roasted mini peppers (Step-by-Step Instructions)

To make roasted mini peppers, it involves the below simple steps! Toss whole or halved sweet peppers with olive oil, balsamic vinegar, minced garlic, oregano, salt, and pepper. Spread them on a rimmed baking sheet and roast at 425°F (220°C) for 20–25 minutes, flipping halfway through, until soft and slightly blistered. Serve warm or at room temperature as a flavorful side dish or appetizer.

Step 1: Preheat your oven
Step 2: Prep the peppers
Step 3: Make the seasoning
Step 4: Toss the peppers
Step 5: Roast the peppers
Step 6: Serve
Mini peppers are arranged in a baking dish and seasoned.
  1. Combine all the ingredients and mix it throughly in a baking dish.
Baked mini peppers with olive oil and garlic on a baking dish.
  1. Roast at 425°F (220°C) for 20–25 minutes.

These roasted mini sweet peppers are also a great addition to a charcuterie board or served with a creamy goat cheese, ricotta cheese, or even a cream cheese dip on the side. Next time you're roasting veggies to go with your main dish, don't forget to include these — just rinse them in cold water, trim, and roast. They’re simple, satisfying, and guaranteed to win over even the pickiest eaters.

Variations

  • Garlic Parmesan Roasted Peppers: After roasting, sprinkle with freshly grated Parmesan and pop back in the oven for 2–3 minutes until melty and golden.
  • Spicy Version: Add crushed red pepper flakes or a pinch of cayenne to the seasoning mix for a little heat.
  • Lemon & Herb: Swap balsamic for lemon juice and use dried thyme or rosemary for a lighter, zesty flavor profile.
  • Stuffed Mini Peppers: Slice and roast halved peppers, then fill with whipped feta cheese, hummus, or herbed cream cheese for a fun appetizer twist.
  • Roasted Pepper Salad: Cool the roasted peppers and toss with chickpeas, feta, and fresh parsley for a Mediterranean-style salad.
Colorful sweet peppers roasted until blistered and caramelized in a baking dish.

Serving Suggestions for roasted mini peppers

These sweet and savory roasted mini peppers are incredibly versatile — here are some of our favorite ways to enjoy them:

As a side dish: Serve warm alongside BBQ chicken thighs, salmon, baked shrimp skewers, or your favorite roasted protein for a balanced and colorful plate.

With hummus & dips: Pair with no garlic hummus or baba ganoush for a Mediterranean-style delicious appetizer or snack board. Serve it with a bowl of parmesan ranch dip to enjoy.

Wraps or sandwiches: Add them to paninis, salad sandwich melts, pita wraps, bagel sandwiches or grain bowls for extra flavor and texture.

On a charcuterie board: Their glossy, roasted finish adds a pop of color and sweetness to any cheese platter.

Tossed in salads: Let them cool slightly and slice them into leafy salads, pasta salads, or kale quinoa bowls for a caramelized veggie boost.

With eggs: Serve them with a soft omelet or a side of Chili Scrambled Eggs for a bold and vibrant breakfast.

Equipment

Baking dish or cookie sheet pan

Close-up overhead shot of roasted sweet peppers seasoned with balsamic and oregano.

Storage and Reheating Tips

Cool completely before storing: Let the roasted peppers come to room temperature before placing them in the fridge to prevent excess moisture.

Store in an airtight container: Keep leftovers in a sealed container in the refrigerator for up to 4 days. 

Reheat gently: Warm them in a 350°F oven for 5–7 minutes or use a skillet over low heat until heated through. Avoid the microwave to keep the texture intact.

Not freezer-friendly: Freezing is not recommended, as the texture becomes mushy once thawed.

Top Tips for Perfect Roasted Mini Peppers with Balsamic

  • Use a variety of colors: Red, yellow, and orange mini peppers not only look beautiful but also offer slightly different sweetness levels.
  • Don’t overcrowd the pan: Give the peppers space to roast, not steam. Use two pans if needed for even caramelization.
  • Toss well in the balsamic mixture: Make sure every pepper is coated with olive oil, balsamic vinegar, garlic, and seasoning for maximum flavor.
  • Roast at high heat: 425°F is ideal to blister the skins and deepen the sweetness.
  • Flip halfway for even roasting: This helps all sides get golden and lightly charred.
  • Watch the garlic: Minced garlic can burn quickly — mix it into the oil and keep it on the peppers, not directly on the pan.
  • Add fresh herbs after roasting: A sprinkle of fresh oregano just before serving adds brightness and color.
  • Serve warm or room temp: They’re versatile enough to enjoy straight from the oven or later in a salad or platter.
Mini peppers arranged on a baking dish after roasting.

FAQ

Do I need to cut the mini peppers before roasting?

No not needed! You can roast them whole for a juicier texture or slice them in half for more caramelization. It’s totally up to your preference, both ways are delicious.

Can I make roasted mini peppers ahead of time?

Yes! These peppers are great for meal prep. Roast them up to 3–4 days in advance and store in the fridge. They reheat well and taste just as flavorful at room temperature.

Do I need to peel the skin after roasting?

No, the skin becomes tender during roasting and is edible.

Can I use an air fryer instead of an oven?

Yes! You can absolutely roast mini peppers in an air fryer. Preheat the air fryer to 375°F , then cook the seasoned mini peppers for 10–12 minutes, shaking the basket halfway through. They’ll come out beautifully blistered and tender in less time than the oven.

What’s the best way to use leftover roasted mini peppers?

Toss them into salads, grain bowls, or wraps, or serve over toast with hummus or whipped feta. They also make a great topping for pizza or pasta!

Baked mini peppers with olive oil and garlic on a white plate.

Related

Looking for other recipes like this? Try these:

  • Stack of strawberry muffins with chocolate chips and fresh strawberries on the side.
    Strawberry Chocolate Chip Muffins Recipe (EASY)
  • Easy homemade blueberry mojito mocktail served with ice and seltzer water in three. glasses.
    Blueberry Mojito Mocktail (Virgin Mocktail Recipe)
  • Golden roasted shrimp skewers fresh out of the oven, served with dipping sauce and herbs arranged beautifully on a green platter.
    Oven-Baked Shrimp Skewers ( Easy Shrimp Kabobs In The Oven)
  • Parmesan ranch dip in a green bowl surrounded by veggies like broccoli, carrots, cherry tomatoes and cucumber.
    Parmesan Ranch Dip Recipe (Creamy Garlic ranch dressing)

Pairing

These are my favorite dishes to serve with this oven-roasted small peppers recipe:

  • A hand is taking a slice of cheese naan and the cheese is melting and stretching.
    Cheese Naan bread Recipe (Stuffed with cheese)
  • Flatlay of butter chicken with naan, rice, and Indian-style salad.
    Butter Chicken with Naan (Creamy, Easy & Better Than Takeout)
  • A vibrant veggie hummus bagel sandwich topped with creamy hummus, fresh avocado slices, crisp cucumber, juicy tomatoes, and mixed greens, served on a toasted everything bagel.
    Hummus Bagel Recipe (Veggie Bagel Sandwich)
  • Delicious and smooth hummus without garlic, artfully styled on a bowl with vibrant veggies and , perfect for dipping.
    Creamy Hummus Without Garlic (Easy Garlic-Free Recipe)

If you tried this Roasted Mini Pepper recipe or any other recipe from my blog, I’d love to hear your thoughts! ⭐ Please leave a STAR rating and share your experience in the COMMENTS below. Your support means so much and helps me continue creating delicious recipes. Thank you for being part of this journey!

Easy roasted sweet peppers on a platter garnished with parsley in a white plate.

Roasted Mini Peppers with Balsamic and Garlic (Oven-Baked)

Abi Guna
These Roasted Mini Sweet Peppers are tender, caramelized, and bursting with natural sweetness. Made with just olive oil, garlic, and simple seasonings, they’re the perfect easy side dish or summer appetizer. Serve them warm, room temp, or cold — a colorful and healthy addition to any meal!
5 from 8 votes
Print Recipe Pin Recipe
Prep Time 10 minutes mins
Cook Time 20 minutes mins
Total Time 30 minutes mins
Course Appetizer, Side Dish, Snack
Cuisine American
Servings 4 people
Calories 117 kcal

Equipment

  • Baking Dish (9X13) Baking tray also works

Ingredients
  

  • 2 lb mixed mini peppers
  • 3 tablespoons olive oil
  • 2 tablespoons balsamic vinegar
  • 2 cloves garlic minced
  • 1 teaspoon dried oregano
  • 1 teaspoon salt
  • ½ teaspoon ground black pepper
  • Chopped fresh oregano to garnish

Instructions
 

  • Preheat your oven to 425°F (220°C). Use a 9X13 baking dish or line a baking sheet with parchment paper or foil for easy cleanup.
  • Rinse the mini sweet peppers and pat them dry. You can leave them whole, or slice them in half.
  • In a mixing bowl, combine olive oil, balsamic vinegar, minced garlic, dried oregano, salt, and black pepper. Stir well to blend.
  • Add the peppers to the bowl and toss until they’re evenly coated in the balsamic-garlic mixture.
  • Spread the peppers out in a single layer on your baking dish. Roast for 20–25 minutes, flipping once halfway through, until the skins are blistered and the peppers are tender.
  • Transfer to a serving dish, garnish with fresh oregano and enjoy warm or at room temperature. These roasted sweet peppers make a beautiful side, salad topper, or appetizer!

Notes

  1. Halved peppers roast faster and caramelize more, while whole peppers stay juicier — both ways work!
  2. Roasted balsamic can get sticky — lining your pan makes cleanup a breeze.
Keyword Healthy, roasted, side dish

Chili Scrambled Eggs Recipe (quick, easy & spicy)

May 6, 2025 by Abi Guna 17 Comments

If you ask me what my go-to healthy breakfast is when I’ve only got 10 minutes, it’s hands-down these Chili Scrambled Eggs. Creamy, fluffy, and full of flavor, they’re my answer to boring mornings — made with simple pantry staples and just the right kick of heat from fresh red chili. 

Soft and fluffy chili scrambled eggs served in a pink plate with chives on top. With fork on the side.

This quick egg dish comes together faster than your favorite brunch spot could ever deliver, and honestly? It’s way better than any restaurant-style scrambled eggs. Whether you’re powering through a busy weekday or easing into a slow Sunday, this protein-packed breakfast never disappoints.

If you're a fan of bold, flavorful breakfasts, these chili scrambled eggs are a must-try. The combination of fluffy eggs and fiery chilies makes for an energizing start to your day. For a well-rounded meal, consider pairing them with our hummus bagel sandwich for a creamy contrast. If you're in the mood for something lighter, our kale quinoa salad offers a refreshing balance to the heat. And for those who enjoy a touch of sweetness in the morning, our Banana Chocolate Chunk Muffins make a delightful accompaniment. From beaten eggs to finished scramble, it’s comfort in a pan — and breakfast made it better.

[feast_advanced_jump_to]
Creamy scrambled eggs with chili served on toast, sprinkled with fresh chives.

Why You’ll Love This Scrambled Eggs with Chili Recipe

Whether you’re new to the kitchen or looking for your next go-to egg recipe, this is the perfect recipe to elevate your mornings!

  • Minimal effort: This recipe brings heat, creaminess, and bold flavor with just a few simple ingredients.
  • Ready in 10 minutes: Perfect for busy mornings or a quick, protein-packed lunch, these eggs come together faster than your coffee brews.
  • Easy and tasty: The soft, creamy texture paired with the gentle kick of fresh red chili makes every bite exciting without being overpowering.
  • Customizable: Keep it mild or turn up the heat. Add cheese, herbs like green onions, or veggies — this recipe plays well with what you’ve got in your fridge.
  • Better than restaurants: Seriously! Once you make these at home, you’ll wonder why you ever ordered scrambled eggs out.

What to serve with homemade chili scrambled eggs

Warm sourdough toast or a toasted bagel - Classic and satisfying, great for scooping up those soft, fluffy eggs.

Avocado Toast - The creamy avocado balances the heat of the eggs — a perfect breakfast pairing. Even English Muffin pairs are just perfect!

Fresh salad - A light, crisp side to keep things refreshing and colorful. Try my Kale Quinoa Salad and Crispy Caesar Salad recipe which goes very well with scrambled eggs.

Banana Chocolate Chunk Muffins or Blackberry Oatmeal Muffins - Add a touch of sweetness to your savory plate — ideal for brunch.

Roasted Mini Peppers - Their roasted, tangy flavor complements the richness of the eggs beautifully.

Ingredients and Substitutions

When it comes to easy breakfast recipes, this chili scrambled eggs dish checks all the boxes, quick, flavorful, and made with simple ingredients you probably already have on hand. Lets see the detailed ingredients list below.

Overhead view of creamy scrambled eggs with red chili ingredients laid out.
  • Unsalted Butter: Adds richness and helps achieve soft, creamy eggs. I used unsalted butter but for substitutions, use ghee or olive oil for a dairy-free option.
  • Eggs: The main ingredient of the dish, providing protein and a fluffy base. I have used whole eggs for the recipe, but you can also use only egg white for substitute.
  • Heavy cream: Makes the eggs extra soft and luxurious. A splash of whole milk, half-and-half, or a splash of non-dairy milk (like oat or almond) will also work.
  • Red chili: Brings heat and flavor contrast to the creamy eggs. I used the fresh one for the recipe, if you could’t find the fresh red chili then opt for green chili, chili flakes, or a pinch of cayenne pepper for a similar kick.
  • Salt and black pepper: Essential for seasoning and enhancing all the flavors. Add a dash of garlic salt or smoked paprika for an extra flavor twist (optional).
  • Chives: Adds freshness and a pop of color. Try green onions, parsley, or cilantro if chives aren’t available.

See recipe card for quantities.

How to make Chili scrambled eggs (Step-by-Step Instructions)

Step 1: Crack and whisk the eggs

Step 2: Prep the chili

Step 3: Sauté the chili in butter

Step 4: Pour in the eggs

Step 5: Cook to your desired texture

Step 6: Garnish and serve

Ingredients being added in a green bowl to make creamy scarmbled egg with chili.
  1. Add the eggs, heavy cream, salt and pepper.
Beaten eggs in a bowl for the chili scrambled egg recipe.
  1. Beat the eggs using a fork or whick for 1-2 minutes.
Overhead view of sauted red chili with butter.
  1. Saute the chili with butter.
Egg mixture being poured in the skillet to make scrambled egg with chili.
  1. Pour in the egg mixture and cook on a low heat.
Easy chili scrambled eggs in a nonstick pan with a rubber spatula folding the eggs.
  1. Gently fold in the sides from the bottom of the pan, when soft curds forms.
Easy chili scrambled eggs in a nonstick cast iron pan with a rubber spatula folding the eggs.
  1. Cook until the eggs or gloosy and silky.

Plate the eggs and sprinkle with chopped fresh chives for color and a mild onion freshness. 

Hint: Use reheated eggs as a quick filling for breakfast tacos, grain bowls, or even tucked into a warm tortilla with a little cheese and avocado!

Variations

  • Cheesy Chili Scrambled Eggs - Stir in shredded cheddar parmesan cheese, feta, or goat cheese right before the eggs finish cooking for a rich, melty twist.
  • Chili Scramble with Avocado - Top with sliced avocado or mash some into the eggs while cooking for a creamy, cooling balance to the spice.
  • Veggie Version - Sauté chopped onion, bell peppers, or spinach with the chili for a veggie-packed scramble.
  • Extra Spicy Scrambled eggs - Add chili flakes, jalapeños, or a dash of hot sauce to turn up the heat.
  • Scrambled eggs with sourcream - A pinch of salt and a splash of sour cream or cream adds richness, while finely chopped red chili peppers bring just a little heat to wake up your taste buds.
Close-up of silky scrambled eggs with red chili pepper slices and fresh herbs.

Equipment needed to make spicy scrambled eggs

  • Mixing bowl: For whisking the eggs with seasoning and cream.
  • Whisk or fork: To beat the eggs until fluffy and well combined.
  • Sharp knife & cutting board: For finely chopping red chili peppers and any garnishes.
  • Nonstick skillet: Helps cook the eggs gently and prevents sticking.
  • Silicone spatula: Ideal for folding the eggs gently to keep them soft and silky.
  • Measuring spoons: To measure cream, salt, pepper, and optional add-ins like sour cream or parmesan.
  • Serving plate or bowl: To plate your eggs beautifully and keep them warm.

Storage and Reheating Tips

  • Cool completely before storing: Let the eggs come to room temperature before placing them in the fridge to prevent sogginess.
  • Refrigerate: Store any leftover chili scrambled eggs in an airtight container for up to 2 days. They’re best when eaten fresh, but leftovers still work great in wraps or bowls!
  • Reheat gently: Warm the eggs in a nonstick skillet over low heat, stirring occasionally until heated through. You can also microwave them in 20–30 second bursts, stirring between each round to avoid overcooking.
  • Avoid freezing: Scrambled eggs tend to get rubbery and lose their soft texture when frozen and reheated, so it’s best to make a fresh batch.
Creamy scrambled eggs with chili served on pink plate, sprinkled with fresh chives.

Top Tips for Perfect Chili Scrambled Eggs

  • Whisk well and whisk long: Beat the eggs until completely blended and slightly frothy. This adds air and helps create that soft, fluffy texture.
  • Add creaminess with heavy cream or milk: Just a splash makes the scramble extra soft and velvety.
  • Use low and slow heat: Keep your pan on low to medium-low. High heat cooks eggs too fast and makes them rubbery.
  • Infuse the butter with chili: Sauté the chopped chili in butter first to mellow the heat and flavor the fat before adding the eggs.
  • Don't overcook: Remove the eggs from the heat while they’re still slightly glossy — they’ll finish cooking with residual heat and stay soft.
  • Use a silicone or rubber spatula: Gently push the eggs from edge to center in slow folds to maintain soft curds.
  • Season at the right time: Salt draws out moisture, so add it while whisking the eggs — not during or after cooking.
  • Garnish for freshness: A sprinkle of fresh chives or herbs adds color, flavor, and brightness to balance the spice.

FAQ

What type of chili should I use for my scrambled eggs?

You can use fresh red chili (like Fresno or red jalapeño) for heat and color, or swap in green chili for a slightly milder kick. You can also use red pepper flakes or a pinch of cayenne if fresh chilies aren’t available.

How do I keep scrambled eggs soft and not dry?

Cook them slowly over low heat and remove from the pan while they’re still slightly glossy. A splash of heavy cream or milk also helps keep the texture rich and creamy.

Are chili scrambled eggs spicy?

They can be, but you’re in control. Remove the seeds from the chili for a milder flavor as I did here, or skip the chili and just use a dash of chili powder or flakes to dial in the heat.

Can I make these scrambled eggs ahead of time?

Chili scrambled eggs are best fresh, but you can store leftovers for up to 2 days in the fridge. Reheat gently on the stove or in short bursts in the microwave.

Chili scrambled eggs on a rustic pink plate with fork, fresh herbs, and toasted bread on the side.

Related

Looking for other recipes like this? Try these:

  • A stack of warm Nutella waffles served with a side of whipped cream, fresh strawberries, and a rich chocolate-hazelnut drizzle, creating a decadent and mouthwatering brunch treat.
    Nutella Waffles (Crispy, Easy & Ready in 15 Minutes)
  • Close-up of a crispy chicken salad melt sandwich with golden toasted bread, melted cheese, and creamy chicken salad filling stacked one above the other.
    Easy Cheesy Chicken Salad Melt Sandwich Recipe
  • Perfectly crispy sweet potato cubes sprinkled with parsley and sea salt in a white bowl along with dipping sauce, lemon wedges in the sides.
    Air Fryer Sweet Potato Cubes (Crispy, Easy & Ready in 15 Minutes)
  • Nutella mousse piped into fancy serving cups, garnished with whipped cream and chocolate curls for a luxurious look.
    Nutella Mousse (Easy 4-Ingredient No-Bake Dessert)

Pairing

These are my favorite dishes to serve with this spicy scrambled egg recipe:

  • Homemade vanilla bean latte in a beautiful glass mug accompanied by vanilla beans on the side.
    Vanilla Bean Latte Recipe (Starbucks Copycat in 5 Minutes)
  • Easter Rocky Road stacked one above the other with easter decorations around on a pink background.
    Easter Rocky Road With Easter Eggs And Chocolate
  • Beautifully decorated homeade baked easter donuts with patel colored donut glaze topped with Easter festive sprinkles, mini eggs. The Easter are placed in a pink plate with blue napkin underneath on a pink backgorund with festive sprinkles, mini eggs around.
    Easter Donuts (Baked, Easy & Perfect with Pastel Glaze)
  • The BESt homemade vanilla bean syrup for coffee is stored in an airtight container with fresh vanilla beans along the sides.
    Vanilla Bean Coffee Syrup (Easy Homemade Starbucks Copycat)

If you tried this Chili Scrambled Eggs recipe or any other recipe from my blog, I’d love to hear your thoughts! ⭐ Please leave a STAR rating and share your experience in the COMMENTS below. Your support means so much and helps me continue creating delicious recipes. Thank you for being part of this journey!

Overhead view of creamy scrambled eggs with red chili and chives garnish.

Chili Scrambled Eggs Recipe (quick, easy & spicy)

Abi Guna
Quick and creamy Chili Scrambled Eggs made with red chili peppers, heavy cream and healthy fluffy eggs. A spicy, easy protein-packed breakfast ready in under 10 minutes!
5 from 9 votes
Print Recipe Pin Recipe
Prep Time 5 minutes mins
Cook Time 5 minutes mins
Total Time 10 minutes mins
Course Breakfast
Cuisine American, French
Servings 2 people
Calories 220 kcal

Equipment

  • Mixing Bowls
  • Measuring cups and spoons
  • Spatula
  • Nonstick skillet
  • Sharpe knife and cutting board
  • Fork or whisk

Ingredients
  

  • 4 large eggs
  • 1 fresh red chili pepper finely chopped
  • 1 tablespoon unsalted butter
  • 1 tablespoon heavy cream
  • ½ teaspoon Salt
  • ½ teaspoon Black pepper
  • Fresh chives finely chopped (for garnish)

Instructions
 

  • In a small bowl, crack in the eggs. Add a splash of heavy cream, along with a pinch of salt and pepper. Whisk until the yolks and whites are fully combined and the mixture looks light and bubbly, (Don’t skip this step it gives you fluffier scrambled eggs)
  • Finely dice the fresh red chili, removing the seeds if you prefer less heat. You can adjust the quantity depending on your spice tolerance.
  • In a nonstick skillet over medium-low heat, melt the butter. Add the chopped chili and sauté for 30 seconds to 1 minute, just until fragrant. This infuses the butter with chili flavor and softens the heat slightly.
  • Lower the heat slightly and pour the whisked eggs into the pan. Let them sit for a few seconds, then use a spatula to gently push the eggs from the edges of the pan toward the center. Wooden spoons also work here. Continue stirring slowly and gently for soft, custard-like curds.
  • Keep stirring until the eggs are softly set but still a little creamy — they’ll continue to cook slightly from the residual heat even after you remove them from the pan.
  • Plate the eggs and sprinkle with chopped fresh chives for color and a mild onion freshness.
  • Serve immediately while warm, with toast, avocado, or a side of roasted veggies.

Notes

  1. Use fresh red chili for a bold flavor, adjust the amount based on your spice preference.
  2. The key to achieving silky eggs is starting with a well-whisked egg mixture. Take the time to whisk the eggs thoroughly until they're light and airy — that’s what gives you that restaurant-style texture.
  3. Cook on low heat for soft, fluffy eggs, patience is key for the best texture.
Keyword breakfast, eggs, Healthy

Strawberry Chocolate Chip Muffins Recipe (EASY)

April 29, 2025 by Abi Guna 15 Comments

If you’re in the mood to bake something sweet, moist, and totally delicious recipe, these bakery style Strawberry Chocolate Chip Muffins are calling your name! Juicy strawberries and melty chocolate come together in the fluffiest muffin base — it’s the kind of recipe you’ll want to keep on repeat.

Close-up of a moist strawberry muffin with melted mini chocolate chips.

These Strawberry Chocolate Chip Muffins bake up soft, fluffy, and bakery-style ones loaded with juicy strawberries and melty mini chocolate chips. Sour cream keeps the crumb extra moist (Greek yogurt works too), and the quick high-heat start gives you tall muffin tops, perfect for breakfast, lunchboxes, or a sweet snack. or satisfying that afternoon craving alongside a caramel latte.

If you’re as muffin-obsessed as we are around here, don’t stop at just these Strawberry Chocolate Chip Muffins! You’ll also love my soft and fluffy Banana Chocolate Chunk Muffins for a cozy, chocolatey bake, or the wholesome and fruity Blackberry Oatmeal Muffins — perfect for breakfast meal prep. Pair any of these with a creamy Vanilla Bean Latte for the ultimate homemade coffee shop moment.

But if you’re in the mood for something sweet-but-no-bake, you have to try my decadent Nutella Covered Strawberries, Chocolate Covered Strawberries, Strawberry Santas — they're always a crowd favorite.

[feast_advanced_jump_to]
Freshly baked strawberry chocolate chip muffins surrounded by fresh strawberries and mini chocolate chips.

Why You'll Love This Easy Strawberry Chocolate chip muffins Recipe

Whether you're baking a batch for Valentine’s Day, weekend brunch, or just craving something cozy from your collection of baked goods, this is an easy recipe that always delivers tender muffins with a soft crumb. Here are some more reasons why you will love this recipe!

  • Quick & Easy: All you need is just simple ingredients and a bowl or two to make these moist muffins. Great for beginners or a quick weekend bake under 30 minutes.
  • Sweet indulgent: Each bite is bursting with juicy strawberries and gooey mini chocolate chips — it's the kind of combo that never gets old. Agree?
  • Beautiful texture: Moist, fluffy, and just the right amount of tender. These muffins bake up beautifully every time with the right amount of sweetness!
  • Versatile and family-friendly: Whether it’s breakfast on the go, or brunch or something sweet with your afternoon latte as a dessert, these strawberry muffins always hit the spot among kids and adults!
  • Make-Ahead: These chocolate chip muffins are freezer friendly! Make a batch (or two!) and stash some away for later — they reheat like a dream.
Close-up of a moist strawberry muffin with melted mini chocolate chips.

What to Serve with Strawberry Chocolate Chip Muffins

  • Coffee: A warm, frothy vanilla bean latte or a salted caramel latte is just the perfect match for these muffins. 
  • Fresh Fruit or Yogurt: Add a side of Greek yogurt or a small bowl of seasonal berries to keep things light and refreshing like my berry chia seed pudding.
  • Scrambled Eggs: Add a savory balance to your muffin plate with fluffy scrambled eggs or quick egg muffins. It's a great way to round out a sweet-and-savory breakfast.
  • Sandwiches: Savory options like a hummus veggie sandwich or chicken salad melts pair perfectly with the sweet flavor of strawberry muffins.

Ingredients & Substitutions for chocolate strawberry muffins

If you're a huge fan of soft, fluffy muffins with pockets of melty chocolate and bursts of strawberry flavor, these muffins are about to become one of your new favorite things to bake. The combination of fresh chopped strawberries and mini chocolate chips creates that perfect balance of sweet and fruity in every bite. Let's see the ingredients below!

Ingredients laid out for making strawberry chocolate chip muffins.
  • All-purpose flour: The base of the muffins, providing structure and softness. You can use  1:1 gluten-free baking blend for a gluten-free version.
  • Baking powder: Helps the muffins rise and gives them a fluffy texture.
  • Baking soda: Works with the sour cream to create lift and a tender crumb.
  • Salt: Balances the sweetness and enhances all the flavors.
  • Unsalted butter: Butter adds a rich flavor and moisture. Use softened butter, not melted butter. For substitution,you can use neutral oil (like canola or vegetable oil) for a lighter texture or melted coconut oil for a dairy-free option.
  • Sugar: For the sweetness of the muffins. I have used white sugar but you can also use brown sugar instead.
  • Eggs: Bind the batter and help the muffins rise. Use flax eggs or yogurt for an egg-free option.
  • Vanilla extract: Adds warmth and enhances the flavor.
  • Sour cream: Makes the muffins extra moist and tender with a slight tang. You can also substitute the sour cream with Greek yogurt or plain yogurt or whole milk or even buttermilk works.
  • Fresh Strawberries: Juicy and sweet strawberries add bursts of flavor throughout. Fresh is best; if using frozen, don’t thaw, dice frozen and toss with flour to reduce sogginess.
  • Mini chocolate chips: I use mini chocolate chips so they hey distribute better in muffin batter and give chocolate in every bite. But you can use regular-sized chocolate chips, white chocolate, or dark chocolate chunks based on your preference.

See recipe card for quantities.

A oval platter filled with moist strawberry muffin with melted mini chocolate chips.

How to Make Strawberry Chocolate Chip Muffins

Lets, see how to make the best strawberry chocolate chip muffins with step-by-step process below!

To make these moist and fluffy Strawberry Chocolate Chip Muffins, start by preheat to 425°F for the bakery-style rise, then finish at 350°F until the centers set. This two-temperature method helps create taller tops without drying the muffins. Whisk together the dry ingredients — flour, baking powder, baking soda, and salt — and set aside. In a separate bowl, cream the butter and sugar until light and fluffy, then mix in the eggs, vanilla, and sour cream until smooth. Gently combine the wet ingredients and dry ingredients, being careful not to overmix.

In a large bowl butter and sugar are creamed and sour cream is added.
Dry ingredients and wet ingredients are being combined to make the moist strawberry muffins.

Fold in the diced strawberries and mini chocolate chips, then scoop the batter into the muffin cups, filling them about ¾ full. To get that beautiful golden brown top and tall muffin form, we use an initial high temperature in the oven — it’s honestly the best way to get that bakery-style rise!

Chopped strawberries and mini chocolate chips added to the muffin batter.
In a large bowl the strawberry chocolate chip muffin batter is ready to bake.

Bake for 5 minutes at 425°F, then reduce the temperature to 350°F and continue baking for 15–18 minutes, or until the tops are golden and a toothpick comes out clean. Let them cool slightly on a wire rack before enjoying!

The strawberry chocolate muffins are ready in the muffin pan to bake.
Strawberry chocolate chip muffins are placed in a cooling rack.

If you want to mix things up next time, try folding in some freeze-dried strawberries for a more intense berry flavor — it’s the only way I’ll do them now when fresh berries are out of season.

Hint: Cut strawberries into small pieces and blot with paper towels to reduce extra moisture. And also lightly coat diced strawberries before folding in to help prevent sinking.

Variations

  • Strawberry Banana Chocolate Chip Muffins - Mash 1 ripe banana and fold it into the batter with the strawberries. It adds extra moisture and a naturally sweet twist that pairs beautifully with chocolate!
  • Strawberry Coconut Muffins - Swap the chocolate chips for shredded coconut and add a splash of coconut extract.
  • Strawberry Double Chocolate Muffins - Mix ¼ cup cocoa powder into the dry ingredients and use dark chocolate chips instead of semi-sweet. Now you’ve got a rich, brownie-like muffin with bright pops of strawberry.
  • Mixed Berry Muffins - Mix strawberries with other berries like blueberries or raspberries for a colorful, juicy upgrade — perfect when you need to use up what’s in the fridge!
Strawberry chocolate chip muffin broken in half showing juicy strawberries inside.

Equipment

  • Mixing Bowls – One for dry ingredients and another for wet ingredients.
  • Hand Mixer – For mixing the wet ingredients.
  • Spatula  – To fold in the chocolate chips and chopped strawberries.
  • Measuring Cup & Spoons – For accurate ingredient measurements.
  • Muffin Pan – A standard 12-cup muffin pan for baking.
  • Muffin Liners – To prevent sticking and make cleanup easier.
  • Ice Cream Scoop  – For evenly filling the muffin cups.

Storage & Freezing Tips for easy strawberry muffins

Room temperature: Store completely cooled strawberry chocolate muffins in an airtight container at room temperature or cover with a clean plastic wrap for up to 2 days. Because the strawberries add moisture, they’re best enjoyed within the first couple of days for that fresh-baked taste.

Refrigerating: If you need them to last a little longer, pop the muffins in the fridge for up to 4–5 days. Warm them up for 10–15 seconds in the microwave before serving to bring back that soft, melty texture.

Freezing: Place the fully cooled muffins in a single layer on a baking sheet and freeze for 1 hour. Transfer to a freezer-safe zip-top bag or container. Freeze for up to 3 months.

Close-up of a moist strawberry muffin with melted mini chocolate chips in a platter.

Top Tips for Perfect Strawberry Chocolate Chip Muffins

  1. Use only room temperature ingredients for this muffins recipe, this helps the batter mix together more smoothly, creating a tender, and moist muffins.
  2. Use fresh strawberries because the fresh ones yield the best flavor and texture.
  3. Mix the wet and dry ingredients until just combined. Overmixing can lead to dense, tough muffins instead of light and fluffy ones.
  4. Baking at 425°F for the first 5 minutes gives the muffins a nice tall rise. Don’t forget to lower the oven temperature to 350°F to finish baking without over-browning the tops.
  5. Using mini chocolate chips distribute more evenly throughout the batter, making sure every bite has a little melty chocolate goodness. But you are welcome to use regular chocolate chips as well.
  6. Filling the muffin liners about three-quarters full gives you that perfect domed top without overflowing during baking.
  7. Sprinkle a few extra mini chocolate chips (and even a couple of sliced strawberries) on top before baking for a bakery-style look.
  8. This step is optional: Before folding the strawberries into the batter, toss them in a tablespoon of flour. This helps keep them from sinking to the bottom while the muffins bake.

FAQ

Can I use frozen strawberries?

Of course you can, use them frozen (do not thaw), dice small, and toss with a teaspoon of flour to reduce excess moisture.

How can I make these muffins healthier?

To make these strawberry muffins healthy, substitute half the all-purpose flour with whole wheat flour and use a natural sweetener like honey or maple syrup in place of sugar.

Can I make mini muffins with this recipe?

bsolutely you can! Pour the prepared thick muffin batter in a mini muffin tin and adjust the baking time to 10-12 minutes and check for doneness.

Can I make these muffins dairy-free?

Absolutely! Substitute the butter with a plant-based alternative and use a dairy-free sour cream or full-fat coconut yogurt. Just be sure the replacements are unsweetened for best results.

Can I freeze these muffins?

Yes! Let them cool completely, store airtight 2–3 days; freeze up to 2 months (wrap individually). Thaw at room temp or microwave for 20–30 seconds to enjoy them warm.

How do I prevent the strawberries from sinking to the bottom?

Toss the diced strawberries in 1 tablespoon of flour before folding them into the batter. This helps them stay evenly distributed while baking.

How do I stop muffins from being soggy?

Pat strawberries dry using a kitchn towel, don’t overmix the batter, and bake until a toothpick comes out clean (melted chocolate is okay).

Can I use regular chocolate chips?

Yes you can, but mini chips spread more evenly. I sometimes use dark or semi sweet regular chocolate chips for a variation.

Can I swap sour cream?

Ofcourse you can. Replace sour cream with Greek yogurt, 1:1.

Bakery-style strawberry chocolate chip muffins topped with extra mini chocolate chips.

Related

Looking for other recipes like this? Try these:

  • Crispy chicken caesar salad in a white bowl accompanied by a bowl homemade caesar salad dressing.
    Crispy Chicken Caesar Salad (Easy Restaurant-Style Recipe)
  • Chicken and shrimp fried rice is placed in a serving bowl, the skillet the fried rice is peeking. Soy sauce is placed in a dipping saucer along with the green onions in a wooden bowl.
    Chicken and Shrimp Fried Rice (Easy Better-Than-Takeout Dinner)
  • Square image of Single banana blackberry oatmeal muffin placed in a plate with fresh blackberries arround and banana is the behind.
    Banana Blackberry Oatmeal Muffins
  • Banana chocolate chunk muffins stacked one above the other.
    Banana Chocolate Chunk Muffins (Bakery style Recipe)

Pairing

These are my favorite dishes to serve with this easy chocolate strawberry muffin recipe:

  • CLose up shot of pesto butter salmon garnished with basil and lemon wedges.
    Pesto Butter Salmon (Easy 20-Minute Dinner Recipe)
  • Blackened salmon bites in a oval platter arranged beautifully and garnished with parsley and lemon wedges in the side.
    Blackened Salmon Bites (Crispy, Spicy & Easy Recipe)
  • Roasted carrots and asparagus with goat cheese plated in a off white plate served with lemon wedges in the sides and garnished with parsley.
    Roasted Carrots and Asparagus – Easy Oven-Baked Side Dish
  • Stacked red velvet ake waffles , whipped cream topped with pecans and chocolate chips. Cream cheese drizzled over.
    Red Velvet Cake Waffles Recipe (With Cake Mix)

If you tried this Strawberry Chocolate Chip Muffins recipe or any other recipe from my blog, I’d love to hear your thoughts! ⭐ Please leave a STAR rating and share your experience in the COMMENTS below. Your support means so much and helps me continue creating delicious recipes. Thank you for being part of this journey!

Stack of strawberry muffins with chocolate chips and fresh strawberries on the side.

Strawberry Chocolate Chip Muffins Recipe (EASY)

Abi Guna
These Strawberry Chocolate Chip Muffins are soft, fluffy, and packed with juicy chopped strawberries and melty mini chocolate chips. Made with sour cream for extra moisture and a hint of vanilla for warmth, they bake up beautifully golden brown with a tender crumb. This easy, one-bowl recipe is perfect for breakfast, brunch, or a sweet snack — and freezes well for make-ahead treats!
5 from 7 votes
Print Recipe Pin Recipe
Prep Time 10 minutes mins
Cook Time 22 minutes mins
Total Time 32 minutes mins
Course Breakfast, Dessert
Cuisine American
Servings 12 Muffins

Equipment

  • Mixing Bowls
  • Measuring cups and spoons
  • Cooling rack
  • Muffin Pan
  • Hand Mixer

Ingredients
  

  • 2 cups all-purpose flour
  • 1 ½ teaspoons baking powder
  • ½ teaspoon baking soda
  • ½ teaspoon salt
  • ½ cup unsalted butter at room temperature
  • ¾ cup sugar
  • 2 eggs at room temperature
  • 1 ½ tablespoons vanilla extract
  • ½ cup sour cream at room temperature
  • 1 cup fresh strawberries diced
  • ¾ cup semi-sweet mini chocolate chips

Instructions
 

  • Preheat your oven to 425°F. Line a 12-cup muffin pan with cupcake liners or lightly grease with nonstick cooking spray.
  • In a medium bowl, whisk together the flour, baking powder, baking soda, and salt. Set aside.
  • In a large bowl, using a handheld mixer or stand mixer, beat the room temperature butter and sugar together on medium speed until light and fluffy — about 2 to 3 minutes.
  • Add the eggs, one at a time, beating well after each addition. Mix in the vanilla extract until fully combined.
  • Mix in the sour cream, scraping down the sides of the bowl as needed. The batter will look smooth and creamy.
  • Gradually add the dry ingredients to the wet mixture, mixing on low speed just until no flour streaks remain, the batter will look thick.. Do not overmix the muffin batter.
  • Gently fold in the diced strawberries and mini chocolate chips with a rubber spatula, making sure they’re evenly distributed.
  • Scoop the batter into the prepared muffin cups using a cookie scoop, filling each one about ¾ full. You can sprinkle a few extra mini chocolate chips and strawberries on top for a bakery-style look.
  • Bake for 5 minutes at 425°F, then reduce the temperature to 350°F and continue baking for 15–18 minutes, or until the tops are lightly golden and a toothpick inserted into the center comes out clean or with a few moist crumbs.
  • Let the muffins cool in the pan for 5 minutes, then transfer to a cooling rack to cool completely. Serve the muffins to enjoy.

Notes

  1. Use only room temperature ingredients for better results.
  2. Before folding the strawberries into the batter, toss them in a tablespoon of flour. This helps keep them from sinking to the bottom while the muffins bake.
  3. When storing the muffins, line the container with a paper towel to absorb excess moisture and keep the muffin tops from getting sticky!
  4. Sprinkle a few extra mini chocolate chips and sliced strawberries on top before baking for a bakery-style look.
  5. Baking at 425°F for the first 5 minutes gives the muffins a nice tall rise. Don’t forget to lower the oven temperature to 350°F to finish baking without over-browning the tops.
Keyword Baked, breakfast, muffins, Strawberry

Blueberry Mojito Mocktail (Virgin Mocktail Recipe)

April 27, 2025 by Abi Guna 19 Comments

One glass won't be enough when it comes to this refreshing Blueberry Mojito Mocktail! This non-alcoholic drink strikes the perfect balance of sweet, tart, and minty freshness — all beautifully packed into one vibrant, irresistible glass.

Refreshing blueberry mojito mocktail with fresh mint and lime in a glass

All you need are just 5 simple ingredients to make this refreshing Virgin Mocktail Recipe! Fresh blueberries and mint are muddled together with a splash of lime to create a vibrant, flavor-packed base. For a touch of sweetness, homemade vanilla bean syrup is added, then everything is topped off with bubbly club soda for the perfect fizzy finish. Whether you're hosting a weekend brunch, lounging by the pool, or just craving a refreshing afternoon pick-me-up, this mocktail is every bit as fun to sip as it is to make. Trust me — one glass just won’t be enough!

We enjoyed this refreshing Blueberry Mojito Mocktail alongside some Chicken Salad Melts last evening, and it was the perfect light and satisfying combo! If you're looking for even more summer favorites, be sure to check out my Lemon Mini Bundt Cakes for a sweet treat, Lemon Pepper Chicken Thighs for an easy dinner, or Shrimp Skewers for your next backyard BBQ. There's something delicious for every sunny occasion!

[feast_advanced_jump_to]
Homemade blueberry mojito mocktail recipe perfect for summer parties.

Why You’ll Love This Blueberry Mojito Mocktail

  • Quick and Easy: Made with just a handful of simple ingredients, you can make this mocktail in minutes—no cocktail shaker needed!
  • Non-Alcoholic: Perfect for everyone—kids, adults, or party guests looking for a flavorful drink without the booze.
  • Super Refreshing: Fresh blueberries, mint, and lime create a cool, vibrant color drink that’s perfect for hot summer days, July 4th, Mother’s day, etc.,
  • Perfect for all occasions: Its beautiful color and fizzy finish make it a showstopper for brunches, pool parties, baby showers, and beyond!

How to Serve a Blueberry Mojito Mocktail

When it comes to serving a non-alcoholic blueberry mojito, it’s all about keeping things fresh, fun, and a little bit fancy — without any fuss. Whether you're pouring for a summer brunch, a backyard BBQ, or just a quiet afternoon treat, a few simple touches will make your mocktail feel extra special. Here’s how I love to serve it:

  • Use a Pretty Glass - Serve your blueberry mojito mocktail in medium to tall glasses, clear glasses like a highball or a mason jar for a visual appeal.
  • Add Lots of Ice - Fill your glass all the way to the top with ice. A good mojito should be icy cold and super refreshing with every sip.
  • Garnish - A few extra garnishes go a long way so add handful of fresh whole blueberries, sprig of mint, a lime wedge or a thin lime wheel tucked on the rim.
Close-up of blueberry mojito mocktail garnished with mint leaves and lime slices.

What to Serve with a Blueberry Mojito Mocktail

Baked Shrimp Skewers – Juicy, grilled shrimp with a squeeze of lemon is such a natural match for the mint and blueberry flavors.

Goat Cheese Crostini – Toasted bread topped with creamy goat cheese, a drizzle of honey, and a sprinkle of fresh thyme brings the perfect touch of sweetness.

Tropical Salsa and Chips – A mango and pineapple salsa adds a sweet, tangy pop that pairs so nicely with the coolness of the mojito.

BBQ Chicken Thighs – If you're firing up the grill, my BBQ Chicken Thighs are a must! Smoky, juicy, and full of bold flavor, they balance the cool sweetness of the mocktail perfectly.

Chicken Sandwich Melts – For a cozy option, try my Chicken Salad Melts. Toasty, cheesy, and full of savory goodness — they’re easy to make and even easier to love.

Lemon Bundt Cakes – Zesty, buttery mini lemon bundts  are a bright and refreshing treat that never disappoints.

Ingredients and Substitutions

If you love virgin mojitos and fruity drinks, you’re going to be obsessed with this Blueberry Mojito Mocktail! It’s a twist on the traditional mojito, made without alcohol but packed with all the bright, refreshing flavors you expect. Instead of rum, this mocktail option uses fresh blueberries and mint, making it one of my favorite summer drinks to cool off with during the summer heat. Think of it as a lighter, berry-filled spin on a typical mojito — but just as delicious! Lets see the ingredients needed below:

Easy homemade blueberry mojito mocktail  recipe ingredients laid out.
  • Fresh blueberries - Fresh blueberries bring sweet, juicy flavor and a gorgeous natural color to the mocktail. You can use frozen blueberries if fresh ones aren't available but make sure to just thaw them first for best flavor.
  • Fresh mint leaves - Mint gives the mojito its signature refreshing, cooling flavor that pairs so beautifully with the berries. You can also swap the mint with fresh basil for a twist.
  • Lime juice - Fresh lime juice adds the perfect bright, tangy balance to the sweet blueberries. Bottled lime juice works too or you can use fresh lemon juice for a slightly different citrus flavor.
  • Vanilla bean simple syrup - I love vanilla flavors in my drinks, this syrup not only sweetens the drink while adding a subtle, cozy depth. Swap with honey or maple syrup for a natural sweetness, or use agave nectar if you prefer. Any sweeteners should work here.
  • Club soda or sparkling water - Club soda or sparkling water gives the mocktail its lively fizz, making it light and refreshing. Lemon-lime soda can be used if you want a sweeter, more citrusy finish.
  • Ice cubes - Ice keeps the drink cold, crisp, and ultra-refreshing, just like any good mojito should be! I like to crush them a little and add it!

See recipe card for quantities.

Learn how to make Blueberry Mojito Mocktail

Just a few simple steps are involved to make this classic mojitos which is such a great drink! Start by grabbing a sturdy glass and adding the fresh blueberries, mint leaves, a splash of fresh lime juice, and a drizzle of simple syrup. The key to a great mojito mocktail is gently muddling the mint to release those fragrant mint oils without bruising the leaves. Using a muddler (A cocktail muddler is handy here, but the back of a wooden spoon works too), gently press everything together — just enough to release the sweet berry juices and that refreshing minty aroma.

Blueberries, mint, simple syrup, lime juice being added to make blueberry mojito mocktail.
gently muddling the mint to release those fragrant mint oils.

Fill the glass to the brim with ice cubes, then top it off with fizzy club soda or sparkling water. Give it a gentle stir to bring all those bright, fresh flavors together. Finish with a few extra mint leaves, a couple of lime slices, and a sprinkle of blueberries on top if you’re feeling fancy. Serve your Blueberry Mojito Mocktail right away for the most refreshing sip!

Glass is being filled with crushed ice cubes for making blueberry mojito mocktail.
Soda being poured over the glass for making virgin blueberry mocktail.

While the classic mojito uses white rum, we skip it here and instead build up the flavor with a splash of blueberry juice or a quick homemade blueberry syrup. Top it all off with icy seltzer water for that sparkling, bubbly finish. Whether you’re craving a mixed drink without the booze or just looking for a seriously refreshing drink to sip under the sun, this blueberry mojito is such a good reason to make a pitcher and enjoy every last cooling sip!

Hint: If you're making a batch for a party, muddle the mint and blueberries ahead of time, but wait to add the sparkling water until just before serving so it stays a nice and fizzy drink! 

Glass of virgin blueberry mojito mocktail with crushed ice and sparkling water.

Variations

  • Mixed Berry Mojito - Swap some of the blueberries for raspberries, strawberries, or blackberries. A combo of berries gives the drink a gorgeous color and a slightly deeper flavor that fruity mocktails lovers enjoy!
  • Coconut Blueberry Mojito - Replace the club soda with coconut water for a tropical twist.
  • Lemon Blueberry Mojito - Use fresh lemon juice instead of lime juice for a slightly sweeter, less tangy version.
  • Frozen Blueberry Mojito - Blend the blueberries, mint, lime juice, and ice into a slushy-style frozen mocktail. Perfect for hot days when kids want something icy and fun.

How to make simple syrup for mocktails

In this Virgin blueberry mojito recipe I have used my homemade vanilla bean syrup which is just perfect, but if you want to know how to make a homemade simple syrup recipe it's incredibly easy — and it’s a game-changer for mocktails! To make it:

  • Just combine equal parts sugar and water (for example, ½ cup raw sugar and ½ cup water) in a small saucepan over medium heat. Stir gently until the sugar completely dissolves into the water — no need to boil!
  •  Once it’s clear and smooth, remove it from the heat and let it cool.
  •  Store your simple syrup in a clean jar in the fridge for up to a week — perfect for sweetening up your next round of blueberry mojitos drink recipe!
Colorful summer mocktail with blueberries, mint, and fizzy seltzer water.

Equipment

  • Sturdy Glass or Mason Jar
  • Cocktail Muddler (or Wooden Spoon)
  • Measuring Spoons
  • Mixing Spoon 

Storage

Because this mocktail is all about that fresh, fizzy magic, it’s best enjoyed right after you make it. But if you want to prep ahead or have leftovers, here’s the best way to store it:

Without Club Soda: You can muddle the blueberries, mint, lime juice, and simple syrup ahead of time and store the mixture in an airtight container or mason jar in the refrigerator for up to 24 hours. When you’re ready to serve, just add ice and top it off with fresh club soda or sparkling water for that lively fizz.

Top Tips for the Best Blueberry Mojito Mocktail

Making a Blueberry Mojito Mocktail at home is so simple — but a few little tricks can make it truly special! Here’s how to make every glass taste like it came from your favorite café:

  1. When muddling the mint and blueberries, use a light hand. You want to bruise the mint to release the oils without tearing it apart, which can make the drink taste bitter.
  2. Always use fresh lime or lemon juice, it makes a huge difference in flavor.
  3. Chill everything ahead - For an extra refreshing mocktail, chill your glassware, blueberries, club soda, and even your simple syrup before mixing. 
  4. Taste as you go, because some berries may be sweeter and some may not, so adjust the sweetness accordingly.
  5. Garnish them to make the drink as pretty as you could. A pretty drink is an inviting drink, garnish with lime wedges, lime slices, fresh mint leaves!
  6. For the best fizz and the freshest flavor, serve your blueberry mojito mocktail immediately after mixing. 
Summer drink idea: blueberry mojito mocktail in a clear glass with blueberries and mint.

FAQ

Can I use frozen blueberries instead of fresh?

Yes! Frozen blueberries work perfectly if fresh aren't in season. Just let them thaw a little before muddling to help release their juices and flavor.

Can I make this mocktail ahead of time?

Of course you can! Muddle the blueberries, mint, lime juice, and syrup ahead and store it in the fridge for a few hours. But wait to add the ice and sparkling water until just before serving to keep it fresh and fizzy.

What’s the best substitute for club soda?

Sparkling water works great, but if you want a slightly sweeter twist, you can use lemon-lime soda water or a splash of ginger ale or sprite instead.

What if I don't have a muddler?

No problem at all. You can use the back of a sturdy long wooden spoon or even the bottom of the glass or small jar to gently press and muddle the ingredients together.

Related

Looking for other recipes like this? Try these:

  • Homemade Valentine cake pops with cake mix arranged in a glass jar filled with sprinkles.
    Easy Valentine Cake Pops with Cake Mix (No Cracks)
  • Nutella covered strawberries in a pink plate with Nutella jar and fresh strawberries behind.
    Nutella Covered Strawberries
  • Easy , quick and easy oatmeal mug cake with chocolate and raspberries .
    Oatmeal Mug Cake Recipe (Ready in 2 Minutes!)
  • mini lemon bundt cake in a white plate.
    Moist Lemon Mini Bundt Cakes with Lemon Icing

Pairing

These are my favorite dishes to serve with this Virgin Blueberry Mocktail recipe:

  • Juicy Chicken Meatballs in a white plate with marinara sauce on the sides.
    Juicy Air Fryer Chicken Meatballs In 20 Minutes
  • Close up shot of chocolate mini bundt cake with chocolate drizzle on it.
    Mini Chocolate Bundt Cakes With Chocolate Ganache
  • Healthy ground chicken stir fry in a skillet.
    Ground Chicken Stir Fry (Easy 20-Minute Dinner Recipe)
  • Creamy and delicious homemade salted caramel latte recipe in a glass mug.
    Salted Caramel Latte (Better Than Starbucks, Ready in 5 Min)

If you tried this Blueberry Mojito Mocktail recipe or any other recipe from my blog, I’d love to hear your thoughts! ⭐ Please leave a STAR rating and share your experience in the COMMENTS below. Your support means so much and helps me continue creating delicious recipes. Thank you for being part of this journey!

Easy homemade blueberry mojito mocktail served with ice and seltzer water in three. glasses.

Blueberry Mojito Mocktail (Virgin Mocktail Recipe)

Abi Guna
Beat the summer with this refreshing Blueberry Mojito Mocktail with fresh blueberries, homemade vanilla bean syrup, lime juice and mint. Served on a tall glass filled with crushed ice and topped with fizzy club soda.
5 from 10 votes
Print Recipe Pin Recipe
Prep Time 5 minutes mins
Total Time 5 minutes mins
Course Drinks
Cuisine American
Servings 2 Blueberry Mojitos

Equipment

  • Measuring cups and spoons
  • Mason jar or serving glasses
  • Cocktail muddler or wooden spoon
  • Mixing spoon

Ingredients
  

  • ½ cup fresh blueberries (including few for garnish)
  • 10 fresh mint leaves
  • 2 tablespoons fresh lime juice
  • 2 tablespoons vanilla bean simple syrup or honey or maple syrup
  • 1 cup club soda or sparkling water
  • Ice cubes
  • Lime slices for garnish
  • Mint sprig for garnish

Instructions
 

  • In a sturdy glass or mason jar, add the fresh blueberries, mint leaves, fresh lime juice, and simple syrup between two glasses. Using a cocktail muddler or the back of a wooden spoon, gently press down and twist just enough to release the blueberry juices and the fragrant mint oils. Be careful not to over-muddle the mint, as it can turn bitter.
  • Fill the glass all the way to the top with ice cubes. The more ice, the colder and more refreshing your mocktail will be!
  • Pour club soda or sparkling water over the muddled mixture until the glass is almost full. The bubbles bring everything together and give the drink its light, fizzy finish.
  • Using a long spoon or straw, gently stir the drink from the bottom up to evenly distribute the blueberries, mint, and lime throughout the glass.
  • Finish by garnishing with a few extra mint leaves, a couple of lime slices, and a sprinkle of fresh blueberries if you like.
  • Serve your Blueberry Mojito Mocktail immediately while it's icy cold and wonderfully fizzy. The mentioned recipe ingredients yields two servings.

Notes

  1. Be gentle when muddling the mint — you want to release the oils, not shred the leaves. Light pressure is all you need for the best flavor.
  2. Vanilla bean simple syrup adds a cozy depth of flavor, but you can easily swap it with honey, maple syrup, or agave if you prefer natural sweeteners.
  3. If you’d like to turn this into a cocktail version, just add a splash of white rum before topping with club soda.
Keyword blueberries, drinks, mocktails, summer

Oven-Baked Shrimp Skewers ( Easy Shrimp Kabobs In The Oven)

April 10, 2025 by Abi Guna 25 Comments

If you're looking for a quick and easy dinner or appetizer that feels a little fancy, these oven-baked shrimp skewers are a total win. Juicy, tender shrimp are perfectly seasoned and roasted to perfection—no grill required! Just pair them with a creamy ranch dipping sauce, and you’ve got a delicious weeknight meal ready in no time.

Overhead shot of baked shrimp skewers baked to perfection and served on a gren platter.

All you need are a few basic pantry seasonings and some high-quality shrimp to whip up this flavorful, no-fuss meal. It’s one of those weeknight recipes that comes together quickly but still feels special enough to serve the whole family around the dinner table. Whether you're pairing it with rice, salad, or dipping sauces, these roasted shrimp kebabs are simple, easy, and sure to become a regular in your dinner rotation.

I made shrimp scampi fettuccine last night and had about half of the fresh shrimp leftover. I originally thought of making shrimp fried rice for dinner tonight, but ended up turning them into these juicy shrimp skewers for my daughter’s after-school snack. Since she loves shrimp, she enjoyed them with homemade parmesan ranch sauce as a fun and tasty evening treat. Try my pineapple chicken kabobs when you are planning to grill next time.

Love seafood recipes? You should also check out the buttery Salmon Scampi Pasta for another quick dinner idea. If you want something different, the Chicken Salad Melt Sandwich or the refreshing Hummus Bagel are great choices too.

[feast_advanced_jump_to]

Why You’ll Love This Oven Baked Shrimp Skewers Recipe

One of my favorite ways to make shrimp is by roasting them on skewers right in the oven. It’s quick, mess-free, and delivers perfectly cooked shrimp every time. But that’s not the only reason, here are a few more reasons why you’ll want to try these shrimp skewers in an oven recipe!

  • No Grill Needed – Get that delicious roasted flavor right in your oven, perfect for any season, no outdoor grill required.
  • Quick & Easy – This recipe comes together in under 20 minutes, making it a go-to for busy weeknights or last-minute entertaining.
  • Packed with Flavor – A handful of pantry spices bring out the natural sweetness of the shrimp without overpowering them.
  • Family-Friendly – Trust me, even picky eaters love these! Serve with a favorite dip like parmesan ranch or tuck them into tacos for a fun dinner twist.
  • Versatile – Great to serve these baked shrimps with rice, salad, grilled veggies, or served solo as a light party appetizer.
Skewered shrimp seasoned with herbs and spices, baked to perfection and served on a platter with dipping sauce.

What to Serve with Oven-Baked Shrimp Skewers or Shrimp Kabobs

  • Salads -Light and zesty salads, like kale quinoa salad, balance the savory flavor of the shrimp perfectly.
  • Grains & Rice - Refreshing and flavorful rice, quinoa with just a hint of tang should really go well with the baked shrimp.
  • Roasted Veggies – Simple, nutritious, and oven-friendly sides like roasted carrots and cauliflower or roasted carrots and asparagus pair wonderfully with shrimp.
  • Sweet potato wedges or sweet potato cubes - Makes a great contrast to the savory flavor of the shrimp.
  • Dipping Sauces - Creamy and bold parmesan dipping sauce , garlic aioli, pairs well with the roasted shrimp skewers.

Ingredients and Substitutions 

If you're making oven shrimp skewers for the first time, you're in for a real treat! This recipe is all about simple prep, fresh ingredients, and bold lemon flavors that bring out the natural sweetness in the succulent shrimp. You don’t need anything fancy, just a handful of pantry staples and a quick squeeze of fresh lemon juice to brighten everything up. Lets see the ingredients list below!

Oven-roasted shrimp skewers ingredients laid out on a warm backdrop before making the recipe.
  • Shrimp - Shrimp is one of the best quick-cooking proteins you can add to your weekly seafood recipes, and the best part is how nutrient-dense it is without being heavy. It’s rich in essential fatty acids that support heart and brain health, and packed with Vitamin B, especially B12, which helps with energy and metabolism. I have used large shrimp for this recipe. You can use jumbo shrimp (adjust cooking time slightly), or medium shrimp or any shrimp size.
  • Olive Oil - Helps coat the shrimp with seasonings, you can also use avocado oil, olive oil or melted butter as a substitute.
  • Lemon Juice - Adds brightness and cuts through the richness. Lemon juice can be replaced by lime juice too.
  • Salt - Enhances the overall flavor of the shrimp.
  • Seasonings - Paprika gives that smoky depth of flavor, Italian seasonings gives a herby note, garlic powder, onion powder, black pepper and cayenne pepper.
  • Lemon Zest - Intensifies the lemon flavor and adds freshness. If you don’t have zest, increase lemon juice slightly or use lime zest.

See recipe card for quantities.

Holding a Juicy oven-baked shrimp skewers with crispy edges in a hand.

How to make easy oven-baked shrimp skewers recipe

Start by preheating your oven to 425°F. We want that nice high heat to roast the shrimp quickly and lock in all that juicy flavor. Line a sheet pan with parchment paper or foil for easy clean up, then place a wire rack on top. This helps the heat circulate around the shrimp for even cooking and a slightly crisp finish.

If you’re using bamboo skewers, be sure to soak them in water for at least 15 minutes to prevent them from burning in the oven. I used metal skewers, which saves a little prep time and makes cleanup even easier.

Shrimp marinade ingredients added into a large bowl.
  1. In a large mixing bowl, combine olive oil, lemon zest, paprika, garlic powder, onion powder, Italian seasoning, salt, black pepper, cayenne pepper, and a splash of lemon juice.
Shrimp added into the marinade and tosses well.
  1. Before adding the deveined shrimp, give them a quick pat dry with a clean kitchen towel or paper towel—this helps the marinade stick better and ensures they roast instead of steam. Toss the shrimp into the bowl and gently coat them in the seasoning mix.
Shrimp skewers are arranged in a baking sheet and ready for baking.
  1. Thread 4 to 5 marinated shrimp onto each skewer from the sharp end of the skewer, making sure to leave a little space between each one so they cook evenly. Place the assembled skewers in a single layer on your prepared wire rack.
Shrimp skewers are just out from the oven and cooling in the wire rack.
  1. Pop them into the oven and bake for 8 to 10 minutes, or until the shrimp are pink, firm, and opaque. Keep an eye on them, as they cook fast, and we don’t want to dry them out!

Once they’re done, remove the shrimp skewers from the oven and let them rest for a minute. Garnish with a sprinkle of chopped parsley or any fresh herbs.The texture of the shrimp turns beautifully tender with lightly crisped edges, and reaches the ideal internal temperature (about 120–125°F for shrimp) making sure they stay juicy, not rubbery. Plus, you can pair them with so many different side dishes, from salads and rice bowls to roasted veggies. The hint of seasoning with the lemon flavors makes them incredibly versatile and hard to resist!

Hint: For a little extra char or crisp edges, you can broil them for the last 1–2 minutes, just keep a close watch so they don’t burn.

Overhead shot of baked shrimp skewers served with a side of creamy Parmesan Ranch Dip.

Variations

  • Swap Italian seasoning for Cajun or Creole spice blend to make spicy Cajun shrimp skewers—serve them with ranch or a cooling yogurt dip.
  • To make Garlic Butter Shrimp Skewers, use melted butter instead of olive oil and add minced fresh garlic in place of garlic powder for bold, buttery flavor.
  • For a sweet and spicy twist, mix together honey, soy sauce, sriracha, and lime juice to create a glaze. Brush it over the shrimp before baking and again just before serving.
  • Want to turn it into a meal? Alternate the shrimp with chunks of zucchini, bell peppers, red onions, or cherry tomatoes to make Shrimp & Veggie Skewers—also known as shrimp kabobs!

Equipment

  • Large mixing bowl – For marinating the shrimp.
  • Measuring spoons – To measure spices and seasonings accurately.
  • Wooden or metal skewers – Metal skewers are reusable; wooden ones need soaking.
  • Baking sheet – For roasting the skewers in the oven.
  • Wire rack – Helps air circulate and gives a nice roasted finish.
  • Parchment paper or foil – For easy cleanup and to line your baking sheet.
Close-up of oven-baked shrimp skewers arranged on a platter, garnished with fresh parsley and lemon wedges.

Storage Instructions for Oven-Baked Shrimp Skewers

In the Refrigerator: Let the shrimp cool completely before storing. Remove from skewers and place in an airtight container. Store in the fridge for up to 3 days.

To reheat: Warm in a skillet over medium heat for 2–3 minutes or reheat in the oven at 350°F until heated through. 

In the Freezer: Cooked shrimp skewers can be frozen for up to 2 months. Place in a freezer-safe container or with parchment paper between layers.

To reheat: Thaw in the fridge overnight, then bake at 375°F until hot, about 6–8 minutes.

Top Tips for Oven-Baked Shrimp Skewers

  1. Use larger or jumbo shrimp, since it holds up better in the oven and stays juicy without overcooking.
  2. Patting the shrimp dry before marinating helps the seasoning stick and prevents excess moisture during baking.
  3. Marinate the shrimp for at least 15 minutes before baking. Wrap it with a plastic wrap and set aside, for extra depth, you can marinate up to 2 hours in the fridge.
  4. If using wooden skewers, soak them in water for 15–20 minutes to prevent burning in the oven.
  5. Shrimp cooks fast, about 8–10 minutes at 425°F. Overcooking can make them rubbery, so keep an eye on them!
  6. Use a wire rack for even roasting since it helps hot air circulate for a more evenly roasted result.
Skewered shrimp seasoned with herbs and spices, baked to perfection being dipped into the parmesan ranch dip sauce.

FAQ

Can I use frozen shrimp for this skewers recipe?

Yes you can! Just make sure to fully thaw and bring it to room temperature
and pat dry the shrimp before marinating. Excess moisture can affect the texture and flavor of the dish.

Do I have to use skewers?

Nope! You can simply spread the seasoned shrimp on a parchment-lined baking sheet and roast them the same way, no skewers needed.

How do I know when the shrimp is cooked or not?

Shrimp are fully cooked when they turn opaque pink and firm. They also curl into a "C" shape. Avoid overcooking the shrimps, they only need about 8–10 minutes in the oven.

Can I prep these shrimp skewers ahead of time?

Yes! You can marinate the shrimp up to 1 day in advance, then skewer and bake just before serving. 

Can I grill these shrimps instead of baking?

Absolutely! Grill over medium heat for about 2–3 minutes per side until shrimp are cooked through and slightly charred.

How long do you cook shrimp skewers in the oven?

Shrimp skewers typically cook in the oven at 400°F for 8–10 minutes, depending on the size of the shrimp. They are done when they turn pink and opaque.

What size shrimp is best for skewers?

Large or jumbo shrimp work best for shrimp skewers because they stay juicy and are easier to thread onto skewers.

What can I serve with oven-baked shrimp skewers?

They pair well with rice, quinoa salad, roasted vegetables, salad, pasta, or dipping sauces like garlic butter or ranch dip.

Close-up of oven-baked shrimp skewers arranged on a blue plate, garnished with fresh parsley and lemon wedges with ranch dip in a blue bowl.

Related

Looking for other recipes like this? Try these:

  • Air Fryer Teriyaki Chicken Thighs (Easy Better-Than-Takeout Dinner)
  • Juicy and crispy air fryer BBQ chicken thighs coated with a caramelized smoky barbecue glaze on a serving plate.
    Air Fryer BBQ Chicken Thighs (Juicy, Crispy & Easy Dinner)
  • Crispy air fryer sweet potato wedges served with ketchup in a white plate.
    Air Fryer Sweet Potato Wedges
  • Healthy oven-roasted vegetables on a white bowl
    Roasted Cauliflower and Carrots (Easy Oven Recipe) 

Pairing

These are my favorite dishes to serve with this best shrimp skewers recipe:

  • Hot honey Brussels sprouts in a baking tray
    Hot Honey Brussels Sprouts (Crispy Oven-Roasted Recipe)
  • Ricotta Pesto Pasta in a white cast iron skillet
    Pesto Ricotta Pasta (Creamy, Easy 20-Minute Dinner)
  • Easy Pesto without Pine nuts feature image in a gray white bowl
    Pesto Without Pine Nuts (Easy Walnut Pesto Recipe in 5 Minutes)
  • Finished Ground chicken spaghetti dish in a skillet
    Ground Chicken Spaghetti with Vegetables (Easy High-Protein Dinner)

If you tried this BEST Oven-Baked Shrimp Skewers recipe or any other recipe from my blog, I’d love to hear your thoughts! ⭐ Please leave a STAR rating and share your experience in the COMMENTS below. Your support means so much and helps me continue creating delicious recipes. Thank you for being part of this journey!

Golden roasted shrimp skewers fresh out of the oven, served with dipping sauce and herbs arranged beautifully on a green platter.

Oven-Baked Shrimp Skewers (BEST shrimp Recipe )

Abi Guna
These oven-baked shrimp skewers are juicy, flavorful, and ready in under 20 minutes—no grill required! Perfect for a quick weeknight dinner or easy appetizer, made with fresh ingredients and bold seasonings
5 from 12 votes
Print Recipe Pin Recipe
Prep Time 10 minutes mins
Cook Time 10 minutes mins
Total Time 20 minutes mins
Course Appetizer, Main Course
Cuisine American
Servings 4 people

Equipment

  • Mixing Bowl
  • Measuring cups and spoons
  • Metal or wooden skewers
  • Wire rack
  • Baking Sheet

Ingredients
  

  • 1.5 lb large raw shrimp peeled and deveined (tails off)
  • 2 tablespoons olive oil
  • 1 tablespoon lemon juice
  • 1 teaspoon salt
  • 1 teaspoon dried Italian seasonings
  • 1 teaspoon paprika
  • 1 teaspoon garlic powder
  • ½ teaspoon onion powder
  • ½ teaspoon lemon zest
  • ½ teaspoon black pepper
  • ¼ teaspoon cayenne pepper optional
  • Fresh parsley for garnish
  • Lemon wedges for garnish

Instructions
 

  • Preheat your oven to 425°F (220°C). Line a baking sheet with parchment paper or foil, and place a wire rack on top. Set it aside.
  • (If you're using wooden skewers, soak them in water for at least 15 minutes to prevent burning. I used metal skewers, so I was able to skip this step.)
  • In a large bowl, combine olive oil, lemon zest, paprika, garlic powder, onion powder, Italian seasoning, salt, pepper, cayenne pepper, and lemon juice. Mix well with a spoon or fork until fully combined.
  • Pat the shrimp dry using a clean kitchen towel to remove any excess moisture.
  • Add the shrimp to the marinade and toss until they are evenly coated.
  • Thread 4–5 shrimp onto each skewer, leaving a bit of space between each piece to ensure even cooking.
  • Place the prepared skewers in a single layer on the wire rack.
  • Bake in the preheated oven for 8–10 minutes, or until the shrimp are pink, firm, and opaque. Be careful not to overcook them!
  • Once done, remove from the oven, garnish with chopped fresh parsley, and serve with lemon wedges and your favorite dipping sauce—like parmesan ranch dip or garlic aioli.

Notes

  • Use fresh or thawed shrimp for any shrimp skewer recipe to get the best results.Pat them dry to help the marinade stick and prevent sogginess.
  • Marinate at least 15 minutes for great flavor, but avoid over-marinating as the acid in lemon juice can slightly "cook" the shrimp.
  • Broil (optional): For extra char or crisp edges, you can broil the shrimp skewers for the last 1–2 minutes of cooking. Keep a close eye to avoid burning!
  • If using wooden skewers, don’t forget to soak them in water for 15–20 minutes to prevent them from burning.
  • To reheat the shrimp skewers use a skillet or oven. (Avoid the microwave to maintain texture.)
Keyword Appetizers, Baked, Dinner, Shrimp

Parmesan Ranch Dip Recipe (Creamy Garlic ranch dressing)

April 9, 2025 by Abi Guna 17 Comments

Homemade dips are the BEST, and this Parmesan Ranch Dip has quickly become a favorite in our home! This creamy, flavorful dip is made with tangy sour cream and a savory, cheesy twist from freshly grated Parmesan, creating a rich garlic ranch-style dressing that’s perfect for any occasion. . Whether you're serving it with chicken tenders, shrimp skewers, fresh-cut veggies, sweet potato wedges, or onion rings at your next get-together, this dip is guaranteed to be a crowd-pleaser.

Parmesan ranch dip surrounded by carrot sticks, cucumber slices, and broccoli.

I stopped buying store-bought dips and dressings because of their high cost and added preservatives. Once you realize how easy it is to make this homestyle ranch at home that has great flavor, I promise you won’t want to go back to the store-bought kind! This parmesan garlic ranch dressing comes together in just minutes with simple ingredients you probably already have in your kitchen. Just mix everything in a bowl until smooth and creamy, and enjoy it with your favorite appetizers.

Want to turn this into a dressing too? Just add an extra ¼ cup of buttermilk to thin it out a bit. It makes the dip perfectly pourable and great for drizzling over salads like salmon kale salad or a classic chicken caesar salad or taco salads. One recipe, two delicious ways to enjoy! Serve it alongside something hearty like the Oven Baked Shrimp Skewers or spread it into a sandwich like the Chicken Salad Melt Sandwich for extra flavor. If you’re putting together a light meal, it also works beautifully with the fresh Hummus Bagel. And to round things out, finish with something sweet like Nutella Covered Strawberries or a quick treat such as Oatmeal Mug Cake.

[feast_advanced_jump_to]
A spoon is taking a spoonful of parmesan ranch dressing dipping sauce.

Why You’ll Love This Parmesan Ranch Dipping Sauce Recipe

  • Quick & Easy – Ready in just minutes with basic ingredients and no fancy equipment needed.
  • Super Flavorful – A creamy blend of tangy sour cream, basic ranch seasoning ingredients, and rich parmesan makes this dip totally irresistible.
  • Versatile – Use it as a dip for appetizers or sides or thin it out for a delicious salad dressing.
  • Family Favorite – Even picky eaters love it! It’s cheesy, creamy, and always a hit at gatherings or weeknight dinners. My daughter puts this ranch dip on everything—you name it!
  • Better Than Store-Bought – No preservatives added! Just simple, fresh flavors made at home with quality ingredients!
Overhead shot of Bowl of cheesy ranch dip made with buttermilk and fresh parmesan sorrounded by veggies like cucumber, carrots, broccoli, cherry tomatoes.

What to Serve with Homemade Parmesan Ranch Dip

  • Chicken Tenders or Nuggets - Crispy, juicy, and made for dipping—this combo is a guaranteed crowd-pleaser.
  • Shrimp Skewers - Grilled or baked shrimp skewers in the oven pairs beautifully with the creamy, cheesy tang of parmesan ranch.
  • Veggie Platter – Carrots, broccoli, celery, cucumbers, bell peppers, and cherry tomatoes all pair perfectly with this dip. It makes eating raw veggies way more fun—just like dipping into no-garlic hummus or roasted carrot hummus! This dipping sauce even pairs well with roasted carrots and cauliflower!
  • Sweet Potato Wedges or Sweet potato cubes - Swap out ketchup for this rich, flavorful dip.
  • Onion Rings - Crispy and golden on the outside, perfectly matched with the cool creaminess of ranch.
  • Pizza or Flatbreads - Use it as a dipping sauce for pizza crusts or drizzle over cheese naan for extra flavor.
  • Sandwiches or Wraps - Spread it inside wraps or sandwiches like chicken salad melts or veggie club bagel sandwiches for a creamy kick.
  • Salads (as a dressing) - Thin it out with a splash of buttermilk and use it as a creamy dressing for chopped Caesar salad, or Quinoa salads. The best salad dressing ever!

Ingredients and Substitutions for Garlic Ranch dressing

I personally love creamy dips with bold flavor, this Parmesan Ranch Dip is about to become your new favorite! It’s rich, zesty, and packed with cheesy goodness—perfect as a tasty dip for everything from veggie sticks to crispy chicken tenders. The smooth, tangy base, it doubles as a flavorful parmesan ranch dressing too! Lets see the ingredients needed to make this dipping sauce recipe below!

Creamy parmesan ranch dip ingredients laid out for making the recipe.
  • Sour Cream - Adds tanginess and creaminess to the dip. I have used the full fat version but you are welcome to use low-fat or light sour cream too. Plain Greek yogurt is a good option too for that extra protein and a thicker texture.
  • Mayonnaise - Gives the dip a richness and a silky texture. You can substitute with light mayo too.
  • Parmesan Cheese  - Adds a salty, nutty, and cheesy depth of flavor to the dipping sauce. You can also use Pecorino Romano (for a sharper taste) or nutritional yeast for a dairy-free, cheesy alternative.
  • Salt - Balances and enhances all the flavors.
  • Black Pepper - Adds mild heat and a little zing to the sauce.
  • Dried Parsley and Dried Dill Weed (optional) - For the herby flavor.
  • Onion Powder and Garlic powder - Brings that classic ranch flavor and a little sweetness that we will get in the store bought hidden valley ranch mix.
  • Garlic - Adds a bold, fresh garlic kick to the dip. Use more garlic powder if preferred, or mash into a paste for a smoother texture.
  • Lemon Juice - Brightens the dip and balances the richness. You can very well substitute with White vinegar or apple cider vinegar.
  • Buttermilk – Helps thin the dip to your desired consistency while adding a subtle tangy flavor. Don’t have buttermilk? No worries! Just make a quick DIY version by mixing 4 tablespoons of milk with ½ teaspoon of lemon juice. Let it sit for 5 minutes, and your buttermilk is ready to use.

See recipe card for quantities.

How to make parmesan ranch dip recipe

To make this creamy Parmesan Ranch Dip, start by mixing the base, combine sour cream and mayonnaise in a bowl until smooth. Then, add the flavor by stirring in grated parmesan, garlic powder, onion powder, chopped garlic, lemon juice, and your seasonings.

Next, adjust the texture by adding a splash or two of buttermilk until you reach your desired dip consistency. Chill the dip in the refrigerator for at least 30 minutes to let the flavors meld.

Mix in all the ingredients into a bowl for making ranch dip.
  1. Add all the ingredients in a small bowl for mixing.
Parmesan ranch dip in a bowl with a spoon.
  1. Mix until smooth and creamy.

One of my favorite ways to serve this dip is with fresh veggie dippers like carrots, cucumbers, bell peppers, and even snap peas. Chopped green onions add a subtle bite and make the flavor pop even more! If you're into trendy flavors, this could easily become your next signature sauce thast is perfect for sandwiches, wraps, and even drizzled over roasted potatoes. It's one of those homemade recipes you'll keep coming back to, no matter the season.

How to make parmesan ranch dip with ranch seasoning mix (alternative method )

If you are looking for a quick shortcut, this easy Parmesan Ranch Dip made with ranch seasoning mix is perfect when you're short on time but still want big flavor! Just mix together sour cream, mayonnaise, and your favorite ranch seasoning mix in a medium bowl. Stir in the grated parmesan, a bit of lemon juice, and a splash of buttermilk to get the consistency just right. Chill for about 30 minutes to let the flavors come together, and you're good to go. It’s a super simple and tasty option if you already have ranch mix in your pantry!

Thick parmesan ranch dip in a glass jar with lemon and garlic on the side, a spoon comes in and take the sauce.

Parmesan Ranch Dip Variations

  • Add a pinch of cayenne pepper, smoked paprika, or a few drops of hot sauce for a little heat to make spicy parmesan ranch dip.
  • Mix in ¼ cup of shredded sharp cheddar cheese along with the parmesan for a bolder, more indulgent cheddar parmesan ranch dip recipe.
  • Add finely chopped fresh herbs like chives, dill, or basil for a fresh, for a herby note ranch dip.
  • Mash half a ripe avocado and add in to create avocado ranch dip that is an ultra-creamy twist that’s perfect for tacos or grilled meats.

Equipment

  • Mixing Bowl – Medium-sized, for combining all your ingredients.
  • Whisk or Spoon – For mixing the dip until smooth and well combined.
  • Measuring Cups & Spoons – To measure ingredients accurately.
  • Airtight Container – For storing the homemade dip in the fridge.
Parmesan ranch dip styled with a veggie platter on a wooden board.

Storage Tips for Homemade Parmesan Ranch Dip

Refrigerator: Store the ranch dip in an airtight container in the fridge for up to 5–6 days. Stir well before each use.

Make Ahead Friendly: This parmesan dip actually tastes better after a few hours, once the flavors have had time to meld, so feel free to make it ahead of time when you host parties.

Top Tips for Parmesan Ranch Dip and dressing recipe

  1. Use freshly grated parmesan cheese as it melts into the dip better and adds richer flavor than pre-packaged shredded cheese.
  2. Add a pinch of cayenne or a few drops of hot sauce in the sauce recipe to make the ranch dip a little spicier.
  3. Adjust the consistency with buttermilk, start with a little and add more as needed, less for a thick ranch dip, more for a pourable dressing to make Parmesan ranch dressing for salads.
  4. Let the dip rest in the fridge for at least 30 minutes so the flavors can meld. It gets better as it sits!
  5. It disappears fast, especially when served with fries, tenders, or veggie platters—so make extra if you're hosting!
Easy ranch dip with parmesan cheese and garlic placed in a glass jar, perfect for veggies or wings.

FAQ

Can I make this parmesan ranch dip ahead of time?

Yes Of course! The dipping sauce tastes even better after a few hours in the fridge. Make it ahead and let the flavors develop before serving.

How long does parmesan ranch dip recipe last in the fridge?

Store the dip in an airtight container, it will stay fresh for up to 5–6 days in the refrigerator.

Can I use bottled lemon juice instead of fresh?

Fresh lemon juice is best for flavor, but bottled will work in a pinch. Just use a bit less since it's more concentrated.

Is this Parmesan ranch dip gluten-free?

Yes! All the ingredients are naturally gluten-free, but always double-check your labels, especially for mayo and parmesan.

Can I make this parmesan ranch dip dairy-free?

Absolutely! Use vegan mayo, plant-based sour cream, and nutritional yeast in place of parmesan for a delicious dairy-free version.

Can I use this as a salad dressing?

Yes! Just add a few extra tablespoons of buttermilk to thin it out to your desired pourable consistency.

What’s the best way to serve this parmesan dip?

Serve it with veggies, chicken tenders, fries, shrimp skewers, or as a spread for wraps and sandwiches. It’s super versatile!

What is Parmesan ranch dip made of?

Parmesan ranch dip is made with a creamy base like mayonnaise and sour cream, combined with Parmesan cheese, garlic, herbs, and ranch-style seasonings for a rich, tangy flavor.

Can I make Parmesan ranch dip without mayo?

Yes, you can substitute mayonnaise with Greek yogurt for a lighter version.

Parmesan ranch dip  in a green bowl surrounded by carrot sticks, cucumber slices, cherry tomatoes and broccoli.

Related

Looking for other recipes like this? Try these:

  • Easy shrimp scampi fettuccine in a white skillet and garnished with parsley
    Easy Shrimp Scampi Fettuccine
  • CHRISTMAS cake pops in a glass
    Easy Christmas Cake Pops with Cake Mix - Holiday Treat
  • Easy spicy vegetable soup feature shot in dutch oven
    Easy Spicy Vegetable Soup with Fire Roasted Tomatoes
  • butterscotch chocolate chip Oatmeal cookies featuring cookies
    Oatmeal Butterscotch Chocolate Chip Cookies

Pairing

These are my favorite dishes to serve with parmesan ranch dip recipe:

  • Glass noodles stir fry in a skillet
    Glass Noodles Stir Fry with Chicken (Easy Korean Japchae)
  • Lemon pepper chicken in a plate garnished with parsley
    Crispy Baked Lemon Pepper Chicken Thighs – Easy Dinner Recipe
  • Berry Chia Seed Pudding in two jars
    Overnight Berry Chia Seed Pudding (Greek Yogurt)
  • Andes Mint Brownies (Best Fudgy Chocolate Brownies)

If you tried this Parmesan Ranch Dip or any other recipe from my blog, I’d love to hear your thoughts! ⭐ Please leave a STAR rating and share your experience in the COMMENTS below. Your support means so much and helps me continue creating delicious recipes. Thank you for being part of this journey!

Parmesan ranch dip in a green bowl surrounded by veggies like broccoli, carrots, cherry tomatoes and cucumber.

Parmesan Ranch Dip Recipe (Garlic ranch dressing)

Abi Guna
Creamy Parmesan Ranch Dip made with sour cream, mayo, garlic, and fresh parmesan—perfect for veggies, chicken tenders, or chips. Quick, easy, and full of flavor!
5 from 8 votes
Print Recipe Pin Recipe
Prep Time 5 minutes mins
Total Time 5 minutes mins
Course Appetizer, Condiments, Dip, Sauce, Snack
Cuisine American
Servings 2 cups of sauce

Equipment

  • Mixing Bowls
  • Measuring spoons and cups
  • Spoon or Whisk

Ingredients
  

  • ½ cup sour cream
  • ½ cup mayonnaise
  • ½ cup grated parmesan cheese
  • 2 tablespoons fresh lemon juice
  • 2 teaspoon dried parsley
  • 1 teaspoon garlic clove finely chopped
  • ½ teaspoon salt
  • ½ teaspoon black pepper
  • ½ teaspoon onion powder
  • ½ teaspoon garlic powder
  • 2-4 tablespoons buttermilk adjust for desired consistency

Instructions
 

  • In a medium bowl, combine the sour cream and mayonnaise. Whisk until smooth and well combined.
  • Stir in parmesan cheese, salt, pepper, parsley, onion powder, garlic powder, chopped garlic, and lemon juice.
  • Add buttermilk 1 tablespoon at a time until you reach your desired dip or dressing consistency.
  • Cover and refrigerate for at least 30 minutes to let the flavors meld.
  • Enjoy with veggie platters, chicken tenders, fries, shrimp skewers, or as a creamy salad dressing if thinned out further.

Notes

  1. For a thicker ranch dip, use less buttermilk. For a pourable ranch dressing, add more buttermilk 1 tablespoon at a time until you reach your desired consistency.
  2. Letting the homestyle ranch dip rest in the fridge for at least 30 minutes allows the flavors to fully develop. It tastes even better the next day!
  3. Store the parmesan ranch dipping sauce in an airtight container in the fridge for up to 5 days and use it when needed.
Keyword Condiments, Dips, parmesan, ranch, sauces

Cheese Naan bread Recipe (Stuffed with cheese)

April 7, 2025 by Abi Guna 13 Comments

As a true bread lover, I'm always looking for new and fun ways to level up my homemade naan, and that’s exactly how this cheese naan was born! It’s everything you love about classic naan: soft, fluffy, and golden, but with a gooey, melty cheese surprise tucked inside. Learn how to make this Indian recipe from scratch with VIDEO instructions! 

A hand taking a piece of cheese naan and the cheese is streching over.

You know what's the best part about this cheesy naan? You don’t need a tandoor oven—just a hot cast iron skillet and a handful of pantry staples. Whether you’re pairing it with your favorite Butter Chicken or enjoying it on its own as a cheesy snack, this recipe is guaranteed to be a crowd-pleaser!

As an Indian mom, making naan at home is one of my favorite parts of meal prep—it brings so much warmth and comfort to our table. There's something incredibly satisfying about watching the dough puff up and turn golden in a hot pan, ready to scoop up rich curries or spicy gravies. I’m always excited to explore new variations, from the plain naan to flavorful twists like garlic naan, stuffed naan, cheesy garlic naan and even cheesy versions that the kids absolutely love.

[feast_advanced_jump_to]

CHECK OUT THE Cheese stuffed NAAN RECIPE MADE FROM SCRATCH, WITH A VIDEO TUTORIAL!

Why You’ll Love This Cheese Naan Recipe

  • Simple ingredients – You only need a handful of pantry staples like flour, yogurt, and cheese—no other fancy ingredients are required.
  • Perfect for meal prep – These naan reheat beautifully, making them a great make-ahead option for busy weeknights or hosting parties or potlucks.
  • Soft, fluffy, and cheesy – This naan is everything you love about classic Indian bread, but with a melty cheese center that makes every bite extra comforting and crave-worthy.
  • No tandoor needed – You can make it right on your stovetop in a skillet, with simple ingredients you likely already have at home.
  • Versatile Recipe – Serve it with your favorite curries, soups, or enjoy it as a snack or appetizer. It’s always a hit—especially with kids!
Cheese is melting and oozing from the cheese naan when cutting into halves.

What to serve with cheese stuffed naan

  • Rich, creamy curries like Butter Chicken, Paneer Tikka Masala, Chana Masala, or Palak Paneer pair beautifully with this cheese-stuffed naan bread.
  • A cool, refreshing yogurt dip like Cucumber Raita is a wonderful complement to balance the richness.
  • For a fusion twist, Classic Hummus or Roasted Carrot Hummus taste amazing with the warm, cheesy naan.
  • Grilled chicken or lamb skewers are perfect for wrapping inside the soft naan to make a hearty handheld meal.
  • You can also use roasted carrots and cauliflower or roasted asparagus as a delicious filling layered inside the naan and enjoy it as a flavorful vegetarian option.

Ingredients and substitutions

Made with simple ingredients like plain flour and a generous filling of cheese, each naan is soft, golden, and oozing with melty mozzarella in every bite. You can roll the dough thicker for a pillowy, bread-like feel or keep it thinner if you prefer a slightly crispier texture. Let's see the ingredients needed below!

Ingredients laid out for making cheese stuffed naan bread.
  • All-purpose flour - The base of the dough, making the naan soft and tender pillowy indian flatbread. For substitutions use bread flour for a chewier texture or half whole wheat flour for a more wholesome version.
  • Active dry yeast - Helps the dough rise and gives it that light, airy texture. You can also use instant dry yeast in the same amount, but no proofing needed.
  • Sugar - Feeds the yeast and adds a hint of sweetness. You can always substitute it with honey or maple syrup.
  • Warm water - Activates the yeast and hydrates the dough.
  • Plain yogurt  - Adds softness, a slight tang, and moisture to the naan dough. But you can substitute with Greek yogurt, sour cream or any non -dairy yogurt option as well.
  • Oil - Adds richness to the dough and keeps the dough soft. You can substitute with melted ghee, vegetable oil or any neutral oil.
  • Salt - Enhances flavor and balances the dough. You can also use sea salt instead.
  • Shredded mozzarella - Melts well and gives that gooey, stretchy center we are looking for. Use a blend of mozzarella and cheddar for a twist.
  • Butter - Gives a rich, glossy finish.

See recipe card for quantities.

Cheese-stuffed naan bread stacked on a baking paper with melted cheese oozing out.

How to make cheese naan bread recipe in stove top

Active the yeast - Start by mixing warm water, sugar, and sprinkle yeast in a small bowl. Let it sit for 5–10 minutes until it becomes foamy—this means your yeast is alive and ready to go!

Make the dough - In a large stand mixer bowl, combine the dry ingredients; flour and salt, then pour in the foamy yeast mixture along with yogurt and oil. Mix it all together until a shaggy, sticky dough begins to form.

Knead the dough - Transfer dough to a floured surface or stand mixer and knead for about 8–10 minutes. If needed add a tablespoon of warm milk (optional).You’re looking for a soft, smooth, and elastic texture that bounces back when gently pressed.

First rise - Place the dough in a lightly greased bowl and cover with a towel or cling film. Let the dough rest in a warm spot for 1 to 1.5 hours, or until it’s doubled in size and fluffy.

Divide and fill - Punch down the dough and divide it into 8–10 equal portioned balls. Use flour on a work surface and flatten each ball to a small circle, fill the center with shredded cheese, then pinch the edges of the dough and seal it lock in the filling. Cover the remaining dough with a clean towel to avoid drying.

Roll Out the Naan - Lightly roll each filled ball into an oval or teardrop shape about ¼ inch thick using a rolling pin. Be gentle—pressing too hard can cause the cheese to break through the dough.

Cook the naan - Heat a dry skillet or cast iron pan over medium heat. Cook each naan for 1–2 minutes per side until golden spots appear and it puffs up with beautiful bubbles.

Serve - Brush the hot naan with melted butter or garlic butter (grate a garlic clove in butter)as soon as it comes off the pan. Serve warm with curries, dips, or enjoy it all on its own—the melty cheese inside is irresistible! Store the leftover naan in an airtight container.

Cheese being stuffed and rolled out while making cheese naan bread.

If you're a fan of favorite Indian dishes, you’re going to love this cheese-stuffed naan! Whether it’s your first timemaking naan at home or you’re just trying something new, this recipe today brings that warm, comforting vibe you'd find in your favorite Indian restaurant—right from your kitchen.

Cheese-Stuffed Naan Variations

  • Garlic Cheese Naan - Add minced garlic or garlic powder to the cheese filling or mix it into melted butter before brushing. Sprinkle with chopped cilantro or coriander leaves for extra flavor.
  • Spicy Cheese Naan - Add a pinch of red chili flakes, chopped green chilies, or jalapeños to the filling for a spicy kick.
  • Mixed Cheese Naan - Use a cheese blend like mozzarella, cheddar, gouda, or feta for a more complex flavor and texture.

Equipment

  • Measuring Cups & Spoons - For measuring the ingredients.
  • Stand mixer - To knead the dough.
  • Dough Scraper or Knife - To divide dough into portions.
  • Cast iron skillet - To cook the naan.
  • Pastry brush - To brush the melted butter on top of the naan.
Close-up of freshly cooked naan with melted cheese inside and brushed butter on top.

How to Store Cheese Naan

At Room Temperature - Store cooled naan in an airtight container or wrap it in foil.Best enjoyed within 1–2 days.

In the Refrigerator - Store in a sealed container for up to 4–5 days. Reheat in a skillet or toaster oven. Avoid the microwave if possible, it can make the naan chewy texture or soggy.

In the Freezer - Let naan cool completely, then stack with parchment paper between each piece to prevent sticking. Place in a freezer-safe bag or container and freeze for up to 2 months. To reheat, thaw for a few minutes, then warm in a hot pan until soft and melty again. You can also reheat directly from frozen on low heat.

Top Tips for Cheese-Stuffed Naan Bread

  1. Make sure the water is warm—not hot—when activating yeast (around 105–110°F). 
  2. Use room temperature ingredients for the best dough consistency.
  3. Don’t overstuff the cheese. Add just 2-3 tablespoons of cheese, too much can cause the filling to burst while rolling or cooking. Pinch the edges well after filling to keep the cheese from leaking out.
  4. Addition of yogurt yields softer bread, so don't skip this step.
  5. Use light pressure when rolling stuffed naan. If you press too hard, the cheese may break through the dough.
  6. A hot skillet or cast iron pan is key for that golden-bubbled, tandoor oven -style finish. No need for oil in the pan.
  7. Cheese-stuffed naan is best when served hot and fresh, so the cheese stays gooey and melty.

FAQ

What kind of cheese works best for stuffed naan bread?

Mozzarella cheese is the best option for its meltability and stretch. You can also use a blend of cheddar, gouda, feta, or your favorite melting cheese for added flavor.

Can I make the naan dough ahead of time?

Yes! You can refrigerate the dough after the first rise. Just bring it back to room temperature for 30–45 minutes before shaping and filling.

Can I make this naan without yeast?

Of Course you can, but the texture will be slightly different. Use baking powder (1 tsp) and baking soda (¼ tsp) instead of yeast, and skip the rise time. The naan will be soft but less airy.

Is cheese-stuffed naan freezer-friendly?

Absolutely. Let cooked naan cool completely, then freeze in a zip-top bag. Reheat on a skillet or in the oven.

Why is my cheese leaking out when cooking?

It could be due to overfilling or not sealing the edges tightly. Make sure to gently roll the naan without pressing too hard, and seal the dough well before cooking.

What should I serve with cheese naan?

Serve it with curries, soups, grilled chicken, or even dips like hummus or raita.

Overhead view of garlic butter cheese naan with chopped herbs on top.

Related

Looking for other recipes like this? Try these:

  • Red velvet cookie cake sliced and kept in a white plate
    Valentine’s Cookie Cake (Red Velvet Cookie Cake Recipe)
  • In a bowl salmon kale quinoa salad
    Salmon Kale Quinoa Salad
  • Wide shot of dark chocolate fudge with almonds
    Easy Dark Chocolate Fudge with Almonds (No Bake)
  • Roasted carrot hummus with canned chickpeas feature image
    Roasted Carrot Hummus with Canned Chickpeas (Easy)

Pairing

These are my favorite dishes to serve with this Indian cheesy naan recipe:

If you tried this Cheese Naan or any other recipe from my blog, I’d love to hear your thoughts! ⭐ Please leave a STAR rating and share your experience in the COMMENTS below. Your support means so much and helps me continue creating delicious recipes. Thank you for being part of this journey!

A hand is taking a slice of cheese naan and the cheese is melting and stretching.

Cheese Naan bread Recipe (Stuffed with cheese)

Abi Guna
Soft and fluffy cheese naan made on the stovetop with simple ingredients. This easy homemade naan is filled with melty cheese and perfect with curries or as a cheesy snack - with a step-by-step video tutorial included.
5 from 7 votes
Print Recipe Pin Recipe
Prep Time 20 minutes mins
Cook Time 10 minutes mins
Resting Time 1 hour hr 30 minutes mins
Total Time 2 hours hrs
Course Appetizer, Breakfast, Snack
Cuisine Indian
Servings 10 Naan Bread

Equipment

  • Measuring cups and spoons
  • Standing Mixer
  • Sharp Knife
  • Cast iron skillet
  • Mixing Bowls

Ingredients
  

  • 4 cups all-purpose flour
  • 1 packet active dry yeast 2 ¼ tsp
  • 1 teaspoon sugar
  • 1 cup warm water
  • ½ cup plain yogurt at room temperature
  • 2 tablespoon olive oil or any neutral oils
  • 1 teaspoon salt
  • 2 cups mozzarella cheese shredded
  • 2 tablespoons melted butter for brushing

Instructions
 

  • In a small bowl, combine 1 cup warm water, sugar, and active dry yeast.
  • Stir and let it sit for 5–10 minutes until the mixture becomes foamy and bubbly, indicating the yeast is active.
  • In a large mixing bowl, whisk together flour and salt.
  • Add the activated yeast mixture, plain yogurt, and oil (vegetable or olive oil).
  • Mix with a spatula or wooden spoon until a rough, shaggy dough forms.
  • Transfer the dough to a stand mixer with a dough hook, or knead by hand on a lightly floured surface.
  • Knead for 8–10 minutes, until the dough is smooth, soft, and elastic.
  • If the dough is too sticky, sprinkle in a little more flour as needed.
  • Place the kneaded dough in a greased bowl, cover with a clean kitchen towel or plastic wrap.
  • Let it rise in a warm place for 1 to 1.5 hours, or until doubled in size.
  • Punch down the risen dough and divide it into 8–10 equal portions.
  • Flatten each ball slightly, place 2–3 tablespoons of shredded cheese in the center.
  • Pinch and seal dough edges tightly to enclose the cheese and form a ball.
  • Gently roll each filled dough ball into an oval or teardrop shape , about ¼ inch thick. Be careful not to press too hard—this helps prevent the cheese from leaking out.
  • Heat a cast iron skillet over medium-high heat until hot (no oil needed).
  • Place one rolled naan onto the pan and cook for 1–2 minutes until bubbles form and the bottom is golden.
  • Flip and cook the other side for 1–2 minutes until lightly charred and cooked through.
  • Remove from the pan and immediately brush with melted butter or garlic butter.
  • Serve the cheese naan warm with your favorite curry, dip, or enjoy as it is.

Video

Notes

  1. Water that’s too hot can kill the yeast. Aim for around 105–110°F to activate it properly.
  2. Allow the dough to rise fully, until doubled in size for the fluffiest naan texture.
  3. Stick to 2–3 tablespoons of cheese per naan to prevent it from bursting while rolling or cooking.
  4. Make sure the edges are pinched tightly after stuffing to avoid cheese leaks while rolling or cooking.
  5. A cast iron skillet or heavy-bottomed pan gives the naan those classic golden brown spots and light charring—like you'd get from a tandoor.
  6. Brush the cheese stuffed naan  immediately with butter to keep the naan softer for a longer time.
  7. Cooked naan can be frozen. Cool completely, then store in freezer-safe bags. Reheat straight from frozen on a pan or in the oven.
Keyword cheese, Indian, snacks

Butter Chicken with Naan (Creamy, Easy & Better Than Takeout)

April 6, 2025 by Abi Guna 23 Comments

Want a restaurant-style experience at home? This rich, comforting Butter Chicken with Naan is a must-try! It’s a beloved family favorite, tender, marinated chicken simmered in a creamy, buttery tomato-based sauce, packed with bold spices and irresistible flavor. Check out the from-scratch recipe with video!

If you love cozy dinners like this, don’t miss my cheese naan or explore my dinner recipes collection for more easy meal ideas.

Top view of butter chicken in a bowl with naan and basmati rice. Garnished with cilantro and red onions.

This Butter Chicken is ultra-creamy, restaurant-style, and weeknight-easy. A quick yogurt marinade keeps the chicken juicy and helps it brown fast; a brief broil (or sear) adds the light char you expect from your favorite spot. Then everything simmers in a silky tomato-butter sauce enriched with cream and finished with kasuri methi (dried fenugreek) for that unmistakable aroma. You’ll get spoon-coating sauce, tender chicken, and balanced heat—perfect for scooping up with warm naan or ladling over basmati rice. Plan 30–60 minutes for marinating (hands-off) and about 25 minutes to cook. Want a full table? Add a cooling cucumber raita and a simple salad while the chicken rests. Leftovers reheat beautifully for tomorrow’s lunch.

Having strong Indian roots, I’ve always wondered why so many people shy away from cooking Indian recipes. I realized it’s often because of the long ingredient lists—many classic curries call for at least 10 spices or more! But here’s the truth: not all Indian dishes are hard to make. There’s always a simpler, approachable way to prepare them without losing the authentic flavor and richness that makes Indian food so special. I’m here to break that myth, one easy recipe at a time!

Fan of Indian Naan recipes? Check out my cheese naan recipe thats, kids love! For more comforting chicken dinners: Orange Chicken and Rice, Oven Roasted Chicken, Chicken dumplings casserole or more chicken recipes collection here.

[feast_advanced_jump_to]

Check out the butter chicken and naan recipe made from scratch, complete with a VIDEO tutorial!

What is Butter Chicken, why it is so famous?

Butter Chicken, also known as Murgh Makhani, is one of the most beloved Indian dishes worldwide. It features tender, marinated chicken simmered in a rich, creamy tomato-based sauce that's spiced just right.The sauce gets its signature silky texture from butter and cream, making it perfect for scooping up with warm naan or spooning over basmati rice. It’s comforting, indulgent, and surprisingly easy to make at home.

Why You’ll Love This Easy Butter Chicken with Naan Recipe

  • Better than Restaurant: This recipe gives you all the bold, creamy, comforting flavors of your favorite Indian restaurant, without leaving your kitchen.
  • Easy to make: With step-by-step instructions and video with pantry-friendly ingredients, this butter chicken is beginner-friendly yet tastes like it simmered for hours.
  • Perfect flavors: Tender chicken is cooked in a rich tomato-butter sauce spiced just right—not too hot, just flavorful and satisfying.
  • Pairs perfectly with naan: Homemade soft, fluffy naan takes this dish to the next level, ideal for soaking up every bit of that buttery sauce.
  • Crowd-pleaser: Whether it's a cozy dinner or a special occasion, this dish always impresses guests and family alike. We make them for Friday night dinner and best for meal preping options!
Creamy butter chicken close up shot. Garnished with heavy cream and cilantro.

Butter Chicken vs. Chicken Tikka Masala Sauce

These two dishes are both popular Indian favorites, but many people often get them confused and aren't sure how they differ in taste. Here's a simple breakdown to help you understand the difference—especially if you're new to Indian cooking!

  • Butter Chicken - Creamier, milder, buttery, and slightly sweet
  • Tikka Masala - Spicier, tangier, with a more intense and complex spice profile

Both are absolutely delicious—the choice comes down to whether you're in the mood for something rich and comforting, bold and spicy!

Ingredients for making Butter chicken with substitutions

Not every household has all the Indian pantry staples on hand, but check out the alternative options below so you can still make this authentic butter chicken curry right at home.

Ingredients laid out to make the authentic Indian Butter Chicken recipe.
  • Chicken breast – Lean and tender; can substitute with chicken thighs because it stays juicier and taste more like restaurant butter chicken.
  • Plain yogurt – Helps tenderize; Greek yogurt or dairy-free yogurt works too.
  • Lemon juice – Adds tang and helps break down the meat; substitute with lime juice if you don't have lemon handy.
  • Spices - Garam masala, Paprika or red chili powder, ground coriander, Turmeric, Ground cumin, provides lots of flavors and mild spice to the butter chicken.
  • Salt - Enhances the overall taste of the dish.
  • Garlic - Fresh preferred, but you can also substitute with ½ teaspoon garlic powder.
  • Ginger - Adds warmth to the dish. Substitute with ½ teaspoon ground ginger if you don't have fresh ginger handy.
  • Lemon juice - Helps to tenderize the chicken pieces.
  • Butter - Add richness to the sauce and entire dish.
  • Oil - To prevent sticking and any oil works like vegetable oil, olive oil , sunflower oil, etc.,
  • Onion - For the base sauce. I have used yellow onion but red onion works too.
  • Dried fenugreek leaves (kasuri/ kasoori methi) – Adds authentic aroma to the sauce but you can skip if not available.
  • Tomato paste - For that bold tomato flavor.
  • Tomato puree – Adds a rich tomato base to the sauce; can use crushed tomatoes instead.
  • Water - To adjust the consistency of the masala.
  • Heavy cream – Adds creaminess to the dish. You can substitute coconut cream or cashew cream for a dairy-free option. Even Greek yogurt works too!
  • Cilantro – For garnish and freshness.

See recipe card for quantities.

Ingredients for making Indian Naan Bread with substitutions

Ingredients laid out for making Indian Naan bread recipe from the scratch.
  • All-purpose flour - The base of the dough, you can substitute with bread flour for chewy naan, or use half whole wheat flour for a nuttier flavor.
  • Active dry yeast -  Helps the dough rise and creates airiness.
  • Sugar - Feeds the yeast and adds a hint of sweetness; you can use honey or maple syrup instead.
  • Warm water - Activates the yeast and hydrates the dough; make sure it’s not too hot. Can use warm milk for a softer texture.
  • Yogurt - Makes the naan soft and tender; substitute with Greek yogurt, dairy-free yogurt, or sour cream also.
  • Oil - Adds richness and keeps the dough soft. Use olive oil, vegetable oil, or melted ghee.
  • Salt -  Enhances flavor of the bread.
  • Melted butter - Adds flavor and that signature buttery finish.
  • Garlic and cilantro - Optional but flavorful!

See recipe card for quantities.

How to make butter chicken with homemade naan and why this tastes like a restaurant

To make butter chicken, start by marinating the chicken in plain yogurt, spices, garlic, and ginger to infuse it with flavor and tenderness. Next, cook the chicken in a skillet until it’s browned becuase butter chicken’s signature flavor comes from marinated chicken with light char (tandoor-style). In the same pan, sauté onions and spices until fragrant, then add the tomato puree and let it simmer until thickened. 

Indian butter chicken and naan making steps.

Return the cooked chicken to the pan and let it simmer in the sauce to absorb all the flavors. Once the sauce is rich and well-blended, stir in the cream to create that signature silky, buttery texture. Finally, garnish with chopped cilantro and serve hot with naan or rice.

Indian butter chicken and naan step by step process.

To make naan bread, start by activating the yeast with warm water and sugar until it becomes foamy. Then, make the dough by mixing in flour, salt, yogurt, and oil with the yeast mixture. Once combined, knead the dough until it’s smooth and elastic. Let it rest for the first rise, allowing it to double in size. After rising, divide and shape the dough into small balls and roll each one into a teardrop or oval shape. 

Indian naan bread recipe un making with step by step process.

Cook the naan in a hot skillet until bubbly and golden on both sides. Finally, brush with melted butter or garlic butter to enjoy with the homemade butter chicken!

What to serve with Homemade Butter Chicken

Naan or Garlic Naan - Soft, warm naan is ideal for scooping up butter chicken. You can check the recipe below for making your classic homemade naan bread!

Basmati Rice - Fluffy and aromatic, basmati rice is another most classic pairing. Even Shrimp Fried Rice works pairs well too.

Salad - Add a fresh side like my Salmon Kale Quinoa Salad to balance the richness—then finish the meal 

Cucumber Raita - This cooling yogurt-based side with cucumber and spices helps balance the richness and spice of butter chicken.

Roasted Vegetables - Roasted veggies make a delicious and wholesome side for this butter chicken. I love serving this with roasted carrots and cauliflower or roasted asparagus and carrots for a flavorful pairing.

Dessert: Easy dessert like Chocolate Covered Strawberries will be perfect to enjoy as a after meal dessert.

Authentic Indian butter chicken with soft garlic naan and fresh cilantro garnish.

Butter Chicken Recipe Variations

  • Add extra chili powder or fresh green chilies or cayenne pepper for more heat to make spicy butter chicken.
  • Swap heavy cream with full-fat coconut milk or coconut cream for a dairy-free, butter chicken with coconut milk.
  • Add 10–12 cashews (soaked) or 2–3 tablespoons cashew butter for extra creaminess.

Naan Bread Recipe Variations

  • Add minced garlic to the dough or brush on top before cooking. Sprinkle with chopped cilantro for extra flavor to make Garlic Naan.
  • Fill rolled dough with shredded mozzarella then seal and cook for gooey, cheesy naan.
  • Replace half or all of the all-purpose flour with whole wheat flour for a heartier, more nutritious version to make whole wheat naan.
Close-up of butter naan bread brushed with melted butter and garnished with cilantro.

Equipment

  • Mixing Bowls - For marinating the chicken and mixing the dough ingredients.
  • Large Skillet - To cook the chicken.
  • Dutch oven or Deep Pan -  For simmering the sauce.
  • Measuring Cups & Spoons - For measuring the ingredients.
  • Stand mixer - To knead the dough.
  • Dough Scraper or Knife - To divide dough into portions.
  • Cast iron skillet - To cook the naan.
  • Pastry brush - To brush the melted butter on top of the naan.

Storage Tips for Butter Chicken

Refrigerator:  Store the cooldown butter chicken in an airtight container and keep well in the fridge for up to 4 days. Reheat gently in a pan or microwave, for the best results add a splash of water or cream to loosen the sauce.

Freezer (meal prep friendly): Cool the butter chicken completely, then store in a freezer-safe container or resealable bag. Freeze for up to 2 months. Thaw overnight in the fridge and reheat on the stovetop over medium-low heat.

Close up shot of Indian butter chicken and naan served with pickled onions and raita.

Storage Tips for Naan Bread

Room Temperature: Store cooled naan in an airtight ziplock bag or bread box. The naan stays best for 1–2 days at room temp.

Refrigerator: Place the naan in a sealed container or wrap in foil. The naan stays up to 4–5 days, but naan may dry out slightly. Reheat in the microwave or lightly toast in a toaster.

Freezer: Stack cooled naan with parchment between each piece, then freeze in a zip-top freezer bag and the shelflife is Up to 2 months. Reheat directly from frozen in a hot skillet or toaster oven for best texture.

Top tips to make the perfect Butter Chicken with Naan Bread

Butter Chicken Tips

  1. Marinate the chicken for at least one hour.
  2. Browning the chicken before adding it to the sauce adds a delicious smoky flavor and gives it that authentic touch.
  3. A pinch of dried fenugreek leaves (kasuri methi) is the secret to that authentic butter chicken aroma. Crush it between your fingers before adding to enhance the buttery sauce flavor!

Naan Bread Tips

  1. Water should be warm—not hot—to properly activate the yeast.
  2. Kneading helps build gluten for that perfect chew. Aim for 8–10 minutes until the dough is smooth and stretchy.
  3. A good rise (about 1–1.5 hours) helps create airy, bubbly naan when cooked.
  4. Add garlic or herbs for extra flavor while brushing the naan with melted butter.
Flatlay of homemade butter chicken with naan, rice, and Indian-style.

FAQ

Can I make butter chicken ahead of time?

Of Course you can! In fact, butter chicken often tastes better the next day as the flavors deepen. Store it in an airtight container in the fridge for up to 4 days, or freeze for up to 2 months.

What kind of chicken is best for butter chicken?

Boneless, skinless chicken breasts or thighs are ideal because they stay juicy and flavorful.

Is butter chicken spicy?

Traditional butter chicken is mildly spiced, not overly hot. Even small childrens can enjoy them. You can adjust the spice level by using more or less chili powder or adding fresh green chilies if you prefer it hotter.

Can I use store-bought naan?

Absolutely! While homemade naan is delicious, store-bought naan is a quick and easy alternative. Just warm it up in a skillet or oven before serving.

What’s a good substitute for heavy cream in butter chicken?

You can use coconut cream, cashew cream, Greek yogurt, or even half-and-half. Coconut cream adds a slightly sweet, dairy-free twist.

Can I make naan without yeast?

Yes! You can make no-yeast naan using baking powder or baking soda with yogurt. It won’t rise as much, but it’s still soft and tasty.

How do I store and reheat leftover Indian naan bread?

Wrap naan in foil or store in an airtight container. Reheat on a hot skillet or in the oven. You can also freeze cooked naan and toast straight from the freezer.

What should I serve with butter chicken and naan?

Pair it with basmati rice, cucumber raita, pickled onions, or a fresh side salad to complete the meal.

How do I get restaurant-style flavor?

To get that restaurant flavor, lightly char the marinated chicken (broil or sear) before finishing in the sauce, and add kasuri methi and cream at the end. 

Homemade butter chicken in rich tomato sauce with a stack of warm butter naan in the side.

Related

Looking for other recipes like this? Try these:

Pairing

These are my favorite dishes to serve with this butter chicken with butter naan recipe:

If you tried this Homemade Butter Chicken With Naan or any other recipe from my blog, I’d love to hear your thoughts! ⭐ Please leave a STAR rating and share your experience in the COMMENTS below. Your support means so much and helps me continue creating delicious recipes. Thank you for being part of this journey!

Flatlay of butter chicken with naan, rice, and Indian-style salad.

Butter Chicken With Naan Bread (Easy Indian Recipe)

Abi Guna
Creamy homemade butter chicken with naan—an easy, flavorful Indian dish made from scratch with a step-by-step video tutorial. Enjoy the soft and fluffy butter naan dipped in rich and creamy tomato based gravy.
4.73 from 11 votes
Print Recipe Pin Recipe
Prep Time 20 minutes mins
Cook Time 30 minutes mins
Naan Bread Prep Time 1 hour hr 30 minutes mins
Total Time 2 hours hrs 20 minutes mins
Course Dinner, lunch, Main Course
Cuisine Indian
Servings 4

Equipment

  • Measuring spoons and cups
  • Mixing Bowls
  • Large Skillet
  • Dutch Oven
  • Sharpe knife
  • Cast iton skillet
  • Standing Mixer

Ingredients
  

Ingredients For Butter Chicken

For the Chicken Marinade:

  • 1.5 lb boneless chicken breasts cut into bite-sized pieces
  • ⅓ cup plain yogurt full fat
  • 1 tablespoon lemon juice
  • 1 teaspoon garam masala
  • 1 teaspoon paprika
  • ⅛ teaspoon turmeric
  • 1 teaspoon salt
  • 2 cloves garlic minced
  • 1 inch fresh ginger grated
  • 2 tablespoons butter
  • 1 tablespoon oil

For the Butter Sauce:

  • 2 tablespoons butter
  • 2 tablespoons oil
  • 1 medium yellow onion finely chopped
  • 2 cloves garlic minced
  • 1 inch fresh ginger grated
  • 2 teaspoons garam masala
  • 1 ½ teaspoons dried fenugreek leaves
  • 1 teaspoon coriander powder
  • 1 teaspoon chili powder or paprika
  • 1 teaspoon ground cumin
  • 1 teaspoon salt
  • ½ teaspoon turmeric
  • 1 15 ounce can tomato puree
  • ½ cup water
  • ½ cup heavy cream
  • 1 teaspoon sugar optional
  • 1 tablespoon chopped cilantro for garnish
  • 1 teaspoon kasuri methi (dried fenugreek leaves)

Ingredients For Homemade Naan

  • 4 cups all-purpose flour
  • 1 packet active dry yeast (2 ¼ teaspoons)
  • 1 teaspoon sugar
  • 1 cup warm water
  • ½ cup plain yogurt
  • 2 tablespoon oil
  • 1 teaspoon salt
  • 2 tablespoon melted butter for brushing
  • Chopped garlic cilantro or topping

Instructions
 

Instructions For Butter Chicken

  • In a large mixing bowl, combine the boneless chicken pieces with all the marinade ingredients: plain yogurt, lemon juice, garlic, ginger, garam masala, kashmiri chili or paprika, turmeric, and salt. Mix everything thoroughly to coat the chicken evenly.
  • Cover the bowl with a lid or plastic wrap and refrigerate for at least for 30-60 minutes or ideally overnight. This allows the chicken to absorb all the flavors and become tender.
  • Heat 1 tablespoon of oil and 2 tablespoons of butter in a large skillet over medium-high heat.
  • Once hot, add the marinated chicken pieces in a single layer (work in batches if needed).
  • Cook for 4–5 minutes on each side, or until the chicken is nicely browned (Char) and fully cooked through. Remove the chicken from the pan and set it aside on a plate.
  • In the medium heat a dutch oven for making makhani sauce, melt another 2 tablespoons of butter over medium heat along with 2 tablespoons of oil.
  • Add the finely chopped onion and sauté for about 5–7 minutes, until it's soft, translucent, and golden brown.
  • Add the minced garlic, grated ginger, and all the spices—including garam masala, cumin, chili powder or paprika, coriander, turmeric, fenugreek leaves, and salt.
  • Stir constantly and cook for 1–2 minutes until fragrant. Add the tomato paste and stir for a couple more minutes.
  • Pour in the tomato puree and mix well to combine with the onion-spice mixture. Let it cook for 5–6 minutes, stirring occasionally, until the butter chicken sauce darkens slightly in color and thickens.
  • The mixture will turn too thick, add ½ cup of water to loosen it to a smooth consistency.
  • Return the cooked chicken (along with any juices) to the pan.
  • Stir to coat the chicken thoroughly in the buttery tomato sauce.
  • Simmer on low heat for 5–7 minutes, allowing the chicken to absorb the sauce and the flavors.
  • Lower the heat to medium-low, then pour in the heavy cream and sugar (if using).
  • Stir gently until the sauce becomes rich, smooth, and creamy. Let it simmer for another 2–3 minutes to bring everything together. Turn off the heat and sprinkle with chopped fresh cilantro.
  • Crush kasuri methi (dried fenugreek leaves) between your palms and stir in off the heat. Add a final pat of butter and adjust salt/heat.
  • Serve hot with naan, jeera rice, or basmati rice for a comforting and satisfying Indian meal alongside some lime wedges or lemon wedges.

Instructions For Homemade Naan Recipe

  • In a glass cup or small bowl, combine 1 cup warm water (about 110°F), 1 teaspoon sugar, and 1 packet active dry yeast (2 ¼ teaspoons). Stir to dissolve the sugar and yeast.
  • Let it sit for 5–10 minutes, or until the top becomes foamy and bubbl.
  • In a large mixing bowl (or the bowl of a stand mixer), whisk together 4 cups all-purpose flour and 1 teaspoon salt.
  • Pour in the activated yeast mixture, followed by ½ cup plain yogurt and 2 tablespoons of oil (such as vegetable or olive oil).
  • Stir with a spatula or wooden spoon until a shaggy dough begins to form.
  • Using a standing mixer knead the dough. Attach the dough hook and knead on medium speed for 8–10 minutes, until the dough is smooth, elastic, and slightly tacky but not sticky.
  • Lightly grease a clean bowl with oil and place the dough inside. Cover with a clean kitchen towel or plastic wrap.
  • Let it rise in a warm place (like inside an off oven with the light on) for 1 to 1.5 hours, or until the dough has doubled in size.
  • Once risen, punch down the dough to release the air.
  • Divide the dough into 8–10 equal pieces, depending on how large you want your naan.
  • Roll each piece into a smooth ball, then use a rolling pin to roll each one into an oval or teardrop shape, about ¼ inch thick. Lightly flour your surface if needed.
  • Heat a cast iron skillet over medium-high heat until hot (no oil needed). Place one piece of rolled dough onto the hot skillet.
  • Cook for 1–2 minutes, until bubbles form on the surface and the bottom has golden spots. Flip and cook the other side for another 1–2 minutes, pressing lightly with a spatula for even browning.
  • Remove from the skillet once both sides are cooked and slightly charred in spots.
  • Immediately brush the hot naan with melted butter or ghee.
  • Serve the naan bread warm with your favorite Butter Chicken to enjoy.

Video

Notes

Notes For Butter Chicken Recipe:
  1. Marinating the chicken for at least 1 hour is great, but overnight in the fridge gives the best depth of flavor and tenderness.
  2. Use mild paprika for a mild spice, or swap with chili powder or cayenne for more heat. Adjust to your preference.
  3. Like many Indian dishes, butter chicken often tastes even better the next day once the flavors have had more time to deepen. So leftovers taste better!
  4. This butter chicken recipe freezes beautifully. Let it cool completely, then store in an airtight container for up to 2 months.
Notes For Naan Bread Recipe:
  1. The water for activating yeast should be around 105–110°F. Too hot can kill the yeast, and too cold won’t activate it properly.
  2. If kneading by hand, transfer the dough onto a lightly floured surface and knead for about the same time, adding a little flour as needed until you get a smooth texture.
  3. Make sure the dough rises until doubled in size—this helps create that light, airy naan texture. Cold environments may require a longer rise time.
  4. Use a hot skillet to get the signature golden-brown bubbles and slightly charred spots—like what you'd get from a tandoor oven.
  5. Brushing the naan with melted butter, ghee, or garlic butter immediately after cooking enhances flavor and keeps it soft.
  6. Cooked naan can be frozen! Just cool completely, then store in freezer bags. Reheat in a hot pan or toaster.
Keyword Chicken, comfort food, Indian

Hummus Bagel Recipe (Veggie Bagel Sandwich)

March 29, 2025 by Abi Guna 17 Comments

A quick and easy way to elevate your breakfast or lunch game, this veggie Hummus Bagel sandwich is a must-try! Packed with fresh, colorful veggies and creamy hummus, it's a satisfying and healthy meal that's perfect for busy mornings or a light, nutritious lunch. Plus, it comes together in just 10 minutes!

Healthy veggie hummus bagel sandwich with avocado, cherry tomatoes, mixed greens, and a generous layer of hummus, served on a toasted whole grain bagel stacked one above the other.

Not only is this hummus and bagel recipe loaded with flavor, but it's also vegetarian, making it a great option for plant-based eaters. With minimal effort and simple ingredients, you’ll have a hearty, delicious sandwich ready in no time.I always make these bagels and hummus for our Saturday lunch when it’s time for my daughter’s game since it only takes 10 minutes to whip up this sandwich! Give it a try and see how this veggie hummus sandwich quickly becomes your new go-to meal!

Fan of sandwiches? Try you should definately try my Chicken melt sandwich, Turkey melt, Cream cheese sandwich, I bet you will amazed with the flavors here!

Whether you're a fan of classic hummus or prefer roasted carrot hummus for a twist, this sandwich is incredibly versatile and easy to customize. The combination of crunchy veggies, smooth hummus, and a perfectly toasted bagel creates a mouthwatering bite every time. Serve it with a side of sweet potato wedges or sweet potato cubes or a refreshing quinoa salad or protein-packed option like Oven Baked Shrimp Skewers. Pair it with a coffee made extra special using Vanilla Bean Coffee Syrup for a complete, wholesome meal.

[feast_advanced_jump_to]
Healthy veggie hummus bagel sandwich with avocado, cherry tomatoes, mixed greens, and a generous layer of hummus, served on a toasted whole grain bagel.

Why You Will Love This Hummus Bagel Recipe

  • Quick and Easy: Ready in just 10 minutes, this bagel sandwich is perfect for busy mornings or a quick lunch. All you need is just 5 ingredients!
  • Healthy: Loaded with fresh veggies and creamy hummus, it’s a nutritious option that keeps you full and energized. Its a protein rich meal option!
  • Customizable: Swap the veggies, try different hummus flavors, or add your favorite toppings to make it your own!
  • Plant-Based Goodness: This veggie hummus bagel is naturally vegetarian, and you can easily make it vegan by choosing a dairy-free bagel and hummus.
  • Perfect for Meal Prep: Prep the veggies ahead of time and assemble when you’re ready to eat, perfect for quick and easy lunches on the go.
Creamy hummus spread on a toasted bagel topped with crisp veggies and avocado, served on a rustic tin tray.

What to Serve with Hummus Bagel Sandwich

  • Salads - A fresh, tangy salad with cucumbers, tomatoes, olives, and feta pairs perfectly with this recipe. Try it with my Salmon Kale Quinoa Salad for a wholesome and balanced meal.
  • Fries and Wedges - Crispy and slightly sweet, sweet potato wedges or sweet potato cubes are the perfect complement to the savory bagel. They add a satisfying crunch and a hint of natural sweetness.
  • Pickles - Dill pickles and pickled red onions add a punch of flavor and a pop of color to your bagel sandwich. 
  • Soups - A warm and comforting bowl of tomato basil soup pairs beautifully with the freshness of the bagel. For a spicier option, try a hearty vegetable soup to add some heat and contrast to the creamy hummus veggie sandwich.
  • Drinks: A classic vanilla bean latte pairs beautifully with the savory sandwich, while a salted caramel latte adds a rich, contrasting flavor.

Ingredients and Substitutions

This recipe is a game-changer! Imagine creamy, flavorful hummus on a bagel, layered with fresh veggies and a hint of seasoning. Whether you're spreading hummus on bagel halves or loading it up with crisp greens, juicy tomatoes, and creamy avocado, this sandwich is a perfect balance of texture and taste. The ingredient list has everything you need to create this delicious, satisfying meal in just minutes. Ready to whip up your new favorite lunch? Let’s get started!

Ingredients laid out for hummus bagel veggie sandwich recipe.
  • Everything Bagels - Everything bagels are the perfect base for this sandwich. If you don’t have everything on hand, plain, whole grain, or even sesame bagels work just as well!
  • Homemade Hummus - Creamy and smooth, hummus brings richness and flavor to the bagel sandwich. You can use your favorite store-bought hummus or make it at home like my no garlic hummus recipe.
  • Mixed Greens - A mix of fresh greens like baby spinach, arugula, and kale adds color, crunch, and a burst of freshness. You can also use romaine, spring mix, or even some microgreens for a more delicate texture.
  • Cucumber - Crisp and hydrating, cucumber slices add a refreshing crunch that balances the creaminess of the hummus. If you’re out of cucumbers, thinly sliced zucchini or bell peppers work great too!
  • Cherry tomatoes - Juicy and slightly sweet, cherry or grape tomatoes add a pop of color and a burst of freshness to every bite.
  • Avocado - Creamy avocado slices add a buttery texture and a dose of healthy fats to the sandwich.
  • Seasonings - Salt and pepper adds the flavors of the veggies and hummus.

See recipe card for quantities.

How to make Hummus Bagel recipe

This quick and easy sandwich comes together in no time! Perfect for busy mornings or a light and healthy lunch! Let's see to how to make this easy sandwich recipe with step-by step instructions.

Everything bagels toased to perfection and placed on the baking tray.
  1. Lightly toast the bagel halves until they are golden and crispy.
Hummus has been spreaded generously on the bagels on the baking tray.
  1. Spread the hummus generously on both sides of the toasted bagel. 
Spring green mix placed above the hummus layer on the toasted bagel.
  1. Start by placing the mixed greens on one half of the bagel.
Cucumber slices and tomato slices placed on the bagels for hummus sandwich recipe.
  1. Add the sliced cucumber, tomato slices.
Avocado slices are being topped above the toasted bagel sandwich.
  1. Top it off with avocado slices.
CLose the other half of the toasted bagel to make the hummus sandwich.
  1. Place the other half of the bagel on top and gently press down.

Once your delicious hummus bagel sandwich is fully assembled, carefully slice it in half using a sharp knife. This not only makes it easier to eat but also showcases all those vibrant layers of creamy hummus, fresh veggies, and perfectly toasted bagel.

Serve the sandwich immediately to enjoy that perfect combination of crunchy bagel, smooth hummus, and crisp, juicy vegetables. If you’re packing it to go, wrap it tightly in parchment paper or foil to keep it fresh and easy to transport. Whether you’re enjoying it for breakfast, lunch, or a quick snack, this hummus bagel sandwich is sure to hit the spot! 

Meal prep Tip: Prepare the veggies and hummus ahead of time and store them separately. Toast and assemble just before eating to keep everything fresh and flavorful.

Close-up of a hummus bagel sandwich cut in half with creamy garlic-free hummus, colorful veggies, on a golden, crispy bagel.

Variations on hummus bagel

  • Mediterranean Twist: Add some roasted red peppers, Kalamata olives, and crumbled feta cheese for a bold and savory flavor.
  • Spicy Kick: Add pickled jalapeños and a drizzle of sriracha or hot sauce for a spicy, flavorful twist.
  • Caprese Hummus Bagel: Top with fresh mozzarella slices, juicy tomato slices, and fragrant basil leaves to create a delicious Caprese-inspired bagel.

Equipment

  • Toaster - To toast the bagels
  • Spatula or Butter Knife: To spread the hummus.

Storage

Make Ahead Tips:

  • If you’re preparing the sandwich ahead of time, it’s best to keep the components separate and assemble just before eating.
  • Store sliced veggies, hummus, and bagels separately to prevent sogginess.

Refrigeration:

  • Once assembled, wrap the sandwich tightly in plastic wrap or place it in an airtight container.
  • Store in the refrigerator for up to 1 day for the best freshness and texture.
  • If using avocado, drizzle it with lemon juice to prevent browning before assembling.
Healthy veggie hummus bagel sandwich with avocado, cherry tomatoes, mixed greens, and a generous layer of hummus, served on a toasted whole grain bagel placed on a baking tray.

Top Tips for Making the Best Hummus Bagel Sandwich

  1. Lightly toast the bagel halves until they’re golden and crispy. This adds a nice crunch and prevents the bagel from becoming soggy when layered with hummus and veggies.
  2. Allow the bagel cool for a minute after toasting before spreading the hummus. This prevents the hummus from melting and keeps the texture smooth and creamy.
  3. Use fresh, crisp veggies to balance the creamy hummus and soft bagel. Sliced cucumbers, cherry tomatoes, and avocado work wonderfully for a vibrant, colorful presentation.
  4. Add greens first to create a barrier between the hummus and juicy veggies like tomatoes to prevent sogginess.
  5. Hummus bagels are best enjoyed fresh to maintain their texture and flavor. If making ahead, wrap tightly to keep the bagel from drying out.

FAQ

Can I make the hummus bagel sandwich ahead of time?

Yes, you can prepare the ingredients ahead of time and store them separately. Toast the bagel and assemble the sandwich just before eating to maintain freshness and prevent sogginess.

What type of bagel works best for this sandwich?

Everything bagels add a great flavor with their savory seasoning, but plain, whole wheat, sesame, or multigrain bagels also work well. 

Can I use store-bought hummus?

Absolutely! Store-bought hummus works great, especially if you're short on time. 

Can I add protein to this bagel sandwich?

Yes! Adding grilled chicken, turkey slices, smoked salmon, or a fried egg can make it more filling and protein-packed. 

What is a hummus bagel sandwich?

A hummus bagel sandwich is a vegetarian sandwich made with a bagel spread with hummus and layered with fresh veggies like cucumber, tomato, lettuce, and onions for a healthy and flavorful meal.

Is a hummus bagel healthy?

Yes! A hummus bagel is a nutritious and plant-based option, packed with fiber, protein, and healthy fats, especially when loaded with fresh vegetables.

What vegetables go well in a hummus bagel?

Popular options include cucumber, tomato, red onion, lettuce, spinach, bell peppers, and avocado. You can mix and match based on your preference.

What spreads go well with hummus on a bagel?

You can pair hummus with cream cheese, basil pesto, hummus, or a drizzle of olive oil for extra flavor, depending on your taste.

Delicious hummus bagel sandwich with colorful veggies and a creamy hummus spread, perfect for a healthy breakfast or lunch.

Related

Looking for other recipes like this? Try these:

Pairing

These are my favorite dishes to serve with this hummus bagel recipe:

If you tried this Hummus Bagels recipe or any other recipe from my blog, I’d love to hear your thoughts! ⭐ Please leave a STAR rating and share your experience in the COMMENTS below. Your support means so much and helps me continue creating delicious recipes. Thank you for being part of this journey!

A vibrant veggie hummus bagel sandwich topped with creamy hummus, fresh avocado slices, crisp cucumber, juicy tomatoes, and mixed greens, served on a toasted everything bagel.

Hummus Bagel Recipe (Veggie Bagel Sandwich)

Abi Guna
This creamy and flavorful hummus bagel sandwich is loaded with fresh veggies and smooth hummus on a perfectly toasted bagel will be ready in 10 minutes. A quick and healthy meal that's perfect for breakfast, lunch, or a satisfying snack!
5 from 7 votes
Print Recipe Pin Recipe
Prep Time 10 minutes mins
Total Time 10 minutes mins
Course Breakfast, lunch, Main Course, Snack
Cuisine American, Mediterranean
Servings 4 people
Calories 418 kcal

Equipment

  • Toaster to toast the bagels
  • Spatula or Butter Knife to spread the hummus

Ingredients
  

  • 4 counts everything bagel sliced
  • 1 cup homemade hummus
  • 2 cups mixed greens
  • 1 cup cucumber sliced
  • 1 cup cherry tomatoes sliced
  • 1 medium avocado sliced
  • ½ teaspoon salt
  • ½ teaspoon pepper

Instructions
 

  • Prep the Veggies: Slice the cucumber, cherry tomatoes, and avocado, and set them aside.
  • Toast the Bagel: Lightly toast the bagel halves until they are golden and crispy.
  • Spread the Hummus: Generously spread hummus on both sides of the toasted bagel.
  • Layer the Veggies: Start by placing the mixed greens on one half of the bagel. Add the sliced cucumber, tomato slices, and top it off with avocado slices. Season with a little salt and pepper, if desired.
  • Assemble the Sandwich: Place the other half of the bagel on top and gently press down.
  • Serve: Slice in half and serve immediately.

Notes

  • Use a flavored hummus like roasted carrot hummus or sun-dried tomato for an extra punch or a regular hummus.
  • Swap the bagel with a whole grain or gluten-free option if preferred.
  • Hummus bagel sandwiches are best enjoyed fresh, but if you have leftovers, wrap them tightly and store in the refrigerator for up to one day.
Keyword bagel, Healthy, hummus, sandwich, vegetable

Creamy Hummus Without Garlic (Easy Garlic-Free Recipe)

March 28, 2025 by Abi Guna 15 Comments

Skip the garlic, keep the goodness. This hummus without garlic is velvety, mild, and flavorful, perfect if you prefer a gentler taste or want to avoid garlic breath. We blend tahini and lemon first for a whipped texture, then add chickpeas, olive oil, and a splash of ice-cold water or aquafaba to make it extra smooth. It’s vegan, pantry-friendly, and ready in minutes for dipping, spreading, or meal prep.

A bowl of creamy hummus without garlic, topped with a drizzle of olive oil, smoked paprika, and fresh parsley, served with colorful veggie sticks.

Whether you're prepping for a party, looking for a healthy snack, or just craving something quick and easy, this garlic-free hummus is your new go-to. Plus, it’s so simple to make, and you’ll wonder why you didn’t try it sooner! 

You know what's the best part? This hummus is just as delicious and versatile as the classic version. You still get the rich, nutty flavor from tahini, the bright zing from fresh lemon juice, and that irresistibly creamy texture. It pairs beautifully with pita bread, crunchy veggie sticks, or as a spread for hummus bagels, sandwiches and wraps. Craving something unique and more flavorful than regular hummus? Check out my delicious Roasted Carrot Hummus Recipe with a twist!

[feast_advanced_jump_to]
The cucumber slice being dipped in the creamy homemade humus.

How to make Hummus Without Garlic (Creamy & Easy)

Wondering how to make hummus creamy with canned chickpeas? The secret lies in blending the tahini and lemon juice first, adding a bit of ice water for a smooth, fluffy texture. Incorporating aquafaba (the liquid from the can) also makes a noticeable difference. Whether you're serving it as a dip, spread, or side dish, this vegan hummus recipe will impress everyone with its rich, velvety texture and vibrant flavor.

This chickpea hummus is perfect for meal prepping or whipping up a quick appetizer. With just a few simple steps and minimal effort, you’ll have a batch of delicious, creamy hummus ready to enjoy. Pair it with fresh veggies, pita bread, or use it as a sandwich spread for a healthy and satisfying option. Try this hummus recipe with canned chickpeas today and elevate your snacking game!

Why You’ll Love This Garlic-Free Hummus Recipe

  • Quick and Easy: With just a few pantry ingredients and a few minutes in the food processor, you’ll have a healthy snack or dip ready to go! It’s the perfect meal prep spread option.
  • Smooth and Creamy: The texture is irresistibly velvety and perfect for dipping or spreading. Smear it on anything from sourdough bread, bagels, wraps, naan, or pita bread—the possibilities are endless!
  • No Garlic Breath: You get all the classic hummus goodness without the worry of lingering garlic breath, making it great for social gatherings and everyday meals.
  • Great for Everyone: Whether you’re garlic-sensitive or just prefer a milder taste, this hummus is a crowd-pleaser. It’s the perfect addition to potlucks, parties, or your weekly meal prep lineup!
Smooth and velvety hummus without garlic presented in a rustic bowl, garnished with olive oil and sesame seeds, surrounded by sliced vegetables and tomatoes.

What to Serve with Classic Creamy Hummus

Hummus is so versatile that you can pair it with just about anything! Whether you’re hosting a party, whipping up a quick snack, or just craving something hearty and satisfying, here are some of my favourite ways to enjoy the creamy hummus:

  • Breads, Crackers and Chips- Think warm, soft pita bread or crispy pita chips, crunchy seed crackers, are classic and unbeatable! Try naan, sourdough, or even toasted bagel slices for a fun twist. Sometimes you just need that salty crunch! Tortilla chips, pretzel sticks, and veggie chips are fun and easy dipping options.
  • Spread on Bread - Start your morning right by spreading this creamy hummus on a slice of toasted bread. You can also make a hearty sandwich, like my Hummus Bagel for lunch, or use it as a flavorful spread for a chicken sandwich. Either way, you’ll love the amazing taste!
  • Veggie Sticks - Veggies and hummus are a match made in snacking heaven! Slice up some carrots, cucumbers, bell peppers, or celery for that satisfying crunch. Don’t forget radishes, cherry tomatoes, and roasted sweet potato wedges, sweet potato cubes for a colorful, vibrant platter.
  • Protein and Grains - Amp up your hummus game by serving it alongside grilled chicken skewers or crispy falafel balls or chicken meatballs. Feeling fancy? Serve with a couscous or quinoa salad for a Mediterranean feast!
  •  Salads - Pair hummus with a bright Greek salad, roasted veggies, or a simple chickpea salad. The freshness complements the creamy texture and makes it feel extra wholesome. Roasted Mini Peppers with Balsamic and Garlic, perfect dipper platter.

Ingredients and Substitutions

All you need are fewer than 7 ingredients to whip up this creamy homemade hummus recipe—without garlic! Let’s take a look at each ingredient, along with some handy substitution options if you’re missing anything.

Garlic-free homemade hummus ingredients laid out.
  • Chickpeas (Garbanzo Beans) - Chickpeas are the main ingredients for hummus, giving it that creamy, slightly nutty flavor. Canned chickpeas are super convenient, but you can also cook dried chickpeas from scratch for an even fresher taste. If you’re out of chickpeas, try using white beans or cannellini beans for a similar texture!
  • Tahini (Sesame Paste) - Tahini is what gives hummus its signature creamy, nutty flavor. If you’re not a fan of tahini or don’t have it on hand, swap it out with smooth peanut butter or sunflower seed butter for a slightly different, but equally delicious, result.
  • Olive Oil - Olive oil adds a luscious, silky texture to your hummus. Use extra virgin olive oil for the best quality.
  • Lemon Juice - Freshly squeezed lemon juice brings brightness and balances the richness of the tahini.
  • Ice cubes - Adding ice cubes to the food processor while blending hummus might sound a bit unusual, but it actually helps in achieving that super smooth and creamy texture! Ice cubes keep the mixture cool, preventing the ingredients from overheating and maintaining that silky texture.
  • Salt - A pinch of salt enhances all the flavors, giving your hummus that satisfying, savory taste.
  • Ground Cumin - Cumin adds a warm, earthy note that complements the nuttiness of the tahini and chickpeas.
  • Paprika - A dash of paprika adds that extra smokey flavor to the hummus recipe.
  • Water - Adding a few tablespoons of water helps achieve that perfect, creamy consistency. You can also use the aquafaba (the liquid from the canned chickpeas) instead—just be sure to save it before draining the can!

See recipe card for quantities.

How to make hummus without garlic

If you're looking for a garlic-free hummus that's just as creamy and flavorful as the classic version, I got you covered with simple steps! This hummus recipe without garlic is perfect for those who prefer a milder taste. Made with simple pantry ingredients like canned chickpeas, tahini, lemon juice, and olive oil, this recipe is quick and easy to make. Plus, it's completely vegan, making it a great addition to your plant-based meal rotation.

In a food processor ingredients added for prepping Delicious and smooth hummus without garlic.
  1. Add the ingredients into the food processor; chickpeas, salt, paprika, cumin, tahini, ice cubes and lemon juice.
In a fod processor the hummus being processed without salt.
  1. Blend until smooth and creamy by scraping the sides using a spatula.

Add water, one tablespoon at a time, to the food processor while blending. This gradual addition helps you control the consistency, ensuring the hummus becomes smooth and creamy without getting too watery. Keep blending until the texture reaches your desired level of creaminess—light and fluffy or dense and thick, depending on your preference.

Once the hummus has the perfect consistency, take a quick taste and adjust the seasoning. Add more salt or a squeeze of lemon juice to brighten the flavors if needed. If you prefer a bit of warmth and depth, sprinkle in a little more cumin and blend again. Remember, tasting and adjusting as you go ensures your hummus has a balanced and delicious flavor profile.

Hint: Always use a clean spoon to scoop out portions to avoid contamination. If the hummus thickens after storage, simply stir in a little water or olive oil to bring back the creamy texture!

Cucumber slice being dipped in the creamy homemade hummus without garlic in a bowl.

Variations

  • Spicy Hummus - Give your hummus a little kick by adding 1-2 teaspoons of harissa, sriracha, or cayenne pepper. 
  • Roasted Vegetable Hummus - Blend in roasted carrots, beets, or red bell peppers for a colorful and naturally sweet variation. Roasting brings out a deep, caramelized flavor that pairs beautifully with creamy hummus. Like my roasted carrot hummus recipe!
  • Avocado Hummus - For a rich and creamy twist, blend in half a ripe avocado. It adds a silky texture and a mild, buttery flavor—perfect for spreading on toast!
  • White Bean Hummus 0 Replace chickpeas with cannellini or navy beans for a softer, smoother texture. This variation is extra creamy and mild in flavor.

Equipment

  • Food Processor or Blender: Essential for blending all the ingredients into a smooth and creamy consistency.
  • Spatula: Great for scraping down the sides of the processor and making sure every bit of hummus gets blended evenly.
  • Measuring Cups and Spoons: Accurate measurements help you get the perfect balance of flavors.
Garlic-free homemade hummus with a golden drizzle of olive oil, sprinkled with cumin and herbs, paired with crisp veggie dippers , a hand taking the hummus dip with a baby carrot.

Storage & Make-Ahead

Refrigerator: Transfer your hummus to an airtight container to keep it fresh. Drizzle a thin layer of olive oil on top to help seal in moisture and maintain creaminess. Store in the fridge for up to 4-5 days.

 Freezer: Use a freezer-safe container and leave some space at the top for expansion. Drizzle with olive oil to prevent drying out. Freeze for up to 3 months. To thaw, move it to the fridge overnight and give it a good stir before serving.

Tips for the Creamiest Texture

  1. A good-quality tahini makes all the difference! Choose a smooth, creamy variety for the best texture.
  2. To get that dreamy, velvety texture, blend the hummus for a few extra minutes, even if it looks done. Stop occasionally to scrape down the sides for an even mix.
  3. Start with a small amount of water or aquafaba, then add more as needed. This helps avoid runny hummus.
  4. A drizzle of olive oil not only adds richness but also helps with the smooth texture. I highly recommend using Extra virgin olive oil as it has the best flavor for hummus.
  5. Hummus tastes even better after chilling for a few hours. This allows the flavors to meld and deepen. Make it ahead of time for parties or meal prep!
  6. Always store your hummus in an airtight container with a layer of olive oil on top to keep it fresh and moist.
Rich and creamy garlic-free hummus served in a handmade pottery dish, topped with olive oil and a sprinkle of paprika, with fresh veggies.

FAQ

What can I use instead of tahini in this no garlic hummus recipe?

If you want to make a garlic hummus recipe without Tahini, you can swap tahini with smooth peanut butter, almond butter, or sunflower seed butter. The flavor will be slightly different but still creamy and delicious!

Is hummus without garlic still flavorful?

Yes! The combination of tahini, lemon juice, cumin, and olive oil creates a delicious and well-rounded flavor profile, even without the garlic punch.

Can I make hummus without olive oil?

Yes, you can skip the olive oil and add a bit more water or aquafaba for consistency. It will be slightly less rich but still tasty.

How long does hummus without garlic last in the fridge?

Store it in an airtight container, and it should last for 4-5 days. Adding a thin layer of olive oil on top helps keep it from drying out.

Can I freeze hummus without garlic?

Yes! Freeze it in a sealed container for up to 3 months. Let it thaw in the fridge overnight and give it a good stir before serving.

Is hummus without garlic good for people with acid reflux?

Yes! Garlic can trigger acid reflux for some people, so skipping it makes the hummus gentler on the stomach.

What are some creative ways to use hummus without garlic?

Use it as a sandwich spread, dip for veggies and pita, or even as a creamy salad dressing by thinning it with a little water or lemon juice.

A bowl of creamy hummus without garlic, topped with a drizzle of olive oil, smoked paprika, and fresh parsley, served with colorful veggie sticks.

Related

Looking for other recipes like this? Try these:

Pairing

These are my favorite dishes to serve with this no garlic hummus recipe:

If you tried this Hummus without garlic recipe or any other recipe from my blog, I’d love to hear your thoughts! ⭐ Please leave a STAR rating and share your experience in the COMMENTS below. Your support means so much and helps me continue creating delicious recipes. Thank you for being part of this journey!

Delicious and smooth hummus without garlic, artfully styled on a bowl with vibrant veggies and , perfect for dipping.

Hummus Without Garlic

Abi Guna
Creamy and flavorful hummus without garlic that's perfect for those who prefer a milder taste or want to avoid garlic breath. Made with simple pantry ingredients, this smooth and velvety dip is quick to make and versatile for any meal or snack. Enjoy it as a spread, dip, or healthy appetizer!
5 from 7 votes
Print Recipe Pin Recipe
Prep Time 10 minutes mins
Total Time 10 minutes mins
Course Appetizer, Snack
Cuisine Mediterranean
Servings 8 servings (2 tablespoons per serving)
Calories 64 kcal

Equipment

  • Food Processor
  • Measuring cups and spoons
  • Spatula

Ingredients
  

  • 1 (15 ounces) can chickpeas drained and rinsed
  • ¼ cup tahini
  • 2 tablespoons olive oil plus extra for drizzling
  • 2 tablespoons freshly squeezed lemon juice
  • ½ teaspoon ground cumin
  • ¼ teaspoon smoked paprika
  • ½ teaspoon salt
  • 2-3 ice cubes
  • 2–3 tablespoons water to adjust for consistency
  • Chopped parsley optional, to garnish
  • Sesame seeds optional, to garnish

Instructions
 

  • In a food processor, combine chickpeas, tahini, ice cubes, olive oil, lemon juice, cumin, paprika and salt.
  • Blend until smooth, scraping down the sides as needed.
  • Add water, one tablespoon at a time, and blend until the hummus reaches your desired creaminess.
  • Adjust salt and lemon juice to your taste. You can add more cumin for a bit of warmth if desired.
  • Transfer to a serving bowl and drizzle with olive oil to keep the hummus moist.
  • Sprinkle with smoked paprika for a pop of color, along with chopped parsley and sesame seeds.
  • Serve the no-garlic hummus with pita bread, veggie sticks, or use it as a spread in bagel sandwiches and wraps.

Notes

  • Store the hummus in an airtight container with a layer of olive oil on top to keep it fresh and moist.
  • If the hummus is too thick, add a little more ice water or aquafaba and blend again until it’s just right.
  • This hummus recipe is super versatile! Feel free to add roasted veggies, herbs, or spices to suit your taste similar to my roasted carrot hummus recipe!
  • Store in an airtight container in the fridge for up to 4-5 days. Make a big batch and portion it out for snacks or quick meals throughout the week.
  • You can pair this hummus without garlic with fresh veggies, bread, or as a spread for wraps, bagels and sandwiches.
Keyword Condiments, Dips, Healthy, hummus, snacks

Nutella Waffles (Crispy, Easy & Ready in 15 Minutes)

March 19, 2025 by Abi Guna 9 Comments

These Nutella waffles are the perfect treat if you’re a Nutella lover! Crispy on the outside and soft on the inside, these waffles are packed with rich chocolate-hazelnut flavor in every bite. You’ll also enjoy my Nutella covered strawberries for another quick and easy chocolate fix. If you’re looking for more easy ideas like this, be sure to explore my breakfast recipes collection for quick and delicious options.

A stack of warm Nutella waffles served topped with whipped cream, fresh strawberries, and a rich chocolate-hazelnut drizzle, creating a decadent and mouthwatering brunch treat.

Top them with fresh strawberries, bananas, a dollop of whipped cream, and an extra drizzle of warm Nutella to take them to the next level. These waffles are effortless, decadent, and absolutely irresistible!

As many of you know, I love Nutella! My Nutella-covered strawberries have been a huge hit on the blog, followed by my no-bake Nutella Mousse recipe or Nutella Mug Cake, which is a must-try followed by Nutella Puff Pastry. With just ½ cup of Nutella left in my jar, I wanted to create something quick and family-friendly for brunch—and that’s how these BEST Nutella Waffles came to life!

Are you a waffle fan? Then you have to try these Red Velvet Waffles made with cake mix and fall flavored Apple Cinnamon Waffles with warm spices and another fall favourite Pumpkin Pecan Waffles to enjoy your morning breakfast!

[feast_advanced_jump_to]
Close up shot of A plate of Nutella-infused waffles with a crispy, golden texture, topped with a drizzle of melted Nutella, fresh strawberries, whipped cream and nutella drizzle.

Why You’ll Love These Nutella Waffles Recipe

  • Decadent Treat - Unlike regular waffles with Nutella as a topping, this waffle recipe blends Nutella directly into the batter, giving every bite a rich, chocolate-hazelnut flavor. 
  • Easy to Make – With simple ingredients and minimal prep time, you can whip up these waffles effortlessly for breakfast, brunch, or dessert. This is our goto weekend breakfast!
  • Versatile & Customizable – Enjoy them plain, or top them with extra Nutella drizzle, fresh fruit like berries or bananas, whipped cream, or a sprinkle of powdered sugar for an extra treat.
  • Kid-Friendly & Crowd-Pleasing – Whether you're making these for kids or serving them at a brunch gathering, they’re guaranteed to be a hit!
  • Great for Make-Ahead & Freezing – These waffles freeze well and reheat beautifully in the toaster or oven, making them perfect for busy mornings.
A fork cutting through a soft, chocolatey Nutella waffle, showing its fluffy interior, with extra Nutella drizzled on top.

What to Serve with Nutella Waffles

These Nutella waffles are rich, chocolatey, and indulgent, so pairing them with lighter, fresh sides creates the perfect balance. Serve them with fresh berries, sliced bananas, or a dollop of whipped cream for a classic combination that enhances the flavor without overpowering it.

  • Fresh Fruits – Serve these waffles with fresh fruits like strawberries, whose slight tartness balances the sweetness of Nutella. Bananas are a classic combination, while mixed berries enhance the chocolate-hazelnut flavor.
  • Extra Toppings – Nutella waffles are delicious on their own, but you can take them to the next level with toppings like a warm drizzle of Nutella, light and airy whipped cream, a dusting of powdered sugar, crunchy nuts, or shredded coconut for a tropical touch!
  • Syrups & Spreads – Maple syrup is a classic choice, but for a different flavor, try a drizzle of caramel sauce, vanilla bean coffee syrup, almond butter, or peanut butter.
  • Drinks – A classic vanilla bean latte pairs beautifully with Nutella’s sweetness, while a salted caramel latte offers a rich, contrasting flavor.
  • For more sweet breakfast ideas, don’t miss my Red Velvet Cake Waffles or a quick Oatmeal Mug Cake—both are easy, delicious, and perfect alongside these waffles. If you’re in the mood for something lighter, my Nutella covered strawberries make a fresh and elegant pairing.

Ingredients And Substitutions You’ll Need

To make these delicious Nutella waffles, you'll need a few simple ingredients that come together for the perfect crispy yet fluffy texture. Let's see the ingredients needed below!

Ingredients spread over on pink hue background for making quick and easy nutella waffles.
  • All-Purpose Flour – The base of the waffle batter, giving structure and fluffiness. If you're looking for a healthier option, swap it with whole wheat flour for added fiber, or use gluten-free flour for a gluten-free version. I have tested this recipe with kodiak protein pancake mix for that extra protein and still it tastes great!
  • Baking Powder – The secret to light, fluffy waffles! It helps the batter rise and creates that perfect crisp-on-the-outside, soft-on-the-inside texture. 
  • Salt – A pinch of salt balances the sweetness and enhances the chocolate-hazelnut flavor. If using salted butter, you can reduce or skip the added salt.
  • Eggs – Provide structure and help the waffles stay soft and fluffy inside. If you're out of eggs or need a vegan option, replace each egg with ¼ cup unsweetened applesauce or a flax egg (1 tablespoon ground flaxseed + 3 tablespoon water, mixed and rested for 5 minutes).
  • Milk – Keeps the batter smooth and adds moisture. You can use buttermilk for extra fluffiness, or substitute with almond milk, oat milk, or coconut milk for a dairy-free option.
  • Nutella – The main ingredient for this waffle recipe! It infuses the batter with a rich, chocolate-hazelnut flavor. 
  • Vanilla Extract – Enhances the overall flavor with a warm, sweet aroma.
  • Melted Butter – Adds richness and helps create crispy edges. Use vegetable oil, melted coconut oil, or even Greek yogurt for a slightly healthier alternative.
  • Strawberries - To serve with waffles. But any fruits like berries, bananas, sliced apples works too!

See recipe card for quantities.

How To Make Nutella Waffles

If you're a Nutella lover looking for the best Nutella recipes, you can't go wrong with a delicious chocolate laoded nutella waffles! It's the perfect balance of crispy waffles and creamy chocolate-hazelnut goodness, making it one of the most irresistible Nutella breakfast recipes. Lets see the recipe with step-by step images below!

In a bowl dry ingredients being mixed for nutella waffles recipe.
  1. In a bowl combine the dry ingredients; flour, salt and baking powder.
Nutella being added to the wet mixture in a large bowl.
  1. In a seperate large bowl beat the eggs followed by nutella. Mix until well combined. Add milk, vanilla, butter.
Flour being added to a large bowl to make nutella waffles.
  1. Once the wet mixture is combined fold in the dry ingredients mixture.
The nutella waffle batter in a large bowl.
  1. Mix the flour until combined, dont overmix the waffle batter. (Few lumps are just fine)
Pour the nutella waffle batter in a waffle maker.
  1. Pour the waffle batter in the greased waffle maker.
crispy nutella waffles being cooked in a waffle maker.
  1. Cook the waffles until golden and crispy.

For the ultimate indulgence, serve your Nutella waffles warm and fresh off the waffle iron. Drizzle extra warm Nutellaover the top for a rich, chocolate-hazelnut finish that melts into every bite. Add a handful of fresh strawberries or sliced bananas to balance the sweetness with a refreshing, fruity touch.

For extra decadence, top with a dollop of fluffy whipped cream and a light dusting of powdered sugar, creating a beautiful and irresistible presentation. Pair with a side of maple syrup, chopped hazelnuts, or a scoop of vanilla ice cream for a next-level treat. Whether you're enjoying them for breakfast, brunch, or dessert, these waffles are guaranteed to impress!

More Easy Nutella Recipes

If you love these Nutella waffles, be sure to try some of my other easy Nutella treats like Nutella mug cake, Nutella mousse, Nutella covered strawberries and Nutella puff pastry. They’re all simple, delicious, and perfect for satisfying your sweet cravings!

A plate of Nutella-infused waffles with a crispy, golden texture, topped with a drizzle of melted Nutella, fresh strawberries  slices, sweet and nutty breakfast.

Variations

Want to switch things up? Here are some fun and delicious variations of Nutella waffles to suit different tastes and occasions!

  • Double Chocolate Nutella Waffles  - Add ¼ cup extra cocoa powder and ¼ cup chocolate chips to the batter for a richer, double-chocolate experience.
  • Banana Nutella Waffles - Mash ½ ripe banana into the batter for a naturally sweet, moist waffle.
  • Nutella-Stuffed Waffles - Instead of mixing Nutella into the batter, add a spoonful of Nutella between two layers of batter in the waffle iron for a gooey, stuffed center. I use this method when I am making pancakes!

Equipment

  • Waffle Maker - A good-quality waffle iron ensures crispy edges and a fluffy interior. 
  • Mixing Bowls – One for dry ingredients and another for wet ingredients, making it easier to mix everything smoothly.
  • Whisk or Hand Mixer – Helps combine ingredients evenly, especially when mixing Nutella into the batter.
  • Measuring Cups & Spoons – Ensures accurate measurements for the perfect waffle texture.
  • Spatula – Great for folding the wet and dry ingredients together without overmixing.
A oval plate served with Fluffy Nutella waffles with deep, crispy pockets filled with melted Nutella, garnished with fresh strawberries for a beautiful and delicious presentation.

Storage & Reheating Tips for waffles with nutella

Storing Leftover Waffles:

  • Place completely cooled waffles in an airtight container or resealable bag. Separate layers with parchment paper to prevent sticking. The waffles stay fresh for 3 days.
  • Lay waffles in a single layer on a baking sheet and freeze for 1-2 hours until firm. Transfer to a freezer-safe bag or airtight container with parchment paper between layers. Staying fresh for 3 months.

Reheating Nutella Waffles: 

  • Toaster – The best method for a crispy texture. Heat frozen or refrigerated waffles on a medium setting until warm and crisp.
  • Oven – Preheat to 350°F (175°C), place waffles directly on the oven rack or a baking sheet, and bake for 5-7 minutes.
  • Air Fryer – Heat at 350°F (175°C) for 3-5 minutes for crispy results.

Tips for Crispy and Fluffy Waffles

  • The nutella might be slightly thick, so heating the Nutella (10-15 seconds in the microwave) makes it easier to blend into the batter without clumping.
  • Don’t overmix the batter, stir until just combined.
  • A fully heated waffle iron ensures crispy edges and even cooking. So make sure the waffle iron is hot enough before pouring the batter.
  • Placing hot waffles directly on a plate can make them soggy from trapped steam. Instead, let them cool slightly on a wire rack for maximum crispiness.
  • Lightly grease the waffle iron with cooking spray or melted butter to prevent sticking and achieve golden, crispy waffles.
  • Use a ⅓ or ½ cup measuring cup to pour the batter, ensuring consistent waffle size and avoiding overflow.
Backlight shot of  A breakfast spread featuring Nutella waffles stacked high, surrounded by bowls of fresh fruit, syrup.

FAQ

Can I make the waffle batter ahead of time?

Yes! You can prepare the waffle batter and store it in the refrigerator for up to 24 hours. Just give it a gentle stir before using.

Can I freeze Nutella waffles?

Absolutely! Let them cool completely, then freeze in a single layer on a baking sheet before transferring to a freezer bag. They can be stored for up to 3 months.

Can I make these waffles without eggs?

Yes you can! Replace each egg with ¼ cup applesauce or a flax egg (1 tablespoon ground flaxseed + 3 tablespoon water, mixed and rested for 5 minutes).

Can I use a pancake mix or cake mix instead of making the batter from scratch?

Yes of course! You can use a store-bought waffle mix and simply add ½ cup of Nutella to the wet ingredients. For a cake-like version, use chocolate cake mix as the base.

How do I prevent my waffles from sticking to the waffle iron?

Make sure to grease the waffle maker with cooking spray or melted butter before adding the batter. Also, avoid opening the waffle maker too soon—let it fully cook!

Can I make Nutella waffles gluten-free?

Yes! Substitute all-purpose flour with gluten-free 1:1 baking flour or almond flour for a gluten-free version

Can I make this recipe dairy-free?

Definitely! Use almond milk, oat milk, or coconut milk instead of regular milk, and replace butter with coconut oil or dairy-free margarine.

What are the best toppings for Nutella waffles?

Some delicious options include fresh strawberries, bananas, whipped cream, chopped nuts, powdered sugar, or an extra drizzle of warm Nutella.

Can I add Nutella directly to waffle batter?

Yes! Adding Nutella directly to the batter gives these Nutella waffles a rich chocolate-hazelnut flavor throughout.

How do you make Nutella waffles crispy?

To get crispy Nutella waffles, cook them until golden brown and avoid opening the waffle maker too early. A light coating of oil also helps.

How do I reheat waffles to keep them crispy?

Reheat in a toaster or oven instead of the microwave to keep the waffles crispy.

How do you make easy Nutella waffles at home?

Making easy Nutella waffles at home is simple and quick. Start by preparing a basic waffle batter, then mix in Nutella for rich chocolate flavor. Cook the batter in a preheated waffle iron until crispy and golden. These homemade Nutella waffles are perfect for a quick breakfast or dessert—if you’re looking for more sweet ideas, explore my dessert recipes collection. Top with fruits, syrup, or more Nutella for an indulgent treat.

Horizontal image of A stack of warm Nutella waffles served with a side of whipped cream, fresh strawberries, and a rich chocolate-hazelnut drizzle, creating a decadent and mouthwatering brunch treat.

Related

Looking for other recipes like this? Try these:

Pairing

These are my favorite dishes to serve with this Nutella Waffles recipe:

If you tried this Nutella Waffles or any other recipe from my blog, I’d love to hear your thoughts! ⭐ Please leave a STAR rating and share your experience in the COMMENTS below. Your support means so much and helps me continue creating delicious recipes. Thank you for being part of this journey!

A stack of warm Nutella waffles served with a side of whipped cream, fresh strawberries, and a rich chocolate-hazelnut drizzle, creating a decadent and mouthwatering brunch treat.

Nutella Waffles (Crispy, Easy & Ready in 15 Minutes)

Abi Guna
These fluffy Nutella waffles are a chocolate lover’s dream! Infused with rich, creamy Nutella, they’re crispy on the outside and soft on the inside, making them perfect for breakfast, brunch, or dessert. Serve with extra Nutella drizzle, fresh fruit, and whipped cream for an indulgent treat the whole family will love!
5 from 5 votes
Print Recipe Pin Recipe
Prep Time 10 minutes mins
Cook Time 10 minutes mins
Total Time 20 minutes mins
Course Breakfast, Dessert
Cuisine American
Servings 5 servings
Calories 439 kcal

Equipment

  • Waffle Maker
  • Mixing Bowls
  • Measuring cups and spoons
  • Hand Mixer
  • Spatula

Ingredients
  

  • 1 ½ cups all-purpose flour
  • 2 teaspoons baking powder
  • ¼ teaspoon salt
  • 2 large eggs at room temperature
  • 1 cup milk at room temperature
  • ½ cup Nutella
  • 2 teaspoons vanilla extract
  • 2 tablespoons melted butter
  • Whipped cream to serve
  • Fresh fruits to serve
  • Cooking spray

Instructions
 

  • Preheat the waffle iron according to the manufacturer's instructions.
  • In a large bowl, whisk together flour, baking powder, and salt.
  • In another bowl, whisk the eggs, then add the Nutella. Use a whisk or hand mixer to mix until well combined.
  • Add milk, vanilla extract, and melted butter, whisking until smooth.
  • Gradually add the wet mixture to the dry ingredients, stirring until just combined. Do not overmix the batter.
  • Lightly grease the waffle iron, then pour ⅓ cup of batter in, spreading it evenly. Cook according to your waffle maker’s instructions until golden brown and crispy.
  • Serve warm with extra Nutella drizzle, fresh strawberries, whipped cream, or powdered sugar.

Notes

  1. Slightly warming the Nutella makes it easier to mix into the batter.
  2. For extra crispiness, let the waffles rest on a wire rack instead of stacking them.
  3. These waffles freeze well and stay fresh for 3 months,  just reheat in a toaster or oven for a quick treat!
  4. The recipe yeild 10 square waffles.
Keyword breakfast, nutella, waffles

Easy Cheesy Chicken Salad Melt Sandwich Recipe

March 13, 2025 by Abi Guna 25 Comments

Imagine biting into a warm, crispy sandwich with creamy chicken salad and gooey melted cheese in every bite. This Chicken Salad Melt Sandwich is the ultimate comfort food, perfect for a cozy weekend brunch or a delicious addition to your next picnic spread equivalent to Turkey Melt Sandwich!

Close-up of a crispy chicken salad melt sandwich with golden toasted bread, melted cheese, and creamy chicken salad filling, served one above the above !

If you're craving a perfectly grilled sandwich or a classic chicken salad, this chicken melt salad satisfies both in one bite. It's a comforting, satisfying meal with a crispy outside and a creamy, cheesy inside. With just 15 minutes and a few simple pantry ingredients, you can make this delicious sandwich in no time. Check out my classic turkey melt sandwich and if you are vegetarian don't worry try my grilled cream cheese sandwich!

A few days ago, I made a delicious chicken noodle stir-fry for dinner, followed by chicken and shrimp fried rice last night. I have a huge collection of chicken recipes in my blog and today, I found myself with just one lonely chicken breast left in the fridge, and that’s when inspiration struck! These chicken salad melt sandwiches came together in no time, making the perfect quick and satisfying lunch. For more easy meal ideas, try the fresh and wholesome Hummus Bagel Sandwich or pair your meal with Oven Baked Shrimp Skewers. And don’t forget to add a cozy drink using Vanilla Bean Coffee Syrup to complete your meal.

[feast_advanced_jump_to]
A perfectly grilled chicken salad melt sandwich a hand holding it , with cheese oozing from the sides and garnished with fresh parsley.

Why You’ll Love This Chicken Salad Melt Recipe

  • Quick & Easy – Ready in just 15 minutes with simple pantry ingredients.
  • Perfect for Any Meal – Great for lunch, brunch, or a quick weeknight dinner.
  • Crispy and Cheesy – Golden, buttery toasted bread with gooey melted cheese in every bite.
  • Flavorful – The chicken salad is rich, creamy, and packed with texture from celery, bell peppers and onions.

What is a Chicken Melt Sandwich?

A chicken salad melt is a warm, toasted sandwich made with creamy chicken salad and melted cheese. It’s similar to a tuna melt but uses shredded chicken mixed with mayonnaise, mustard, celery, onions, red bell pepper and seasonings. The mixture is spread onto bread, topped with cheese, and then grilled or toasted until the bread is golden brown and the cheese is melted.

Warm and crispy chicken salad melt with gooey cheese, placed on a wooden board with a side of coleslaw  and Chips.

What to Serve with a Chicken Salad Melt

  • Potato Chips – I love serving these sandwiches with a side of crispy potato chips for the perfect crunchy contrast to the creamy, melty filling.
  • French Fries or Sweet Potato Fries – Crispy, salty, and always a favorite! My sweet potato wedges and sweet potato cubes also pair beautifully with this recipe.
  • Pickles – My husband enjoys these sandwiches with a side of tangy pickles, which add a refreshing bite that cuts through the richness.
  • Coleslaw – Whether creamy or vinegar-based, coleslaw adds the perfect crunch and freshness to balance the sandwich.
  • Roasted Vegetables – Roasted veggies make a delicious and wholesome side. I love serving this with roasted carrots and cauliflower or roasted asparagus and carrots for a flavorful pairing.

Ingredients & Substitutions for Chicken Melt

This chicken melt sandwich is the perfect blend of creamy, cheesy, and crispy textures, making it a go-to comfort meal. Whether you're craving a quick lunch or a satisfying dinner, this chicken melt recipe comes together in just 20 minuteswith simple ingredients. Below, you'll find everything you need to make this flavorful sandwich, that turns out perfectly golden and melty every time!

Ingredients laid out for making chicken salad melt sandwich.
  • Chicken Breast – Cooked and shredded chicken works best, but you can also use rotisserie chicken or any leftover chicken for your convenience.
  • Mayonnaise – Adds creaminess; swap with Greek yogurt  for a healthier option.
  • Dijon Mustard – Enhances the flavor with a little tang; substitute with yellow mustard or honey mustard if preferred.
  • Celery – Adds crunch to the salad.
  • Bell pepper - The red bell pepper brings the mild sweetness and flavor to the salad.
  • Red Onion – Brings a bit of sharpness; swap with green onions, shallots, or leave it out if you prefer a milder flavor.
  • Lemon Juice – Brightens the flavors.
  • Salt & Pepper – Season to taste.
  • Bread slices – I have used Sourdough bread in this recipe but a whole wheat, rye, or even a croissant works well. For a low-carb option, try a lettuce wrap.
  • Cheese – Pepper jack is a fantastic option. Cheddar, Swiss, provolone, or mozzarella also works beautifully. 
  • Butter – Helps create that crispy, golden crust when grilling. You can also substitute with olive oil, ghee, or vegan butter.

See recipe card for quantities.

How to make the BEST Chicken Salad Melt Sandwich recipe

Creating a delicious melt sandwich is easy with this step-by-step guide! This chicken cheese sandwich is packed with creamy salad, spicy cheese, and crispy toasted bread, making it an irresistible meal. Follow these simple instructions to whip up the ultimate chicken melts, golden, cheesy, and full of flavor in every bite!

In a large bowl ingredients combined for chicken salad for the chicken salad melt sandwich.
  1. In a large bowl combine the ingredients; shredded chicken, onions, celery, mayonnaise, Dijon mustard, bell pepper, salt and pepper.
Chicken salad mixture mixed well in a bowl.
  1. Mix well until well combined to make the creamy chicken salad.
One side of the bread sliced being filled with chicken salad mixxture.
  1. Fill the prepared chicken salad mixture in one side of the sour dough bread slice.
The chese slice being arranged on top of the mixture while making chicken salad melt sandwich recipe.
  1. Top the chicken salad mixture with pepper jack cheese slices.
Butter being spread on top of the bread slice placed on a pan.
  1. Spread the butter on top of the bread slice.
A perfectly grilled chicken salad melt sandwich on a frying pan.
  1. Toast for 2-3 minutes per side, pressing lightly, until golden brown.

Once the sandwich is golden brown and the cheese has melted beautifully, remove it from the heat and let it rest for a minute. This helps the flavors settle and makes slicing easier. Using a sharp knife, carefully cut the chicken salad melt in half—either diagonally for a classic café-style look or straight down the middle for a hearty bite. Serve it warm while the cheese is still gooey, pairing it with a side of crispy chips, a fresh green salad, or a bowl of warm tomato soup for the ultimate comfort meal!

Variations

  • Add sriracha, hot sauce, or red pepper flakes to the chicken salad for an extra kick.
  • For a BBQ Chicken Melt, mix the chicken salad with BBQ sauce instead of mayo. As a BBQ chicken fan, my husband sometimes go with this method!
  • Stir in some homemade basil pesto and use mozzarella or provolone for an Italian-inspired melt.
  • Toss the chicken in buffalo sauce and mix with ranch or blue cheese dressing for a classic buffalo-flavored melt.
Close-up of a crispy chicken salad melt sandwich with golden toasted bread, melted cheese, and creamy chicken salad filling.

Equipment

  • Mixing Bowl – For combining the chicken salad ingredients.
  • Grill Pan or Skillet – To cook the sandwich until golden brown and crispy.
  • Measuring Cups & Spoons – For accurate ingredient portions.

Storage

Storing the Chicken Salad:

Store the chicken salad mixture in an airtight container in the refrigerator for up to 3 days. If making ahead, store the chicken salad separately and assemble the sandwich just before cooking.

Storing Assembled Sandwiches:

  • Refrigeration: If you have a non grilled sandwich assembled, wrap it tightly in plastic wrap or foil and refrigerate for up to 1 day.
  • Freezing: It’s best to freeze only the chicken salad mixture, not the assembled sandwich, as the bread can become soggy.

Reheating Leftovers:

  • Skillet: Reheat the sandwich over medium-low heat until crispy and warmed through.
  • Air Fryer: Heat at 350°F (175°C) for 3-5 minutes for a crispy texture.
  • Oven: Bake at 350°F (175°C) for 5-7 minutes until heated through.
A perfectly grilled chicken salad melt sandwich on a rustic tray, with cheese oozing from the sides and garnished with fresh parsley.

Top Tips for Making the Perfect Chicken Salad Melt

  1. Use the Right Bread – Choose sturdy bread like sourdough, which I used in this recipe. Whole wheat or rye also work well since they can hold up to the creamy filling without getting soggy. If using softer bread, lightly toast it before assembling to prevent it from becoming too soft.
  2. Shred the Chicken Well – Finely shredded or diced chicken blends better with the mayo and seasonings, giving a smoother, more even texture. I used two forks to shred the chicken easily.
  3. Best Cheese– Cheddar, Swiss, provolone, or mozzarella melt beautifully. If you prefer a sharper taste, try smoked gouda or pepper jack like I did here.
  4. Golden Crust – Spread softened butter on the outside of the bread before grilling for an extra crispy, golden-brown crust.
  5. Press Lightly While Cooking – Use a spatula to gently press the sandwich while grilling. This helps the cheese melt evenly and gives that perfect crunch.
  6. Cook Over Medium-Low Heat – Cooking too fast can burn the bread before the cheese melts. Medium-low heat allows the sandwich to crisp up while the cheese becomes gooey.
  7. Let It Rest Before Slicing – Let the sandwich sit for a minute after removing it from the heat. This helps the cheese set slightly, making slicing cleaner.
  8. Make Ahead Tip – The chicken salad mixture can be prepped up to 3 days in advance and stored in the fridge, making it an easy meal option and I always do that!
Golden-brown chicken salad melt sandwich, cut horizontally , with melted cheese and creamy chicken salad peeking out, served on a plate.

FAQ

Can I make the chicken salad ahead of time?

Yes Of Course! The chicken salad mixture can be stored in an airtight container in the refrigerator for up to 3 days. Assemble and grill the sandwich fresh for the best texture. 

Can I use canned chicken for this chicken melt sandwich recipe?

Absolutely! Just drain and shred it well before mixing. Freshly cooked or rotisserie chicken will have better texture and flavor, but canned chicken works too.

Can I make this cheesy sandwich recipe in an air fryer?

Yes you can! Assemble the sandwich and air fry at 350°F (175°C) for 5-6 minutes, flipping halfway, until crispy and melted.

​​What’s the best bread for a chicken melt recipe?

Sourdough, whole wheat, rye, or ciabatta work well since they hold up to the creamy filling. If using soft bread, toast it first.

Can I freeze a chicken salad melt?

It’s best to freeze only the chicken salad mixture (without mayo) for up to 2 months. The sandwich itself doesn’t freeze well, as the bread can become soggy.

How can I make this sandwich healthier?

Swap Greek yogurt for mayo in the chicken salad, choose a low-carb bread option, and add sliced avocado for a boost of healthy fats!

What is a chicken salad melt sandwich?

A chicken salad melt sandwich is made with creamy chicken salad layered on bread and topped with melted cheese, then toasted until warm, crispy, and golden.

What cheese works best for a chicken salad melt?

Cheeses like cheddar, Swiss, provolone, or mozzarella work best because they melt smoothly and complement the creamy chicken salad.

Can I use leftover chicken for this recipe?

Yes! This recipe is perfect for using leftover roasted chicken or rotisserie chicken, making it a quick and easy meal.

How do you keep a chicken salad melt from getting soggy?

To prevent sogginess, use thick bread, toast it lightly before adding the filling, and avoid adding too much dressing to the chicken salad.

Can I make a chicken salad melt in the oven instead of a skillet?

Yes! You can bake it in the oven at 375°F until the cheese is melted and the bread is crispy, or broil briefly for a golden top.

A chicken salad melt sandwich sliced in half, revealing its creamy filling, melted cheese, and toasted bread, served with coleslaw and chips.

Related

Looking for other recipes like this? Try these:

Pairing

These are my favorite dishes to serve with this Chicken Melts recipe:

If you tried this Chicken Salad Melt Sandwich or any other recipe from my blog, I’d love to hear your thoughts! ⭐ Please leave a STAR rating and share your experience in the COMMENTS below. Your support means so much and helps me continue creating delicious recipes. Thank you for being part of this journey!

Close-up of a crispy chicken salad melt sandwich with golden toasted bread, melted cheese, and creamy chicken salad filling stacked one above the other.

Chicken Salad Melt Sandwich

Abi Guna
This chicken salad melt sandwich is the perfect blend of crispy, golden-brown bread, creamy chicken salad, and gooey melted cheese. Packed with flavor and texture, it’s a quick and satisfying meal that’s great for lunch, brunch, or an easy weeknight dinner.
5 from 13 votes
Print Recipe Pin Recipe
Prep Time 5 minutes mins
Cook Time 8 minutes mins
Total Time 12 minutes mins
Course Dinner, lunch
Cuisine American
Servings 2 people
Calories 593 kcal

Equipment

  • Mixing Bowls
  • Measuring cups and spoons
  • Skillet or Grill pan

Ingredients
  

  • 1 cup cooked and shredded chicken
  • 3 tablespoons mayonnaise
  • 1 teaspoon Dijon mustard
  • 2 tablespoons red bell pepper chopped
  • 2 tablespoon celery chopped
  • 2 tablespoon red onion chopped
  • 1 teaspoon lemon juice
  • ½ teaspoon salt
  • ½ teaspoon pepper
  • 4 slices sourdough bread sourdough, whole wheat, or your choice
  • 4 slices pepper jack cheese
  • 2 tablespoons unsalted butter at room temperature

Instructions
 

  • In a bowl, mix shredded chicken, mayonnaise, Dijon mustard, bell pepper, celery, red onion, lemon juice, salt, and pepper until well combined.
  • Spread the chicken salad evenly onto one slice of bread.
  • Place cheese slices on top of the chicken salad, then cover with the second slice of bread.
  • Spread butter over the top of the bread.
  • Heat a skillet over medium-low heat.
  • Place the sandwich in the skillet and grill for 2-3 minutes per side, pressing lightly, until golden brown and the cheese is melted.
  • Remove from heat, slice the chicken salad melt sandwich in half, and serve warm!

Notes

  1. Freshly shredded chicken or rotisserie chicken gives the best texture and flavor to the sandwich. If you are using canned chicken, drain well before mixing.
  2. If you like a lighter version, swap mayonnaise for Greek yogurt or mashed avocado.
  3. Pressing the sandwich gently with a spatula helps the cheese melt evenly and gives that perfect crispy crust.
  4. Store the chicken salad mixture in the refrigerator for up to 3 days, making it easy to prep ahead.
Keyword Chicken, lunch, Salads, sandwich

Air Fryer Sweet Potato Cubes (Crispy, Easy & Ready in 15 Minutes)

March 6, 2025 by Abi Guna 9 Comments

These air fryer sweet potato cubes are crispy on the outside, tender on the inside, and incredibly easy to make. Ready in just 15 minutes, this simple recipe is perfect for a quick side dish or healthy snack. These sweet potatoes come out perfectly golden and flavorful every time, no oven required enjoy with parmesan ranch dip (my favorite!)

Crispy air-fried sweet potato cubes served in a bowl, garnished with fresh herbs.

These Air Fryer Sweet Potatoes Cubes are crispy, flavorful, and ridiculously easy to make! Tossed with olive oil, cumin, paprika, oregano, and a touch of salt, these seasoned sweet potato bites come out perfectly golden brown every time. The air fryer gives them a crispy texture without deep frying, making them a healthier alternative to traditional roasted potatoes. You won’t have to worry about excess oil or soggy fries. Trust me, once you try them, they’ll be on repeat in your kitchen!

This recipe was inspired by my Air Fryer Sweet Potato Wedges a favorite in my kitchen! If you love easy air fryer recipes, be sure to check out my Air Fryer Meatballs, Air Fryer Teriyaki Chicken Thighs, or Air Fryer Chicken Parmesan and Air Fryer BBQ Chicken Thighs for more quick and delicious meals! Serve them alongside Ground Chicken Stir Fry for a quick and balanced dinner, or add them as a side to Blackened Salmon Bites for a flavorful meal. You can also enjoy them with a creamy dip like Parmesan Ranch Dip or alongside Oven Baked Shrimp Skewers for a complete and satisfying spread.

[feast_advanced_jump_to]
Close-up of seasoned sweet potato cubes in a white bowl, ready to serve.

Why You’ll Love This Air Fryer Sweet Potatoes Cubes Recipe 

If you're a sweet potato lover, this recipe is about to become your new favorite! Here’s why:

  • Quick & Easy: This recipe is a breeze to make. All you need is just 20 minutes from prep to plate! Toss the cubes in a little olive oil and seasoning, air fry, and you’re done. It’s perfect for a quick snack, weeknight dinner, or meal prep.
  • Packed with Flavor: With a simple mix of cumin, paprika, oregano, and garlic powder, these sweet potatoes are bursting with flavor. 
  • Healthy & Nutritious: Sweet potatoes are rich in fiber, vitamins, and antioxidants. Making this a guilt-free, nutritious side dish or snack. Plus, they’re naturally gluten-free and vegan! Isn't it amazing!
  • Versatile: These crispy cubes go with anything, serve them alongside grilled chicken, toss them into salads, or dip them in your favorite sauce. They’re perfect for meal prep or a quick snack that keeps you full longer.
  • ​​Customizable: You can make them your own by adding extra seasonings, a sprinkle of parmesan, or even a drizzle of honey for a sweet twist. I love to play around with flavors!

If you’re looking for a quick and easy way to make crispy, flavorful sweet potatoes, this sweet potato air fryer recipe is a must-try! Whether you cut them into diced pieces, chunks, or wedges, the air fryer delivers that perfect crispy outside and tender inside every time.

A bowl of crispy air-fried sweet potato cubes in the side and a fork with a piece of sweet potato cubes and dipping sauce.

What to Serve with Cubed Sweet Potatoes in Air Fryer 

These crispy, flavorful sweet potato cubes in air fryer pair perfectly with a variety of meals and dips! Whether you’re serving them as a side dish, snack, or meal prep staple, here are some delicious pairing ideas:

  • Pair them with hearty mains like Baked Lemon Pepper Chicken Thighs or Herb-Roasted Chicken for a balanced, satisfying dinner. They also make a flavorful side alongside comfort favorites like Chicken and Dumpling Casserole, adding a lightly sweet contrast to creamy dishes.
  • The rich, buttery taste of salmon enhances the natural sweetness of the potatoes—try serving it with pesto butter salmon for a delicious combination!
  • For dipping, pair with a creamy, garlicky aioli or add a kick with spicy mayo for extra flavor.
  • For a hearty meal, served with brown rice or quinoa, you can even add it to a salmon quinoa salad for a nutritious twist!
  • Build a nourishing bowl with grilled chicken or tofu, quinoa, avocado, and a creamy dressing, topped with air-fried sweet potato cubes for a balanced and satisfying dish.
  • And on holiday menus, these sweet potato cubes pair beautifully with seasonal sides like Roasted Carrots and Asparagus, Cheesy Green Bean Casserole, or a spoonful of Cranberry Sauce with Dried Cranberries for a festive finish.

Ingredients and Substitutions

Each ingredient in this recipe is simple, flavorful, and easy to customize, making these Air Fryer Sweet Potato Cubes must-try!

Overhead view of air-fried sweet potato cubes recipe ingredients laid out on a warm neutral backdrop.
  • Sweet Potatoes – The main ingredient of the recipe! Sweet potatoes are naturally sweet, packed with fiber, and get deliciously crispy in the air fryer. You can swap them for regular potatoes for a similar texture. I peeled the skin and cut them into cubes, but if you prefer, you can leave the skin on, they’ll still be just as delicious!
  • Olive Oil – A little olive oil helps the sweet potatoes crisp up while adding a subtle richness. Feel free to use avocado oil  or coconut oil as an alternative option!
  • Ground Cumin – Adds a warm, earthy depth of flavor that pairs beautifully with sweet potatoes. 
  • Paprika – Brings a mild smokiness and enhances the golden color of the sweet potatoes. Substitution: You can also use red chili powder instead!
  • Oregano – A touch of oregano gives a herby note to the dish. You can use thyme or rosemary for a different aromatic twist.
  • Garlic Powder – Adds a rich, savory depth without overpowering the dish. 
  • Salt – Brings out overall flavors of the dish.

See recipe card for quantities.

How to make best Crispy Air fryer sweet potato cubes

If you love crispy, flavorful, and easy-to-make side dishes, these Air Fryer Sweet Potato Cubes are a must-try! Whether you're meal prepping, looking for a quick snack, or need a healthy side for dinner, this air fryer method is the fastest and easiest way to get perfectly roasted sweet potatoes without turning on the oven! Let’s get started with step-by step instructions.

A bowl of cubed sweet potatoes ready to be seasoned.
  1. Peel the skin and cut the sweet potatoes into uniform cubes. I recommend cutting the sweet potatoes into ½-inch thickness.
Toss the cubed sweet potatoes in olive oil and seasonings.
  1. Drizzle with olive oil and sprinkle in the cumin, paprika, oregano, garlic powder, and salt. Toss everything together.
Well seasoned sweet potatoes cubes are in the slicon lined air fryer basket ready to air fry.
  1. Spread the seasoned sweet potato cubes in a single layer in the air fryer basket. Air fry for 15-18 minutes.
Air fryer sweet potato cubes with a sprinkle of fresh parsley in the air fryer basket.
  1. Once done garnish the sweet potato cubes air fryer with parsley.

One of the best parts about this recipe is how versatile it is. You can switch up the seasoning for sweet potatoes to match your mood, go savory with garlic, paprika, and oregano, or try a sweet twist with cinnamon and maple syrup. I always love playing with the flavors! These roasted sweet potatoes in the air fryer are the perfect healthy side dish, snack, or meal prep addition. No matter how you serve them, these air-fried sweet potato chunks will quickly become a staple in your kitchen!

Hint: Add a pinch of chili flakes for a spicy kick or serve with garlic yogurt dip for extra deliciousness!

How Long to Cook Sweet Potato Cubes in the Air Fryer

Cooking time depends on the size of the cubes and your air fryer model:

  • ½-inch cubes: 10–12 minutes (soft inside, lightly crisp)
  • ¾-inch cubes: 12–15 minutes (perfect balance of crispy + tender)
  • 1-inch cubes: 15–18 minutes (crispy edges, soft center)

The Best temperature is: 400°F (200°C)

Flavor Variations for Air Fryer Sweet Potato Cubes

You can switch things up and play around with various flavors while making this crispy sweet potatoes!

  • Garlic Herb Roasted Sweet Potatoes- Toss with garlic powder, Italian seasoning, and olive oil.
  • Smoky & Spicy Sweet Potatoes - Add smoked paprika, cayenne pepper, and garlic powder for a bold, smoky-spicy flavor.
  • Sweet & Spicy Sweet Potatoes - Before serving the dish, drizzle some spicy honey or sriracha for extra heat!
  • Cinnamon Sugar Sweet Potatoes - Swap the savory seasonings for cinnamon, nutmeg, and a touch of brown sugar for a caramelized, slightly sweet twist. Perfect to enjoy on cozy evenings!
  • Parmesan Roasted Sweet Potato - Toss with grated Parmesan, Italian seasoning, and a pinch of garlic powder for a cheesy, herby kick. My favorite version!
Overhead view of air-fried sweet potato cubes  cooked in the air fryer.

Equipment

Air Fryer – A basket-style air fryer works best for even cooking, but a tray-style air fryer also does the job. The air fyer I used in the recipe in 6 quart size.

Silicone Air Fryer Liners (Optional) – I love using them for easy cleanup and to prevent sticking!

Mixing Bowl – Helps toss the sweet potatoes with seasonings and oil for even coating.

Measuring Spoons & Cups – For accurate measurement of spices, oil, and seasonings.

Storage

Refrigeration: Store the cooked sweet potato cubes in an airtight container in the fridge for up to 4 days. The best option is meal prep!
Freezing: Freeze in a single layer on a baking sheet for 1-2 hours before transferring to a zip-top freezer bag. They last up to 3 months in the freezer.

Reheating for Best Crispiness

Air Fryer: Reheat at 350°F (175°C) for 3-5 minutes until crispy.
Oven: Bake at 400°F (200°C) for 8-10 minutes, flipping halfway.

Golden, crispy sweet potato cubes with a sprinkle of fresh parsley on a white serving bowl.

Top Tips for Perfect Air Fryer Sweet Potato Cubes

  1. The key to perfect sweet potatoes is cutting them into uniform ½-inch cubes. This ensures they cook evenly and crisp up without burning or staying undercooked.
  2. Always preheat your air fryer to 380°F (190°C) for 3-5 minutes before adding the potatoes. This helps them start crisping up immediately instead of steaming.
  3. For the best crispiness, spread the cubes in a single layer. If they’re piled on top of each other, they’ll steam instead of getting crispy. Work in batches if needed!
  4. Shake the basket at the halfway mark (about 8-9 minutes in) so the cubes cook evenly on all sides. This step is crucial for that crispy-on-the-outside, tender-on-the-inside texture.
  5. Air fryer times vary, so check at 15 minutes and add 2-3 extra minutes if you like them crispier.
  6. Air-fried sweet potatoes are best enjoyed fresh, as they may soften over time. If making ahead, reheat in the air fryer at 350°F (175°C) for 3-5 minutes to bring back the crispiness.

FAQ

How long does it take to cook sweet potato cubes in air fryer?

It typically takes 15-18 minutes at 380°F (190°C). But Air fryer time varies depending on the brand, so check at 15 minutes and add 2-3 extra minutes if you like them crispier.

Do I need to peel the sweet potatoes before air frying?

Not at all! Peeling is optional! Leaving the skin on adds extra fiber and nutrients while also giving a slightly crispier texture. Just make sure to wash and scrub them well.

Why aren’t my sweet potato cubes crispy?

There are few reasons for this, if you follow the below tips then you can avoid getting your sweet potatoes soggy!
- Don’t overcrowd the air fryer basket, cook in batches
- Always preheat for 3-5 minutes for even cooking.
- Shake the basket halfway through.

Can I make this sweet potato cubes recipe without oil?

Yes! You can air-fry sweet potato cubes without oil, but they won’t be as crispy. A light spritz of cooking spray can help achieve a golden exterior.

Can I store and reheat air-fried sweet potatoes?

Store leftovers in an airtight container in the fridge for up to 4 days. To reheat and crisp them back up, air fry at 350°F (175°C) for 3-5 minutes.

Can I use frozen sweet potatoes?

Yes, but frozen cubes may need a slightly longer cook time (18-20 minutes). No need to thaw, just air fry straight from frozen it comes handy!

Can I make these sweet potato cubes in the oven instead?

Yes you can! Spread the seasoned sweet potatoes in a baking tray and bake at 425°F (220°C) for 25-30 minutes, flipping halfway through for even crispiness. I love this method when I am doing in large quantity!

Can I use frozen sweet potato cubes?

Yes! You can cook frozen cubes directly in the air fryer, but increase the cooking time by a few minutes.

What seasonings go well with sweet potato cubes?

Popular options include garlic powder, paprika, cinnamon, chili powder, and Italian seasoning.

Are air fryer sweet potatoes healthy?

Yes, they are a healthy and nutritious side dish, rich in fiber, vitamins, and antioxidants.

Air-fried sweet potato cubes on a white bowl with a side of dipping sauce.

Related

Looking for other recipes like this? Try these:

Pairing

These are my favorite dishes to serve with this air fried sweet potato cubes recipe:

If you tried this Air fryer Sweet Potato Cubes or any other recipe from my blog, I’d love to hear your thoughts! ⭐ Please leave a STAR rating and share your experience in the COMMENTS below. Your support means so much and helps me continue creating delicious recipes. Thank you for being part of this journey!

Perfectly crispy sweet potato cubes sprinkled with parsley and sea salt in a white bowl along with dipping sauce, lemon wedges in the sides.

Air Fryer Sweet Potato Cubes

Abi Guna
Crispy and flavorful Air Fryer Sweet Potato Cubes made with simple ingredients! Ready in just 20 minutes, this easy recipe is perfect as a healthy side dish or snack. Learn how to get perfectly golden, seasoned sweet potato cubes every time! 
5 from 4 votes
Print Recipe Pin Recipe
Prep Time 5 minutes mins
Cook Time 15 minutes mins
Total Time 20 minutes mins
Course Side Dish, Snack
Cuisine American
Servings 4 people
Calories 152 kcal

Equipment

  • Air Fryer
  • Mixing Bowls
  • Measuring cups and spoons

Ingredients
  

  • 3 medium sweet potatoes skin peeled and cut into ½-inch cubes
  • 2 tablespoons olive oil
  • 1 teaspoon ground cumin
  • 1 teaspoon paprika
  • ½ teaspoon oregano
  • ½ teaspoon garlic powder
  • ½ teaspoon salt
  • Chopped parsley to garnish
  • Lemon wedges to serve

Instructions
 

  • Before you start, preheat your air fryer to 380°F (190°C) for 3-5 minutes. Line the airfryer basket with a liner if you are using it. Set it aside.
  • In a large mixing bowl, add the sweet potato cubes. Drizzle with olive oil and sprinkle in the cumin, paprika, oregano, garlic powder, and salt. Toss everything together until all the pieces are evenly coated with the seasoning.
  • Spread the seasoned sweet potato cubes in a single layer in the air fryer basket. Avoid overcrowding, so cook in batches to make sure they crisp up properly rather than steaming.
  • Set the air fryer to 380°F (190°C) and cook for 15-18 minutes, shaking the basket halfway through to ensure even cooking. The sweet potatoes should turn golden brown and crispy on the outside while staying soft and tender inside.
  • Once done, transfer the sweet potato cubes to a serving dish. Serve warm and garnish with fresh parsley for color or a squeeze of lemon juice for a fresh, zesty kick. Pair them with your favorite dipping sauce or enjoy them as a side with any meal!

Notes

  1. The most important point to remember is don’t overcrowd the basket. If the sweet potato cubes are too close together, they’ll steam instead of crisping. So I recommend cooking in batches if necessary for the best results.
  2. Shake the basket halfway through for even cooking. 
  3. Lightly coat with oil for golden edges.
  4. Tossing the air fryer basket at the 8-9 minute mark helps for even cooking and prevents burning.
  5. Store leftovers in an airtight container in the fridge for up to 4 days. Reheat in the air fryer at 350°F (175°C) for 3-5 minutes to bring back crispiness.
Keyword Air fryer recipes, Appetizers, Healthy, side dish, snacks, Sweet Potato

Nutella Mousse (Easy 4-Ingredient No-Bake Dessert)

March 2, 2025 by Abi Guna 15 Comments

This Nutella mousse is an easy 4-ingredient no-bake dessert that’s rich, creamy, and incredibly simple to make. With just a few ingredients and minimal effort, you get a light and fluffy chocolate mousse packed with that classic Nutella flavor. If you’re looking for more easy treats like this, be sure to explore my dessert recipes collection for more quick and indulgent ideas.

A glass cup filled with silky Nutella mousse, topped with whipped cream, chocolate shavings, and chopped hazelnuts.

After seeing how much everyone loved my Nutella covered strawberries, I knew I had to create something even more indulgent like my Nutella Waffles , Nutella Mug Cake and Nutella Puff Pastry. And trust me, this silky-smooth chocolate hazelnut mousse does not disappoint and also dont forget to check my insanely delcious Oreo Mousse! Don’t forget to check the recipe VIDEO added in the recipe card!

The best part? You only need FOUR ingredients to whip up this deliciously creamy dessert—no oven required!Whether you’re hosting a dinner party or just craving something sweet, this quick and easy treat is perfect for any occasion. And here’s the real magic, it takes just 10 minutes to prepare! Yes, you read that right! A rich, chocolatey, mini dessert that’s effortless yet so impressive. So grab your whisk and get ready to dive into a spoonful of Nutella bliss!

Craving more rich and chocolatey treats?  Don't stop at Nutella Chocolate Mousse—treat yourself to some of my other irresistible chocolate desserts! Check out the Mini Chocolate Bundt Cakes, Mint Chocolate Brownies, Chocolate Almond Fudge, and Rocky Road recipes right here on the blog. Trust me, you won’t want to miss these heavenly desserts! Looking for cozy comfort food to pair with dessert? My Chicken and Dumpling Casserole makes the perfect dinner before this mousse.

[feast_advanced_jump_to]
A dessert plate featuring Nutella mousse beautiful garnished with whipped cream and nuts. In the behind featuring Nutella jar on a pink background.

Why You’ll Love This Nutella Mousse Recipe

  • Quick & Easy – As I mentioned earlier, this nutella chocolate mousse recipe needs jJust four ingredients and 10 minutes of prep—no baking, no fuss!
  • Rich & Creamy texture – A silky-smooth mousse with the perfect balance of chocolate and Nutella flavors. I love how light and airy the texture is!
  • No-Bake – This no-bake dessert is perfect for when you want something sweet without turning on the oven. Isn't it amazing?
  • 4-ingredient dessert - Simple, fuss-free, and crowd-pleasing.
  • Perfect for Any Occasion – Whether you’re hosting a dinner party or celebrating a special occasion like Mother’s Day, a birthday, an anniversary, Valentine’s Day, Easter, or any holiday treat, or simply indulging yourself, this mousse is always a hit!
  • Individual Servings – These adorable mousse cups may be small, but they deliver big, indulgent flavor in every bite! I love how easy it is to serve them in cute little cups for the perfect individual portions. Who doesn’t love mini desserts?
A beautifully styled Nutella mousse dessert  topped with whipped cream, chocolate shavings, and chopped hazelnuts.

The Secret Behind the Perfect Chocolate Mousse With Nutella

I’ve personally tested countless Nutella mousse recipes—including the popular two-ingredient nutella mousse version, but let’s be honest, they just don’t hold up! While they might be easy to make, they deflate too quickly and lack that light, airy, and silky-smooth texture we all crave in a perfect mousse.

So, what’s the secret ingredient that makes this Nutella Mousse flawless every time? Melted chocolate! 

Adding melted dark chocolate not only helps the mousse set properly, but it also creates that luxurious, rich, and creamy consistency that stays stable, even at room temperature! Unlike the basic two-ingredient mousse, which loses its texture after sitting out, this recipe holds its shape beautifully for hours while staying light and airy.

So if you’ve been searching for that perfect Nutella Mousse, look no further! This recipe checks all the boxes—silky, smooth, rich, decadent, and stable enough to impress at any occasion. Give it a try, and I promise you’ll never go back to the basic version again! 

Rich and airy Nutella mousse served in a clear glass bowl, with a spoonful taken out, showing its smooth texture.

What to Serve with Nutella Mousse

Nutella Mousse is delicious on its own, with a rich Nutella cream base and an airy whipped cream mousse, every bite is silky-smooth and irresistibly indulgent. But pairing it with the right treats can take it to the next level! Here are some perfect accompaniments!

  • Toppings: For even more chocolatey goodness, add shaved chocolate. For extra crunch, sprinkle chopped hazelnuts, almonds, or macadamia nuts, just like I did in this recipe. You can make it even richer with a chocolate or caramel drizzle and if you’re feeling extra indulgent, a scoop of ice cream works too! 
  • Fresh fruits: Strawberries, raspberries, or blueberries add a refreshing contrast to the mousse. Banana slices are also a classic pairing that complements the chocolate flavor beautifully. For a quick fruity option, try serving it alongside my Nutella covered strawberries.
  • Cookies: The crisp texture of biscotti perfectly balances the smooth mousse. Sometimes, a chewy cookie like an oatmeal butterscotch chocolate cookie can also be a wonderful pairing! You can also pair it with a chewy option like my Oatmeal Mug Cake for a cozy dessert combination.
  • Beverage Pairings: A bold espresso or coffee provides the perfect contrast to the sweet mousse. You can also pair it with a Salted Caramel Latte or a Vanilla Bean Latte for a deliciously cozy combination!
  • For more easy dessert ideas, don’t miss my holiday dessert collection, or try my Mini Chocolate Bundt Cakes or the indulgent Pumpkin Mug Cake

Ingredients & Substitutions for no-bake Nutella dessert

This easy Nutella chocolate mousse recipe is made with just a few simple ingredients yet delivers an incredibly creamy texture. The result is a light and airy Nutella whipped cream mousse that’s full of chocolate-hazelnut flavor in every spoonful.

Ingredients needed for nutella chocolate mousse being laid out on a pink background.
  • Heavy Cream – The base of the mousse, giving it a light and airy texture. Make sure it’s cold for the best whip! You can substitute coconut cream for a dairy-free option.
  • Powdered Sugar – Adds just the right amount of sweetness while keeping the mousse smooth. If you prefer less sweetness, you can reduce the amount or use a sugar-free alternative like powdered erythritol.
  • Nutella – The star ingredient that brings in rich chocolate-hazelnut flavor! You can swap it for any chocolate-hazelnut spread or even melted chocolate mixed with hazelnut butter for a homemade touch.
  • Dark Chocolate – The secret to a perfectly stable mousse! It helps set the mousse while adding extra depth of flavor. You can use semi-sweet chocolate for a slightly milder taste, but since I'm a big dark chocolate fan, I went with dark chocolate!
  • Hazelnuts (optional) – Adds a delicious crunchy contrast to the creamy mousse. Feel free to swap with macadamia nuts, almonds, or even crushed cookies for a different texture!

See recipe card for quantities.

How to make the Best Nutella Mousse (Step by Step)

If you love whipped cream desserts, then this Nutella Mousse is a must-try! It's one of the best Nutella dessert recipes—rich, creamy, and packed with chocolate-hazelnut goodness. The best part? It’s one of the easiest Nutella recipes you’ll ever make! Check the step-by step instructions below or the recipe VIDEO added in the recipe card for easy understanding!

Melted dark chocolate in a bowl for nutella mousse recipe.
  1. Melt the chopped chocolate in a microwave safe bowl.
Nutella being added to the melted chocolate for making the best no bake chocolate mousse.
  1. Add the Nutella and mix with melted chocolate until everything comes together.
Beat the heavy cream until stiff peaks form for nutella mousse recipe.
  1. Beat the whipped cream and sugar until stiff peak is formed.
Nutella mixed to make no bake nutella mousse.
  1. Add the nutella and chocolate mixture to the whipped cream and fold it gently.
Nutella mousse piped into fancy serving cups.
  1. Pipe the nutella mousse beautifully into a serving glass.
Creamy Nutella mousse in an elegant dessert glass, garnished with a swirl of whipped cream.
  1. Garnish with whipped cream and top with chopped chocolate and hazelnuts.

You can serve this chocolate hazelnut mousse with Nutella as an elegant no-bake dessert for guests, or use it as a luscious Nutella mousse filling for cakes, cupcakes, or layered parfaits. Whether you’re enjoying it on its own or dressing it up with toppings, this dreamy Nutella mousse dessert is always a crowd-pleaser.

Hint: If stacking multiple layers, pipe a border of frosting around the edges before adding the mousse filling to prevent it from spilling out.

Variations

No matter which variation you choose, this Nutella Mousse is always a hit! Here are some of my favourite variations!

  • Nutella Mocha Mousse – Add 1 teaspoon of instant espresso powder to the melted chocolate for a rich mocha twist. As a coffee lover I love this variation so much!
  • Nutella Peanut Butter Mousse – Fan of peanut butter? Then swap half of the Nutella with creamy peanut butter for a nutty, chocolatey combination.Dairy-Free Nutella Mousse – Replace the heavy cream with coconut cream for a creamy, dairy-free version with a hint of coconut flavor. It still tastes amazing!
Elegant Nutella mousse in a clear glass topped with whipped cream, chocolate shavings, and chopped hazelnuts.

Equipment

Mixing Bowls – You'll need at least two bowls. One for whipping the cream and another for melting the chocolate.

Hand Mixer or Stand Mixer – A hand mixer makes whipping the cream effortless, but a stand mixer works just as well for quick and even mixing.

Spatula – Perfect for gently folding the Nutella and melted chocolate into the whipped cream without deflating it.

Piping Bag (Optional) – Helps create a beautiful, mess-free presentation when transferring the mousse into serving glasses. A ziplock bag with the tip cut off works too!

Serving Glasses or Bowls – Choose mini dessert cups (4 ounce) or ramekins for a stylish presentation. I have linked mine already, I love them so much!

How to Store quick chocolate mousse

Refrigeration: Store Nutella mousse in airtight containers or covered dessert cups in the fridge for up to 3 days. This keeps it fresh while maintaining its creamy texture.

Freezing: You can freeze Nutella chocolate mousse for up to 2 months. Store it in an airtight container and thaw in the fridge overnight before serving. For a frozen treat, enjoy it straight from the freezer like a chocolatey semifreddo!

Room Temperature: Unlike traditional two-ingredient mousse, this recipe holds its structure well at room temperature for a few hours, making it perfect for parties. However, it's best served chilled for the smoothest texture.

Close-up of  Nutella mousse, highlighting its velvety, chocolate-hazelnut goodness.

Top Tips for Making the Perfect Nutella Mousse Recipe

  • Use chilled heavy cream, cold cream whips up faster and holds its structure better, giving you a light and fluffy mousse.
  • If using a microwave, heat in 15-second intervals, stirring in between to prevent burning. A double boiler works great too! But I used a microwave for my convenience.
  • When combining the whipped cream with Nutella and melted chocolate, gently fold the mixture to keep it light and airy. Stirring too hard can deflate the mousse.
  • Nutella is already sweet, so taste the mixture before adding powdered sugar. You might need less than you think!
  • Refrigerate the mousse for at least 1 hour before serving. This helps it set and enhances the flavors.

FAQ

Can I make this Nutella Mousse ahead of time?

Yes absolutely! You can prepare it up to 2 days in advance. Just store it covered in the fridge and add toppings right before serving for the best texture and flavor.

Can I freeze Nutella Mousse?

Yes absolutely, but the texture may change slightly. For a frozen dessert, freeze the mousse in individual cups, then let it sit at room temperature for 10–15 minutes before serving for a creamier consistency.

Why is my nutella mousse not fluffy?

This usually happens if the whipped cream is overmixed when folding in the Nutella and chocolate mixture. Use a spatula to fold it and make sure to gently fold to keep it light and airy!

How long should I chill the mousse before serving?

At least 1 hour in the fridge for the best texture, but if you have more time, 2-3 hours will make it even firmer and more decadent.

Can I use milk chocolate instead of dark chocolate?

Yes of course! Milk chocolate will make the mousse sweeter and creamier, while dark chocolate adds a deeper, more intense chocolate flavor. Choose based on your preference. 

Can you make Nutella mousse with 4 ingredients?

Yes! This Nutella mousse uses just 4 simple ingredients to create a rich and creamy dessert that’s easy to make at home.

Is Nutella mousse a no-bake dessert?

Yes, Nutella mousse is a no-bake dessert, making it perfect for quick and easy preparation without using the oven.

Two clear glasses of no bake nutella chocolate mousse topped with whipped cream, chocolate shavings, and chopped hazelnuts on a pink background.

Related

Looking for other recipes like this? Try these:

Pairing

These are my favorite dishes to serve with this no bake nutella mousse cups recipe:

If you’re craving a rich, decadent treat, these Nutella mousse dessert cups are exactly what you need. If you tried this or any other recipe from my blog, I’d love to hear your thoughts! ⭐ Please leave a STAR rating and share your experience in the COMMENTS below. Your support means so much and helps me continue creating delicious recipes. Thank you for being part of this journey!

Nutella mousse piped into fancy serving cups, garnished with whipped cream and chocolate curls for a luxurious look.

Nutella Mousse (Easy 4-Ingredient No-Bake Dessert + VIDEO)

Abi Guna
A foolproof, no-bake Nutella Mousse recipe made with just four ingredients! This silky-smooth, rich, and decadent dessert is perfect for any occasion. These cute mini desserts are an absolute must-try!
5 from 8 votes
Print Recipe Pin Recipe
Prep Time 10 minutes mins
Chilling Time 1 hour hr
Total Time 1 hour hr 10 minutes mins
Course Dessert
Cuisine American
Servings 6 servings
Calories 303 kcal

Equipment

  • Serving glass
  • Mixing Bowls
  • Measuring cups and spoons
  • Hand Mixer
  • Spatula

Ingredients
  

  • 2 ounces dark chocolate bar chopped
  • 1 ½ cups heavy cream chilled
  • ¼ cup powdered sugar
  • ½ cup Nutella
  • Chopped hazelnuts for garnish

Instructions
 

  • Place the chopped dark chocolate in a heatproof bowl and melt it using a double boiler or in the microwave in 15-second intervals, stirring until smooth.
  • Once melted, add the Nutella and mix until well combined. Set aside.
  • In a large mixing bowl, beat the heavy cream using a hand mixer or stand mixer on medium-high speed for 3–4 minutes until slightly thickened.
  • Add the powdered sugar and continue beating until soft peaks form. Set aside 2 tablespoons of the whipped cream for garnish.
  • To the remaining whipped cream, add the Nutella and melted chocolate mixture.
  • Gently fold the ingredients together until fully combined and smooth, be careful not to deflate the mixture.
  • Transfer the mousse to a piping bag, cut the tip, and pipe it into serving glasses or bowls. Refrigerate for at least 1 hour to set.
  • Before serving, top each mousse cup with a spoonful of whipped cream. Sprinkle with chopped hazelnuts for crunch and chopped chocolate for extra flavor.
  • Please take a moment to leave a comment & rating. It's appreciated and so helpful!

Video

Notes

  1. The recipe yields 6 servings, with each serving approximately 4 ounces.
  2. When folding in the Nutella and melted chocolate, use a gentle folding motion to keep the mousse light and airy.
  3. If using a microwave, melt in 15-second intervals, stirring in between. If using a double boiler, stir continuously to prevent burning.
  4. Unlike traditional two-ingredient mousse, this recipe holds its texture even at room temperature thanks to the addition of melted chocolate!
  5. For the make-ahead option,you can prepare this mousse up to 2 days in advance. Keep it covered in the fridge and add toppings just before serving.
Keyword chocolate, easy desserts, Holiday Desserts, no bake, nutella, Valentine's day dessert

Vanilla Bean Latte Recipe (Starbucks Copycat in 5 Minutes)

February 27, 2025 by Abi Guna 5 Comments

Say hello to my favorite homemade vanilla bean latte! This cozy, creamy latte is infused with real vanilla bean, giving it a smooth, luxurious flavor in every sip. Made with bold espresso, steamed milk, and my homemade vanilla bean coffee syrup, this easy latte recipe tastes just like your favorite coffee shop drink (copycat starbucks) only better and made right at home. 

Homemade vanilla bean latte in a glass mug. The vanilla beans are in the side and a homemade vanilla bean coffee syrup on the background.

Whether you enjoy it hot and frothy or iced and refreshing, this latte is the perfect treat to start your day or unwind in the afternoon. Skip the coffee shop and whip up this dreamy vanilla latte in minutes! I’ve always loved Starbucks’ Vanilla Bean Latte, but ever since I started making my own version at home, I’m never going back—homemade is just that good! 

If you're a coffee lover, you should definitely try my Salted Caramel Latte recipe! You can also pair this latte with sweet treats like Nutella Covered Strawberries, Red Velvet Cake Waffles, or a quick Oatmeal Mug Cake for the perfect cozy breakfast or afternoon pick-me-up.

[feast_advanced_jump_to]
Tje best Starbucks vanilla bean latte in a glass mug. The vanilla beans are in the side and a homemade vanilla bean coffee syrup on the background.

Why You’ll Love This Vanilla Bean Latte Recipe 

If you’re a latte lover, this Vanilla Bean Latte is about to become your new favorite! Here’s why:

  • Better Than Coffee Shop Lattes – Made with real vanilla bean for an authentic, rich flavor that beats any store-bought version. Trust me this latte is too delicious!
  • Easy & Quick to Make – Skip the coffee run! This latte comes together in minutes with just a few simple ingredients. All you need is just 5 minutes!
  • Budget-Friendly - Save money by making this indulgent drink at home without sacrificing quality or flavor. If you add up what you spend on coffee in a year, trust me—you could probably treat yourself to a vacation with your family instead!
  • Minimal Equipment – No fancy equipment needed! Just brew, milk frother, mix, and enjoy a luxurious, café-style latte anytime.
The close shot of vanilla bean latte in a clear glass mug.

What to Serve with your Vanilla Bean Latte

A warm, creamy Vanilla Bean Latte pairs perfectly with a variety of sweet treats and light bites. But here are some of my favorite options to enjoy alongside with vanilla latte:

  • Cookies: My first most favorite way to enjoy is with Oatmeal Butterscotch Chocolate Chip Cookies which goes very well with this latte since its chewy, sweet pairing that complements the vanilla flavor.
  • Almond Biscotti: Perfect for dipping into your latte for a crunchy bite.
  • Pastries & Baked Goods: A tangy citrus contrast to the warm vanilla tones pairs beautifully with my Mini Lemon Bundt Cakes. For a rich and decadent coffee break, try it with my Mini Chocolate Bundt Cakes. Light, flaky, and buttery croissants also make the perfect companion to your latte! 
  • Donuts and muffins: Who doesn't like donuts and coffees? Soft, fluffy, and delicious donuts like my Easter Donuts recipe are a perfect pairing. For a comforting, bakery-style treat with a hint of sweetness, try my Banana Chocolate Chunk Muffins or Blackberry Oatmeal Muffins—they complement the vanilla flavors beautifully! 
  • Chocolate & Sweets: Nutella-Covered Strawberries is a simple yet indulgent pairing. For those who love a rich and sweet contrast try my Dark chocolate almond fudge.

Ingredients And Substitutions For Vanilla Bean Latte

All you need is just three ingredients to make this latte! With these simple, customizable ingredients, you can create a barista-quality Vanilla Bean Latte at home, exactly the way you love it!

Ingredients laid out to make homemade best vanilla bean latte recipe on a marble countertop.
  • Strong brewed coffee – The bold, rich base of the latte that balances the sweetness of vanilla. If you don’t have an espresso machine, use strong brewed coffee, instant espresso, or even cold brew for a different twist. 
  • Milk  – The key to a smooth, creamy texture that blends beautifully with vanilla. Whole milk gives the richest flavor, while oat or almond milk offers a dairy-free alternative. Coconut milk adds a slight tropical touch! I have used whole milk in this recipe!
  • Vanilla Bean Coffee Syrup – The main star ingredient of the recipe! Made with real vanilla bean, this syrup infuses deep, aromatic vanilla flavors into every sip. Don’t have vanilla beans? Use pure vanilla extract or vanilla bean paste for a similar effect.

See recipe card for quantities.

How To Make A Homemade Vanilla Latte

Below is the step-by-step instructions for easy understanding!

Milk frother being used to make vanilla bean latte recipe in a white creamer mug.

Froth the warm milk using a milk frother.

Stron coffee being added to a glass mug to make best vanilla bean latte.

Pour the freshly brewed strong coffee in a glass mug.

Homemade vanilla bean coffee syrup being added the vanilla bean latte recipe in a glass mug.

Add the homemade vanilla bean syrup.

Frothed milk being added to a glass milk with espresso already on it.

Pour the frothed milk into the latte.

Stir everything together to blend the rich espresso, warm frothed milk, and fragrant vanilla bean syrup into a perfectly balanced drink. Take a sip and enjoy the smooth, creamy, and velvety texture, with just the right touch of sweetness and warmth.

Hint: Make it iced! Pour everything over ice for a refreshing Vanilla Bean Iced Latte.

Variations For Homemade Vanilla Bean Latte, Better Than Starbucks

There are plenty of variations you can make using the base vanilla latte recipe, Here are some my favorite lists:

  • Iced Vanilla Bean Latte – Skip the steaming! Pour espresso, vanilla bean syrup, and cold milk over ice, then stir for a refreshing iced coffee treat.
  • Vanilla Caramel Latte – Add a drizzle of caramel sauce to the vanilla bean syrup for a rich, buttery sweetness!
  • Mocha Vanilla Bean Latte – Stir 1-2 teaspoons of cocoa powder into the espresso for a chocolate twist—like a cross between a latte and a mocha! I do this variation often!
  • Pumpkin Spice Vanilla Latte  – Add ½ teaspoon of pumpkin spice to the espresso for a fall-inspired drink with warm, cozy notes. Perfect during the fall season!
  • Vanilla Chai Latte – Replace espresso with strong brewed chai tea and mix in vanilla bean syrup for a creamy, spiced chai latte. They taste just amazing!
Best vanilla bean latte in a glass mug, vanilla bean on it. In background vanilla bean syrup in a glass jar.

Equipment

Coffee Maker or Espresso Machine - To brew strong coffee or espresso.

Milk Frother - To create creamy, frothed milk for your latte.

Microwave safe glass/mug - To warm the milk.

Measuring Spoons and Cups - For accurately measuring the coffee, syrup, and milk

Storage

A Vanilla Bean Latte is best enjoyed immediately, but if you need to store it, here’s how:

Refrigerate: If you have leftover latte, store it in an airtight container or mason jar in the fridge for up to 24 hours. Shake or stir well before reheating.

Reheating: Warm it in the microwave for 30-45 seconds or on the stovetop over low heat while stirring.

Homemade vanilla bean latte in a glass mug, vanilla bean in the side.

Top Tips for making the Best Vanilla Bean Latte

  1. For the best flavor, use real vanilla bean, vanilla bean paste, or pure vanilla extract—skip artificial vanilla for a richer taste in your vanilla bean coffee syrup recipe.
  2. A strong, bold espresso balances the sweetness of vanilla. No espresso machine? Use strong brewed coffee or instant espresso instead.
  3. Use a milk frother, French press, or shake in a jar to create that creamy, foamy texture just like your favorite coffee shop.
  4. A dash of cinnamon, nutmeg, or even pumpkin spice can elevate the flavor and add warmth to your latte.
  5. Whole milk makes it extra creamy, but oat milk, almond milk, and coconut milk work great for a dairy-free version.
  6. Avoid storing a latte with frothed milk, as it will lose its texture. Instead, froth fresh milk when ready to serve
  7. Store the coffee and vanilla bean syrup mixture separately in the fridge for up to 2 days. When ready, pour it over ice and add fresh cold milk for a quick iced vanilla latte!

FAQ

Can I make this vanilla latte without an espresso machine?

Yes absolutely! If you don’t have an espresso machine, you can use strong brewed coffee or instant espresso.

Can I use this same recipe and make latte iced?

Absolutely! For an Iced Vanilla Bean Latte, simply pour espresso and vanilla bean syrup over ice, then add cold milk and stir.

Whats the Best Coffee Beans for Lattes?

A great latte starts with high-quality coffee beans that complement the creamy, steamed milk. I love the Medium to Dark Roast Beans and I think it is the best choice for lattes.

How can I make my latte frothy without a frother?

No frother? No problem! Try:
- Shaking warm milk in a jar with the lid on until foamy.
- Using a French press—pump the plunger up and down to create foam.
- Whisking vigorously on the stovetop as the milk heats up. Best arm workout 😉

What’s the best milk to use for lattes?

Whole milk makes the creamiest latte, but for a dairy-free option, oat milk, almond milk, or coconut milk works great too!

What is a vanilla bean latte?

A vanilla bean latte is a coffee drink made with espresso, steamed milk, and real vanilla bean or vanilla syrup. It has a smooth, creamy texture with a naturally sweet vanilla flavor.

How do I make a Starbucks vanilla bean latte at home?

To make a Starbucks-style vanilla bean latte, combine espresso, steamed milk, and homemade vanilla bean syrup. Adjust the sweetness and milk ratio to your preference for a perfect copycat version.

How can I make my Vanilla latte sweeter or less sweet?

You can easily adjust the sweetness by adding more or less vanilla bean syrup. You can also use honey or maple syrup as natural sweeteners.

Does a vanilla bean latte contain caffeine?

Yes, a vanilla bean latte contains caffeine from the espresso. You can make it caffeine-free by using decaf espresso or coffee.

Horizontal image homemade vanilla bean latte in a clear glass mug.

Related

Looking for other recipes like this? Try these:

Pairing

These are my favorite dishes to serve with this homemade vanilla latte recipe:

If you tried this Homemade Vanilla Bean Latte or any other recipe from my blog, I’d love to hear your thoughts! ⭐ Please leave a STAR rating and share your experience in the COMMENTS below. Your support means so much and helps me continue creating delicious recipes. Thank you for being part of this journey!

Horizontal image homemade vanilla bean latte in a clear glass mug.

Vanilla Bean Latte Recipe (Starbucks Copycat in 5 Minutes)

Abi Guna
This homemade Vanilla Bean Latte is rich, creamy, and infused with real vanilla bean flavor for a cozy, coffee shop-style drink at home. Made with bold espresso, steamed milk, and homemade vanilla bean coffee syrup, it’s perfect for both hot and iced versions. Ready in minutes, this smooth and velvety latte is an easy, budget-friendly, and customizable treat to enjoy any time of day!
5 from 3 votes
Print Recipe Pin Recipe
Prep Time 5 minutes mins
Cook Time 5 minutes mins
Total Time 10 minutes mins
Course Drinks
Cuisine American
Servings 1
Calories 151 kcal

Equipment

  • Measuring cups and spoons
  • Microwave safe mugs
  • Coffee Maker or Espresso Machine
  • Milk Frother

Ingredients
  

  • 1 shot espresso (½ cup strong brewed coffee)
  • ¾ cup steamed whole milk
  • 2 tablespoons vanilla bean coffee syrup, adjust to taste

Instructions
 

  • Start by brewing your favorite strong coffee or a shot of espresso. If using an espresso machine, pull one shot of espresso. If you don’t have an espresso machine, brew ½ cup of strong coffee using a French press, drip coffee maker, or instant espresso powder for a bold flavor.
  • In a small saucepan, warm ¾ cup of milk over medium heat until it’s hot but not boiling. If using a microwave, heat the milk for 30-45 seconds until warm. Once heated, use a milk frother to create a light and foamy texture.
  • In a mug, pour the brewed espresso or coffee. Stir in 2 tablespoons of vanilla bean coffee syrup, adjusting to taste for more or less sweetness.
  • Slowly pour the steamed and frothed milk over the coffee, holding back some foam with a spoon and then topping it at the end for a beautiful finish.
  • Stir, sip, and enjoy your homemade Vanilla Bean Latte—smooth, creamy, and delicious.
  • Please take a moment to leave a comment & rating. It's appreciated and so helpful!

Notes

  1. If you don't have espresso machine, use strong brewed coffee or instant espresso.
  2. Adjust sweetness by adding more or less vanilla bean syrup to taste.
Keyword breakfast, coffee, drinks, latte

Easter Rocky Road With Easter Eggs And Chocolate

February 23, 2025 by Abi Guna 18 Comments

When it comes to quick and easy Easter treats, my go-to is always Easter Rocky Road! This rich, crunchy, and chocolate-packed dessert is the perfect blend of sweet, crunchy, and chewy textures, making it absolutely irresistible. 

Rocky Road with easter themed fudge stacked one above the other beautifully loaded with mini marshmallows and mini eggs chocolate. With pink flowers behind.

It’s made with a mix of dark and milk chocolate, crunchy macadamia nuts, fluffy mini marshmallows, colorful Cadbury mini eggs, and crushed digestive biscuits—giving every bite the perfect balance of crunch and melt-in-your-mouth goodness.

Did you get a chance to check out other Easter treats loved by kids, like Easter Donuts?

Looking for more Easter recipes? Try my tasty side dishes Roasted Carrots and Cauliflower or Roasted Carrots and Asparagus —both make fantastic additions to your Easter dinner table!

[feast_advanced_jump_to]
Close up shot of homemade Easter Rocky Road beautifully decorated.

Why You’ll Love This Easter Rocky Road Recipe 

Whether you call it a Rocky Road Easter Egg or simply a Mini Egg Rocky Road Recipe, one thing’s for sure—it’s easy to make, no-bake, and totally irresistible!

  • No-Bake & Super Easy – All you need is to just melt, mix, and chill—this recipe comes together in minutes, making it perfect for busy Easter prep or last-minute treats. How easy it is!
  •  Rich, Crunchy & Chocolatey – A delicious mix of dark and milk chocolate, crunchy macadamia nuts, chewy mini marshmallows, and crispy digestive biscuits in every bite! Trust me even adults can’t resist from eating this delicious treat!
  • Festive & Fun – Colorful Cadbury Mini Eggs make this treat look as beautiful as it tastes—perfect for dessert platters, edible gifts, or Easter party snacks. It's an easy way to impress your guests and your kids!
  • Make-Ahead Friendly – Prepare in advance and store in the fridge—just slice and serve whenever you’re ready! No last minute tension!
  • Kid-Friendly & Customizable – A great recipe to use up leftover Easter chocolate eggs  or Halloween candies! Swap in your favorite nuts, cookies, or add white chocolate for a fun twist!
homemade Rocky Road with easter themed fudge beautifully loaded with mini marshmallows and mini eggs chocolate.

Delicious Ways to Serve and Enjoy Rocky Road

Pair your Easter Rocky Road with other delicious treats for a festive dessert spread or a well-balanced menu! Here are some of my favourite options:

  • Hot Chocolate or Coffee latte – A warm drink to enjoy alongside your rocky road for the ultimate cozy Easter treat. I always enjoy them with my Salted Caramel Latte or Vanilla Bean Latte.
  • Easter Baked Donuts – Light, fluffy, and decorated with pastel glaze, these donuts are a fun and colorful addition to your Easter treats.
  • Lemon Mini Bundt Cakes – The zesty, refreshing flavor of these mini lemon cakes balances out the richness of chocolate.
  • Roasted Carrot Hummus – A savory, creamy dip to contrast the sweetness—perfect for an appetizer before dessert!
  • Berry Chia Seed Pudding – A light, fruity option that adds a healthy, refreshing balance to your dessert table.

Ingredients & Substitutions

If you're looking for the ultimate Easter treat, this Mini Egg Rocky Road is a must-try! All you need is less than 10 ingredients to make this recipe! Packed with crunchy biscuits, gooey marshmallows, and colorful Cadbury Mini Eggs, this Easter Egg Rocky Road is the perfect balance of chocolatey, crunchy, and chewy goodness.

Easter Rocky Road Ingredients placed beautifully on a pink background.
  • Dark Chocolate Bar -  Adds a rich, slightly bitter depth to balance the sweetness. If you prefer a milder flavor, swap for semi-sweet chocolate or use all milk chocolate for a sweeter taste. 
  • Milk Chocolate Bar – Creates a smooth, creamy, and sweet chocolate base. If you love a deeper chocolate flavor, substitute with extra dark chocolate or even white chocolate for a fun twist!
  • Butter – Helps melt the chocolate smoothly and adds a silky texture to the rocky road. You can replace it with coconut oil for a dairy-free option.
  • Mini Marshmallows  – These soft, chewy bites create a pillowy texture in every bite! If you don’t have mini marshmallows, cut regular-sized marshmallows into small pieces or use vegan marshmallows for a plant-based version. I used the colorful ones for that spring vibes!
  • Roasted Macadamia Nuts – Adds a delicious crunch and buttery richness. Swap with almonds, walnuts, pecans, or hazelnuts if preferred, or leave them out for a nut-free version.
  • Digestive Biscuits – These crumbly, lightly sweet cookies add a nice crunch to balance the chocolate. Substitute with rich tea biscuits, graham crackers, shortbread, or Biscoff biscuits for a different flavor.
  • Cadbury Mini Eggs – These colorful, candy-coated chocolates make the rocky road festive and extra fun! If you don’t have mini eggs (mini creme eggs), use M&Ms, chocolate chips, or chopped Easter chocolates.
  • Vanilla Extract  – Enhances all the flavors with a hint of warmth and sweetness. If you're out of vanilla, try using almond extract or just leave it out—your rocky road will still taste amazing!

See recipe card for quantities.

How to make Homemade Easter Rocky Road Recipe

Making Easter Rocky Road at home is as simple as melt, mix leftover chocolate, and chill! No baking required—just a few easy steps, and you’ll have a rich, crunchy, and chocolatey treat perfect for Easter. Check out the step-by-step instructions below for easy guidance!

Chocolate combined in a bowl with butter to make rocky road recipe for easter.

In a microwave safe bowl, add the roughly chopped milk and dark chocolate along with the butter.

Melted chocolate in a white bowl.

Melt the chcocolate in a microwave until the chocolate is completely melted.

Mini eggs, mini marshmallows, nut, biscuits in a white bowl to make Easter rocky road recipe.

Add the mini eggs, mini marshamallows, nuts, digestive biscuits, in a large bowl and mix until just combined.

Melted chocolate added over the Easter chocolate addins in a white bowl for Easter Rocky road recipe.

Pour the melted chocolate over the add-ins. Mix until combined.

Prepared roaky road mixture is added to a square pan.

Transfer the rocky road mixture into the prepared square tin.

The Rock Road was decored with cadbury mini eggs.

Decorate the top with Cadbury Mini Eggs.

For the best texture and easy slicing, chill your Easter Rocky Road for at least 2 hours in the fridge. This allows the chocolate to fully set, ensuring that each bite holds its delicious crunch and chewiness.

When it's time to slice, use this simple trick for perfectly smooth, clean cuts—run a sharp knife under hot water for a few seconds, wipe it dry, and then slice through the rocky road. The warmth helps glide through the chocolate without cracking, giving you beautiful, even squares every time!

Hint: Store slices with parchment paper in between to prevent them from sticking together!

Beautifully decorated Easter Rocky Road fudge placed in a white tray sourranded  by Easter decorations in a pink background.

Variations

The best thing about Rocky Road? You can make it your own! Why settle for just one version when you can mix things up and make it even more exciting? Here are some fun, delicious, and easy ways to customize your Easter Rocky Road!

  • White Chocolate Rocky Road – Swap out the dark and milk chocolate for creamy white chocolate—perfect for a sweeter, more indulgent twist that pairs beautifully with mini eggs!
  • Peanut Butter Lovers’ Rocky Road – Stir a spoonful of peanut butter into the melted chocolate for a rich, nutty flavor. Add crushed peanuts or peanut butter cups for extra crunch!
  • Biscoff Cookie Rocky Road – Swap digestive biscuits for crushed Biscoff cookies to add a warm, spiced caramel flavor—you’ll love the difference!
  • Nut-Free Crunchy Rocky Road – No nuts? No problem! Replace them with crushed pretzels, crispy rice cereal, or extra mini marshmallows for the perfect crunch.
a piece of Easter Rocky Road placed in a white background decorated with mini eggs beautifully.

Equipment

  • Mixing Bowls – For combining the melted chocolate with all the delicious mix-ins.
  • Heatproof Bowl – Needed for melting chocolate over a double boiler or in the microwave.
  • Spatula or Wooden Spoon – For stirring everything together evenly without crushing the mix-ins too much.
  • Baking Dish or Square Pan – To spread the rocky road mixture into an even layer before chilling.
  • Parchment Paper – Makes removing and slicing the rocky road super easy (no sticking!).

Storage

 If your home isn’t too warm, rocky roads can stay out for a few hours when serving at parties. However, if it's warm, the chocolate may soften or melt, so refrigeration is best!

 In the Refrigerator – Store your Easter Rocky Road in an airtight container in the fridge for up to 2 weeks. This keeps it firm and fresh!

In the Freezer – Want to keep it longer? Freeze in an airtight container or ziplock bag for up to 3 months. When ready to eat, let it thaw in the fridge for a few hours before serving.

Rocky Road with easter themed fudge stacked one above the other beautifully loaded with mini marshmallows and mini eggs chocolate.

Top Tips for Making the Best Easter Rocky Road

Follow these simple tips, and you’ll have the most irresistible, chocolatey, crunchy, and chewy Easter Rocky Road!

  1. To avoid burning, melt the chocolate gently using a double boiler or microwave in 30-second intervals, stirring in between. Smooth, silky chocolate = perfect rocky road!
  2. The best texture comes from a balance of chewiness and crunch! Use fresh nuts, crisp biscuits, and soft marshmallows for the perfect bite every time.
  3. Line your pan with parchment paper, this makes it super easy to lift out and slice your rocky road without any sticking or mess!
  4. Gently fold everything together to keep the mini eggs and biscuits from breaking too much—we want big, delicious chunks!
  5. Press it down evenly by using the back of a spoon to spread and gently press the mixture into the pan, ensuring an even layer before chilling.
  6. Chill for at least 2 hours in the fridge before slicing—this helps everything firm up perfectly for neat, clean squares.
  7. Run a sharp knife under hot water, wipe dry, and then slice for smooth, clean cuts without cracking the chocolate!

FAQ

Can I make Easter Rocky Road ahead of time?

Absolutely! Easter Rocky Road is a great make-ahead treat. Store it in the fridge for up to 2 weeks or freeze it for up to 3 months—just thaw before serving!

How do I store Easter Rocky Road?

Store in an airtight container in the fridge for up to 2 weeks or freeze for up to 3 months. Keep it chilled to prevent melting!

Can I use just one type of chocolate?

Yes! You can use all dark chocolate for a richer taste or all milk chocolate for a sweeter version. You can even try white chocolate for a fun twist!

What can I use instead of digestive biscuits?

If you don’t have digestive biscuits, you can use graham crackers, shortbread cookies, Biscoff biscuits, or even Rice Krispies for a crunchy texture.

Can I make this nut-free?

Yes! Simply leave out the macadamia nuts and add extra mini marshmallows, crushed pretzels, or crispy rice cereal for crunch instead.

Can I use leftover Easter candy in this recipe?

Yes! This is the perfect recipe to use up leftover Easter chocolates, mini eggs, or marshmallow candies—just mix them in for a fun, festive twist!

Horizontal image of homemade Easter Rocky road fudge filled a square tray beautifully decorated with easter items.

Related

Looking for other recipes like this? Try these:

Pairing

These are my favorite dishes to serve with this Rocky Road Fudge recipe:

If you tried this Homemade Easter Rocky Road or any other recipe from my blog, I’d love to hear your thoughts! ⭐ Please leave a STAR rating and share your experience in the COMMENTS below. Your support means so much and helps me continue creating delicious recipes. Thank you for being part of this journey!

Easter Rocky Road stacked one above the other with easter decorations around on a pink background.

Easter Rocky Road

Abi Guna
This Easter Rocky Road is a rich, crunchy, and chocolatey no-bake dessert made with milk and dark chocolate, macadamia nuts, mini marshmallows, crushed digestive biscuits, and Cadbury Mini Eggs. It’s quick, easy, and perfect for Easter celebrations! 
5 from 9 votes
Print Recipe Pin Recipe
Prep Time 10 minutes mins
Chilling Time 2 hours hrs
Total Time 2 hours hrs 10 minutes mins
Course Dessert
Cuisine American
Servings 16 bars
Calories 330 kcal

Equipment

  • Mixing Bowls
  • Sharp Knife
  • Square pan
  • Measuring cups and spoons

Ingredients
  

  • 4 oz dark chocolate bar chopped
  • 4 oz milk chocolate bar chopped
  • 2 tablespoon unsalted butter
  • 1 cups mini marshmallows
  • ½ cup roasted macadamia nuts
  • 8-10 digestive biscuits broken into chunks
  • ¾ cup Cadbury mini eggs some whole, some crushed
  • 1 teaspoon vanilla extract

Instructions
 

  • In a heatproof bowl, melt the dark and milk chocolate with butter using a microwave (30-second intervals) or double boiler, stirring until smooth. Add the vanilla extract to the melted chocolate and set aside.
  • In a large bowl, add the mini marshmallows, macadamia nuts, crushed digestive biscuits, and almost half of the mini eggs.
  • Pour the melted chocolate over the dry ingredients and gently mix until everything is well coated.
  • Line a baking tray with parchment paper and spread the mixture evenly. Sprinkle the remaining mini eggs on top for decoration.
  • Refrigerate for at least 2 hours until fully set. Once firm, cut into bite-sized squares using a large sharp knife and enjoy!

Notes

  1. Since chocolate is the star of this recipe, opt for high-quality dark and milk chocolate for the best flavor and texture.
  2. Let the rocky road set for at least 2 hours in the fridge to ensure firm, easy-to-slice pieces.
  3. Feel free to swap nuts, biscuits, or chocolates to suit your taste! Try using Biscoff cookies, pretzels, or dried fruits for a fun twist.
  4. Store in the fridge to prevent melting and maintain the perfect texture, especially in warmer weather.
Keyword chocolate, easter, easy desserts, no bake

Easter Donuts (Baked, Easy & Perfect with Pastel Glaze)

February 19, 2025 by Abi Guna 17 Comments

These soft and fluffy Easter donuts are the perfect festive treat to celebrate spring. Light, airy, and beautifully decorated, they’re ideal for Easter brunch, dessert tables, or a fun baking project with family. Whether you glaze them, add sprinkles, or keep them simple, these homemade donuts come out bakery-style every time and are guaranteed to be a hit. Check out the VIDEO in the recipe card!

Beautifully decorated homeade baked easter donuts with patel colored donut glaze topped with Easter festive sprinkles, mini eggs. The Easter are placed in a pink plate with blue napkin underneath on a pink backgorund with festive sprinkles aorund.

The best part? These donuts are easy to make and healthier than fried ones, making them a great choice for Easter brunch, dessert, or a fun baking activity with kids. I guarantee they’ll be a hit.

These homemade Easter doughnuts are even better than the ones from Krispy Kreme, Dunkin', or Tim Hortons—I promise! Soft, fluffy, and perfectly glazed, they’re a must-try for your Easter celebrations! Topped with a pastel-colored glaze and festive sprinkles, they bring a fun and delicious touch to any Easter celebration. Don’t forget to check out the VIDEO tutorial in the recipe card!

Interested in more Easter recipes? Did you check this Easter no bake treat? Easter Rocky Road and also check out my Roasted Carrot Hummus—a perfect Easter party appetizer and crowd-pleaser! Add a quick dessert like Nutella Covered Strawberries or bite-sized Brownie Cake Pops for an easy party platter everyone will love. For delicious side dishes, try Roasted Carrots and Cauliflower or Roasted Carrots and Asparagus—both are amazing additions to your Easter dinner menu!

[feast_advanced_jump_to]
CLose up shot of beautifully decorated homeade baked easter donuts with pastel colored donut glaze topped with Easter festive sprinkles, mini eggs. The Easter are placed in a pink plate with blue napkin underneath on a pink backgorund with festive sprinkles, mini eggs around.

Why You’ll Love This Easter Donut Recipe

Nothing says Easter celebration like a batch of festive Easter doughnuts! These soft, fluffy, and beautifully decorated Easter-themed donuts are the perfect sweet treat for spring. The main reasons why I love this recipe are:

  • Quick & Easy – These donuts come together in just 20 minutes, making them perfect for Easter brunch, dessert, or a fun baking activity with kids. My daughter loves glazing and decorating them with sprinkles—it’s so much fun!
  • Light & Airy Texture – These baked donuts are soft, fluffy, and healthier than traditional fried ones, with fewer calories but just as much deliciousness!
  • Fun & Festive – Topped with pastel-colored glaze, Easter sprinkles, and mini eggs, these donuts are a perfect springtime treat. After all, who doesn’t love sprinkles on their baked goodies?
  •  Customizable – Change up the glaze colors and toppings to match any holiday! Try red and green for Christmas, red for Valentine’s Day, or a simple white glaze with rainbow sprinkles for birthdays.
  •  Guaranteed Crowd-Pleaser – Whether for family gatherings, Easter parties, or gifting, these donuts are always a hit! Once you serve them, everyone will be asking for the recipe—no doubt!
Stacked baked easter donuts one above the other in a pink background on a blue plate. easter donuts with pastel colored donut glaze topped with Easter festive sprinkles, mini eggs.

What to Serve with Baked Donuts

Pair your baked Easter donuts with these delicious drinks and sides to create the ultimate Easter brunch or dessert spread! Below are my few favorite serving options!

  • Vanilla Bean Latte – A smooth and creamy latte that pairs beautifully with sweet donuts.
  • Salted Caramel Latte – The perfect balance of sweet and salty flavors to enjoy alongside your Easter treats.
  • Freshly Squeezed Juice – Orange juice, lemonade, or a citrus spritzer adds a refreshing balance.
  • Fruit Platter – Serve with sliced strawberries, blueberries, raspberries, and oranges for a fresh contrast.
  • Chia Seed Pudding - Layer Greek yogurt, chia seed pudding, and maple syrup with fresh mixed berries for a balanced addition.
  • Deviled Eggs – A classic Easter brunch staple for a protein-packed side.
  • Nutella-Covered Strawberries – A fresh and indulgent pairing with donuts.

Ingredients and Substitutions

The below mentioned simple pantry ingredients come together to make the most delightful, fluffy, and festive Easter donuts! Decorated with pastel glazes, Easter sprinkles, and topped with mini eggs, these Easter egg doughnuts are as fun to make as they are to eat! Customize them however you like and enjoy a fun holiday treat!

Easter donut recipe ingredients placed in a bowl on a pink background.
  • All-Purpose Flour – The base for soft, fluffy donuts! Want a gluten-free option? Swap with 1:1 gluten-free baking flour or oat flour for a healthier twist.
  • Baking Powder – The magic ingredient that makes your donuts light and airy. 
  • Granulated Sugar – Adds the right amount of sweetness to your donuts. The mentioned sugar is just the perfect amount of sweetness with the glaze. If you are not going to make glaze then I recommend adding ¼ cup more sugar in the donut batter to balance it. For a healthier option, try coconut sugar or a sugar substitute like monk fruit sweetener.
  • Egg – Helps bind everything together while adding richness. Need an egg-free version? Use a flaxseed egg (1 tablespoon ground flax + 3 tablespoon water) or unsweetened applesauce.
  • Milk – Keeps the donuts moist and tender. You can also use buttermilk instead.
  • Unsalted Butter – Adds richness and flavor. Swap it with coconut oil or a neutral oil like vegetable or avocado oil for a dairy-free option.
  •  Vanilla Extract – Enhances the flavor and aroma of the donuts. For a twist, you can also use almond or lemon extract for a different flavor profile!
  • Powdered Sugar (for the glaze) – Creates a smooth and glossy glaze. 
  • Milk (for the glaze) – Helps thin out the glaze to the perfect consistency. You can swap it with almond milk, oat milk, or coconut milk for a dairy-free option.
  • Food Coloring & Sprinkles – The secret to that festive Easter look! Use natural food dyes from beet juice or turmeric for a more natural option.

See recipe card for quantities.

Beautifully decorated homeade baked easter donuts with pastel colored donut glaze topped with Easter festive sprinkles, mini eggs. The Easter are placed in a pink and blue plates with blue napkin underneath on a pink backgorund with festive sprinkles, mini eggs around.

How to Make Baked Easter Donuts (Step-by-Step)

These Easter baked donuts are lighter than fried donuts but just as indulgent, making them perfect for brunch, dessert, or a kid-friendly baking activity. Decorate them with mini eggs for an extra festive touch, and you’ve got the cutest mini egg donuts that everyone will love! It takes just 8 simple steps:

Preheat & Prep – Preheat the oven and grease the donut pan.
Mix Dry Ingredients – Whisk together the flour, baking powder, salt, and sugar.
Mix Wet Ingredients – Combine the egg, milk, melted butter, and vanilla extract. Combine – Gently mix the wet and dry ingredients until just combined.
Fill the Donut Cavities – Pipe the batter into the donut pan.
Bake & Cool – Bake until golden, then let the donuts cool completely.
Make the Pastel Glaze – Mix powdered sugar, milk, and food coloring.
Dip & Decorate – Glaze the donuts and top with sprinkles or mini eggs.

Lets see them with step-by step instruction images below!

Dry ingredients are being mixed for making easter donuts recipe.

Combine the dry ingredients in a bowl.

Wet ingredients being combined for making easter donuts recipe.

In a seperate bowl combine the wet ingredients.

Fold the dry ingredients into the wet mixture for easter donuts recipe.

Folding the dry ingredients into the wet ingredients mixture.

Donut pan cavity being filled with the batter using a piping bag.

Fill the donut pan cavities with the prepared batter.

The spoon being mixed into the bowl for making pastel glaze.

Prepare the pastel colored glazing in 4 different small bowls.

A hand showing pastel blue glazed donuts.

Dip the cooled donuts into the glaze and tap the excess glaze.

Let the glaze fully set for about 10-15 minutes, allowing it to form a smooth, glossy finish that holds the sprinkles and decorations beautifully. Once set, take a bite into these soft, fluffy, and perfectly baked Easter donuts, bursting with a light, airy texture and a sweet, pastel-colored glaze.

Hint: If making ahead, store unfrosted donuts separately and glaze them fresh for the best look and taste! 

Decorating Easter Donuts with Pastel Glaze

Decorating these Easter donuts is one of the most fun parts of the recipe! Once the donuts are cooled, dip or drizzle them with a smooth pastel glaze in soft spring colors like pink, blue, yellow, and lavender. The light, colorful finish makes them perfect for Easter brunch, parties, or a festive dessert table.

If you love creating seasonal treats like this, be sure to explore my holiday desserts collection for more festive and easy baking ideas. You can keep it simple with a classic glaze or get creative by layering colors and textures for a bakery-style look.

Easter Donut Decorating Ideas

Make your Easter donuts stand out with these fun and easy decorating ideas:

  • Pastel glaze drizzle - Use a spoon or piping bag to drizzle different pastel-colored glazes over the donuts for a soft, spring-inspired look.
  • Sprinkles and sanding sugar - Add pastel sprinkles or colored sugar right after glazing for a festive touch.
  • Mini chocolate eggs - Place mini eggs on top of the glaze while it’s still wet for a fun Easter-themed decoration.
  • Bunny-inspired designs - Use icing to create simple bunny faces, ears, or shapes for a cute and kid-friendly option.
  • Marbled glaze effect - Swirl two or more pastel colors together for a beautiful marbled finish.
Beautifully decorated homeade baked easter donuts with patel colored donut glaze topped with Easter festive sprinkles, mini eggs. The Easter are placed in a blue plate with blue napkin underneath on a pink backgorund.

Variations

  • Lemon Glazed Donuts – Add lemon zest and juice to the batter for a bright citrusy flavor, and glaze with a lemon-powdered sugar glaze.
  • Chocolate Easter Donuts – Replace ½ cup flour with cocoa powder for a rich, chocolatey twist. Drizzle with white chocolate glaze and top with sprinkles! It tastes amazing!
  • Carrot Cake Donuts – Mix in grated carrots, cinnamon, and nutmeg for a carrot cake-inspired treat! Top with cream cheese glaze for extra indulgence. Treat for cake cake lovers!
  • Gluten-Free Easter Donuts – Swap all-purpose flour with 1:1 gluten-free baking flour for a gluten-free version that’s just as fluffy and delicious!

Equipment

  • Donut Pan – Essential for getting that perfect donut shape! Use a silicone or nonstick metal pan. I have linked the donut pan I used for this recipe.
  • Mixing Bowls – You’ll need one for dry ingredients and one for wet ingredients to mix everything smoothly.
  • Whisk & Spatula – A whisk helps blend ingredients evenly, while a spatula is great for folding the batter.
  • Piping Bag – Makes it easy to fill the donut cavities neatly without a mess. Simply cut the tip and pipe!
  • Measuring Cups & Spoons – To measure the dry and wet ingredients accurately.
  • Cooling Rack – Helps the donuts cool evenly before glazing, preventing sogginess.
  • Small Bowls – For mixing different pastel-colored glazes to decorate your donuts.
Beautifully decorated single easter donuts with pastel colored donut glaze topped with Easter festive sprinkles, mini eggs. The Easter are placed in a blue plate on a pink backgorund with festive sprinkles, mini eggs around.

Storage For Easter Donuts

Room Temperature (1-2 Days) – Store unglazed donuts in an airtight container at room temperature for up to 2 days. If glazed, they are best enjoyed the same day.

Refrigerator (4-5 Days) – Keep glazed or unglazed donuts in an airtight container in the fridge for up to 5 days. Let them come to room temperature before serving for the best texture.

Freezer (Up to 2 Months) – Freeze unglazed donuts in a single layer on a baking sheet until firm, then transfer them to a ziplock bag or airtight container. Thaw at room temperature and glaze before serving.

 Reheating – Warm stored donuts in the microwave for 10-15 seconds or in a 350°F oven for 5 minutes to refresh their softness.

Tips for Soft and Fluffy Donuts

  1. Use Fresh Ingredients – Fresh baking powder, vanilla extract, and high-quality butter will give your donuts the best flavor and texture.
  2. Don’t Overmix the Batter - Stir until just combined! Overmixing leads to dense and chewy donuts instead of soft and fluffy ones.
  3. Use a Piping Bag – Spoon batter into a piping bag or ziplock bag, cut the tip, and neatly fill the donut pan for evenly shaped donuts.
  4. Fill Only ¾ Full – Avoid overfilling the donut cavities to prevent overflow and keep the classic donut shape.
  5.  Grease the Pan Well – Lightly coat your donut pan with baking spray or butter to prevent sticking.
  6. Check for Doneness – Insert a toothpick in the center—if it comes out clean, the donuts are ready! Overbaking can dry them out.
  7.  Cool Before Glazing – Allow the donuts cool completely on a wire rack before glazing. Warm donuts will melt the glaze and make a mess!
  8. Decorate Right Away – Add sprinkles, mini eggs, or toppings immediately after dipping in glaze so they stick perfectly.
Showing the inner texture of the beautifully decorated Easter donuts stacked one above the another on a blue plate in pink background.

FAQ

Can I make these donuts gluten-free?

Absolutely! Swap the all-purpose flour with 1:1 gluten-free baking flour for a gluten-free version that’s just as fluffy and delicious.

Can I make the batter ahead of time?

It’s best to bake the donuts fresh, but you can prepare the dry and wet ingredients separately and mix them just before baking.

Can I freeze these donuts?

Yes! You can freeze unglazed donuts for up to 2 months in an airtight container. Let them thaw at room temperature and glaze before serving.

Why are my donuts dense instead of fluffy?

Over Mixing the batter can cause dense donuts. Mix until just combined to keep them light and airy.

Can I air fry these Easter donuts?

Yes absolutely! Bake in an air fryer at 350°F  for 8-10 minutes until golden brown. Follw the rest of the instructions for making glaze according to the recipe.

What glaze works best for Easter donuts?

A simple powdered sugar glaze with vanilla or lemon works perfectly. For a festive look, divide the glaze and add pastel food coloring to create colorful Easter donuts.

Why are my donuts dry?

Dry donuts are usually caused by overbaking or too much flour. Measure ingredients carefully and remove the donuts from the oven as soon as they are set and lightly golden.

How do I decorate Easter donuts for a festive look?

Decorate with pastel glaze, sprinkles, shredded coconut (for a nest effect), or mini chocolate eggs to create fun and eye-catching Easter-themed donuts.

Horizontal image of Beautifully decorated homeade baked easter donuts with pastel colored donut glaze topped with Easter festive sprinkles, mini eggs. The Easter are placed in a pink and blue plates with blue napkin underneath on a pink backgorund with festive sprinkles, mini eggs around.

Related

Looking for other recipes like this? Try these:

Pairing

These are my favorite dishes to serve with this baked Easter donuts recipe:

If you tried this Easter Donuts Recipe or any other recipe from my blog, I’d love to hear your thoughts! ⭐ Please leave a STAR rating and share your experience in the COMMENTS below. Your support means so much and helps me continue creating delicious recipes. Thank you for being part of this journey!

Beautifully decorated homeade baked easter donuts with patel colored donut glaze topped with Easter festive sprinkles, mini eggs. The Easter are placed in a pink plate with blue napkin underneath on a pink backgorund with festive sprinkles, mini eggs around.

Easter Donuts Recipe + VIDEO

Abi Guna
These baked Easter Donuts are soft, fluffy, and perfectly festive with a pastel-colored glaze and fun sprinkles! Made with simple ingredients, these donuts are easy to bake, healthier than fried donuts, and ready in just 20 minutes. Perfect for Easter brunch, dessert, or a fun baking activity with kids!
5 from 9 votes
Print Recipe Pin Recipe
Prep Time 15 minutes mins
Cook Time 15 minutes mins
Total Time 30 minutes mins
Course Dessert
Cuisine American
Servings 12 Donuts
Calories 201 kcal

Equipment

  • Donut pan
  • Mixing Bowls
  • Cooling rack
  • Measuring cups and spoons

Ingredients
  

For the Easter Donuts:

  • 1 ¾ cups all-purpose flour
  • 2 teaspoons baking powder
  • ½ teaspoon salt
  • ½ cup granulated sugar
  • 1 large egg at room temperature
  • 1 cup whole milk at room temperature
  • ¼ cup unsalted butter melted
  • 1 teaspoon vanilla extract
  • Easter sprinkles for decoration
  • Mini eggs for decoration
  • Baking spray to grease the donut pan

For the Glaze:

  • 1 cup powdered sugar
  • 2-3 tablespoons milk
  • ½ teaspoon vanilla extract
  • Food coloring pastel pink, blue, yellow, etc.

Instructions
 

  • Start by preheating your oven to 350°F (175°C). Lightly grease a donut pan with butter or nonstick spray to ensure your donuts release easily after baking. Set aside while you prepare the batter.
  • In a large mixing bowl, whisk together flour, baking powder, salt, and sugar until well combined. This step ensures an even distribution of ingredients, giving you light and fluffy donuts.
  • In a separate medium bowl, whisk together the egg, milk, melted butter, and vanilla extract until smooth. This mixture brings richness and flavor to your donuts while keeping them soft and moist.
  • Gradually add the dry ingredients into the wet ingredients, stirring gently until just combined. Be careful not to overmix—a few lumps are fine! Overmixing can lead to dense donuts.
  • Transfer the batter to a piping bag or ziplock bag, cut the tip, and pipe the batter into each donut cavity, filling about ¾ full to allow room for rising.
  • Place the pan in the oven and bake for 12-15 minutes, or until the donuts are golden brown and spring back when lightly touched. A toothpick inserted should come out clean. Mine took exactly 12 minutes to bake but it really depends on the oven.
  • Let the donuts cool in the pan for a few minutes, then transfer them to a wire rack to cool completely before glazing.
  • Meanwhile, in a small bowl, whisk together powdered sugar, milk, and vanilla extract until smooth. If the glaze is too thick, add a little more milk; if too thin, add more powdered sugar.
  • Divide the glaze into separate bowls, add a few drops of pastel food coloring to each, and mix well to create beautiful Easter-inspired shades. I used pink, orange, yellow and blue. A tiny drop goes a long way!
  • Dip the cooled donuts into the glaze, ensuring an even coat. Lift and let the excess drip off before placing the donuts back on the wire rack. While the glaze is still wet, sprinkle with Easter sprinkles or top with mini eggs for a festive touch. Let the glaze set for about 10-15 minutes.
  • The recipe yields exactly 12 donuts! Once the glaze is set, enjoy your beautifully decorated Easter donuts!

Video

Notes

  1. Stir the batter until just combined to keep the donuts light and fluffy. Overmixing can lead to dense, tough donuts.
  2. A slightly thicker glaze helps the colors stand out beautifully. If it's too thin, add more powdered sugar; if too thick, add a little milk.
  3. Lightly spray the donut cavities with baking spray to prevent sticking and ensure easy release.
  4. Want to skip store-bought food colors? Try beet powder, turmeric, matcha, or freeze-dried raspberry powder for beautiful, natural pastel shades!
Keyword Baked, donuts, easter, holiday baking

Vanilla Bean Coffee Syrup (Easy Homemade Starbucks Copycat)

February 15, 2025 by Abi Guna 13 Comments

This vanilla bean coffee syrup is the perfect homemade alternative to store-bought syrups. Made with simple ingredients, it adds a rich, warm vanilla flavor to your coffee, lattes, smoothies, and iced drinks. It’s an easy way to create café-style drinks at home with minimal effort.

Vanilla bean syrup in a air tight container. Vanilla bean pods near by.

This Vanilla Bean Syrup is made with real vanilla beans, sugar, and water, creating a smooth, aromatic, and flavorful homemade coffee syrup that’s far better than store-bought versions. Whether you enjoy hot coffee, cold brew, or flavored lattes, a splash of this rich vanilla syrup will make every sip extra special. Plus, it’s incredibly easy to make, requires just three simple ingredients, and can be stored for weeks! Trust me, your home will smell like a coffee shop every time you make a hot or cold beverage with this homemade Vanilla Bean Coffee Syrup!

Try my favorite Vanilla Bean Latte recipe using this homemade coffee syrup! If you love lattes, don’t miss my other favorite—Salted Caramel Latte! This homemade syrup pairs perfectly with sweet treats like the cozy Oatmeal Mug Cake or indulgent Red Velvet Cake Waffles. For something bright and citrusy, enjoy it alongside the Lemon Mini Bundt Cake.

[feast_advanced_jump_to]

Why You’ll Love This Vanilla Bean Coffee Syrup Recipe

Making homemade vanilla syrup is easier than you think! This vanilla simple syrup is made with just three ingredients; sugar, water, and real vanilla beans—creating a smooth and flavorful sweetener.

  • Easy to Make & Store – This recipe comes together in minutes and stays fresh for weeks, making it a great coffee bar staple.
  • Better Than Store-Bought – No artificial flavors or preservatives added to this syrup —just pure, homemade goodness with three simple ingredients.
  • Rich & Aromatic Flavor – Made with real vanilla beans, this syrup adds a deep, warm, and sweet vanilla taste to any drink.
  • Versatile & Customizable – Perfect for hot coffee, cold brew, lattes, teas, smoothies, and even cocktails or desserts!

If you love coffeehouse-style drinks like me, this homemade vanilla bean syrup is a must-have, trust me!

Vanilla bean coffee syrup in a glass jar with spoon on it.

What to Serve with Vanilla Coffee Syrup

This homemade Vanilla Bean Coffee Syrup isn’t just for coffee! Here are some delicious ways to use it:

  • Lattes & Cappuccinos – Stir into hot or iced lattes for a smooth, sweet vanilla flavor. Like I did in my Vanilla Bean Latte recipe!
  • Chai or Matcha Lattes – Enhances tea-based drinks with a hint of vanilla warmth.
  • Pancakes & Waffles – Drizzle over buttermilk pancakes, waffles like red velvet cake waffles, or French toast instead of maple syrup.
  • Oatmeal & Yogurt Bowls – Stir into warm oatmeal or Greek yogurt for natural sweetness. You can drizzle this syrup over oatmeal mug cake to enjoy or even in berry chia seed pudding for that extra sweet touch!
  • Muffins & Breads – Use as a glaze over banana bread, banana blackberry oatmeal muffins, banana chocolate chunks muffins or cinnamon rolls.
  • Cocktails & Mocktails – Use in espresso martinis, vanilla bourbon cocktails, or lemonades for a gourmet twist.
  • Milkshakes & Smoothies – Blend it into vanilla or chocolate shakes for extra depth.
  • Fruit Salads – A light drizzle enhances berries, peaches, or grilled pineapple.
  • Ice Cream Topping – Pour over vanilla or caramel ice cream for a gourmet drizzle.

Ingredients

This simple 3-ingredient vanilla syrup recipe is easy to make and perfect for elevating coffee, lattes, and more!

Ingredinets laid out for making vanilla bean coffee syrup
  • Water – The base for dissolving the sugar and creating a smooth syrup.
  • Granulated sugar – Adds sweetness and helps create the perfect syrup consistency.
  • Vanilla bean – The star ingredient! Scrape out the vanilla seeds and add the whole pod for a deep, rich flavor.

See recipe card for quantities.

How to make vanilla syrup for coffee

If you're wondering how to make vanilla syrup, the process is simple: simmer the ingredients together, let the flavors infuse, and store it for weeks of delicious use. Below step-by-step instructions helps you for better understanding!

Vanilla bean being scarped from the pod. The vanilla bean seeds in the knife.

Vanilla bean seeds scraped from the pod.

In a saucepan vanilla bean added along with the water and suagr.

In a saucepan add water, sugar and vanilla bean seeds along with the bean.

Vanilla bean syrup being simmered in the saucepan.

Simmer the sauce for 5-7 minutes on a medium heat.

Vanilla bean syrup in a glass jar with a spoon on it.

Once cooled down transfer the vanilla bean syrup in a glass jar to store.

Whether you’re making a vanilla bean simple syrup for your morning brew or a sweet drizzle for pancakes, this recipe is a must-try! If you’re looking for more cozy and refreshing ideas, be sure to explore my drinks recipes collection for more easy homemade beverages.

Substitutions

  • Sugar: Granulated white sugar is recommended for this recipe, but you can use brown sugar for a deeper, caramel-like flavor. For a natural sweetness, try maple syrup or honey, but keep in mind that the syrup will be slightly thinner compared to traditional simple syrup.
  • Vanilla Bean: I highly recommend using good-quality vanilla beans for the best flavor. However, if you can’t find one, you can substitute 1 tablespoon of vanilla bean paste. If using vanilla extract, increase the amount to 2 tablespoons for a strong, rich vanilla taste.

Variations

  • Brown Sugar Vanilla Syrup – Swap white sugar for brown sugar to create a deeper, caramel-like flavor.
  • Honey Vanilla Syrup – Use honey instead of sugar for a naturally sweet twist.
  • Maple Vanilla Syrup – Add pure maple syrup for a warm, rich flavor that pairs perfectly with coffee and lattes.
  • Cinnamon Vanilla Syrup – Stir in ½ teaspoon of ground cinnamon or add a cinnamon stick while simmering for a cozy spiced touch.
  • Lavender Vanilla Syrup – Infuse the syrup with dried lavender flowers for a floral, aromatic boost.
  • Salted Caramel Vanilla Syrup – Mix in a pinch of sea salt and a drizzle of caramel for a sweet-savory combination.

These fun variations make this homemade vanilla bean syrup even more versatile, perfect for coffee, lattes, teas, and desserts!

Vanilla bean syrup with seeds on the coffee syrp taken in a golden spoon.

Equipment

  • Saucepan - To make the syrup.
  • Sharp Knife – For slicing and scraping the vanilla bean seeds.
  • Measuring Cups & Spoons – For accurate ingredient measurements.
  • Glass Jar or Bottle – A sterilized container with a tight lid for storing the syrup and keeping it fresh.

Storage

Refrigeration: Store the vanilla bean syrup in an airtight glass jar or bottle in the refrigerator for up to 2 weeks.

Sterilized Container for Longer Shelf Life: If stored in a sterilized glass bottle, the syrup may last up to 1 month in the fridge.

Freezing Option: If you want to keep it for longer, freeze the syrup in small ice cube trays and thaw as needed.

Close up shot of vanilla bean coffee syrup in a glass container with a vanilla bean in it.

Top Tips for Making the Best Vanilla Bean Syrup

  1. For the best flavor, choose plump, aromatic vanilla beans instead of dried-out ones. Madagascar, Tahitian, or Mexican vanilla beans work best. I have used madagascar vanilla bean for this recipe.
  2. Heat the syrup gently over medium-low heat to extract the best flavor without burning the sugar. A slow simmer for 5-7 minutes is ideal.
  3. Avoid grainy syrup by stirring continuously until the sugar completely melts. This step is crucial to get the smooth syrupy consistency.
  4. If you prefer a clearer syrup, strain out the vanilla bean pieces using a fine-mesh sieve or cheesecloth before storing.
  5. Adding a teaspoon of vanilla extract after removing from heat boosts the flavor even more! But I didn't do it in this recipe since the vanilla bean I used was so aromatic!

FAQ

Can I use vanilla extract instead of vanilla beans?

Ofcourse you can! If you don’t have vanilla beans, substitute 2 teaspoons of vanilla extract. However, vanilla beans provide a richer, deeper flavor compared to extract.

How long does homemade vanilla bean syrup last?

If it is stored in an airtight container in the refrigerator, it stays fresh for up to 2 weeks. If stored in a sterilized glass bottle, it may last up to a month.

Can I use brown sugar instead of white sugar?

Absolutely! Brown sugar adds a caramel-like depth to the syrup, making it even richer in flavor.

Why is my syrup is grainy?

This happens when the sugar isn’t fully dissolved. Make sure to stir constantly over medium-low heat until the sugar is completely melted. Remove the inner side of the saucepan with the help of a spoon constantly.

Can I freeze vanilla bean syrup?

Yes you can! Freeze it in a small portions using an ice cube tray, then thaw as needed.

How can I make it dairy-free or keto-friendly?

This recipe is already dairy-free! For a keto-friendly version, replace sugar with a low-carb sweetener like monk fruit or erythritol.

Whats the difference between vanilla bean syrup and vanilla bean extract?

Vanilla syrup is sweetened and used as a flavor-enhancing syrup, while vanilla extract is a pure flavoring agent without added sugar. If replacing one with the other, you’ll need to adjust for sweetness.

Vanilla bean syrup and vanilla coffee bean syrup placed in an airtight container and in a glass placed in a marble surface.

Related

Looking for other recipes like this? Try these:

Pairing

These are my favorite dishes to serve with this Vanilla bean coffee syrup recipe:

The BESt homemade vanilla bean syrup for coffee is stored in an airtight container with fresh vanilla beans along the sides.

Vanilla Bean Coffee Syrup

Abi Guna
This homemade Vanilla Bean Coffee Syrup is smooth, aromatic, and perfect for sweetening coffee, lattes, and more. Made with just three simple ingredients, this syrup comes together in minutes and lasts for weeks!
5 from 7 votes
Print Recipe Pin Recipe
Prep Time 5 minutes mins
Cook Time 7 minutes mins
Total Time 12 minutes mins
Course Dessert, Drinks
Cuisine American
Servings 1 cup
Calories 47 kcal

Equipment

  • Saucepan
  • Measuring cups and spoons
  • Sharpe knife
  • Mason jar or airtight container

Ingredients
  

  • 1 cup water
  • 1 cup granulated white sugar
  • 1 vanilla bean split and seeds scraped

Instructions
 

  • Slice the vanilla bean lengthwise and scrape out the seeds with a knife.
  • In a small saucepan, combine water, sugar, vanilla bean seeds, and the whole pod. Bring to a gentle simmer over medium heat, stirring until the sugar dissolves.
  • Let the mixture simmer for 5-7 minutes, allowing the vanilla bean to release its deep flavor. The syrup starts to thicken a bit.
  • Remove from heat, discard the vanilla pod. Let the syrup cool, then transfer it to a sealed bottle or jar.

Notes

  1. Keep the vanilla bean coffee syrup in an airtight container in the fridge for up to 2 weeks.
  2. Over time, natural vanilla particles may settle at the bottom, so give it a quick shake before adding it to your coffee or desserts.
  3.  Always use a clean, dry spoon to prevent contamination and extend freshness!
Keyword coffee, easy desserts, latte, syrup, vanilla

Crispy Chicken Caesar Salad (Easy Restaurant-Style Recipe)

February 10, 2025 by Abi Guna 11 Comments

This Crispy Chicken Caesar Salad is the ultimate combination of crunchy, juicy, and creamy textures that make every bite irresistible! The golden, crispy pan-fried chicken, fresh crisp romaine lettuce, and shaved parmesan cheese, this salad is tossed in a rich, homemade Caesar dressing that’s perfectly tangy and full of flavor better than classic caesar chicken salad.

Crispy Chicken caesar salad served in a white oval platter and caesar dressing is drizzled over.

The crispy chicken adds a delicious twist to the classic chicken Caesar salad, making it hearty enough to be a satisfying meal on its own. You can also air fry chicken instead! The savory, garlicky dressing coats every leaf, while the juicy, breaded chicken adds the perfect crunch. Whether you enjoy it as a hearty lunch, light dinner, or a crowd-pleasing side, this restaurant-quality Caesar salad is easy to make at home. Serve it with crunchy croutons, extra parmesan, and a squeeze of fresh lemon for a salad that’s fresh, flavorful, and satisfying! I use the remaining chicken from the salad to make our family’s favorite chicken salad melt sandwich for next day’s lunch. Win.Win.

A spoonful of homemade cranberry sauce makes a sweet-tart dressing drizzle over the Chicken Salad makes it extraordinary to enjoy! Looking for more high-protein salads? Check out my Salmon Kale Quinoa Salad or Shaved brussels sprouts salad. And also I have a huge collection of chicken recipes in my blog, don't forget to check them out 🙂

[feast_advanced_jump_to]
Close up shot for crispy chicken and the caesar salad.

Why You’ll Love This Crispy Chicken Caesar Salad Recipe

You may think what makes this crispy chicken salad so special? The perfectly seasoned, breaded chicken is pan-fried to golden perfection, adding crunch to every bite.

  • Quick and Easy  – This salad can be made in under 30 minutes, this is a perfect weeknight meal, light lunch, or side dish.
  • High-Protein Meal – The crispy chicken and parmesan cheese make this salad hearty enough to enjoy as a main dish.
  • Amazing Texture & Flavor – A delicious balance of crispy, juicy, and creamy in every bite! The golden, crunchy chicken pairs beautifully with fresh romaine lettuce and rich, tangy Caesar dressing.
  • Better Than Restaurant Salads – Made with fresh ingredients and homemade dressing, this salad delivers restaurant-quality taste right at home.
  • Customizable – Swap the chicken for grilled shrimp, salmon, or tofu, or add extra toppings like avocado, bacon, or cherry tomatoes for a twist on the classic.
Black light shot of Crispy chicken caesar salad in a white bowl accompanied by a bowl homemade caesar salad dressing.

What to Serve with Crispy Chicken Caesar Salad 

While Crispy Chicken Caesar Salad is a satisfying meal on its own, pairing it with the right side dish can encourage your kids and family to enjoy dining experience! Whether you’re looking for something light, hearty, or refreshing, here are some great options I love to serve alongside:

Garlic bread or Dinner Rolls – Soft, fluffy, and delicious rolls alongside a crisp, fresh salad.

Soups - A rich, creamy tomato soup that pairs beautifully with the garlicky flavors of the salad. Even a spicy vegetable soup goes well with this crispy chicken salad.

Roasted Veggies – Hot honey Brussel sprouts, Roasted carrots and asparagus, Roasted cauliflower and carrots or zucchini bring a warm, hearty contrast.

Grilled Shrimp or Salmon – If you love seafood, adding grilled salmon or shrimp makes this a restaurant-worthy dish. (Check out my Salmon Kale Quinoa Salad for another great pairing!)

How to make CAESAR SALAD DRESSING WITHOUT ANCHOVIES

Caesar salad dressing ingredients added to the bowl.
Homemade caesar salad dressing without anchovies in a bowl with a spoon.

Love Caesar salad but not a fan of anchovies? This Caesar Salad Dressing Without Anchovies is just as creamy, tangy, and flavorful as the classic version—without the fishy taste! Made with mayonnaise, parmesan cheese, Dijon mustard, lemon juice, Worcestershire sauce, garlic, and olive oil, this dressing has a rich, velvety texture with the perfect balance of savory and zesty flavors. It’s quick to make, requires simple pantry ingredients, and is perfect for drizzling over Crispy Chicken Caesar Salad, wraps, or even as a dip! If you're looking for an easy, homemade alternative to store-bought dressing, this anchovy-free Caesar dressing is the way to go! —it’s a total game-changer!

Ingredients

The ingredients laid out for crispy chicken caesar salad with homemade caesar dressing.
  • Chicken Breasts- Boneless and skinless chicken breasts is the base of the crispy chicken, tender and juicy, slicing them horizontally ensures even cooking and a perfect crispy coating.
  • Paprika – Provides a mild smoky flavor and slight sweetness.
  • Salt – Enhances all the seasonings.
  • Ground Pepper – Adds a subtle heat and depth of flavor to the seasoning mix.
  • All-Purpose Flour – Helps create a base layer for the breading, allowing the egg and breadcrumbs to stick better for an extra crispy texture.
  • Large Egg  – Acts as a binding agent, helping the breadcrumbs adhere to the chicken while adding richness.
  •  Water – Thins the egg mixture slightly, making it easier to coat the chicken evenly.
  • Panko Breadcrumbs – Creates an extra crispy, airy coating, giving the chicken a light, crunchy texture when fried.
  •  Romaine Lettuce – The classic base of a Caesar salad, offering a crisp, refreshing crunch that holds up well to the rich dressing.
  •  Parmesan Cheese – Aged and salty, parmesan enhances the umami flavor of the dressing while adding richness and a slightly nutty taste.
  • Croutons – Golden, crispy bread cubes that add crunch and absorb the creamy dressing, making every bite extra satisfying.
  • Garlic – Infuses the dressing with a robust, aromatic kick.
  • Lemon Juice – Brightens up the dressing with a fresh, citrusy tang, balancing out the richness of the oil and cheese.
  • Dijon Mustard – Helps emulsify the dressing while adding a mild, tangy spice that enhances the overall flavor.
  •  Worcestershire Sauce – Adds depth and umami, its a key to the signature Caesar taste.
  •  Olive Oil – Creates a smooth, creamy consistency in the dressing while adding a slight fruitiness.
  • Mayonnaise - The creamy base of the dressing, replacing raw eggs in traditional Caesar dressing, making it rich and smooth.

See recipe card for quantities.

HOW TO MAKE BEST CRISPY CHICKEN CAESAR SALAD

Making Crispy Chicken Caesar Salad involves three main steps: first, preparing the panko and Parmesan-coated crispy chicken; second, making the Caesar salad dressing; and finally, assembling the salad with fresh ingredients and the homemade dressing. Lets see the step-by-step instructions process!

The Chicken breasts are sliced horizontally and placed in a wooden cutting board surrounded by the seasonings.

Cut the chicken breast horizontally and pound it if nesscary for even thickness.

Prepared breading station to make crispy chicken for crispy chicken caesar salad recipe.

Dredge the seasoned chicken breast in flour, and then egg mixture and then panko mixture.

In a large white skillet the   crispy chicken is prepared in batches for caesar salad recipe.

Pan fry the chicken breasts until crispy and golden.

In a gray oval platter the crispy is sliced and placed.

Once done, slice the chicken breasts.

Prepared homemade Caesar Salad Dressing in a bowl with golden spoon.

Meanwhile, combine the Caesar Salad dressing ingredients in a bowl and mix until smooth and creamy.

Gathered prepared Caesar Salad ingredients arranged in a serving platter.

Gather all the prepared Caesar Salad ingredients and toss it.

Top the salad with crispy, golden-brown sliced chicken, ensuring even distribution for a perfect bite every time. Gently toss everything together, allowing the homemade Caesar dressing to coat the fresh romaine lettuce, crunchy croutons, and juicy chicken evenly. For the final touch, sprinkle freshly ground black pepper and a generous amount of grated Parmesan cheese over the salad, enhancing its savory depth. Serve immediately while the chicken is still warm and crispy, and enjoy this flavorful, satisfying dish! 

Crispy Chicken caesar salad served over a oval platter and garnished with grated parmesan cheese.

Substitutions for Crispy Chicken Caesar Salad

  • For a lighter option, swap crispy chicken with grilled, baked, or air-fried chicken.
  • Lettuce can be substituted with a heartier, nutrient-dense green like kale, which holds up well to dressing.
  • Toasted nuts are a great substitute for croutons, adding crunch without the extra carbs.
  • Greek yogurt dressing is a great alternative as it’s lighter and high in protein, making it a healthier swap for mayo-based dressing.

Variations

Looking to switch up your Crispy Chicken Caesar Salad? Try these delicious variations for a fresh twist on this classic dish!

  • Flavor Variations: Toss crispy chicken in buffalo sauce for a spicy kick. For a lighter option, swap crispy chicken for grilled, baked, or air-fried chicken.
  • Protein Variations: Replace chicken with grilled or crispy shrimp for a seafood twist. For a vegetarian version, use crispy pan-fried tofu or tempeh as a protein substitute.
  • Salad Variations: Swap romaine lettuce for chopped kale for a heartier, nutrient-dense alternative.
  • Extra Toppings for More Flavor: Bacon adds a smoky, crispy bite to your salad, while avocado brings creaminess and extra healthy fats.
Close up shot of crispy chicken interior of the caesar chicken salad recipe.

Equipment

Mixing Bowls – To mix the Caesar dressing and coat the chicken with panko and Parmesan.

Skillet or Frying Pan – To cook the crispy chicken to golden perfection.

Large Salad Bowl – For tossing and assembling the salad.

How to Store Crispy Chicken Caesar Salad

To keep your Crispy Chicken Caesar Salad fresh, store the components separately to prevent sogginess.

Crispy Chicken: Store in an airtight container in the refrigerator for up to 3 days. Store in an airtight container in the refrigerator for up to 3 days.

Caesar Dressing: Store homemade dressing in a sealed jar or airtight container in the fridge for up to 5 days.

Romaine Lettuce & Toppings: Keep chopped romaine lettuce in a zip-top bag or airtight container with a paper towel to absorb moisture.

Assembled Salad: If already mixed with dressing, it’s best eaten immediately. Leftovers may become soggy after a few hours.

For the best texture and flavor, assemble the salad fresh before serving!

CLose up shot of crispy chicken caesar salad in a white bowl drizzled with salad dressing.

Top Tips for Making the Best Crispy Chicken Caesar Salad

  1. Panko breadcrumbs create a lighter, crispier coating compared to regular breadcrumbs, giving the chicken that perfect crunch. So don't miss this step for that extra crispiness!
  2. When frying, cook the chicken in batches to maintain crispiness instead of steaming. So don’t overcrowd the pan.
  3. Use fresh Romaine lettuce, for maximum crunch, wash and fully dry the romaine before tossing it in the dressing.
  4. Homemade caesar salad dressing is a game-changer. Making Caesar dressing from scratch gives you richer, fresher flavors compared to store-bought versions. So just spend 2-3 minutes making your own salad dressing!
  5. To prevent sogginess, mix the lettuce, croutons, and dressing right before serving.

FAQ

Can I air-fry the chicken breasts instead of frying?

Of Course you can! For a healthier option you can air-fry at 375°F for 12-15 minutes until crispy and golden.

How to keep the chicken crispy for a long time in a salad?

To maintain crispiness, let the cooked chicken rest on a wire rack instead of a plate to prevent sogginess. Avoid adding it to the salad until just before serving.

Can I make this salad ahead of time?

You can prep the components in advance; chop the lettuce, make the dressing, and cook the chicken. Store everything separately and assemble just before serving for the best texture.

What’s the best way to reheat crispy chicken?

Reheat in an air fryer at 375°F for 3-5 minutes or in the oven at 350°F for 10 minutes to keep it crispy. Avoid microwaving, as it can make the coating soggy.

Can I bake the chicken instead of frying it?

Yes absolutely! Bake at 400°F  for 20-25 minutes, flipping halfway, until golden and crispy. For extra crunch, spray with cooking oil before baking.

Crispy chicken caesar salad in a white bowl accompanied by a bowl homemade caesar salad dressing with parmesan cheese in a bowl on other side.

Related

Looking for other recipes like this? Try these:

Pairing

These are my favorite dishes to serve with this crispy caesar chicken salad recipe:

Crispy chicken caesar salad in a white bowl accompanied by a bowl homemade caesar salad dressing.

Crispy Chicken Caesar Salad

Abi Guna
Enjoy this Crispy Chicken Caesar Salad, a perfect mix of golden, crunchy chicken, crisp romaine lettuce, parmesan cheese, and a rich homemade Caesar dressing. This easy and satisfying salad recipe is great for lunch, dinner, or meal prep. Ready in under 30 minutes, it's a restaurant-quality dish you can make at home! 
5 from 6 votes
Print Recipe Pin Recipe
Prep Time 15 minutes mins
Cook Time 15 minutes mins
Total Time 30 minutes mins
Course Main Course, Salad
Cuisine American
Servings 4 people
Calories 578 kcal

Equipment

  • Mixing Bowls
  • Large Skillet
  • Measuring spoons and cups

Ingredients
  

For the Crispy Chicken

  • 1.5 pound boneless skinless chicken breasts, sliced horizontally
  • ½ teaspoon garlic powder
  • ½ teaspoon paprika
  • ½ teaspoon salt
  • ½ teaspoon ground pepper
  • ½ cup all-purpose flour
  • 1 large egg
  • 2 tablespoons water
  • 1 cup panko breadcrumbs
  • ½ cup grated parmesan cheese
  • 3 tablespoons olive oil

For the Caesar Dressing

  • ½ cup mayonnaise
  • 2 tablespoons olive oil
  • 1 tablespoon lemon juice
  • 1 teaspoon Dijon mustard
  • 1 teaspoon Worcestershire sauce
  • 1 garlic clove minced
  • ¼ cup grated parmesan cheese
  • ½ teaspoon salt
  • ½ teaspoon ground pepper

For the Caesar Salad

  • 4 cups romaine lettuce chopped
  • ½ cup parmesan cheese grated
  • 1 cup croutons
  • ½ teaspoon black pepper

Instructions
 

  • Cut the chicken breasts horizontally. If needed, pound them to an even thickness.
  • Season with salt, pepper, garlic powder, and paprika. Set aside.
  • In the first bowl, add all-purpose flour.
  • In the second bowl, beat the egg and water.
  • In the third bowl, mix panko breadcrumbs and parmesan cheese.
  • Dredge the chicken in flour first, then dip it in the beaten egg, and finally coat it with the panko-parmesan mixture.
  • Shake off any excess coating.
  • Heat olive oil in a pan over medium heat and fry until golden brown and crispy about 3-4 minutes per side. Let rest for a few minutes before slicing.
  • Meanwhile prepare the caesar dressing; Whisk together mayonnaise, olive oil, lemon juice, Dijon mustard, Worcestershire sauce, garlic, and parmesan.Season with salt and pepper to taste. Set it aside.
  • In a large bowl, combine chopped romaine lettuce, croutons, parmesan, and Caesar dressing.
  • Top with crispy sliced chicken and toss gently.
  • Sprinkle with fresh black pepper, grated parmesan cheese, and serve immediately!

Notes

  1. If the chicken breasts are thick, pound them to an even thickness for faster, more even cooking.
  2. For a lighter dressing, replace mayonnaise with Greek yogurt or use a store-bought Caesar dressing for convenience.
Keyword Chicken, Main Dish, Salads

If you love Caesar salad with crispy chicken, this Fried Chicken Caesar Salad is a must-try! It’s the perfect combination of crunchy, golden-breaded chicken, crisp romaine lettuce, parmesan cheese, and a rich, creamy Caesar dressing. If you try this recipe, please leave a STAR rating in the comment section below! Your feedback helps a small blogger like me stay motivated in creating content for my readers. Also, feel free to follow me at Food Exit on Instagram, TikTok, and Pinterest for the latest recipe updates!

Chicken and Shrimp Fried Rice (Easy Better-Than-Takeout Dinner)

February 6, 2025 by Abi Guna 11 Comments

Today, I made this flavor-packed, one-pan Chicken and Shrimp Fried Rice for dinner, and it's always a huge hit in my home! This savory, protein-packed, and easy-to-make dish combines juicy chicken, tender shrimp, fluffy rice, crisp vegetables, and a rich, umami-filled sauce for a meal that's both delicious and satisfying.

Chicken and shrimp fried rice in a bowl garnished with green onions in a warm background. Soy sauce placed in a dipping  plate.

Pineapple Chicken Kabobs goes well with this fried rice! When it comes to chicken and shrimp recipes with rice, this one stands out because of its savory garlic-ginger base, fluffy grains of rice, and rich umami flavors from soy sauce and sesame oil. The shrimp adds a light, slightly sweet seafood touch, while the chicken provides heartiness and depth. If you love chicken and shrimp dishes, this stir-fried classic is a perfect balance of textures and flavors. Whether served as a main course or alongside other Asian-inspired sides, this shrimp fried rice with chicken will satisfy your cravings for bold, comforting flavors in every bite, while the vibrant veggies add texture and nutrition. Ready in under 30 minutes, this one-pan fried rice recipe is a must-try for anyone who loves flavorful and comforting meals! And also I have a huge collection of chicken recipes in my blog, don't forget to check them out 🙂

Looking for more one-pan recipes ready in under 30 minutes? Check out my Ground Chicken Spaghetti, Glass Noodle Stir-Fry, Shrimp Scampi Fettuccine, and Pesto Ricotta Pasta!

[feast_advanced_jump_to]
Close up shot of shrimp, chicken pieces and other ingredients in Chicken and shrimp fried rice recipe.

Why You’ll Love This Easy Chicken and Shrimp Fried Rice Recipe

  • Quick & Easy – Ready in under 30 minutes, making it perfect for busy weeknights!
  •  One-Pan Meal – Everything cooks in a single pan, meaning less cleanup and more convenience.
  • Protein-Packed – A delicious combination of juicy chicken and tender shrimp, making it hearty and satisfying.
  • Better Than Takeout – Loaded with bold, umami flavors, this homemade version is fresher and healthier than restaurant fried rice.
  • Customizable – Swap the protein, add more veggies, or make it spicy for a personalized touch!
  • Great for Meal Prep – Stores well in the fridge, so you can enjoy leftovers for a quick and tasty meal anytime.

Once you try it, this flavor-packed, one-pan fried rice will become a favorite in your home!

What to Serve with Chicken and Shrimp Fried Rice

Chicken and Shrimp Fried Rice is a complete meal on its own, packed with the perfect balance of carbs, protein, and fiber. However, you can elevate your meal by pairing it with crispy spring rolls, egg rolls, or dumplings for a delicious appetizer. Complement the dish with a warm bowl of egg drop soup, spicy vegetable soup, or miso soup. If you want extra protein, serve it with teriyaki chicken or blackened salmon bites for a well-rounded and satisfying meal! For a lighter side, try Asian cucumber salad, stir-fried bok choy, or sautéed green beans.

In a spoon Chicken and shrimp fried rice is being scooped from the serving bowl.

Best Rice for Fried Rice

The best rice for fried rice should be firm, non-sticky, and able to absorb flavors while maintaining its texture. Here are the top choices to make pick the best choice for making shrimp and chicken fried rice recipe: 

Day-Old Cooked Rice (Preferred)

Chilled, day-old rice is slightly dried out, preventing it from becoming mushy when stir-fried. If using freshly cooked rice, spread it on a tray and refrigerate for at least 30 minutes to remove excess moisture.

Long-Grain Rice (Best Choice)

Jasmine Rice – Light, fluffy, and slightly fragrant, making it the best option for fried rice.

Basmati Rice – Less sticky, with long separate grains that absorb sauces well.

For the best restaurant-style fried rice, jasmine rice is the top choice!

Ingredients

This dish delivers the best Chinese chicken fried rice experience right from your own kitchen. It needs only 10 main ingredients to create this flavorful fried rice recipe!

Chicken and shrimp fried rice ingredients laid out on a pink background.
  • Chicken - Provides a hearty, protein-rich base that pairs well with the shrimp for a balanced dish. Using boneless, skinless chicken breasts or thighs ensures juicy and flavorful bites. 
  • Shrimp - Adds a sweet, delicate seafood flavor that enhances the dish. Cooking shrimp quickly over high heat keeps them tender and juicy. 
  • Cooked Rice - The main component of fried rice, day-old rice is ideal as it’s slightly dried out, preventing messiness and allowing each grain to absorb the sauce. I have used a day old jasmine rice for the recipe.
  • Carrots and Peas - Adds natural sweetness and a slight crunch, enhancing both the texture and flavor of the dish.
  • Onion - Provides a slightly sharp, sweet flavor when sautéed, helping to balance the richness of the dish.
  • Garlic - Enhances the umami flavors with its aromatic, I always use fresh garlic works since they are best for maximum flavor.
  • Ginger - Brings a warm, slightly peppery taste that pairs well with garlic and soy sauce, adding depth to the dish. You can either grate and mince them finely.
  • Soy Sauce - A key seasoning that adds a salty, umami depth to the dish while giving the rice a slightly darker color. If you are using low- sodium soy sauce, check the seasonings and adjust the salt.
  • Oyster Sauce - Adds a slightly sweet and savory richness, deepening the overall flavor profile of the fried rice.
  • Sesame Oil - Adds a distinct nutty aroma and flavor, enhancing the Asian-inspired taste of the dish. So don’t skip this!
  • Oil - Used to cook the chicken, shrimp, and vegetables while preventing sticking. Neutral oils like vegetable or canola oil work best.
  • Salt & Black Pepper - Enhances the flavors and balances the dish. 
  • Green Onions - Adds a fresh, mild onion flavor and a pop of color to the final dish.

See recipe card for quantities.

How to make fried rice with chicken and shrimp 

The combination of seafood and poultry makes it a flavor-packed, protein-rich meal that’s quick, easy, and better than takeout. The step-by-step instructions below can help you to create this amazing recipe!

Cooked chicken pieces in a skillet for Chicken and shrimp fried rice recipe.

In a large skillet, cook the chicken pieces for 4-5 minutes until its done.

Cooked shrimp in a skillet for Chicken and shrimp fried rice recipe.

In a same skillet, cook the shrimp for 4-5 minutes until its done.

Vegetables cooked in the skillet for chicken and shrimp fried rice.

Add onion, garlic, ginger and veggies and cook for 4-5 minutes.

Cooked chicken, shrimp, rice and sauce in the skillet for Chicken and shrimp fried rice recipe.

Stir in the sauces along with the cooked chicken, shrimp and rice.

Continue mixing for 3-5 minutes, ensuring that the rice, chicken, shrimp, and vegetables are evenly coated with the flavorful sauce. Stir occasionally to prevent sticking and allow the ingredients to develop a slight crispiness for that authentic fried rice texture. If needed, adjust the seasoning with a little extra soy sauce or a pinch of salt to enhance the flavors.

Once everything is well combined and heated through, sprinkle generously with chopped green onions for a fresh, aromatic finish. You can also add a dash of sesame seeds or red chili flakes for extra flavor. Serve the fried rice hot, straight from the pan, and enjoy this delicious, homemade Chicken and Shrimp Fried Rice—perfect for a quick weeknight dinner or meal prep!

Cooked Chicken and shrimp fried rice in a white skillet surrounded by a wooden bowl of green onions, soy sauce in a bowl, salt and pepper shakes in the bottom.

Substitutions

If you need to swap out ingredients, here are some great alternatives to keep your fried rice flavorful and balanced!

 Rice Substitutes:

Brown Rice – A healthier alternative with more fiber; slightly chewy but works well.
Cauliflower Rice – Low-carb and keto-friendly, great for a lighter version.
Quinoa – Adds protein and a nutty flavor while keeping the dish gluten-free.

Vegetarian Protein Substitute:

Tofu – A great vegetarian option. Firm tofu works best when pan-fried first to maintain texture.

Oyster Sauce Substitute:

Hoisin Sauce – Slightly sweeter but works as a great replacement.
Soy Sauce + Brown Sugar – A mix of soy sauce and a small amount of brown sugar mimics the depth of oyster sauce.

These swaps will help you customize your fried rice while keeping it delicious and satisfying!

CLose up shot of Chicken and shrimp fried rice recipe.

Fried Rice Variations

Looking to switch things up? Try these delicious variations for a unique twist on classic fried rice!

  • Beef Fried Rice – Use thinly sliced steak or ground beef for a hearty and savory version.
  • Egg Fried Rice – A simple yet delicious option with scrambled eggs as the main protein. My kids favorite one!
  • Pineapple Fried Rice – Adds a tropical, sweet-savory flavor with fresh or canned pineapple chunks. Perfect to make when pineapple is in season.
  • Spicy Fried Rice – Mix in Sriracha, red chili flakes, or Thai chili for an extra kick.
  • Quinoa Fried Rice – A high-protein, fiber-rich alternative with the same great stir-fried flavors. You dont want to worry about cards here!
  • Mexican Fried Rice – Toss in black beans, corn, and salsa for a Tex-Mex-inspired dish.
Chicken and shrimp fried rice served in a bowl, wooden bowl has green onions and another bowl has soy sauce.

Equipment

  • Large Skillet - All you need is a one skillet to make the entire recipe.
  • Serving bowls - To serve the shrimp fried rice.
  • Measuring spoons and cups - To measure the quantity of spices and other ingredients.

Storage

To keep your fried rice fresh and flavorful, follow these simple storage tips:

  • Refrigeration: Allow the fried rice to cool completely before storing to prevent excess moisture. Transfer to an airtight container and refrigerate for up to 3 days.
  • Freezing: For longer storage, place the cooled rice in a freezer-safe container or resealable bag. Freeze for up to 3 months. Flatten the rice in the bag for even freezing and easy thawing.
  • Reheating (Stovetop): Heat a pan over medium heat, add a splash of oil or water, and stir-fry until hot.
  • Reheating (Microwave): Place the rice in a bowl, cover with a damp paper towel, and heat in 30-second intervals, stirring in between to retain moisture.

With proper storage, your fried rice stays delicious for quick and easy meals!

In a spoon full of Chicken and shrimp fried rice over a serving bowl.

Top Tips for Perfect homemade chicken shrimp fried rice everytime:

  1. Use cold, day-old rice for the best texture.
  2. If using fresh rice, let it cool completely before frying.
  3. Break up clumps before adding it to the pan to ensure even frying.
  4. Sear chicken, shrimp, or tofu separately, then set them aside to avoid overcooking. Add them back at the end.
  5. Cook on high heat to achieve that signature wok-fried aroma. It doesn’t mean you need to use only wok, any heavy bottom skillet should work.
  6. After adding rice to the pan, let it sit for 30-60 seconds before stirring to develop a crispy texture. Don’t skip this step!

FAQ

Can I use fresh rice instead of day-old rice?

Yes, but for the best texture, spread freshly cooked rice on a tray and refrigerate it for at least 30 minutes before stir-frying. This helps remove excess moisture and prevents mushiness.

Can I make fried rice without soy sauce?

Yes! Substitute with coconut aminos, tamari (gluten-free option), or a mix of salt and sesame oil for flavor.

Can I make fried rice vegetarian or vegan?

Absolutely! Swap the chicken/shrimp for tofu, add more veggies, and use soy sauce or coconut aminos instead of oyster sauce.

Can I add other proteins to fried rice?

Yes! You can try it with beef, salmon, pork, or even scrambled eggs for extra protein and flavor.

What’s the best type of rice for fried rice?

Jasmine rice is the best choice for fluffy, non-sticky fried rice. Basmati rice also works well, while brown rice adds a healthier twist with a slightly chewy texture.

Can I use frozen chicken or shrimp in this fried rice recipe?

Yes, you can use frozen chicken or shrimp in this fried rice recipe! But make sure you thaw them completely before using them in the recipe. After thawing, use a paper towel to remove excess moisture to prevent the shrimp/chicken from becoming watery while stir-frying.

Can I add any other vegetables to the fried rice?

Yes! You can add a variety of vegetables to your fried rice for extra flavor, texture, and nutrition. Few examples are: corn, bell pepper, cabbage, broccoli, mushrooms, zucchini, etc.,

Horizontal image of Chicken and shrimp fried rice recipe served in a warm bowl in a pink background.

Related

Looking for other recipes like this? Try these:

Pairing

These are my favorite dishes to serve with this chicken shrimp fried rice recipe:

Chicken and shrimp fried rice is placed in a serving bowl, the skillet the fried rice is peeking. Soy sauce is placed in a dipping saucer along with the green onions in a wooden bowl.

Chicken and Shrimp Fried Rice

Abi Guna
If you're craving a homemade, restaurant-quality meal, this chicken and shrimp fried rice is a must-try! The combination of seafood and poultry makes it a flavor-packed, protein-rich meal that’s quick, easy, and better than takeout.
5 from 5 votes
Print Recipe Pin Recipe
Prep Time 10 minutes mins
Cook Time 15 minutes mins
Total Time 25 minutes mins
Course Dinner, lunch, Main Course
Cuisine Asian, Chinese
Servings 4 people
Calories 413 kcal

Equipment

  • Large Skillet
  • Serving Bowls
  • Measuring spoons and cups

Ingredients
  

  • 2 tablespoons oil divided
  • 1 cup chicken breast or thighs diced (approx 5 ounces)
  • 1 cup medium shrimp peeled and deveined (approx 4 ounces)
  • 1 teaspoon salt divided
  • 1 teaspoon black pepper divided
  • 2 cloves garlic minced
  • 1 teaspoon ginger minced
  • ½ cup yellow onion chopped
  • ¾ cup fresh/frozen carrots and peas thawed
  • 3 cups cooked rice I used leftover Jasmine rice - a day old
  • 2 tablespoons soy sauce
  • 1 tablespoon oyster sauce
  • 1 teaspoon sesame oil
  • 2 green onions chopped (for garnish)

Instructions
 

  • Heat 1 tablespoon of oil in a large skillet over medium-high heat.
  • Add the diced chicken, season with ½ teaspoon salt and pepper, and cook for 4-5 minutes, until fully cooked. Remove from the pan and set aside.
  • In the same pan, add the shrimp, season with ½ teaspoon salt and pepper, and cook for 1-2 minutes per side, until pink and opaque. Remove from the pan and set aside.
  • To the same pan, add the remaining 1 tablespoon of oil and sauté the garlic, ginger, and onion until fragrant.
  • Next, add the carrots and peas, stirring for 2-3 minutes until slightly tender.
  • Stir in the cooked rice along with the chicken, mixing well.
  • Pour in the soy sauce, oyster sauce, and sesame oil, stirring until everything is evenly coated. Continue mixing for 3-5 minutes until well combined.
  • Sprinkle with chopped green onions and serve hot. Enjoy!

Notes

  1. For the best texture, use cold, day-old rice to prevent it from becoming mushy.
  2. Fry chicken and shrimp in batches if needed to ensure each of them cooks evenly and gets a good sear.
  3. Add cashews or peanuts for a nutty crunch, if desired.
Keyword Chicken, Dinner, fried rice, one pan, Shrimp

If you're craving a homemade, restaurant-quality meal, this fried rice with shrimp and chicken is a must-try! If you try this recipe, please leave a STAR rating in the comment section below! Your feedback helps a small blogger like me stay motivated in creating content for my readers. Also, feel free to follow me at Food Exit on Instagram, TikTok, and Pinterest for the latest recipe updates!

Banana Blackberry Oatmeal Muffins

February 2, 2025 by Abi Guna 11 Comments

Get ready for a delicious treat! These Banana Blackberry Oatmeal Muffins are soft, moist, and naturally sweet from ripe bananas and juicy blackberries. They’re perfect for breakfast or a quick snack!

Banana blackberry oatmeal muffins placed in a plate on a warm background with fresh blackberries behind.

Banana Blackberry Oatmeal Muffins provide a harmony of flavors and health benefits that are welcome in any home. Bananas help create wonderful moisture, while the whole berries offer a tangy zest. Serve these to children and friends and watch them want more. These fruit muffins are exquisitely irresistible.

If you love banana muffins, you’ll want to try my family’s favorite Banana Chocolate Chunk Muffins—rich, decadent, and perfect for any occasion!

Looking for more oatmeal recipes? Try my Oatmeal Mug Cake or Oatmeal Chocolate Butterscotch Cookies for a delicious treat!

[feast_advanced_jump_to]
Close up shot of blackberry banana oatmeal muffins.

Spring is the perfect time to find just-picked, aromatic blackberries at farmers' markets. Our bodies crave fresh fruit, and these muffins deliver! A cup of blackberries provides nearly 30% of the daily fiber requirement and is packed with essential vitamins and minerals. The fruit also helps keep the muffins moist, preventing them from drying out like many others.

If you're looking for healthy blackberry muffins, this recipe is a great option, packed with fiber and fresh fruit. Whether you're meal prepping or craving a homemade baked good, this recipe for blackberry muffins is simple and easy to follow. The combination of bananas, oats, and juicy blackberries makes these banana oat muffins a nutritious and satisfying choice for any time of day!

Why You’ll Love These Banana Blackberry Oatmeal Muffins Recipe

  • Easy to Make – Simple ingredients and minimal prep time make this a no-fuss recipe for any day of the week.
  • Naturally Sweet & Moist – Ripe bananas add natural sweetness and keep the muffins soft and fluffy.
  • Wholesome – Made with rolled oats for added fiber, making them a satisfying snack or breakfast option.
  • Bursting with Juicy Blackberries – Fresh berries are a genuinely sweet indulgence. These fresh blackberries add a delicious tart contrast to the sweetness of bananas.
  • Great for Breakfast or Snacks – Enjoy with a cup of coffee. They not only make a great grab-and-go breakfast, but they are also a healthy snack. 
  • Freezer-Friendly – Make a batch ahead of time and store extras in the freezer for a quick snack anytime!
Three Banana blackberry oatmeal muffins stacked with fresh blackberries arround and banana is the behind.

What to Serve with Banana Blackberry Oatmeal Muffins

These muffins are delicious on their own, but pairing them with the right sides makes for an even better meal or snack! Here are some great options:

Tea or Coffee or Latte – The warm, comforting flavors of these muffins go beautifully with a cup of fragrant tea or a strong coffee. My Salted Caramel Latte recipe is just perfect to enjoy with these banana blackberry oatmeal muffins! 

Butter or Spreads – Enjoy them warm with a dab of butter, honey butter, or your favorite fruit jam for extra flavor.

Fresh Fruits – Serve alongside a bowl of fresh berries, sliced bananas, or a refreshing fruit salad for a light and healthy touch.

Yogurt or a Parfait – Pair with creamy pudding like my Berry chia seed pudding recipe!

Smoothie – A fruit smoothie complements these muffins perfectly, adding extra nutrients and freshness to your meal.

The banana blackberry oatmeal muffins sliced into halves to show the texture of the muffins.

How to Quickly Ripen Bananas for Muffins

You don’t have ripe bananas? No worries, I’ve got you covered! To quickly ripen bananas for muffins using the oven method, follow these steps:

Preheat the Oven – Set your oven to 300°F (150°C).
Place Bananas on a Baking Sheet – Keep them in their peels and arrange them on a parchment-lined baking sheet.
Bake for 15-20 Minutes – Bake until the peels turn completely black or light black spots starts to appear and the bananas become soft.
Cool & Use – Let them cool for a few minutes, then peel and mash for your muffins!

This method enhances their natural sweetness, making them ideal for baking.

Ingredients

Ingredients laid out for banana blackberry oatmeal muffins in a warm backdrop.
  • Banana - Ripe bananas add natural sweetness and moisture, making the muffins soft and flavorful. The riper the banana, the better the flavor!
  • Oats - Rolled oats provides a hearty texture and a boost of fiber, giving the muffins a chewy and slightly nutty taste.
  • All-purpose flour - The main structure-building ingredient, ensuring the muffins hold their shape while staying soft and tender.
  • Brown sugar - Adds moisture and a rich caramel-like sweetness due to its molasses content, enhancing the overall flavor.
  • White sugar - Balances the sweetness and helps with browning, giving the muffins a slightly crisp top.
  • Cinnamon - A warm spice that complements the banana.
  • Baking powder - A leavening agent that helps the muffins rise, making them light and fluffy.
  • Baking soda - Works alongside the baking powder and the acidity of the bananas to create an even better rise.
  • Salt - Enhances the flavors of the other ingredients.
  • Eggs - Provides structure, moisture, and helps bind the ingredients together for a smooth batter.
  • Oil - Keeps the muffins moist and tender without adding extra flavor—vegetable or canola oil works well. I have used vegetable oil here.
  • Milk - Adds moisture and helps create a soft crumb, ensuring the muffins don’t turn out too dense. I have used whole milk (full fat) for this recipe.
  • Vanilla extract - Enhances the overall flavor with a subtle warmth and sweetness.
  • Blackberries - Adds bursts of juicy sweetness and a slight tartness, complementing the bananas and cinnamon beautifully. I have used fresh blackberries here.

See recipe card for quantities.

How to Make Banana Blackberry Oatmeal Muffins

Making Banana Blackberry Oatmeal Muffins is simple! Mash the bananas, then mix the dry ingredients in one bowl and the wet ingredients in another. Combine everything, stirring gently to avoid overmixing, and fold in the blackberries. Scoop the batter into a lined or greased muffin tin and bake. The step-by-step images below help you for easy understanding to create these beautiful muffins!

A hand is mashing the banana with a fork in a white bowl for making the muffins.
In a bowl mash the bananas.
A hand is mixing the dry ingredients using a whisk for making the banana oatmeal muffins recipe.

Mix the dry ingredients in a medium bowl.

In a large white bowl the wet ingredients are being mixed with a whisk for making Banana Blackberry Oatmeal Muffins.

The liquid ingredients are mixed in a large bowl.

The wet and dry ingredients being mixed in white bowl for Banana Blackberry Oatmeal Muffins recipe.

Add the dry ingredients mixture to the wet ingredients mixture and mix them gently.

The flour coated blackberries are added to the muffin batter for making Banana Blackberry Oatmeal Muffins.

Add the blackberries and gently fold them into the muffin batter.

Banana Blackberry Oatmeal Muffin batter is poured in a muffin pan and ready to bake.

Top the muffins with oats and fresh blackberries before baking.

The muffins should be golden brown on top and slightly firm to the touch. Once baked, let them cool in the pan for a few minutes before transferring them to a wire rack to cool completely. This helps them set and keeps them from becoming too dense.

Now, they’re ready to enjoy! These muffins are soft, moist, and packed with flavor—perfect for breakfast, snacks, or even dessert. For extra guidance, check out the step-by-step video in the recipe card to see exactly how they come together. That’s it! A quick and delicious treat with minimal effort.

Group of banana blackberry oatmeal muffin placed in a warm backdrop  with fresh blackberries arround and banana is the behind.

Hint: Toss the sliced blackberries in a little flour before adding them to the batter. This helps prevent them from sinking to the bottom while baking.

Variations and Substitutions

These banana and blackberry muffins are a delicious and wholesome treat, perfect for breakfast or a snack, but these muffins can be tweaked to your specific tastes and needs:

  1. For a gluten-free treat, use gluten-free flour. Also, check to ensure that the oats you are using are gluten-friendly – not all of them are.
  2. Plant-based milk and substituting flax seeds for the eggs will keep these muffins vegan.
  3. Feel free to substitute maple syrup for sugar.
  4. Blackberries are a treasure, but if they are unavailable, strawberries, which ripen in April, and blueberries, which ripen in May, can easily be used.

Equipment

  • Mixing Bowls – For combining dry and wet ingredients separately before mixing them together.
  • Whisk & Spatula – A whisk helps blend the wet ingredients, while a spatula ensures everything is well mixed without overworking the batter.
  • Measuring Cups & Spoons – Essential for accurate ingredient measurements.
  • Muffin Pan – A standard 12-cup muffin pan is ideal for evenly sized muffins.
  • Muffin Liners– Use paper or silicone liners for easy removal and less cleanup.
  • Ice Cream Scoop  – For evenly filling the muffin cups.
Single banana blackberry oatmeal muffin placed in a plate with fresh blackberries arround and banana is the behind.

Storing Banana Blackberry Oatmeal Muffins

Room Temperature – These muffins stay fresh for up to 2 days when stored in an airtight container.

Refrigeration – Store in an airtight container in the fridge for up to 4 days to maintain freshness.

Freezing – Freeze for up to 3 months in a freezer-safe bag or container. Thaw at room temperature or warm in the microwave for a quick treat. Thats why I say its BEST for meal prep!

 The banana in the muffins helps keep them moist, even when stored for later!

Top Tips for Preparing the Best Banana Blackberry Muffins

  1. For the best-sized muffin, use an ice cream scoop to fill your muffin cup with batter.
  2. If you are a fan of large-domed muffin heads, here’s the secret:  Fill the muffin cup three-quarters to the top to get that large “muffin head” everyone loves. It also helps to fill only half the cups to release more heat into the muffin pan. That means making a second batch, but large muffin heads are desired by all.
  3. Bananas are at their sweetest when they are overripe. Even a few brown spots are fine.
  4. While this muffin is all about freshness, you can use frozen berries in an emergency. Ensure that they are completely thawed before incorporating them into the batter.
  5. If your muffins seem dry, take a few minutes off the baking time or lower the oven temperature a bit. These Banana Blackberry Oatmeal Muffins should be brimming with moisture.
Horizontal Image of banana blackberry oatmeal muffin placed in a plate with fresh blackberries arround and banana is the behind.

FAQ

Can I use frozen blackberries instead of fresh?

Yes you can! If using frozen blackberries, do not thaw them before adding to the batter to prevent excess moisture. Add them directly from the freezer to the muffin batter.

How can I make these banana muffins healthier?

Use whole wheat flour instead of all-purpose flour, replace sugar with honey or maple syrup, and opt for Greek yogurt instead of oil. These substitutions will help to create a healthier muffin version.

Can I make these blackberry muffins gluten-free?

Absolutely! Swap the all-purpose flour for a gluten-free flour blend and ensure your oats are labeled gluten-free.

Can I use a different fruit instead of blackberries and follow the same recipe?

Yes! Try blueberries, raspberries, chopped strawberries, or even diced apples for a tasty variation.

Why are my oatmeal muffins turned dense?

Over Mixing the batter can make muffins dense. Stir until just combined to keep them light and fluffy. Use a spatula to do this job!

Flatlay image of banana blackberry oatmeal  muffins in a warm background with fresh blackberries around.

Related

Looking for other recipes like this? Try these:

Pairing

These are my favorite dishes to serve with this Banana Blackberry Oatmeal Muffin recipe:

Square image of Single banana blackberry oatmeal muffin placed in a plate with fresh blackberries arround and banana is the behind.

Banana Blackberry Oatmeal Muffins

Abi Guna
Banana Blackberry Oatmeal Muffins are soft, moist, and naturally sweet, made with ripe bananas, juicy blackberries, and hearty oats. Perfect for breakfast or a wholesome snack! 
5 from 6 votes
Print Recipe Pin Recipe
Prep Time 10 minutes mins
Cook Time 20 minutes mins
Total Time 30 minutes mins
Course Breakfast, Dessert
Cuisine American
Servings 12 muffins
Calories 201 kcal

Equipment

  • Mixing Bowls
  • Whisk
  • Spatula
  • Ice cream scoop
  • Muffin Pan
  • Cooling rack

Ingredients
  

  • 2 medium ripe bananas mashed (about a cup)
  • 1 ½ cup rolled oats I have used whole grain rolled oats
  • 1 cup all-purpose flour + 2 tablespoons
  • ⅓ cup brown sugar packed
  • ⅓ cup granulated white sugar
  • 1 ½ teaspoon ground cinnamon
  • 1 ½ teaspoon baking powder
  • ½ teaspoon baking soda
  • ½ teaspoon salt
  • 2 medium eggs at room temperature
  • ⅓ cup oil any flavorless oil
  • ½ cup milk I have used whole milk
  • 1 teaspoon vanilla extract
  • 1 cup fresh blackberries cut into halved

Instructions
 

  • Preheat the oven to 375°F (190°C). Line a muffin tin with cupcake liners and set it aside.
  • In a medium bowl, mash the bananas with a fork until smooth. Set aside.
  • In a large bowl, whisk together the oats, 1 cup of flour, brown sugar, white sugar, baking soda, baking powder, cinnamon, and salt.
  • In another bowl, beat the eggs using a whisk until just mixed. Add the oil, milk, and vanilla extract, and stir to combine.
  • Add the mashed bananas to the wet ingredients and mix until smooth.
  • Gradually add the dry ingredients into the wet mixture, stirring until just combined.
  • Meanwhile, toss the blackberries with the remaining 2 tablespoons of flour to prevent them from sinking in the batter.
  • Gently fold in the blackberries, being careful not to overmix.
  • Divide the batter evenly into the muffin cups, filling each almost to the top.
  • Place the muffin tray in the oven and bake for 20–22 minutes, or until a toothpick inserted in the center comes out clean.
  • Allow the muffins to cool in the pan for 5 minutes, then transfer them to a wire rack to cool completely.
  • Enjoy warm or store in an airtight container for up to 3 days.

Video

Notes

  1. Lightly tossing blackberries in flour helps prevent them from sinking to the bottom of the muffins.
  2. Stir until just combined to keep the muffins light and fluffy. Overmixing can make them dense.
  3. The riper the bananas, the sweeter and more flavorful your muffins will be.
Keyword Baked, banana, blackberries, muffins, oatmeal

If you try this recipe, please leave a STAR rating in the comment section below! Your feedback helps a small blogger like me stay motivated in creating content for my readers. Also, feel free to follow me at Food Exit on Instagram, TikTok, and Pinterest for the latest recipe updates!

Banana Chocolate Chunk Muffins (Bakery style Recipe)

January 30, 2025 by Abi Guna 5 Comments

There’s nothing better than the smell of moist Banana Chocolate Chunk Muffins baking in the oven—don’t you agree? These muffins are soft, moist, and packed with rich chocolate chunks in every bite. They make an absolutely delicious treat, perfect for breakfast or a snack any time of the day! Recipe includes how-to do VIDEO in the recipe card!

Banana chocolate chunk muffins in a marble surface, banana in the background.

No more wasting overripe brown bananas—turn them into something delicious! These best ever muffins, made with ripe bananas for natural sweetness, are the great way to use up leftover bananas while treating yourself to a tasty dessert. Enjoy them warm with melted chocolate oozing out or grab one on the go—they’re a simple, satisfying treat for breakfast, snack time, or whenever you need a sweet bite!

Fan of banana muffins, have a look at my Banana Blackberries Oatmeal Muffins recipe!

Do you love a sweet breakfast like these muffins? Then you should try Oatmeal Mug Cake, Oatmeal Chocolate Chip Butterscotch Cookies, and Berry Chia Seed Pudding next!

[feast_advanced_jump_to]

I love the combination of dark chocolate and semi-sweet chocolate in my desserts, like my popular Dark Chocolate Almond Fudge. But if you don’t have both varieties, simply use 1 cup of semi-sweet chocolate chunks or 1 cup of dark chocolate or bittersweet chocolate  instead.

Whether you call them banana & chocolate muffins or a chocoholic’s dream, they’re perfect for breakfast, snacks, or even dessert. Instead of regular chocolate chips, this recipe uses choc chip chunks for an extra gooey texture that melts beautifully into the muffins. Easy to make and full of flavor, these muffins will quickly become a favorite in your kitchen!

Banana chocolate chunks muffins placed beautifully, banana placed in the side.

Why You’ll Love This Banana Chocolate Chunk Muffin Recipes

These banana and chocolate muffins are soft, moist, and loaded with rich chocolate chunks in every bite similar to chocolate chip banana bread. But that is not the only reason you will love the recipe, below are some more reasons to love this best muffin recipe you came across on the internet today!

  • Easy to Make – Simple ingredients and no fancy equipment needed—just a whisk to bring it all together to make fluffy muffins!
  • Naturally Sweetened – Ripe bananas add natural sweetness, reducing the need for extra sugar, which is always a plus!
  • Loaded with Chocolate – Rich chunks of chocolate that melt into every bite for a delicious treat—loved by both kids and adults!
  • Soft and Moist – These muffins are perfectly tender and stay fresh for days. A foolproof recipe every time!
  • Perfect Anytime – Enjoy them for breakfast, as a snack, or even as a dessert. Best way to use the overripped bananas.
  • Freezer-Friendly – Make a batch ahead and store them for a quick grab-and-go option. I do this all the time—it’s the BEST meal prep recipe for stress-free mornings!
Showing the inner texture of the banana chocolate chunks muffins where chocolate oozing out.

Chocolate Chunk Banana Muffins Are Best Served With

  • A Hot Cup of Coffee, Tea, or Latte – The rich chocolate and banana flavors pair perfectly with a warm drink. My Salted Caramel Latte recipe is a great match for these Banana Chocolate Chunk Muffins!
  • Milk – Classic combination for a creamy, refreshing contrast. My daughter loves this combination.
  • Peanut Butter or Almond Butter – A spread of nut butter enhances the flavor and adds a satisfying richness. A perfect way to enjoy these bakery style muffins!
  • Fresh Berries – Strawberries, raspberries, or blueberries add a fresh, tart contrast.

Why Use Chocolate Chunks Instead of Chocolate Chips in Muffins?

While chocolate chips work well, chocolate chunks take these easy Banana Muffins to the next level! Here are some reasons.

  1. Chocolate chunks melt more evenly and create gooey chocolate pockets, while chocolate chips hold their shape due to stabilizers.
  2. Chunks provide a more intense chocolate experience in every bite since they are often made from higher-quality chocolate.
  3. The irregular shape of chunks gives muffins a more rustic, homemade, and bakery-style appearance.

Ingredients

Ingredients of banana chocolate chunks muffins placed in a marble surface.
  • All-purpose flour – Provides the structure and base for the muffins, giving them a soft yet sturdy texture.
  • Baking powder – Acts as a leavening agent to help the muffins rise and become light and fluffy.
  • Baking soda – Works alongside the baking powder to create an airy texture.
  • Salt – Enhances the overall flavor by balancing the sweetness and bringing out the richness of the chocolate.
  • Banana- Adds natural sweetness, moisture, and a rich banana flavor to the muffins.
  • White sugar – Sweetens the muffins while helping to create a tender crumb.
  • Greek yogurt - Provides moisture and a slight tang, making the muffins extra soft while also enhancing their structure.
  • Oil - Keeps the muffins moist and tender; options like vegetable oil, canola, or avocado oil work well. I haven't tried with olive oil.
  • Vanilla extract – Enhances the aroma and deepens the flavor of the muffins.
  • Eggs - Helps bind the ingredients together while contributing to the muffins' light and fluffy texture.
  • Dark chocolate chunks – Adds intense, slightly bitter chocolate flavor that balances the sweetness of the muffins.
  • Semi-sweet chocolate chunks - Creates melty chocolate pockets throughout the muffins, adding texture and extra chocolatey goodness.

See recipe card for quantities.

Close up shot of chocolate oozing from the banana chocolate chunks muffins.

Substitutions

  • Flour - Swap all-purpose flour with whole wheat flour for a healthier option or gluten-free flour blend for a gluten-free version.
  • Sugar - Use coconut sugar, honey, or maple syrup for a natural sweetener.
  • Greek Yogurt - Substitute with sour cream, regular yogurt for similar creamy texture.
  • Oil - Swap for melted butter, coconut oil, or applesauce for a lower-fat version.
  • Eggs - Use flax eggs (1 tablespoon flaxseed + 2.5 tablespoon water per egg) or unsweetened applesauce (¼ cup per egg) for an egg-free version.
  • Chocolate Chunks - Substitute with chocolate chips, white chocolate, or chopped nuts for variety.

How to make Banana Chocolate Chunk Muffins

These Chocolate Chip Banana Muffins are the perfect mix of rich chocolate and naturally sweet bananas, creating a soft, moist, and flavorful treat. The combination of dark and semi-sweet chocolate chunks melts beautifully into the muffins, making every bite extra indulgent.

Using overripe bananas not only enhances the sweetness but also adds moisture from the mashed bananas, ensuring a tender texture without needing extra butter or oil. Whether you’re a fan of chocolatey desserts or just looking for a way to use up those ripe bananas, this recipe is a must-try!

What makes these muffins even better is how simple they are to prepare. With just a few basic ingredients and minimal prep time, you can whip up a batch in no time. The muffins rise beautifully in the oven, thanks to a quick temperature adjustment that gives them a bakery-style domed top.

They’re perfect for breakfast, an afternoon snack, or a sweet treat after dinner. Plus, they store well, making them great for meal prep. Enjoy them fresh out of the oven or warm them up later for that just-baked goodness!

The step-by-step instructions help you make perfectly moist chocolate chunk muffins every time! (Don't forget to checkout the banana chocolate chunk muffins recipe VIDEO in the recipe card)

Dry ingredients added to a white bowl to make banana chocolate chunk muffins.

Dry ingredients add the bow; flour, baking powder, baking soda and salt.

Banna being mashed with a fork in a large bowl for Banana Chocolate Chunks Muffins

In a large bowl add the bananas and mash it using a fork.

Wet ingredients added and mixed with a whisk for Banana Chocolate Chunks Muffins recipe.

Add Greek yogurt, oil, sugar and Vanilla extract. Mix well along with the eggs.

Dry ingredients add the wet mixture for Banana Chocolate Chunks Muffins recipe.

Dry ingredient mixture added the wet ingredients. Mix with a spatula.

Chocolate chunks added to the muffin batter.

Add the chocolate chunks to the muffin batter and fold them gently.

Banana Chocolate Chunks Muffin batter added to the muffin panusing an ice cream scoop.

Using an ice cream scoop divide the batter equally into the muffin pan cavities.

(Optional: You can add turbinado sugar on muffin tops or extra chocolate chunks for that gooey part). Place the muffin tray in the preheated oven and bake at 425°F (218°C) for 5 minutes. This initial high heat helps the muffins rise quickly, creating a beautiful domed top. After 5 minutes, reduce the oven temperature to 350°F (177°C)and continue baking for another 13–15 minutes. The muffins are done when a toothpick inserted into the center comes out clean or with just a few moist crumbs.

Once baked, remove the tray from the oven and let the muffins cool in the pan for about 5 minutes—this helps them set and makes them easier to handle. Then, carefully transfer them to a wire rack to cool completely. This step ensures they don’t become soggy from trapped heat. Enjoy warm, or store them for later to enjoy a delicious treat anytime! 

Banana Chocolate chunk Muffins baked in a muffin pan close up shot.

Hint: If you don’t have cupcake liners, simply grease the muffin tin with baking spray or a light coat of butter to prevent sticking. This gives the muffins a slightly crispier edge while still making them easy to remove after baking! 

Variations

  • For Gluten-Free Versions – Use a gluten-free flour blend instead of all-purpose flour for a gluten-free banana muffins version.
  • Nutty Variations - Add ½ cup chopped walnuts, pecans, or almonds for extra crunch. I love crunchy top muffins!
  • Peanut Butter Banana Muffins – Swirl in ¼ cup peanut butter for a rich, nutty flavor.
  • Double Chocolate Banana Muffins – Mix 2 tablespoons cocoa powder into the batter for an extra chocolatey treat. Who doesn't love extra chocolate!

Equipment

  • Mixing Bowls – One for dry ingredients and another for wet ingredients.
  • Fork – To mash the bananas until smooth.
  • Whisk – For mixing the wet ingredients.
  • Spatula  – To fold in the chocolate chunks and gently mix the batter.
  • Measuring Cup & Spoons – For accurate ingredient measurements.
  • Muffin Pan – A standard 12-cup muffin pan for baking.
  • Muffin Liners – To prevent sticking and make cleanup easier.
  • Ice Cream Scoop  – For evenly filling the muffin cups.
Stack of banana chocolate chunks muffins one above the other in a marble surface.

How to Store Banana Chocolate Chip Muffins

Room Temperature - Store your delicious banana muffins in an airtight container and keep at room temperature for up to 3 days in a cool, dry place.

Refrigerator - If storing longer, place muffins in an airtight container and refrigerate for up to 1 week. Warm them in the microwave for 10–15 seconds before serving.

Freezer  - Wrap each muffin individually in plastic wrap or freezer bag and place them in a freezer-safe bag. Freeze for up to 3 months. To reheat, microwave a frozen muffin for 30 seconds to 1 minute, or let it thaw at room temperature.

My Top Tips for Preparing Banana Chocolate Chunk Muffins

These simple tips will help you achieve bakery-style, soft, and chocolate-packed banana muffin recipe every time! 

  1. Use Overripe Bananas – The riper the bananas, the sweeter and more flavorful your muffins will be. Look for bananas with brown spots!
  2. Mash Bananas Well – Mash until smooth to ensure even distribution in the batter for soft and moist muffins.
  3. Don’t Overmix the Batter – Stir just until combined; overmixing can lead to dense, tough muffins instead of light and fluffy ones.
  4. Room Temperature Ingredients – Use room-temperature eggs and Greek yogurt for a smoother batter and even baking.
  5. Start with a High Oven Temperature – Baking at 425°F (218°C) for the first 5 minutes helps create a bakery-style muffin top. Then, reduce the temperature for even baking.
  6. Fill Muffin Cups Almost to the Top – This gives the muffins a nice rise and a domed top.
  7. Let Muffins Cool Before Removing – Allow muffins to cool for 5 minutes in the pan, then transfer them to a wire rack. This helps them set properly.
Horizontal image of banana chocolate chunk muffins placed beautifully on a marble surface, banana's in the background.

FAQ

Can I use frozen bananas?

I always prefer using fresh bananas. But, Yes frozen bananas work well too. Thaw frozen bananas completely, drain any excess liquid, and mash them before using.

What type of chocolate works best?

Dark, semi-sweet, or even milk chocolate chunks work great. For extra richness, use a combination of chocolate chips and chopped chocolate bars like I did in this recipe.

Why did my banana muffins turn out dense?

Over Mixing the batter can lead to dense muffins. Stir just until the ingredients are combined for a light, fluffy texture.

Can I make these muffins without eggs?

Yes! Substitute each egg with ¼ cup unsweetened applesauce or a flax egg (1 tablespoon flaxseed meal + 2.5 tablespoons water).

Can I make these muffins gluten-free?

Yes! Swap the all-purpose flour for a 1:1 gluten-free flour blend. Avoid almond or coconut flour, as they absorb moisture differently.

Related

Looking for other recipes like this? Try these:

Pairing

These are my favorite dishes to serve with Banana Chocolate Chunks Muffins recipe:

Banana chocolate chunk muffins stacked one above the other.

Banana Chocolate Chunk Muffins

Abi Guna
These Banana Chocolate Chunk Muffins are soft, moist, and packed with rich, melty chocolate in every bite. Easy to make and freezer-friendly, these muffins are a delicious way to use up overripe bananas while satisfying your sweet tooth!
5 from 3 votes
Print Recipe Pin Recipe
Prep Time 10 minutes mins
Cook Time 20 minutes mins
Total Time 30 minutes mins
Course Breakfast, Dessert
Cuisine American
Servings 12 Muffins
Calories 237 kcal

Equipment

  • Whisk
  • Muffin Pan
  • Cooling rack
  • Mixing Bowls
  • Measuring spoons and cups

Ingredients
  

  • 2 cups all-purpose flour
  • 1 ½ teaspoon baking powder
  • ½ teaspoon baking soda
  • ½ teaspoon salt
  • 2 medium ripe bananas mashed (about 1 cup)
  • ¾ cup granulated white sugar
  • ½ cup Greek yogurt at room temperature
  • ⅓ cup oil any flavorless oil
  • 1 tablespoon vanilla extract
  • 2 eggs at room temperature
  • ½ cup dark chocolate chunks
  • ½ cup semi- sweet chocolate bar roughly chopped into chunks

Instructions
 

  • Preheat the oven to 425°F (218°C). Line a muffin tin with cupcake liners and set it aside.
  • In a medium bowl, whisk together the flour, baking soda, baking powder, and salt.
  • In a large bowl, add the banana and mash it with a fork until smooth.
  • Add the sugar, Greek yogurt, oil, and vanilla extract to the mashed banana and mix well.
  • Add the eggs one at a time, whisking until just combined.
  • Gradually add the dry ingredients into the wet mixture, stirring until just combined.
  • Gently fold in the chocolate chunks, being careful not to overmix.
  • Divide the batter evenly into the muffin cups, filling each almost to the top.
  • Place the muffin tray in the oven and bake at 425°F (218°C) for 5 minutes. Then, reduce the oven temperature to 350°F (177°C) and bake for an additional 13–15 minutes, or until a toothpick inserted in the center comes out clean.
  • Allow the muffins to cool in the pan for 5 minutes, then transfer them to a wire rack to cool completely.
  • Enjoy warm or store in an airtight container for up to 3 days.

Video

Notes

  1. Use overripe bananas for the best sweetness and moisture.
  2. Avoid overmixing the batter to keep the muffins light and fluffy.
  3. Starting at 425°F  for 5 minutes helps the muffins rise quickly, giving them a bakery-style dome.
Keyword banana, breakfast, chocolate, easy desserts, muffins

If you try this recipe, please leave a STAR rating in the comment section below! Your feedback helps a small blogger like me stay motivated in creating content for my readers. Also, feel free to follow me at Food Exit on Instagram, TikTok, and Pinterest for the latest recipe updates!

Pesto Butter Salmon (Easy 20-Minute Dinner Recipe)

January 26, 2025 by Abi Guna 7 Comments

Pesto Butter Salmon is a dish full of rich and bold flavors. The salmon is tender and flaky, with a buttery smoothness that melts in your mouth. The homemade pesto adds a fresh, garlicky, and slightly nutty taste that perfectly complements the richness of the salmon. Together, the butter and pesto create a creamy, flavorful coating that makes every bite irresistible.

Baked  Pesto Salmon Butter in a baking dish close up shot ganrished with basil and lemon wedges.

This Pesto Butter Salmon recipe is perfect for busy evenings or special dinners. It’s simple to make and tastes amazing. With just a few ingredients; fresh salmon, basil pesto, and butter—you can whip up a dish that feels fancy but is easy to prepare at home. The salmon cooks to perfection, blending beautifully with the fresh, garlicky pesto and the richness of butter. Whether you need a quick meal or something to impress your guests, this recipe is a great choice. It’s easy, versatile, and bound to become a favorite in your kitchen.

If you've been following me for a while, you know I’m a big fan of pesto sauce. One of the most popular recipes on my blog is my Pesto sauce without pine nuts. And If you are looking for Substitutes for pine nuts in pesto check that too! Using that sauce, I created my kids' favorite, Pesto Ricotta Pasta, which is always a huge hit. Serve it alongside Air Fryer Sweet Potato Cubes or Hot Honey Brussels Sprouts for a flavorful and balanced dinner. Are you a fan of high-protein salmon recipes? Then you should definitely try my Blackened Salmon Bites and Salmon Kale Quinoa Salad recipes!

[feast_advanced_jump_to]
Pesto Butter Salmon served in a white oval platter garnished with basil and lemon wedges.

Why You Will Love This Recipe for Baked Salmon with Pesto Sauce

  • Quick and Easy: The indulgent savoriness of salmon meets the rich indulgence of pesto butter for true baked goodness that can be prepared in 15 minutes.
  • Rich and Unique Flavor: It is extraordinary as it blends butter and pesto to create a unique and distinctive salmon topped with compound butter. 
  • Healthy and Delicious: Packed with omega-3 fatty acids and nutrients, balancing richness with health benefits. There's lots of rich butter here, and it’s all healthy.
  • Flavor-Infused Perfection: Garlicky pesto and butter cover the salmon while it bakes and infuses it with amazing flavor.
  •  Versatile Dinner Option: Salmon, the health-giving fish with its abundance of omega-3 fatty acids, is welcome at any dinner table.

How to Make Pesto Butter

Pesto butter recipe is so simple and easy to make, and all you need are just two ingredients: pesto sauce and butter. Place the softened butter in a small bowl and add the pesto sauce. Mix them together until smooth and well combined. Use the pesto butter right away to top salmon, pasta, bread, or vegetables. You can also wrap it in plastic wrap, roll it into a log, and refrigerate it for later use. This quick and flavorful mixture adds a burst of taste to any dish!

Flaky pesto butter salmon in a serving plate with a fork.

What to Serve with Pesto Butter Salmon

Salmon with Pesto Sauce is easily adaptable to many side dishes. 

  • Garlic Mashed Potatoes: Go bold with some garlic or Boursin mashed potatoes.
  • With Pasta and Grains: It will stand up to creamy pasta dishes like Ricotta Pesto Pasta and rice dishes.
  • Roasted Vegetables: It is also an excellent match for Roasted carrots and cauliflower, Sweet potato wedges, Roasted carrots and asparagus, or Hot honey brussel sprouts for a balanced and hearty side.
  • Desserts: This rich, buttery dish deserved a sweet dessert, such as mint chocolate brownies or a no-bake cheesecake.

Salmon and Its Health Benefits

Salmon isn't just delicious—it’s packed with health benefits for you and your family, thanks to its rich content of omega-3 fatty acids. Here's how salmon supports your health:

Health Benefits

  • Lowers Cholesterol: Helps maintain healthy cholesterol levels.
  • Regulates Blood Pressure: Supports cardiovascular health.
  • Reduces Stroke Risk: Contributes to improved blood flow and vascular health.
  • Heart Health: Promotes overall heart function and reduces the risk of heart disease.
  • Healthy Skin: Omega-3s and essential nutrients nourish and protect your skin.
  • Stronger Bones: Provides vitamin D and other minerals essential for bone health.
Salmon Pesto butter served in a plate with roasted carrots and asparagus in a orange plate.

How to Make Homemade Pesto Sauce

I’ve crafted a Pesto sauce recipe without pine nuts, using walnuts as a budget-friendly alternative. If you’re looking for a classic basil pesto sauce, follow the recipe below to create your own:

Ingredients

  • 3 ½ cups fresh basil leaves
  • 2 cups toasted, chopped walnuts (or substitute with pine nuts or your favorite nuts)
  • 5 garlic cloves
  • ¼ cup grated Parmigiano-Reggiano (use genuine block cheese, not pre-grated packages; vegans can substitute with nutritional yeast)
  • ½ tsp lemon juice (or to taste)
  • 1 cup oil (coconut or olive oil works well)
  • Salt and pepper to taste

Directions

  1. Combine Ingredients: Puree the basil, nuts, and garlic in a food processor until finely chopped.
  2. Add Lemon Juice: Drizzle lemon juice over the mixture for a bright, fresh flavor.
  3. Incorporate Oil: Slowly add the oil while processing until the mixture achieves a smooth consistency.

Season: Adjust salt and pepper to taste.

Ingredients You’ll Need

Pesto Butter Salmon Recipe Ingredients laid out.
  • Salmon fillets (cut into four portions)- Salmon is the star of the dish, providing a rich source of omega-3 fatty acids, protein, and a buttery texture that pairs perfectly with pesto. Cutting it into portions ensures even cooking and ease of serving.
  • Salt - Enhances the natural flavors of the salmon and balances the richness of the butter and pesto.
  • Black pepper - Adds a mild kick and earthy undertones to complement the savory profile of the dish.
  • Unsalted butter - Softened butter blends effortlessly with pesto, creating a creamy topping that infuses the salmon with richness and moisture.
  • Basil pesto - The vibrant, garlicky, and herbaceous flavor of pesto adds depth and complements the natural flavor of the salmon.
  • Lemon juice - Brightens the dish with a tangy note, balancing the richness of the butter and pesto.

See recipe card for quantities.

How to Make Pesto Butter Salmon

Looking for a delicious and easy recipe for salmon with pesto? This dish combines tender, flaky salmon with the rich, herby flavors of pesto and creamy butter. Check out the step-by-step instructions below to make it for perfect weeknight meal.

Pesto sauce and butter in a bowl.

In a small bowl combine pesto sauce and butter.

Pesto butter in a bowl.

Mix until well combined. Salmon Pesto Butter is ready , set it aside.

Seasoned salmon filets with salt and pepper in a baking dish.

Season the salmon with salt and pepper.

Pesto butter added to the salmon and placed in a baking dish.

Pesto butter added to the salmon generously on top.

Bake the salmon in the preheated oven for 12–15 minutes, or until it is fully cooked and flakes easily with a fork. The cooking time may vary slightly depending on the thickness of the fillets, so keep an eye on them to ensure they are perfectly done. Once baked, carefully transfer the salmon to serving plates to maintain its shape and juices. Garnish with fresh lemon slices for a bright, tangy flavor and a sprinkle of fresh basil for added aroma and color. Serve it right away alongside your favorite side dishes, and enjoy a delicious, wholesome meal that’s sure to impress!

Baked Pesto butter salmon in a baking dish. Garnished with basil. Lemon wedges in a bowl aside.

Substitution and Variations for Pesto Butter Salmon

  • Fish Alternatives: Sure, you want to use salmon for your salmon with pesto butter, but why not try this recipe with trout, halibut, or cod, as well? Play with the different flavors and adjust the cooking time according to the fish’s thickness.
  • Seasoning Options:Experiment with the seasonings when preparing pesto and salmon. Italian seasoning or a bit of garlic powder can add some zest. 
  • Crunchy Topping:  For a bit of crunch, drizzle the salmon with panko crumbs before placing it in the oven.
  • Lighter Option: This is a very buttery recipe, but you can also prepare it with olive oil.
  • Pesto Butter Versatility: Pesto butter is heavenly on salmon, but it can also be used with pasta, over meat, and as a spread over rolls and bread.

Equipment

  • Baking Dish: To bake the salmon evenly and retain its juices.
  • Measuring Cups and Spoons: Ensures accurate measurements of ingredients.
  • Mixing Bowl: To combine the pesto butter.
  • Silicone Brush or Spoon: To spread the pesto butter evenly over the salmon.

How To Store Cooked Salmon

Refrigeration: Place any leftover pesto butter salmon (you should be so lucky) in an airtight container and store it in the refrigerator for two or three days. You don’t want to store any fish longer than that. 

Freezing: If you are freezing your salmon, let it cool before you do, then wrap it in an airtight bag. It will freeze for three months, but its natural texture may change somewhat.

Reheating: To reheat the salmon, thaw it overnight in the refrigerator. Place it in a baking dish and warm it in the oven for 10 minutes at 400 degrees.

CLose up shot of pesto butter with salmon and garnished with lemon wedges in a baking dish.

Tips for Perfect Pesto Butter Salmon

  1. Make sure the salmon is patted dry for crispier skin.
  2. Use the best pesto you can find. Quality matters. Try the homemade version listed below. It’s my favorite.
  3. Salmon, like most fish, dries easily. Keep an eye on it while it bakes and use a food thermometer to ensure it reaches 125 degrees.

I probably don’t have to emphasize to my readers that homemade tends to be much tastier than store bought. While decent pesto sauce is readily available at any market, try making your own in just a few steps. This recipe will make approximately 16 servings. Basil is the main ingredient, of course, but the food police won’t come knocking if you run short and need to add a bit of spinach.

FAQ

Can I use frozen salmon for this recipe?

Yes, frozen salmon works well. Thaw it completely in the refrigerator before cooking for best results. Use a kitchen towel to remove the excess moisture before using it for the recipe.

How do you know the salmon is cooked perfectly?

Salmon is done when it flakes easily with a fork and has an internal temperature of 145°F (63°C).

Can I substitute the butter with another option?

Yes, olive oil is a great substitute for butter, offering a lighter and healthier alternative.

What if I don’t have basil pesto?

I have already shared my version of basil pesto without pine nuts, but you can make a quick substitute by blending fresh basil, garlic, olive oil, and Parmesan cheese, or try using store-bought pesto alternatives like sun-dried tomato or spinach pesto.

Can I make this recipe dairy-free?

Absolutely! Replace butter with a plant-based alternative and use nutritional yeast instead of Parmesan cheese in the pesto.

Can I prepare this dish in advance?

Yes, you can prepare the pesto butter mixture and coat the salmon ahead of time. Store it in the refrigerator and bake just before serving.

How do I make this pesto butter salmon gluten-free?

The recipe is naturally gluten-free, but double-check your pesto to ensure it doesn’t contain any gluten-based ingredients.

What is pesto butter salmon?

Pesto butter salmon is a simple dish where salmon is topped with a mixture of butter and pesto, then baked or pan-seared until tender and flavorful.

Can I use store-bought pesto for this recipe?

Yes! Store-bought pesto works perfectly for pesto butter salmon, but homemade pesto will give a fresher flavor.

Is pesto butter salmon healthy?

Yes, it’s a protein-rich and healthy meal, especially when paired with vegetables. Salmon is high in omega-3 fatty acids and nutrients.

Horizontal shot of pesto butter salmon served with roasted veggies. Pesto sauce placed in a bowl aside.

Related

Looking for other recipes like this? Try these:

Pairing

These are my favorite dishes to serve with this pesto butter salmon recipe:

CLose up shot of pesto butter salmon garnished with basil and lemon wedges.

Pesto Butter Salmon

Abi Guna
Pesto Butter Salmon is a quick and flavorful dish featuring tender salmon topped with a creamy blend of pesto and butter. It’s simple to make, rich in taste, and perfect for any meal.
5 from 4 votes
Print Recipe Pin Recipe
Prep Time 10 minutes mins
Cook Time 15 minutes mins
Total Time 25 minutes mins
Course Main Course
Cuisine American, Italian
Servings 4 people
Calories 345 kcal

Equipment

  • Baking Dish
  • Mixing Bowl
  • Measuring Spoons

Ingredients
  

  • 1 pound salmon fillets cut into four portions
  • ½ teaspoon salt
  • ½ teaspoon black pepper
  • 3 tablespoons unsalted butter softened
  • 4 tablespoons basil pesto homemade or store-bought
  • 1 teaspoon lemon juice
  • Lemon slices for garnish
  • Fresh basil for garnish

Instructions
 

  • Preheat your oven to 375°F (190°C). Grease a baking dish with cooking spray and set it aside.
  • Pat the salmon fillets dry with a paper towel, then place them in the prepared baking dish. Season both sides of the salmon with salt and pepper.
  • In a small bowl, mix the softened butter, pesto, and lemon juice until well combined. Spread a generous layer of the pesto butter over the top of each fillet.
  • Bake in the preheated oven for 12-15 minutes, or until the salmon is fully cooked and flakes easily with a fork.
  • Carefully transfer the salmon to plates and garnish with lemon slices and fresh basil. Serve immediately with your favorite sides and enjoy!

Notes

  • Fresh, wild-caught salmon works best for optimal flavor and texture, but frozen salmon is a great option if thawed properly.
  • Adjust baking time based on the thickness of the salmon fillets to avoid overcooking.
  • Salmon is done when it flakes easily with a fork and reaches an internal temperature of 145°F (63°C).
  • Pesto Butter Salmon pairs well with roasted vegetables, rice, pasta, or fresh salads, making it a versatile dinner option.
Keyword Main Dish, Pesto, Salmon

Blackened Salmon Bites (Crispy, Spicy & Easy Recipe)

January 23, 2025 by Abi Guna 17 Comments

If you’re a fan of seafood recipes that are simple yet bursting with flavor, try this easy Blackened salmon bites recipe—it’s sure to become a favorite in your kitchen. Coated with a bold blend of spices and baked to perfection, each bite is smoky, crispy on the outside, and tender on the inside.

Blackened salmon bites in a bowl with white rice, ganrished with parsley and served with lemon wedges on the sides.

This dish brings a touch of Creole-inspired flair to your table, making it a fantastic option for weeknight dinners, appetizers, or even meal prep. Ready in just 15 minutes, these salmon bites are a quick, delicious, and healthy way to elevate your seafood game.

What makes these Blackened Salmon Bites stand out is their bold seasoning. A blend of smoked paprika, garlic powder, and cayenne pepper creates a rich, savory crust that perfectly complements the natural sweetness of the salmon. The high-heat baking method ensures that the salmon stays juicy while achieving the crispy, caramelized exterior that makes blackened dishes so irresistible.

If you’re looking for a flavorful and easy way to enjoy salmon, try my Salmon Kale Quinoa Salad, Salmon Scampi and Pesto Butter Salmon —it’s perfect for meal prep! These flavorful blackened salmon bites make a perfect addition to any quick and satisfying meal. Pair them with something fresh like the Hummus Bagel or Chicken Salad Melt Sandwich. And to finish things off, add a sweet treat like Brownie Cake Pops or the rich Nutella Covered Strawberries for a complete and delicious spread.

[feast_advanced_jump_to]

Why You Will Love This Blackened Salmon Bites Recipe

  • Quick and Easy: Ready in just 15 minutes, these salmon bites are perfect for a quick meal or an impressive appetizer.
  • Bold Flavors in Every Bite: Blackened Baked Salmon Bites are the epitome of bold flavors. Cayenne pepper and paprika are blended with other seasonings that blacken the salmon and caramelize the crust to develop a crisp, dark, and savory coating. 
  • Fiery Smoky Delight: These spicy salmon bites create a fiery smoky dance on your tongue. The gentle, sweet richness of the salmon and the heat generated by spices and herbs come together as a seafood masterpiece. Since these are small “bites” instead of fillets, the spices are stretched over a greater surface area for the best effect.
  • Inspired by Creole Cuisine: New Orleans is known for its spicy Creole offerings. It is the logical birthplace of the hot cubed salmon recipes which use a higher-than-usual temperature to achieve the delicious blackening.
CLose up shot of blackened salmon bites.

How Nutritious is Salmon?

We know how delicious baked salmon bites are. Most people love it. Interestingly, it is also one of the healthiest foods available. A simple serving is a mere 200 calories, while wild salmon has even fewer calories – 180. Any salmon is a terrific source of vitamin 12, vitamin D, potassium, and iron. 

Due to all these nutrients, and the amount of healthy omega-3 fatty acids salmon contains, this easy salmon bites recipe is good for any number of physical disorders, including artery inflammation, blood pressure, and cholesterol levels. It can protect against strokes, heart attacks, and dementia.

It’s hard to argue against the power of salmon.

In a oval platter the blackened salmon bites are arranged to serve.

What to Serve with Your Baked Blackened Salmon Bites

These salmon bites are versatile and pair well with a variety of dishes. Whether you serve them with roasted vegetables, creamy pasta, or use them as a topping for salads and tacos, these salmon bites are incredibly versatile. They’re also perfect for meal prepping, as they store well and reheat beautifully. Here are some great options to complement their bold, smoky flavor:

  • Hot Honey Brussels Sprouts: The sweet and spicy glaze on roasted Brussels sprouts perfectly complements the smoky blackened salmon, creating a harmonious balance on your plate.
  • Salad Topping: Add them to a fresh salad, like the Salmon Kale Quinoa Salad. This nutritious combination of kale, quinoa, and salmon gets an extra smoky kick with the blackened salmon bites.
  • Roasted Vegetables: Pair them with roasted vegetables like Roasted Carrots and Asparagus or Roasted Carrots and Cauliflower for a flavorful and wholesome side.
  • Cucumber and Avocado: A refreshing side of cucumber and avocado offers a cool contrast to the spiciness of the salmon bites.
  • Fish Tacos: Use the salmon bites as the main filling for delicious and easy fish tacos. Add your favorite toppings for an elevated taco night.
  • Creamy Pasta: Serve alongside a creamy pasta dish like the Pesto Ricotta Pasta for a comforting and indulgent pairing.

Ingredients

If you’re wondering how to cook blackened salmon, it’s easier than you might think! Simply prepare the seasoning, toss the salmon in it, and bake to perfection. Check out the ingredients below to create this fantastic recipe!

Ingredients laid out for blackened salmon recipe.
  • Salmon fillet, skinless, cut into 1-inch cubes: The star of the dish, salmon provides a rich, buttery flavor and tender texture that works beautifully with the bold blackened seasoning. Cutting it into cubes ensures even cooking and maximizes the seasoning coverage.
  • Olive oil: Helps the spices adhere to the salmon and adds a subtle richness, ensuring the cubes stay moist during baking.
  • Smoked paprika: Brings a smoky depth of flavor and vibrant color, essential for achieving that classic blackened taste. If you don't have smoked paprika you can also use regular paprika instead.
  • Garlic powder: Adds a savory, aromatic flavor that enhances the overall seasoning blend.
  • Onion powder: Complements the garlic powder with a mild, slightly sweet flavor.
  • Thyme: Contributes an earthy, herbaceous note that balances the boldness of the spices.
  • Oregano: Adds a subtle, peppery warmth and enhances the complexity of the seasoning blend.
  • Brown sugar: Provides a hint of sweetness that contrasts beautifully with the smoky and spicy elements, helping with caramelization. 
  • Cayenne pepper: Delivers a touch of heat, giving the salmon bites their signature kick.
  • Salt: Enhances the natural flavors of the salmon and the spices, ensuring a well-balanced taste.
  • Black pepper: Adds a mild, earthy spice that complements the seasoning without overpowering it.
  • Lemon wedges: The fresh lemon juice adds a bright, zesty finish that cuts through the richness of the salmon and spices.
  • Parsley: Provides a fresh, vibrant pop of color and a mild herbaceous flavor to balance the bold seasoning.

See recipe card for quantities.

How to make Blackened Salmon Bites Recipe

These bites are also a fantastic option as a baked salmon appetizer, perfect for entertaining or serving at casual gatherings. Whether you’re preparing them for a dinner party or a quick snack, they’re sure to impress with their rich flavor and irresistible texture. Follow the step-by-step instructions below to make them in just a few simple steps!

In a small white bowl the seasonings are combined for blackened salmon recipe.

Combine all spices into a same bowl and combine thoroughly.

Salmon cubes in a white bowl.

Using a sharp knife cut the salmon into equal cubes and add it to bowl.

Blackened seasoning added to the salmon cubes.

Massage the salmon with olive oil and add the prepared seasonings. Toss it.

Seasoned salmon bites ready to bake in a baking tray.

Arrange the salmon bites in a baking tray and bake.

Place the prepared salmon bites in the preheated oven and bake for 12-15 minutes. Keep an eye on them as they cook, and check for doneness by gently pressing with a fork—the salmon should flake easily and appear opaque throughout. Cooking times may vary slightly depending on the thickness of the salmon pieces, so it’s a good idea to check a few minutes early to avoid overcooking. For best results, ensure the edges are crisp and caramelized while the interior remains tender and juicy. Once done, remove the salmon from the oven and let it rest for a minute before serving.

Baked blackened salmon bites in a baking tray.

Substitutions and Variations for Baked Blackened Salmon Bites

  • Alternative Fish Options: This baked blackened salmon recipe can be quite flexible. If salmon is not available, try using steelhead trout, which is milder than salmon. 
  • Spice Substitutions: The spices are the key to creating salmon bites. However, don’t let the lack of appropriate spices prevent you from making this recipe with sriracha sauce or sweet chili sauce. Both are ready-to-buy sauces that bring a natural fire to any dish. Cooking a great meal is all about being flexible.
  •  Flexible Protein Choices: If you don’t have salmon, try cutting up leftover chicken and seasoning it with the same spices for a flavorful twist.

Equipment

  • Mixing Bowl: For combining the salmon cubes with olive oil and seasoning.
  • Baking Sheet: A large, rimmed baking sheet for evenly spreading the salmon cubes during baking.
  • Parchment Paper or Aluminum Foil: To line the baking sheet for easy cleanup and to prevent sticking.
  • Sharp Knife and Cutting Board: For trimming and cutting the salmon into evenly sized cubes.
  • Measuring Spoons: To accurately measure the spices and seasonings for the recipe.
  • Tongs or Spatula: For tossing the salmon cubes with seasoning and for flipping them.
In a white bowl the blackened salmon bites served over white rice, garnish with parsley and lemon wedges.

Storing Baked Blackened Salmon Bites

Refrigeration: Salmon is far too delicious to waste a single bite. Store any leftovers in an airtight container in the refrigerator for four days.

Freezing: If you wish to store the salmon longer, keep it in the freezer for 4 months.

Reheating Tip: Reheat gently in the oven, air fryer, or skillet to maintain their flavor and texture.

Key Tips for Blackened Salmon Bites:

Crispy salmon bites will always be a flavor delight, but you can elevate even these to be their best with just a few simple guidelines.

  1. Fresh salmon will invariably taste better.
  2. Ensure the bites are cut evenly to achieve an even baking.
  3. Do not crowd the baking dish when cooking the salmon bites.
  4. Fish can dry out very quickly. Watch your cooking temperature carefully to get crispy on the outside and juicy and flaky on the inside.
  5. Serve the salmon bites with sauces such as an inviting remoulade, a garlic aioli, or a spicy mayonnaise (add some sriracha to the mayo).
  6. Herbs and spices are the key to a winning recipe for salmon bites. Experiment until you get the best combination for you. Since cayenne is a key spice, adjust it to your desired heat level. The heat can be countered by the brown sugar, and that, too, can be balanced according to taste.
Blackened salmon bites in a close up shot ganrished with parsley.

FAQ

Can I use frozen salmon for this recipe?

Yes, you can use frozen salmon. Make sure to thaw it completely and pat it dry before cutting it into cubes and seasoning.

What if I don’t have smoked paprika?

Regular paprika can be used as a substitute, though it won’t have the same smoky flavor. You can add a small amount of chipotle powder for smokiness.

Can I cook this blackened salmon on the stovetop instead of baking?

Absolutely! Heat a non-stick skillet over medium-high heat, add a bit of oil, and sear the salmon bites for 2-3 minutes per side until cooked through.

How to Make Blackened Salmon Bites in an Air Fryer?

Follow the same instructions up to the seasoning step. Preheat your air fryer to 400°F (200°C) for 3-5 minutes. Place the seasoned salmon cubes in a single layer in the air fryer basket, ensuring they are not overcrowded to allow for even cooking. Air fry the salmon at 400°F (200°C) for 7-10 minutes, shaking the basket halfway through to ensure even browning. The salmon is ready when it flakes easily with a fork and has a crisp, caramelized exterior.

How do I know when the salmon is done?

The salmon is fully cooked when it flakes easily with a fork and reaches an internal temperature of 145°F (63°C).

What are some good dipping sauces to serve with this?

Try serving with creamy options like garlic aioli, lemon dill sauce, or a spicy sriracha mayo for added flavor when serving as an appetizer for a game day or potluck or any parties!

What can I use instead of salmon?

You can substitute salmon with other fish like cod, trout, or even shrimp. Adjust cooking times based on the thickness of the protein.

Can I make these ahead of time?

Yes, you can prepare and season the salmon cubes in advance, then bake them just before serving for the best texture and flavor. So I would say these blackened salmon bites are just perfect for weekend meal prep.

horizontal image of balckened salmon bites in a oval plate with garnishes on the sides.

Related

Looking for other recipes like this? Try these:

Pairing

These are my favorite dishes to serve with this blackened salmon bites recipe:

Blackened salmon bites in a oval platter arranged beautifully and garnished with parsley and lemon wedges in the side.

Blackened Salmon Bites

Abi Guna
Bold and flavorful Blackened Salmon Bites, coated in a smoky spice blend and baked to perfection. Crispy on the outside, tender on the inside, and ready in just 15 minutes—a quick, healthy, and delicious seafood dish!
5 from 8 votes
Print Recipe Pin Recipe
Prep Time 10 minutes mins
Cook Time 15 minutes mins
Total Time 25 minutes mins
Course Appetizer, Main Course
Cuisine American
Servings 4 people
Calories 257 kcal

Equipment

  • Baking Tray 
  • Mixing Bowls
  • Measuring Spoons
  • Aluminium Foil or Parchment Paper

Ingredients
  

  • 1 pound salmon fillet skinless, cut into 1-inch cubes
  • 2 tablespoons olive oil
  • 1 tablespoon smoked paprika
  • 1 teaspoon garlic powder
  • 1 teaspoon onion powder
  • 1 teaspoon dried thyme
  • 1 teaspoon dried oregano
  • 1 teaspoon brown sugar
  • ½ teaspoon cayenne pepper
  • ½ teaspoon salt
  • ¼ teaspoon black pepper
  • Lemon wedges for serving
  • Fresh parsley for garnish

Instructions
 

  • Preheat your oven to 400°F (200°C). Line a baking sheet with parchment paper and set it aside.
  • Pat the salmon cubes dry with a paper towel to remove excess moisture. Place them in a large mixing bowl.
  • Drizzle the salmon cubes with olive oil and toss to coat evenly.
  • In a small bowl, mix together the smoked paprika, garlic powder, onion powder, thyme, oregano, brown sugar, cayenne pepper, salt, and black pepper.
  • Sprinkle the seasoning mix over the salmon and gently toss to coat all the pieces evenly.
  • Arrange the seasoned salmon bites on the prepared baking sheet in a single layer.
  • Bake in the preheated oven for 12-15 minutes, or until the salmon is cooked through and flakes easily with a fork.
  • Transfer the salmon bites to a serving plate. Garnish with fresh parsley and serve with lemon wedges on the sides.

Notes

  1. Fresh salmon works best for this recipe, but if using frozen salmon, thaw it completely and pat it dry to remove excess moisture.
  2. If you prefer less heat, reduce or avoid the cayenne pepper. 
Keyword Appetizers, Baked, Healthy, Salmon

If you try this quick and easy blackened salmon bites recipe, please leave a STAR rating in the comment section below! Your feedback helps a small blogger like me stay motivated in creating content for my readers. Also, feel free to follow me at Food Exit on Instagram, TikTok, and Pinterest for the latest recipe updates!

Roasted Carrots and Asparagus – Easy Oven-Baked Side Dish

January 20, 2025 by Abi Guna 19 Comments

Looking for a simple yet delicious dish? Try my Roasted Carrots and Asparagus recipe! It combines the earthy sweetness of roasted carrots, the vibrant freshness of asparagus, and the creamy tang of goat cheese to create the perfect side dish. These roasted veggies make the perfect side dish for my Chicken and Dumpling Casserole, a creamy baked dinner that’s always a hit.

Roasted asparagus and carrots in a baking tray garnished with crumbled goat cheese and parsley.

It's a versatile dish that pairs beautifully with roasted chicken, grilled salmon, or even a holiday feast like Easter or Thanksgiving dinner or for a romantic dinner. Whether you’re planning a quick weeknight meal or a special gathering, this roasted vegetable recipe is the perfect addition to your menu. Plus, it’s naturally gluten-free, vegetarian-friendly, and packed with nutrients, making it a wholesome choice for health-conscious foodies. Give this simple and flavorful dish a try today and elevate your next meal! Serve this roasted veggies with cheesy mashed potatoes for a complete meal!

Don’t forget to check out my family’s favorite side dishes too! Try Roasted Carrots and Cauliflower, Hot Honey Brussels Sprouts, or for a healthy twist, Air Fryer Sweet Potato Wedges.

[feast_advanced_jump_to]
CLose up shot of quick and easy roasted carrots and asparagus recipe.

Why You’ll Love This Roasted Carrots and Asparagus Recipe

  • Delicious and Nutritious:Roasted asparagus and carrots are delicious and highly nutritious – a winning culinary combination and an easy vegetable side dish that goes with most main courses. 
  • Sweet Caramelization: Why roast? Oven-roasted vegetables have a sweet caramelization and crispness that is difficult to achieve with any other cooking method.
  • Customizable Flavors: Elevate that intense flavor with your favorite seasoning, such as paprika or garlic powder. 
  • Nutrient Retention: In addition, not cooking your vegetables in the usual way – boiled in water – helps keep them more nutritious and preserves their important antioxidants.
  • Year-Round Ingredients: Carrots are available in various colors throughout the year, so have a bit of artistic fun.
  • Perfect for Holidays:  Asparagus is a spring vegetable, which is when they are at their best.  This asparagus carrot recipe is your Easter meal ideas side dish. What a great way to surprise friends and family.

We strongly encourage you to start roasting other vegetables.

Roasted asparagus and carrots in a plate.

Roasted Carrots and Asparagus are Best Served With

The best part of a carrot and asparagus side dish is that it can be served with most roasted entrees ! Perfect alongside roasted entrees like salmon, chicken, beef, and pork.

  • Lemon Pepper Chicken Thighs: The zesty lemon flavor complements the natural sweetness of roasted vegetables. 
  • Air Fryer Teriyaki Chicken: The savory teriyaki glaze pairs well with the earthy flavors of roasted carrots and asparagus.
  • Air Fryer BBQ Chicken: The smoky barbecue notes enhance the roasted vegetables' taste.
  • Ground Chicken Spaghetti: This hearty pasta dish is balanced by the lightness of the roasted veggies.
  • Shrimp Scampi Fettuccine: The garlicky shrimp and pasta are elevated when served alongside roasted carrots and asparagus.
  • Salmon Kale Quinoa Salad: This fresh and nutritious salad pairs well with the roasted vegetables for a complete meal.
  •  Vegetarian Option: Pair with a baked potato to turn this side dish into a complete vegetarian meal.
  • Withs Sauces: For adventurous foodies, try drizzling the roasted carrots and asparagus with a hollandaise sauce, which is a rich and delectable pairing for the asparagus. Or try a honey mustard sauce, which pairs well with both. 
  • Crumbled Bacon: Sprinkle with crispy bacon bits for an indulgent finishing touch.

How to Get Your Kids to Love Roasted Vegetables

Kids can be naturally fussy about vegetables, including roasted carrots and asparagus, before they have tasted them. You can help your kids overcome this innate inclination by allowing them to become more involved. Have them pick their own asparagus spears at the market. Let them arrange the carrots and asparagus on the baking sheet. Counting while they do so can improve their math. Make vegetables fun.

Topping them with a bit of Goat Cheese adds a creamy, tangy twist that makes these veggies irresistible. Incorporating dishes like this into your family meals is a great way to introduce kids to healthy side dish recipes while ensuring they get the essential nutrients they need. With vibrant colors, delicious flavors, and nutritious benefits, this recipe is a win for the whole family! 

Ingredients

Ingredients laid out for roasting asparagus and carrots.
  • Carrots: Carrots add natural sweetness and a hearty texture to the dish. Cutting them into sticks ensures even cooking and better caramelization.
  • Asparagus: Asparagus provides a tender, slightly nutty flavor that balances well with the sweetness of carrots. Trimming removes the tough, woody ends for a pleasant bite.
  • Olive oil: Oil helps coat the vegetables, ensuring even roasting and enhancing their flavor.
  • Garlic powder: Garlic powder adds a mild, savory depth to the dish.
  • Salt: Essential for bringing out the natural sweetness of the vegetables and balancing the overall flavor.
  • Black pepper: Adds a mild heat and earthiness, complementing the roasted vegetables.
  • Paprika: Paprika enhances the dish with a warm and smoky flavor.
  • Goat cheese: The creamy, tangy goat cheese provides a luxurious contrast to the roasted veggies' texture and flavor.
  • Lemon juice: Lemon juice brightens the dish with a fresh, zesty acidity, balancing the richness of the goat cheese.
  • Parsley: Parsley adds a pop of color and a mild herbal freshness.

See recipe card for quantities.

CLose up shot of showing texture of simple roasted carrots and asparagus recipe.

How to make Roasted Carrots and Asparagus with Goat Cheese

Learn how to make oven roasted vegetables in a quick simple method. As always start by preheating your oven to 400°F (200°C) to ensure it reaches the perfect temperature for roasting. While the oven heats up, prepare your baking sheet by lining it with parchment paper. This step makes cleanup easier and prevents the vegetables from sticking, allowing them to roast evenly.

Next, focus on prepping your vegetables. Begin by trimming the tough, woody ends of the asparagus, as these can be too fibrous to enjoy. Set the trimmed asparagus aside. Then, wash the carrots thoroughly under cold water to remove any dirt or residue. Depending on your preference, you can peel the carrots or leave the skin on for added texture and nutrients.

Finally, slice the carrots into sticks roughly the same size as the asparagus to ensure they cook evenly. This simple prep work sets the stage for perfectly roasted vegetables!

The carrots and asparagus cut into equal length and arranged on a baking sheet.

The carrots and asparagus are cut into equal length and arranged on a baking sheet.

The seasonings added to the carrots and asparagus recipe in a baking sheet.

Seasonings added to the veggies and mixed well. Roast them in the oven for 15–18 minutes. 

Once they are lightly browned and tender with a slight crisp, remove them from the oven. While the vegetables are still hot, sprinkle crumbled goat cheese generously over the top. The heat from the vegetables will soften the goat cheese slightly, creating a creamy and flavorful contrast.

For an added burst of freshness, squeeze a bit of lemon juice over the roasted vegetables. Finally, garnish with a sprinkle of chopped fresh parsley to enhance the dish’s visual appeal and flavor. Serve immediately and enjoy this simple yet elegant side dish, perfect for any meal!

Roasted carrots and asparagus resting after out from the oven. Garnished with goat cheese and parsley.

Hint: Be sure to stir the vegetables halfway through the cooking time to ensure even caramelization and tenderness. 

Substitutions and Variations

  • Vegetable Swaps: Replace carrots and asparagus with other vegetables like sweet potatoes or turnips. Be sure to cut them into thin pieces, similar in size to asparagus, for even roasting. Even parsnips, green beans, or Brussels sprouts are great alternatives to carrots and asparagus.
  • Cheese Alternative: If goat cheese isn’t available, feta cheese is an excellent substitute, providing a similar savory touch to the dish. Parmesan, or even cream cheese for a similar creamy and tangy flavor.
  • Spices Swaps: Garlic powder can be replaced with fresh minced garlic for some bold flavors. Adding ½ teaspoon of curry powder would also enhance the total flavor of the dish. Experiment with spices like cumin, thyme, rosemary, or chili flakes for added flavor.

Equipment

  • Baking Sheet: A large, rimmed baking sheet to spread the vegetables evenly for optimal roasting.
  • Parchment Paper or Aluminum Foil: For easy cleanup and to prevent the vegetables from sticking to the baking sheet.
  • Knife and Cutting Board: To trim and cut the carrots and asparagus into even sizes for consistent cooking.
  • Tongs or Spatula: For tossing the vegetables during roasting to make sure even caramelization.
  • Measuring Spoons: To accurately measure olive oil, salt, and seasonings.
Roasted carrots and asparagus served ibuprofen a light orange plate and beautifully ganrished with goat cheese and parsley.

Storing and Reheating Your Roasted Carrots and Asparagus

Refrigeration: Keep your roasted carrots and asparagus for five days in the refrigerator while placed in an airtight container.

Freezing: Freeze the vegetables in a tightly sealed container for up to 3 months.

Reheating in the Microwave: Use the microwave for quick reheating, though it may not retain the crispiness.

Reheating in the Air Fryer: Use an air fryer to reheat for a crispier texture.

Reheating in the Oven: Place the vegetables on a sheet pan and reheat in the oven at 350°F for about 12 minutes.

Top Tips on Preparing Roasted Carrots and Asparagus

  1. Whether you are roasting carrots, asparagus, or adding other vegetables, make sure they are sliced the same size for even roasting. The asparagus is thin, so ensure that carrots or other veggies match in size.
  2. Place them on the baking sheet in a single layer – again, for even roasting.
  3. Thin asparagus stalks will be crispier than their fatter counterparts. In this case, size will matter.
  4. You should use fresh vegetables for this recipe. In an emergency, however, you can use frozen veggies, but they will not crisp up. Trust me, you want the crisp.
  5. Be sure to trim the asparagus before roasting. Use a sharp knife to remove the tough end parts.
  6. Experiment with toppings. Chopped almonds or other nuts can add a crunchy interest.
  7. Don’t forget the goat cheese, which complements the sweetness of roasted vegetables.
Horizontal shot of roasted carrots and asparagus recipe served in a plate.

FAQ

Can I use frozen carrots or asparagus in this recipe?

Yes, but it's best to thaw and pat them dry first to remove excess moisture. This ensures better caramelization during roasting.

How do I prevent the vegetables from becoming soggy while roasting?

Make sure to dry the vegetables thoroughly before roasting, and avoid overcrowding the baking sheet so they roast instead of steam.

Can I make this dish ahead of time?

Yes! Roast the vegetables, store them in an airtight container, and reheat in an oven or air fryer to restore crispness before serving.

Is this roasted carrots and asparagus recipe suitable for meal prep?

Yes, the roasted vegetables store well in the fridge and can be reheated for quick meals throughout the week. It's the perfect dish to prepare on Sundays for hassle-free weekday dinners.

Related

Looking for other recipes like this? Try these:

Pairing

These are my favorite dishes to serve with this oven roasted asparagus and carrots recipe:

Roasted carrots and asparagus with goat cheese plated in a off white plate served with lemon wedges in the sides and garnished with parsley.

Roasted Carrots and Asparagus

Abi Guna
A simple and delicious side dish, Roasted Carrots and Asparagus combines the natural sweetness of carrots, the tender crispness of asparagus, and the creamy tang of goat cheese. Perfectly seasoned and roasted to perfection, this dish is quick to prepare and pairs beautifully with any meal.
5 from 9 votes
Print Recipe Pin Recipe
Prep Time 10 minutes mins
Cook Time 18 minutes mins
Total Time 28 minutes mins
Course Side Dish
Cuisine American
Servings 4 People's
Calories 117 kcal

Equipment

  • Baking Sheet
  • Parchment paper
  • Measuring Spoons
  • Knife
  • Cutting Board

Ingredients
  

  • 1 pound carrots remove the top part and cut into sticks
  • 1 pound asparagus trimmed the bottom part
  • 2 tablespoon olive oil
  • 1 teaspoon garlic powder
  • 1 teaspoon salt
  • ½ teaspoon black pepper
  • ½ teaspoon paprika
  • ¼ cup goat cheese crumbled
  • 1 tablespoon lemon juice
  • Lemon wedges to serve
  • Chopped fresh parsley to garnish

Instructions
 

  • Preheat your oven to 400°F (200°C) and line a baking sheet with parchment paper.
  • Trim the woody ends of the asparagus and set them aside. Wash the carrots and cut them into sticks similar in size to the asparagus (peeling is optional).
  • Place the carrots and asparagus on the prepared baking sheet. Drizzle with olive oil and season with garlic powder, paprika, salt, and pepper. Toss to coat evenly.
  • Roast the vegetables in the preheated oven for 15–18 minutes, stirring halfway through, until tender and slightly caramelized.
  • Remove from the oven and immediately sprinkle crumbled goat cheese over the hot vegetables, allowing it to soften slightly. Add a squeeze of fresh lemon juice for an extra burst of flavor.
  • Garnish with chopped fresh parsley before serving and enjoy!

Notes

  • For the best texture and flavor, serve the vegetables right after roasting.
  • Skip the goat cheese or use a plant-based alternative for a vegan-friendly version.
  • Use leftovers as a topping for salads, pasta, or grain bowls.
Keyword Asparagus, carrots, roasted vegetables, side dish

If you try this recipe, please leave a STAR rating in the comment section below! Your feedback helps a small blogger like me stay motivated in creating content for my readers. Also, feel free to follow me at Food Exit on Instagram, TikTok, and Pinterest for the latest recipe updates!

Red Velvet Cake Waffles Recipe (With Cake Mix)

January 13, 2025 by Abi Guna 15 Comments

These red velvet cake waffles are the perfect combination of fluffy waffles and rich, chocolatey cake flavor. Made with a simple cake mix and just a few ingredients, this easy recipe creates soft, tender waffles with that classic red velvet taste and vibrant color. If you’re looking for more easy ideas like this, be sure to explore my breakfast recipes collection for quick and delicious options.

Cream cheese drizzle over the stacked red velvet cake waffles in a plate and pecans in the behind.

Perfect for special occasions like Valentine’s Day, Galentine’s Day, Mother’s Day, brunch parties, or simply treating yourself, these waffles are easy to make and absolutely irresistible—a luxurious treat you’ll never forget! They’re also perfect for birthdays, anniversaries, or any time you’re craving a festive and indulgent breakfast or dessert. These waffles are even better with a drizzle of Vanilla Bean Coffee Syrup for extra flavor.

If you’re a fan of red velvet, you must try this Red Velvet Cookie Cake—it’s a showstopper dessert that’s perfect for any occasion! More interesting waffles like my Nuella Waffles , Apple Cinnamon Waffles , Pumpkin Waffles are the best breakfast ever!

Looking for more Valentine’s Day recipes? Don’t miss my Chocolate Covered Strawberries, Nutella-Covered Strawberries, Valentine’s Day Cake Pops, Dark Chocolate Almond Fudge, Mini Chocolate Bundt Cake and Lemon Mini Bundt Cakes—they’re guaranteed to impress!

[feast_advanced_jump_to]
Cream cheese and chocolate ganache drizzled  over the red velvet waffles and topped with pecans.

Why You Will Love This Recipe for Red Velvet Cake Waffles

Red velvet cake is high on most people’s sweet fantasies. They make an indulgent dessert, and the waffles can be used for sweet breakfast recipes. They offer an explosion of flavors in every bite. With a decadent cream cheese topping and a rich chocolate drizzle, they easily turn into romantic Valentine’s Day waffles. Of course, they are perfect for brunch get-togethers and Mother’s Day, as well. Any special occasion can fulfill the fantasy and satisfy the craving in less than 10 minutes.

The wonderful cream cheese glaze is perfect for many other cakes and pastries. The glaze multitasks and is a dream come true on cinnamon rolls. It is thinner than a regular frosting and is easier to drizzle. 

Are you raising a dubious eyebrow at the thought of using a prepared cake mix? Please don’t. There are several real advantages here. 

  1. All the measuring is done for you, making it much more difficult to mess up, and it saves you valuable time.
  2. One cake package will be more cost-effective than purchasing each ingredient separately.
  3. The quality and texture of the cake will be consistent each time you prepare it.
  4. It is beginning-chef friendly.
  5. It is simple to prepare a variety of flavored cakes.
Backlit shot of red velvet waffles, drizzled chocolate ganache and cream cheese drizzle.

Serving Options for Red Velvet Cake Waffles

Classic Pairing: We already know how well red velvet cake waffles pair with a cream cheese glaze – pure heaven. But heaven is multi-dimensional. 

Coffee or Latte: My famous Salted Caramel Latte recipe goes well with these waffles. A cup of coffee or espresso will blend nicely with the waffle’s natural sweetness. Consider this pairing for a sophisticated dessert. 

Seasonal Berries: Try topping the waffles with luscious seasonal berries for some bright colors.

Savory Twist: For the definitive breakfast waffle, serve them with crisp, yummy bacon.

Mimosa: For an adult treat, pair the waffles with a mimosa to elevate your brunch game.

Brunch Spread: These waffles are also perfect alongside other easy breakfast treats like my Nutella Waffles or a quick Oatmeal Mug Cake to create a fun and indulgent brunch table.

Kid-Friendly Option: Kids will be thrilled with a cold glass of milk.

These versatile serving ideas make red velvet cake waffles perfect for any occasion, from casual breakfasts to elegant desserts!

Ingredients

Ingredients laid out on a marble table for the red velvet cake waffles recipe.
  • Red Velvet Cake Mix - The base for these waffles, providing that classic red velvet flavor with its rich, cocoa-infused taste and vibrant red color.
  • Eggs  - They add structure and richness to the batter, helping the waffles stay fluffy and hold their shape.
  • Milk - Adds moisture to the batter, creating a smooth, pourable consistency.
  • Vegetable Oil - A neutral oil that keeps the waffles tender and prevents them from drying out during cooking.
  • Vanilla Extract -Enhances the flavor of the batter.
  • Cream Cheese - The star ingredient for the cream cheese glaze, adding a tangy, rich, and creamy element to balance the sweetness.
  • Confectioners’ Sugar - Used to sweeten the cream cheese glaze.
  • Dark or Semi-Sweet Chocolate Chips - Melted to create a decadent chocolate drizzle, adding richness and indulgence to the dish.
  • Heavy Cream - Combines with the chocolate chips to make a silky ganache.
  • Pecans: For that extra crunch.

See recipe card for quantities.

How to make Red Velvet Waffles with Cake Mix (Step by Step)

Looking for the best recipe for red velvet waffles recipe? This one has it all! Made with cake mix waffles, these red velvet treats are fluffy, flavorful, and incredibly easy to prepare. The waffles are topped with a luscious cream cheese drizzle for waffles, adding a tangy sweetness that perfectly complements their rich cocoa flavor. For an extra indulgent touch, finish them with a decadent chocolate drizzle waffles topping. Below is the step by step instructions for the recipe.

Red velvet waffles ingredients in a mixing bowl.

Red Velvet cake mix, eggs, oil and milk added to a mixing bowl.

Red Velvet cake mix waffles batter in a bowl.

Waffle batter mixed until smooth.

Red velvet cake waffles cooked in a waffle maker.

Cook the waffles in a waffle maker.

Cream cheese glaze and chocolate ganache in bowls.

Prepare the cream cheese glaze and chocolate ganache(optional) for drizzling.

Serve the easy red velvet waffles warm for the best flavor and texture, topped with a generous swirl of whipped cream for a light and airy touch. Add a drizzle of creamy, tangy cream cheese glaze and finish with a rich chocolate drizzle to elevate the indulgence. For a delightful crunch, garnish with chocolate chips and chopped pecans, which complement the soft and fluffy waffles perfectly. These toppings not only enhance the flavor but also add a visually stunning presentation, making the waffles as beautiful as they are delicious. Whether it’s for a special brunch or a cozy dessert, these waffles are sure to impress! 

If you love festive treats like this, don’t miss my holiday desserts collection for more sweet and celebratory recipes.

Red velvet cake waffles in a oval plate. Dark chocolate ganche and cream cheese drizzle topped with chopped pecans and chocolate chips.

Substitutions and Variations for Red Velvet Cake Waffles Recipe

  • Flexible Cake Mix: These waffles with cream cheese are flexible and can be adapted to what is in your cupboard. Feel free to use any other flavor cake mix to achieve scrumptious results. Swap the red velvet cake mix with any other flavor, such as chocolate, vanilla, or funfetti, for equally delicious results.
  • Customize the Batter: Create a unique batter by adding special treats such as chocolate chips, toffee bits, flaked coconuts, or anything else your family craves.
  • Dairy-Free Option: Use a plant-based milk like almond or oat milk and a dairy-free cream cheese alternative for a vegan-friendly version.
  • Flavorful Glaze Variations: Replace the cream cheese glaze with a simple powdered sugar glaze or drizzle with caramel or strawberry sauce.

Equipment

  • Mixing Bowls: For mixing the waffle batter and preparing the cream cheese glaze or chocolate drizzle.
  • Whisk: Essential for blending the batter smoothly and whipping up the cream cheese glaze.
  • Measuring Cups and Spoons: For accurately measuring the ingredients
  • Waffle Maker: A key tool for cooking the waffles 
  • Microwave-Safe Bowl: For melting the chocolate chips and heavy cream into a silky ganache.
Close up shot of red velvet cake mix waffles topped with pecans and chocolate chips with cream cheese drizzle and Chocolate ganache.

Storing Red Velvet Cake Waffles

Cool Completely Before Storing: Don’t refrigerate the easy red velvet cake waffles until they are completely cooled, otherwise, they will turn soggy.

Refrigeration: Once they have cooled, transfer them to an airtight container and refrigerate them for up to three days.

Freezing: Cake waffles can be frozen. Store the waffles in a large freezer bag for about a month. 

Reheating the frozen waffles

Oven Method: When you are ready for them, place the waffles on a baking sheet, cover loosely with aluminum foil, and bake at 350°F for about 12 minutes.

Toaster Oven Method: You can place them in a toaster oven for 3 minutes to get them nice and crunchy.

These tips ensure your red velvet cake waffles stay fresh and delicious, whether refrigerated or frozen!

Backlit shot of red velvet cake mix waffles topped with pecans and chocolate chips with cream cheese drizzle and Chocolate ganache.

Top Tips for Preparing Red Velvet Cake Waffles

  1. For the perfect waffle, preheat the waffle maker. Be sure to coat it with a nonstick cooking spray.
  2. For an even richer red velvet waffle, use buttermilk instead of regular milk when preparing the batter.
  3. You want the cream cheese frosting to be truly smooth. To achieve genuine creaminess, ensure the cream cheese is at room temperature before using it.
  4. When you follow this recipe, you are already drizzling the waffles with chocolate. Take the chocolate craving a step further and add some chocolate chips to the batter. 
  5. Avoid over-combining the batter and simply gently mix the ingredients.
  6. To achieve the smoothest frosting, ensure that your cream cheese is at room temperature before using it.

FAQ

Can I use a homemade red velvet cake batter instead of a cake mix?

Yes, absolutely! If you prefer homemade, you can use your favorite red velvet cake recipe instead of a boxed mix for a more personalized touch.

Can I make these red Velvet cake ahead of time?

Yes! Prepare the waffles in advance, let them cool completely, and store them in an airtight container in the refrigerator for up to 3 days or freeze for up to 1 month. Reheat them in an oven or toaster for the best texture.

What type of waffle maker should I use?

You can use any waffle maker—round, square, or Belgian. I used square waffle maker for this recipe!

Can I make these waffles gluten-free?

Yes! Use a gluten-free red velvet cake mix and ensure all other ingredients, like the chocolate chips, are gluten-free.

How do I thin the cream cheese glaze if it’s too thick?

Add a small amount of milk, one teaspoon at a time, until the glaze reaches your desired drizzling consistency. Pouring consistency would be perfect!

Can I add mix-ins to the waffle batter?

Yes! Fold in chocolate chips, fresh berries, chopped nuts, or even crushed Oreos for added flavor and texture.

What are red velvet cake waffles?

Red velvet cake waffles are waffles made using red velvet cake batter or cake mix, creating a soft, fluffy texture with a rich cocoa flavor and signature red color.

Do red velvet waffles taste like cake?

Yes, they have a soft, cake-like texture with a mild chocolate flavor, similar to red velvet cake but slightly crisp on the outside from the waffle iron.

How do I keep waffles crispy?

Place cooked waffles on a wire rack instead of stacking them. You can also keep them warm in a low oven (200°F) to maintain crispiness.

Are red velvet waffles good for special occasions?

Absolutely! Their vibrant color makes them perfect for Valentine’s Day, Christmas, birthdays, or holiday brunches.

In a white plate, red velvet cake mix waffles topped with pecans and chocolate chips with cream cheese drizzle and Chocolate ganache.

Related

Looking for other recipes like this? Try these:

Pairing

These are my favorite dishes to serve with Red Velvet Cake Mix Waffles Recipe:

Stacked red velvet ake waffles , whipped cream topped with pecans and chocolate chips. Cream cheese drizzled over.

Red Velvet Cake Waffles (Easy, Fluffy & Made with Cake Mix)

Abi Guna
Looking for an effortless breakfast that’s rich and decadent? These Red Velvet Cake Waffles are fluffy, flavorful, and bursting with that classic red velvet charm, all made effortlessly with red velvet cake mix.
5 from 8 votes
Print Recipe Pin Recipe
Prep Time 10 minutes mins
Total Time 20 minutes mins
Course Breakfast, Dessert
Cuisine American
Servings 4 peoples
Calories 379 kcal

Equipment

  • Mixing Bowl
  • Waffle Maker
  • Whisk
  • Microwave-safe bowl
  • Measuring cups and spoons

Ingredients
  

For the red velvet waffles

  • 1 box red velvet cake mix I used Betty Crocker Super Moist Red vlevet Cake Mix
  • 3 medium eggs at room temperature
  • 1 cup milk
  • ½ cup vegetable oil
  • 1 teaspoon vanilla extract
  • Non-stick cooking spray
  • Optional toppings: whipped cream, fresh berries, chopped pecans or powdered sugar

For the cream cheese glaze

  • 4 ounces cream cheese at room temperature
  • ¾ cup confectioners’ sugar
  • ⅓ cup milk
  • ¼ teaspoon vanilla extract

For the chocolate drizzle (optional)

  • ½ cup dark or semi-sweet chocolate chips
  • 3 tablespoons heavy cream

Instructions
 

  • Preheat your waffle maker according to the manufacturer’s instructions and spray it with non-stick cooking spray.
In a large mixing bowl, whisk together the red velvet cake mix, eggs, milk, oil, and vanilla extract until smooth and well combined.
  • Pour the batter onto the preheated waffle maker, filling it to the recommended level. Close the lid and cook for 3–5 minutes, or until the waffles are cooked through and slightly crispy on the outside. Carefully remove the waffles and repeat with the remaining batter.
  • Meanwhile, prepare the cream cheese drizzle by mixing cream cheese, powdered sugar, vanilla, and milk in a bowl until smooth. Set it aside.
For the chocolate drizzle, combine chocolate chips and heavy cream in a microwave-safe bowl and microwave for 1 minute. Stir until the chocolate is fully melted and smooth.
  • Serve the waffles warm, topped with whipped cream, cream cheese drizzle, and chocolate drizzle. Garnish with chocolate chips and chopped pecans for an extra crunch.

Notes

  1. Make sure to preheat the waffle maker and dont forget to coat it with a nonstick cooking spray.
  2. The recipe yield 10 square waffles.
Keyword breakfast, Cake Mix, red Velvet, Valentine's day dessert, waffles

If you try this red velvet cake mix waffles recipe, please leave a STAR rating in the comment section below! Your feedback helps a small blogger like me stay motivated in creating content for my readers. Also, feel free to follow me at Food Exit on Instagram, TikTok, and Pinterest for the latest recipe updates!

Easy Valentine Cake Pops with Cake Mix (No Cracks)

January 10, 2025 by Abi Guna 21 Comments

Planning something sweet for Valentines Day? Let me present my go-to recipe for Valentine Cake Pops—a showstopper treat that’s a hit in our home every year for Valentine’s Day! These easy and perfect treats are made with crumbled cake from cake mix, mixed with rich cream cheese frosting, and coated in smooth white chocolate. Finished with adorable Valentine’s Day sprinkles, they’re the ultimate combination of fun, flavor, and celebration! 

Valentine cake pops arranged in a glass jar filled with sprinkles.

All you need is a box of cake mix, store-bought cream cheese frosting, white chocolate, and colorful sprinkles! Isn’t it amazing to create beautiful Valentine Cake Pops at home—better than Starbucks—using just these simple ingredients? If you want to make cake pop from the scratch check out my Starbucks inspired brithday cake pops recipe. For more holiday based recipes check out my holiday desserts collection too!

These are the perfect cake pops, soft, fudgy centers dipped in glossy chocolate and dressed in pink sprinkles. Kids and adults alike enjoy them, especially on special occasions like Valentine’s Day. These delicious desserts are perfect for your kids' Valentine’s Day treats at school, thoughtful gifts for college friends, or even to share at the office. They’re guaranteed to be the BEST treat to showcase on your dessert table or at any party, making every celebration extra sweet!

This recipe is inspired by the famous Christmas Cake Pops recipe from my blog—don’t forget to check it out! For chocolate variations, check out my brownie cake pops!

[feast_advanced_jump_to]

More Valentine’s Day Dessert Ideas You’ll Love

  • Nutella Covered Strawberries
  • Puff Pastry Hearts
  • Valentines Red Velvet Cookie Cake
  • Mini Chocolate Bundt Cakes
  • Dark Chocolate Almond Fudge
  • Chocolate Covered Strawberries
  • Nutella Puff Pastry
  • Nutella Mousse
  • Nutella Waffles
Homemade valentines day cake pops beautifully decorated with sprinkles.

Why You’ll Love This Valentine Cake Pops Recipe

  • Simple and Easy: With just a few simple ingredients like cake mix, cream cheese frosting, and white chocolate, these cake pops come together effortlessly.
  • Festive and Fun: Decorated with colorful Valentine’s Day sprinkles, these cake pops are perfect for adding a festive touch to any celebration.
  • Loved by All Ages: Whether for kids, friends, or colleagues, these treats are a hit with everyone, making them ideal for school, office, potluck desserts or home parties.
  • Perfect for Gifting: These adorable, bite-sized desserts make thoughtful Valentine’s Day gifts packaged in cute wrappers or boxes.
  • Customizable: Switch up the flavors, colors, or decorations to suit your style and create a personalized treat. Like I did in my Christmas Cake pops recipe.
  • Better Than Store-Bought: Homemade and crafted with love, these cake pops rival even Starbucks valentine cake pop, trust me!

What to Serve with this Valentine Day Cake Pops

  • Coffee or Latte: Pair your cake pops with a warm cup of coffee, a creamy latte, or even a decadent Salted Caramel Latte for a cozy treat.
  • Champagne or Sparkling Wine: Elevate your Valentine’s Day celebration by pairing cake pops with a glass of bubbly champagne or sparkling rosé.
  • Fresh Strawberries: Complement the sweetness of the cake pops with the refreshing juiciness of fresh strawberries or Nutella-covered strawberries.
  • Fruit Platter: Add a healthy touch by offering a vibrant fruit platter with berries, kiwi, and grapes to balance the sweetness of the cake pops. I would so any colorful fruits should work!
  • Cheese Board: Create a sweet-and-savory experience by serving cake pops with a charcuterie board featuring cheeses, nuts, and crackers. Our family loves these kinds of cute charcuterie boards.

These pairings will make your Valentine’s Day dessert table even more special and memorable!

Ingredients

As I mentioned earlier, these Valentine cake pops recipe needs less than 5 ingredients to make!

Ingredients laid out for Valentine's Day cake pop recipe in a marble table.
  • Yellow cake mix - This pre-packaged cake mix serves as the base for the cake pops, providing a soft, moist texture and a delicious vanilla flavor. I used Betty Crocker cake mix.
  • Eggs -  Add structure, moisture, and richness to the cake mix, helping it bake up fluffy and soft.
  • Oil - Oil keeps the cake moist and tender.
  • Cream cheese frosting - Creamy, tangy frosting binds the cake crumbs together to create the ideal consistency for shaping the cake pops. I used Betty Crocker Rich and Creamy Cream cheese frosting.
  • Vanilla almond bark or White Chocolate Chips - A coating that melts smoothly and hardens quickly, ideal for covering the cake pops.
  • Valentine's Day sprinkles -  Add a festive touch, enhancing both the look and texture of the cake pops.

See recipe card for quantities.

How to make Valentines cake pops

If you are looking to impress with a festive treat? Cake pops for Valentine’s are the ultimate way to celebrate! Whether you’re searching for creative cake pop ideas for Valentine’s Day or planning to make a batch of Valentine’s Day cake pops for loved ones, these delightful bites are sure to steal the show. Decorated with sprinkles, drizzles, or even shaped into hearts, they make the perfect sweet gift.

Beautifully decorated valentines cake pops arranged in a marble table.

Preparing the cake: While the oven warms up, grab a large bowl and combine yellow cake mix, eggs, oil, and water. Mix everything together until the batter is smooth and luscious—it only takes about two minutes! Just follow the cake mix box instructions. Pour the batter into your prepared pan to bake.

Mix: Now comes the fun part—Add the crumbled cake to the bowl of a stand mixer, then mix on low with frosting, scraping down the side of the bowlso every bit blends evenly—this keeps the cake pop recipe from turning gummy.

Refrigerate: Scoop and roll the mixture in the palm of your hand to form smooth balls, then set them on a piece of parchment paper.  Refrigerate for 10 minutes to firm them up.

Dip and decorate: Time to dip! Melt candy melts in a microwave-safe bowl in short bursts, dip cake pops in melted candy melts, gently tapping off the excess coating for an even finish. Before the chocolate sets, decorate with colorful Valentine’s Day sprinkles. Place the pops upright in a foam block or similar stand to let them set beautifully.

For an alternative twist, try making Valentine’s cake balls without sticks—just as delicious and fun!

Step-By-Step Instructions

Baked cake from a cake mix.

Bake the cake according to the package instructions and allow to cool down.

Crumbled cake and cream cheese frosting in a white bowl.

Crumbled cake and cream cheese frosting getting mixed.

Cake balls  arranged in a white plate.

Shape into evenly shaped round balls.

Dip the cake pops in white chocolate.

Cake balls dipped in white chocolate.

Once the chocolate hardens, your Valentine’s Cake Pops are ready to shine! Serve at room temperature and watch them disappear.

Beautifully decorated valentines day cake pops in a jar on a pink background.

Substitutions for Valentine’s Cake Pops Recipe

  • Yellow Cake Mix or Red velvet cake mix: Substitute the yellow cake mix or red velvet cake mix with your favorite homemade cake recipe for a personal touch. This allows you to control the flavors and ingredients while skipping the boxed mix.
  • Cream Cheese Frosting: Replace cream cheese frosting with buttercream for a milder, sweeter taste. Homemade frosting works perfectly here, and for dietary needs, opt for dairy-free or vegan cream cheese frosting as an alternative.
  • White Chocolate Coating: Use milk or dark chocolate for a richer flavor or substitute with candy melts for easier melting and a wide range of colors. For a vegan-friendly option, choose dairy-free chocolate.
  • Sprinkles: Instead of sprinkles, try finely crushed almonds, pecans, or pistachios for a deliciously crunchy and nutty topping.

Variations for Valentine’s Cake Pops

Here are some creative ways to customize your Valentine’s Cake Pops:

  • Flavor Variations: Use chocolate cake mix and coat with milk or dark chocolate for a rich, indulgent treat. Swap red velvet with strawberry cake mix for a fruity twist and pink hue. The color will be just perfect for Valentine's Day!
  • Shape Variations: Use a heart-shaped mold or shape the cake balls by hand for a romantic touch.
  • Vegan or Gluten-Free Cake Pops: Use gluten-free cake mix and dairy-free frosting to make the recipe suitable for dietary restrictions. Coat with vegan chocolate for a complete allergen-friendly option.
Pink heart decorated valentine cake pops placed in a marble table with red heart sprinkles in the side.

Equipment

Mixing Bowls: For mixing the cake, frosting, and coating ingredients.

Hand Mixer: Used blend to make the cake batter. Even whisk will work.

Baking Pan: To bake the cake.

Cookie scoop: To make evenly-sized cake balls.

Lollipop Sticks: For creating the iconic cake pop look.

Storage

Proper storage ensures your Valentine cake pops remain fresh and delicious, whether you’re making them ahead or saving leftovers. Here’s how to store them:

Room Temperature: Place the cake pops in an airtight container, separating layers with parchment or wax paper to prevent sticking.They can last at room temperature for up to 5 days, provided the environment is cool and dry.

Refrigerator: Arrange the cake pops in an airtight container with parchment or wax paper between layers. Keep them in the fridge to maintain freshness. Refrigerated cake pops can last up to 1 week

Freezer: You can also freeze the cake pops for up to 2-3 months.

Thawing: If frozen, allow the cake pops to thaw in the fridge or at room temperature for about 30 minutes before serving.

Backlit shot of valentine cake pops with red heart sprinkles in the side.

Top Tips for making the BEST cake pops using cake mix

  1. Crumble the cake finely to ensure a smooth texture that binds well with the frosting. 
  2. Add the frosting gradually, using just enough to hold the crumbs together. Too much frosting will make the mixture too soft and difficult to roll.
  3. Refrigerate or freeze the rolled cake balls for 15–30 minutes before inserting the sticks. This helps them firm up and prevents them from falling apart.
  4. Melt chocolate coating in short intervals, stirring frequently to prevent burning or seizing.
  5. Dip the end of each lollipop stick in melted chocolate coating before inserting it into the cake ball. This acts as “glue” to keep the stick secure. (It's an important step better not to skip this!)
  6. Dip the cake pops straight into the melted coating and gently tap off the excess while twirling the stick. Avoid stirring or shaking, as this may loosen the cake ball.
  7. Place the dipped cake pops in a styrofoam block or cake pop stand to set. This ensures a clean, round finish without smudges. I use a heavy bottom glass to place my cake pops in it, its strong and steady one.

FAQ

Can I use homemade cake instead of store bought cake mix?

Of Course! You can use your favorite homemade cake recipe instead of a boxed mix. Just make sure the cake is fully cooled and crumbled finely for the best texture.

Can I make cake pops without sticks?

Yes! Simply roll the cake balls and serve them as cake truffles. I do this at times. They’re just as delicious and perfect for bite-sized treats.

How do I prevent the cake balls from falling off the sticks?

Dip the tip of each stick in melted chocolate before inserting it into the cake ball. Chill the cake balls before dipping to ensure they stay firm.

What can I use instead of cream cheese frosting?

You can substitute cream cheese frosting with homemade buttercream, ganache, or even a store-bought frosting of your choice.

How many cake pops will this recipe yield?

For a 9x13-inch cake using a standard box of cake mix and cream cheese frosting, you can expect to make about 30 cake pops if they are golf ball-sized (about 1.5 inches in diameter).

Can I Make Cake Pops from Leftover Cake?

Yes, you can absolutely make cake pops from leftover cake! It's a perfect way to repurpose leftover cake into a fun treat. Simply crumble the cake into fine crumbs, mix it with a small amount of frosting to bind it, and roll the mixture into balls. From there, follow my cake pop-making process: insert sticks, chill, dip in melted chocolate, and decorate.

Horizontal Image of Valentines cake pops arranged in a glass jar with a pink linens on the saide.

Related

Looking for other recipes like this? Try these:

Pairing

These are my favorite dishes to serve with Valentine Cake Pops Recipe:

Homemade Valentine cake pops with cake mix arranged in a glass jar filled with sprinkles.

Valentine cake pops

Abi Guna
Valentine Cake Pops—our go-to treat for Valentine’s Day! Made with crumbled cake, cream cheese frosting, and coated in smooth white chocolate, these festive pops are topped with adorable sprinkles for the perfect mix of fun and flavor!
5 from 11 votes
Print Recipe Pin Recipe
Prep Time 30 minutes mins
Cook Time 11 minutes mins
Chilling Time 30 minutes mins
Total Time 1 day d 30 minutes mins
Course Dessert
Cuisine American
Servings 30 Cake Pops
Calories 188 kcal

Equipment

  • Mixing Bowl
  • Baking Pan
  • Hand Mixer
  • Lollipop sticks

Ingredients
  

  • 1 13.25 oz box super moist yellow cake mix (such as Betty Crocker)
  • 3 medium eggs at room temperature
  • ⅓ cup unflavored oil such as vegetable oil
  • 1 cup water
  • ½ cup cream cheese frosting (such as Betty Crocker Rich and Creamy)
  • 12 oz vanilla almond bark or substitute white chocolate or candy melts
  • 30 Cake pop sticks
  • Valentine's Day sprinkles for decorating

Instructions
 

  • Preheat your oven to 350°F (175°C). Grease a 9x13-inch baking pan with cooking spray and set it aside.
  • In a large mixing bowl, combine the yellow cake mix, eggs, oil, and water. Use a hand mixer or whisk to blend everything together until the cake batter is smooth and well-combined, about 2 minutes.
  • Transfer the cake batter to the prepared sheet pan and spread it out evenly. Bake for 25-28 minutes, or until a toothpick inserted into the center of the cake comes out clean.
  • Once baked, allow the cake to cool completely. After cooling, trim off the brown edges of the cake to create a clean surface.
  • Break the cake into 4-5 large pieces and crumble them into fine crumbs in a bowl.
  • Add the cream cheese frosting to the crumbled cake in the bowl. Mix it well until the frosting is evenly distributed.
  • Using an ice cream scoop or a tablespoon, take a portion of the cake mixture about the size of a golf ball and roll it into a smooth ball.
  • Place the formed cake balls on a plate. Refrigerate them for about 10 minutes to help them firm up.
  • Meanwhile, in a microwave-safe bowl, melt the white chocolate or almond bark in short intervals (20-30 seconds), stirring after each interval until smooth and fully melted.
  • Dip the tip of each cake pop stick into the melted chocolate, then insert it halfway into each cake pop to help it stay in place. Return the cake pops to the plate and refrigerate again for 10 minutes to set the sticks. (Don’t skip this step)
  • After the cake pops have chilled, dip each one into the melted white chocolate or almond bark until completely coated. Gently tap the stick to remove any excess chocolate and ensure an even coating.
  • Decorate the cake pops with valentine's day sprinkles immediately after coating. Once decorated, place the cake pops vertically, sticking the end of the stick into a foam block or a similar surface to keep them upright.
  • Allow the cake pops to come to room temperature and let the chocolate coating fully set. Once set, enjoy these delicious Valentine cake pops!

Notes

  • Trim off the brown edges of the cake after baking and discard them for a smoother texture in your cake pops.
  • If the chocolate or candy coating is too thick, add a small amount of coconut oil or vegetable shortening to thin it out for a smooth, even coating.
  • Work in batches by keeping some cake balls chilled while coating others to prevent them from softening and losing their shape.
Keyword Cake Mix, Cake Pops, easy desserts, Valentine's day dessert

If you try this homemade Valentine Cake pops recipe, please leave a STAR rating in the comment section below! Your feedback helps a small blogger like me stay motivated in creating content for my readers. Also, feel free to follow me at Food Exit on Instagram, TikTok, and Pinterest for the latest recipe updates!

Nutella Covered Strawberries

January 8, 2025 by Abi Guna 22 Comments

Looking for a sweet and indulgent treat with a twist on regular chocolate-covered strawberries? This Nutella Covered Strawberries recipe is the perfect choice! It combines the luscious creaminess of Nutella with the rich flavor of dark chocolate and the juicy sweetness of strawberries, creating a dessert that’s truly heavenly. Whether you’re planning a romantic dinner or simply treating yourself, these strawberries covered with Nutella are an easy, elegant, and irresistible option.

In a plate full of Nutella covered strawberries with pink background. Nutella is placed in a bowl in the side.

Perfect for Valentine’s Day dessert recipes, this treat is simple to make yet irresistibly delicious. Imagine the rich hazelnut and cocoa spread combined with dark chocolate draped over fresh, ripe berries—because who doesn’t love Nutella on strawberries? Ready in just minutes, this recipe is ideal for celebrations, gifting, or a quick indulgence. Make your Valentine’s Day extra special with this effortless yet impressive dessert!

If you love these Nutella Covered Strawberries, you’ll definitely want to try some of my other strawberry and Nutella treats! For a classic option, check out my Chocolate Covered Strawberries, or bake a batch of Strawberry Chocolate Chip Muffins for a sweet breakfast idea. Looking for something fun and festive? Strawberry Santas are always a hit! And if you can’t get enough Nutella, don’t miss my easy Nutella Mug Cake, flaky Nutella Puff Pastry, crispy Nutella Waffles, or creamy Nutella Mousse—perfect for satisfying every chocolate craving.

Looking for more Valentine’s Day recipes? Check out my Valentine Cake Pops, Red Velvet Cookie Cake , mini chocolate bundt cakes and Dark Chocolate Almond Fudge—perfect for celebrating the day of love!

[feast_advanced_jump_to]

You may have this question: Should chocolate-covered strawberries be refrigerated? The answer is yes—refrigerating them is the best way to keep them fresh and prevent the chocolate from melting. Whether you're enjoying a classic chocolate-dipped treat or experimenting with a strawberry and Nutella twist, proper storage ensures the best flavor and texture. Just remember to store them in an airtight container and bring them to room temperature before serving for the ultimate indulgence! Love no bake desserts like these, its certainly an easy to make heavenly dessert!

Strawberry covered in nutella and dark chocolate and bite taken to see inside.

Why You’ll Love This Quick and Easy Nutella-Covered Strawberry Recipe 

  • Quick and Effortless: Ready in minutes with just 3 ingredients, perfect for any occasion.
  • Perfect Flavor Pairing: Strawberries and chocolate are a natural food pairing. The sweet and tart essence of the strawberry blends perfectly with the richness of Nutella and chocolate in taste and texture. They were destined for each other, a culinary romance such as Cleopatra and Marc Anthony.
  • Fun and Customizable: Add toppings like crushed nuts, sprinkles, or shredded coconut to make it your own.
  • Romantic Valentine’s Treat:  Impress your significant other by serving these Nutella-covered strawberries as a surprise Valentine’s Day strawberry treat. Don’t forget the champagne, which goes well with chocolate.
Single nutella covered Strawberry n a orange plate.

Why everyone loves Nutella? 

The rich combination of creamy hazelnuts and smooth cocoa creates a unique, indulgent taste that’s hard to resist. Nutella pairs perfectly with everything—spread it on toast, drizzle it over pancakes, mix it into desserts, or enjoy it straight from the jar! Whether you’re a kid or an adult, Nutella appeals to everyone with its decadent and universally loved flavor profile.

Nutella is an inspiration born in 1964 in Italy as a blend of hazelnuts and cocoa cream. It was a brilliant idea and has become the world’s most popular hazelnut spread. Everyone knows it is luscious, but few consider the health benefit of the “nut” part, namely the hazelnuts. Twenty-five percent of the world’s hazelnuts end up a part of Nutella. Hazelnuts have several health benefits. They can elevate a person’s mood with tryptophan, and they can boost heart health. Not bad qualities for a luxury chocolate spread. 

Nutella coveres strawberries in a pink plate and pink background , nutella product in the behind along with the fresh strawberries.

What to Serve with Nutella-Covered Strawberries

Nutella and strawberries are a special occasion delicacy that can stand alone or be enriched with a good drink. The blending of Nutella and strawberries rises to perfection, so you want to be sure that your beverage is rich enough to stand up to this bit of luxury and let its flavors shine without overpowering it.

  • Champagne or Sparkling Wine: If you are serving milk chocolate-covered strawberries to an adult group, consider offering the treat with some ruby port, a sweet beverage, or a white ale, which has a lower alcohol content and is less sweet. The light, bubbly nature of champagne pairs beautifully with the richness of Nutella and the tartness of strawberries. The ruby port is especially welcome following dinner and is a well-known dessert wine. If you are serving Nutella-covered strawberries as an informal snack, offer a casual white ale. Dark chocolate-covered strawberries have a slightly more complex flavor, so you want a strong wine to match it. An earthy pinot noir is an excellent choice, as is a roasted malt porter. 
  • Coffee: Pair with a warm drink for a cozy treat—Nutella and coffee are a match made in heaven! Try my Salted Caramel Latte, which is the perfect complement to enjoy alongside. An ideal treat for Galentine’s Day celebrations!
  • Whipped Cream: Add a dollop of whipped cream for extra creaminess and a classic pairing. Just perfect for Kids Valentines day treat!
  • Ice Cream: Serve with a scoop of vanilla or chocolate ice cream for an indulgent dessert experience. This is kids friendly pairing option too!

The right accompaniment elevates your Nutella-covered strawberries to an exquisite level.

Ingredients

Ingredients laid out for Strawberry covered Nutella recipe in a pink hue background.
  • Strawberries: Sweet, juicy strawberries serve as the perfect base for this recipe, offering a refreshing and slightly tart contrast to the rich Nutella and chocolate.
  • Nutella: This creamy hazelnut and cocoa spread adds a luscious, decadent layer of flavor, complementing the natural sweetness of the strawberries.
  • Dark Chocolate: The dark chocolate enhances the richness of the coating while balancing the sweetness of the Nutella with its slightly bitter notes. Semi-Sweet Chocolate also works here for this recipe!
  • White Chocolate Bar: Used for drizzling or decorating, white chocolate adds a touch of sweetness and visual contrast, making the strawberries look even more elegant. This is optional though for an extra decoration.

See recipe card for quantities.

How to make Chocolate covered Strawberries with Nutella

A Nutella strawberry creation perfectly combines the creamy richness of hazelnut spread with the sweet juiciness of strawberries, making it a dessert worth savoring. Lets see how to make this recipe with step by step instructions.

Drying the fresh strawberries in a baking tray lined with parchment paper.

Was and dry the fresh strawberries to remove the extra moisture.

In a microwave safe bowl, added dark chocolate and nutella.

In a microwave safe bowl combine dark chocolate and Nutella and microwave till its melts.

Strawberry dipped in the nutella chocolate mixture.

Dip the strawberries in the nutella chocolate mixture.

Nutella covered strawberries placed in a baking tray.

Arrange the nutella chocolate dipped strawberries in a baking tray lined with the parchment paper and refrigerate.

For an elegant finish, drizzle melted white chocolate over the strawberries to create a beautiful decorative touch. The creamy white chocolate adds a contrasting sweetness and enhances the visual appeal of the dessert. Once decorated, place the strawberries back in the refrigerator to allow the chocolate to set completely. This step not only secures the design but also ensures the strawberries remain fresh and ready to impress when it’s time to serve. 

White Chocolate Drizzle over the nutella covered strawberries.

Substitutions and Variations to Nutella Covered Strawberries

Nutella-covered strawberries are incredible. However, you may wish to include different fruit treats, as well. People are becoming very conscious of their eating habits, and a few variations will impress them. You can also cover other fruits with Nutella.

  • Instead of dipping your juicy strawberries in Nutella, try dipping them in plain or flavored yogurt. It’s a great way to offer a treat that is nutritious and provides an impressive supply of protein and antioxidants. Just freeze the strawberry yogurt treat for 30 minutes. If you absolutely must, you can add chocolate sprinkles. 
  • Peel and quarter a banana and stick each piece with a toothpick. Transfer the bananas to a parchment-lined baking sheet and generously spread each with Nutella. Freeze for at least one hour. 

Equipment

  • Mixing Bowl: A microwave-safe bowl for melting Nutella and chocolate.
  • Microwave: Use a microwave to melt the Nutella and chocolate quickly or a double boiler for a gentler melting process.
  • Spoon or Spatula: For stirring the Nutella and chocolate to ensure a smooth consistency.
  • Parchment Paper or Wax Paper: To line the baking sheet and prevent the strawberries from sticking as they set.
  • Baking Sheet: To place the dipped strawberries for setting.
  • Toothpicks or Skewers: Useful for holding the strawberries while dipping them into the melted mixture.
Strawberry covered chocolate and nutella dessert placed in a pink plate.

Storing Nutella-Covered Strawberries

These are best enjoyed on the same day for optimal freshness, but they can be refrigerated for up to 24 hours.

Line an airtight container with a paper towel and add the strawberries in a single layer. They will last in the fridge for up to three days.

You can freeze your strawberries for up to three months; however, there is a chance they may become mushy.

Tips on Preparing the Best Nutella-Covered Strawberries

While it is difficult to improve on perfection, here are some tips to ensure that your Nutella-covered strawberry hits all the high notes.

  • Get the freshest, most perfect strawberries you can find. You can, of course, make Nutella-covered strawberries all year round, but remember that strawberry season is from February through June – fortunately, a long season. In February, they are the first fruits to ripen into bright red berries and announce the coming spring. That’s the best time to buy them.
  • Before you begin to prepare your strawberries, ensure that they are dry. Moisture and chocolate do not mix well. Use a paper towel to dry the berries, then let them air-dry on another sheet.
  • For a change, instead of covering your strawberry with Nutella, carefully remove the center and stuff the Nutella inside of the berry. Return the stuffed strawberries to an egg carton until you are ready to serve them.
  • Feel free to add chopped nuts or flavored sprinkles to your covered strawberries as soon as they are dipped. 
Close up shot of Nutella covered strawberries in a pink plate.

FAQ

Can I use frozen strawberries for this recipe?

Fresh strawberries are best for this recipe as frozen ones tend to release moisture when thawed, making it difficult for the Nutella and chocolate to stick properly.

Can you freeze nutella chocolate covered strawberries?

Yes, you can freeze Nutella chocolate-covered strawberries, but it’s not always recommended as freezing can affect their texture and appearance.

How do I prevent the Nutella and chocolate from clumping?

Melt the Nutella and chocolate in short microwave intervals (15–20 seconds) and stir between each interval to ensure a smooth consistency. Adding a teaspoon of coconut oil or butter can also help if you find it more clumpy.

How long do Nutella-covered strawberries last?

They are best enjoyed the same day but can be stored in an airtight container in the refrigerator for up to 24 hours.

Can I use milk chocolate instead of dark chocolate?

Yes! You can use milk chocolate if you prefer a sweeter flavor. It’s all about your taste preferences.

Can I make this recipe vegan?

Yes! Use dairy-free Nutella or a similar hazelnut spread and dairy-free chocolate for a vegan version.

Do I need to refrigerate the strawberries after dipping?

Yes, refrigerating them for 15–20 minutes helps the coating harden and set properly.

Can I use chocolate instead of Nutella?

Yes! You can substitute Nutella with melted chocolate or chocolate chips like my chocolate covered strawberries recipe. However, Nutella gives a creamier, richer texture and hazelnut flavor.

How do you keep strawberries from getting soggy?

Make sure the strawberries are completely dry before dipping. Any moisture can cause the coating to slide off or become watery.

Can I make Nutella covered strawberries ahead of time?

You can make them a few hours ahead, but they are best enjoyed fresh the same day for the best texture and flavor.

How do I make Nutella easier to dip?

Warm the Nutella slightly (10–15 seconds in the microwave) to make it smoother and easier to coat the strawberries.

Can I add some toppings to my strawberries?

Absolutely! Try adding: Crushed nuts, Sprinkles, Coconut flakes and Drizzled white chocolate.

Nutella covered strawberries in a pink plate with nutella in the side along with fresh strawberries.

Related

Looking for other recipes like this? Try these:

Pairing

These are my favorite dishes to serve with Nutella covered strawberry recipe:

Nutella covered strawberries in a pink plate with Nutella jar and fresh strawberries behind.

Nutella Covered Strawberries

Abi Guna
Make these easy and indulgent Nutella Covered Strawberries for the perfect sweet treat! Juicy strawberries coated in creamy Nutella and dark chocolate, with an optional white chocolate drizzle for an elegant touch. Ideal for special occasions or a quick dessert!
5 from 12 votes
Print Recipe Pin Recipe
Prep Time 10 minutes mins
15 minutes mins
Total Time 25 minutes mins
Course Dessert
Cuisine American
Servings 6 People's
Calories 95 kcal

Equipment

  • Mixing Bowl
  • Spoon or spatula
  • Toothpick
  • Baking Sheet
  • Parchment paper

Ingredients
  

  • 1 lb. fresh strawberries
  • 1 cup Nutella
  • ¾ cup dark chocolate bar or chips chopped
  • 2 tablespoons chopped white chocolate bar or chips (optional)

Instructions
 

  • Wash the fresh strawberries thoroughly and pat them completely dry.
  • To ensure no excess moisture remains, line a baking sheet with a paper towel and spread the strawberries out to air dry if needed.
  • In a microwave-safe bowl, combine the chopped chocolate and Nutella.
  • Heat in the microwave for 30 seconds to 1 minute, stirring at intervals, until the chocolate is melted and fully combined with the Nutella, forming a smooth mixture.
  • Hold each strawberry by the stem or insert a toothpick, then dip it into the melted Nutella chocolate mixture.
  • Gently swirl to coat the strawberry evenly and tap off any excess.
  • Place the dipped strawberries on a parchment-lined baking sheet.
  • Refrigerate the strawberries for about 15 minutes or until the Nutella hardens.
  • If using, drizzle melted white chocolate over the strawberries for decoration and refrigerate again until ready to serve.
  • Serve immediately or store the Nutella-covered strawberries in the refrigerator for up to 24 hours.

Notes

  • Make sure the strawberries are thoroughly washed and completely dry before dipping; any moisture will prevent the Nutella from sticking properly.
  • Melt the Nutella and chocolate in short intervals (15–20 seconds) to avoid overheating or burning the mixture.
Keyword chocolate, easy desserts, Strawberry, Valentine's day dessert

If you try this recipe, please leave a STAR rating in the comment section below! Your feedback helps a small blogger like me stay motivated in creating content for my readers. Also, feel free to follow me at Food Exit on Instagram, TikTok, and Pinterest for the latest recipe updates!

Oatmeal Mug Cake Recipe (Ready in 2 Minutes!)

January 5, 2025 by Abi Guna 9 Comments

Healthy single-serving desserts are my go-to when I’m craving something just for me! This healthy Oatmeal Mug Cake is a quick and satisfying treat that’s perfect for breakfast, a wholesome snack, or a cozy dessert. Its fluffy texture, combined with the delightful chewiness of oats and gooey chocolate in every bite, makes it an irresistibly delicious option you’ll want to make it on repeat!

Healthy oatmeal mug cake toppedd with mini chocolate chips and fresh raspberries and fresh mint.

All you need are 10 simple pantry ingredients to create this heavenly, healthy dessert! Oatmeal doesn’t have to be boring—try this Oatmeal Mug Cake Recipe, and I’m sure it will completely change your mind!

Looking for something to snack on similar to this mug cake? Try my Pumpkin Mug Cake or Nutella Mug Cake recipe. How about some oatmeal? My Banana Blackberry Oatmeal Muffins and Butterscotch Oatmeal Cookies are a must-try for any oatmeal lover!

Are you a fan of the breakfast and sweet combo? Then you should definitely try this Berry Chia Seed Pudding—perfect for an early morning breakfast or a late-night dessert! For more quick dessert ideas, check out the fun and festive Brownie Cake Pops or the rich Nutella Covered Strawberries. This cozy treat also pairs perfectly with a warm drink made using Vanilla Bean Coffee Syrup.

[feast_advanced_jump_to]

What is Oat Mug Cake

Healthy Oatmeal mug cake is a single-serving dish in a mug that can be prepared as a healthy breakfast or sweet dessert in just a few seconds. The beauty of this oats mug cake is that it can be served gluten-free with the personal toppings of your choice.

Creating a dessert like this oats cake microwave recipe couldn’t be easier. With minimal prep and just one dish, you’ll have a warm and comforting treat ready in minutes. Whether you’re enjoying it as a quick oatmeal in a mug breakfast or indulging in a post-dinner oatmeal mug cookie, this recipe is both satisfying and convenient. It’s easy to customize with your favorite toppings like fresh berries, chocolate chips, or a dollop of yogurt, making it a versatile option for any time of day.

CLose up shot of oatmeal mug cake in a white mug.

Why you’ll love this Quick and Easy Oatmeal Mug Cake Recipe 

  • Quick and Easy: The oatmeal mug cake is one of the most convenient treats or breakfasts you can prepare since the ingredients are all cupboard staples. 
  • Customizable Toppings: Using individualized toppings allows you to serve this mug cake to your unique specifications. You get exactly what you want, and so does everyone else. The sky is the limit as you experiment with nuts, fruits, chocolate, and more. Yogurt makes a perfect protein topping for breakfast. For dessert, go crazy with nuts and fresh, seasonal berries. Sweet chocolate chips work, as well. 
  • Healthy and Nutritious: The oats are a good source of fiber. The combination of scrumptious and healthy isn’t always easy to find. Here it is conveniently in a cup and ready in a few seconds.
  • Diet-Friendly Options: Easy Oatmeal mug cakes are easily adjustable (use plant-based milk such as almond or soy milk) to vegan. Fortunately, this is also a gluten-free oat cake recipe. It’s a win-win for all. You can check the label and ensure that your oats are gluten-free for a healthy dessert without flour. 
  • Adaptable: This mug cake recipe with oatmeal can be followed by using even flours. Check my “Substitution” section to prepare your mug cake with flour.

This oatmeal mug cake is a win-win for all—a healthy, delicious dessert or breakfast option conveniently made in a cup!

Oatmeal scooped from the mug cake in a spoon.

What to Serve with Oatmeal Mug Cake

Breakfast Toppings: A dollop of yogurt or some fresh berries can be the ideal topping for a breakfast mug cake. Don’t forget a refreshing glass of milk. 

Dessert Pairings: If you enjoy the mug cake for dessert, savor it with a cup of aromatic coffee. My Salted Caramel Latte recipe goes well with this healthy treat. Try it! Have it with vanilla ice cream, honey, or chocolate sauce. 

Fresh Fruits: And you cannot go wrong with fresh fruit. Serve with seasonal fruits for a burst of natural sweetness and flavor. I enjoyed mine with fresh raspberries!

Spices: A sprinkle of spices such as cinnamon truly elevates the taste of your oats mug cake into something special. So don’t miss that spice!

These pairings make your oatmeal mug cake versatile, whether for breakfast, dessert, or a quick snack!

Ingredients for oatmeal mug cake recipe

These ingredients work together to create a perfectly balanced and satisfying oatmeal mug cake!

Oatmeal mug cake ingredients laid out.
  • Milk: Provides moisture and helps bind the ingredients together, creating a soft and fluffy texture in the mug cake. You can use almond milk or oat milk or regular milk.
  • Maple Syrup: Acts as a natural sweetener, adding a rich, caramel-like flavor while keeping the cake refined sugar-free. You can also you brown or white sugar instead.
  • Egg: Adds structure and richness to the cake, helping it rise and stay fluffy during cooking.
  • Vegetable Oil: Helps the cake stays moist and tender, preventing it from drying out.
  • Vanilla Extract: Enhances the flavor with a subtle sweetness and aromatic depth.
  • Whole Grain Rolled Oats: Adds texture and fiber, making the cake hearty and nutritious while maintaining its dessert-like appeal.
  • Baking Powder: Helps the cake rise by creating air pockets, resulting in a light and fluffy texture.
  • Ground Cinnamon: Adds a warm, aromatic spice that complements the sweetness. So I strongly recommend this spice to be added.
  • Salt: Balances the sweetness and brings out the flavors of the other ingredients.
  • Mini Semi-Sweet Chocolate Chips: Adds bursts of chocolaty goodness throughout the cake. You can also you dark or white or butterscotch chocolate chips instead.
  • Raspberries: Provides a tart, juicy contrast to the sweetness of the cake, adding a refreshing and colorful garnish. Any type of berries, sliced bananas or nuts like walnuts, pecans., etc., goes well with this recipe.

See recipe card for quantities.

How to make oatmeal mug cake in a microwave

If you’re craving a quick and healthy treat, this gluten-free oat cake is the perfect solution! Made with wholesome ingredients, this recipe transforms everyday pantry staples into a delicious dessert or breakfast option. Cooked in the microwave, this oat cake recipe gluten-free variation is ideal for those with dietary restrictions or anyone looking for a naturally fiber-rich treat. Its simple preparation and rich flavor make it a must-try for anyone who loves quick, healthy desserts!

In a bow egg, vanilla, oil, maple syrup being mixed for making oatmeal mug cake.

In a small add the ingredients; egg, milk, oil, maple syrup and vanilla extract.

Mixed oatmeal liquid mixture.

Mix the wet ingredients together using a fork.

Oats, baking powder and cinnamon added to the bowl.

Add the dry ingredients; oats, salt, baking powder and ground cinnamon. Mix well.

Mini chocolate chips added to the oatmeal mug cake batter in white mug.

Transfer the prepared oatmeal cake batter into a mug and add the chocolate chips. Give a quick mix.

Microwave oatmeal cake on high for 2 minutes, then check for doneness. The mug cake is ready when it rises and a toothpick inserted into the center comes out clean. If it’s not fully cooked, microwave for an additional 30-second intervals, checking each time to avoid overcooking.

Once done, let the mug cake cool for 1–2 minutes to allow the flavors to settle and the cake to set properly. For a beautiful and flavorful finish, top with fresh fruits like raspberries, strawberries, or blueberries. Add a garnish of fresh mint for a pop of color and a refreshing aroma. You can also drizzle with honey, maple syrup, or a sprinkle of powdered sugar for extra sweetness. Sit back, savor each bite, and enjoy your perfectly cooked oatmeal mug cake! 

Top angle of oatmeal mug cake topped with raspberries and chocolare chips.

Substitutions/Variations for Oats Mug Cake

There are a multitude of variations to preparing an oatmeal mug cake. These below variations make your oatmeal mug cake versatile, nutritious, and a hit with the whole family!

  • Add Veggies: The first secret variation, to get more veggies into your kids, is adding grated carrots to the oats. It tastes great, and they will never know. Being a parent can involve a high level of sneakiness. 
  • Customizable Toppings: Toppings vary according to taste; people can choose their favorites, from chopped nuts, berries, and mini chocolate chips. 
  • Use Oat Flour: Oat flour makes an interesting addition to or substitution for the oats alone as it makes the texture more cake-like. It also adds a bit of a nutty flavor. Since oat flour has an abundance of fiber and is gluten-free, it makes for a healthy oat flour mug cake variation.
  • Peanut Butter Twist: To create a pleasant flavor surprise, add a bit of peanut butter to the recipe. Kids will love it. 

Equipment

Microwave-Safe Mug: Use a sturdy mug (10–12 oz capacity) to mix and cook your cake. I opted to mix the batter in a separate bowl and then transferred it to the mug—both methods work, and using one bowl can mean less cleanup!

Small Bowl: If you prefer to mix ingredients in a separate bowl before pouring them into the mug. Like I did in the recipe.

Fork: For mixing the ingredients directly in the mug.

Measuring Spoons and Cups:  To ensure accurate measurements of ingredients like oats, milk, and sweeteners.

Microwave: Essential for cooking the mug cake quickly and evenly.

Toothpick: To check the cake is cooked.

Oatmeal mug cake with raspoberries and chocolate chips in the sides.

Storing an Oatmeal Mug Cake

Room Temperature:The mug cake can be left unrefrigerated on the counter and covered for a day. 

Refrigeration: If you wish to refrigerate it, allow it to cool, then place it in an airtight container and refrigerate for up to five days. 

Make Extras: Making enough oatmeal mug cake for leftovers is a clever timesaver, especially if you are rushed in the morning or need a dessert in a hurry. 

Reheating an Oatmeal Mug Cake on microwave : The quickest way to reheat your cake is by placing it in a microwave-safe bowl. To keep it moist, add approximately 3 tbsp. of liquid (such as milk) to each cup of mug cake you are microwaving. Cover your bowl and microwave for about 2 minutes. Remove the bowl and stir it well, then sit down and enjoy your breakfast.

Reheating an Oatmeal Mug Cake on stovetop: You can also reheat your oatmeal on the stovetop. Place a cup of the refrigerated oats in a small pan and add about a quarter cup of liquid, either milk or water. Cover the pan and simmer the oatmeal for about 5 minutes. Stir gently and taste test to ensure it is warm enough. You should watch the pan as you reheat your meal to avoid burning it.

Spoon getting scoop of oatmeal mug cake.

Tips and Notes for Making the Best Oatmeal Mug Cake

  1. Be sure you use enough liquid for a good consistency when you microwave your mug cake for two minutes. Do not overcook them or they will dry out. You want a thick but pourable batter.
  2. If you prefer, prepare these cakes in an oven at 350 degrees. Just transfer the oven-safe bowl to a baking sheet and bake for about 12 minutes.
  3. Oatmeal mug cakes can also be baked like muffins in a muffin pan. Just watch them closely to prevent burning.
  4. These cakes are all about the oatmeal. However, to make them more cakelike, use oat flour as mentioned above or regular flour. 
  5. You can use the same amount of apple sauce to replace the oil.

FAQ

Can I make this oatmeal mug cake without an egg?

Absolutely! Substitute the egg with 1 tablespoon of flaxseed meal mixed with 2.5 tablespoons of water (let it sit for 5 minutes). You can also use unsweetened applesauce or mashed banana as an alternative.

Can I use instant oats instead of rolled oats?

Yes, instant oats will work, but the texture will be softer and less hearty than with rolled oats. So I personally love rolled oats.

What can I use instead of maple syrup?

For healthier version you can opt for honey or agave syrup. But even brown sugar  and white sugar can be used as substitutes for maple syrup too.

How do I make the mug cake vegan friendly?

Use plant-based milk (like almond or soy), replace the egg with flaxseed meal or applesauce, and ensure your chocolate chips are dairy-free. Follow the same steps.

Can I add protein powder to this mug cake oats?

Yes, you can! Add 1 tablespoon of your favorite protein powder to the mix for a protein-packed version. You may need to add a splash of extra milk to maintain the right consistency.

What is an oatmeal mug cake?

An oatmeal mug cake is a quick, single-serving dessert made with oats and simple ingredients, cooked in the microwave in just a few minutes. It’s a soft, cake-like treat that’s perfect for a fast breakfast or snack.

Can I make an oatmeal mug cake without flour?

Yes! Most oatmeal mug cakes are naturally flourless since they use oats or oat flour as the base, making them a great gluten-free option when using certified gluten-free oats.

How long do you cook an oatmeal mug cake in the microwave?

An oatmeal mug cake typically cooks in 1–2 minutes, depending on your microwave. Start with 60–90 seconds and adjust as needed.

Is an oatmeal mug cake healthy?

An oatmeal mug cake can be a healthier dessert option, especially when made with natural sweeteners, oats, and minimal sugar. You can also customize it with fruits, nuts, or protein powder.

Horizontal image of healthy mug cake with oats with spoon getting scooped.

Related

Looking for other recipes like this? Try these:

Pairing

These are my favorite dishes to serve with Oatmeal Mug Cake:

Easy , quick and easy oatmeal mug cake with chocolate and raspberries .

Oatmeal Mug Cake

Abi Guna
Make this quick and easy Oatmeal Mug Cake in just minutes! A healthy, single-serving dessert or breakfast option that’s customizable, gluten-free, and packed with flavor. Perfect for busy mornings or late-night cravings!
5 from 5 votes
Print Recipe Pin Recipe
Prep Time 5 minutes mins
Cook Time 2 minutes mins
Total Time 7 minutes mins
Course Breakfast, Dessert
Cuisine American
Servings 1
Calories 438 kcal

Equipment

  • Microwave-Safe Mug
  • Measuring spoons and cups
  • Microwave
  • Toothpick
  • Mixing Bowl

Ingredients
  

  • 3 tablespoons whole milk
  • 2 tablespoons maple syrup
  • 1 medium egg at room temperature
  • 1 tablespoon vegetable oil
  • 1 teaspoon vanilla extract
  • ½ cup whole grain rolled oats
  • ½ teaspoon baking powder
  • ¼ teaspoon ground cinnamon
  • ⅛ teaspoon salt
  • 1 tablespoon mini semi-sweet chocolate chips divided
  • Fresh raspberries to serve

Instructions
 

  • Grease a single-serving mug with baking spray and set it aside.
  • In a medium bowl, whisk together the milk, maple syrup, egg, oil, and vanilla extract using a fork until fully combined.
  • Add the rolled oats, baking powder, cinnamon, and salt to the wet mixture. Gently fold them in until just incorporated.
  • Fold in the mini chocolate chips, reserving some to sprinkle on top later.
  • Transfer the prepared oatmeal mixture into the greased mug and sprinkle the reserved chocolate chips on top for extra flavor.
  • Microwave on high for 2 minutes, checking for doneness after 2 minutes. The mug cake is done when it rises and a toothpick inserted into the center comes out clean. If not fully cooked, microwave for an additional 30 seconds.
  • Let the oatmeal mug cake cool for 1–2 minutes before enjoying. For a beautiful finish, top with fresh fruits like raspberries and garnish with a sprig of fresh mint. Enjoy!

Notes

  1. Greasing the mug before pouring the oatmeal batter makes it easier to enjoy and ensures a stick-free oatmeal experience.
Keyword breakfast, easy desserts, Healthy, oatmeal

Moist Lemon Mini Bundt Cakes with Lemon Icing

December 31, 2024 by Abi Guna 21 Comments

My love for individual desserts knows no bounds! These Lemon Mini Bundt Cakes with Lemon Icing are bright, zesty, and irresistibly delicious, a perfect treat for any occasion. Moist and tender like my classic chocolate mini bundt cakes, they’re infused with fresh lemon juice and zest for a burst of citrus flavor. f you’re looking for more festive treats like this, be sure to explore my holiday desserts collection for even more sweet and celebratory ideas. 

Close up shot of lemon mini bundt cake.

 If you’re a fan of citrus desserts, these Lemon Mini Bundt Cakes are sure to become your new favorite. Perfectly portioned, they’re ideal for everything from casual gatherings to elegant tea parties. Each bundlet cake is topped with a sweet and tangy lemon glaze and garnished with a touch of lemon zest for a stunning, eye-catching finish. Whether you’re looking for an easy recipe to impress guests or a special celebration, these mini bundt cakes are guaranteed to be a showstopper for any season!

These easy mini lemon bundt cakes were inspired by my decadent Mini Chocolate Bundt Cakes. If you enjoy light and refreshing desserts, you’ll also love the rich Red Velvet Cake Waffles or a quick treat like Oatmeal Mug Cake or Orange Poppy Seed Muffins. Pair it with a coffee enhanced by Vanilla Bean Coffee Syrup for a perfect finish. If you are a lemon lover but looking dinner options, then try my Lemon Pepper Chicken Thighs or Shrimp Scampi !

[feast_advanced_jump_to]

Why Mini Lemon Bundt Cakes are Beyond Special

These mini-bundt cakes are a treasure at any gathering. They bake up much quicker than the larger size, thus retaining more moisture. Of course, the lemon glaze adds a unique vibrancy. 

Lemon mini budnt cakes in a white plate.

Mini bundt cakes are as visually stunning as they are tasty. Bundtlet cakes gratify all the senses. They are easy to prepare, make perfect gifts for the office or for teachers, and are delightfully versatile to decorate. Small bundt cake desserts are easy to deal with at gatherings such as cookouts and picnics as they require no utensils and come with automatic portion control. And they are fun for kids to handle.

It is easy to create your own hosting style by serving individual miniature bundt cakes as a dessert. There is an abundance of mini bundt cake recipes with which to experiment. This homemade lemon mini bundt cake recipe emphasizes the tangy pleasure of lemons.

Why Fresh Lemons Are Essential for Perfectly Balanced Pastry Flavors

Lemons are used for more than lemonade. The addition of lemon flavor to pastry adds complexity and a pleasant tartness. Despite their tartness, lemons contain sugar, allowing lemons and sugar to work together in tasty harmony while subtly contrasting each other. The pairing of these two ingredients is a successful culinary marriage that creates a new and unique flavor profile. (Consider what the addition of salt does to food.) To bring out the true flavor, a tinge of lemon works a similar magic to a tinge of salt.

Mini lemon bundt cakes drizzled with lemon glaze on top and in sides lemon  and milk.

While cooking emergencies may compel you to reach for bottled lemon juice for your cake and lemon icing, it is emphatically not recommended. Fresh lemons are healthy and brighter due to the lack of preservatives.

Serving Suggestions for Lemon Cakes

  • Pair these cakes with a hot cup of tea or coffee like my salted caramel latte or Vanilla Bean Latte for an afternoon treat or dessert.
  • Keep it simple with a light dusting of powdered sugar over the mini bundt cakes. This enhances the zesty lemon flavor while maintaining a clean, elegant presentation. I do this when I am running out of time!
  • Add a quick dessert-board pairing like Puff Pastry Hearts with Raspberries, or round out a party spread with Mini Chocolate Bundt Cakes for a chocolate-and-citrus combo that guests love.
  • Serve with fresh strawberries, raspberries, or blueberries for a burst of color and natural sweetness that complements the citrus flavor.

These serving suggestions ensure your lemon mini bundt cakes shine as a star dessert for any occasion, whether it’s a casual snack or an elegant celebration!

Ingredients

These ingredients come together to create a moist, flavorful, and perfectly balanced mini lemon bundt cake recipe!

Ingredients laid out for mini lemon bundt cakes.
  • All-Purpose Flour: Provides structure to the cake and it’s the base that balances the wet and dry ingredients.
  • Baking Powder: Acts as a leavening agent, helping the cake rise and achieve a light, fluffy texture.
  • Salt: Enhances the flavor by balancing the sweetness and intensifying the lemon and vanilla flavor.
  • Butter: Adds richness and moisture to the bundt cakes.
  • White Granulated Sugar: Sweetens the cake and helps retain moisture during baking.
  • Eggs: Provide structure, richness, and stability while binding the ingredients together for a smooth batter.
  • Sour Cream: Adds moisture and a slight tang, complementing the lemon flavor and ensuring a soft, moist crumb.
  • Oil: Contributes to the cake’s moisture, keeping it soft and tender even after cooling.
  • Fresh Lemon Juice:Infuses the cake with a bright, tangy citrus flavor.
  • Lemon Zest: Adds concentrated lemon aroma and citrusy burst.
  • Vanilla Extract: Complements the lemon flavor with a subtle sweetness and warmth
  • Confectioners’ Sugar: Used to create the sweetened lemon drizzle that adds the perfect touch of sweetness to the lemon bundt cakes.

See recipe card for quantities.

How to Make a Mini Lemon Bundt Cake with Sour Cream

As with most baking jobs, start by preheating the oven to 350 degrees. And here comes the main job, greasing your mini bundt pans. I recommend dusting it with flour after greasing as it is critical to prevent the cakes from sticking. Then in a large bowl, combine the flour, baking powder, and salt. Mix well and set aside.

Lemon mini bundt cake in a cooling rack.

In a separate bowl start whipping the butter and sugar with a hand mixer to ensure light cakes until the mixture is smooth and fluffy. Start from low speed and gradually increase the speed and beat for 4-5 minutes.

Keep whipping as you add an egg at a time and whip after each addition. Then stir in the remaining wet ingredients, the sour cream, oil, lemon juice, lemon zest, and the vanilla extract. Combine well. 

The sour cream is an important part of the cake batter as it adds moisture and prevents dryness. It also adds just enough tanginess to work with the lemon. 

Gradually stir the flour mix into the wet mix. At this point, it is time to transfer the batter to the mini bundt cake pan. You can use individual bundt pans (six for this mini lemon bundt cakes recipe) or a single six-cup bundt pan. The latter may be more convenient.

Fill each up about two-thirds to the top and bake for 20 minutes – until you can insert a toothpick in the center of one of the cakes, and it comes out clean. Toothpick test always works great.

When the cakes are done, allow them to cool. Use this time to combine the icing ingredients in a bowl until the consistency is smooth. Drizzle the icing over the cooled little cakes and enjoy. 

STEP-BY-STEP INSTRUCTIONS

In a white bowl butter and sugar for mini lemon mini bundt cakes.

Beat the butter and sugar until pale and light on a medium speed using a electric mixer or stand mixer.

Sour cream and wet mixture in a white bowl for making mini bundt cakes.

Sour cream, lemon zest, oil added to the wet mixture.

Dry mix combined for making the mini bundt cake batter.

Mix wet and dry mixture together gently.

Mini lemon bundt cake batter filled in the mini bundt cake pan.

Fill ⅔ of the bundt cake batter into the mini bundt cake pan.

Baked mini bundt cakes cooled in the wire rack.

Once done allow the mini bundt cakes to cool down.

lemon icing prepared in a bowl for mini lemon bundt cakes.

Mix confectioners sugar, lemon juice and milk to make lemon icing.

Drizzle the amzing lemon icing over the lemon mini bundt cakes to enjoy with your cup of latte!

Lemon glaze drizzled over lemon mini bundt cake in a white plate.

Substitutions for Lemon bundt Cake Ingredients

  • All-Purpose Flour: Substitute with gluten-free all-purpose flour for a gluten-free option.
  • White Granulated Sugar: Use coconut sugar for a natural sweetener or light brown sugar for a deeper flavor (may slightly alter the color).
  • Sour Cream: Substitute with plain Greek yogurt, buttermilk, or coconut cream for a dairy-free alternative.
  • Fresh Lemon Juice: Replace with bottled lemon juice (in a pinch) or an equal amount of lime juice for a different citrus twist. Meyer lemons works well too!

Variations for Mini Lemon Bundt Cake Recipe

These variations let you customize your lemon bundt cakes to suit different tastes and occasions!

  • Lemon Bundt Cake: Pour the batter into a regular bundt pan and bake for a show-stopping presentation. Drizzle with a lemon glaze or dust with powdered sugar. You can double the recipe and follow this same recipe to create a single lemon bundt cake.
  • Add Blueberries: Fold in 1 cup of fresh or frozen blueberries into the batter. Toss the blueberries in a little flour before adding to prevent them from sinking to make Lemon Blueberry Bundt cake recipe.
  • Lemon Poppy Seed Cake: Add 1–2 tablespoons of poppy seeds to the batter for a delightful crunch and a classic pairing with lemon.
  • Add Raspberries: Swirl in raspberry jam or fold fresh raspberries into the batter for a tangy-sweet flavor contrast. The color contrast of the cake will be amazing.
  • Lemon Coconut Cake: Replace the sour cream with coconut cream and sprinkle shredded coconut on top of the glaze for a tropical twist.
lemon icing over the lemon mini bundt cake.

Equipment

  • ​​Mixing bowls - To mix the wet and dry ingredients separately.
  • Mini Bundt Cake Pan - Essential for creating the signature bundt cake shape. Use a silicone or metal mini bundt pan with 6 cavities.
  • Baking Spray - To grease the bundt pan cavities for easy release of cakes.
  • Whisk and spatula - To mix the ingredients.
  • Cooling rack - To allow the cakes to cool evenly after baking.
  • Hand mixer or stand mixer - A handheld or stand mixer makes creaming butter and sugar easier, but you can also use a whisk or spatula.

How To Store Moist Lemon Mini Bundt Cakes

To keep them fresh and flavorful, here’s how you can store them:

Room Temperature: You can store your lemon mini bundt cakes at room temperature for up to three days. Simply place them in an airtight container to prevent them from drying out. This is ideal if you plan to enjoy them within a few days.

Refrigeration: For longer storage, refrigerate the cakes. Wrap them individually or layer them in an airtight container to lock in moisture. They’ll stay fresh for up to four days in the fridge. Allow them to come to room temperature before serving for the best texture and flavor.

Freezing: If you need to store them for a more extended period, these cakes freeze beautifully. Wrap each cake securely in plastic wrap to protect against freezer burn, then place them in an airtight container or freezer-safe bag. They can be frozen for up to three months. Thaw them at room temperature or in the refrigerator when ready to enjoy.

By following these storage tips, you can ensure your lemon mini bundt cakes retain their deliciously moist and zesty flavor, whether you’re saving them for a quick snack or a future celebration. Perfect for prepping ahead!

Back light shot of lemon mini bundt cake in a white plate.

Top Tips for Preparing Lemon Mini Bundt Cakes

  • Your bundt pans should be five inches in size. If you are using smaller pans, reduce the baking time.
  • If you are out of sour cream, plain Greek yogurt can be substituted in a pinch.
  • You can adjust the strength of the lemon flavor by adjusting the sugar and lemon quantities.
  • Ovens vary, and you don’t want your mini bundts to burn. Check on them during the baking time.

FAQ

How long do mini bundt cakes take to bake?

Mini bundt cakes typically take about 18–25 minutes to bake at 350°F (175°C). However, the exact time may vary depending on cake pan size and oven variations.

Can I make these mini bundt cakes dairy-free and gluten-free?

Yes! Replace the butter with plant-based butter, the sour cream with dairy-free yogurt, and the milk in the icing with almond milk or oat milk for the dairy-free version. Replace the all-purpose flour with a gluten-free 1:1 baking flour blend. Ensure all other ingredients are gluten-free as well for a gluten-free version.

How do I prevent the cakes from sticking to the pan?

Grease the pan thoroughly with oil or butter, then dust with flour. Tap out any excess flour. You can also use a non-stick baking spray designed for bundt pans.

Will bottled lemon juice work instead of fresh?

While bottled lemon juice works in a pinch, fresh lemon juice is highly recommended for the best flavor. Fresh lemons also provide zest, which adds a fragrant citrus punch.

Can I make this recipe in a regular-sized bundt pan?

Absolutely! Double the recipe and adjust the baking time to about 40-50 minutes, or until a toothpick inserted in the center comes out clean.

What's the secret to creating a perfectly moist mini lemon bundt cake recipe?

Use ingredients like sour cream or yogurt, don’t overmix the batter, and avoid overbaking. The glaze also helps seal in moisture and adds extra flavor.

What are lemon mini bundt cakes?

Lemon mini bundt cakes are small, individual-sized cakes baked in mini bundt pans, flavored with fresh lemon juice and zest for a bright, citrusy taste.

Can I make lemon mini bundt cakes ahead of time?

Yes! You can bake them 1–2 days in advance. Store in an airtight container and glaze just before serving for the best texture.

What glaze goes best with lemon bundt cakes?

A simple lemon glaze made with powdered sugar and lemon juice pairs perfectly, adding extra sweetness and enhancing the citrus flavor.

Can I freeze mini bundt cakes?

Yes, you can freeze them without glaze for up to 2 months. Thaw at room temperature and glaze before serving.

Horizontal shot of lemon mini bundt cake.

Related

Looking for other recipes like this? Try these:

Pairing

These are my favorite dishes to serve with this lemon mini bundt cake recipe:

mini lemon bundt cake in a white plate.

Lemon Mini Bundt Cake

Abi Guna
Lemon Mini Bundt Cakes with Lemon Icing are bright, zesty, and irresistibly delicious—a perfect treat for any occasion. Moist and tender, they’re infused with fresh lemon juice and zest for a burst of citrus flavor.
5 from 10 votes
Print Recipe Pin Recipe
Prep Time 15 minutes mins
Cook Time 20 minutes mins
Total Time 35 minutes mins
Course Dessert
Cuisine American
Servings 6 mini bundt cakes
Calories 423 kcal

Equipment

  • Mini Bundt Pan
  • Mixing Bowls
  • Hand Mixer
  • Cooling rack
  • Non-Stick Spray
  • Measuring cups and spoons

Ingredients
  

For lemon mini bundt cake

  • 1 ⅓ cups all-purpose flour
  • 1 ½ teaspoons baking powder
  • ½ teaspoon salt
  • ½ cup unsalted butter at room temperature
  • ¾ cup white granulated sugar
  • 2 eggs at room temperature
  • ½ cup sour cream at room temperature
  • ¼ cup flavorless oil
  • 3 tablespoons fresh lemon juice
  • 1 teaspoon lemon zest
  • 1 teaspoon vanilla extract
  • Lemon zest for garnish

For Lemon Icing

  • 1 cup confectioners sugar
  • 1 - 2 tablespoons milk
  • 1 tablespoon fresh lemon juice

Instructions
 

  • Preheat your oven to 350°F (175°C). Grease the mini bundt cake pan with oil or cooking spray and dust it with flour. Tap out any excess flour by inverting the pan. Set aside.
  • In a medium bowl, combine the flour, baking powder, and salt. Mix well and set aside.
  • In another bowl, use a hand mixer to beat the butter and sugar for 2-3 minutes until light and creamy using a hand mixer or stand mixer.
  • Add the eggs, one at a time, beating well after each addition. Then, add the sour cream, oil, lemon juice, fresh lemon zest, and vanilla extract, mixing until fully combined.
  • Slowly add the flour mixture to the wet ingredients, mixing until everything is well incorporated.
  • Use a piping bag or spoon to fill each cavity of the prepared mini bundt cake pan up to ⅔ full. Smooth the tops if needed.
  • Bake for 18-20 minutes, or until a toothpick inserted into the center comes out clean.
  • Remove the pan from the oven and let the mini bundt cakes cool in the pan for 10 minutes. Then, carefully invert the pan onto a wire rack to release the cakes. Allow them to cool completely for another 10 minutes.
  • While the cakes cool, prepare the icing by combining confectioners' sugar, lemon juice, and milk in a bowl. Stir until the mixture reaches a smooth, pourable consistency.
  • Once the cakes are cool, drizzle the lemon icing over the top and garnish with lemon zest. Enjoy these delightful mini bundt cakes!

Notes

  1. If you're looking to make a gluten-free version of lemon mini bundts, simply substitute gluten-free flour for the all-purpose flour (1:1 gluten-free baking flour)
  2. Store the bundt cakes at room temperature for up to 2 days, or in the refrigerator for up to 1 week.
Keyword bundt cakes, easy desserts, lemon

If you try this recipe, please leave a STAR rating in the comment section below! Your feedback helps a small blogger like me stay motivated in creating content for my readers. Also, feel free to follow me at Food Exit on Instagram, TikTok, and Pinterest for the latest recipe updates!

Juicy Air Fryer Chicken Meatballs In 20 Minutes

December 30, 2024 by Abi Guna 19 Comments

These air fryer chicken meatballs are juicy on the inside, crispy on the outside, and unbelievably easy to make in just 20 minutes. Perfect for busy weeknights, meal prep, or healthy appetizers, they’re packed with flavor and require minimal oil thanks to the magic of the air fryer. Serve them with pasta, toss them into a salad, or enjoy them as protein-rich snacks, this versatile recipe is one you’ll make again and again.

Chicken meatballs served as a appetizer along with the marinara sauce.

As I mentioned if you’re looking to switch up your dinner routine, ground chicken meatball recipes are a versatile and delicious option to try. These easy-to-make chicken mince meatballs recipes are perfect for busy weeknights, meal prep, or even as a party appetizer. The real magic, however, lies in pairing them with the best sauce for chicken meatballs—whether it’s a tangy marinara, creamy Alfredo, spicy buffalo sauce, or a sweet and savory teriyaki glaze. No matter your preference, these meatballs are sure to impress with their juicy texture and mouthwatering flavor combinations.

Some other dinner ideas with ground chicken: Ground Chicken Spaghetti and Ground Chicken Stir Fry

Looking for more healthy air-fried recipes? Check out my Air Fryer Teriyaki Chicken Thighs, Air Fryer BBQ Chicken, Air Fryer Chicken Parmesan, and Air Fryer Sweet Potato Wedges! And also I have a huge collection of chicken recipes in my blog, don't forget to check them out 🙂

[feast_advanced_jump_to]
Close up shot of chicken Meatballs in the air fryer.

Why You’ll Love This Quick and Healthy chicken meatballs in air fryer

  • Quick and Easy: Ready in just 20 minutes, this recipe is perfect for busy weeknights or last-minute appetizers.
  • Healthy: Made with lean ground chicken breast and cooked in the air fryer, these meatballs are a lighter alternative to traditional fried versions.I’m always excited to try healthier twists!
  • Juicy and Flavorful: These air-fried meatballs remain perfectly moist and tender, thanks to the ideal blend of ingredients. Every bite is packed with irresistible deliciousness!
  • Versatile: Serve them as a snack, appetizer, or even as part of a main dish with pasta, salad, or veggies.
  • Family-Friendly: Both kids and adults will love these meatballs, especially when paired with their favorite dips like marinara, ranch, or honey mustard.
  • Minimal Cleanup: Cooking in the air fryer means less mess in the kitchen and no oil splatter to deal with. For an even easier cleanup, line the air fryer basket with foil or parchment paper before cooking!
Stacked meatballs in one above the another in a white plate.

What to Serve with Air Fryer Chicken Meatballs

If you’re wondering what to serve with Air Fryer Chicken Meatballs, don’t worry—I’ve got you covered! These ground chicken meatballs are incredibly versatile and pair perfectly with a variety of sides and accompaniments. Here are some delicious ideas to complete your meal:

  1. Serve the chicken meatballs with marinara sauce, ranch, garlic aioli, honey mustard, or barbecue sauce for a flavorful dipping experience. Arrange the meatballs on a platter with toothpicks and a side of dipping sauces—perfect for parties and gatherings as I did here in this recipe.
  2. Pair the meatballs with spaghetti or any pasta tossed in marinara or Alfredo sauce for a comforting and satisfying meal. For inspiration, check out some of my favorite recipes: Ricotta Pesto Pasta and Shrimp Scampi Fettuccine.
  3. Serve the meatballs over a fresh salad with mixed greens, cucumbers, and your favorite dressing like my Kale Quinoa Salad.
  4. Pair the meatballs with creamy mashed potatoes and roasted vegetables such as Roasted Carrots and Cauliflower or roasted Hot Honey Brussels sprouts for a delicious and well-rounded meal.
  5. Make meatball subs with toasted rolls, marinara sauce, and melted mozzarella or Parmesan cheese.

Why This Recipe Works

Making juicy chicken meatballs in the air fryer is easier than you think — but there’s a little science behind why these turn out so good every time. Using ground chicken with a bit of natural fat keeps them from drying out, while a quick mix of breadcrumbs and egg locks in moisture. Cooking them in a single layer with space around each meatball allows hot air to circulate, giving you that golden-brown crust without deep frying. And flipping halfway through ensures even cooking and crispness on all sides. The result? Perfectly tender, flavorful chicken meatballs that taste indulgent but are secretly light and healthy.

Ingredients

These ingredients come together to create flavorful, juicy, and perfectly seasoned chicken meatballs!

Ingredients laid out for creating Best Air Fryer Chicken Meatballs Recipe.
  • Ground Chicken: The base of the meatballs, ground chicken provides a lean and protein-packed alternative to traditional ground meats.
  • Medium Egg: Acts as a binding agent, holding the ingredients together for perfectly shaped meatballs.
  • Olive Oil: The secret ingredient that adds moisture and richness, ensuring the meatballs stay tender even when air-fried.
  • Worcestershire Sauce: Enhances the flavor with a savory, umami kick that complements the chicken.
  • Plain Breadcrumbs: Helps absorb moisture and adds structure, creating a soft and cohesive texture.
  • Parmesan Cheese: Adds a touch of saltiness and a rich, cheesy flavor to the meatballs.
  • Garlic Powder: Infuses the meatballs with a mild, aromatic garlic flavor.
  • Onion Powder: Provides a subtle, sweet onion flavor without the need for fresh onions.
  • Dried Parsley: Adds a pop of color and a light, herbaceous flavor to balance the seasonings.
  • Salt: Enhances all the flavors and ensures the seasoning is well-rounded.
  • Ground Pepper: Adds a hint of heat and spice, giving the meatballs a touch of depth.

See recipe card for quantities.

How to make chicken meatballs in air fryer

Juicy Chicken Meatballs in Air Fryer texture.

Making chicken meatballs in an air fryer is quick, easy, and results in perfectly juicy and flavorful meatballs every time. Start by combining all the mentioned ingredients in the recipe card: ground chicken, breadcrumbs, Parmesan cheese, egg, olive oil, Worcestershire sauce, and seasonings like garlic powder, onion powder, parsley, salt, and pepper. Remember not to overmix and all you need is just your hands for that even mixing.

Mix everything just until combined, then shape the mixture into even-sized balls using an ice cream scoop or your hands. I used my 1 tablespoon measurement ice scream scoop which is just perfect size for a meatball.

 Preheat your air fryer to 390°F and arrange the meatballs in a single layer in the basket, leaving space between them for air circulation. Remember the easy clean up option I mentioned, use a parchment paper or aluminum foil to cover the basket.

Cook the ground chicken meatballs in air fryer for about 10-12 minutes, flipping them halfway through to achieve a golden, crispy exterior. 

STEP-BY-STEP INSTRUCTIONS for chicken meatball recipe air fryer

Ingredients mixed in a bowl for air fryer chicken meatballs.

Combine all the ingredients into a large bowl.

Chicken mixture in a white bowl for the BEST moist chicken meatball recipe.

Mix it thoroughly.

Chicken meatballs shaped into balls placed in a white plate.

Shaped chicken meatballs.

Chicken Meatballs ready to air fry in the air fryer basket.

Air fry the chicken meatballs for 10-12 minutes.

Garnish the air fryer chicken meatballs with chopped parsley and freshly grated parmesan cheese once done.

These air fried chicken meatballs are versatile and can be served with marinara sauce, over pasta, or alongside roasted vegetables for a wholesome meal. Whether you're prepping a quick dinner or creating an appetizer for a crowd, this method guarantees delicious and effortless results every time!

Air Fryer Chicken Meatballs with Parmesan in an air fryer basket.

Substitutions for easy air fryer chicken meatballs

  • Ground Chicken: Substitute with ground turkey for a similar lean option, or use ground beef or pork for a richer flavor. Follow the rest of the same steps.
  • Olive Oil: Use avocado oil, melted butter, or any neutral-flavored oil like canola oil.
  • Worcestershire Sauce: Swap with soy sauce, tamari (for gluten-free), or coconut aminos for a similar umami flavor. I have used soy sauce at times and still these meatballs have turned out so great.
  • Plain Breadcrumbs: Use panko breadcrumbs instead of regular breadcrumbs for a lighter texture.

Variations for Air Fryer Chicken Meatballs Recipe

  • Cheese-Stuffed Chicken Meatballs: My daughter loves this version. Add a small cube of mozzarella or cheddar cheese in the center of each meatball for a gooey surprise when you bite into it.
  • Spicy Meatballs: Add ½ teaspoon of cayenne pepper, crushed red pepper flakes, or a splash of hot sauce to the mixture for a kick of heat. Spice lovers would love this version of meatballs.
  • Asian Chicken Meatballs: Replace Worcestershire sauce with soy sauce, add 1 teaspoon of grated ginger, and serve with a sesame glaze or teriyaki sauce. The meatballs will turn better than the take outs!
  • BBQ Meatballs: Swap Worcestershire sauce for 1 tablespoon of barbecue sauce and serve with extra sauce for dipping. Best to create during the grilling season!
Air fried chicken meatballs dipped in the marinara sauce.

Equipment

Air Fryer: The essential tool for cooking the meatballs to golden perfection without deep frying.

Mixing Bowl: A large bowl for combining all the ingredients evenly.

Measuring Cups and Spoons: For accurately measuring ingredients.

Ice Cream Scoop or Cookie Scoop: To make uniform meatball sizes for even cooking.

Foil or Parchment Paper: Used to line the air fryer basket for easy cleanup and to prevent sticking.

Meat Thermometer: To check that the internal temperature of the meatballs reaches 165°F for safe consumption.

How to Store Easy Air Fryer Chicken Meatballs

  1. Refrigerating Leftovers: Place leftover meatballs in an airtight container and store them in the refrigerator. These air-fried meatballs will stay fresh for up to 3 days, making them a convenient option for meal prepping.
  2. Freezing Meatballs: Allow the cooked meatballs to cool completely, then arrange them in a single layer on a baking sheet and freeze until firm (about 1-2 hours). Once frozen, transfer them to a freezer-safe zip-top bag or container. They can be frozen for up to 3 months, making them a handy solution for quick and easy dinners on busy weekdays.

By storing your Moist Air Fryer Chicken Meatballs properly, you can enjoy them anytime as a quick snack, meal, or appetizer!

How to Reheat these frozen Homemade Chicken Meatballs

  •  Air Fryer Method: Reheat refrigerated or frozen chicken meatballs in the air fryer at 350°F for 3-5 minutes or until heated through.
  • Oven Method: Place meatballs on a baking sheet and reheat at 350°F for 10 minutes. 
  • Stovetop Method: Warm meatballs in a skillet over medium heat with a little marinara sauce for added moisture and flavor.
CLose up shot of chicken Meatballs near marinara sauce.

Top Tips to make the perfect air fryer chicken meatballs recipe

Follow these below tips for perfectly juicy, flavorful, and golden air fryer chicken meatballs every time!

  1. Always preheat your air fryer to ensure even cooking and a perfect golden exterior.
  2. Mix the chicken meatball ingredients until just combined. Overmixing can make the meatballs dense and tough. We don't want that!
  3. Use a cookie or ice cream scoop to ensure all meatballs are the same size. This helps them cook evenly. I used my 1 tablespoon measurement ice cream scoop.
  4. Use a meat thermometer to ensure the meatballs reach an internal temperature of 165°F for safe consumption.

FAQ

How long to air fry chicken meatballs?

Chicken meatballs typically take about 10–12 minutes to cook in an air fryer at 390°F (200°C). Turn the meatballs over around the 5–6 minute mark to ensure they cook evenly on all sides. Adjust cooking times slightly based on the size of your meatballs and the type of air fryer you're using, as models may vary.

Can I use the same recipe to create Air fryer ground turkey meatballs?

Yes, you can easily substitute ground turkey for ground chicken. Just follow the same recipe and cooking instructions. Ground turkey may be slightly leaner, so be sure to include the egg and olive oil to maintain moisture.

How do I prevent the meatballs from sticking to the air fryer basket?

Line the air fryer basket with parchment paper or aluminum foil or lightly spray it with non-stick cooking spray. This prevents sticking and makes cleanup easier.

Can I freeze uncooked air fryer chicken meatballs?

Yes, you can freeze uncooked air fryer chicken meatballs! Freezing them before cooking is a great option for meal prep or making a batch ahead of time as it saves a lot of time. Prepare the meatball mixture as directed and shape it into evenly sized balls. Place the uncooked meatballs on a baking sheet lined with parchment paper in a single layer. Make sure they aren’t touching.
Freeze for 1-2 hours or until the meatballs are firm to touch. Transfer the frozen meatballs to a zip-top freezer bag or airtight container. Label the bag with the date. Freeze for up to 3 months.

Can I make these meatballs gluten-free?

Yes! Swap the breadcrumbs for gluten-free breadcrumbs or almond flour to make the recipe gluten-free. This is also a option for creating a Low-Carb Air Fryer Chicken Meatballs.

Can I use this recipe for baking the meatballs in the oven?

Yes, you can bake the meatballs at 400°F (200°C) for 15-20 minutes, flipping halfway through. However, the air fryer gives them a crispier texture.

horizontal image of air fryer chicken meatballs in a white plate with sauce.

Related

Looking for other recipes like this? Try these:

Pairing

These are my favorite dishes to serve with Air Fry Chicken Meatballs Recipe:

Juicy Chicken Meatballs in a white plate with marinara sauce on the sides.

Air Fryer Chicken Meatballs

Abi Guna
These juicy air fryer chicken meatballs are crispy on the outside, tender on the inside, and ready in just 20 minutes. Made with simple pantry staples and cooked with minimal oil, they’re a healthy and flavorful option for quick dinners, meal prep, or protein-packed snacks. Serve them with pasta, tuck them into sandwiches, or enjoy them with your favorite dipping sauce, this easy recipe is a weeknight favorite you’ll make again and again.
5 from 9 votes
Print Recipe Pin Recipe
Prep Time 10 minutes mins
Cook Time 12 minutes mins
Total Time 22 minutes mins
Course Appetizer, Main Course, Snack
Cuisine American
Servings 4 peoples
Calories 171 kcal

Equipment

  • Air Fryer
  • Measuring spoons and cups
  • Ice cream scoop
  • Mixing Bowls
  • Meat thermometer

Ingredients
  

  • 1 lb ground chicken
  • 1 medium egg
  • 1 tablespoon olive oil
  • ½ tablespoon worcestershire sauce
  • ½ cup regular breadcrumbs plain or panko
  • ¼ cup parmesan cheese grated
  • 1 teaspoon garlic powder
  • 1 teaspoon onion powder
  • 1 teaspoon dried parsley
  • ½ teaspoon salt
  • ½ teaspoon ground pepper
  • Chopped fresh parsley to garnish
  • Marinara sauce to serve

Instructions
 

  • Preheat your air fryer to 390°F for 5 minutes. Line the air fryer basket with aluminum foil or parchment paper to prevent sticking and easy cleaning, and set it aside.
  • In a large mixing bowl combine the ingredients to make chicken meatballs; ground chicken, egg, olive oil, worcestershire sauce, breadcrumbs, parmesan cheese, garlic powder, onion powder, dried parsley, salt and pepper. Mix everything together until well combined.
  • Using an ice cream scoop or your hands, scoop out portions of the chicken mixture and roll them into round balls. Place the meatballs on a plate. This recipe yields approximately 20-22 meatballs.
  • Arrange the chicken balls in the air fryer basket, ensuring they don’t touch or overcrowd. Air fry at 390°F for 10-12 minutes, flipping them halfway through. Cook until the meatballs are golden and the internal temperature reaches 165°F.
  • Once cooked, transfer the meatballs to a serving plate. Garnish with fresh parsley and extra Parmesan cheese if desired.
  • Serve these juicy air-fried chicken meatballs with marinara sauce, ranch, or your favorite dip. Perfect as an appetizer, snack, or main dish!

Notes

  • Line your air fryer basket with parchment paper or foil to prevent sticking and make cleanup easier.
  • Place the meatballs in a single layer with space between them to allow air to circulate for even cooking. Cook in batches if necessary.
  • Turn the meatballs halfway through cooking to ensure they’re golden and evenly cooked on all sides.


Keyword Air fryer recipes, Appetizers, Chicken, Healthy, Main Dish, snacks

If you try this recipe, please leave a STAR rating in the comment section below! Your feedback helps a small blogger like me stay motivated in creating content for my readers. Also, feel free to follow me at Food Exit on Instagram, TikTok, and Pinterest for the latest recipe updates!

Mini Chocolate Bundt Cakes With Chocolate Ganache

December 28, 2024 by Abi Guna 5 Comments

Who else loves individual desserts as much as I do? Let me introduce you to my all-time favorite: Mini Chocolate Bundt Cakes with Chocolate Ganache. These little cakes are the perfect combination of rich indulgence and elegant presentation, making them ideal for any occasion. Each bite is irresistibly moist and tender, with a deep dark chocolate flavor elevated by a hint of coffee in the batter. Finished with a glossy, silky dark chocolate ganache, these mini bundt cakes are pure decadence in every bite!

Mini chocolate bundt cake with ganache.


These mini chocolate bundt cakes with chocolate ganache are a must-make for chocolate lovers—rich, moist, and perfectly sized for parties, holidays, or gifting. The deep chocolate flavor comes from Dutch-process cocoa, sour cream, and a touch of coffee, which intensifies the cocoa and keeps the cakes tender. Finished with a silky dark chocolate ganache (just melted chocolate and warm heavy cream), these moist chocolate bundt cakes taste bakery-quality with minimal effort.

If you are a bundt cake fan then you should try this lemon mini bundt cake recipe too!

Are you a chocolate lover? Then you’re in for a treat! Don’t miss these indulgent recipes: Dark Chocolate Almond Fudge, Mint Chocolate Brownies, and Chocolate Chip Oatmeal Cookies, Chocolate Covered Strawberries, Rocky Road Fudge. Each one is packed with rich, chocolatey goodness that’s sure to satisfy your sweet tooth. Give them a try—you won’t be disappointed!

[feast_advanced_jump_to]
Flatl lay image of chocolate mini Bundt cake with chococlate chips, milk in the sides.

Why You’ll Love This Recipe Mini Chocolate Bundt Cake Recipe

  • Rich Chocolate Flavor: The combination of cocoa and coffee creates a deep, decadent chocolate taste that’s irresistible. I personally love chocolate cakes with coffee flavored recipes.
  • Incredibly Moist cake : Thanks to sour cream, oil, and butter, these mini bundt cakes have a melt-in-your-mouth texture you’ll adore.
  • Perfectly Sized Portions: Individual cakes make serving effortless—no slicing required! They’re great for parties, gifts, or a personal treat.
  • Easy but Elegant: Despite their fancy look, these cakes are simple to make and always impress with their sophisticated ganache topping.
  • Crowd-Pleaser: Whether for a birthday, holiday, valentines day, anniversaries, potluck or just because, these cakes are sure to be a hit with everyone who tries them for dessert!

What to Serve with Mini Chocolate Bundt Cakes

Mini Chocolate Bundt Cakes are a treat on their own, but pairing them with the right accompaniments can elevate the experience. Here are some of my favorite serving ideas to make your dessert extra special:

Milk - A glass of cold milk is a classic choice—it perfectly balances the cake’s sweetness and richness, making each bite even more enjoyable.

Coffee - A cup of coffee is a natural companion for chocolate! Espresso, cappuccino, or a latte beautifully complements the rich chocolate flavor. For a decadent pairing, try my Salted Caramel Latte or Vanilla Bean Latte alongside these mini bundt cakes—it’s a match made in dessert heaven.

Scoop of Ice Cream - Who can resist cake and ice cream together? Add a scoop of vanilla, chocolate, or coffee ice cream on the side for a delightful contrast of warm and cold. It’s a guaranteed crowd-pleaser.

Whipped Cream Topping - Top each bundt cake with a dollop of freshly whipped cream. For an extra touch, garnish with chocolate shavings, fresh berries, or even a sprinkle of cocoa powder.

Dessert Board - Create a dessert board with Nutella Puff Pastry, Apple Turnovers, Raspberry Puff Pastry, Pastel Donuts, Lemon Mini Cakes, etc.,

Close up shot of chocolate mini bundt cakes.

How to Make Dark Chocolate Ganache

Chocolate ganache is prepared by combining chopped chocolate and hot cream. You can also use chocolate chips instead like I used in this recipe. Place the chopped dark chocolate chips in a microwave-safe bowl and set aside. Warm the cream in a pan and bring to a simmer. Don’t allow the cream to boil. As soon as the cream starts to simmer, remove it from the heat and pour over the chocolate chips. 

Allow the mixture to sit for a minute or two, then stir to blend the two ingredients and use immediately while still warm.

Why Opt for Small Bundt Cakes

Size does matter. Regarding bundt cakes, small cakes are a frequent choice due to faster baking time, less waste, and the ease of individual servings. It is also easier to experiment with various flavors without the commitment required of a larger cake.

Visually, these miniature bundt cakes are an adorably cute after-dinner treat. Without specifically broaching the topic, they are also an effective way to keep chocoholics from overeating. They are perfect for crowds as everyone can help themselves.

Ingredients

Ingredients laid out for mini chocolate bundt cakes.
  • All-purpose flour: Provides structure to the cake by forming the base of the batter. 
  • Dutch processed cocoa powder: Adds a rich, deep chocolate flavor and a smooth texture, love using Dutch processed always in my  baking recipes.
  • Baking powder: A leavening agent that helps the cake rise by creating air pockets in the batter during baking.
  • Salt: Enhances the chocolate flavor and balances the sweetness of the cake.
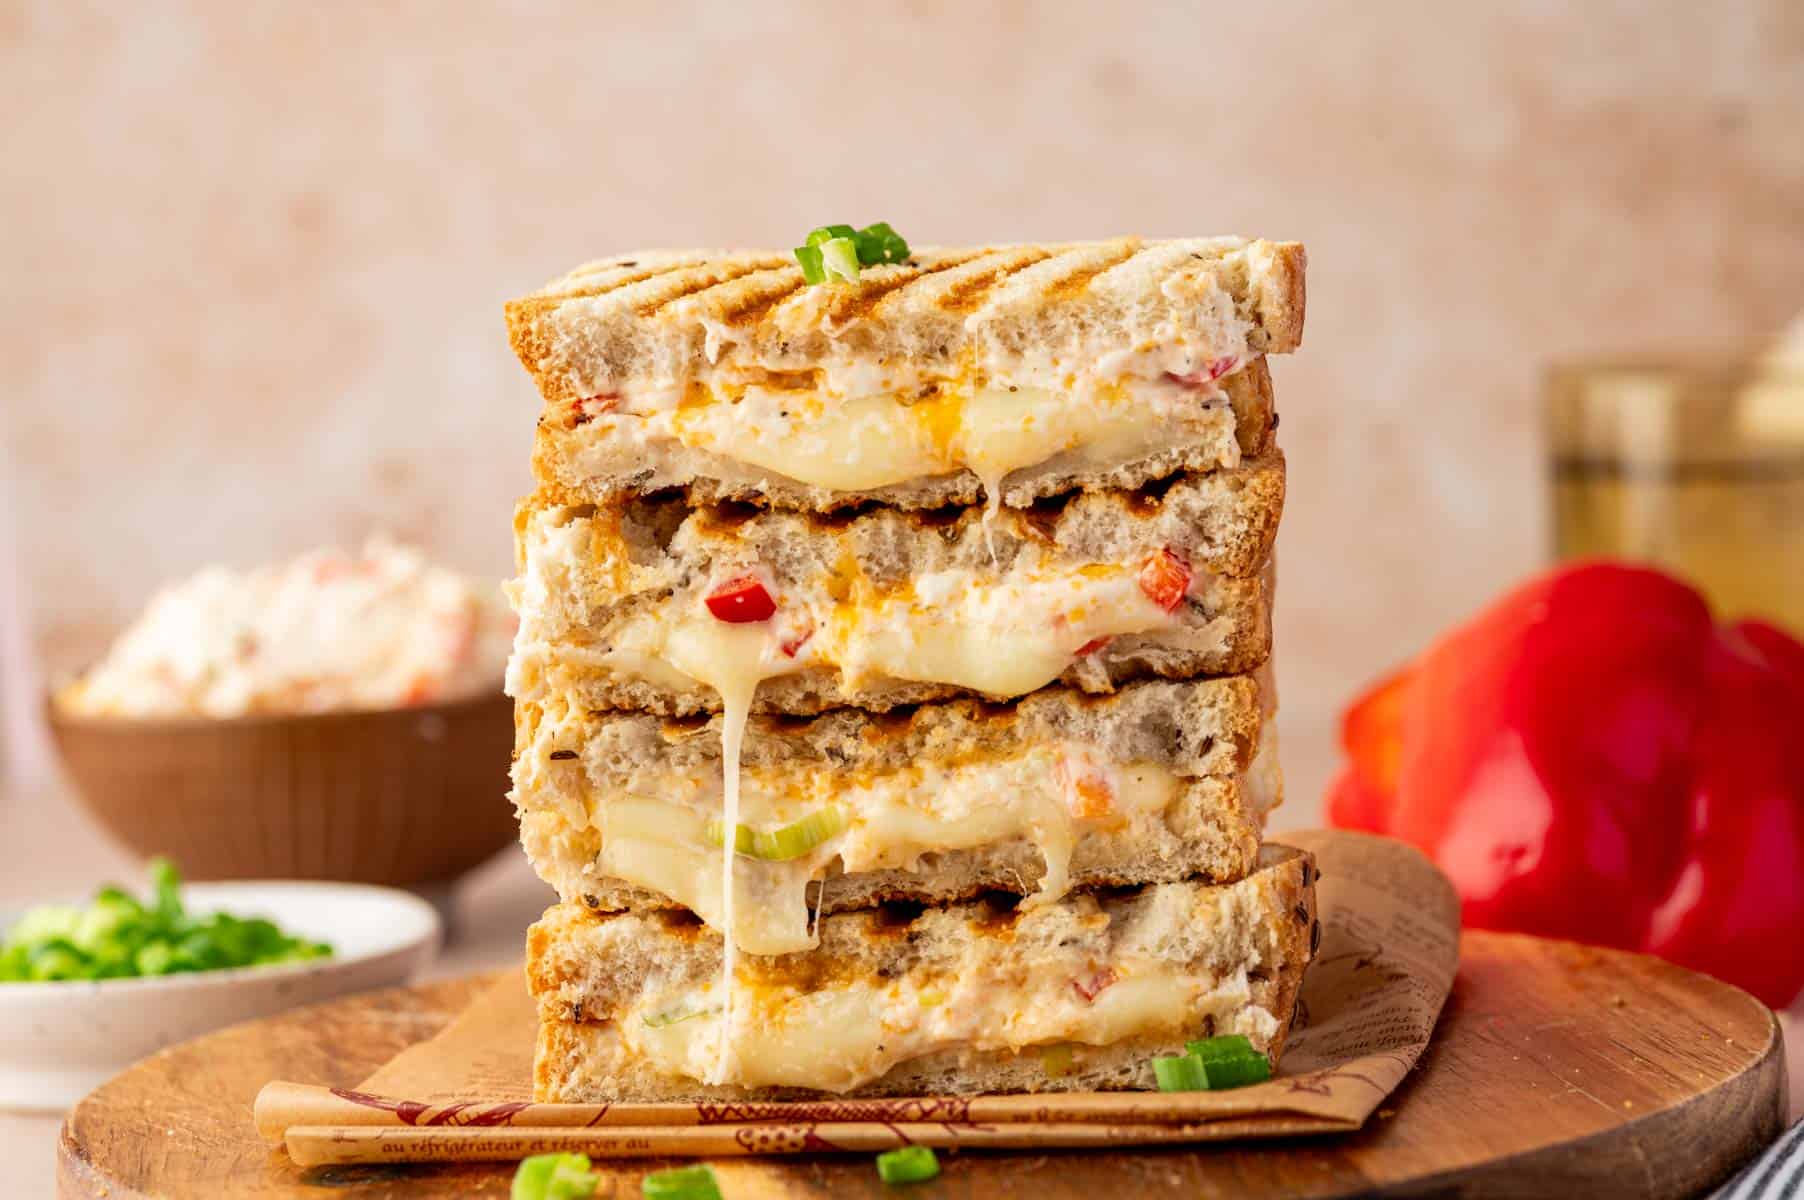
  • Unsalted butter: Adds richness, flavor, and moisture while contributing to a tender crumb. Make sure it's at room temperature.
  • White sugar: Sweetens the cake and helps retain moisture during baking.
  • Eggs: Act as a binding agent, providing structure and stability while contributing to a moist texture. Make sure it's at room temperature.
  • Vanilla extract: Enhances the overall flavor profile by adding a warm, sweet aroma to the chocolate cake.
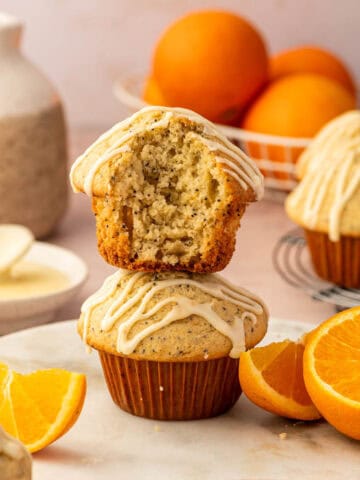
  • Sour cream: Adds moisture and tanginess, helping to keep the cake soft and tender. Make sure it's at room temperature.
  • Oil: Boosts moisture and ensures the cake remains soft even after cooling. Any flavorless oil should work for the recipe and I have used Avocado oil.
  • Brewed warm coffee: Intensifies the chocolate flavor while adding a subtle depth. For deep coffee flavor you can use instant coffee granules too.
  • Dark chocolate chips: Provides bursts of melty chocolate throughout the cake for added richness to the ganache. 
  • Heavy cream: Used to create a silky ganache topping when mixed with chocolate, adding a luscious finishing touch.

See recipe card for quantities.

Fork cut the mini chocolate bundt cake.

How to Make Decadent and Easy, Miniature Bundt Cakes

  1. Preheat the oven to 350 degrees and lightly butter or oil the miniature bundt cake pans. You don’t want your mini cakes to stick.
  2. Whip the butter and sugar in a bowl using a hand mixer. This is how your cakes become light and airy.
  3. Combine the dry ingredients, flour, cocoa powder, baking powder, and salt in another bowl. For the cocoa, we highly recommend Dutch chocolate powder; it’s the best.
  4. Beat in the eggs one at a time. Then, add the sour cream, oil, and vanilla extract, mixing until fully combined. A good, light olive oil is your best oil choice. And don’t omit the sour cream, that natural flavor enhancer, as is the final ingredient, a sweet-smelling cup of brewed coffee.
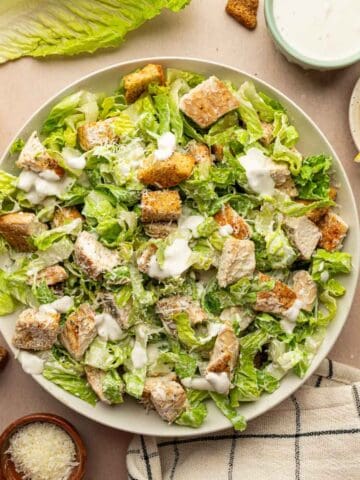

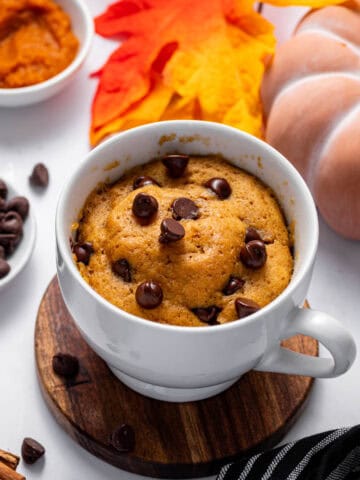

  5. Line up the bundt cake cups and spoon the batter into each without filling the cups to the top.
  6. Bake the mini bundt cakes for about 20 minutes but keep an eye on them. They will be ready to remove from the oven when you can insert a toothpick in the center, and it comes out clean. 
  7. Let the cakes cool completely while you prepare the chocolate ganache.
  8. Combine the chocolate and cream in a microwave-safe bowl. Microwave the ganache for 30-second intervals while stirring after each. Your ganache will be smooth as silk.

STEP-BY-STEP INSTRUCTIONS

Combine the wet ingredients in a bowl.

Combine the wet ingredients in a bowl.

Suage and butter in a bowl.

Beat the sugar and butter in a separate bowl.

Sour cream added to the bowl.

Add sour cream, eggs and oil.

Add the dry ingredients.

Combine the dry and wet ingredients.

coffee added to the bundt cake batter.

Warm coffee added to the bundt cake batter.

Batter divided ot the bundt cake pan.

Divide the batter into the prepared mini bundt cake pan.

Baked mini chocolate bundt cakes.

Allow the mini bundt cakes to cool down in a wire rack.

Chocolate ganache in a bowl.

Combine the chocolate chips and heavy cream to prepare ganache.

Gently drizzle the ganache over the cooled bundt cakes and be prepared to impress friends and family.

Dark chocolate ganache drizzled over the mini chocolate bundt cakes.

Substitutions

  • Flour: Substitute with gluten-free all-purpose flour for a gluten-free option, or whole wheat flour for a nuttier flavor and slightly denser texture.
  • Dutch-Processed Cocoa Powder: Use natural cocoa powder, but note that it may affect the flavor. Because Dutch processes have deep flavors of cocoa comparatively!
  • White Granulated Sugar: Substitute with brown sugar for a deeper flavor or coconut sugar for a natural sweetener.
  • Eggs: Replace with flaxseed meal (1 tablespoon flaxseed + 3 tablespoons water per egg) or unsweetened applesauce (¼ cup per egg) for a vegan option.
  • Sour Cream: Substitute with Greek yogurt or buttermilk for a similar tangy moisture.
  • Freshly Brewed Warm Coffee: Use hot water with a teaspoon of instant espresso powder for the same flavor boost.
  • Dark Chocolate Chips: Substitute with milk chocolate chips or chopped chocolate bar of your choice.

Variations

  • Orange Chocolate Bundt Cakes: Add 1 tablespoon orange zest and replace coffee with orange juice for a citrusy twist.
  • Cream Cheese Swirl: Swirl a mixture of softened cream cheese, sugar, and vanilla into the batter before baking. It creates a chocolate bundt cake with cream cheese swirl!
  • Adding Nuts: Mix in ½ cup chopped walnuts, almonds, or hazelnuts to create nutty cake variations.
  • Salted Caramel Glaze: Drizzle with homemade caramel sauce and sprinkle sea salt. Try these  variations instead of making your own chocolate ganache.
Mini chocolate bundt cake with chocolate ganache in a white plate.

Equipment

Mini Bundt Pan: Essential for creating the signature shape. Use a silicone or metal mini bundt pan with 6-12 cavities.

Mixing Bowls: At least two bowls—one for dry ingredients and another for wet ingredients.

Whisk: For blending dry ingredients and mixing wet components smoothly.

Electric Mixer (Optional): A handheld or stand mixer makes creaming butter and sugar easier, but you can also use a whisk or spatula.

Measuring Cups and Spoons: For accurately measuring dry and liquid ingredients.

Cooling Rack: To allow the cakes to cool evenly after baking.

Non-Stick Spray or Pastry Brush: To grease the bundt pan cavities for easy release of cakes.

How to Store Chocolate Mini Bundt Cakes With Chocolate Ganache

Keep your chocolate bundt cakes in an airtight container in the refrigerator for five to seven days.

To freeze these mini cakes, wrap them in plastic, then aluminum foil, and place them in the freezer for up to six months.

Mini chocolate bundt cake in a plate.

Top Tips to Prevent Mini Bundt Cakes from Sticking to the Pan

These mini bundt cake pans look adorable. However, they are not created equal. When placed in an oven, they can become unbalanced, and you may have lopsided bundt cakes. Not to fear.

As an avid mini bundt cake baker, you will benefit from buying mini cake pans that are joined together – very much like a muffin pan with cups. This will help keep the cakes even. Follow the below tips to make the mini bundt cakes perfect every time!

  1. Use a high-quality non-stick mini bundt pan. I have linked mine in the equipment section.
  2. Use a non-stick spray with flour or a combination of butter and flour. Apply generously, ensuring every nook and cranny is coated, especially the intricate designs.(For extra assurance, use a pastry brush to spread the grease evenly like I did mine)
  3. After greasing, lightly dust the pan with flour or cocoa powder (for chocolate cakes). Shake out the excess for a clean coating.
  4. Let the cakes cool in the pan for 10–15 minutes after baking. Removing them while too hot increases the risk of sticking and breaking.
  5. Gently tap the pan on the countertop to loosen the cakes before inverting.

FAQ

Can I substitute the sour cream?

Absolutely! You can use plain Greek yogurt, buttermilk as a substitute for sour cream.

Can I freeze mini chocolate bundt cakes?

Yes! Wrap the cooled cakes individually in plastic wrap and store them in a freezer-safe container for up to 3 months. Thaw at room temperature before serving.

Can I substitute the coffee in the recipe?

Yes, if you prefer not to use coffee, you can replace it with hot water or milk. However, coffee enhances the chocolate flavor, so the cakes may taste slightly less rich without it.

Can I make the ganache with milk chocolate instead of dark chocolate?

Yes, you can use milk chocolate for the ganache. Keep in mind that it will result in a sweeter flavor compared to dark chocolate.

Mini chocolate bundt cake with chocolate drizzle on it.

Related

Looking for other recipes like this? Try these:

Pairing

These are my favorite dishes to serve with Mini Chocolate Bundt Cake:

Close up shot of chocolate mini bundt cake with chocolate drizzle on it.

Mini Chocolate Bundt Cakes

Abi Guna
Mini chocolate bundt cake with chocolate ganache is a moist and tender cake with deep chocolate and coffee flavor and silky smooth chocolate ganache perfect to serve as a individual dessert for any occasion!
5 from 2 votes
Print Recipe Pin Recipe
Prep Time 15 minutes mins
Cook Time 20 minutes mins
Total Time 35 minutes mins
Course Dessert
Cuisine American
Servings 6 Mini bundt cakes
Calories 483 kcal

Equipment

  • Mini Bundt Pan
  • Mixing Bowls
  • Whisk
  • Measuring cups and spoons
  • Cooling rack
  • Non-Stick Spray

Ingredients
  

For Mini Chocolate Bundt Cake

  • 1 cup all-purpose flour
  • ⅓ cup Dutch processed cocoa powder
  • 1 ½ teaspoons baking powder
  • ½ teaspoon salt
  • ½ cup unsalted butter at room temperature
  • ¾ cup white granulated sugar
  • 2 eggs at room temperature
  • 1 teaspoon vanilla extract
  • ½ cup sourcream at room temperature
  • ¼ cup flavorless oil
  • ¼ freshly brewed warm coffee

For Dark Chocolate Ganache

  • ¾ cup dark or semi chocolate chips
  • ⅓ cup heavy cream

Instructions
 

  • Preheat your oven to 350°F (175°C). Grease the mini bundt cake pan with oil and dust it with flour. Tap out any excess flour by inverting the pan. Set aside.
  • In a medium bowl, combine the flour, coca powder, baking powder, and salt. Mix well and set aside.
  • In another bowl, use a hand mixer to beat the butter and sugar for 2-3 minutes until light and creamy using a hand mixer or stand mixer.
  • Add the eggs, one at a time, beating well after each addition. Then, add the sour cream, oil, and vanilla extract, mixing until fully combined.
  • Slowly add the flour mixture to the wet ingredients, mixing until everything is well incorporated.
  • Pour the warm, freshly brewed coffee into the batter and gently mix until just combined, being careful not to overmix.
  • Use a piping bag or spoon to fill each cavity of the prepared mini bundt cake pan up to ⅔ full. Smooth the tops if needed.
  • Bake for 18-20 minutes, or until a toothpick inserted into the center comes out clean.
  • Remove the pan from the oven and let the mini bundt cakes cool in the pan for 10 minutes. Then, carefully invert the pan onto a wire rack to release the cakes. Allow them to cool completely for another 10 minutes.
  • While the cakes cool, prepare the chocolate ganache by combining chocolate chips and heavy cream in a microwave-safe bowl. Heat the mixture in 30-second intervals, stirring after each, until smooth and pourable.
  • Once the cakes have cooled, drizzle the chocolate ganache over the tops of the mini chocolate bundts. Enjoy these delightful treats!

Notes

  1. For a gluten-free version of the lemon mini bundts, simply substitute the all-purpose flour with 1:1 gluten-free baking flour.
  2. Store the bundt cakes at room temperature for up to 2 days, or in the refrigerator for up to 1 week.
Keyword bundt cakes, cakes, chocolate, easy desserts, mini

If you try this recipe, please leave a STAR rating in the comment section below! Your feedback helps a small blogger like me stay motivated in creating content for my readers. Also, feel free to follow me at Food Exit on Instagram, TikTok, and Pinterest for the latest recipe updates!

Ground Chicken Stir Fry (Easy 20-Minute Dinner Recipe)

December 25, 2024 by Abi Guna 8 Comments

This ground chicken stir fry is the ultimate weeknight dinner! Fast, flavorful, and ready in about 20 minutes. Juicy ground chicken is sautéed with fresh, colorful vegetables and tossed in a savory-sweet sauce that coats every bite. For more easy ideas like this, be sure to explore my dinner recipes collection for quick and delicious meals.

Ground Chicken Stir Fry In a white skillet

It’s lighter than takeout but just as satisfying, and you can serve it over rice, noodles, or even tucked into lettuce wraps for a low-carb twist. Whether you’re meal-prepping for the week or looking for a new family-favorite dinner, this recipe delivers big flavor with minimal effort.

This one-pan meal is not only simple to make but also packed with protein and veggies, making it a wholesome option that pairs perfectly with steamed rice or quinoa. Want to make it even better? Customize it with your favorite seasonings, or top it off with sesame seeds and green onions for an extra burst of flavor. Ready in no time, this recipe is a lifesaver for those hectic evenings when you need something delicious and satisfying!

If you have extra ground chicken on hand, try my ground chicken meatballs or ground chicken spaghetti for another easy dinner option. Love skillet stir fry recipes? Try my Glass Noodles Stir Fry or Orange Chicken and Rice or Chicken and Shrimp Fried Rice perfect dinner option! For a complete meal, pair this stir fry with a fresh side like my Hummus Bagel Veggie Sandwich or something light and refreshing like a simple caesar salad. And also I have a huge collection of chicken recipes in my blog, don't forget to check them out 🙂

[feast_advanced_jump_to]
Asian chicken stry fry recipe in a white bowl.

Why You’ll Love This Ground Chicken Stir Fry Recipe

  • Quick and easy 30-minute dinner: This ground chicken stir fry comes together in about 30 minutes with minimal prep, making it perfect for busy weeknights.
  • Packed with protein and fresh vegetables: Made with lean ground chicken and colorful veggies, this dish is both filling and nutritious.
  • Healthier than takeout: This homemade ground chicken stir fry is lighter, lower in oil, and just as flavorful as your favorite takeout.
  • Easy to customize: You can swap in your favorite vegetables or use whatever you have on hand, making it a flexible and budget-friendly meal.

What Makes Ground Chicken Special

Ground chicken does much of the heavy lifting in your kitchen. It can be used for lasagna, chili, burgers, and many other reasonably priced dishes. If you want a top-level ground chicken, buy boneless and skinless chicken meat at your market and grind it yourself to avoid any surprise ingredients. Add a few dark meat thighs to your grinder for extra flavor.

On its own, lean ground chicken is like a blank canvas – its natural lack of fats means it depends on seasonings, spices, and sauces to create a chicken masterpiece that is very healthy for you. That is why the Asian sauce for this stir fry with ground chicken is so powerful because it contributes to the sublime flavor. Stir-frying with a great sauce can create magic in all Asian ground chicken recipes.

This vegetable chicken stir fry recipe can be prepared in less than half an hour. With one skillet or wok (minimal cleanup) you combine the ground chicken, vegetables, and outstanding sauce. The good thing is you can be flexible about the vegetables you use.

Quick and easy chicken stir stry with ground chicken and veggies in a white skillet close up shot.

Serving Ideas for Stir Fry with ground chicken

Ground chicken stir fry is incredibly versatile and pairs well with so many dishes! Here are a few serving ideas to try:

  • Serve with Grains: It’s perfect over fluffy white rice, hearty brown rice, glass noodles, or even quinoa for a healthier option. If you’d like to learn how to cook perfectly fluffy quinoa, check out my Salmon Kale Quinoa Recipe, where I’ve explained the process in detail!
  • Pair it with a fresh salad: Serve alongside a crisp, refreshing Shaved Brussels Sprouts Salad for a light, crunchy contrast that balances the savory stir fry.
  • Add a roasted veggie side: Make it a balanced meal with oven-baked sides like Roasted Carrots and Asparagus or Roasted Cauliflower and Carrots
  • Make a Wrap or bread: Spoon the stir fry into a tortilla with some fresh veggies to create a delicious chicken and vegetable wrap. For a fun fusion dinner, spoon the stir fry into lettuce wraps or serve it with soft Turkey Melt Sandwiches for a hearty lunch combo.
  • Upgrade Your Soup: Stir any leftover stir fry into a bowl of ramen or a broth-based soup for a hearty, flavorful meal. It works wonderfully in dishes like my family favorite Spicy Vegetable Soup!

These options make it easy to enjoy this stir fry in a variety of ways—perfect for quick dinners or using up leftovers!

Preparing Your Chicken Stir Fry with Vegetables

  1. You start your healthy chicken stir fry meal with ground chicken, available at most markets, or you can have a butcher grind a special chicken breast and thigh meat combination to your exact specifications. 
  2. When the ground chicken is browned, add the aromatics, such as onion, garlic, and ginger to your wok. The aroma alone becomes intoxicating. 
  3. Next, add your vegetables and stir-fry them for a few minutes until they become crisp. 
  4. You are now ready to prepare the magical stir-fry sauce.
Asian inspired chicken stry fry with veggies.

Tips for Preparing the Sauce for Your Ground Chicken Stir Fry

Think of ground chicken as the mannequin in the shop window and the sauce as the fabulous outfit that will make you run inside and buy it. It’s all in how you dress things up.

You can experiment with the type and amount of sauce ingredients, but soy and oyster sauce are standard Asian sauce ingredients. Liven it up with a chili sauce or sriracha sauce, balance the heat with a touch of honey, and drizzle in a bit of sesame oil. That’s the sauce that will infuse your ground chicken with magical flavor.

However, all ingredients are not created equal. For the best minced chicken recipes, go for quality ingredients. How can you tell a quality soy sauce from a mediocre one? It’s easier than you think. Start by reading the label and look for minimal ingredients that do not contain preservatives. The shorter the list of ingredients, the better the soy and oyster sauces will be. And the better the sauces, the bolder and more flavorful your stir fry will taste.

While reading the label, look for the words, “traditionally brewed.” This indicates that the sauce has been made using a traditional method.

Ingredients

The ingredients for this Ground Chicken Stir Fry are simple yet packed with flavor! With a base of ground chicken, fresh vegetables, and a savory-sweet sauce made from soy sauce, honey, and a hint of sriracha, every bite is a burst of deliciousness. It’s versatile and customizable, so you can easily swap in your favorite veggies or adjust the spice level to suit your taste!

Ingredients for simple stir fry with ground chicken
  • Ground Chicken: A lean and versatile protein, ground chicken absorbs flavors well and cooks quickly, making it ideal for stir-fries.
  • Onions: Sweet and savory, onions add depth and aromatic flavor to the dish.
  • Red Bell Pepper: Red bell peppers add a pop of color, crunch to the recipe.
  • Broccoli: Nutritious and fiber-rich, broccoli provides a crisp texture and complements the savory elements of the stir-fry.
  • Chicken Broth: Used to add moisture and enhance flavor. I have used low-sodium chicken broth for this recipe.
  • Soy Sauce: A key ingredient for umami flavor.
  • Honey: Brings a mild sweetness to the recipe. (you can also use light or dark brown sugar instead)
  • Rice Vinegar: A mild and tangy vinegar that adds a subtle acidity to balance flavors in stir-fries.
  • Sriracha Sauce: A spicy chili sauce with a touch of sweetness that brings heat and depth to dishes.
  • Oyster Sauce: A thick, savory sauce with a hint of sweetness, made from oyster extracts, that enhances umami flavor.
  • Ginger and Garlic: The flavor base, adding warmth, spice, and depth to the dish. I usually mince them as tiny as possible.
  • Vegetable Oil: A neutral cooking oil works the best here.
  • Salt and Pepper: Essential seasonings that enhance and balance the dish.
  • Cornstarch: A thickening agent used to give the sauce a silky texture.
  • Green Onions: A fresh and mild onion garnish that adds a pop of color.

See recipe card for quantities.

How to Make Ground Chicken Stir Fry (Step-by-Step)

Cooked ground chicken in a white skillet.

Cook the ground chicken in a large skillet.

Vegetables in a skillet for stir fry

In the same skillet add the vegetables and cook for 4-5 minutes.

Chicken stir fry sauce mixed in a bowl.

Mix the sauce ingredients in a bowl.

Cooked vegetables and ground chicken in a white skillet.

Return the cooked chicken to the skillet along with the sauce.

Once the ground chicken stir-fry is cooked, finish it off by garnishing with freshly chopped green onions for a pop of color and a mild oniony flavor that complements the dish. Serve it warm over a bed of steamed rice!

Close up shot of grouns chicken stir fry.

Substitutions

  • Ground Chicken: Swap with ground turkey, ground pork, or even ground beef for a similar texture and flavor. For a vegetarian option, you can try with crumbled tofu as well.
  • Soy Sauce: Use tamari or coconut aminos for a gluten-free alternative.
  • Vegetables: You can use whatever you have on hand! Try zucchini, snap peas, broccoli, or bell peppers as great alternatives.
  • Honey: Substitute with maple syrup, agave nectar, or even a pinch of brown sugar for sweetness.

Variations

  • Spicy Stir Fry: Add extra sriracha, a dash of chili oil, or fresh chopped chili peppers for a fiery kick.
  • Crunchy Touch: Top with toasted sesame seeds, crushed peanuts, or crispy fried onions for texture.

Tips to Increase Protein in Ground Chicken Stir Fry

Double the chicken - Use a bit more ground chicken for a higher-protein meal.

Add plant-based protein - Toss in edamame, chickpeas, or tofu for extra nutrients.

Top with eggs - A fried or scrambled egg adds both protein and flavor.

Swap your base - Serve with quinoa or cauliflower rice for a healthier, protein-rich option.

Equipment

  • Large skillet 
  • Mixing bowls
  • Measuring cups and spoons
  • Serving bowls
In a white bowl chicken stir fry served over white rice.

How to Store Leftover mince chicken Stir Fry

You can store your leftover ground chicken in an airtight container in the refrigerator. If possible, store separately from any leftover rice.

When reheating your ground chicken, use the stovetop with very low heat. You can also microwave the dish.

Freezing is not recommended as it would affect the crispiness of the vegetables.

Secrets to a Top-Rated Ground Chicken Stir Fry Recipe 

Any ground chicken stir fry recipe is bound for success, but there are tricks to preparing  a dish that is beyond the ordinary:

  1. Make sure your wok is hot before adding any ingredients.
  2. Slice the ingredients, either meat or vegetables, to a uniform size for even frying.
  3. Do not overcrowd your wok or frying pan and use a high heat when frying.
  4. Stir while you fry to prevent burning.
  5. Use an oil that can handle high heat, such as peanut oil or vegetable oil. Avoid olive oil for serious frying as it lacks a high smoke point.

FAQs

How does the stir fry sauce taste like?

This sauce is a perfect balance of sweet, savory, and tangy flavors! The sweetness from honey pairs beautifully with the savory depth of soy sauce, oyster sauce, and a hint of heat from sriracha. To round it all out, rice vinegar adds a tangy kick that takes it to the next level. The result? A flavorful umami-packed sauce that compliments just about any protein or vegetable you toss it with. It’s a game-changer for your stir-fry nights!

What vegetables go well in ground chicken stir fry?

Popular choices include bell peppers, broccoli, carrots, snap peas, zucchini, and onions. You can mix and match based on what you have on hand. 

Can I replace shrimp with the same recipe?

Yes, swapping out chicken for shrimp is a good option for those who love to eat seafood. I sometimes do that when I get some fresh shrimp!

How to make Ground Chicken Stir Fry more saucier?

If you prefer a saucier stir fry, Increase the quantities (almost double) of soy sauce, oyster sauce, honey, sriracha, and rice vinegar in your recipe.Mix 1 teaspoon of cornstarch with 2 tablespoons of water, then stir it into the sauce while cooking.

What is ground chicken stir fry?

Ground chicken stir fry is a quick and easy dish made by cooking ground chicken with vegetables and a flavorful sauce in a hot pan or wok. It’s a simple, one-pan meal perfect for busy weeknights.

How long does it take to make ground chicken stir fry?

Most ground chicken stir fry recipes take about 20–30 minutes from start to finish, making them ideal for quick dinners.

Is ground chicken stir fry healthy?

Yes! This dish is typically high in protein and lower in fat compared to other stir fries, especially when made with fresh vegetables and a light sauce.

How do you keep ground chicken from drying out?

Cook it over medium-high heat and avoid overcooking. Adding sauce or a splash of broth helps keep the ground chicken juicy and flavorful.

Can I meal prep ground chicken stir fry?

Yes! Ground chicken stir fry stores well in the refrigerator for up to 3–4 days, making it great for meal prep.

What can I serve with ground chicken stir fry?

It pairs well with rice, noodles, cauliflower rice, or lettuce wraps for a complete and satisfying meal.

Easy chicken dinner with gorund chicken stir fry in a bowl.

Related

Looking for other recipes like this? Try these:

Pairing

These are my favorite dishes to serve with Ground Chicken Stir Fry:

Healthy ground chicken stir fry in a skillet.

Ground Chicken Stir Fry

Abi Guna
This easy ground chicken stir fry is packed with fresh vegetables and coated in a rich, savory sauce. Ready in 30 minutes, it’s a healthy, high-protein dinner idea. Juicy ground chicken is stir-fried with vibrant red bell peppers, crisp broccoli, and savory onions!
5 from 5 votes
Print Recipe Pin Recipe
Prep Time 10 minutes mins
Cook Time 20 minutes mins
Total Time 30 minutes mins
Course Main Course
Cuisine American, Asian, Chinese
Servings 4
Calories 219 kcal

Equipment

  • Large Skillet
  • Measuring spoons and cups
  • Mixing Bowls
  • Serving Bowls

Ingredients
  

For the chicken stir fry

  • 2 tablespoons vegetable oil divided
  • 1 lb ground chicken
  • ½ teaspoon salt
  • ½ teaspoon ground pepper
  • 1 teaspoon garlic minced
  • 1 teaspoon ginger grated
  • 1 small yellow onion sliced
  • 1 medium red bell pepper sliced
  • 2 cups broccoli florets

For the stir fry sauce

  • ¼ cup chicken broth low sodium
  • 3 tablespoons soy sauce low-sodium
  • 1 tablespoon oyster sauce
  • 1 tablespoon sriracha sauce
  • 1 tablespoon rice vinegar
  • 1 tablespoon honey
  • ½ tablespoon cornstarch
  • 1 teaspoon sesame oil
  • 2 tablespoons chopped green onions for garnish

Instructions
 

  • Heat 1 tablespoon of vegetable oil in a large skillet or wok over medium-high heat.
  • Add the ground chicken and cook, breaking it into small pieces, until no longer pink for about 5 minutes. Season with a pinch of salt and pepper, then remove from the skillet and set aside.
  • In the same skillet, add the remaining 1 tablespoon of oil. Add garlic and ginger, sautéing for about 30 seconds until fragrant.
  • Toss in the onion and red bell pepper, cooking for 2–3 minutes. Add the broccoli and stir-fry for another 3-4 minutes until the vegetables are tender but still crisp.
  • Meanwhile, prepare the stir-fry sauce. In a bowl, combine chicken broth, soy sauce, oyster sauce, sriracha sauce, rice vinegar, honey, sesame oil and cornstarch
  • Pour the sauce over the veggies in the skillet. Return the cooked chicken to the skillet and bring it to a rolling boil; the mixture will start to thicken.
  • Once done, garnish the ground chicken stir-fry with green onions.
  • Serve them over rice to enjoy.

Notes

Stir-Fry Sauce Tips
  • Use cornstarch to thicken for a glossy finish.
  • Add a splash of rice vinegar for tang and balance.
  • Drizzle with sesame oil at the end for deep flavor.

Storage & Meal Prep Tips

  • Lasts 3–4 days in the fridge.
  • Reheat gently in a skillet to preserve texture.
  • Freeze portions for quick weeknight meals.
Keyword Chicken, Dinner, Main Dish, Skillet

Salted Caramel Latte (Better Than Starbucks, Ready in 5 Min)

December 21, 2024 by Abi Guna 7 Comments

Skip the $7 coffee shop latte. This homemade salted caramel latte recipe is ready in 5 minutes, no espresso machine needed, and tastes even better. Save money every single morning.

Caramel syrup dirzzed over the salted caramel latte.

If you're a fan of indulgent coffee drinks, you’ll love this Salted Caramel Coffee Recipe! Perfect for cozy mornings or an afternoon pick-me-up, this recipe combines the creamy sweetness of a Hot Caramel Latte with a touch of sea salt for a sophisticated twist. The balance of flavors in a Sea Salt Latte enhances the rich caramel notes, making each sip irresistibly delicious. Easy to make at home, this drink is a must-try for anyone looking to elevate their coffee game!

Are you a coffee lover? You have to try my Vanilla Bean Latte and Mint Chocolate Brownies—they pair perfectly with a salted caramel latte!

[feast_advanced_jump_to]

Why This Beats the Starbucks Salted Caramel Latte

Quick and Easy: This Salted Caramel Latte recipe takes just minutes to prepare, making it perfect for busy mornings or a cozy afternoon treat.

Café-Quality at Home: Skip the coffee shop lines and enjoy a rich, creamy latte with perfectly balanced sweet and salty flavors right in your own kitchen.

Budget-Friendly: Save money by making this indulgent drink at home without compromising on quality or flavor.

Close up shot of salted caramel latte.

What to Serve with Your Salted Caramel Latte

Pairing your latte with the right food enhances the overall experience. Here are some delicious options that go perfectly with a salted caramel latte:

Pastries: Croissants and cinnamon rolls beautifully complement the creamy and bold flavors of a latte.

Cookies: Biscotti and Butterscotch Oatmeal Cookies are perfect for dipping into your hot latte.

Cakes: Indulge in slices of pound cake, Red velvet cookie cake, coffee cake, or mini bundt cakes. For a chocolate twist, try Andes Mint Brownies and Dark Chocolate Almond Fudge —they pair wonderfully with the latte.

Muffins: Blueberry, banana, or chocolate chip muffins are classic, satisfying pairings.

Granola Parfait: A chia seed parfait with granola and fruit offers a nutritious, latte-friendly option. Have you tried my Berry Chia Seed Pudding? It’s a fantastic choice!

What is a Salted Caramel Latte

We all love our creamy latte, which we have been getting at Starbucks since 1985. That’s when the coffee house began to offer espresso drinks. It all began with quick latte recipes and grew into tasty flavor varieties of milk coffee drinks.

Creamy Salted Hot Caramel Latte in a Glass

Exciting as this was for coffee lovers, Starbucks was way behind the times. Europe was popularizing creamy espresso and steamed milk drinks as early as the 17th century, and the invention of the espresso machine led to the modern latte.

The French, always at the forefront of good taste, invented the incredible combination of salt and caramel in the 1970s. There are few such complex taste treats, and the salted caramel was awarded "Best Sweet in France" in 1971. Enjoying this Best Sweet with our favorite espresso milk drink is the ultimate in luxury as the flavors positively dance in our mouth.

How to Steam Milk for a Latte

Steaming milk properly is essential for creating the creamy, velvety texture that makes a great latte. The good news? You don’t need any high-end machines! You can prepare steamed milk easily and budget-friendly using simple tools like a milk frother.

Frother - Use an electric milk frother or a handheld frother to steam and froth the milk simultaneously. This is quick, easy, and delivers excellent results.

Stovetop + Whisk - Heat the milk in a saucepan over medium heat until warm (but not boiling). Whisk vigorously to create foam. A handheld frother can also be used for better results.

Microwave + Jar - Warm milk in a microwave-safe jar or container with a lid. Once warmed, shake the jar or use a frother to create foam.

Ingredients

Ingredients laid out for salted caramel latte recipe.
  • Brewed Coffee - The bold base of the latte, strong coffee provides a robust flavor that pairs perfectly with the sweetness of the caramel. 
  • Caramel Syrup - This syrup adds the signature sweet and caramel flavor, creating the indulgent taste that makes this latte irresistible.
  • Sea Salt - Enhances the caramel's sweetness while adding depth to the overall flavor.
  • Milk - Steamed or frothed milk adds creaminess and smoothness.
  • Whipped Cream- A finishing touch that adds a light, fluffy texture and an extra layer of indulgence. 

See recipe card for quantities.

How to make a Homemade Salted Caramel Latte

  1. Begin with brewing a cup of your favorite strong coffee or a shot of espresso. That is the basis of your latte, along with the milk.
  2. Warm the milk on the stovetop or in the microwave. To get that all-important froth, use a milk frother. If you long for ultimate latte heaven, purchasing an electric milk frother is worth it. 
  3. Drizzle the inside of two glasses with salted caramel syrup and add a touch of sea salt. That’s your basic power flavor right there.
  4. Pour an equal amount of your coffee into both glasses.
  5. Add two tablespoons of the caramel syrup to both glasses.
  6. Top each glass with the steamed, frothy milk.
  7. Add whipped cream and more caramel sauce over the top.
  8. Pretend you are sitting in a Parisian sidewalk café, sipping your easy salted caramel latte and savoring your best life.

Step-by-step Instructions

Caramel syrup drizzled around the glass.

Caramel syrup drizzled around the glass.

Freshly brewed coffee pour into the caramel drizzled glass.

Pour the freshly brewed coffee.

Caramel syrup being added to the salted caramel latte.

Add sea salt and caramel syrup to the coffee.

Milk frothing.

Froth the warm milk using a milk frother.

Milk poured in the latte.

Pour the frothed milk into the latte.

Whipped cream piped over the salted caramel latte.

Top the caramel latte with whipped cream.

Add more caramel syrup on top—who could say no to that? Enjoy every sip of your latte while it’s still warm!

Salted caramel latte coffee with whipped cream.

Substitutions for Salted Caramel Latte Recipe

Strong Brewed Coffee: Swap with decaf coffee for a caffeine-free option. Alternatively, dissolve 1-2 teaspoons of instant coffee in hot water for a quick and convenient substitute.

Milk: Use non-dairy milk like almond, oat, coconut, or soy for a dairy-free latte. For an extra rich and creamy texture, opt for heavy cream or half-and-half. For a lighter version, use skim milk.

Whipped Cream: Choose coconut whipped cream as a dairy-free alternative, perfect for vegans or those avoiding dairy.

Variations for Salted Caramel Latte Recipe

Here are some creative twists on the classic Salted Caramel Latte to try:

  • Iced Salted Caramel Latte - Swap hot coffee for cold brewed coffee or chilled espresso. Serve over ice with frothed milk and drizzle salted caramel syrup on top for a refreshing version.
  • Vanilla Salted Caramel Latte - Add a splash of vanilla extract or a pump of vanilla syrup for an extra layer of sweetness and flavor.
  • Pumpkin Salted Caramel Latte - Mix in 1-2 tablespoons of pumpkin puree and a pinch of pumpkin spice for a cozy, fall-inspired variation.
  • Salted Caramel Chai Latte - Replace the coffee with brewed chai tea for a spiced, caramel-infused chai latte.

Equipment

Coffee Maker or Espresso Machine - To brew strong coffee or espresso 

Milk Frother - To create creamy, frothed milk for your latte.

Microwave safe glass/mug - To warm the milk

Measuring Spoons and Cups - For accurately measuring the coffee, syrup, and milk.

Top angle shot of salted caramel latte.

Reheating Your Salted Caramel Latte

You can use the steam wand to reheat your caramel latte recipe, although this might affect the original texture. It will stay in the refrigerator for two days, but the magic won’t be there. Like Superman without his cape.

We suggest brewing your coffee or espresso and refrigerating the same, then adding the steamed milk fresh when you are ready.

Top Tips

  1. Whole milk creates a creamy texture, but you can use non-dairy options like oat or almond milk for a lighter or dairy-free version.
  2. For the best foam, use a milk frother or whisk vigorously. Some non-dairy milks, like oat milk, froth better than others.
  3. For the best experience, enjoy your latte fresh and hot. Whipped cream and caramel drizzle may lose texture if left too long.

FAQ

How do I make the salted caramel syrup at home?

I have used store-bought caramel syrup for the recipe, but you can also make your homemade syup easily. You have to combine sugar, water, butter, heavy cream, and a pinch of sea salt to create homemade salted caramel syrup. Let it cool before using it in your latte.

Can I make an iced version of this latte?

Yes ofcourse you can! Use cold brewed coffee or chilled espresso, pour it over ice, and add cold milk and salted caramel syrup. Stir well and enjoy a refreshing iced salted caramel latte.

Can I omit the sea salt adding to the recipe?

Yes, but the sea salt enhances the caramel flavor by balancing its sweetness. Without it, the latte will have a milder, sweeter taste.

Can I add other flavors to my latte?

Yes you can! Vanilla extract, hazelnut syrup, or a sprinkle of cinnamon are excellent additions to customize your salted caramel latte.

Related

Looking for other recipes like this? Try these:

Pairing

These are my favorite dishes to serve with Salted Caramel Latte:

Creamy and delicious homemade salted caramel latte recipe in a glass mug.

Salted Caramel Latte Recipe

Abi Guna
This Salted Caramel Latte Recipe is perfect for you with the ideal balance of sweet and salty flavors, creamy milk, and bold coffee, it’s a must-try for coffee lovers.
5 from 4 votes
Print Recipe Pin Recipe
Prep Time 5 minutes mins
Cook Time 5 minutes mins
Total Time 10 minutes mins
Course Drinks
Cuisine American
Servings 2
Calories 291 kcal

Equipment

  • Coffee Maker or Espresso Machine
  • Milk Frother
  • Microwave safe mugs
  • Measuring spoons and cups

Ingredients
  

  • 1 cup strong brewed coffee
  • 4 tablespoons caramel syrup or caramel sauce
  • Pinch of sea salt
  • 2 cups milk
  • Whipped cream for topping

Instructions
 

  • Brew a shot of espresso or 1 cup of strong coffee. Set it aside.
  • Heat the milk in a saucepan or microwave until warm. Froth it using a milk frother until it’s light and foamy.
  • Coat the inner sides of two glasses with a drizzle of salted caramel syrup. Sprinkle a pinch of sea salt inside for added flavor.
  • Divide the brewed coffee equally between the two glasses.
  • Stir 2 tablespoons of salted caramel syrup into each glass.
  • Pour the steamed milk over the coffee, dividing it evenly between the glasses.
  • Top with whipped cream and drizzle with caramel sauce over.
  • Sip and savor your homemade Salted Caramel Latte!

Notes

  1. This recipe makes 2 servings of salted caramel lattes, with each serving being 8 ounces.
  2. For a bold flavor, use strong brewed coffee or espresso. Weak coffee may dilute the taste of the latte.
  3. Adjust the amount of caramel syrup to suit your taste. If it’s too sweet, reduce the syrup or add more coffee.
Keyword caramel, coffee, drinks, latte

If you try this recipe, please leave a STAR rating in the comment section below! Your feedback helps a small blogger like me stay motivated in creating content for my readers. Also, feel free to follow me at Food Exit on Instagram, TikTok, and Pinterest for the latest recipe updates!

  • « Previous Page
  • 1
  • 2
  • 3
  • Next Page »

Hey, I'm Abi

Your next 'Food Exit' is just 5 minutes away—don’t miss it! Buckle up and enjoy the delicious recipes!

About Me

Popular

Footer

↑ back to top

About

  • Privacy Policy

Newsletter

  • Sign Up! for emails and updates

Contact

  • Contact

As an Amazon Associate I earn from qualifying purchases.

Copyright © 2025 Food Exit Recipes