Food Exit Recipes

menu icon
go to homepage
  • Recipes
  • Contact
  • About

subscribe
search icon
Homepage link
  • Recipes
  • Contact
  • About

×
Home

Air Fryer Teriyaki Chicken Thighs (Easy Better-Than-Takeout Dinner)

December 18, 2024 by Abi Guna 17 Comments

Introducing our family’s favorite Air Fryer Teriyaki Chicken Thighs! These chicken thighs are irresistibly juicy, tender, and packed with bold, delicious flavor. Perfect for a quick and easy meal everyone will love!

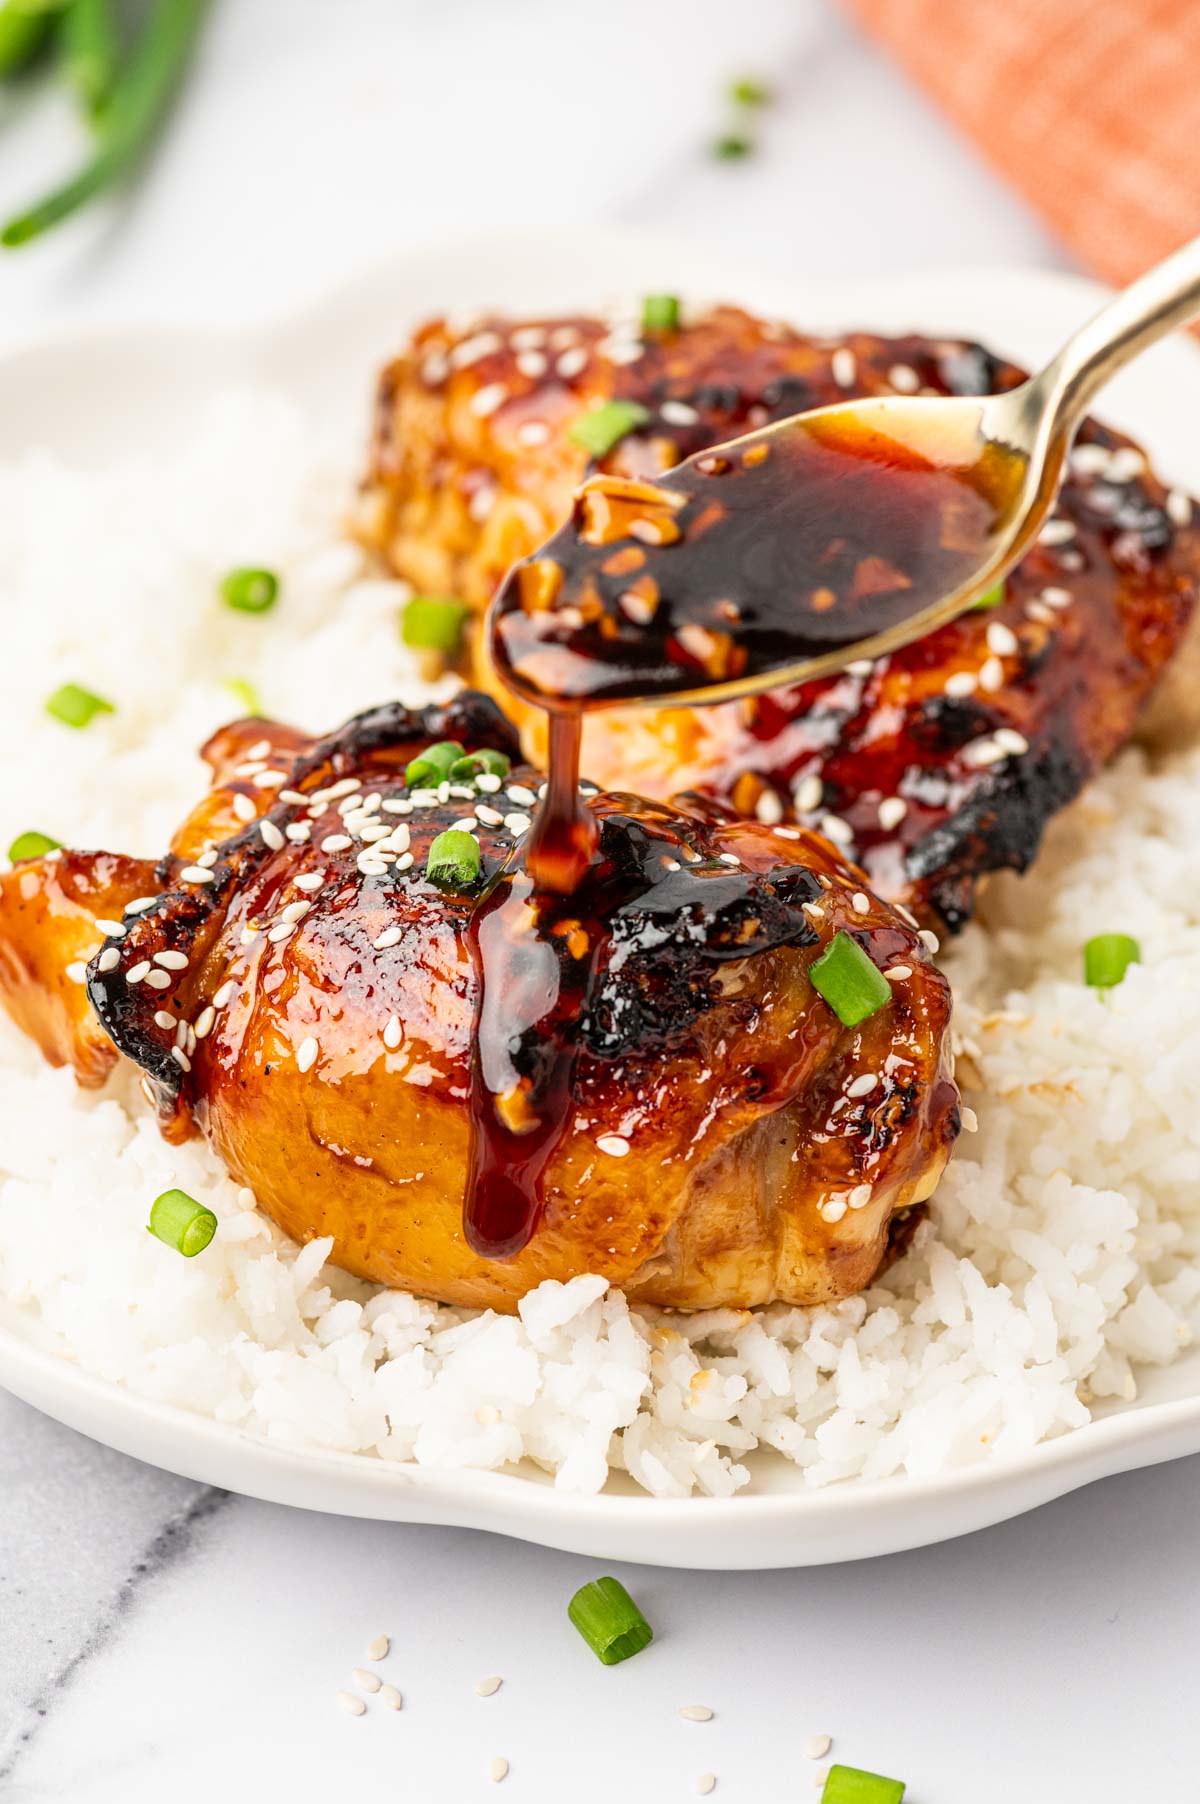
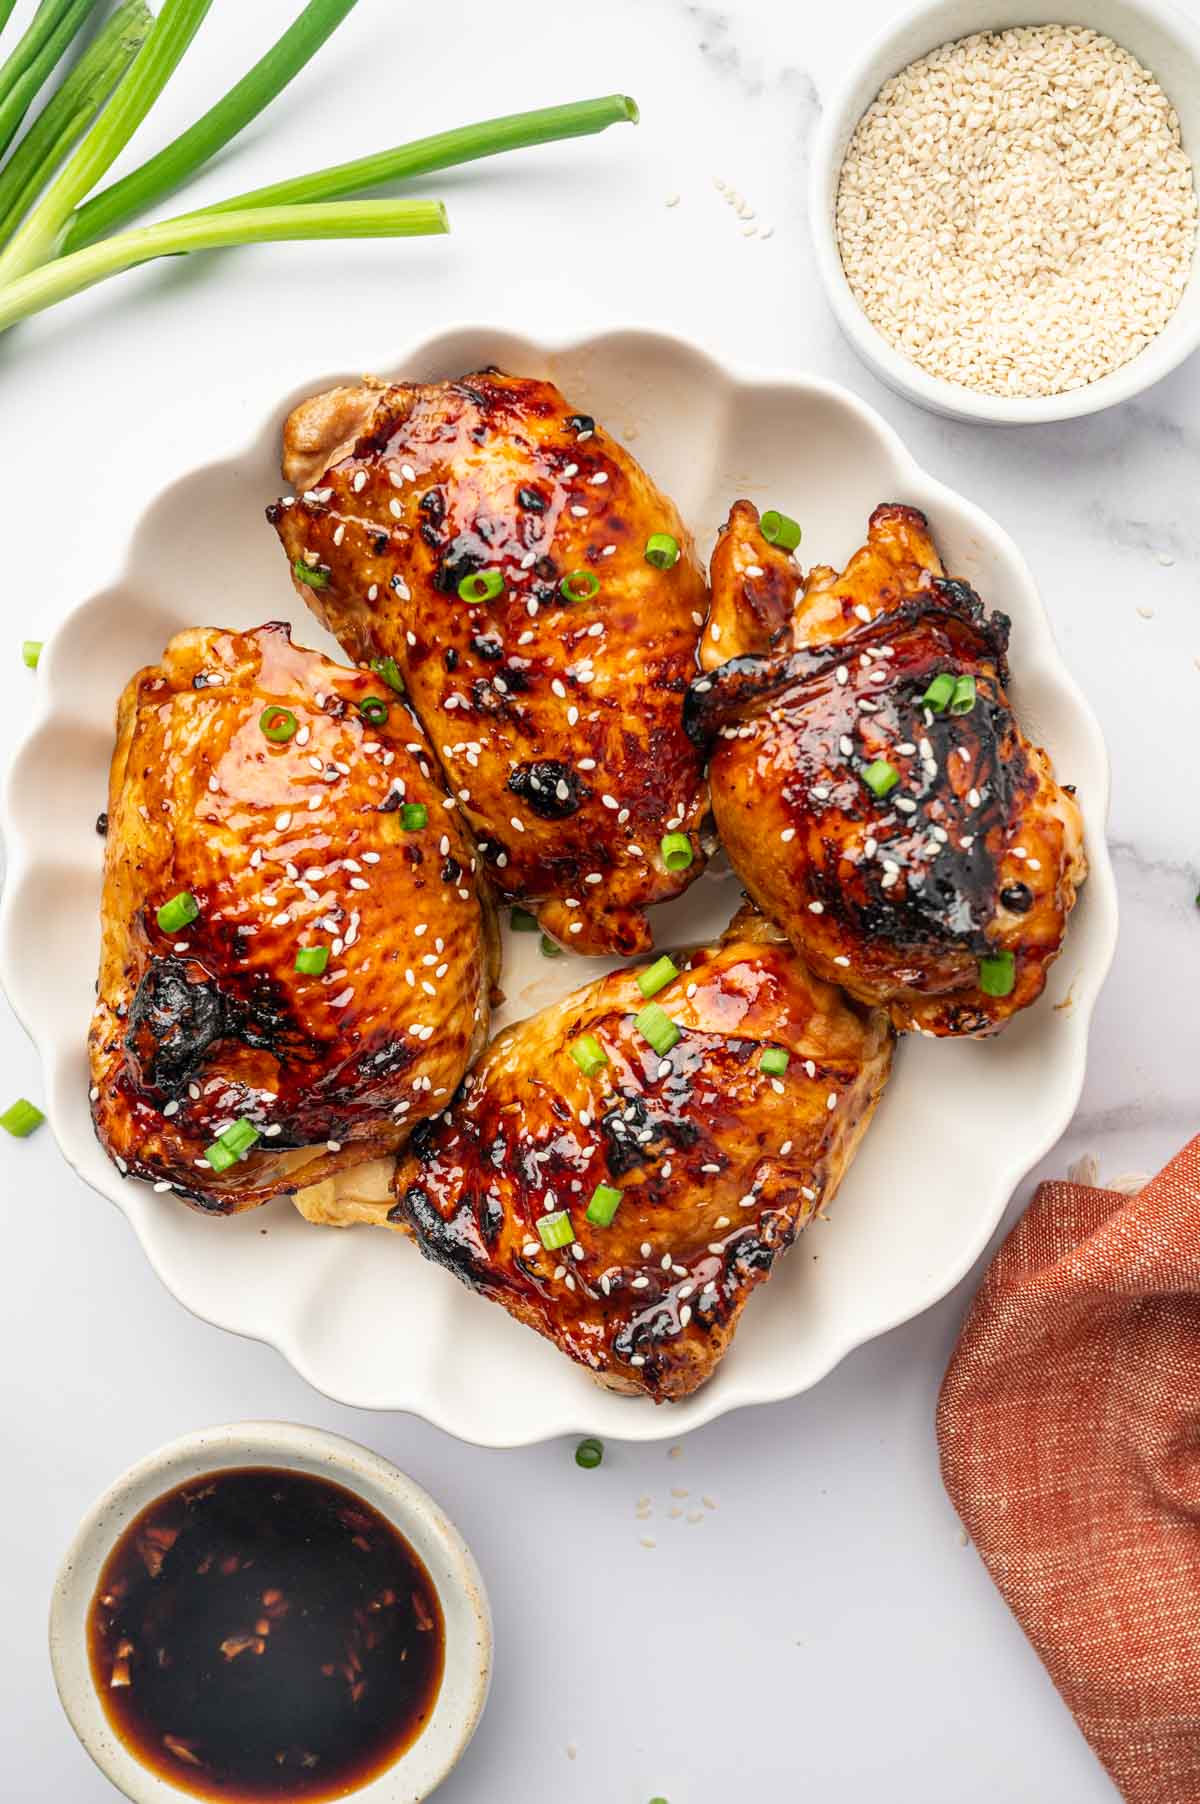
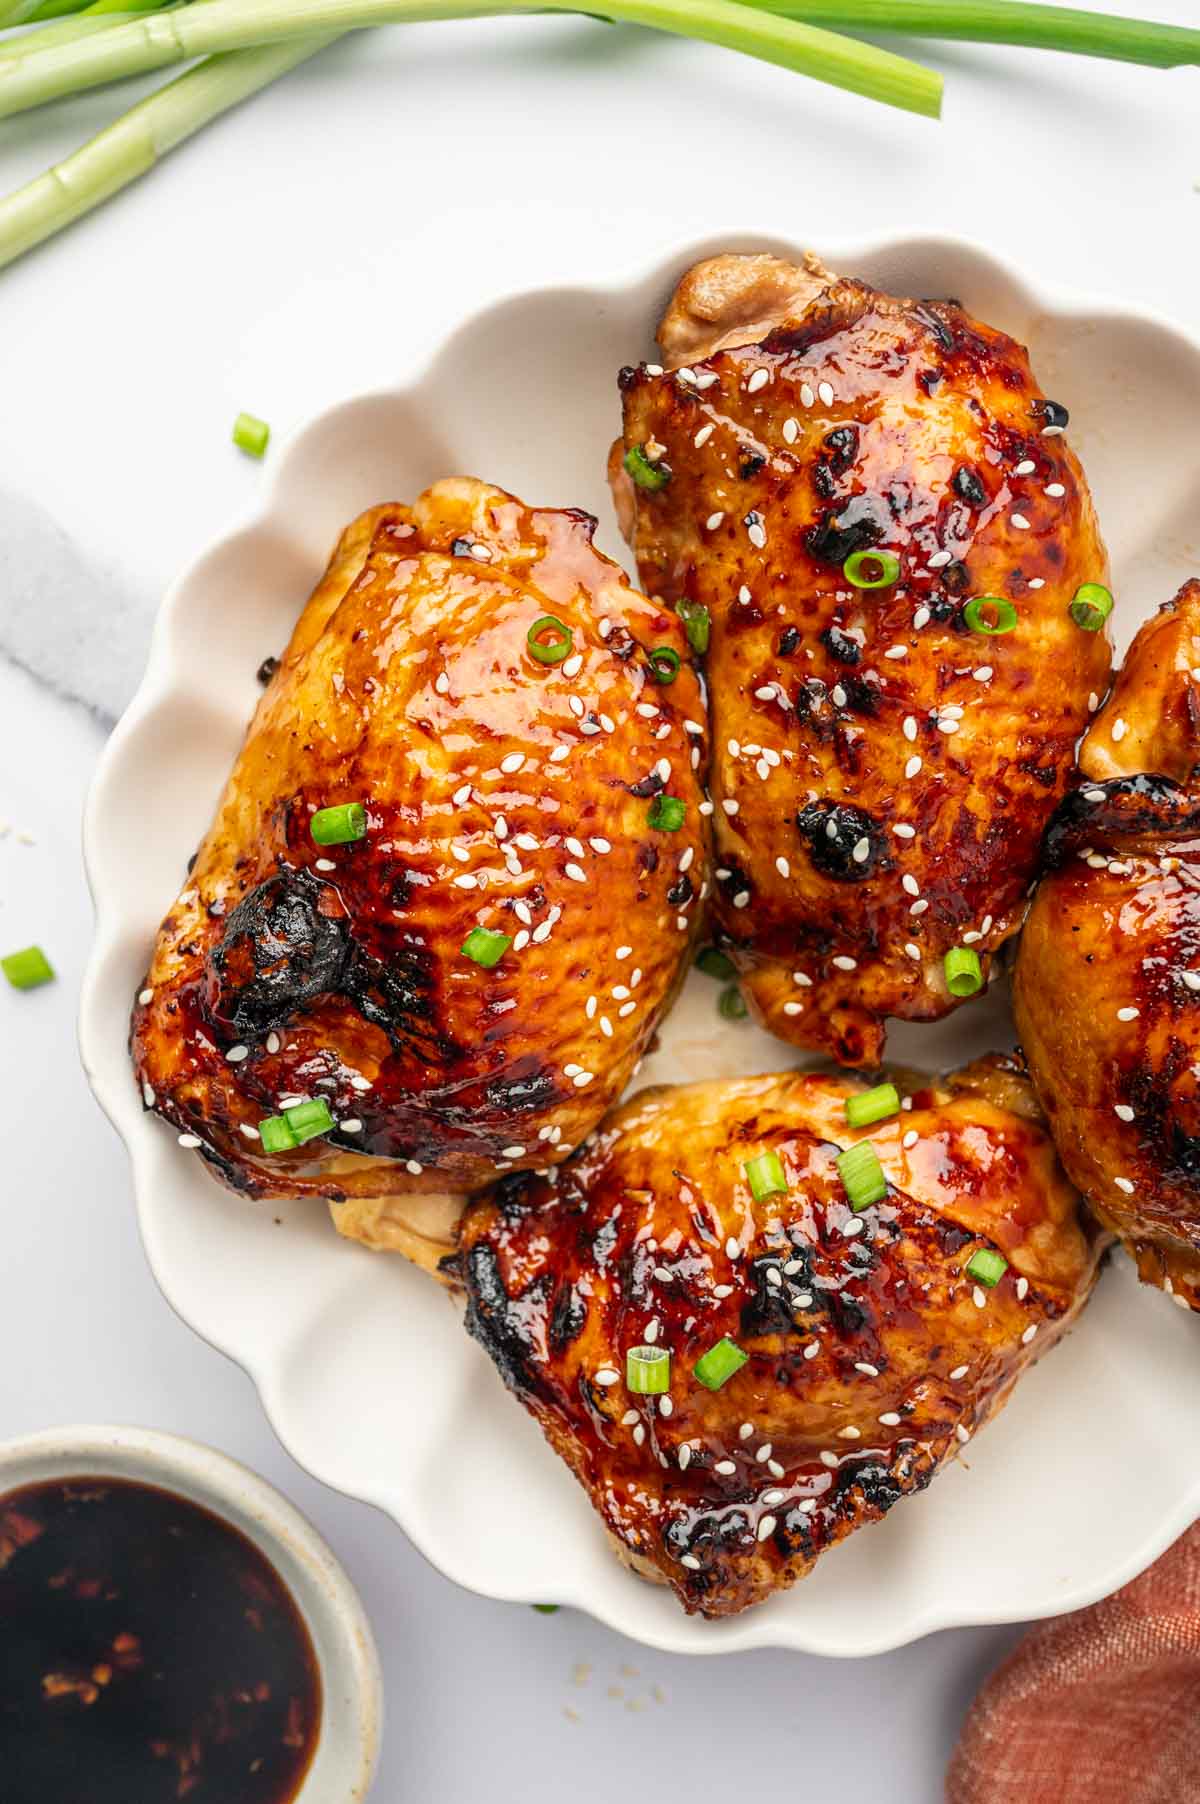
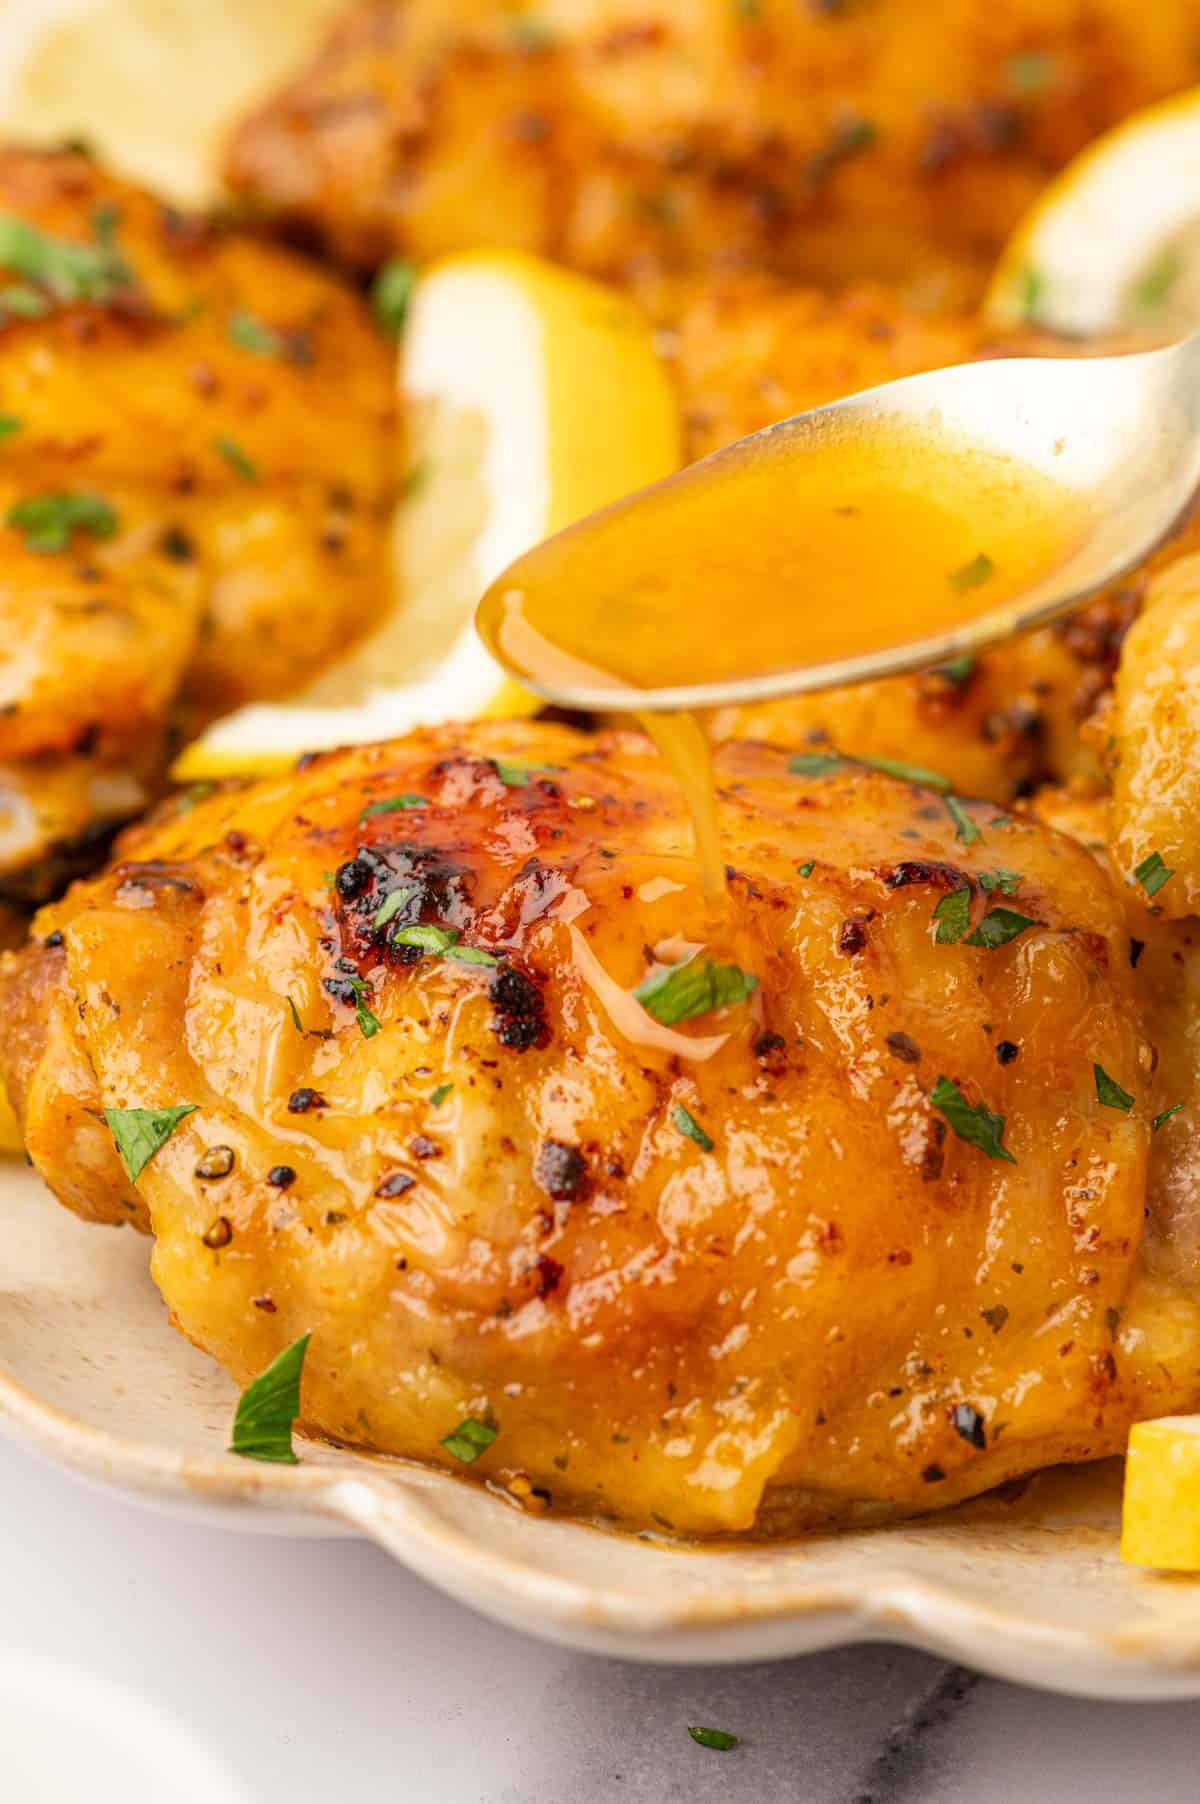
Close-Up of Air Fryer Teriyaki Chicken Thighs Garnished with Sesame Seeds with teriyaki sauce drizzle.

These crispy teriyaki chicken thighs are the ultimate solution for quick and easy weeknight dinners. Cooked to perfection in the air fryer, they develop a crispy, golden skin while staying incredibly moist and juicy inside. Brushed with a rich, homemade teriyaki sauce, every bite is coated in a sticky, savory-sweet glaze that caramelizes beautifully as they finish cooking. Trust me—you’ll find yourself making these again and again! Better than the Panda Express teriyaki chicken recipe!

Serve this chicken thighs with cheesy mashed potatoes and green beans casserole for a complete meal!

If you're a fan of air fryer recipes, you absolutely have to try these popular dishes: Air Fryer BBQ Chicken Thighs , Air Fryer Chicken Meatballs, Air Fryer Chicken Parmesan, Air Fryer Chicken Drumsticks, and Air Fryer Sweet Potato Wedges. They’re easy, delicious, and perfect for any meal! And also you can check this Lemon Pepper Chicken Thighs recipe and Honey Garlic Chicken Thighs to make it for a weekend dinner! And also I have a huge collection of chicken recipes in my blog, don't forget to check them out 🙂

[feast_advanced_jump_to]

Why You’ll Love This Air Fry Teriyaki Chicken Thighs Recipe

  • Quick and Easy - Ready in under 30 minutes, this recipe is perfect for busy weeknights. I like to marinate the chicken over the weekend so it’s ready to cook anytime during the week—super convenient!
  • Healthy and Light - Made with minimal oil and simple ingredients, this recipe is a lighter alternative to traditional teriyaki dishes. No need to worry about extra calories here!
  • Absolutely Delicious - This might just be the most delicious chicken thigh recipe you’ve ever made! The air fryer ensures the chicken is tender and juicy on the inside, with perfectly crisp, golden skin. Coated in a rich, savory-sweet homemade teriyaki sauce, every bite bursts with flavor.
  • Kid-Friendly - The sticky, caramelized glaze is a favorite among kids and adults alike. It’s a guaranteed crowd-pleaser!
  • Customizable - You can easily adapt this recipe by swapping chicken thighs for breasts or drumsticks, depending on your preference. It’s as flexible as it is delicious! Once you try it, this recipe is sure to become a regular in your dinner rotation!
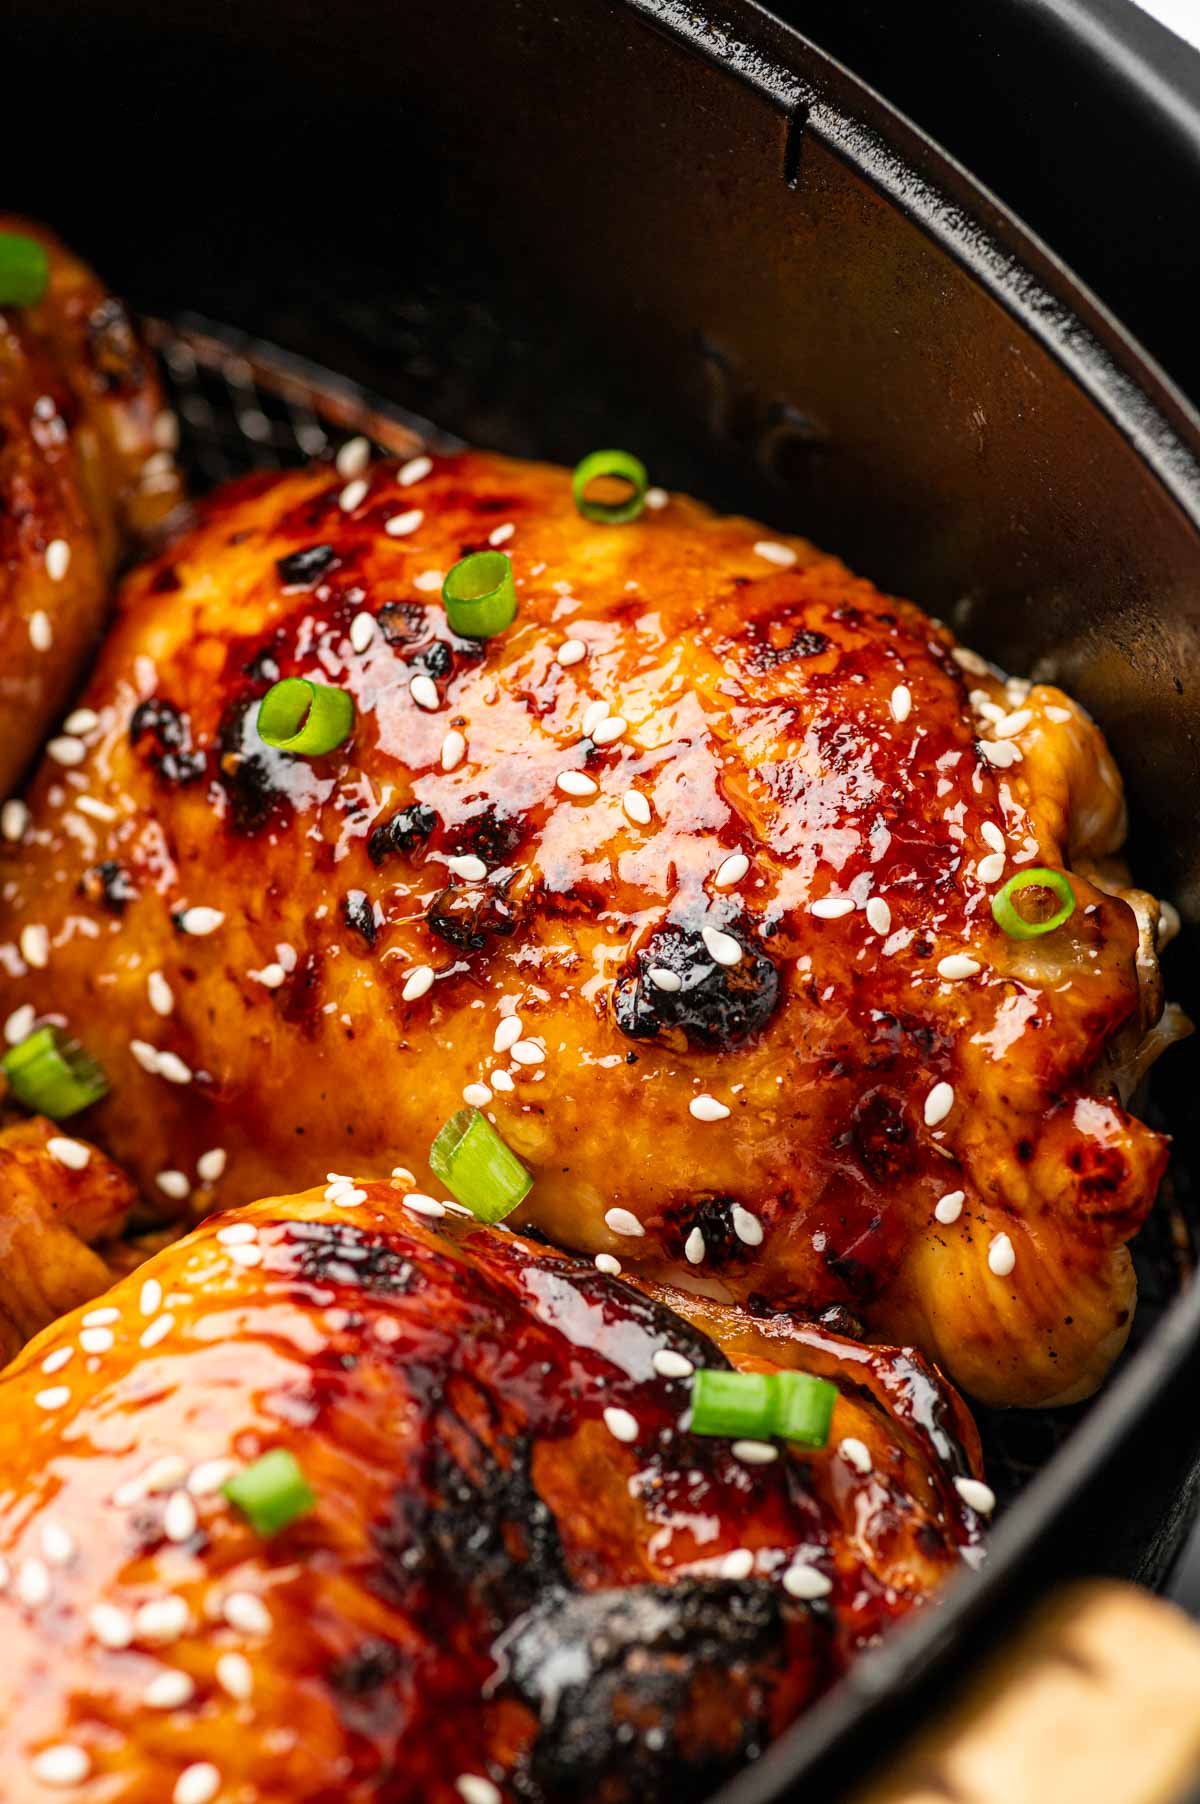
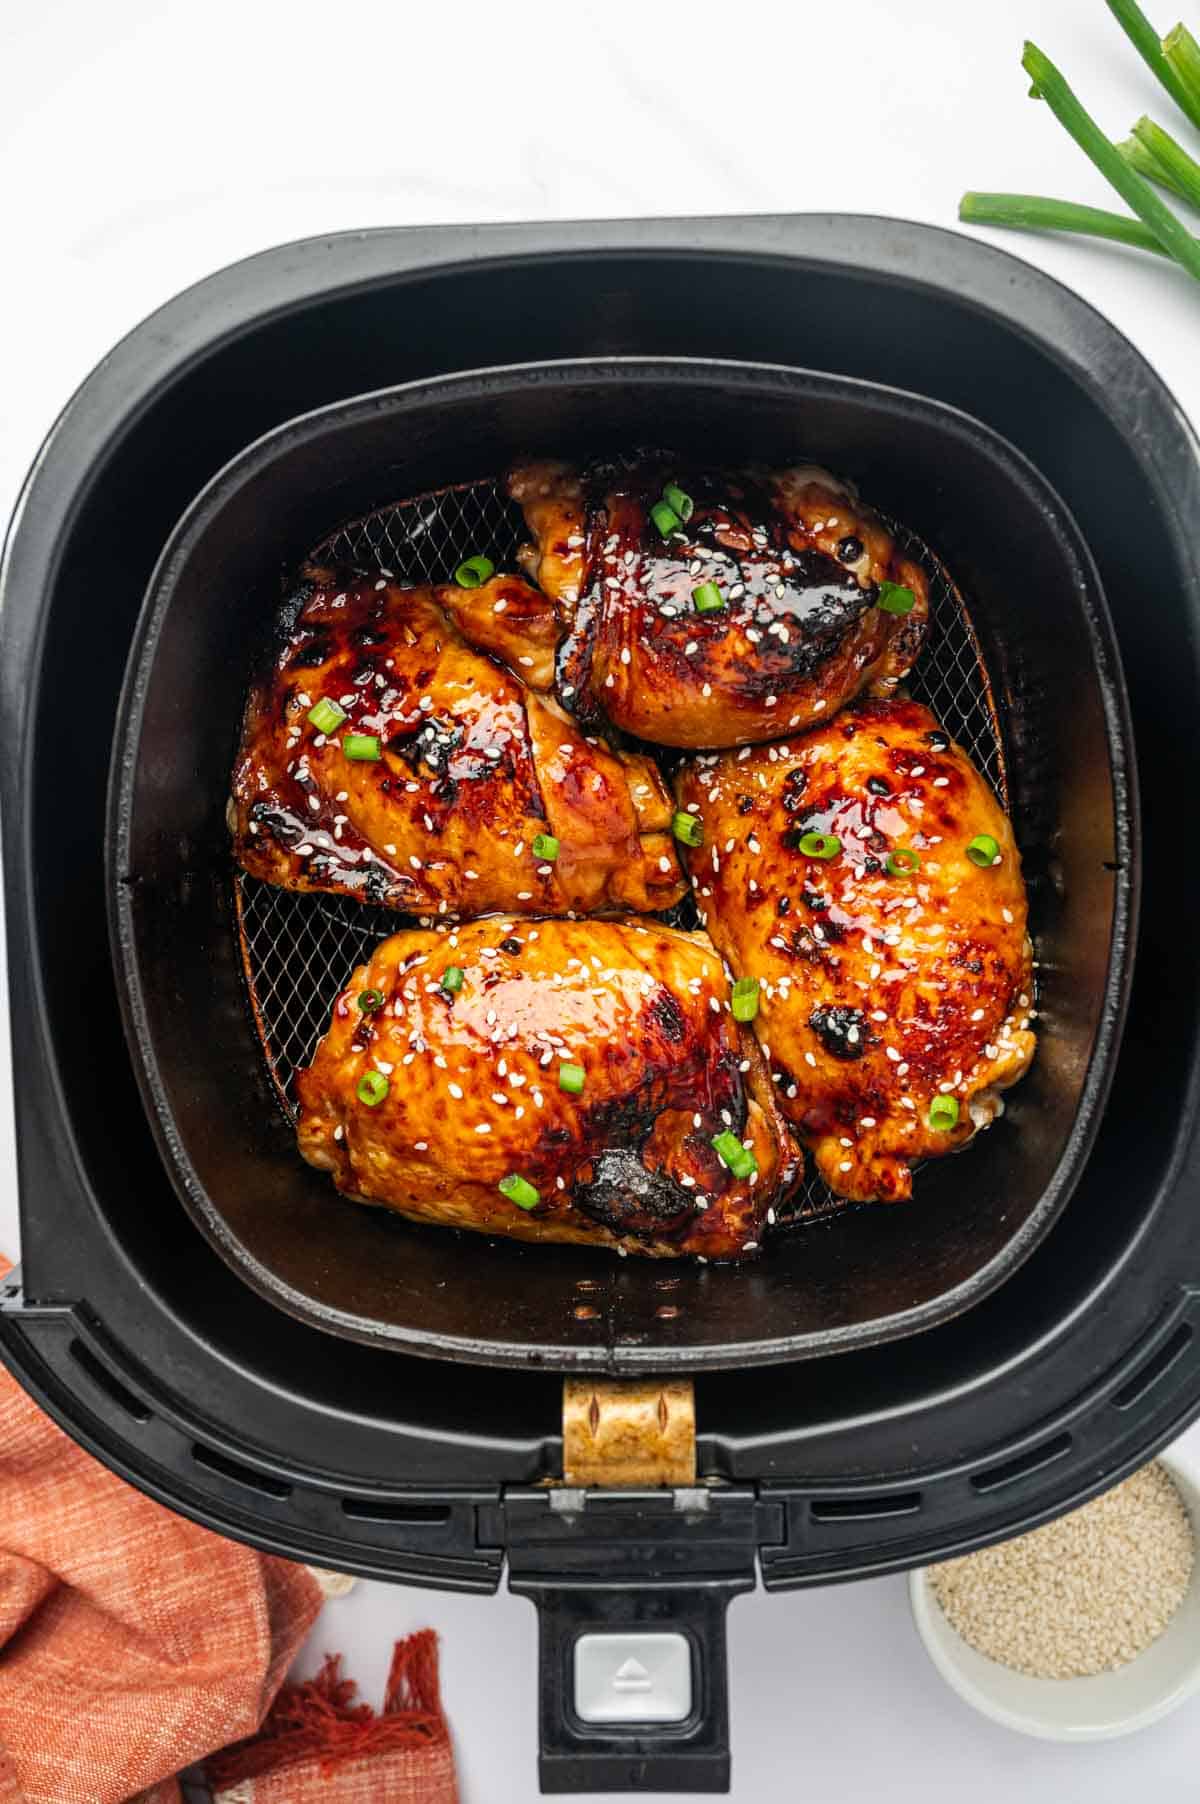
Air Fryer Teriyaki Chicken Thighs in the air fryer basket.

What to Serve with Your Teriyaki Chicken Thighs

With teriyaki chicken thighs in air fryer, you get bold and powerful flavors that deserve equally delicious side dishes. Here are some complementary ideas to pair with this dish:

  • Rice: Flavored or plain, rice is a classic and versatile accompaniment. I love pairing it with a bowl of fluffy white rice, as shown here, but mashed potatoes can also work as a comforting alternative.
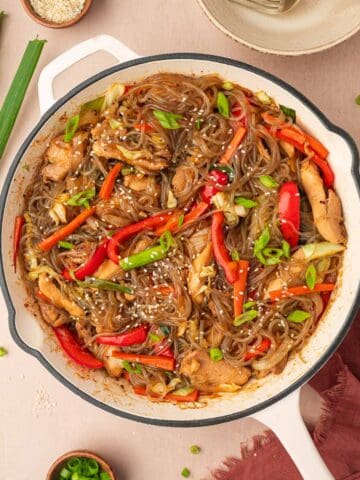
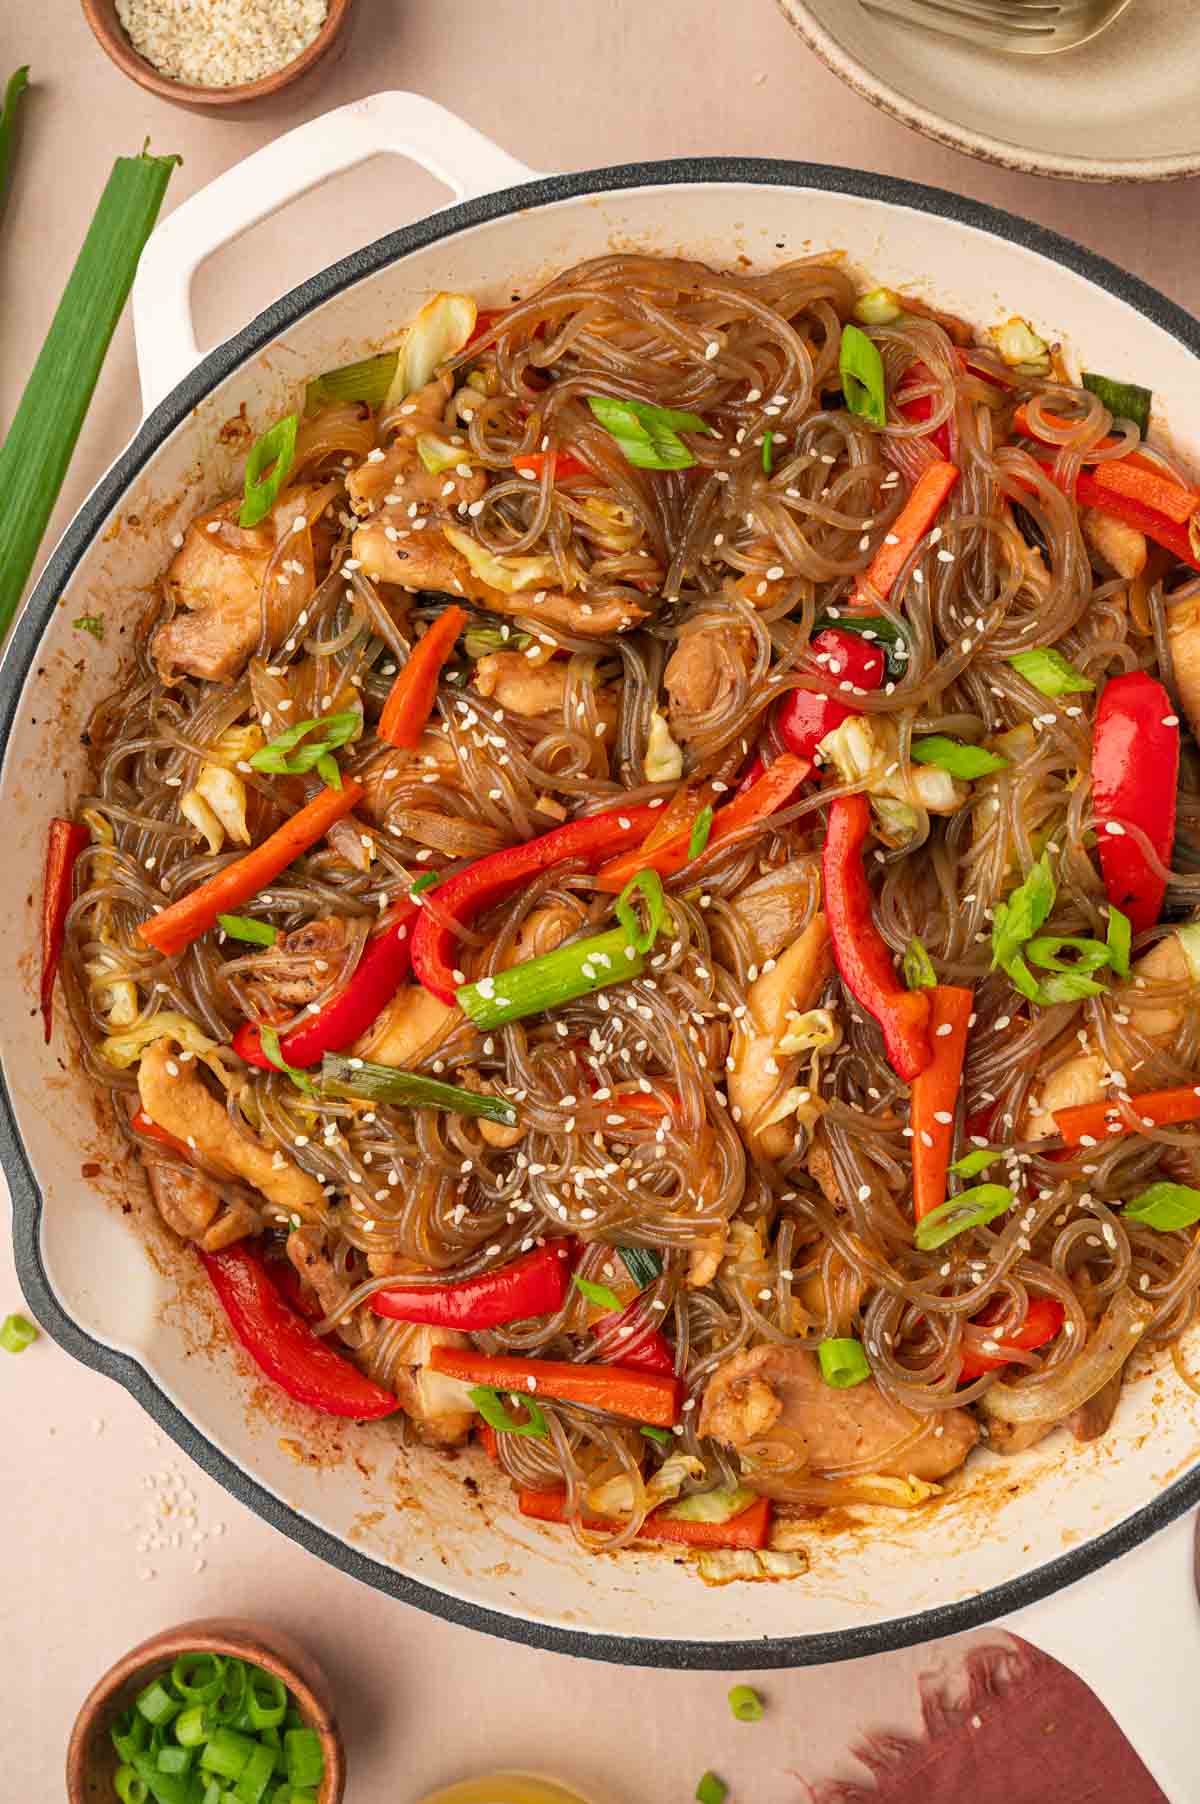
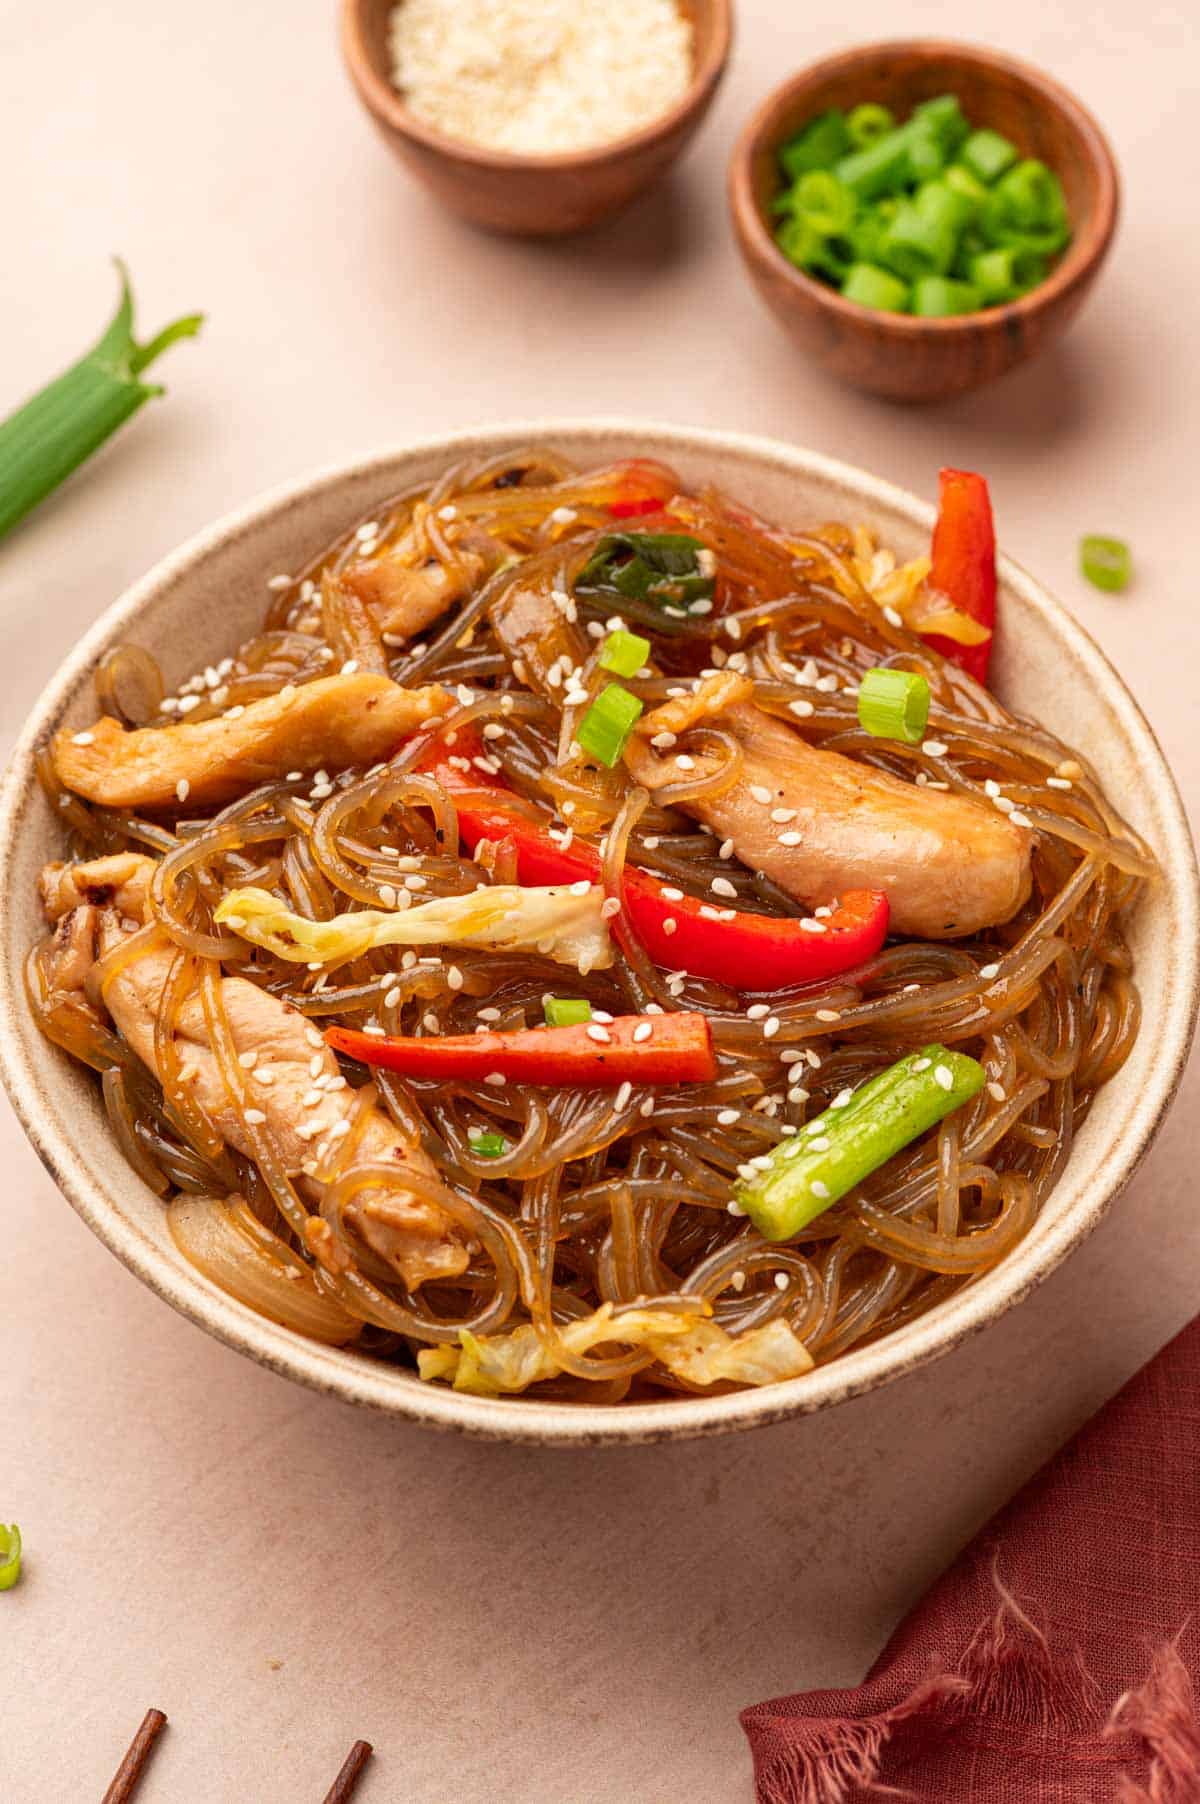
  • Noodles: Lo mein, soba, or rice noodles tossed in soy sauce and sesame oil make an excellent Asian-inspired side. For something special, try my Glass Noodles Stir-Fry recipe!
  • Oven-Roasted Veggies: Roasted carrots and cauliflower, or Hot Honey Brussels Sprouts pair beautifully with teriyaki chicken thighs. Drizzle them with soy sauce and sprinkle with sesame seeds for an extra burst of flavor.
  • Chinese Slaw: A refreshing and flavorful slaw made with cabbage, carrots, and a light, tangy dressing offers a perfect contrast to the richness of the teriyaki glaze.
  • Stir-Fried Vegetables: A colorful medley of bell peppers, broccoli, snap peas, and carrots stir-fried with garlic and sesame oil makes for a healthy, vibrant, and flavorful side dish.

What Makes Air Fryer Teriyaki Chicken Thighs Special

Everything about this meal speaks of a culinary masterpiece, Teriyaki sauce helps produce a rice and complex sticky sauce sweetened with brown sugar. Marinating the chicken in this luscious sauce helps infuse the thighs with maximum flavor.

We highly recommend using bone-in and skin-on thighs for your air-frying experience. The bone helps moisturize the meat from the inside out, while the skin adds a richer flavor and a crispy skin. Ironically, bone-in and skin-on chicken thighs are not only more flavorful, but they are also cheaper to buy. Win-win all the way.

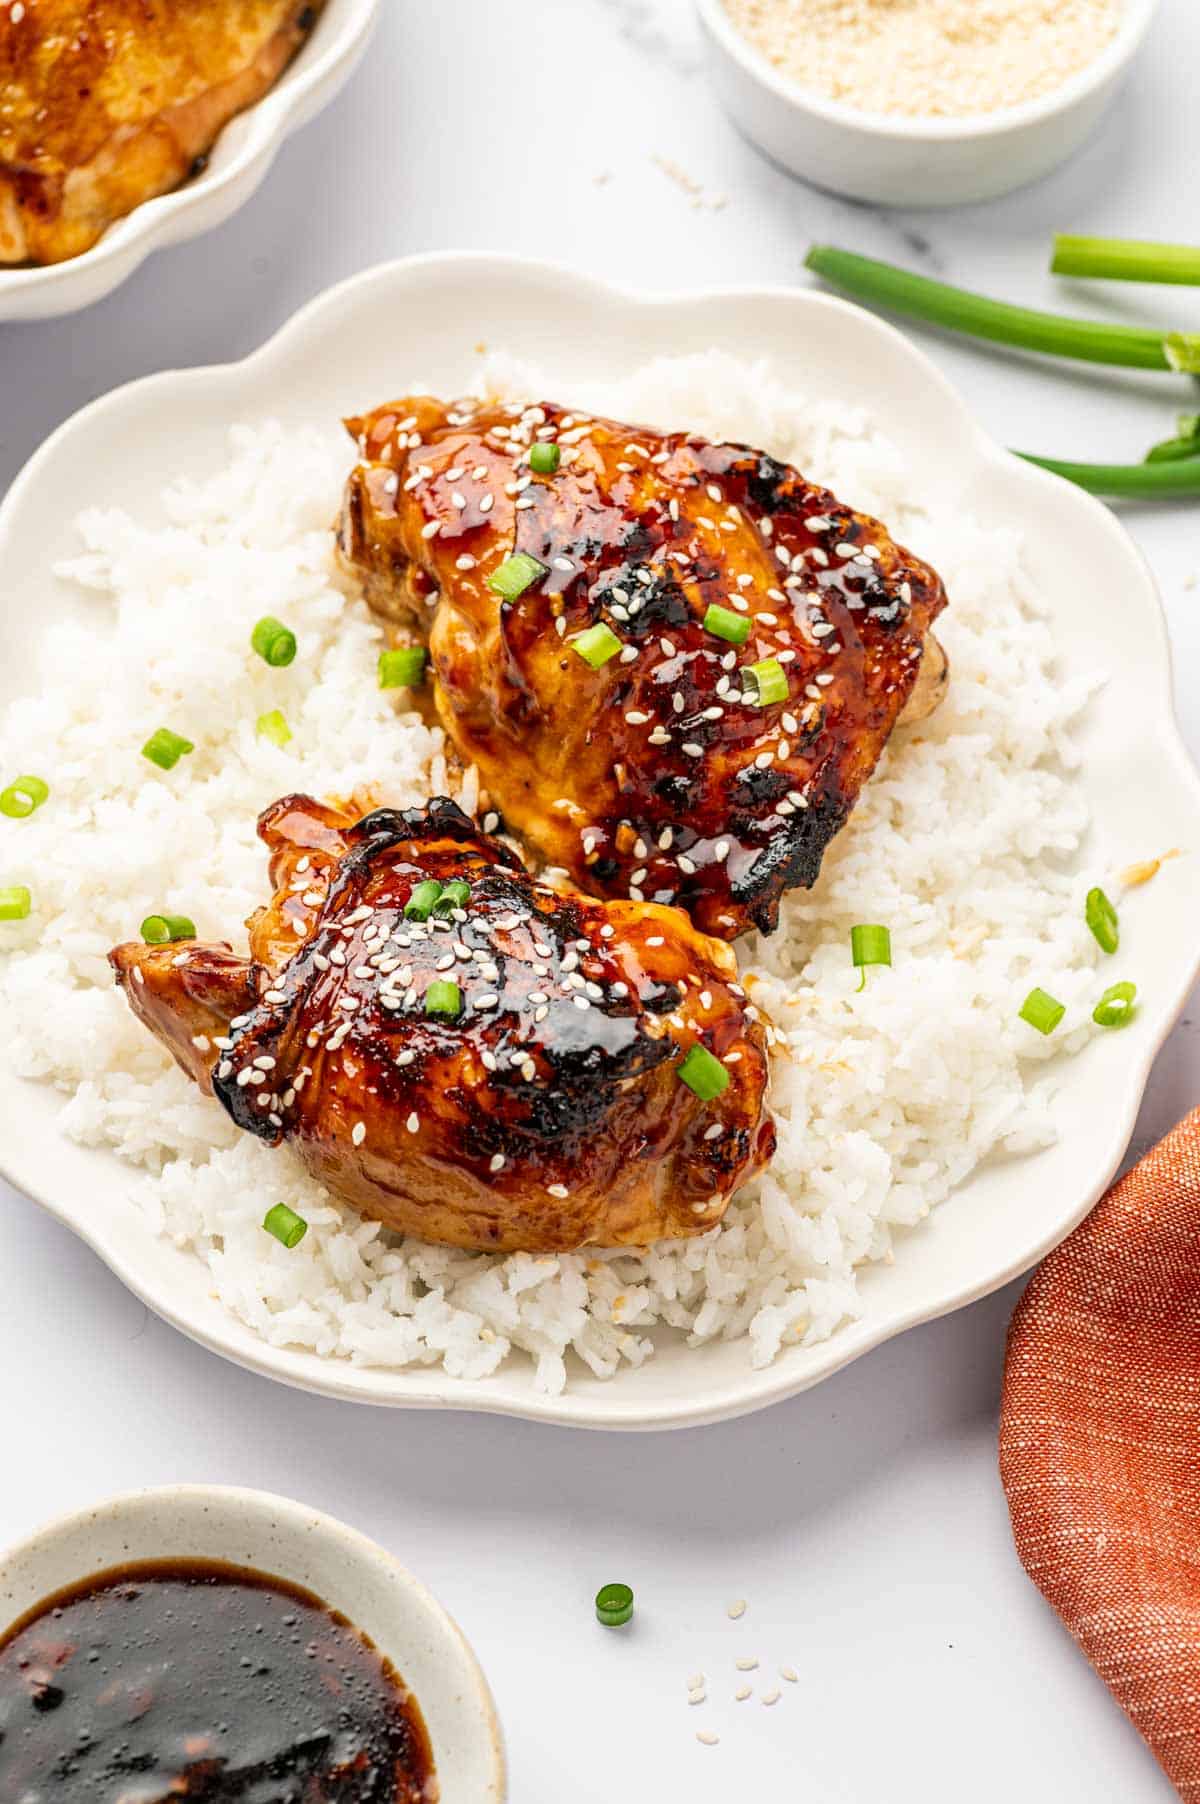
Perfectly Cooked Chicken Thighs in a Rich, Sticky Teriyaki Sauce in a white plate.

One of the secrets to our air fryer teriyaki chicken is the homemade teriyaki sauce. Preparing your own sauce puts you in control of the flavor and the level of sweetness and spiciness. You will find that using fresh garlic and ginger makes a noticeable difference. There is no comparing store-bought teriyaki sauce to homemade.  

Teriyaki sauce hits all your taste buds – it is salty, somewhat spicy, and sweet all at the same time. You can use your homemade sauce for meat, seafood, and vegetables. It makes a great dip, as well. Perfect as a main course, this dish pairs beautifully with a variety of side dishes with teriyaki chicken, such as fried rice. For an irresistible upgrade, try this recipe for teriyaki fried chicken, a mouthwatering combination of crispiness and bold teriyaki flavor that will leave everyone asking for seconds!

Secrets of the Air Fryer: Tips for Perfectly Crispy and Juicy Meals

Chicken is easy to prepare. Historically, it has been baked, roasted, or fried. These days, more and more chefs in the know are turning to an air fryer for healthy chicken. Air fryer chicken has become the go-to way to prepare easy, juicy, and crispy chicken thighs in only 25 minutes by using hot circulating air. This quick cooking style almost guarantees that the chicken will not dry out. When the skin is left on, the chicken thigh will get marvelously crispy. All this for far less time that it would take to bake it. 

Once you feel comfortable with your air fryer, it will become your culinary friend to use for a multitude of air fryer recipes such as appetizers (stuffed mushrooms), meats, fish, vegetables, and even cookies. It does it all fast and with less fat. 

Ingredients

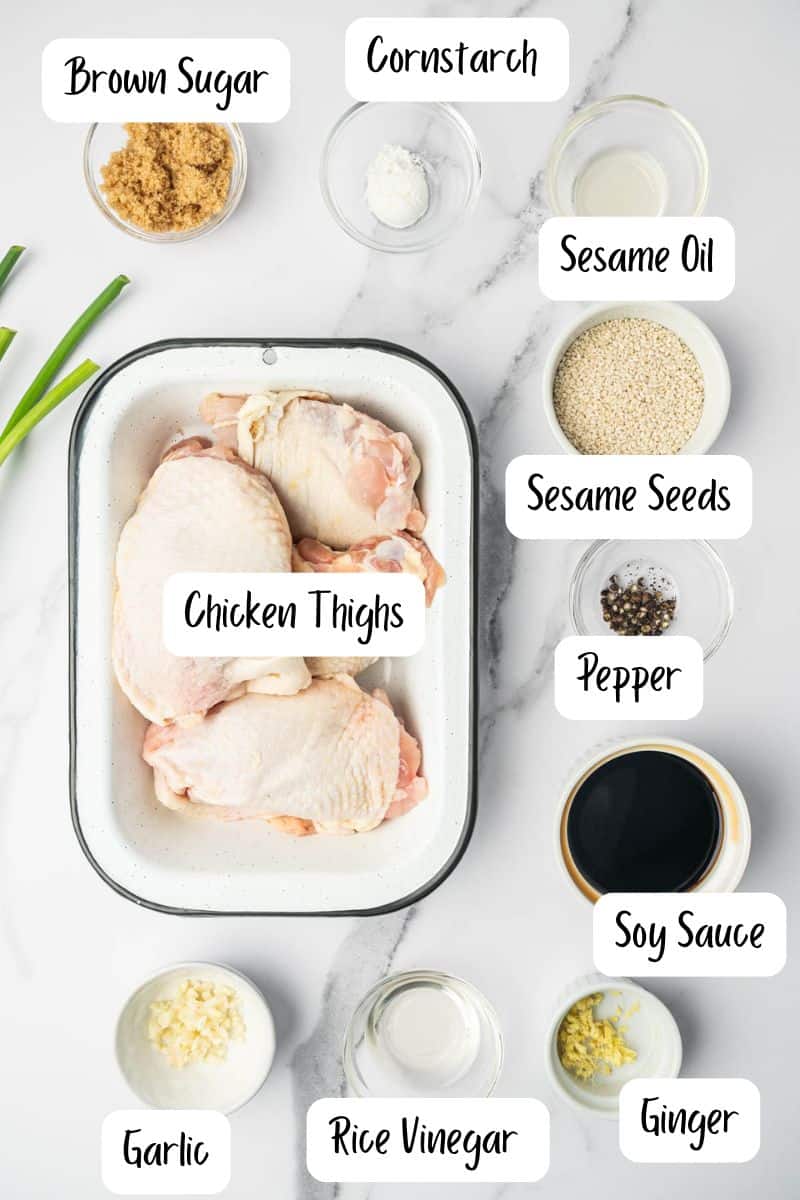
Air Fryer Teriyaki Chicken Thighs Ingredients in the marble counter.
  • Bone-in, Skin-on Chicken Thighs: The main protein of the dish, chicken thighs are flavorful, juicy, and cook perfectly in the air fryer with a crispy skin.
  • Soy Sauce: Provides the salty, umami base for the teriyaki sauce, balancing the sweetness of other ingredients.
  • Brown Sugar: Adds sweetness to the sauce and helps create the sticky, caramelized glaze on the chicken.
  • Rice Vinegar: Adds acidity to balance the sweet and savory flavors of the sauce.
  • Garlic and Ginger: Contributes a bold, aromatic flavor to the sauce, complementing the soy.
  • Black Pepper: Provides a subtle hint of spice to enhance the savory components of the dish.
  • Sesame Oil: Offers a nutty, aromatic richness that elevates the flavors of the teriyaki sauce.
  • Cornstarch: Acts as a thickening agent to give the sauce its glossy, sticky texture.
  • Sesame Seeds: Adds a crunchy texture to the final dish.
  • Green Onions: A  mild garnish that provides a pop of color and a hint of oniony flavor to complement the teriyaki sauce.

See recipe card for quantities.

Healthy Air Fryer Chicken Teriyaki Thighs Recipe

  1. Begin by preheating your air fryer to approximately 375 to 380 degrees.
  2. To ensure true crispiness, dry the chicken thighs thoroughly with a paper towel.
  3. Prepare your sweet and savory teriyaki sauce. The origin of this sauce is a bit of a mystery. It is unlikely to have originated in Japan but is probably the result of Japanese immigrants to the U.S. creating a sauce to grill meat. Yaki translates to grill, and “teri” means shine. The fact is teriyaki sauce will help make your meat shine. 
  4. Marinate the teriyaki chicken thighs in half the teriyaki sauce and the seasoning for about 30 minutes. This helps the thighs absorb the flavor.
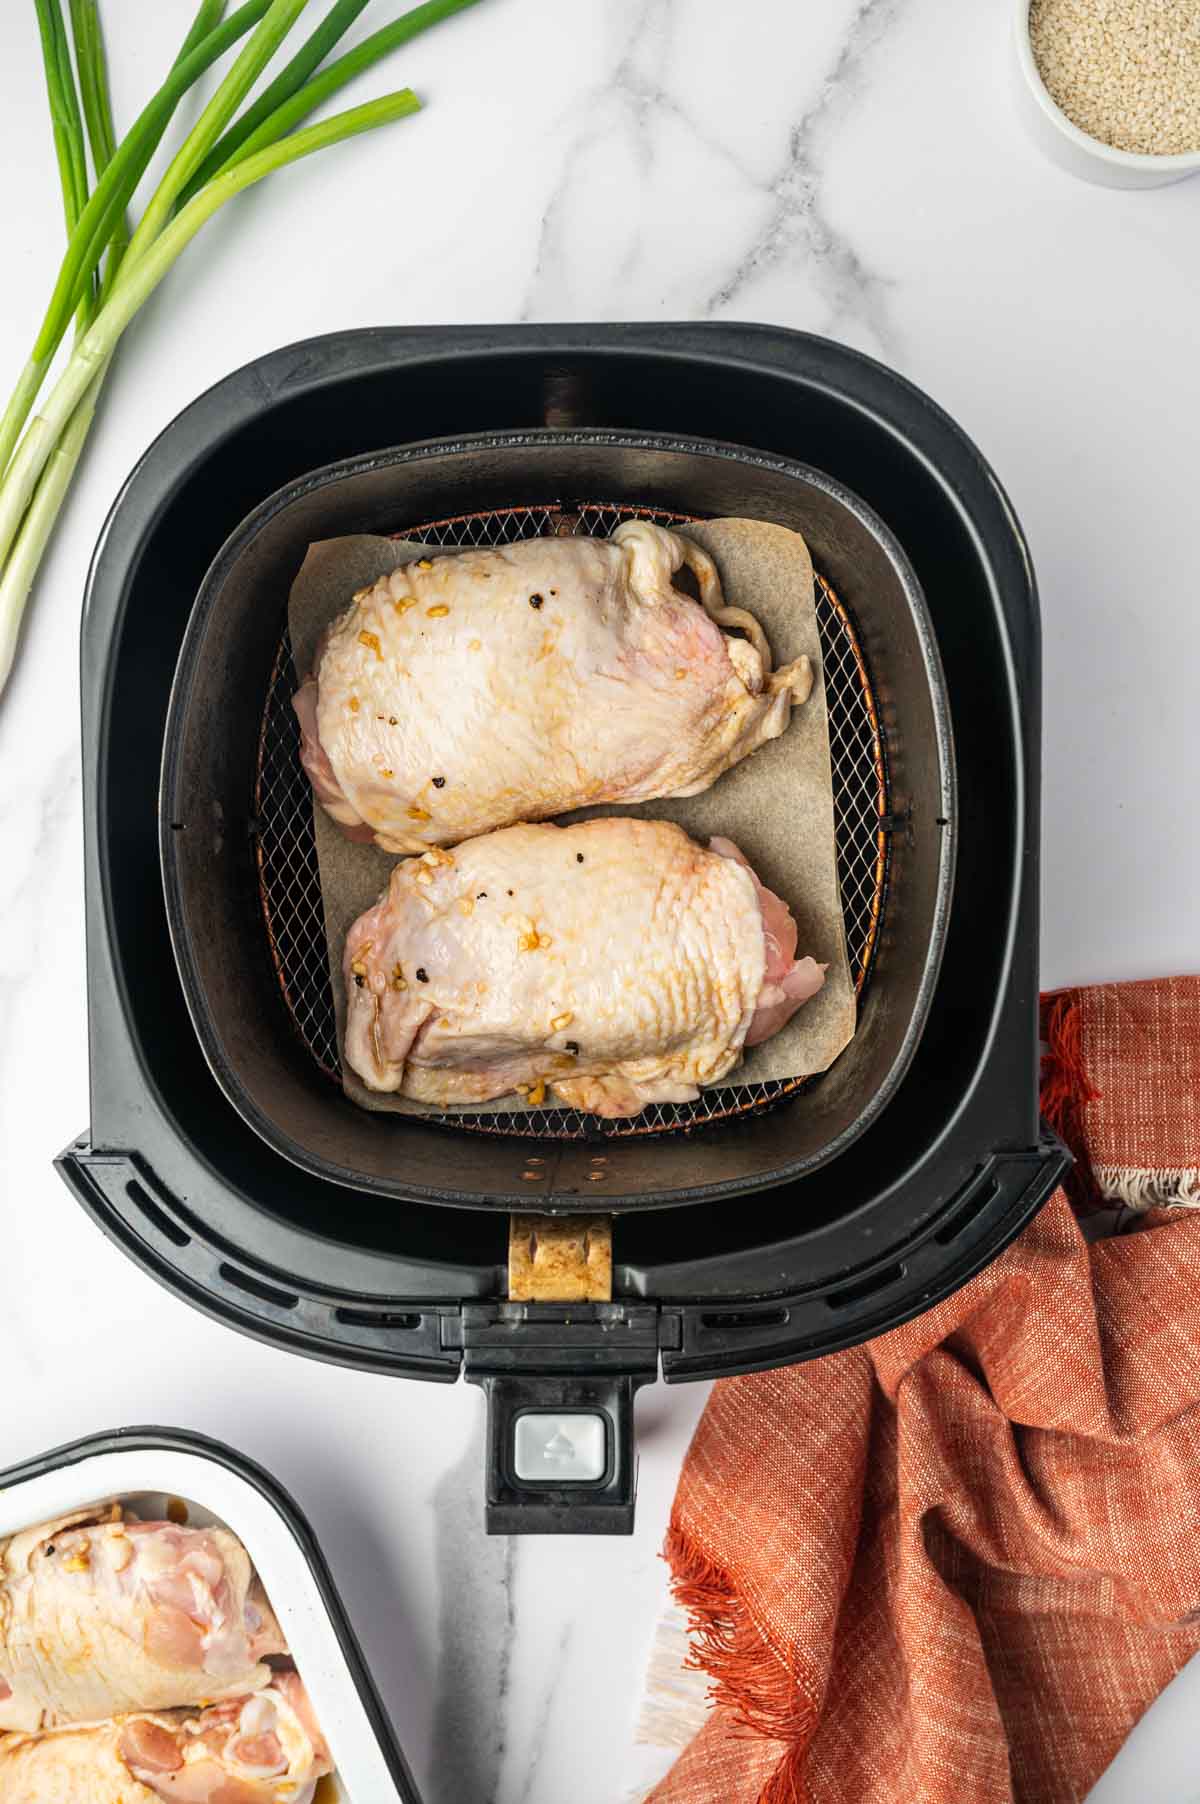
  5. Transfer the marinated chicken thighs into the air fryer basket without crowding them.
  6. Fry them for about 16 minutes while flipping them halfway through the frying process. Brush the thighs with the remaining teriyaki sauce as you flip.
  7. Serve these crispy chicken thighs with rice or your favorite side dish.

Steps By Step Instructions

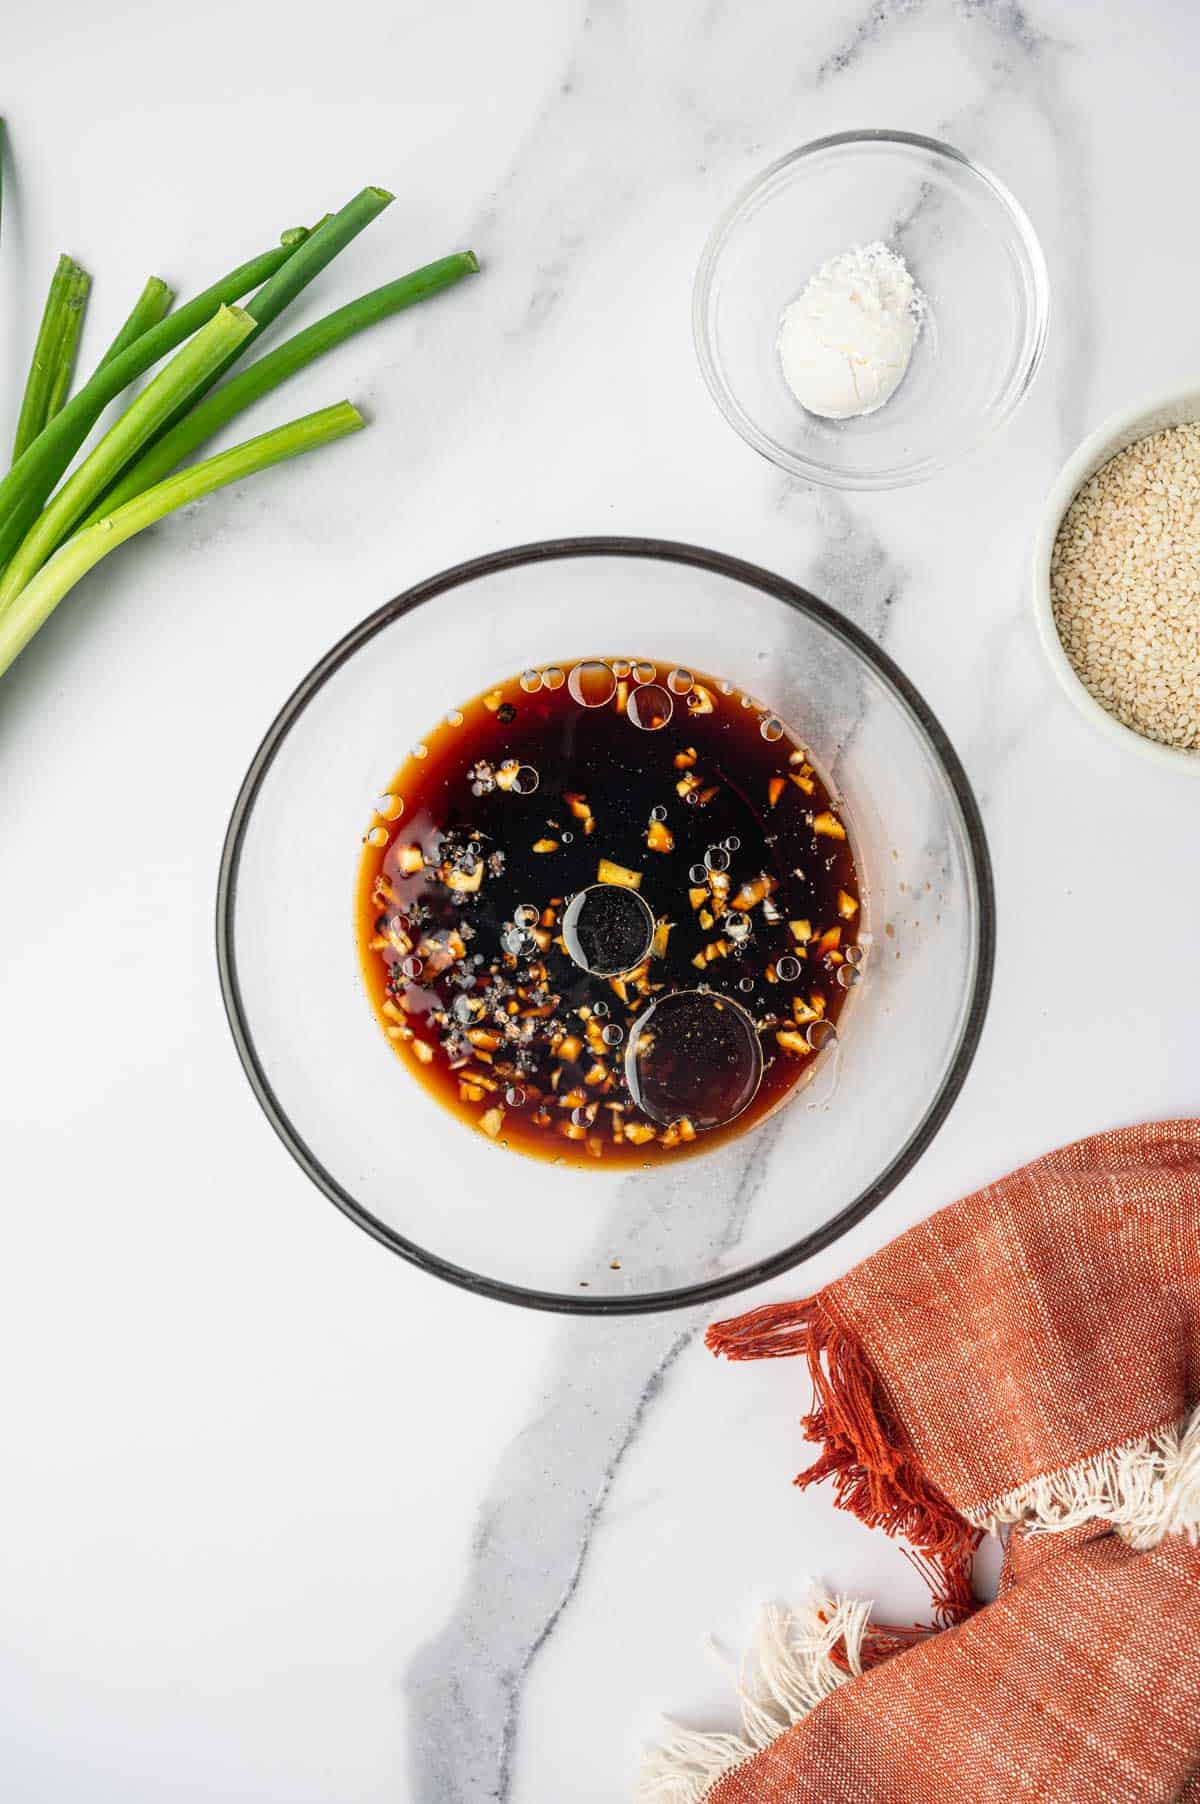
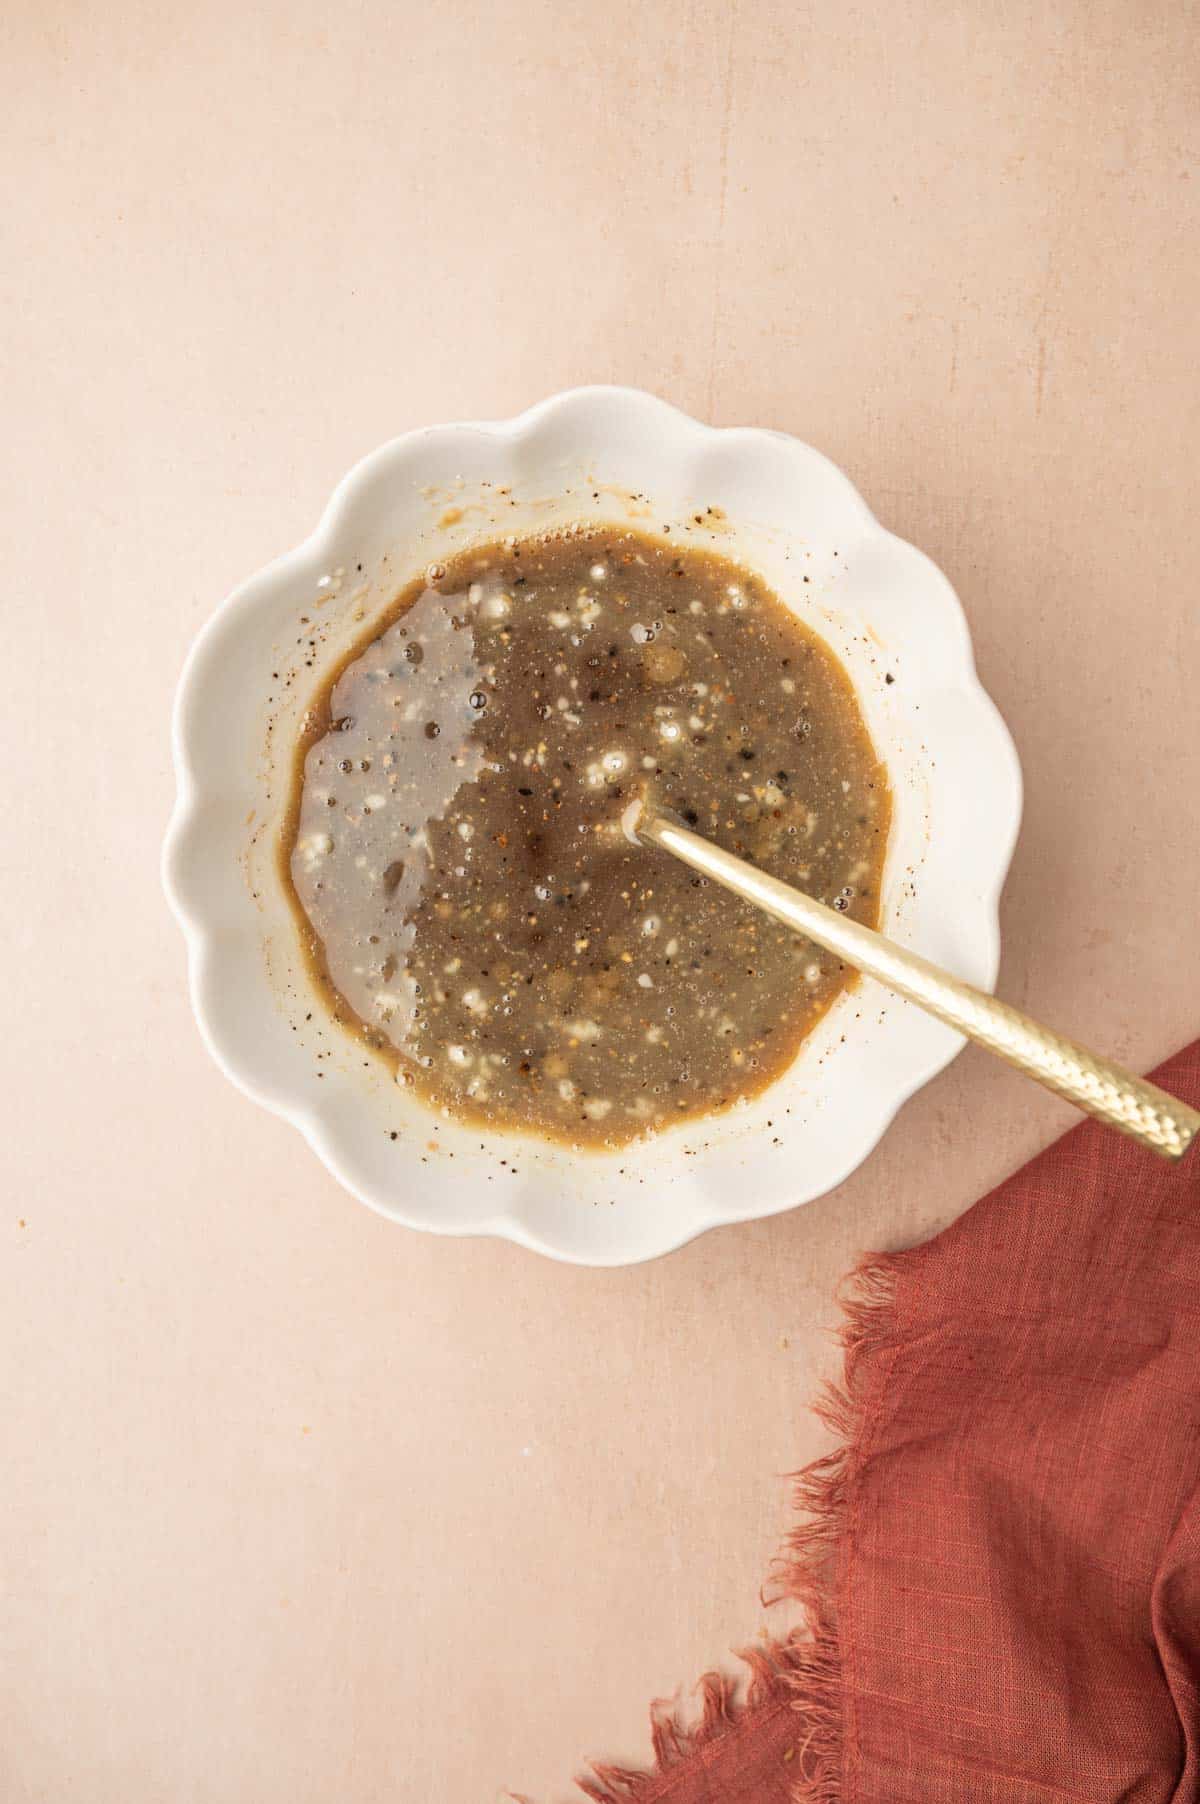
Teriyaki sauce ingredients in a bowl.

Combine all the Teriyaki sauce ingredients in a bowl.

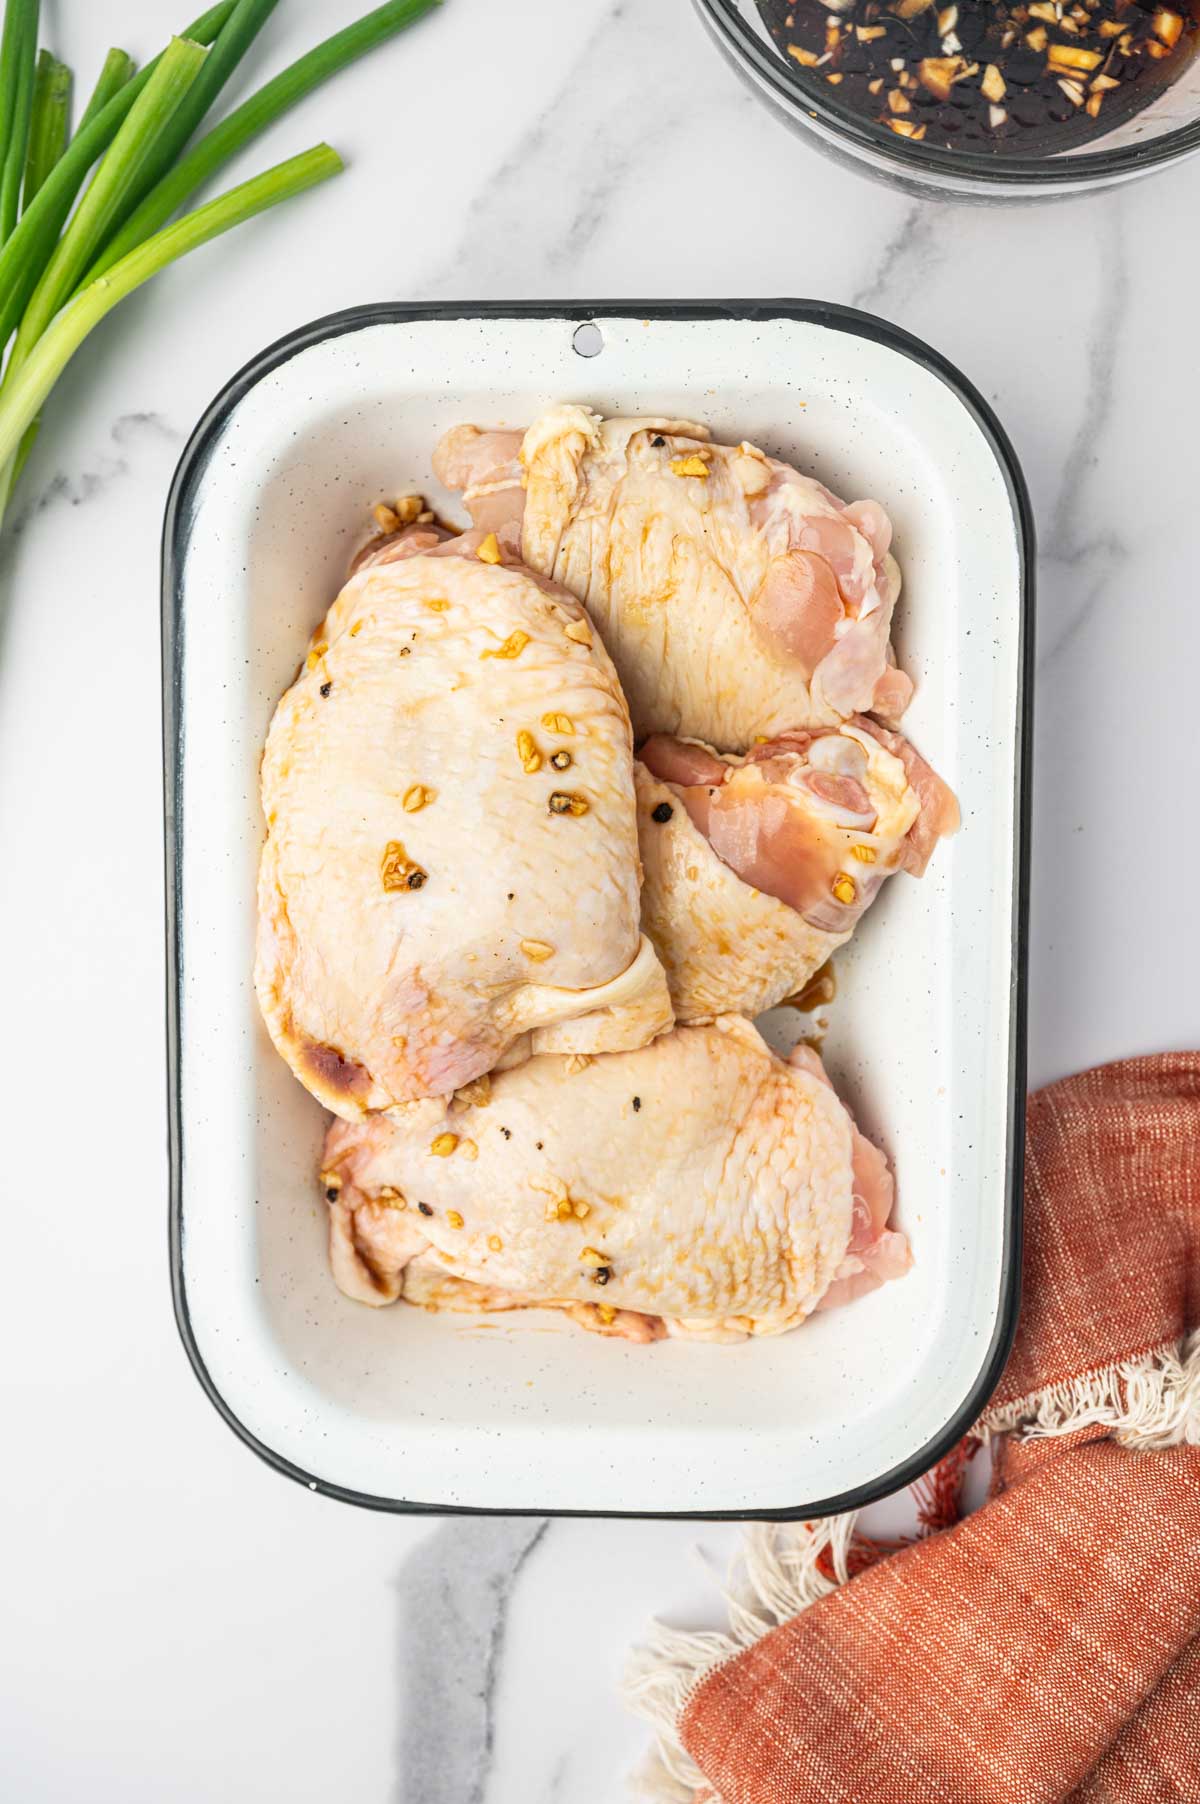
Marinating the chicken thighs in teriyaki sauce.

Marinating the chicken thighs in the prepared Teriyaki sauce.

Air Fryer Teriyaki Chicken Thighs uncooked in the air fryer basket.

Place the chicken thighs in an air fryer basket to air fry.

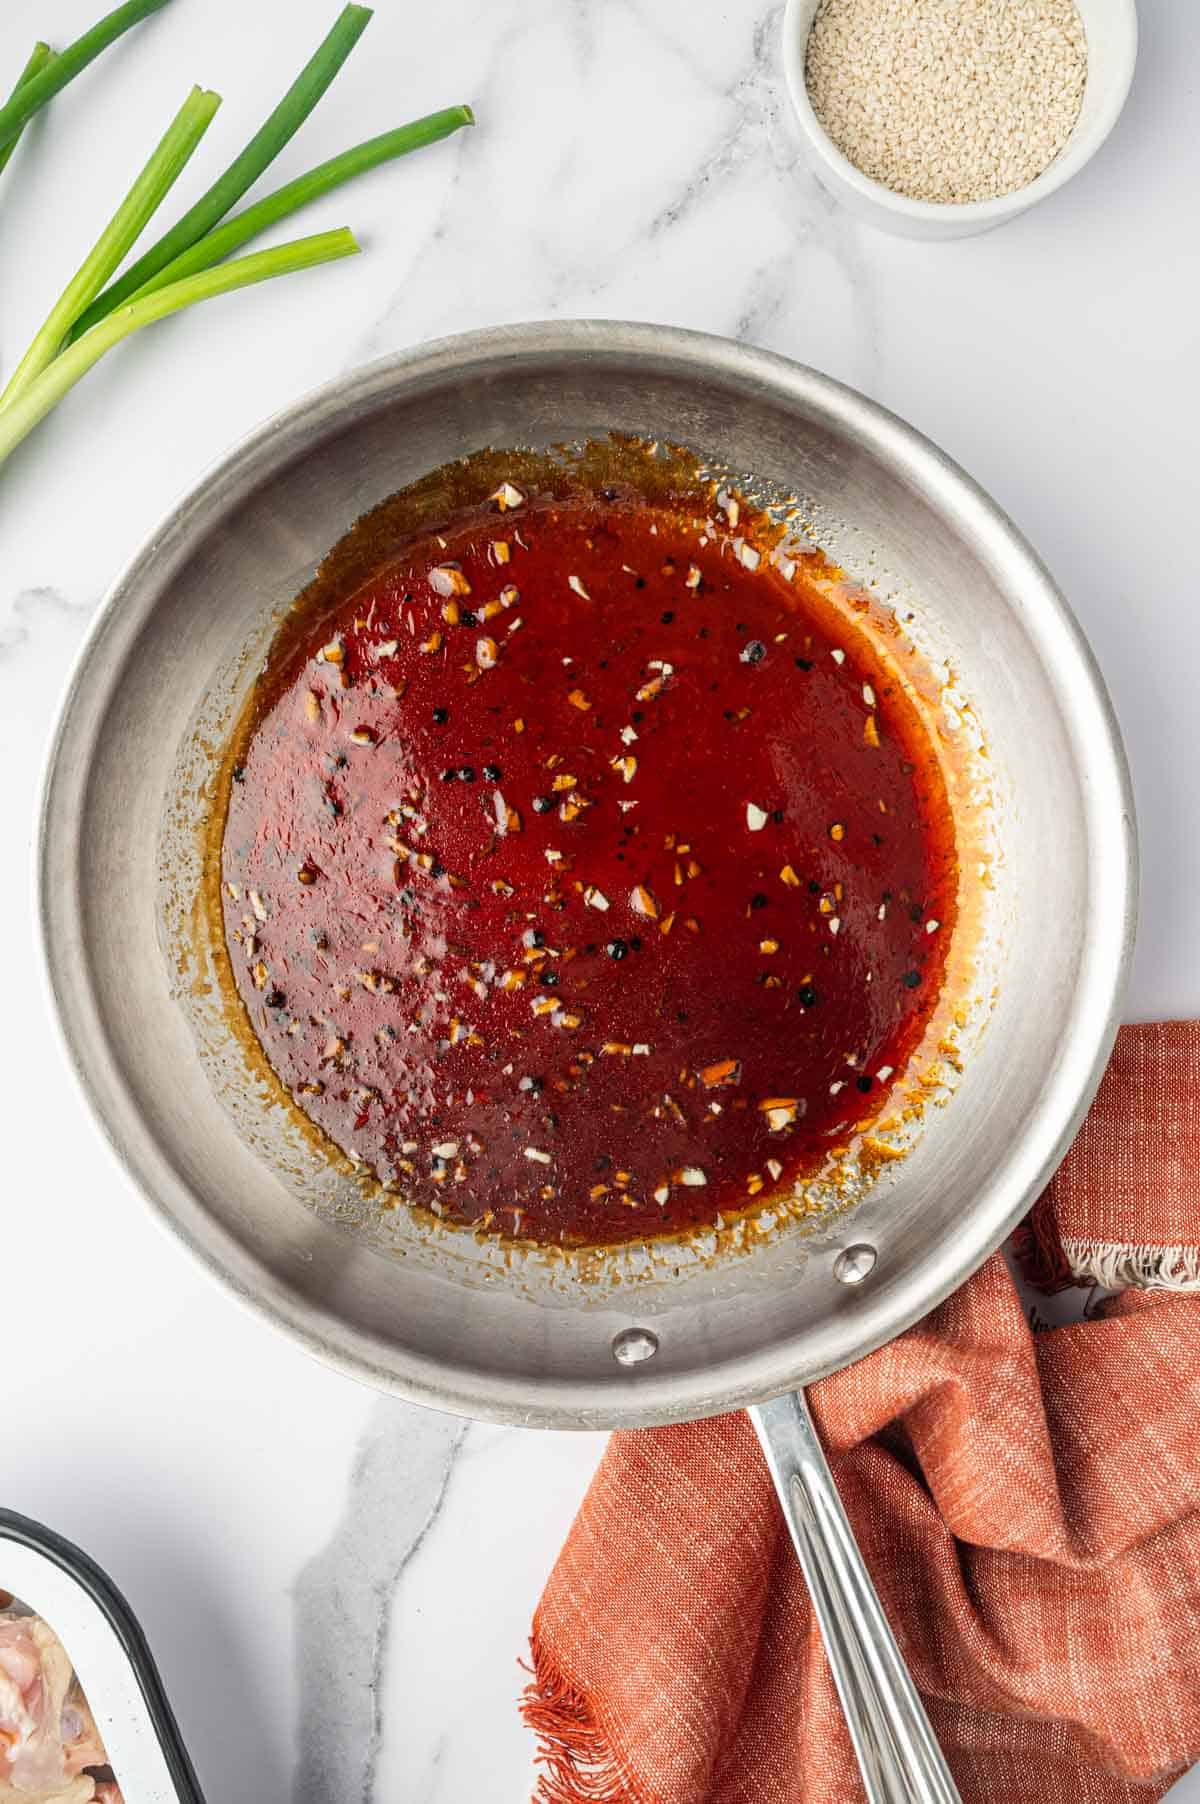
Teriyaki sauce in a skillet.

Simmered Teriyaki Sauce.

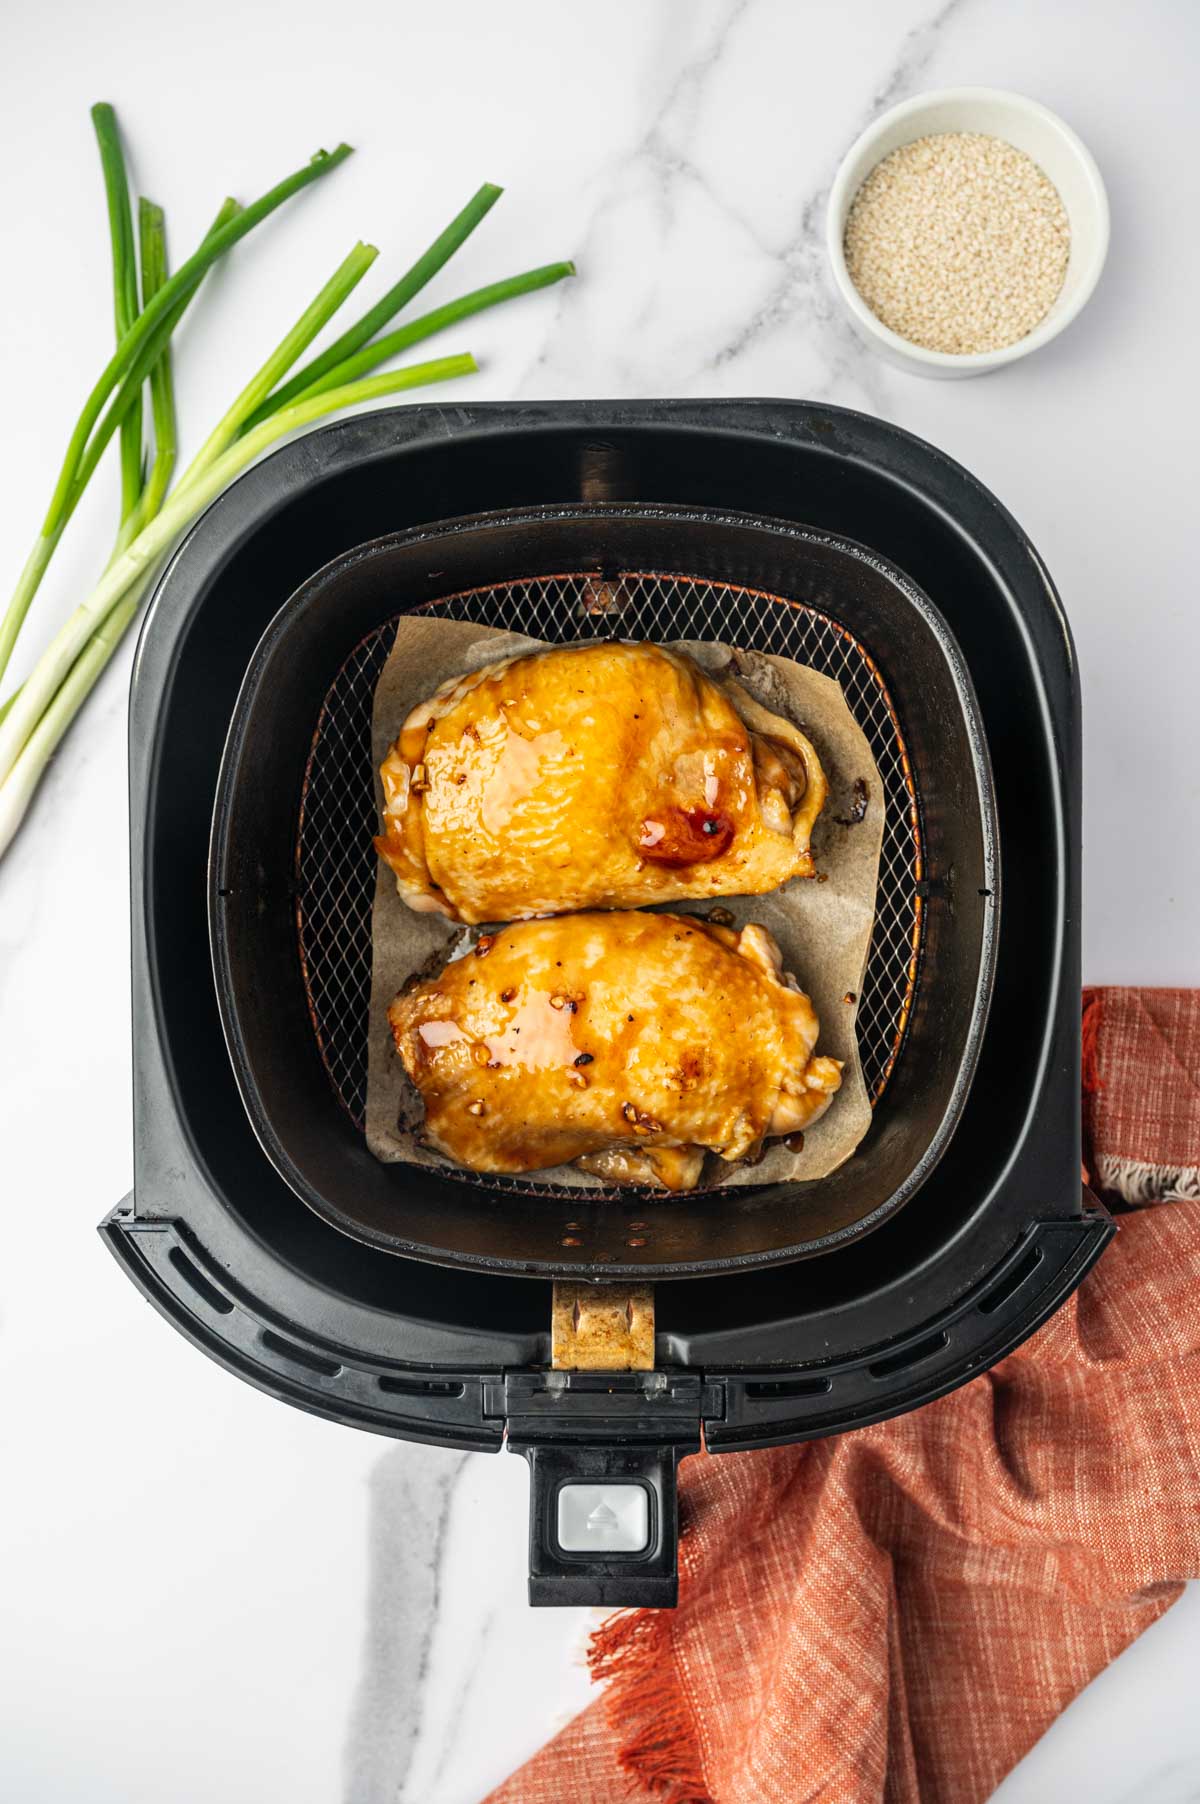
Teriyaki sauce coated over the chicken thighs.

Brush the thighs with the prepared teriyaki sauce. Air Fry again.

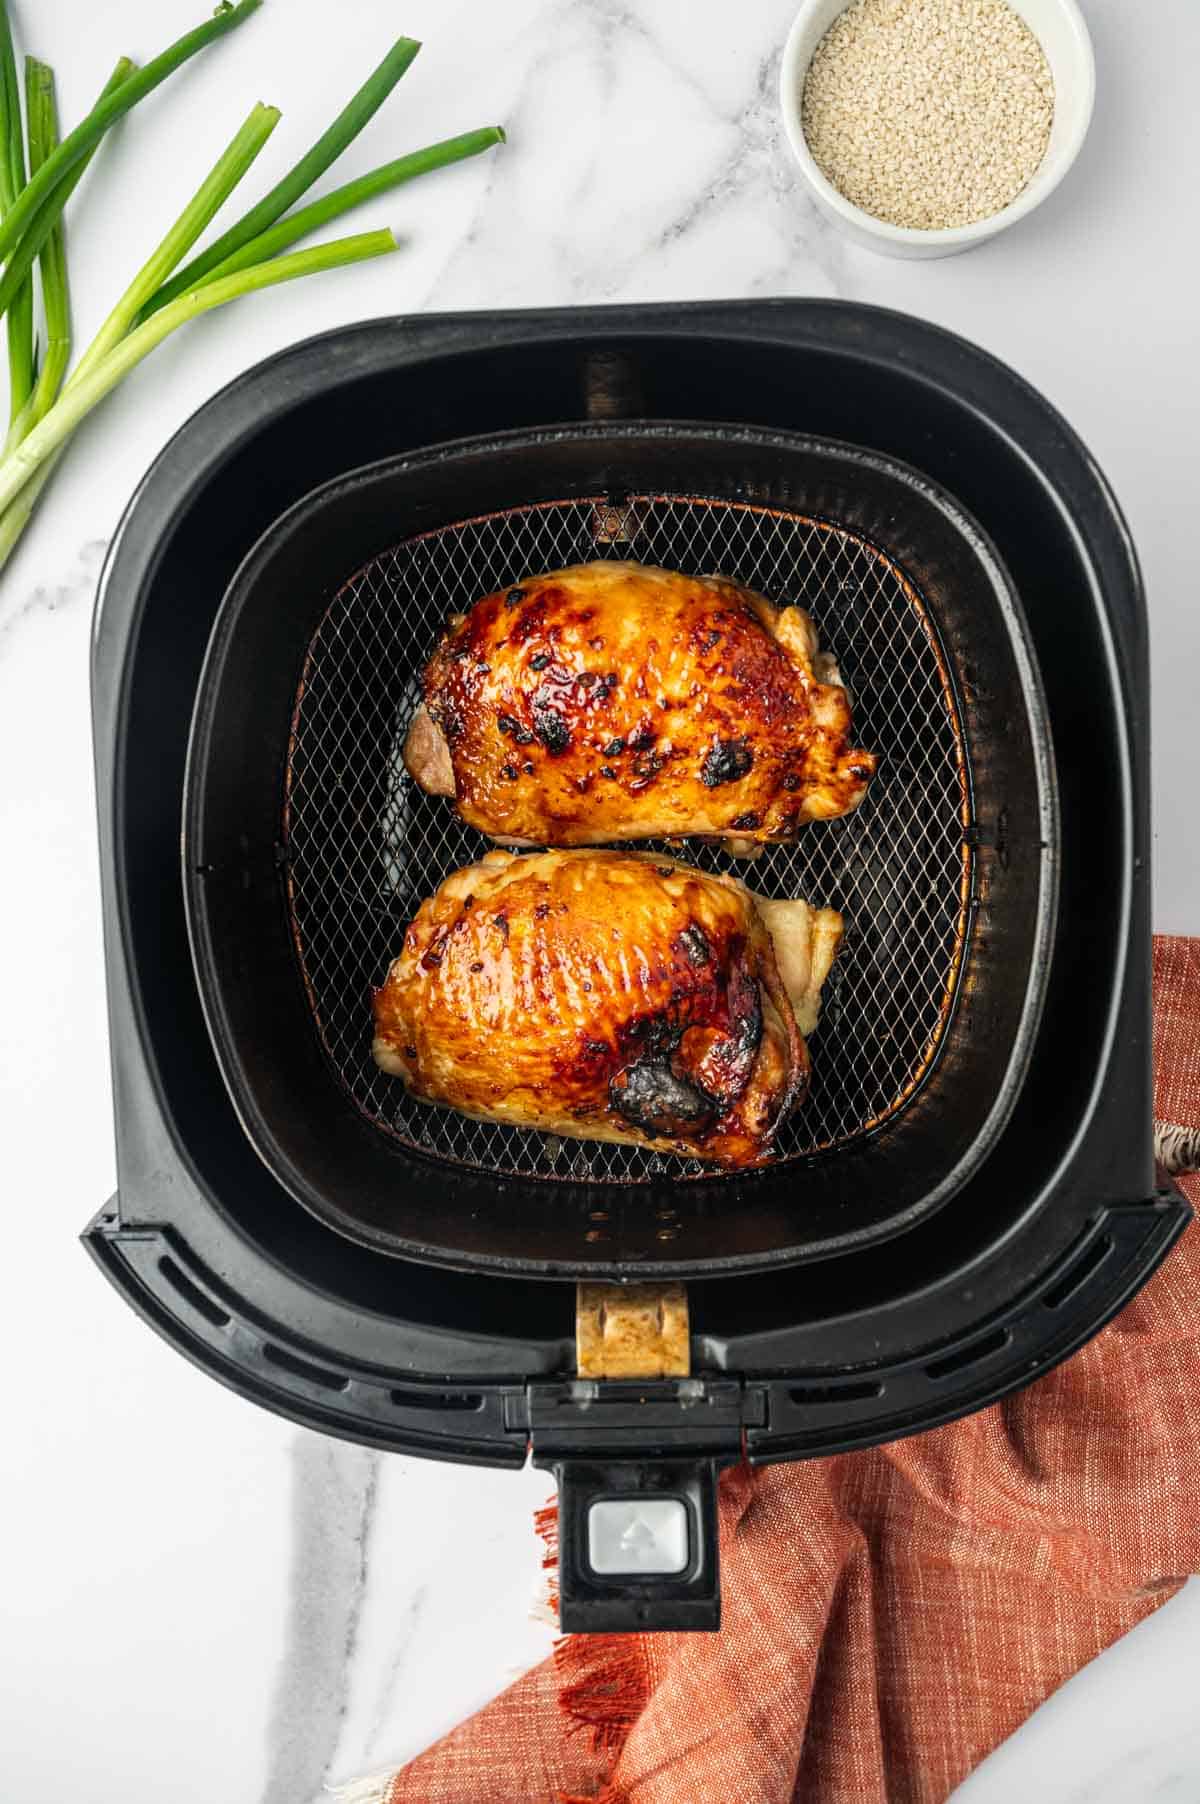
Golden Brown Chicken Thighs Coated in Sticky Teriyaki Sauce

Crispy, golden and sticky chicken thighs are ready.

Once done, garnish the chicken thighs with sesame seeds and chopped green onions.

Quick and Easy Air Fryer Chicken Thighs with a Savory-Sweet Teriyaki Glaze.

Substitutions

If you're missing an ingredient or need a swap, here are some easy substitutions to ensure your teriyaki chicken thigh recipe turn out just as delicious:

  • For Chicken Thighs: Use boneless, skinless chicken breasts for a leaner option. Adjust cooking time as they may cook faster. nother flavorful alternative is chicken drumsticks, these work great with teriyaki sauce and stay juicy in the air fryer.
  • Soy Sauce: Substitute with tamari for a gluten-free option or use coconut aminos for a slightly sweeter and soy-free alternative.
  • Brown Sugar: Replace with honey, maple syrup, or granulated white sugar for sweetness.
  • Cornstarch: Substitute with arrowroot powder or flour as a thickening agent for the sauce.

Variations

Here are some creative and delicious variations to customize your Air Fryer Teriyaki Chicken Thighs recipe:

  • Spicy Teriyaki Chicken Thighs: Add sriracha, chili flakes, or a splash of hot sauce to the teriyaki sauce for a spicy kick.
  • Honey Garlic Teriyaki Chicken Thighs: Mix in honey and extra minced garlic to the sauce for a sweeter, garlicky flavor.
  • Pineapple Teriyaki Chicken Thighs: Add chunks of pineapple to the sauce or cook them alongside the chicken.
Asian-Inspired Teriyaki Chicken Thighs Recipe with Homemade Sauce.

Equipment Needed for Teriyaki Chicken Thighs Recipe

Air Fryer - An essential for cooking the chicken thighs to crispy, golden perfection while keeping them juicy inside.

Small Skillet - To simmer and thicken the teriyaki sauce on the stovetop.

Mixing Bowls - For marinating the chicken and preparing the teriyaki sauce.

Measuring Spoons and Cups - To accurately measure the ingredients for the sauce and marinade.

Basting Brush - To evenly coat the chicken thighs with the teriyaki sauce during cooking.

Storing Teriyaki Chicken Thighs

Properly storing your teriyaki chicken thighs ensures you can enjoy their delicious flavors for days to come. Here’s how to do it:

  • Refrigeration: Place the cooked chicken thighs in an airtight container and refrigerate them for up to four days. When ready to eat, reheat them in an air fryer, oven, or stovetop to restore some of the crispiness. Using a microwave is convenient but may soften the skin.
  • Freezing: If you want to store them for a longer period, place the chicken thighs in an airtight container or a freezer-safe bag. They will keep well in the freezer for up to one month. To prevent freezer burn, ensure as much air as possible is removed from the container or bag before sealing.
  • Reheating Frozen Chicken Thighs: When reheating frozen chicken, allow it to thaw in the refrigerator overnight. To reheat, use an air fryer or oven to revive the crispy texture. Avoid reheating at high heat too quickly, as this can dry out the chicken.
Homemade Teriyaki Sauce Glazed Chicken Thighs Fresh from the Air Fryer.

Top Tip

Once the teriyaki chicken thighs have been refrigerated, they will still taste delicious, but the crispy skin may lose some of its original texture. Reheating in an air fryer or oven can help bring back a bit of the crispiness, but it won’t be exactly the same as freshly cooked.

FAQ

Can I use boneless, skinless chicken thighs instead of bone-in, skin-on?

Yes, you can use boneless, skinless chicken thighs. However, they may cook faster, so adjust the cooking time accordingly. The skin-on thighs provide extra crispiness and flavor, but the dish will still be delicious without it.

Can I make this recipe with chicken breasts?

Absolutely! Chicken breasts are a leaner option, but they can dry out if overcooked. Keep a close eye on the cooking time and consider pounding them to an even thickness for better results.

What if I don’t have an air fryer? Can I make this recipe in Oven?

You can bake the chicken thighs in the oven at 400°F (200°C) for about 35-40 minutes or until they reach an internal temperature of 165°F (75°C). For extra crispiness, broil them for the last 3-5 minutes.

Can I marinate the chicken thighs ahead of time?

Yes! Marinating the chicken for a few hours or overnight enhances the flavor. Just make sure to refrigerate the marinated chicken in an airtight container or ziploc bag to lock the flavors!

Can I Use Store-Bought Teriyaki Sauce for This Recipe?

Yes, you can absolutely use store-bought teriyaki sauce for this recipe! It’s a great time-saving option and still delivers delicious results. 

Related

Looking for other recipes like this? Try these:

  • Oven baked honey garlic chicken thighs with sticky glaze in a baking dish
    Baked Honey Garlic Chicken Thighs (Sticky, Juicy & Ready in 40 Minutes)
  • July Meal Plan for Families: 30 Days, No Repeat Recipes
  • Crispy air fryer chicken drumsticks served on a platter with fresh parsley garnish.
    Crispy Air Fryer Chicken Drumsticks (25 Minutes!)
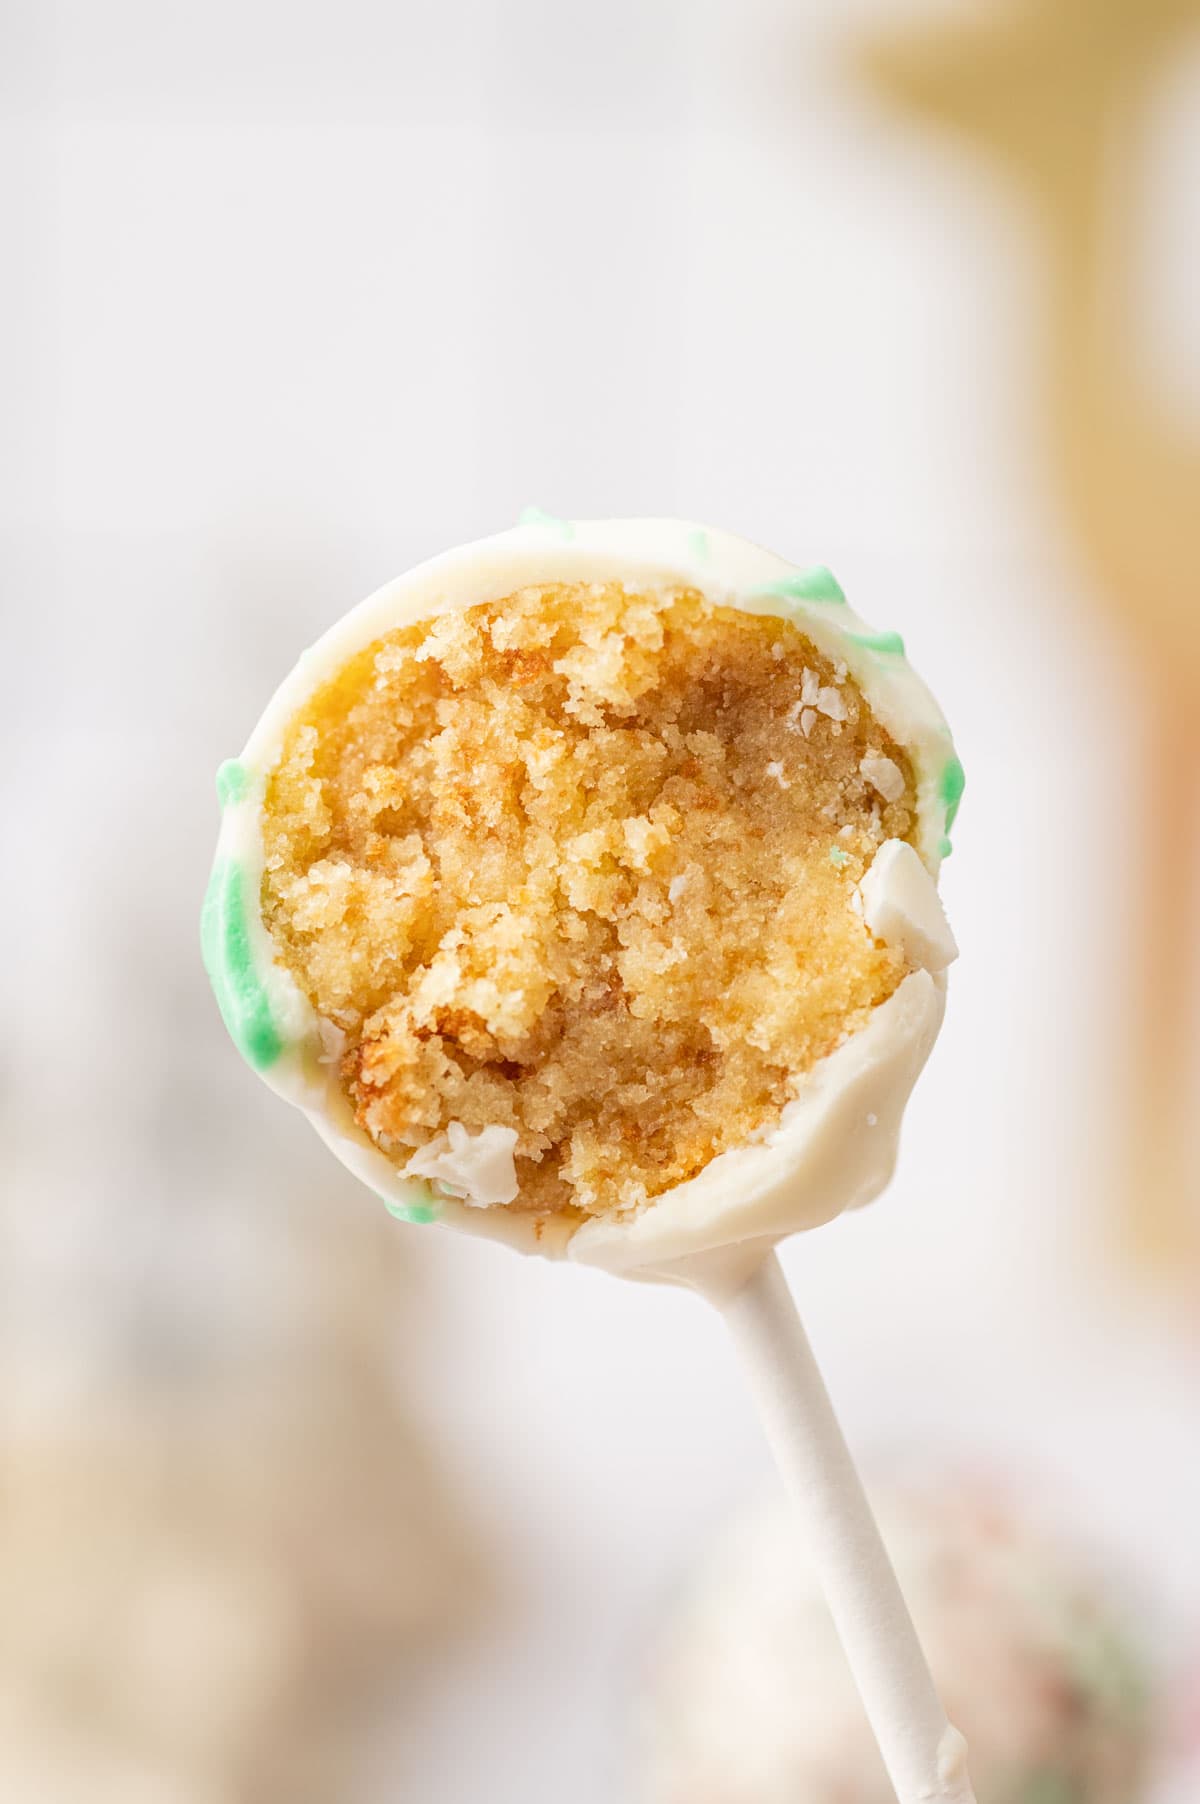
  • Inside of a birthday cake pop showing moist vanilla cake and frosting mixture
    Birthday Cake Pops (Easy Starbucks Copycat Recipe)

Pairing

These are my favorite dishes to serve with Air Fryer Teriyaki Chicken Thighs:

  • images of varies recipes collage for 30 day june meal plan
    June Meal Plan for Families (30 Days, No Repeat Recipes)
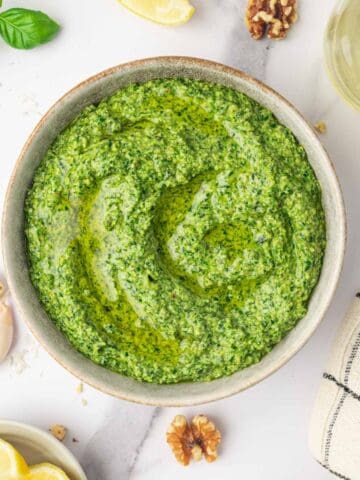
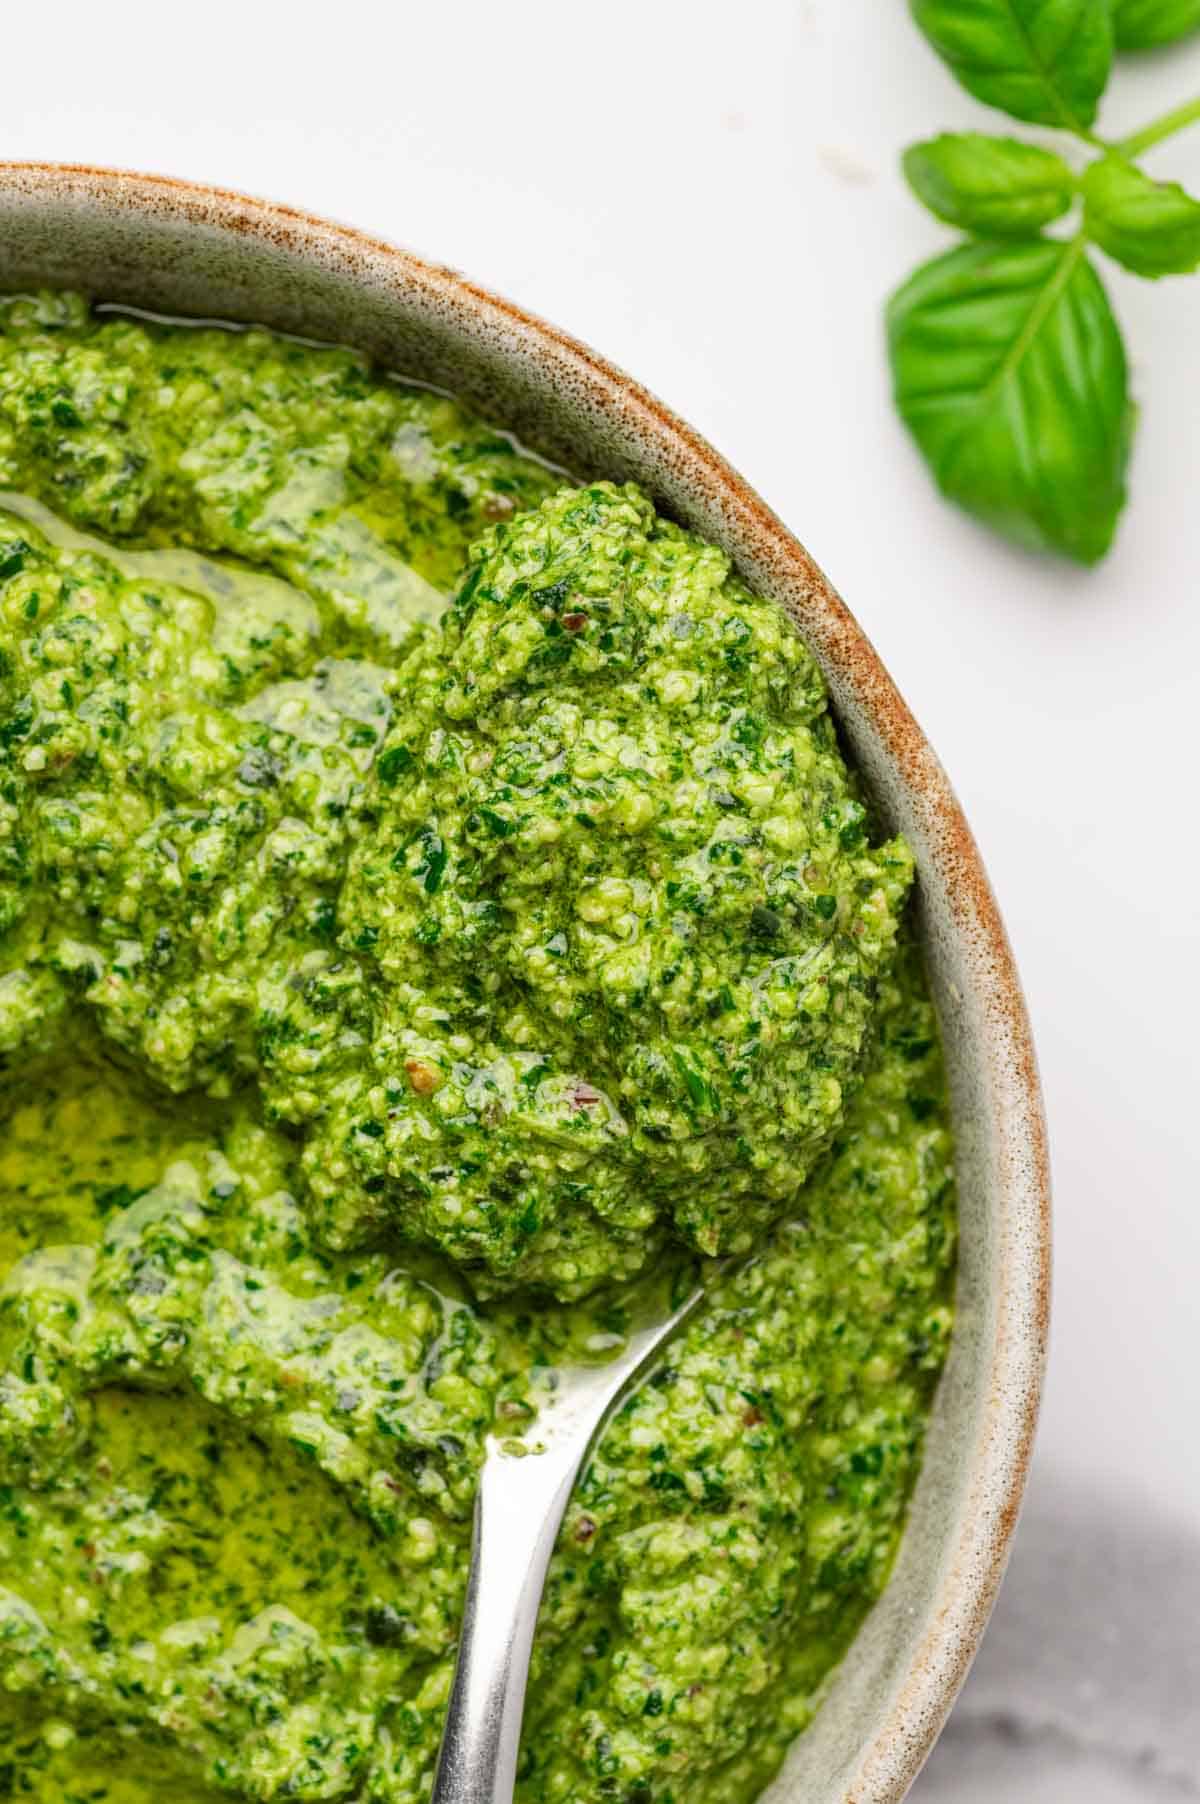
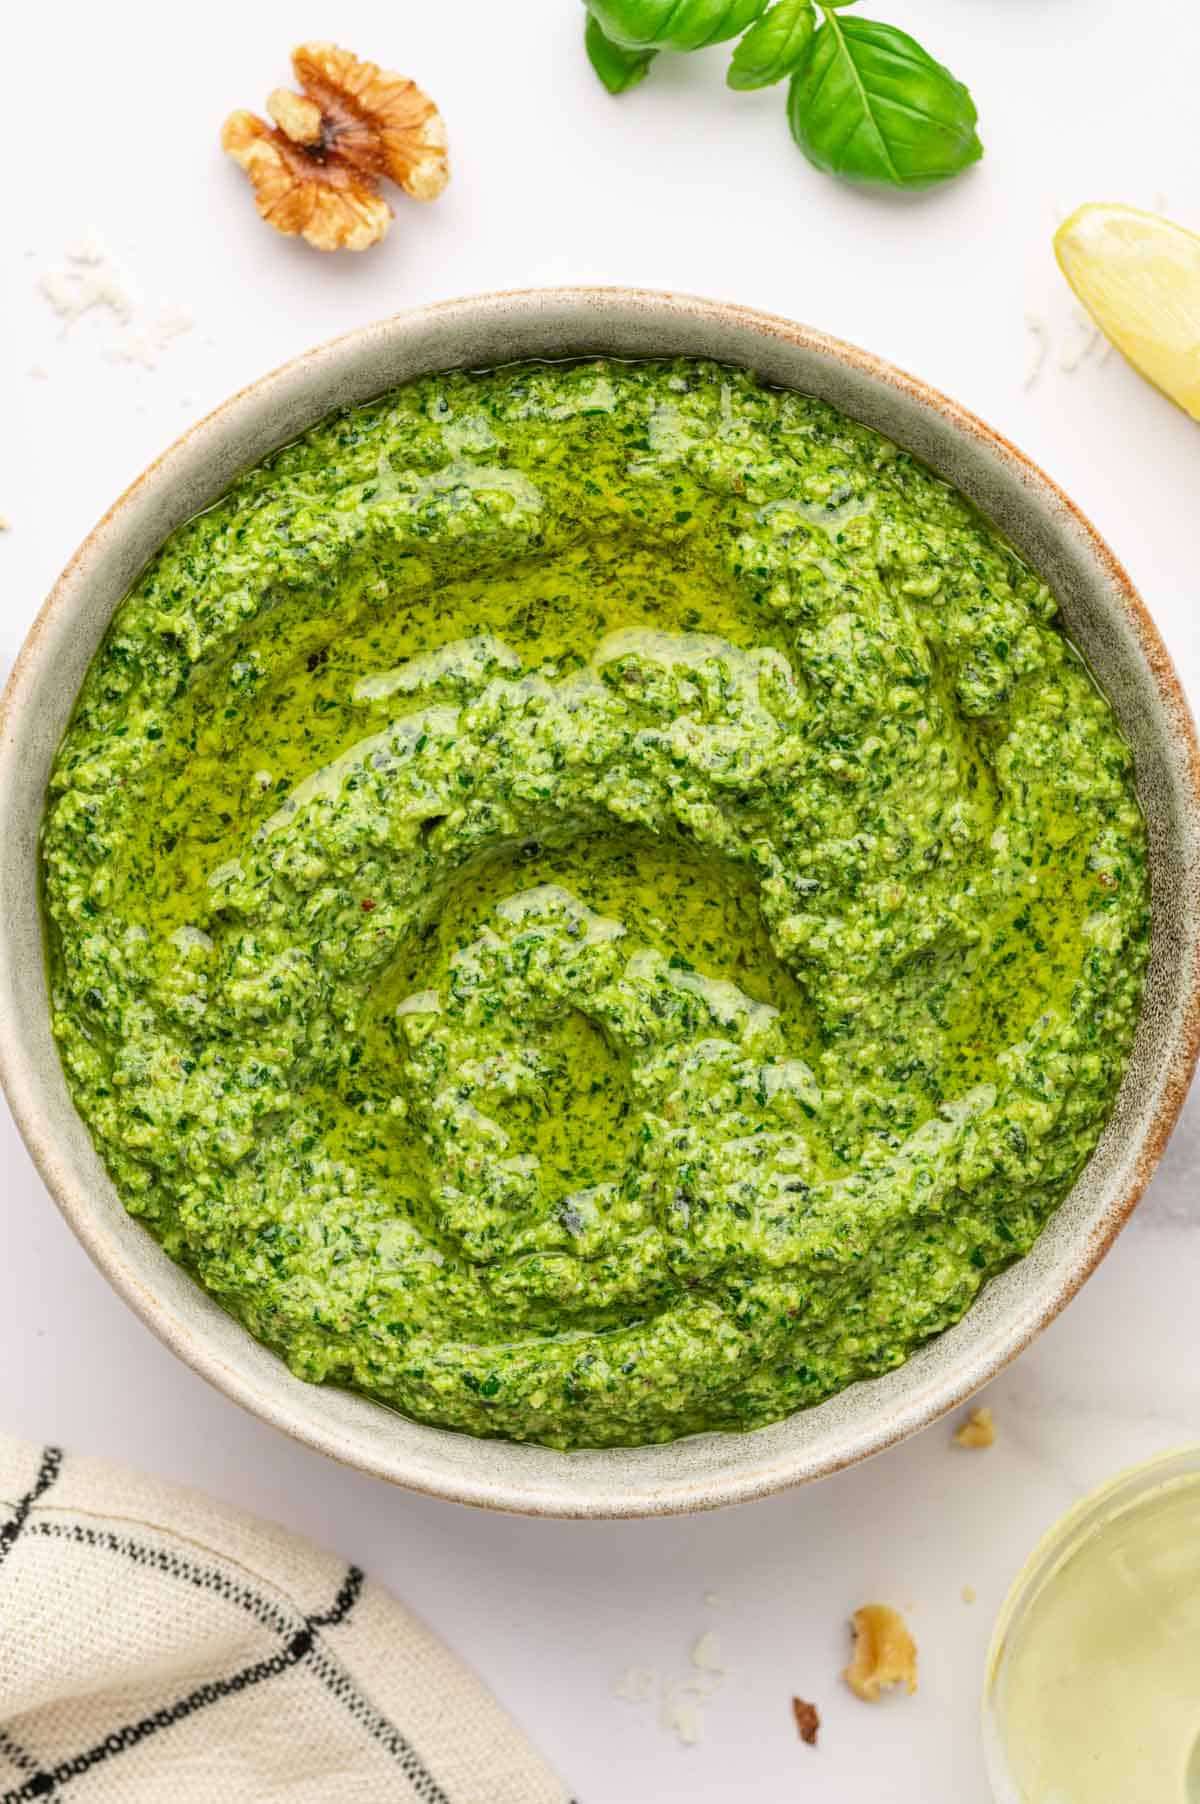
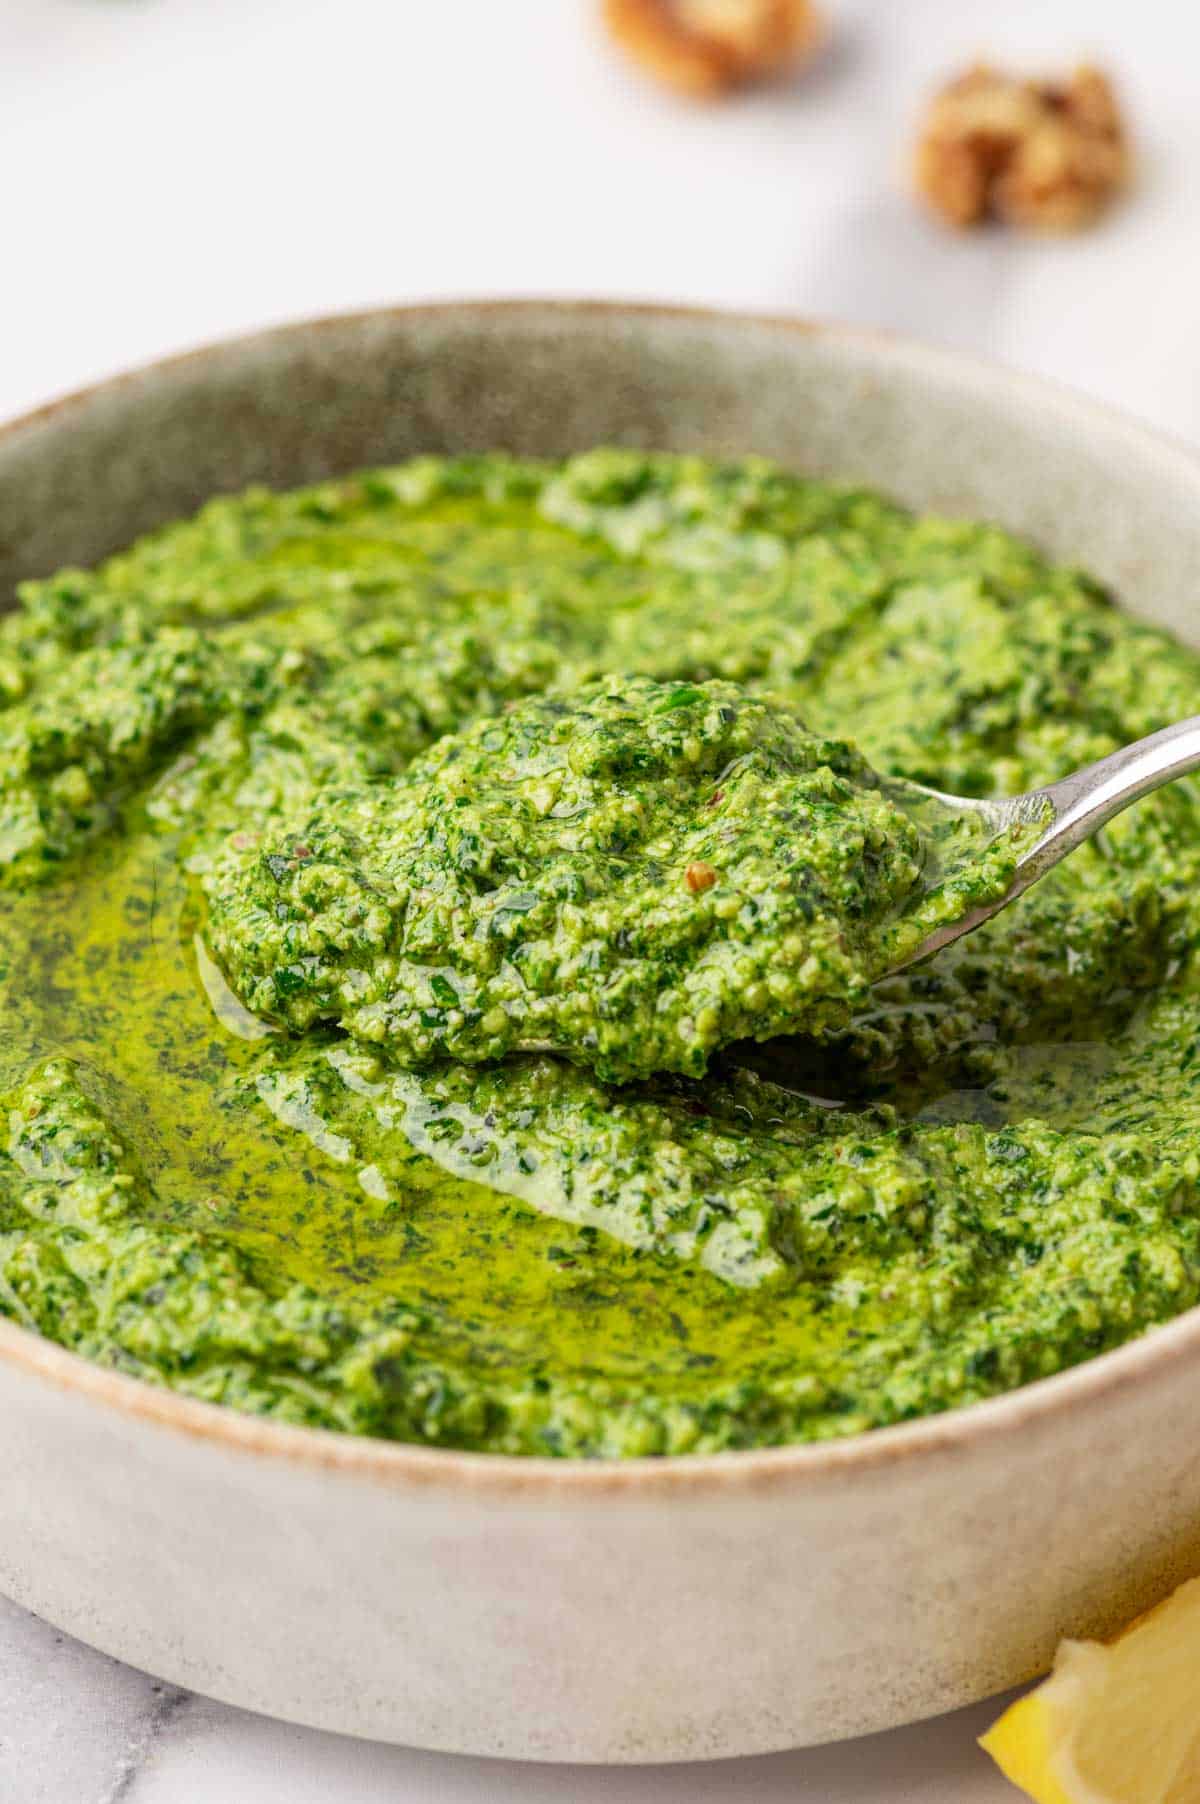
  • a spoon taking the creamy pesto sauce without pine nuts from a bowl.
    Substitute for Pine Nuts in Pesto (Best Easy Alternatives)
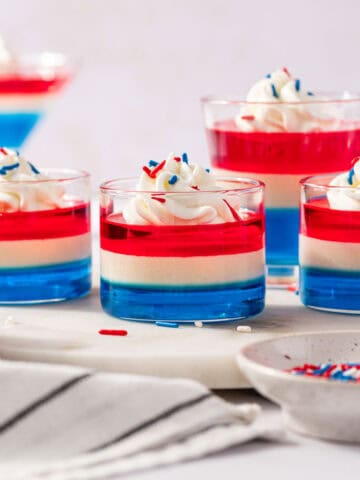
  • Festive red white and blue jello shots for summer holidays party table
    4th Of July Jello Shots (Red, White and Blue layers)
  • Patriotic flag cake recipe decorated with fresh strawberries and blueberries on top of the cake
    4th of July Flag Cake (Easy American Flag Sheet Cake)
Crispy Air Fryer Teriyaki Chicken Thighs with Sesame Seeds and Green Onions.

Air Fryer Teriyaki Chicken Thighs

Abi Guna
These healthy Air Fryer Chicken Thighs are juicy, tender, and bursting with bold flavors, perfect quick and easy meal that’s sure to be a crowd-pleaser
5 from 9 votes
Print Recipe Pin Recipe
Prep Time 1 hour hr 10 minutes mins
Cook Time 20 minutes mins
Total Time 30 minutes mins
Course Dinner, Main Course
Cuisine American, Asian, Japanese
Servings 4
Calories 247 kcal

Equipment

  • Air Fryer
  • Mixing Bowl
  • Skillet
  • Measuring Spoons
  • Basting Brush

Ingredients
  

  • 4 bone-in skin-on chicken thighs
  • ½ cup soy sauce low sodium
  • ¼ cup brown sugar
  • 1 tablespoon rice vinegar
  • 1 teaspoon garlic minced
  • 1 teaspoon ginger grated
  • ½ teaspoon ground black pepper
  • 1 teaspoon sesame oil
  • 1 teaspoon cornstarch
  • 2 teaspoons water to make cornstarch slurry
  • 2 teaspoons sesame seeds to garnish
  • 2 teaspoons chopped green onions to garnish

Instructions
 

  • Preheat your air fryer to 380°F for about 3-5 minutes.
  • Pat the chicken thighs dry with paper towels to remove excess moisture.
  • In a small bowl, combine the ingredients for the teriyaki sauce: Soy sauce, Rice vinegar, Garlic (minced), Ginger (grated), Black pepper, and Sesame oil. Mix well.
  • Add about ⅓ of the prepared sauce to the chicken thighs and marinate for at least 30 minutes, if possible.
  • Pour the remaining sauce into a skillet and simmer over medium heat for 2 minutes. In a small bowl, mix 1 tablespoon of cornstarch with 2 teaspoons of water to make a slurry. Gradually whisk the slurry into the simmering sauce. The sauce will thicken within 2 minutes.
  • Remove the teriyaki sauce from the heat and set it aside.
  • Place the chicken thighs skin-side down in the air fryer basket, ensuring they are not overcrowded. Cook for 8-10 minutes.
  • Brush the chicken thighs generously with the prepared teriyaki sauce on both sides.
  • Cook for an additional 7-8 minutes to caramelize the sauce and create a sticky glaze.
  • Once done, garnish the chicken thighs with sesame seeds and chopped green onions.
  • Serve the chicken thighs over a bed of rice and enjoy!

Notes

  1. If your sauce isn’t thick enough, mix a little more cornstarch with water to create a slurry and stir it into the simmering sauce until it reaches your desired consistency.
  2. Arrange the chicken thighs in a single layer, leaving space between them for proper air circulation. Cook in batches if necessary.
Keyword Air fryer recipes, Chicken, Chicken thighs, Healthy, Teriyaki Sauce

If you try this recipe, please leave a STAR rating in the comment section below! Your feedback helps a small blogger like me stay motivated in creating content for my readers. Also, feel free to follow me at Food Exit on Instagram, TikTok, and Pinterest for the latest recipe updates!

Air Fryer BBQ Chicken Thighs (Juicy, Crispy & Easy Dinner)

December 13, 2024 by Abi Guna 9 Comments

Do you have just 30 minutes to whip up a quick and healthy recipe for your family? Try these juicy and flavorful Air Fryer BBQ Chicken Thighs—the ultimate dinner choice for anyone craving a satisfying and delicious meal. Perfectly crispy on the outside and tender on the inside, these chicken thighs are coated with a rich, smoky BBQ glaze that caramelizes beautifully in the air fryer.

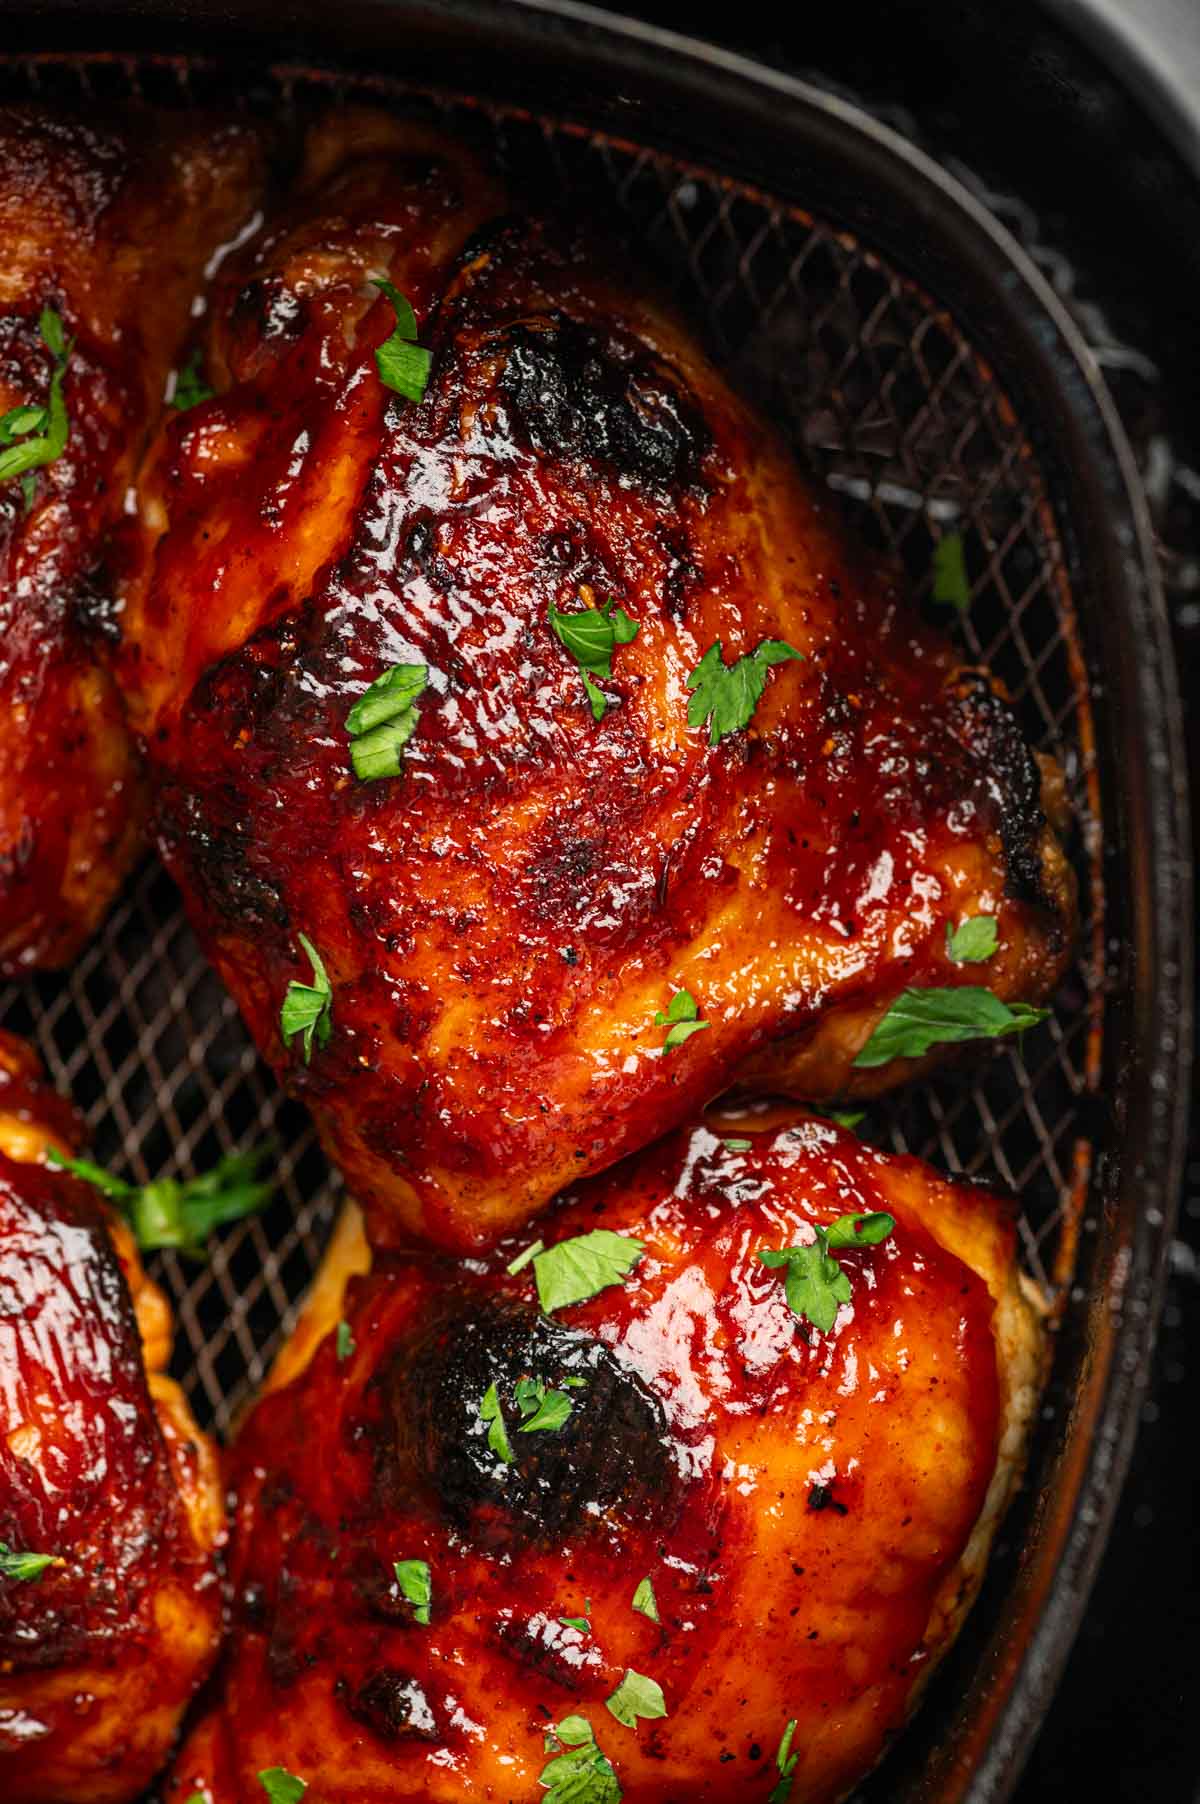
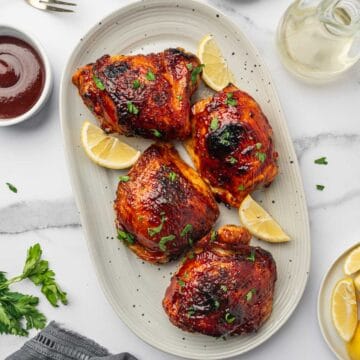
Bone-in, skin-on BBQ chicken thighs cooked to perfection in the air fryer, garnished with fresh parsley.

This air-fried BBQ chicken recipe is a game-changer for busy weeknights or last-minute gatherings. Not only are they incredibly easy to prepare, but they also require less oil than traditional frying methods, making them a healthier option without compromising on flavor.  Serve this chicken thighs with cheesy mashed potatoes and green beans casserole for a complete meal!

Looking for more healthy air-fried recipes? Check out my Air Fryer Teriyaki Chicken Thighs, Air Fryer Chicken Meatballs, Air Fryer Chicken Parmesan, and Air Fryer Sweet Potato Wedges!

Want to try more chicken recipes? Check out these delicious options: Lemon Pepper Chicken, Ground Chicken Spaghetti, and Chicken Stir-Fry Noodles! And also I have a huge collection of chicken recipes in my blog, don't forget to check them out 🙂

[feast_advanced_jump_to]

Why you will love this BBQ Chicken Thighs Recipe

  1. Crispy and Juicy: Achieve perfectly crispy skin and tender, juicy meat with minimal effort.
  2. Quick and Easy: Ready in under 30 minutes, this recipe is ideal for busy weeknights or last-minute dinners. Loved by adults and kids alike, it’s a meal everyone will ask for again and again.
  3. Flavor-Packed: The sweet and smoky BBQ glaze caramelizes beautifully in the air fryer, adding a delicious depth of flavor.
  4. Healthier Option: Uses less oil than traditional frying methods while still delivering incredible taste.
  5. Versatile: Pairs well with a variety of sides, from roasted vegetables to mashed potatoes or a fresh salad. 
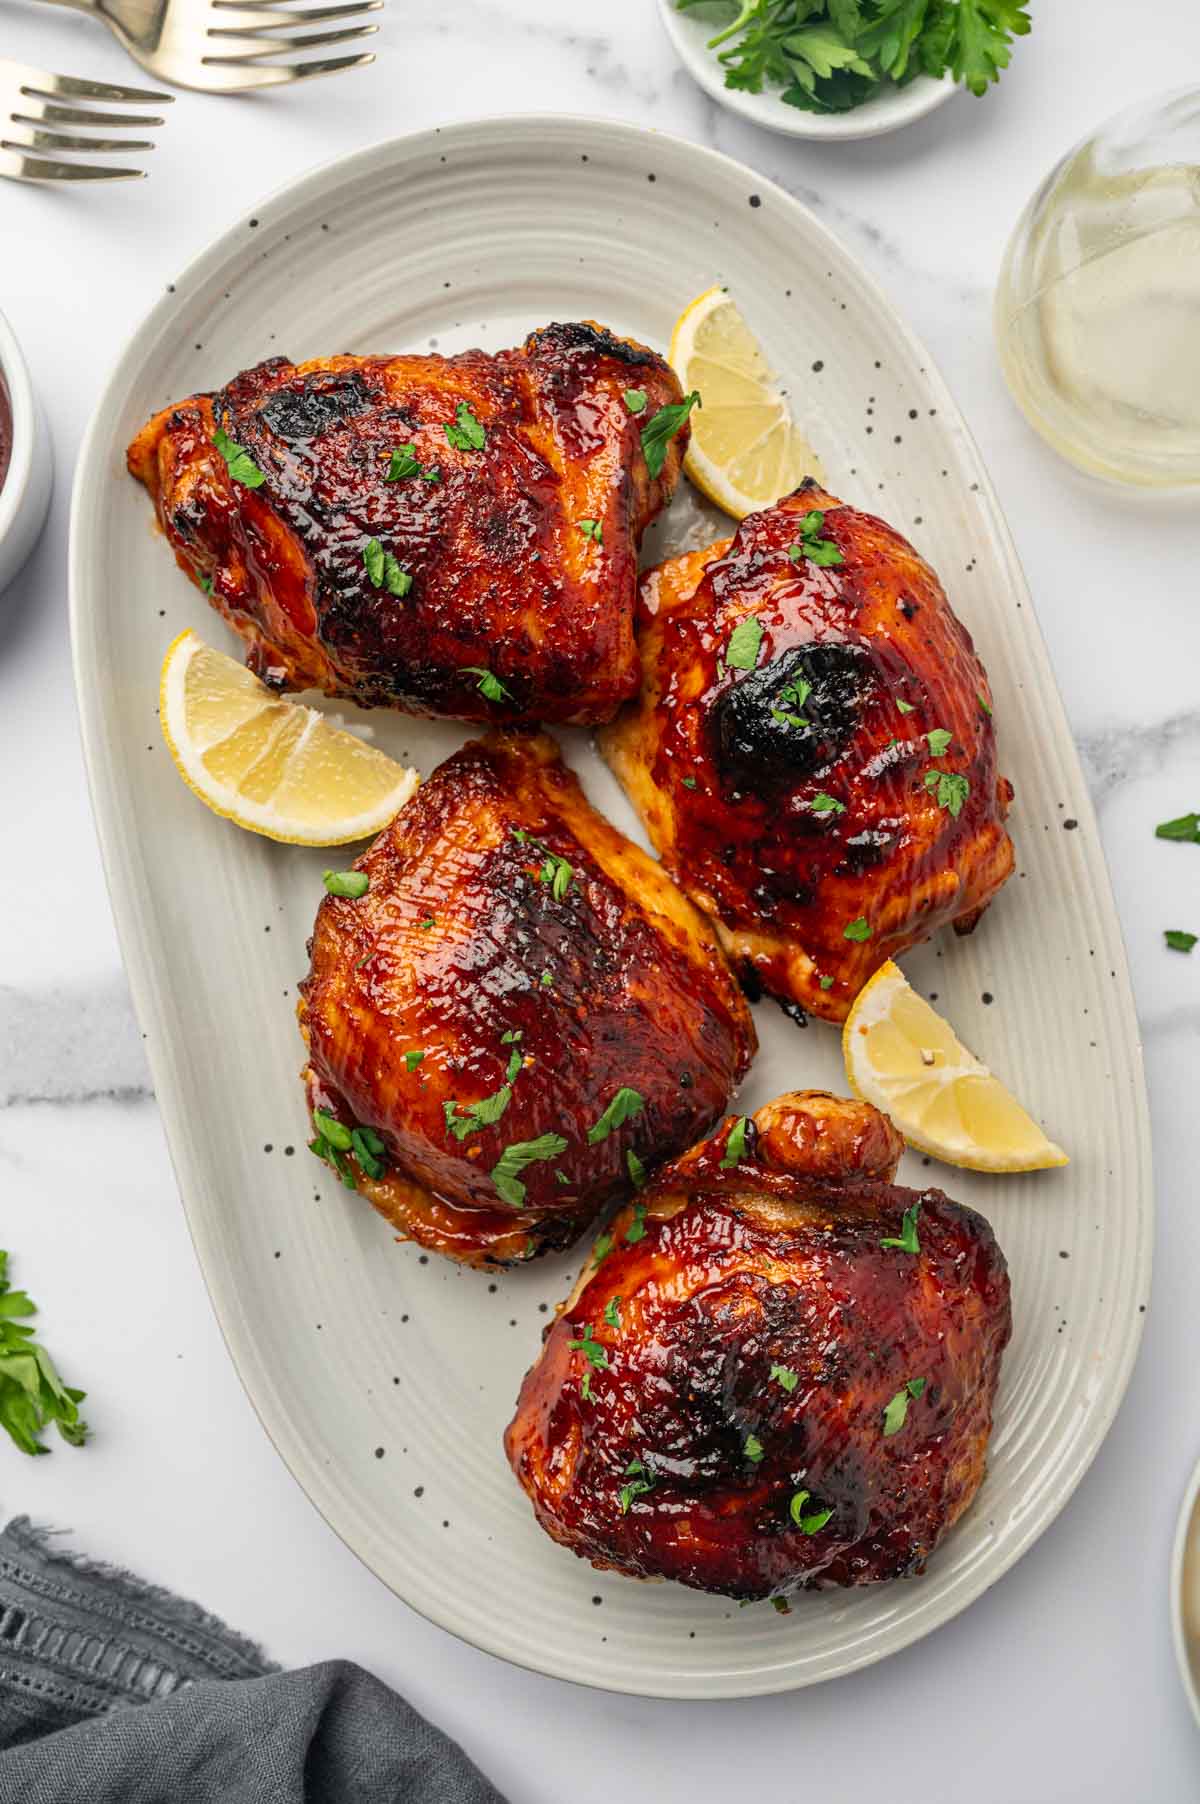
Golden brown air fryer BBQ chicken thighs with a rich, sticky glaze, served alongside a side extra sauce.

What to Serve with Barbeque Chicken Thighs

Many possible tasty sides will turn your air fryer BBQ chicken into a rich meal. Classic sides are macaroni and cheese and baked beans. You can also serve cornbread or roasted vegetables such as Air fry sweet potato wedges and Roasted cauliflower and carrots.

Another option is to slice up the chicken and create a salad, sandwich, or pizza topping. These delicious possibilities are close to endless. This recipe works especially well for BBQ chicken thighs bone-in, ensuring the chicken stays moist and packed with smoky, tangy flavor. Whether you're using a grill or air fryer, these barbecue chicken thighs are sure to become a family favorite!

What Makes Healthy BBQ Chicken Thighs So Special

We will say this once because we don’t want to upset chickens. However, the fact is that the thigh is the best and juiciest part of the chicken. The fat within the dark meat makes it much harder to dry out, and anyone who has ever enjoyed a chicken breast knows how easily they become dry – the difference between dry and juicy chicken breasts can be a matter of minutes. Contrary to the breast, it can be virtually impossible to dry the thighs, which results in a more intense flavor experience. Even if you become distracted and let them cook longer than needed, the odds are they will still be delectable and juicy.

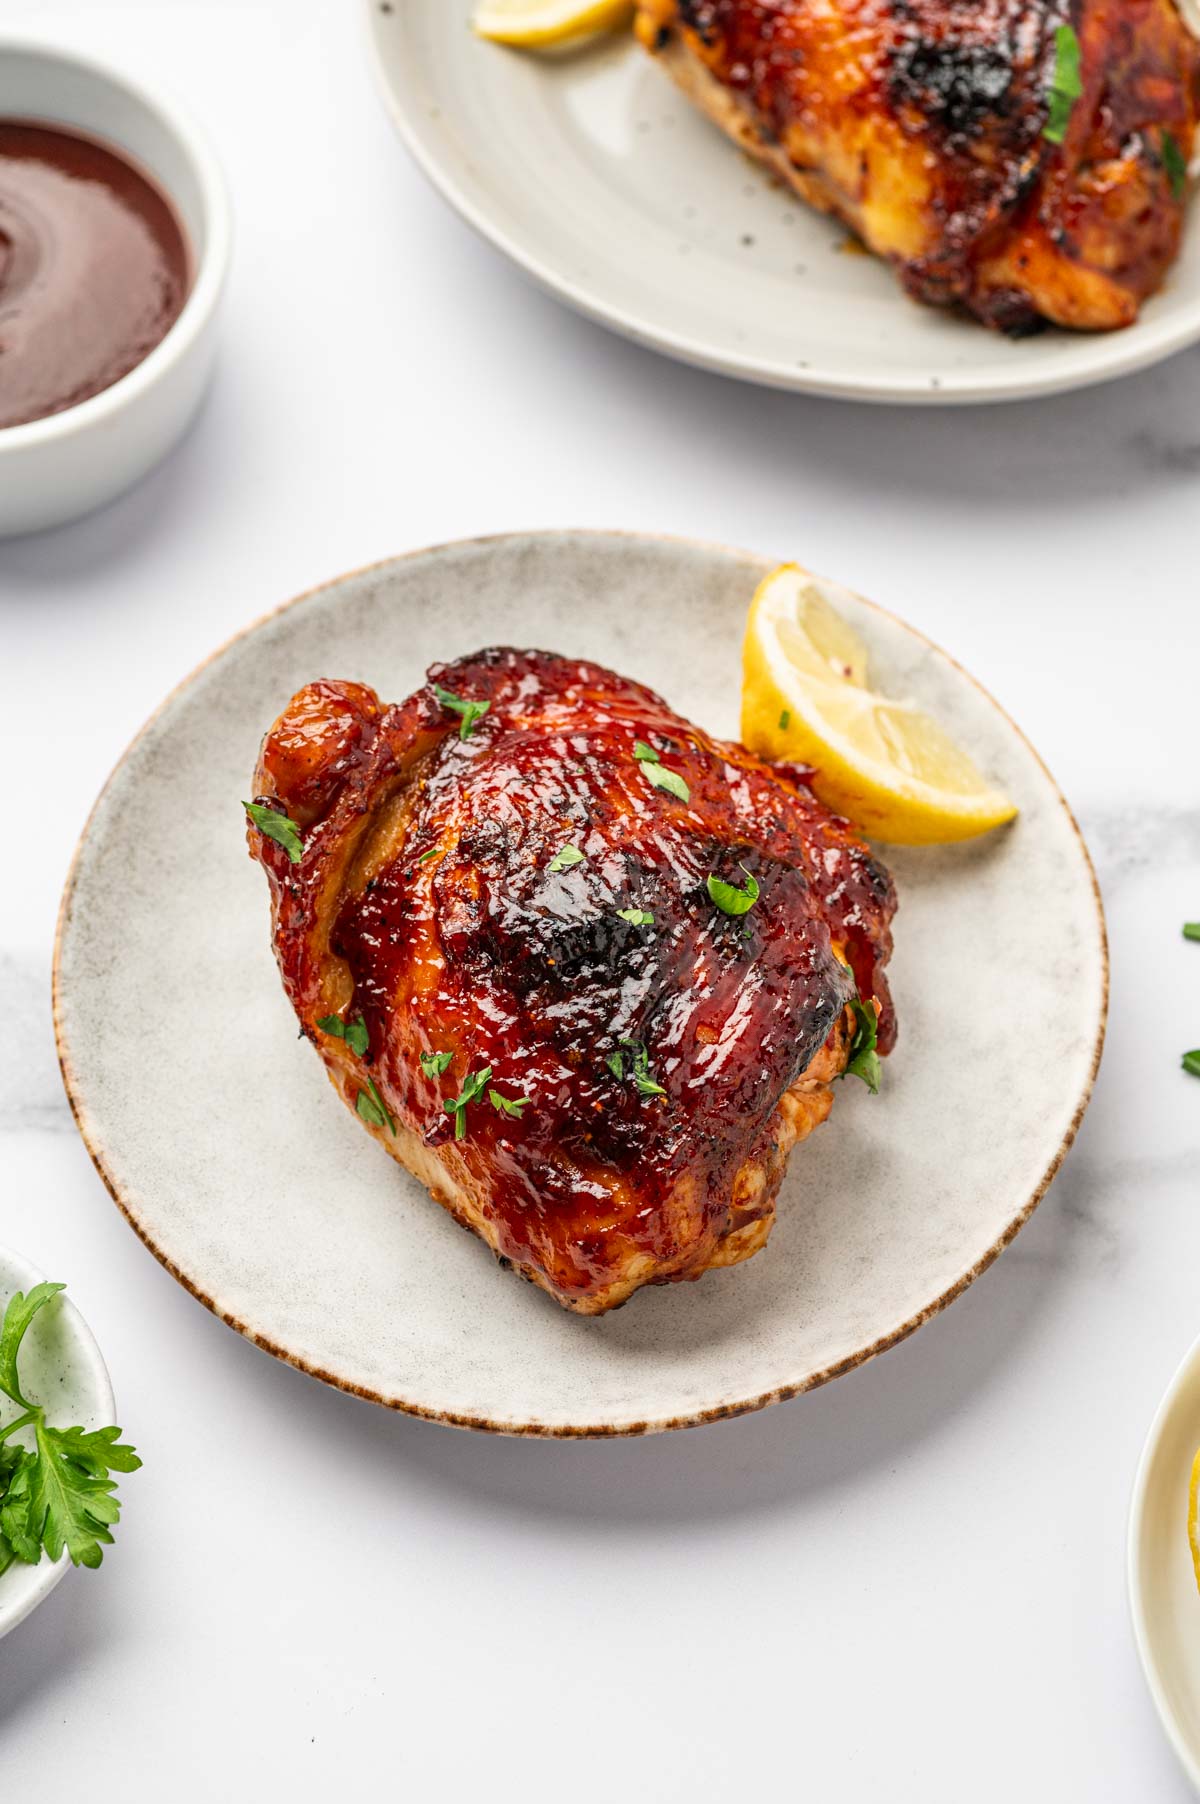
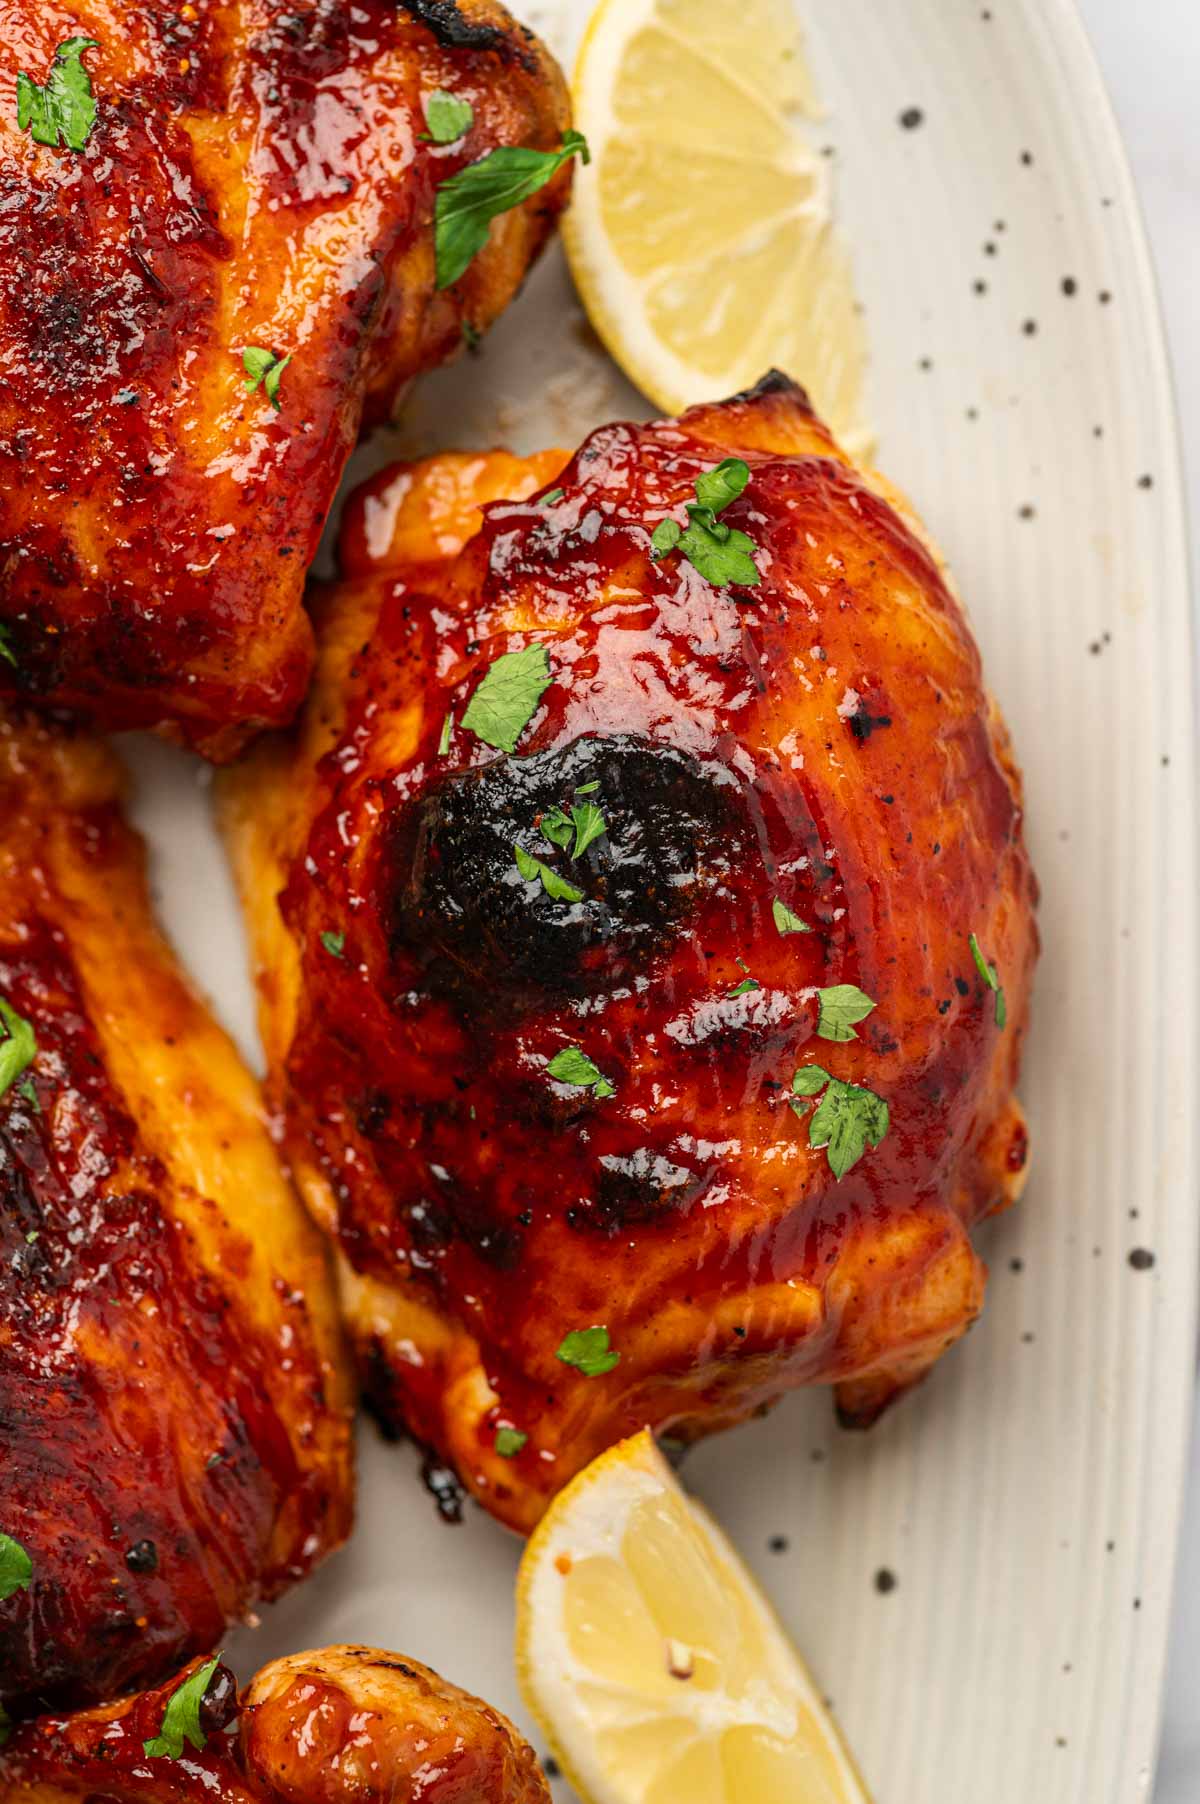
BBQ Air fryer chicken thighs in a white plate.

We also recommend using bone-in chicken thighs with the skin on as this will only contribute to the chicken's juiciness and flavor. 

The thighs are filled with more flavor than the breasts. When marinaded, the thighs absorb the marinade better, and they are quite adaptable and work well with barbeque sauces and different spices. 

Perhaps it is time to become a thigh person. This recipe works especially well for BBQ chicken thighs bone-in, ensuring the chicken stays moist and packed with smoky, tangy flavor. Whether you're using a grill or air fryer, these barbecue chicken thighs are sure to become a family favorite!

The Secrets of Air Frying

Air frying has become popular for a reason. It fries using hot air instead of fat, making a fried meal much healthier and friendlier to your waistline. It cooks faster and neater, as well. 

When air frying chicken thighs, the skin will be unfailingly crisp without using oil. The texture and taste will resemble that of a fried thigh, without the additional, unwanted fat. And the interior will be deliciously juicy and moist. That’s the best part of crispy skin chicken thighs.

Ingredients

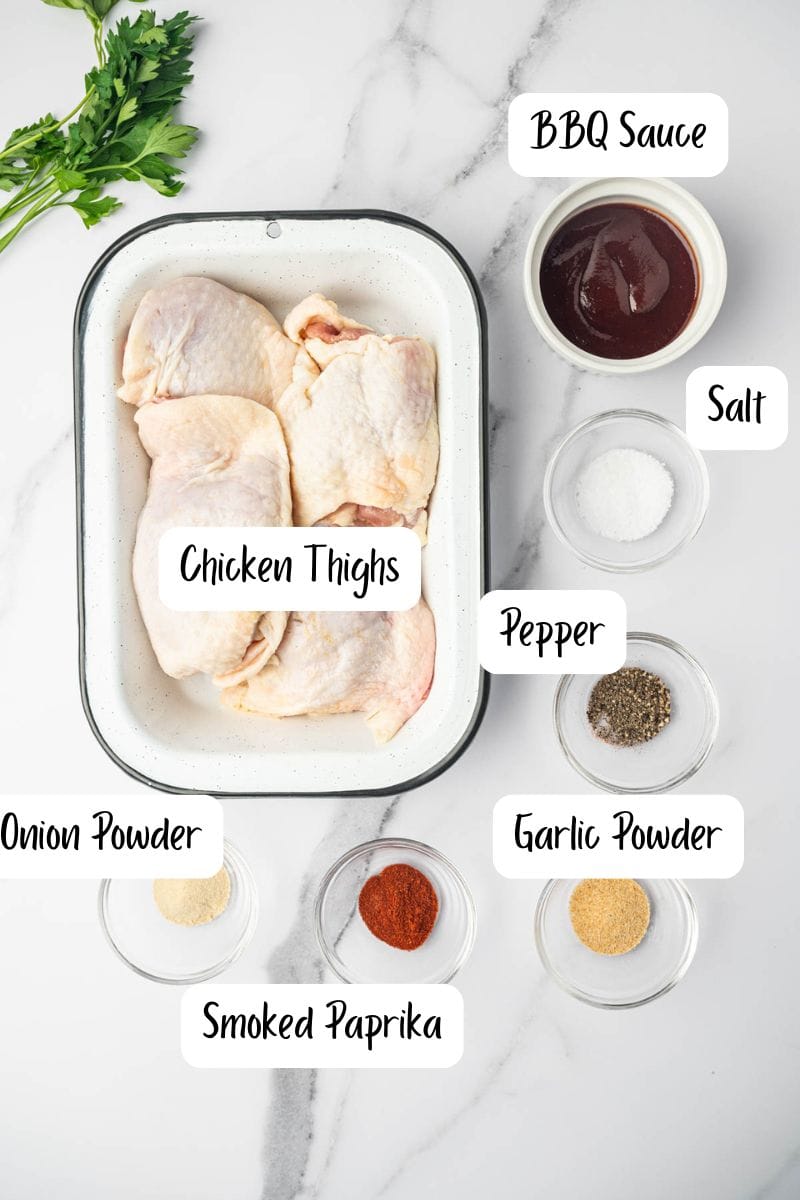
Juicy and crispy air fryer BBQ chicken thighs Ingredients
  • Bone-in, Skin-on Chicken Thighs: These provide juicy, tender meat with crispy skin, making them ideal for air frying. The bone helps retain moisture, while the skin adds flavor and texture.
  • Olive Oil: Olive oil helps the seasonings stick to the chicken and ensures the skin crisps up beautifully in the air fryer.
  • Garlic Powder: Adds a savory, aromatic flavor that complements the smoky BBQ glaze and enhances the overall seasoning.
  • Smoked Paprika: Provides a rich, smoky depth and vibrant color to the chicken.
  • Salt: Essential for enhancing the natural flavors of the chicken and balancing the spices in the seasoning blend.
  • Onion Powder: Offers a mild sweetness and depth of flavor, balancing the stronger spices in the mix.
  • Ground Black Pepper: Adds a subtle heat and depth to the seasoning blend.
  • BBQ Sauce: The star ingredient that creates a rich, sweet, and smoky glaze, caramelizing beautifully on the chicken in the air fryer.

See recipe card for quantities.

How to Master an Easy Air Fryer Barbeque Chicken Thighs Recipe 

  1. To bring out the maximum flavor in your BBQ chicken thighs in air fryer, apply a generous helping of spice rub of salt, pepper, garlic powder, onion powder, and smoked paprika.
  2. To keep your chicken from sticking to the basket, spray it with an oil such as olive oil or avocado oil. 
  3. Brush the chicken lightly with your choice of barbeque sauce and fry for 10 minutes. The best barbeque sauce for chicken has a good blend of sweet and tangy.
  4. Baste the thighs with more barbeque sauce and fry for about 8 to 10 more minutes.
  5. By not pouring all the barbeque sauce at the beginning, you keep the sauce from burning. 

Step By Step Instructions

If you’re craving flavorful and juicy chicken, this recipe for barbecue chicken thighs is a must-try! Learn how to BBQ chicken thighs to perfection with this simple method that works for both grilling and air frying. 

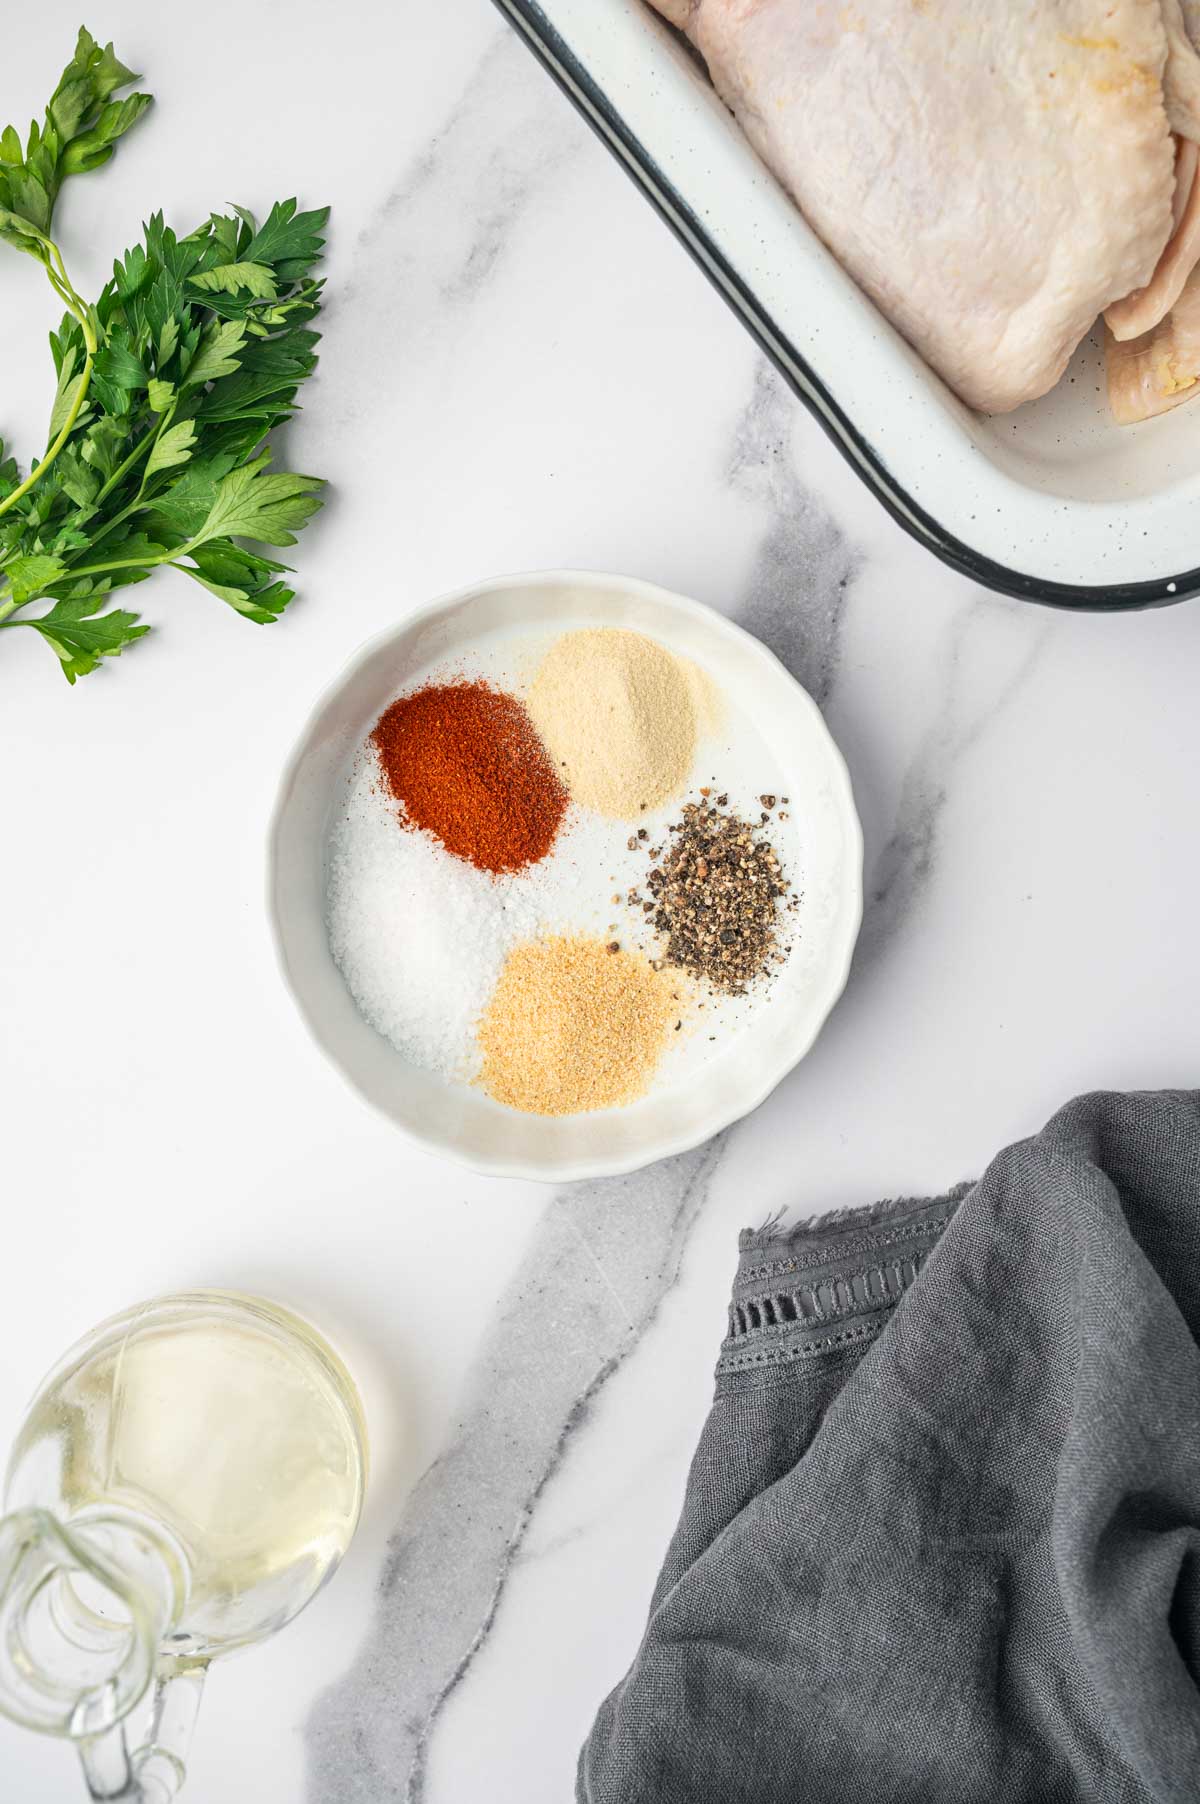
Air fry BBQ seasonings in a white bowl.

Combine all the seasonings into a small bowl.

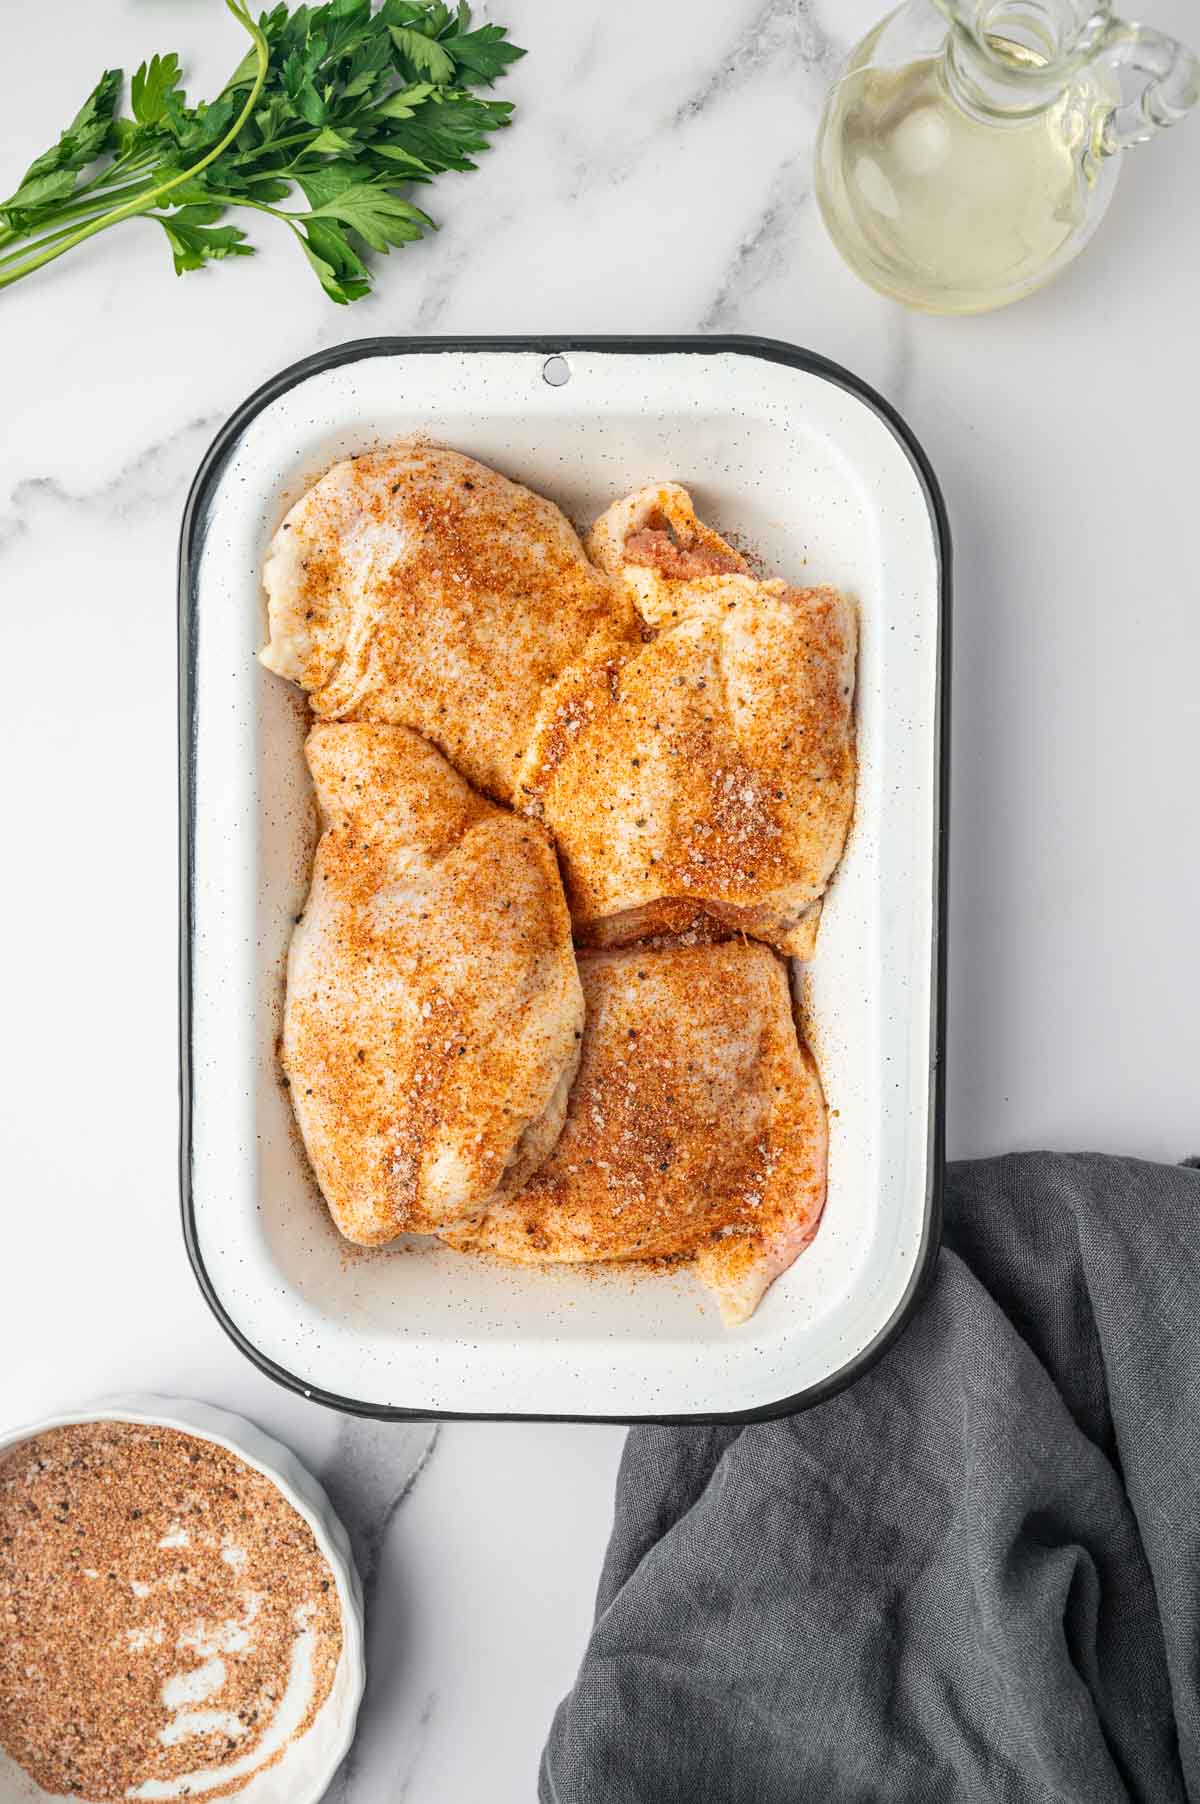
Chicken thighs rubbed with the seasonings

Seasonings rubbed over the chicken thighs.

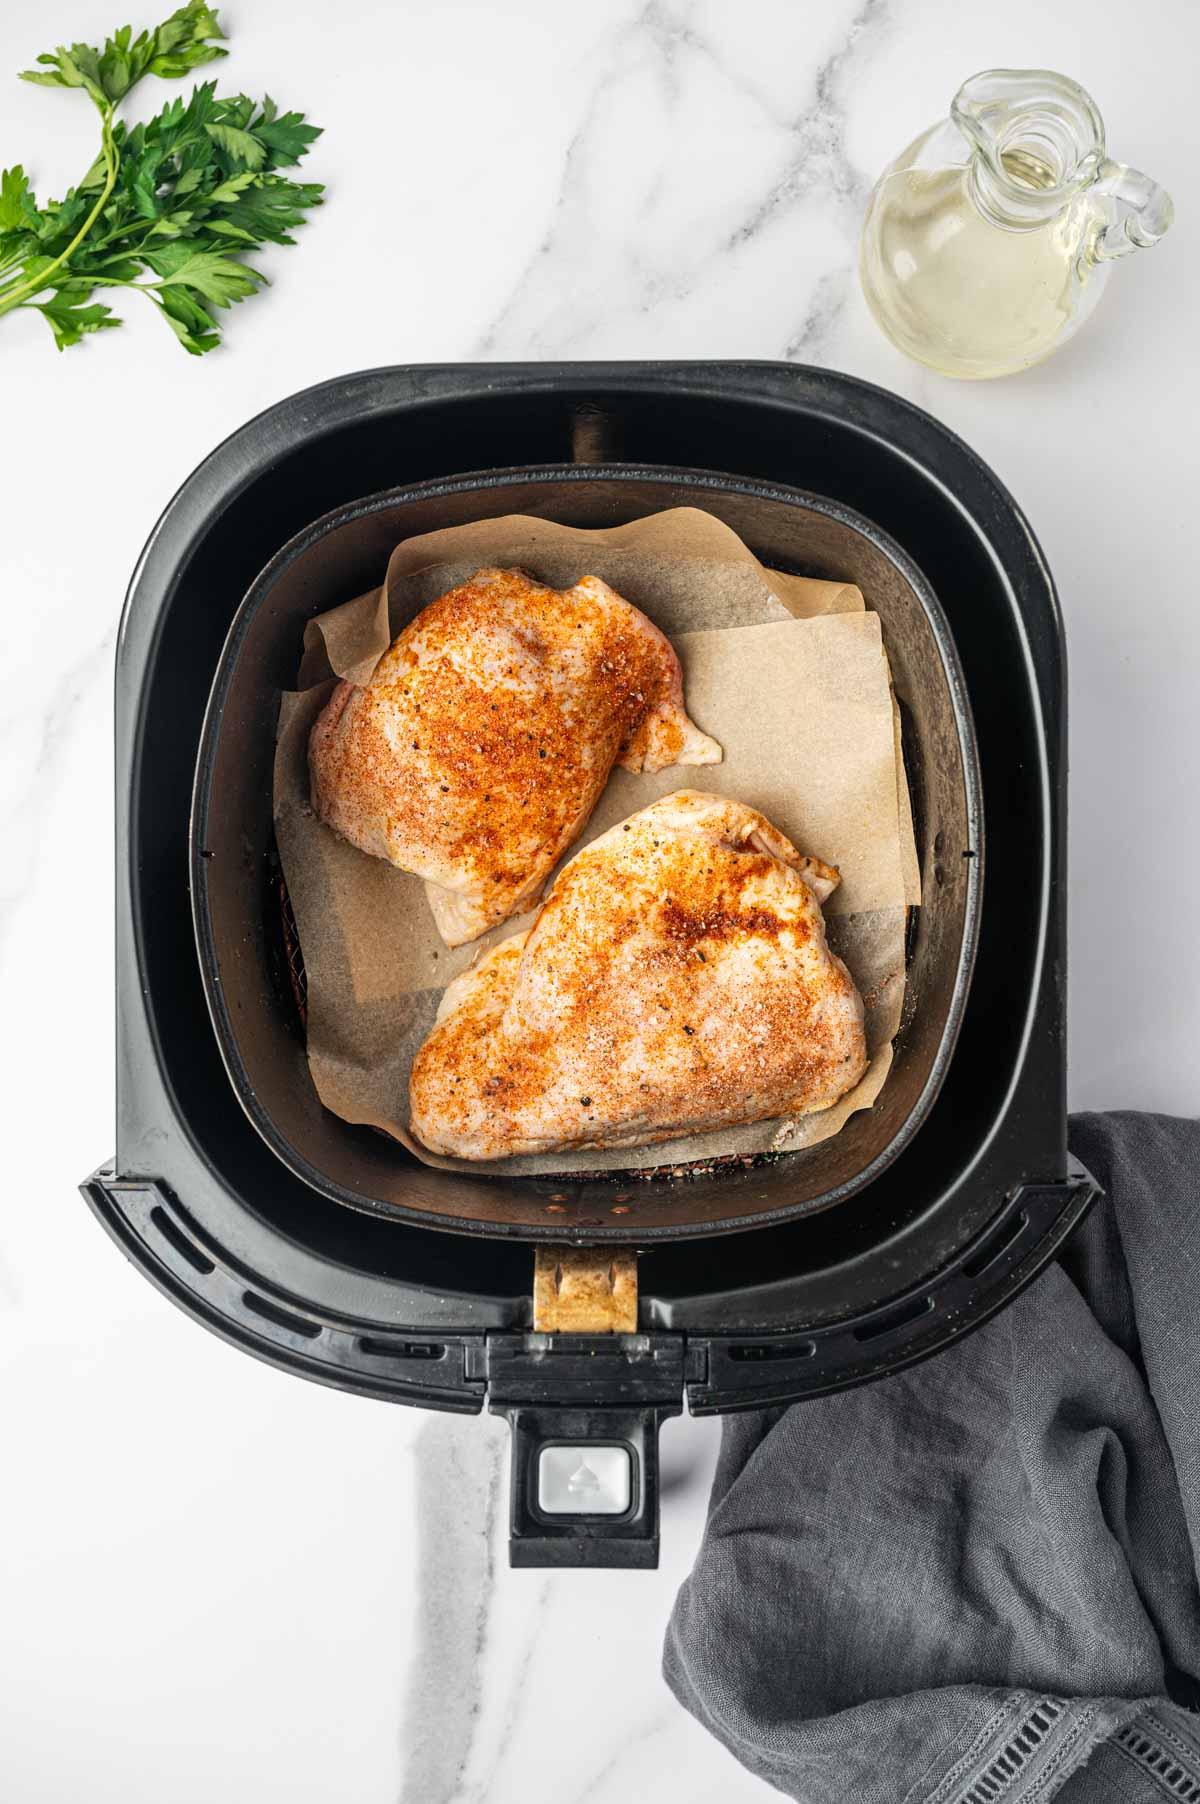
Seasoned chicken thighs placed in the air fryer

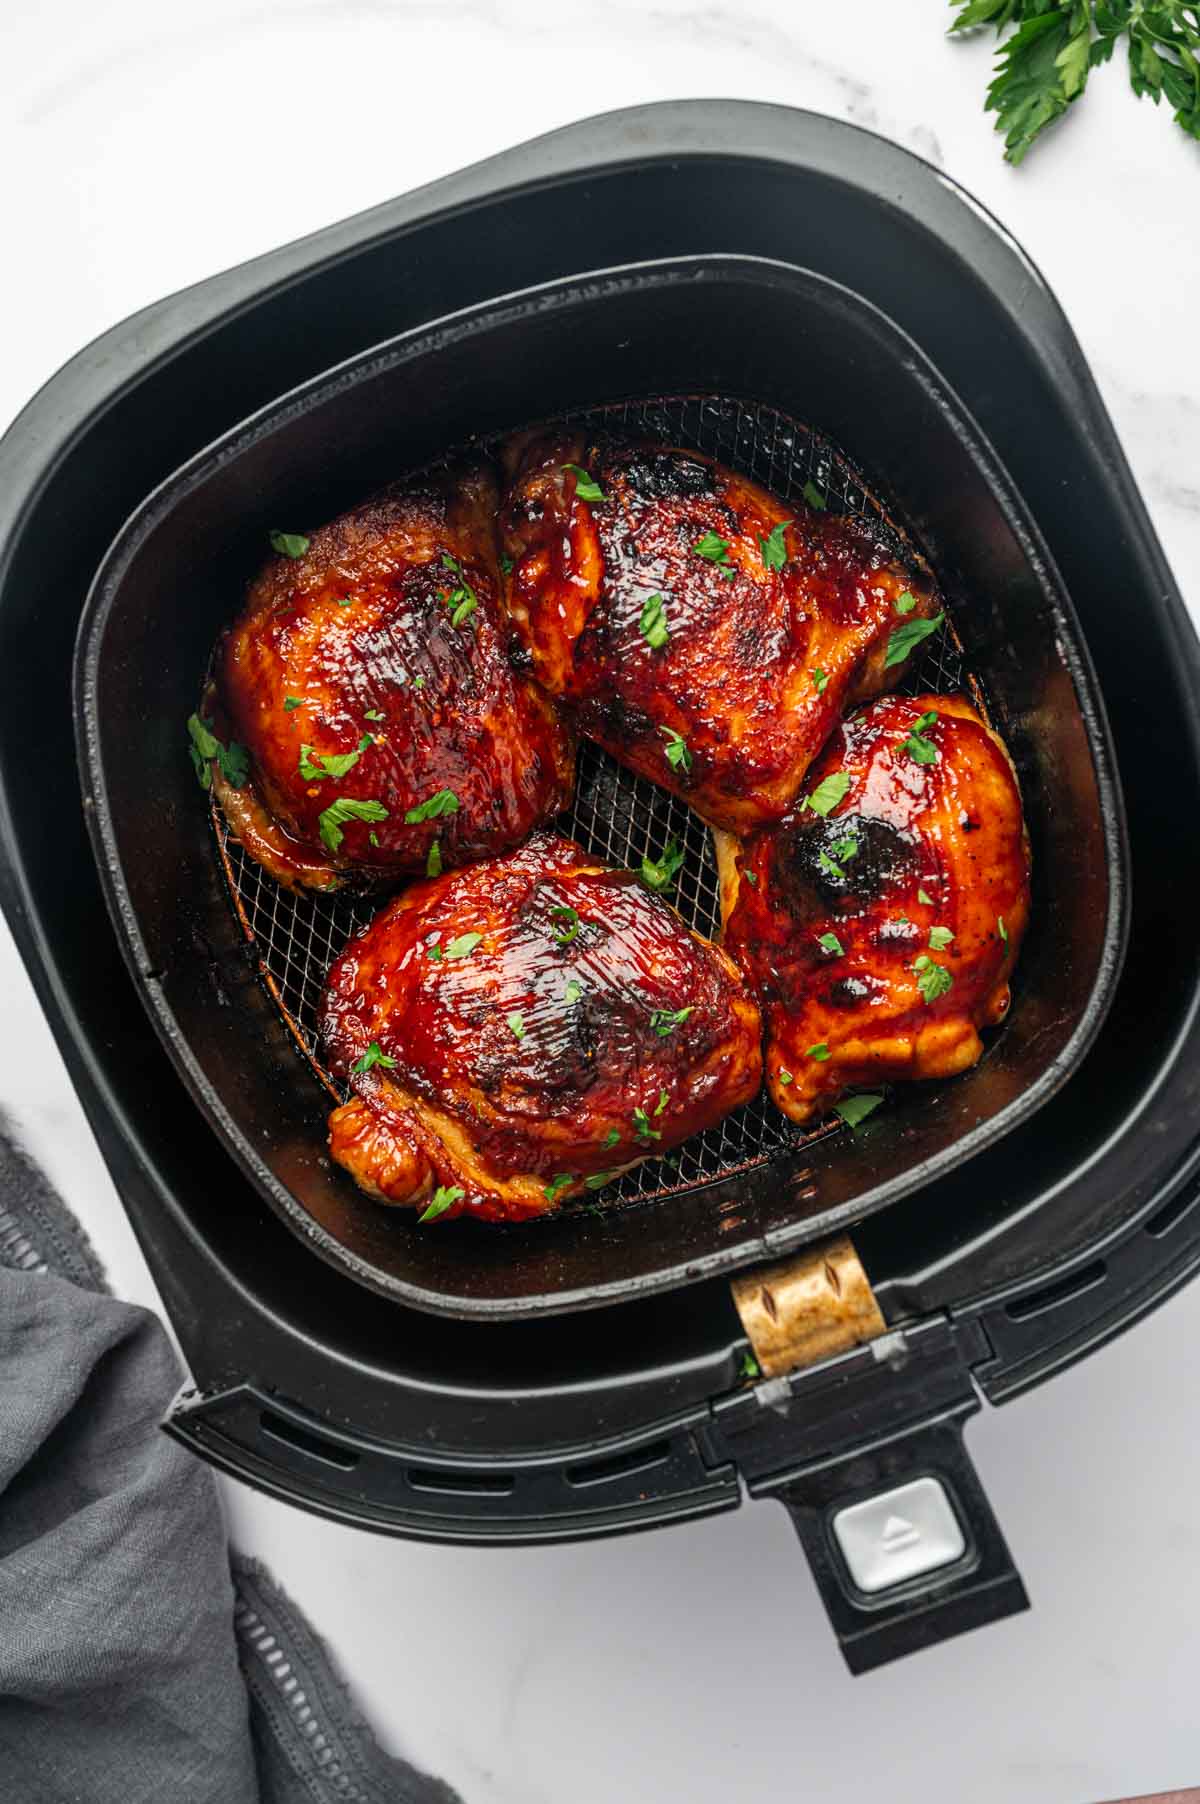
Arrange the chicken thighs in an air fryer basket toair fry for 15 minutes.

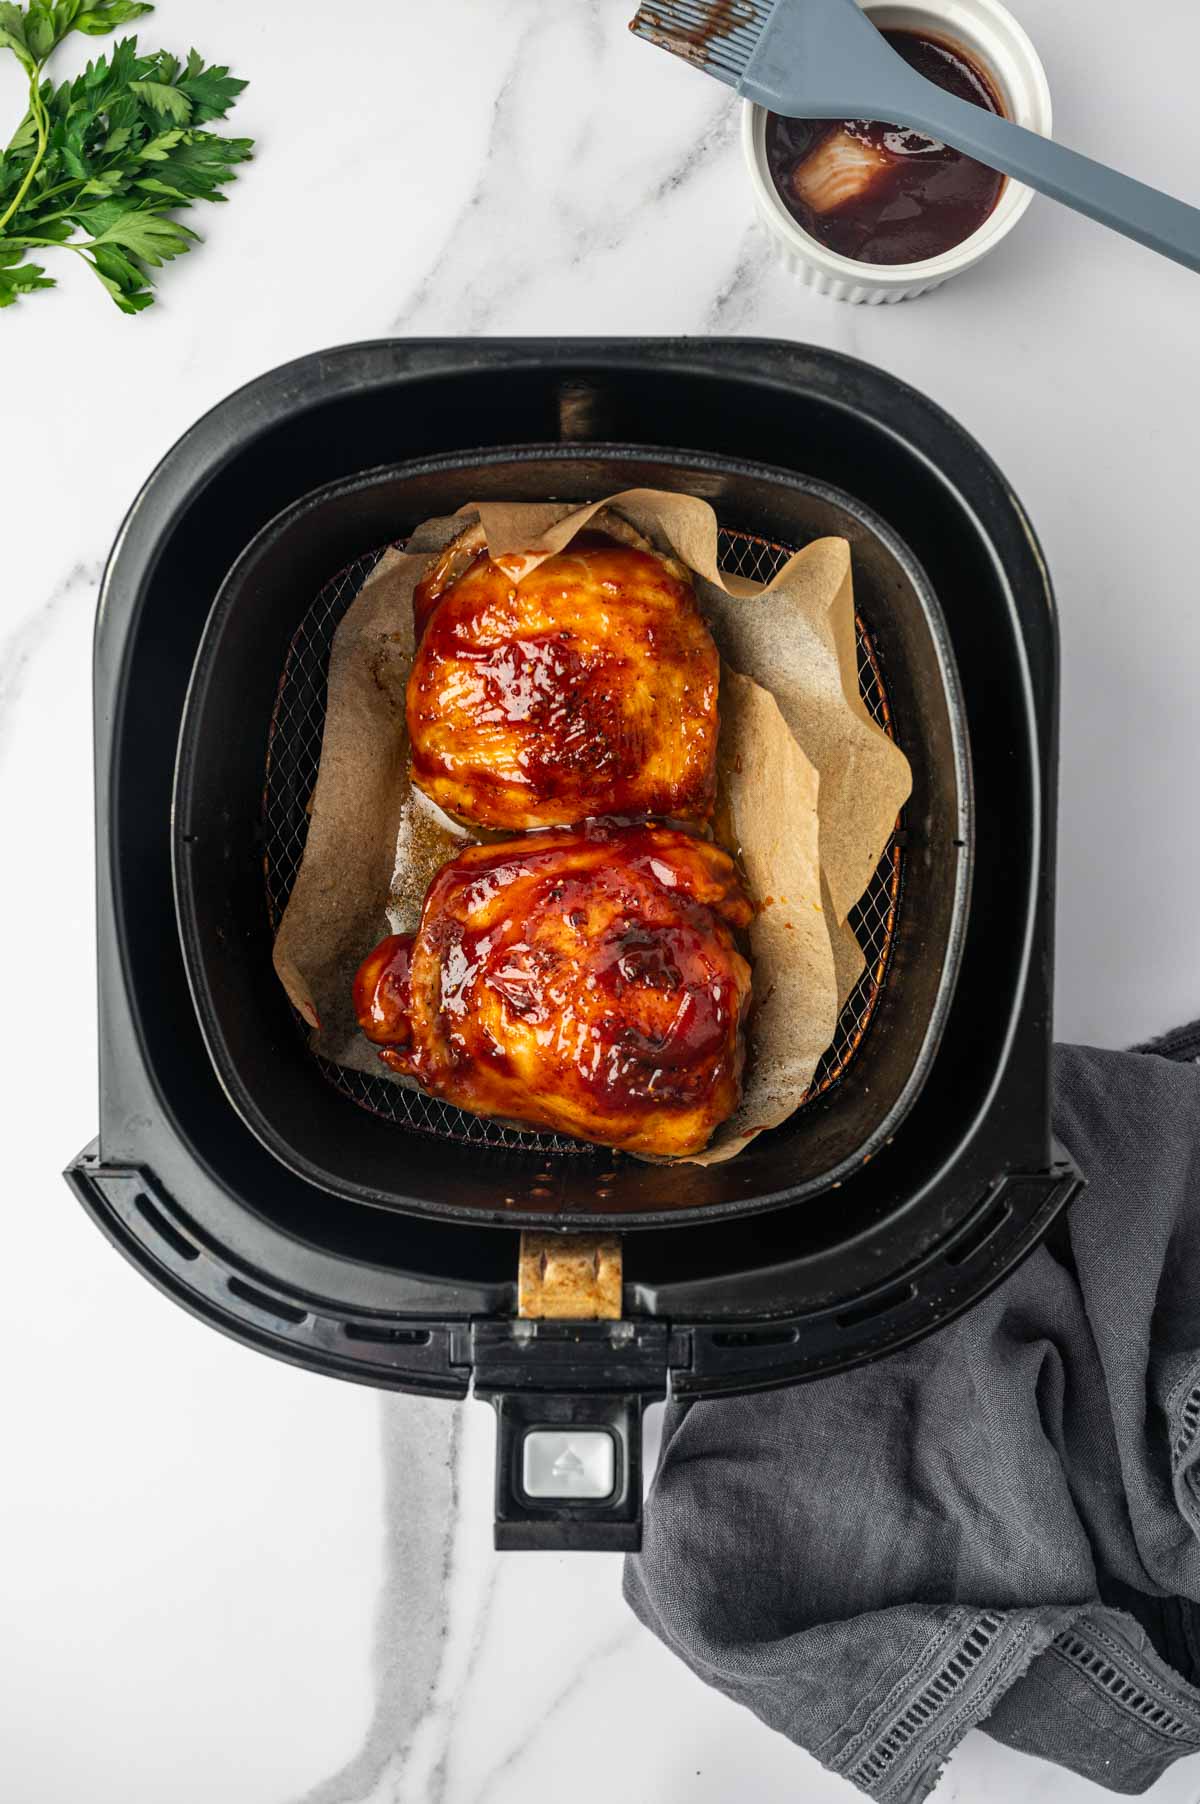
Barbecue sauce coated over the air fry chicken thighs.

Brush the chicken thighs generously with BBQ sauce and air fry for 5 more minutes.

Remove the chicken thighs from the air fryer and let them rest for 5 minutes before serving. Serve with extra BBQ sauce on the side if desired. Garnish with chopped parsley.

Golden brown air fryer BBQ chicken thighs with a rich, sticky glaze, in the air fryer basket.

Substitutions

  • Bone-in, Skin-on Chicken Thighs: Can be substituted with boneless, skinless chicken thighs or chicken drumsticks.
  • Garlic Powder: Can be replaced with fresh minced garlic for a stronger, more aromatic flavor.
  • Smoked Paprika: Substitute with regular paprika, chipotle powder, or a pinch of cayenne pepper for added spice.

Variations

  • Spicy BBQ Chicken Thighs: Add a pinch of cayenne pepper or a splash of hot sauce to the BBQ sauce for a spicy twist.
  • Honey BBQ Chicken Thighs: Mix a tablespoon of honey into the BBQ sauce for a sweet and sticky variation.
  • Teriyaki-Style Chicken Thighs: Replace the BBQ sauce with teriyaki sauce to create flavorful teriyaki chicken thighs.

Equipment

Air Fryer - Essential for achieving perfectly crispy and juicy chicken thighs with minimal oil.

Pastry Brush - To evenly coat the chicken with BBQ sauce during the final cooking stage.

Mixing Bowl - To toss the chicken thighs with olive oil and seasonings before cooking.

Measuring Spoons - To measure out the spices and seasonings accurately.

Delicious air fryer BBQ chicken thighs ready in under 30 minutes, perfect for weeknight dinners or gatherings.

How to Store Leftover Barbeque Chicken Thighs

Store your leftover air fryer BBQ chicken thighs in an airtight container and refrigerate for up to 4 days. When reheating, add a coating of BBQ sauce to keep them moist and juicy.

For longer storage, freeze the BBQ chicken thighs in an airtight container for up to 2 months. Thaw them completely before reheating, and brush with BBQ sauce to restore flavor and moisture. Reheat in the air fryer at 375°F (190°C) for 3-5 minutes to bring back their crispiness.

Hints for barbeque chicken thighs in air fryer

Making Juicy Chicken Thighs in Air Fryer is easy, and here are a few suggestions:

  1. Preheat your air fryer as you would an oven.
  2. For a trouble-free cleanup, line your basket with parchment paper.
  3. Rest the chicken thighs in a single layer and don’t crowd them.
  4. Begin frying with the skin side down, then flip the thighs up. This will result in the crispest skin. 
  5. Chicken thighs can vary in size. Use a meat thermometer and ensure the internal temperature is between 165 and 170 degrees. 
  6. Avoid burning the barbeque sauce by adding most of it toward the end of the cooking cycle.
  7. Do not spray the air fryer with non-stick sprays.
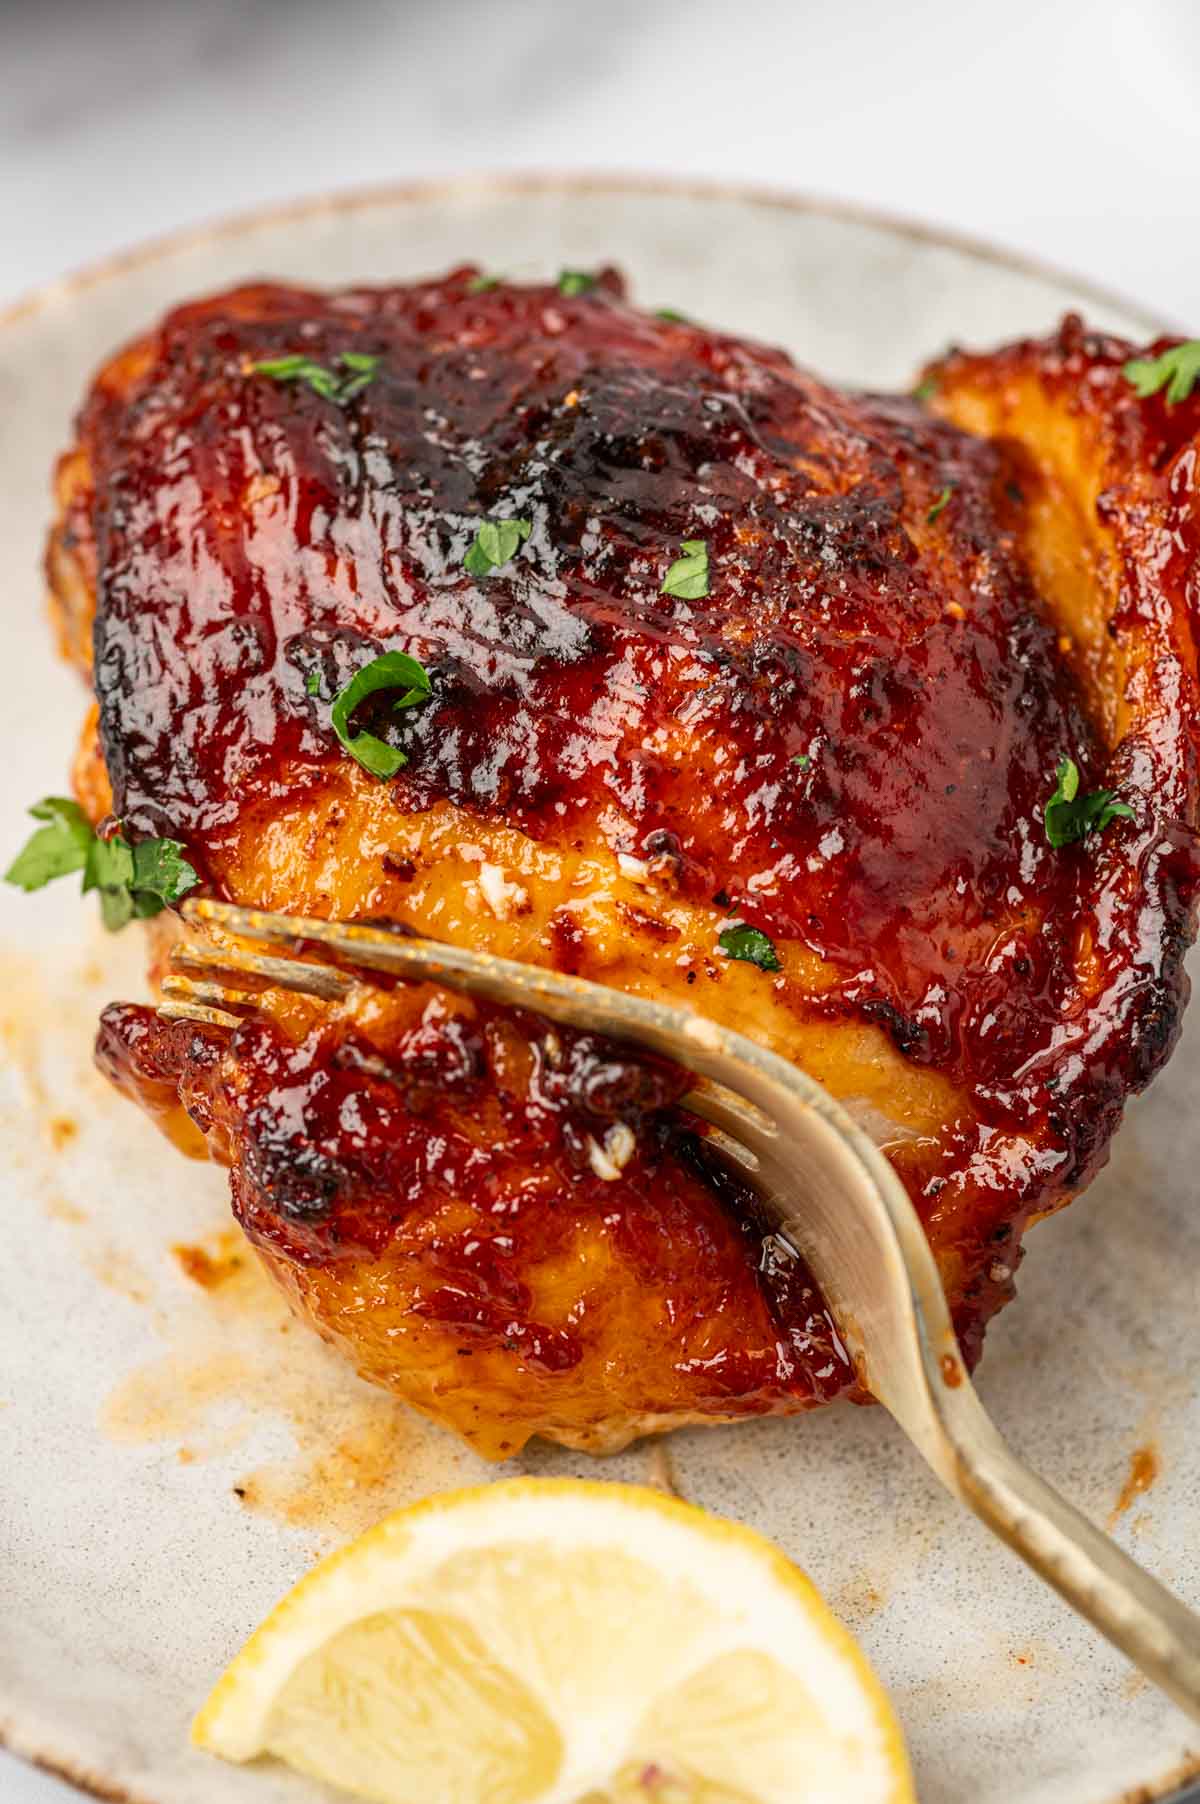
Fork passed through the Airy fry BBQ chicken Thighs

FAQ

Can I use boneless, skinless chicken thighs instead of bone-in, skin-on?

Yes, you can substitute boneless, skinless chicken thighs. However, the cooking time will be shorter, so check for doneness after 12-15 minutes.

How do I prevent the BBQ sauce from burning?

Brush the BBQ sauce onto the chicken during the last 3-5 minutes of cooking. This allows it to caramelize without burning.

Can I make this recipe with chicken breasts or drumsticks?

Absolutely! Adjust the cooking time based on the cut: chicken breasts may take 12-15 minutes, and drumsticks around 20-25 minutes.

How long to cook bbq chicken thigh recipes in the Air fryer?

Cook at 380°F (190°C) for 20-25 minutes, flipping halfway through. Add BBQ sauce during the last 3-5 minutes to caramelize. Ensure the chicken is fully cooked by checking the internal temperature. It should reach 165°F (74°C) at the thickest part. Cooking times may vary slightly depending on the size of the chicken thighs and the model of your air fryer. Always use a meat thermometer for accuracy!

Can I Make Air Fryer BBQ Chicken Thighs in the Oven?

Yes, you can easily make this recipe in the oven! Place the seasoned chicken thighs skin-side up on a baking sheet lined with parchment paper or in an oven-safe dish. Bake for 35-40 minutes, or until the internal temperature reaches 165°F (74°C). n the last 5-7 minutes of baking, brush the chicken thighs generously with BBQ sauce and continue baking until the sauce caramelizes. Serve while its still warm to enjoy!

Related

Looking for other recipes like this? Try these:

  • Close-up shot of orange poppy seed muffin topped with fresh orange glaze stacked one above the other.
    Orange Poppy Seed Muffins With Orange Icing - Moist
  • Juicy grilled chicken and pineapple skewers with colorful vegetables
    Pineapple Chicken Kabobs (Grilled Hawaiian skewers)
  • Creamy Oreo mousse dessert with cookie crumbs on top.
    Oreo Mousse - Quick And Easy No-Bake Dessert
  • Chocolate Nutella mug cake in a mug with gooey middle, quick microwave dessert.
    Nutella Mug Cake Without Egg (Microwave Recipe)

Pairing

These are my favorite dishes to serve with Air Fryer BBQ Chicken Thighs:

  • Air fryer orange chicken and rice served in a bowl with sesame seeds and green onions
    Orange Chicken and Rice (Air Fryer Recipe)
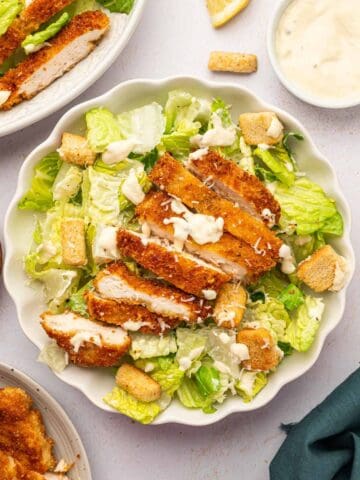
  • Overhead shot of Chicken Caesar Salad with crispy croutons and low calorie greek yogurt dressing.
    Chicken Caesar Salad (No-Mayo Greek Yogurt Dressing)
  • Baked puff pastry hearts with flaky, layered edges.
    Puff Pastry Hearts with Raspberries (Valentine’s Day)
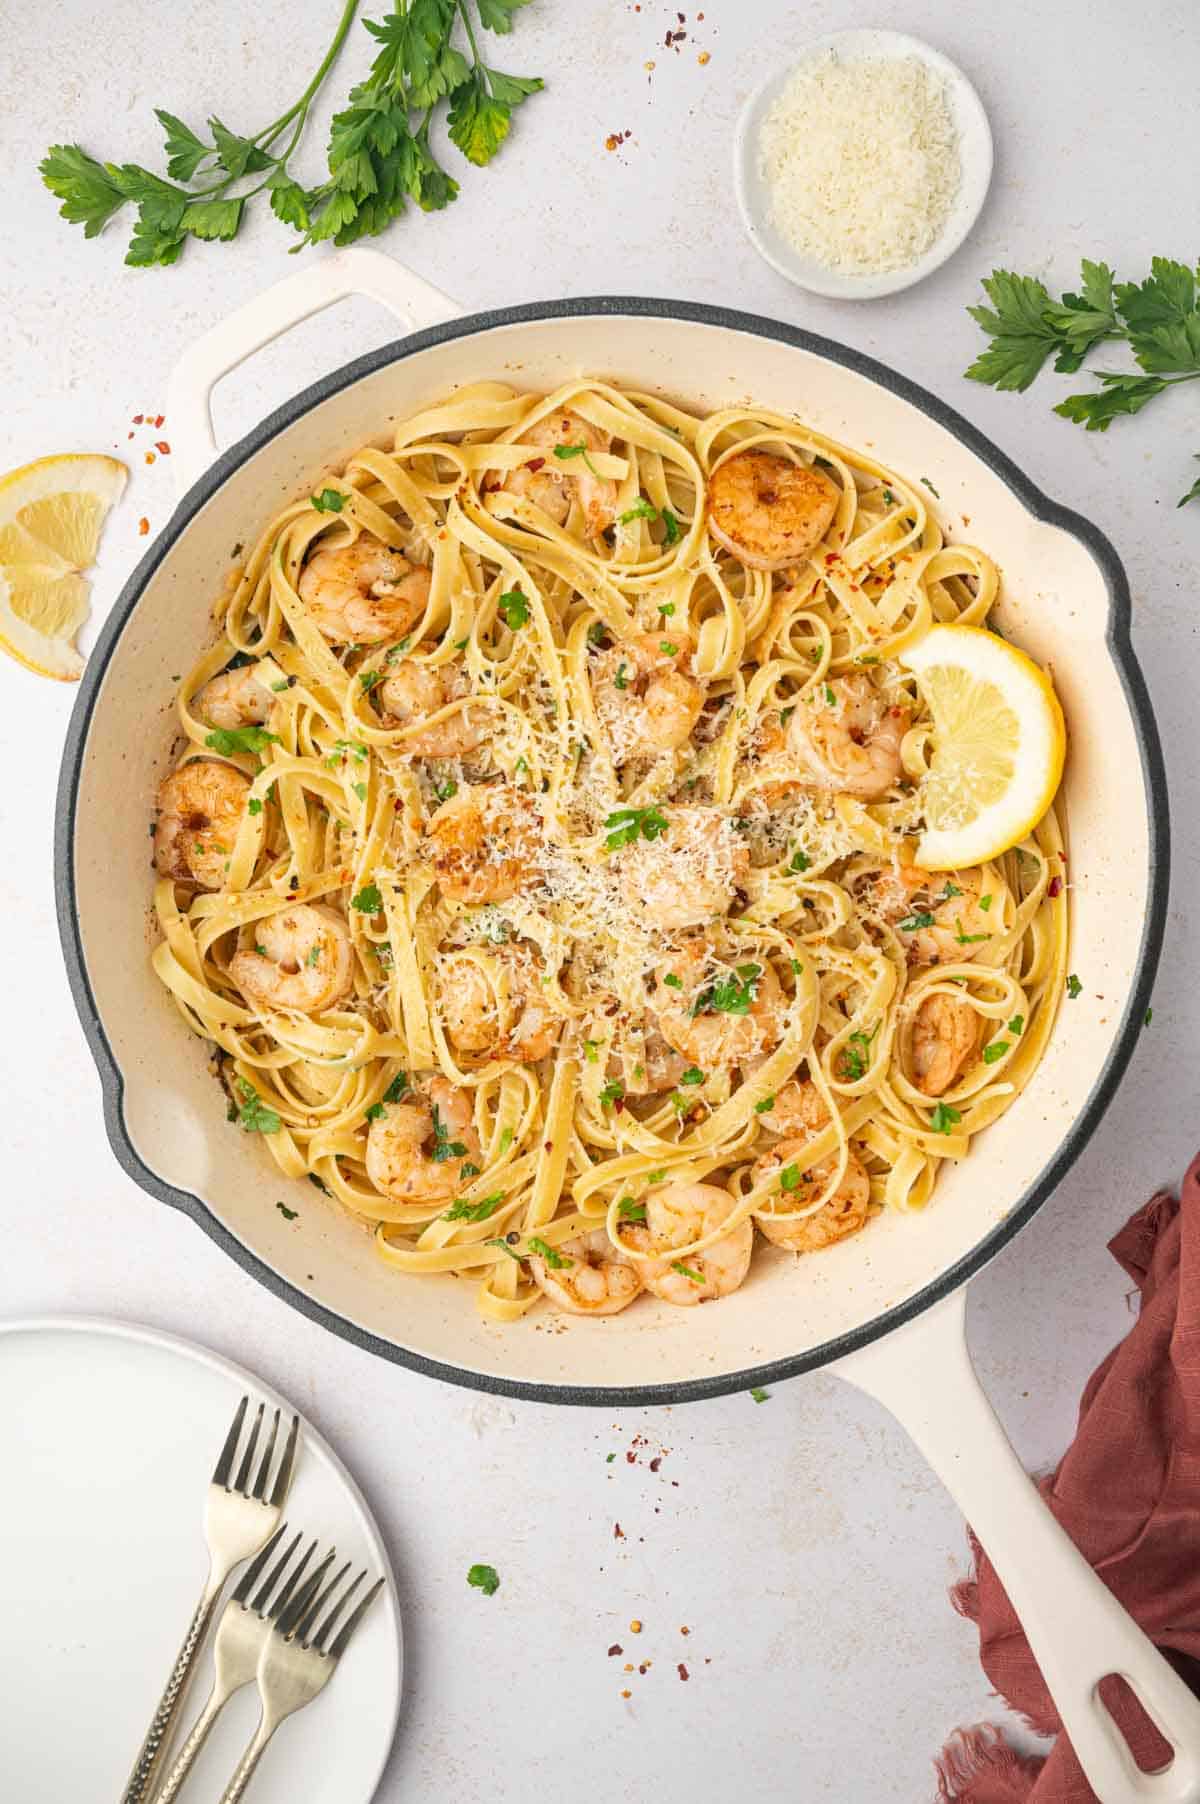
  • Salmon Scampi Pasta (Garlic Butter & Lemon)
Juicy and crispy air fryer BBQ chicken thighs coated with a caramelized smoky barbecue glaze on a serving plate.

Air Fryer BBQ Chicken Thighs

Abi Guna
 Air Fryer BBQ Chicken Thighs - the ultimate dinner choice for anyone craving a satisfying and delicious meal. Perfectly crispy on the outside and tender on the inside, these chicken thighs are coated with a rich, smoky BBQ glaze that caramelizes beautifully in the air fryer.
5 from 4 votes
Print Recipe Pin Recipe
Prep Time 5 minutes mins
Cook Time 25 minutes mins
Total Time 30 minutes mins
Course Dinner, Main Course
Cuisine American
Servings 4
Calories 409 kcal

Equipment

  • Air Fryer
  • Mixing Bowl
  • Measuring Spoons
  • Brush

Ingredients
  

  • 4 Chicken thighs bone-in and skin-on
  • 2 tablespoons olive oil
  • 1 teaspoon salt
  • 1 teaspoon garlic powder
  • 1 teaspoon smoked paprika
  • 1 teaspoon onion powder
  • ½ teaspoon ground black pepper
  • ½ cup BBQ sauce
  • Chopped Parsley to garnish
  • Lemon Wedges to serve

Instructions
 

  • Preheat your air fryer to 380°F for about 3-5 minutes.
  • Pat the chicken thighs dry with paper towels to remove excess moisture.
  • In a small bowl, mix the seasonings; garlic powder, paprika, onion powder, salt, and pepper.
  • Brush olive oil over the chicken thighs and rub this mixture evenly over the chicken thighs.
  • Place the chicken thighs skin-side down in the air fryer basket, ensuring they are not overcrowded. Cook for 10-12 minutes.
  • Flip the thighs over and cook for an additional 8 minutes or until the internal temperature reaches 165°F.
  • Brush the chicken thighs generously with BBQ sauce on both sides.
  • Cook for an additional 3-5 minutes to caramelize the sauce and create a sticky glaze.
  • Remove the chicken thighs from the air fryer and let them rest for 5 minutes before serving. Serve with extra BBQ sauce on the side if desired. Garnish with chopped parsley.

Notes

  1. Ensure the chicken thighs are patted dry with a paper towel before seasoning. This helps the skin crisp up in the air fryer.
  2.  Arrange the chicken thighs in a single layer, leaving space between them for proper air circulation. Cook in batches if necessary.
Keyword Air fryer recipes, BBQ, Chicken, Chicken thighs

Air Fryer Sweet Potato Wedges

December 12, 2024 by Abi Guna 3 Comments

Craving a fried snack but want to keep it healthy? Try these crispy and flavorful Air Fryer Sweet Potato Wedges an irresistible, healthy, and delicious snack or side dish that you’ll want to make again and again! Quick and easy to prepare, these wedges are seasoned to perfection with a blend of spices that enhance their natural sweetness and deliver a satisfying crunch in every bite. 

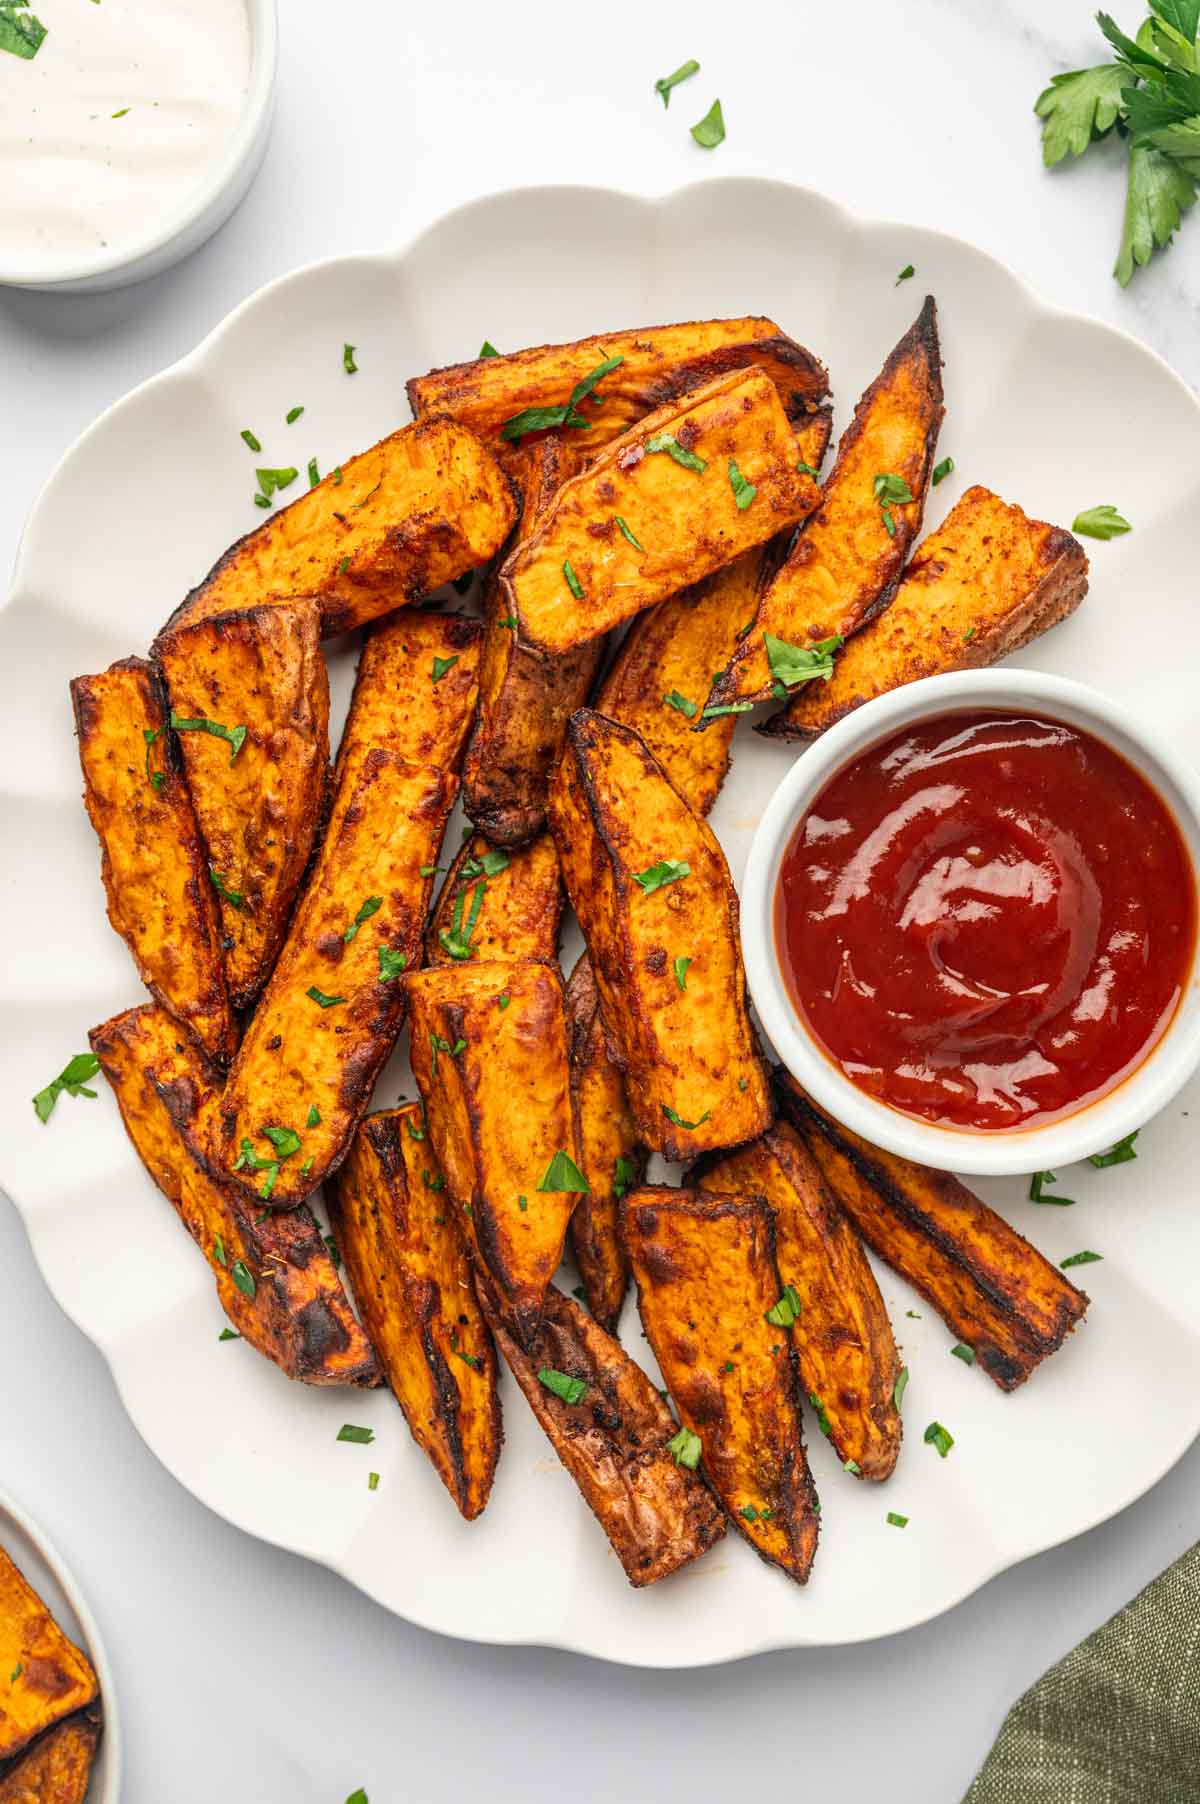
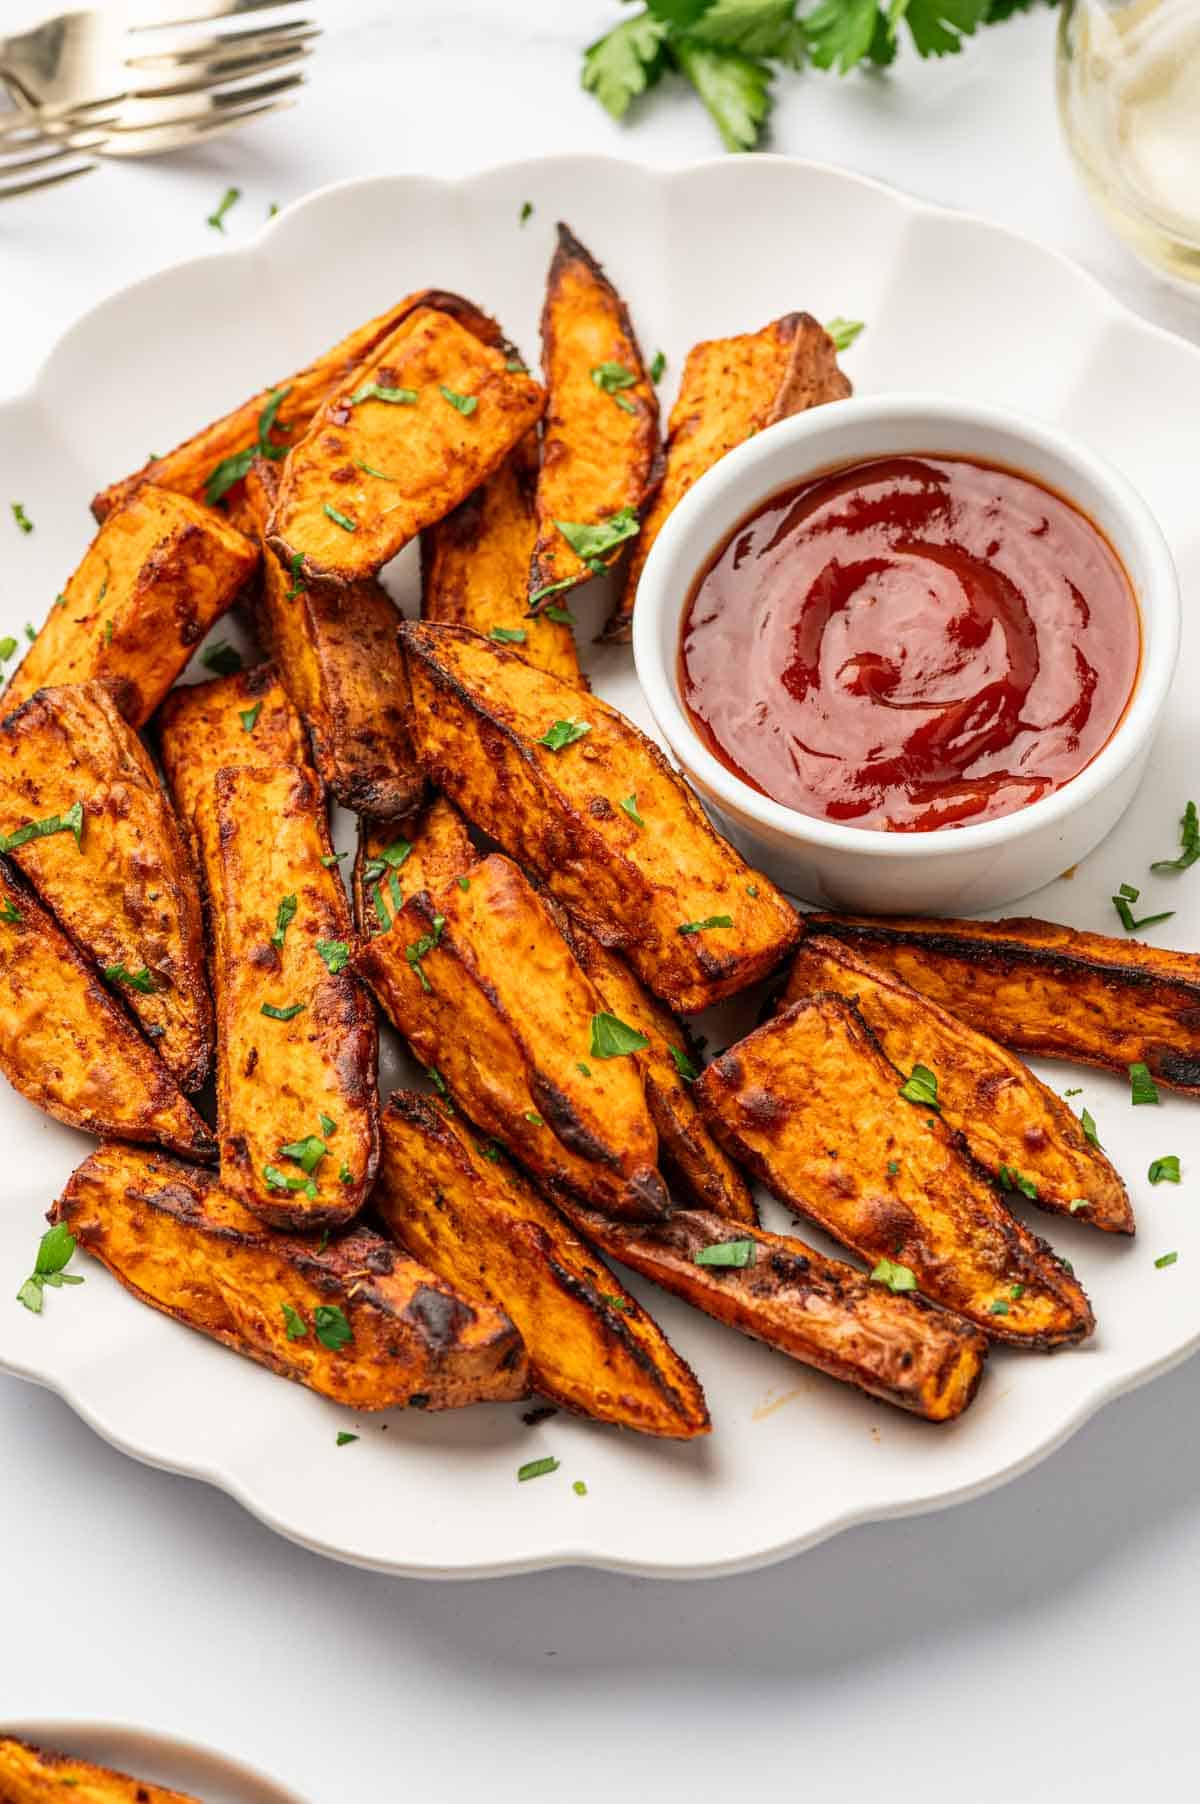
Crispy air fryer sweet potato wedges served with ketchup in a white plate.

Perfect for busy weeknights, game day appetizers, or even as a guilt-free snack, these air fry sweet potato wedges are a versatile addition to any meal. Whether you're pairing them with your favorite dipping sauce or serving them alongside a main dish, they’re guaranteed to be a crowd-pleaser! IIf you only have cubed sweet potatoes, no worries—I’ve got you covered! Try my Air Fryer Sweet Potato Cubes recipe! 

If you're a fan of air fryer recipes, you definitely need to try these Air Fryer BBQ Chicken Thighs , Air Fryer Chicken Drumsticks, Air Fryer Chicken Meatballs , and Air Fryer Teriyaki Chicken Thighs! 

Whether you’re looking to air fry sweet potato wedges for a quick snack or whip up sweet potato steak fries to pair with your favorite burger, this recipe is easy to make and full of flavor. Seasoned to perfection and cooked in minutes, these sweet potato wedges are sure to become a household favorite!

[feast_advanced_jump_to]

Why You Will Love This Sweet Potato Fries in the Air Fryer Recipe

  • Quick and Easy: This recipe comes together in no time, making it perfect for busy weeknights or last-minute meals.
  • Healthier Option: By using the air fryer, you get crispy, golden results with less oil than traditional frying methods.
  • Versatile Side or Snack: These wedges pair well with burgers, grilled chicken or enjoy them as a guilt-free snack with your favorite dip.
  • Crowd-Pleasing: Whether it's for your family, a dinner party, or a game-day snack, everyone will love this recipe.

These air fried sweet potato wedges are the perfect solution! With their crispy exterior and tender interior, they’re a delicious and nutritious side dish.

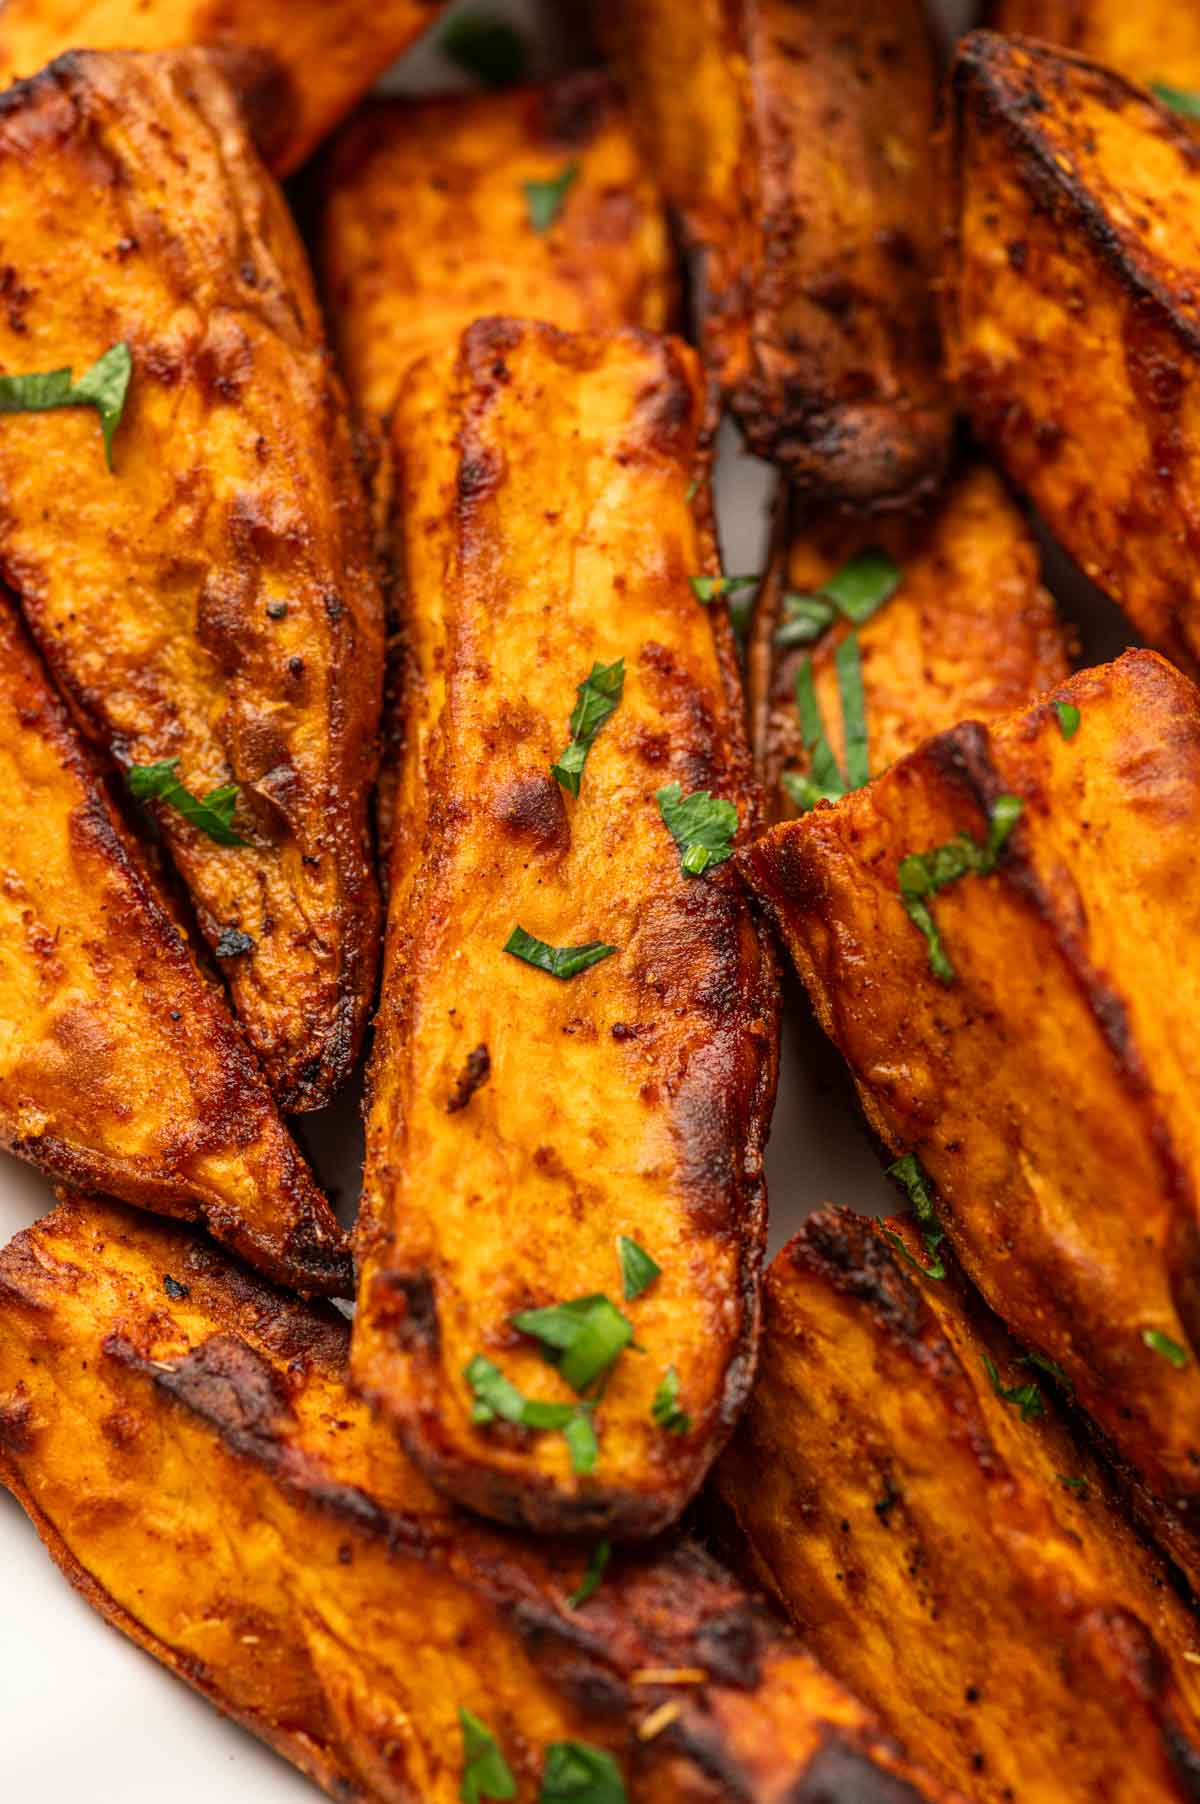
Close-up of crispy sweet potato wedges in an air fryer basket.

Why Air Fry Your Healthy Sweet Potato Wedges

Air frying your vegetables has become synonymous with less fat and extra crispiness. An air fryer also allows for shorter cooking time. It’s a culinary-winning combination. 

As an air fryer side dish, these hot, crunchy, reddish sweet potato wedges are ready to dominate a meal. Every bite is a gem, especially when drizzled with oil and seasoned with salt, pepper, garlic powder, paprika, cumin, and some cinnamon for an added burst of flavor. Each bite is a true flavor experience. 

The air fryer’s circulating hot air guarantees a satisfying crunch without unnecessary oil. And the potato wedges are ready in under half an hour and offer valuable nutrition such as vitamin A, vitamin C, potassium, and fiber. All this good taste helps fight diabetes, cancer, and heart diseases. And for anyone on a diet, you can use air fryer sweet potatoes wedges to create the perfect low-calorie, gluten-free, vegan sweet potato wedges recipe!

What to Serve with Air Fryer Sweet Potato Wedges

  • Just like traditional fries, these wedges pair perfectly with all types of burgers and sandwiches.
  • Elevate any meal by serving them alongside a salad, like a kale quinoa salad, or a hearty meat dish such as lemon pepper chicken thighs. Even kids will clean their plates with these on the side!
  • Pair these wedges with hummus for a healthy and flavorful option—try carrot hummus for a unique twist.
  • Other delicious dipping sauce options include classic ketchup, ranch, garlic aioli, sriracha mayo, sweet chili sauce, and more.
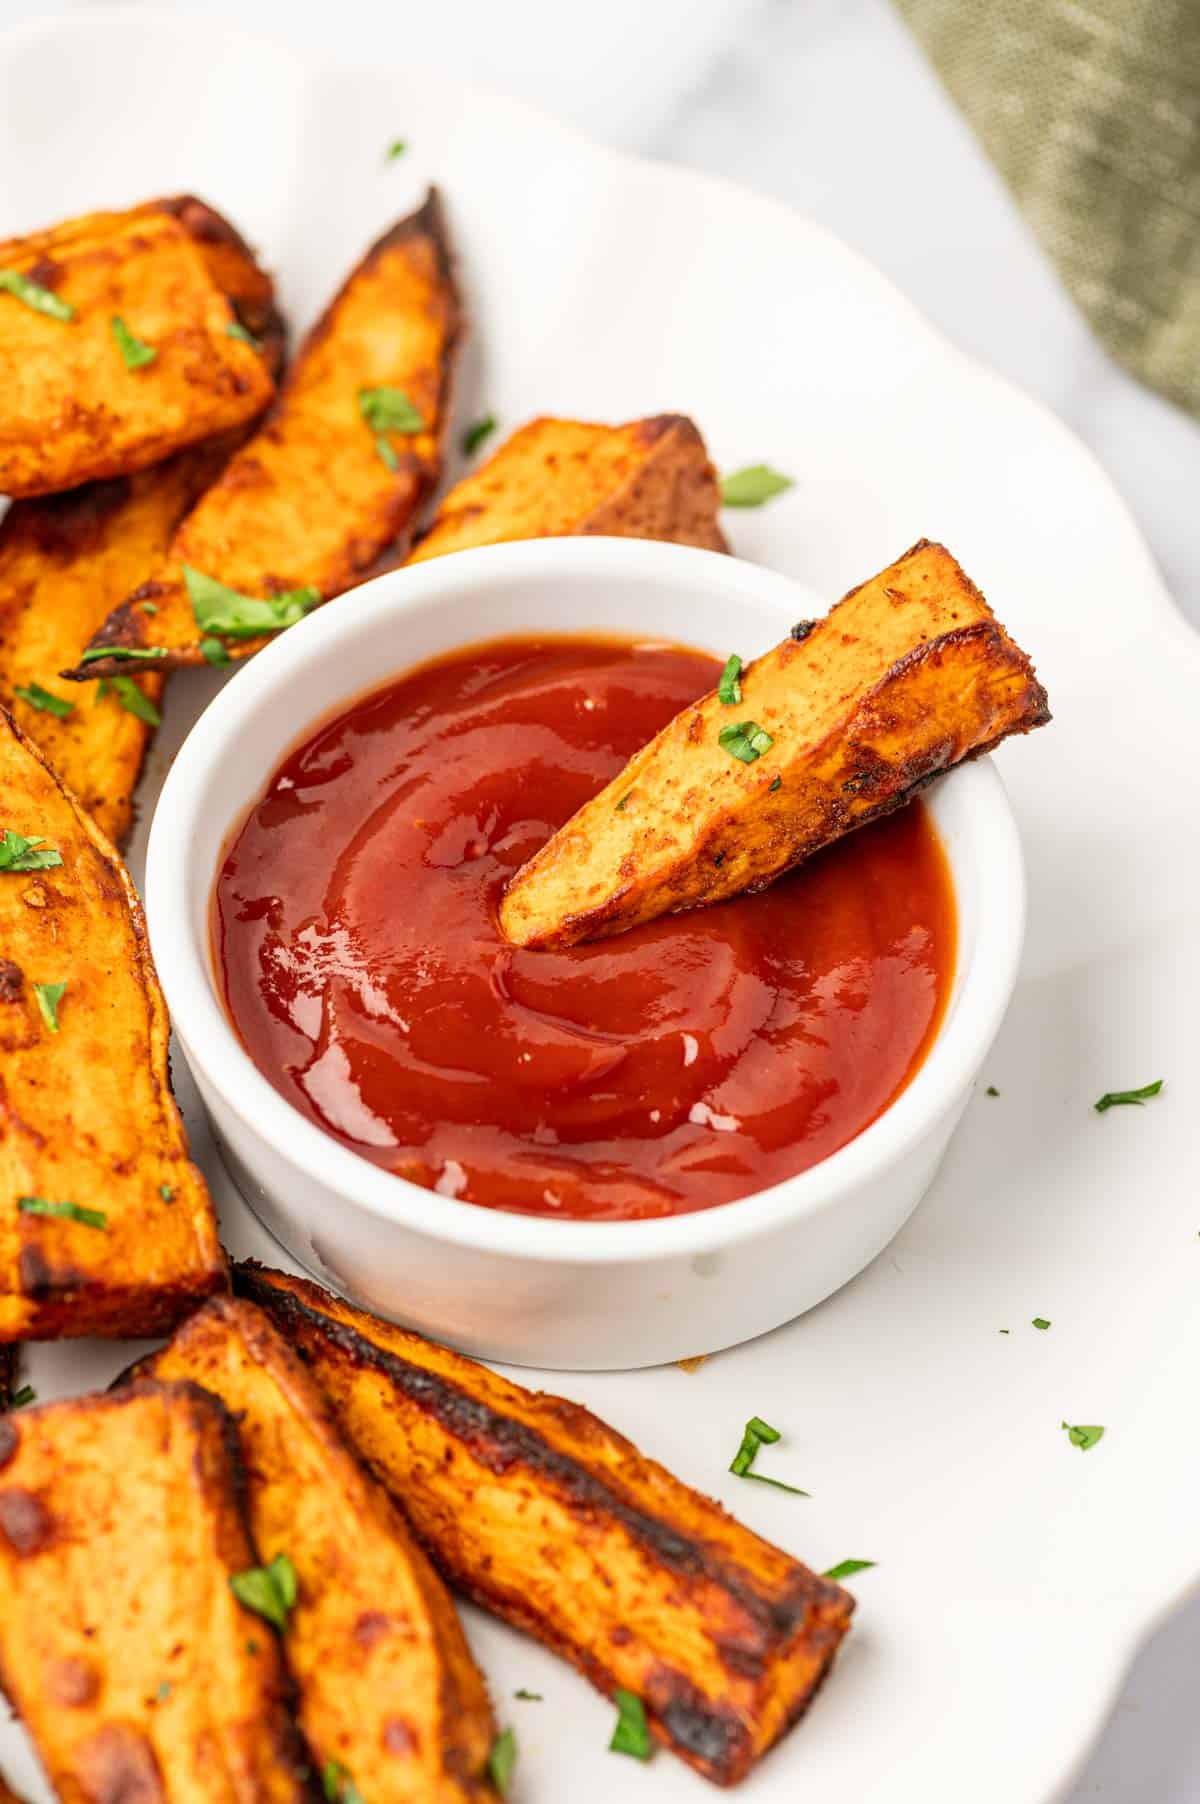
Healthy air fryer sweet potato wedges arranged on a plate with a side of ketchup and a fry dipped in.

Sweet Potatoes Vs Yams

Many people believe sweet potatoes and yams are interchangeable vegetables. Not so. They are different, and you shouldn’t confuse them when preparing this easy air fryer recipe.  

Going just by appearance, the yam has a darker rougher skin while the sweet potato is smooth with a more reddish color. Sweet potatoes taste sweeter, while the yams resemble potatoes more in texture and taste.

Ingredients for Air Fryer Sweet Potato Wedges

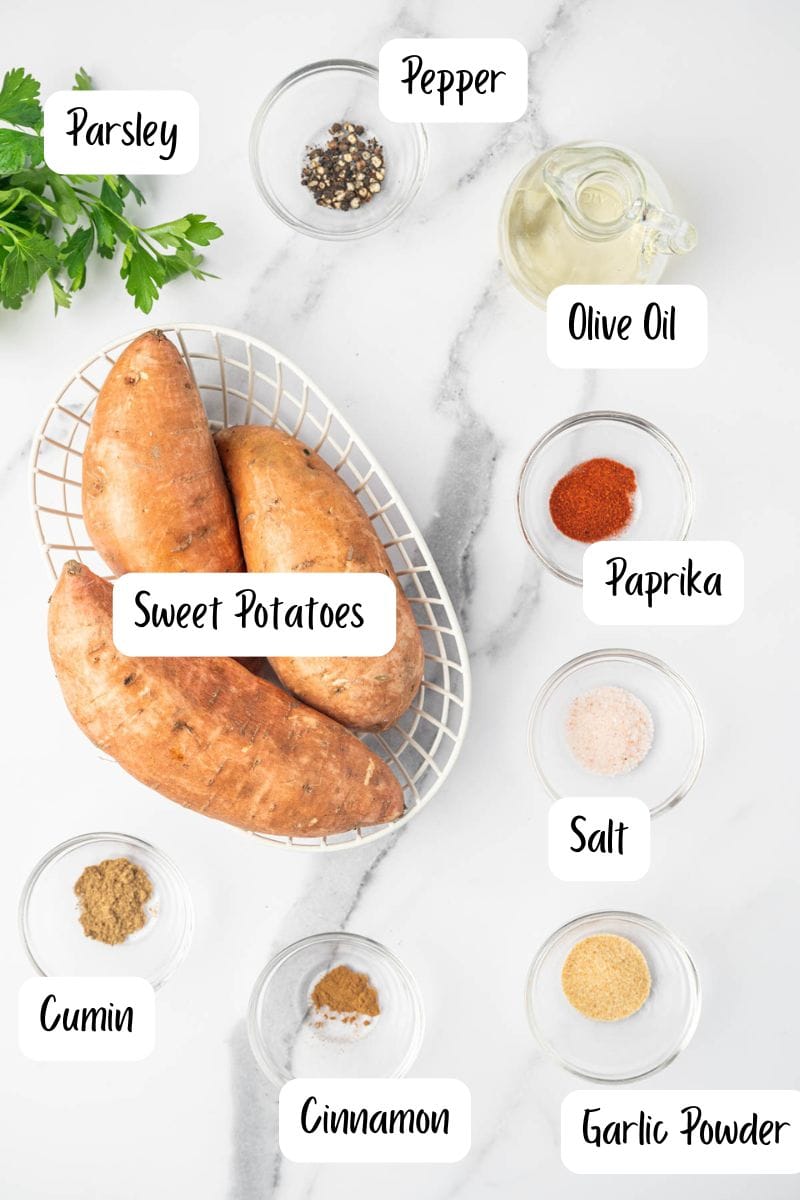
Healthy air fryer sweet potato wedges ingredients
  • Start with the obvious, sweet potatoes. There is no need to peel them, but you can if you so desire.
  • You want to drizzle them in oil, but vegetable oil is far too unhealthy for this job. Use olive oil or avocado oil. The higher the quality of the oil, the better your sweet potato wedges will turn out.
  • Seasonings such as paprika counter the sweetness of the wedges. It’s fine to experiment with blends of sweetness and spices, such as trying a touch of sriracha for added heat.

See recipe card for quantities.

Best way for Air Frying Sweet Potato Wedge

  1. Start by preheating your air fryer to 380 degrees to achieve desired crispiness.
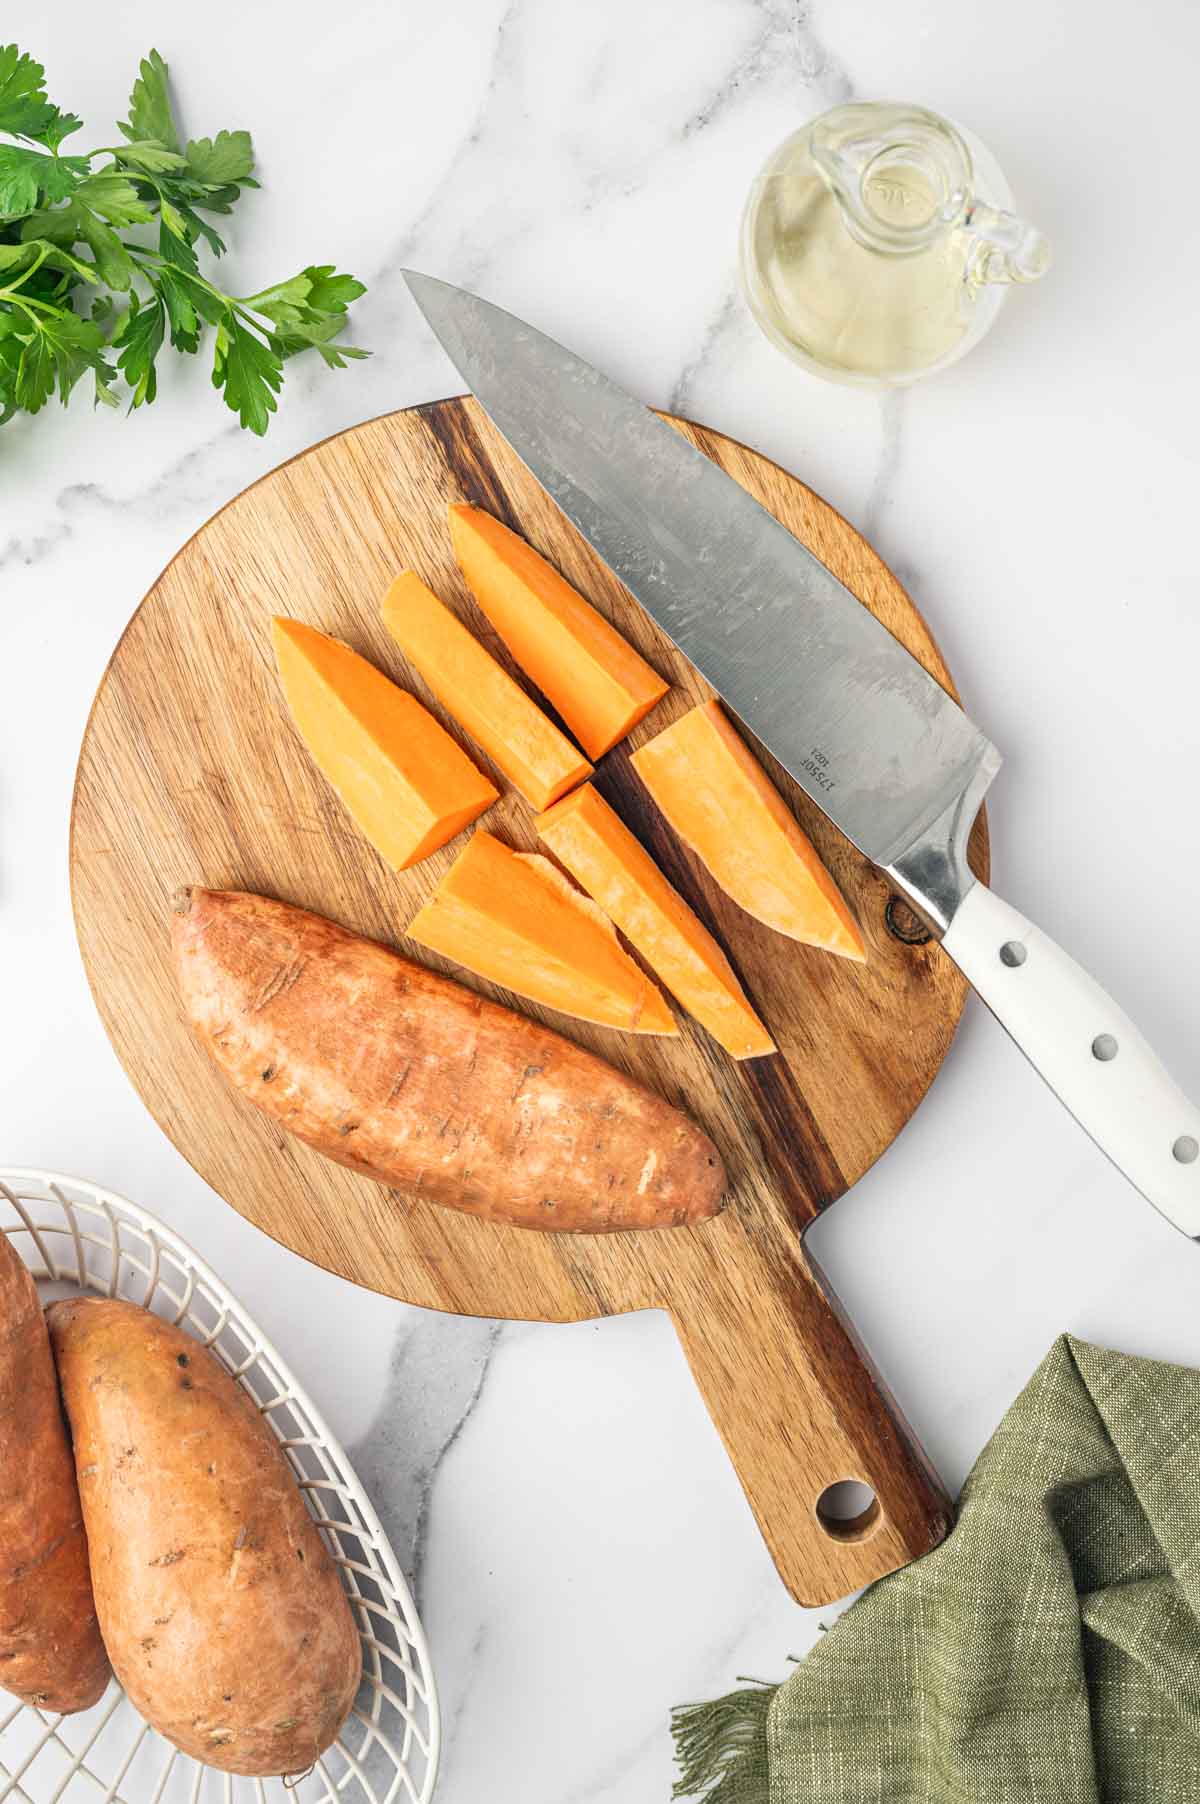
  2. Scrub your sweet potato clean before slicing them into ½-inch wedges.
  3. To slice your sweet potatoes properly, slice the end off and cut the sweet potato in half. Place the open, flat side down. Cut the halves into quarters. Be sure to use a sharp knife. 
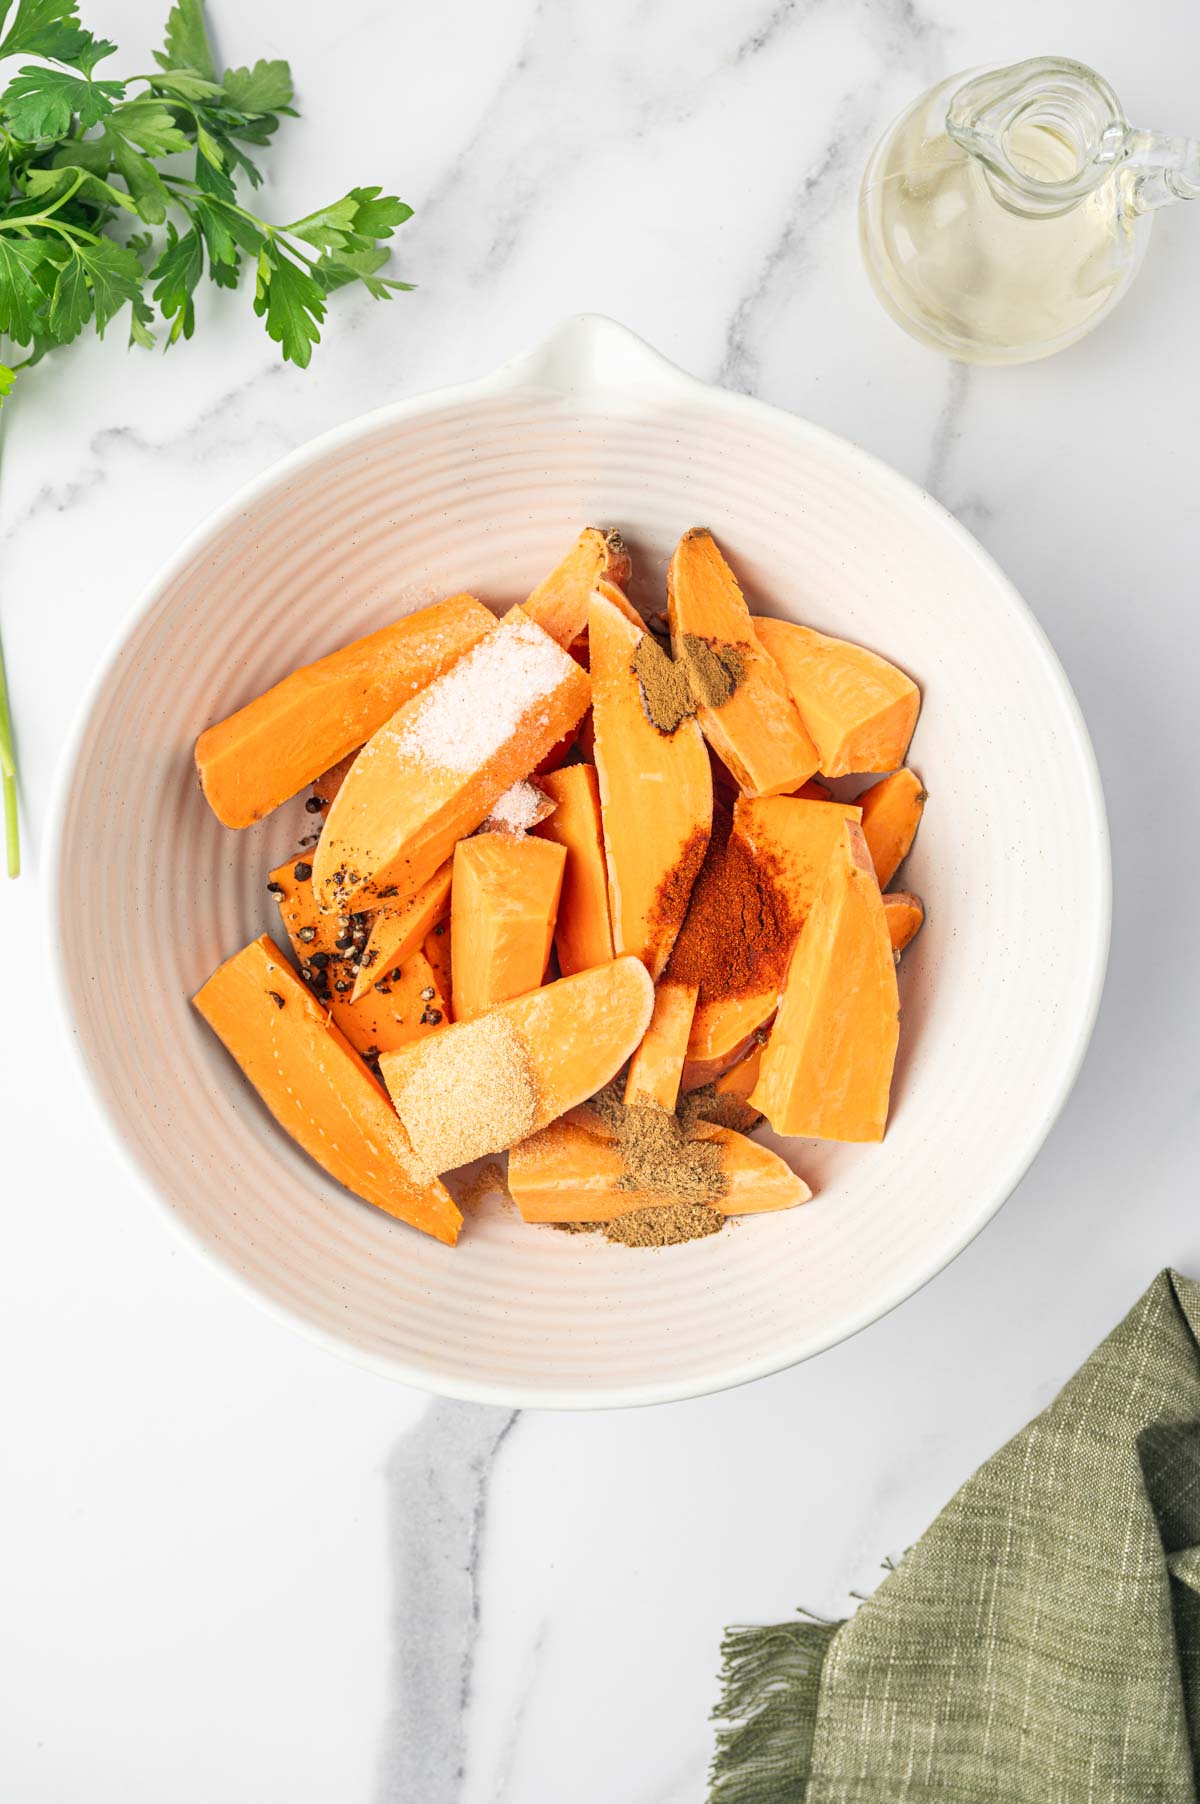
  4. The crispiness of the wedges comes from the oil, so drizzle them with quality olive oil while they are in a bowl. Toss these wedges well.
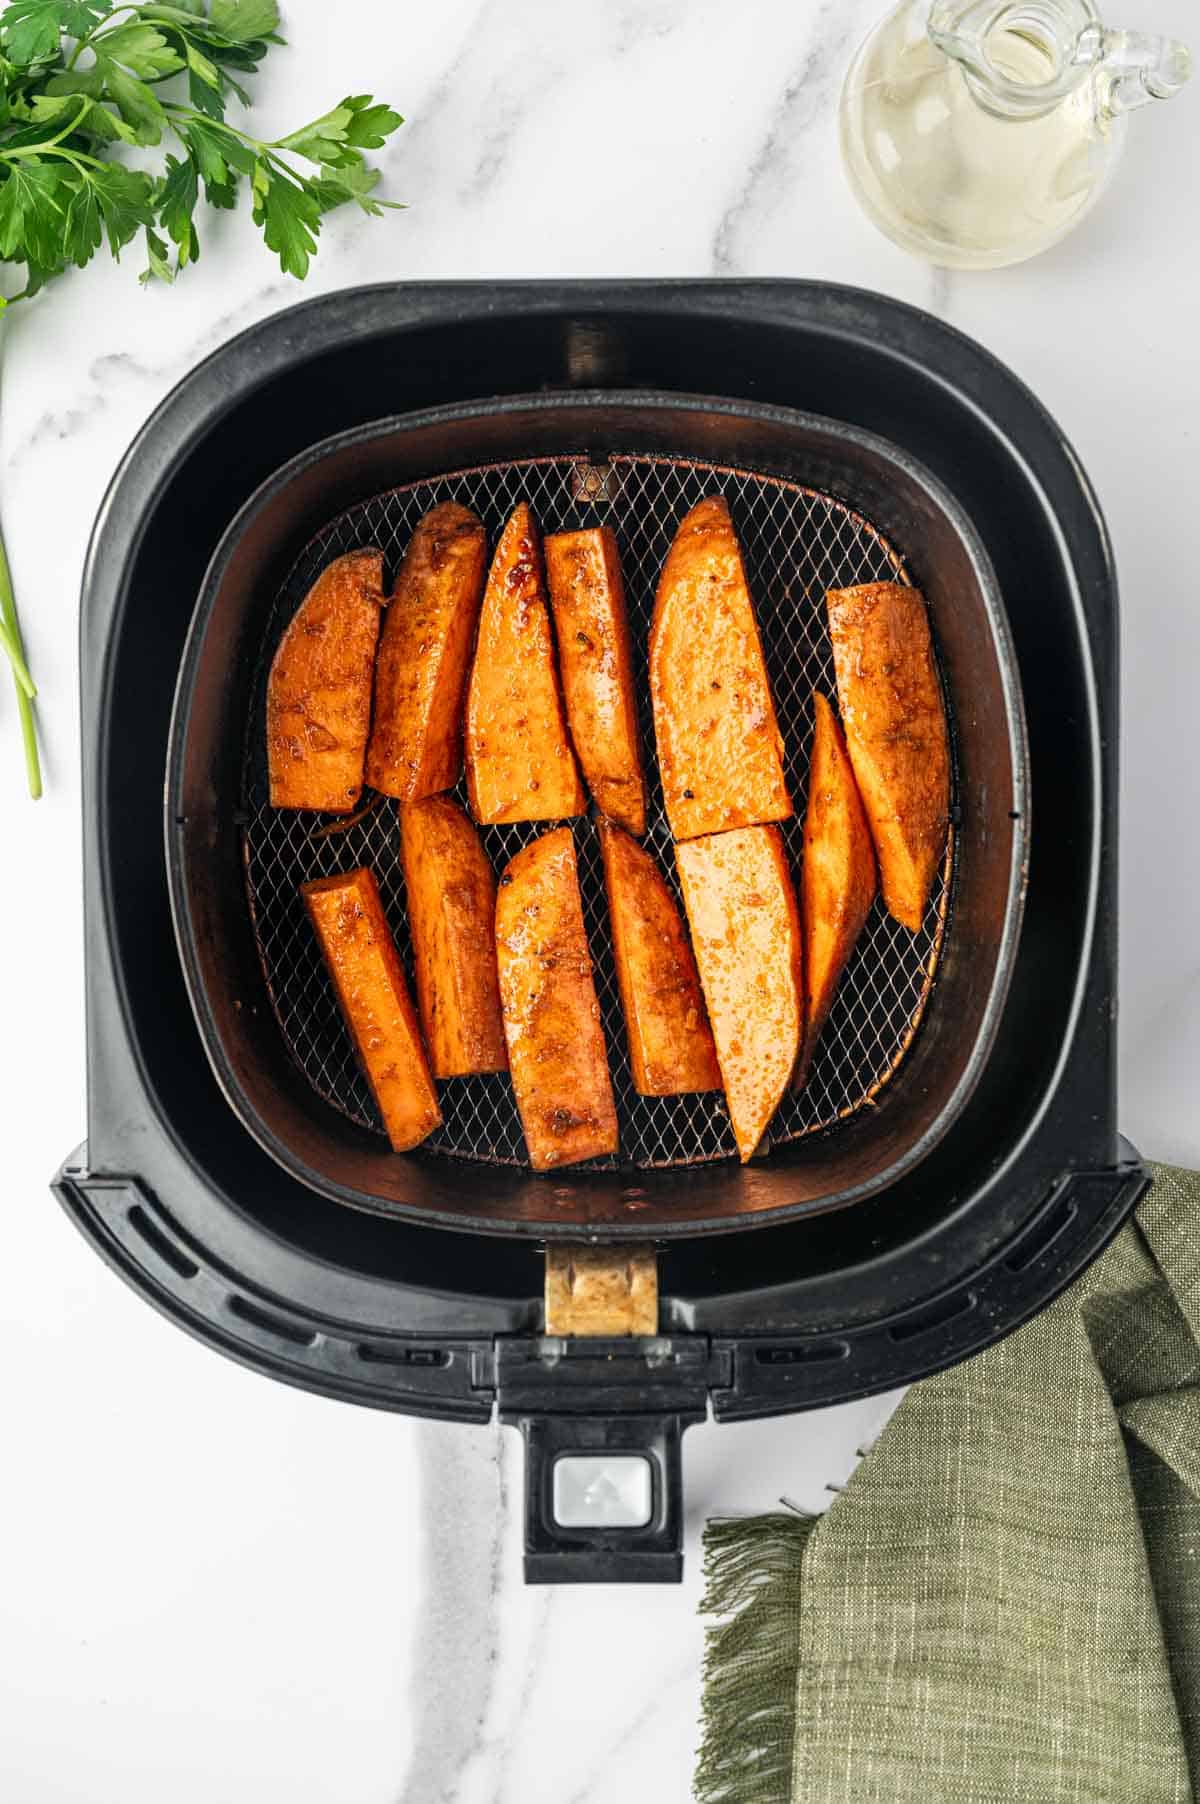
  5. Place the wedges evenly in the fryer basket. Do two batches rather than overloading the sweet potatoes and failing to get them crispy.
  6. Bring out the true flavor by seasoning them properly.
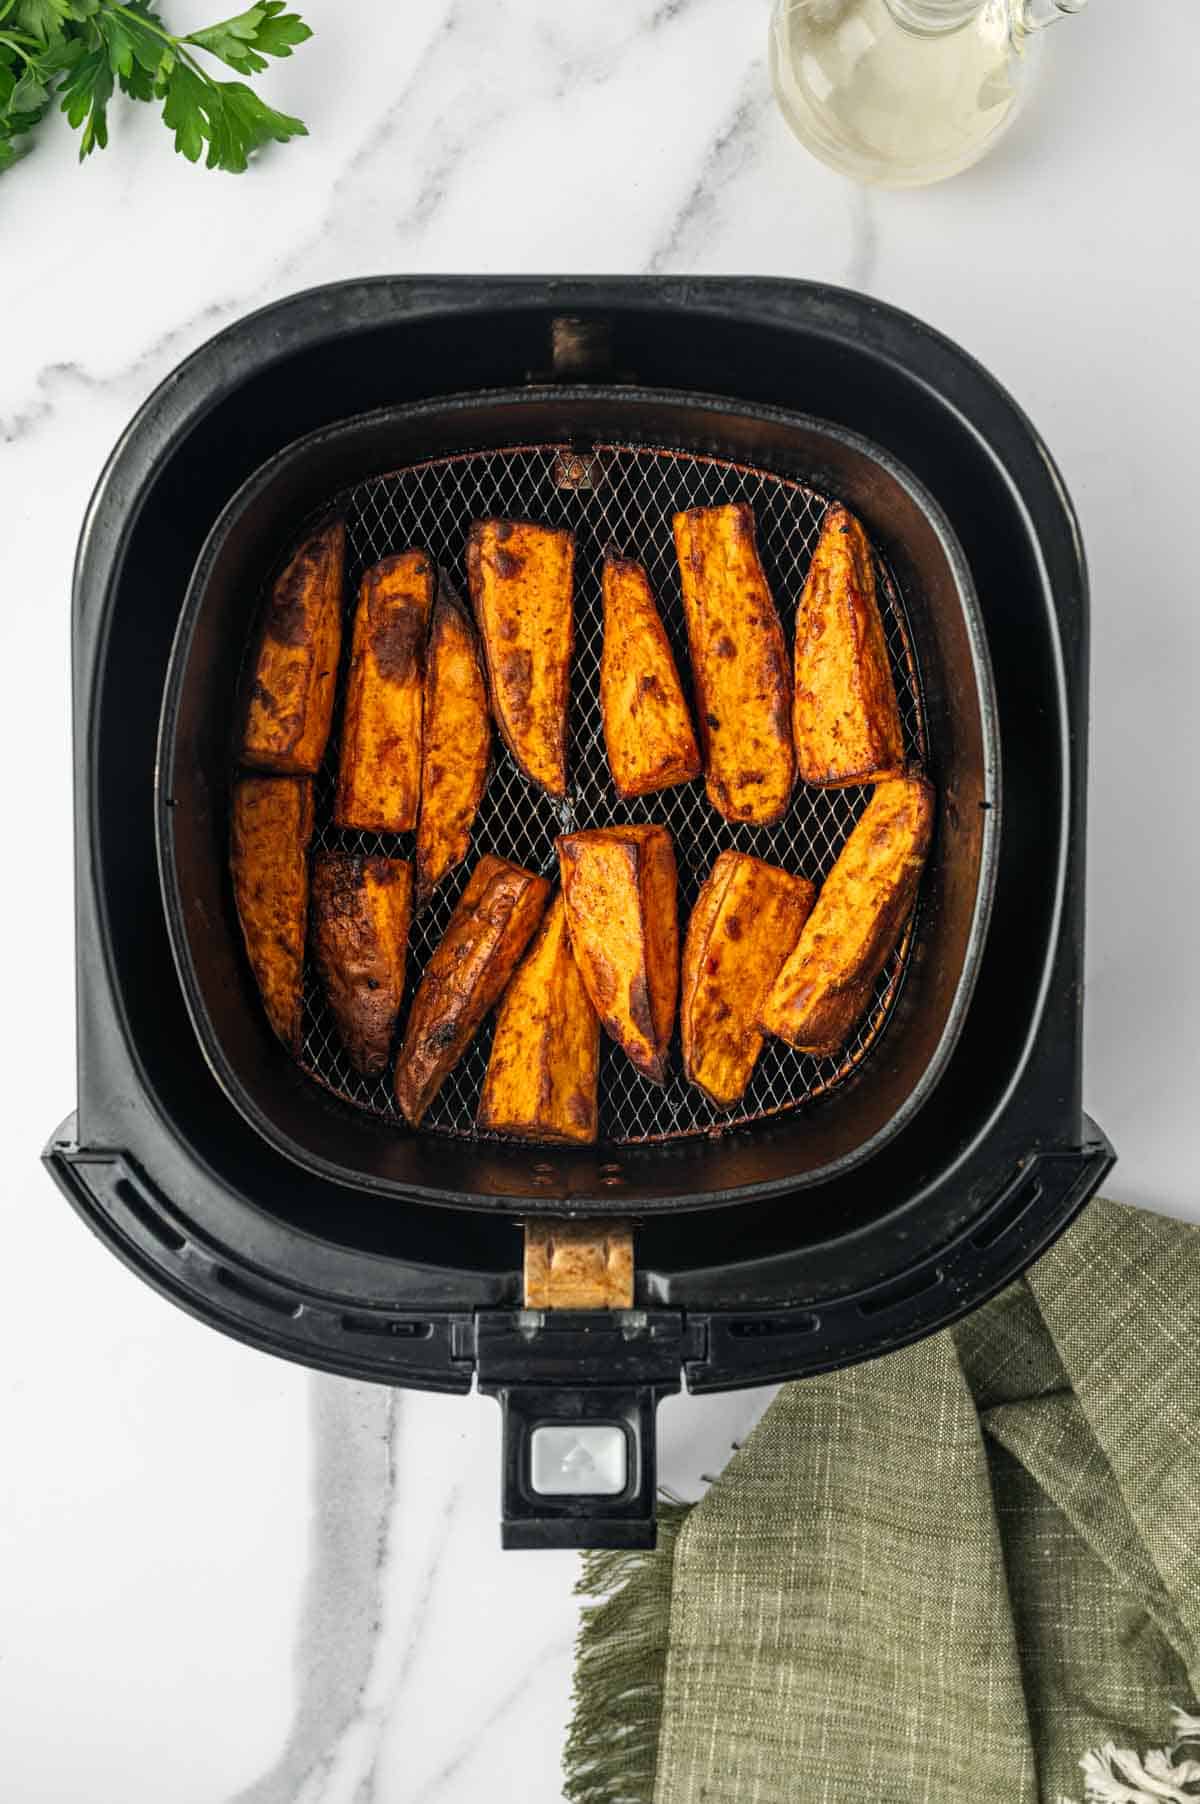
  7. Fry the sweet potatoes for around 15 minutes. Use a tong to turn them once during the frying process.
  8. When serving, you have tasty options for dipping sauces, such as ketchup or even spicy ketchup, which is ketchup with a bit of hot sauce such as sriracha.

How to make sweet potato wedges in air fryer (Step by step instructions)

Sweet potatoes cut into wedges

Slice the sweet potato into ½-inch wedges.

Adding the seasonings to the bowl of cut sweet potatoes .

Toss with olive oil and seasonings.

Arranged sweet potaoes in an air fryer.

Arrange the seasoned wedges in a single layer.

Golden brown sweet potato wedges seasoned with paprika and garlic powder, freshly cooked in an air fryer.

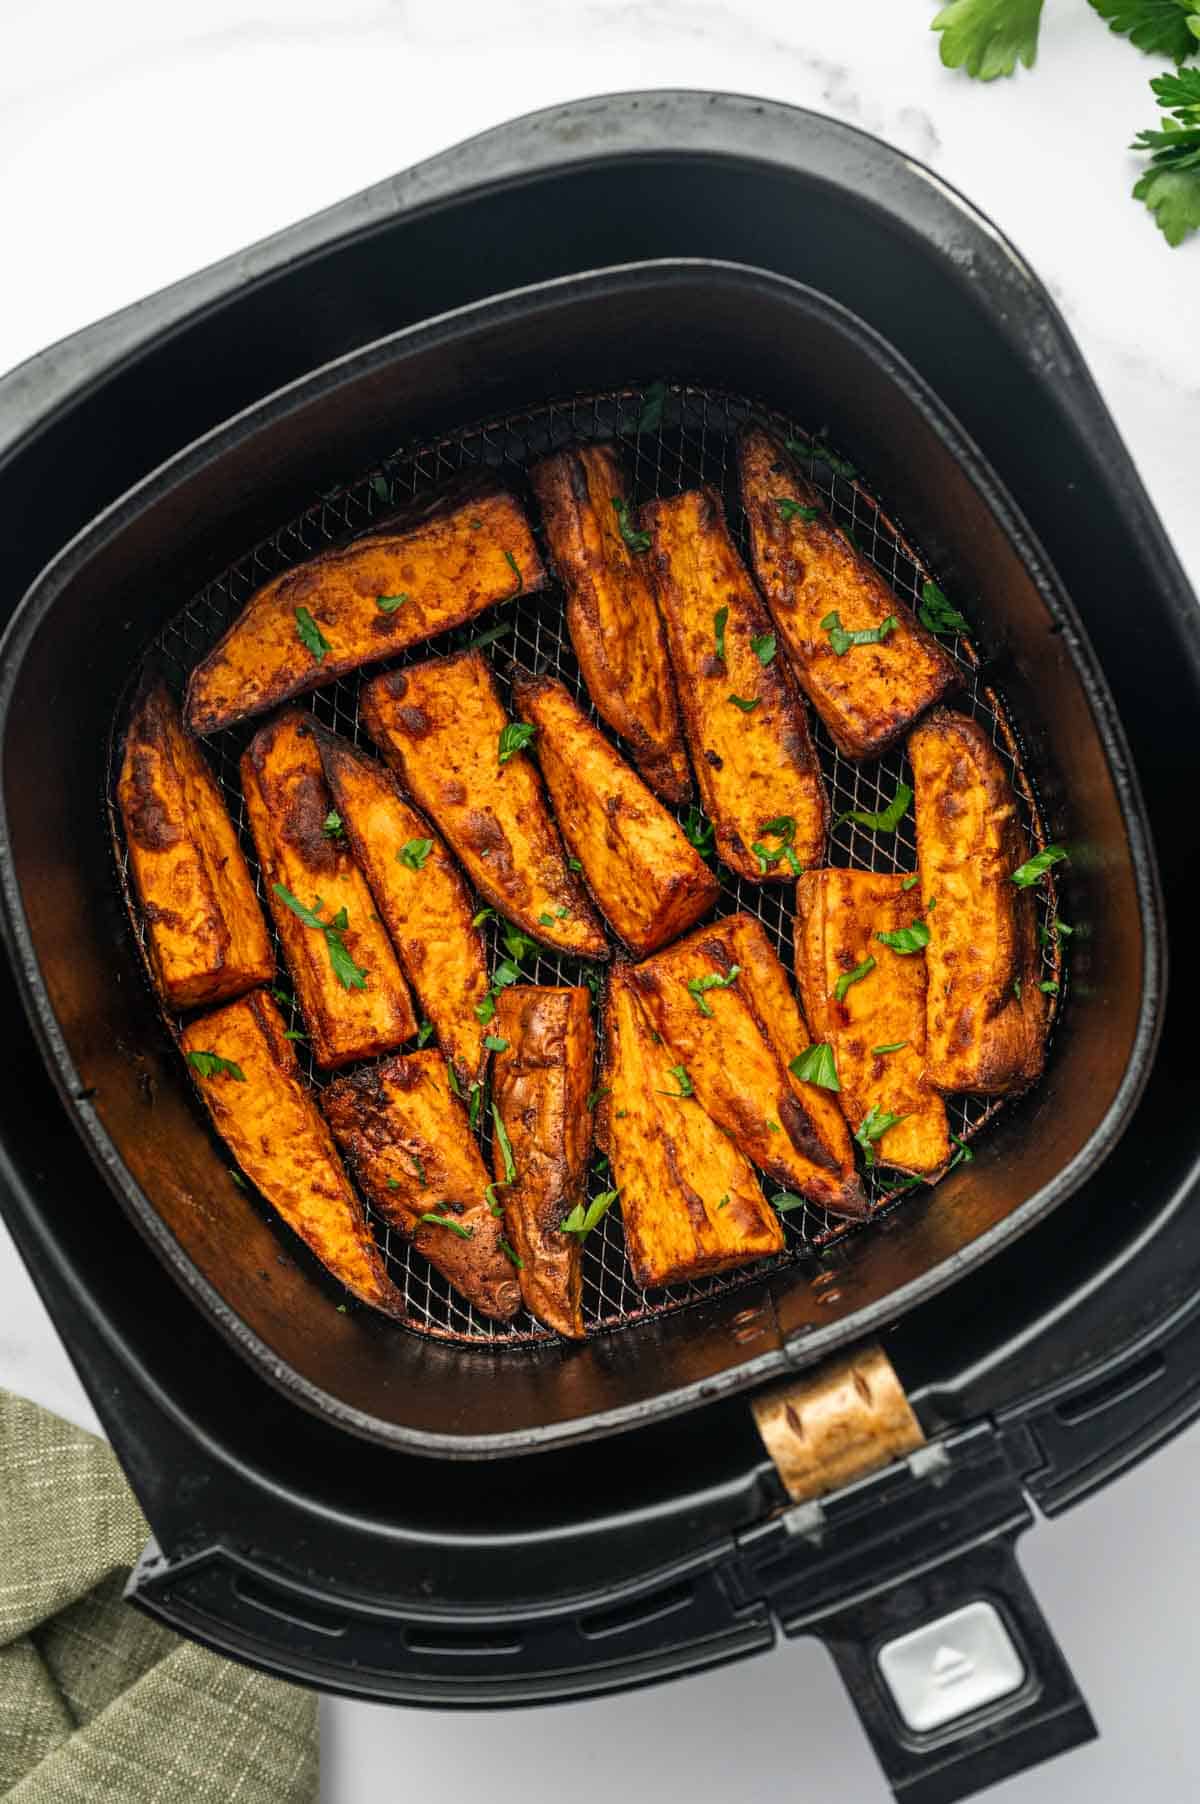
Air fry for 13-15 minutes until crispy and golden.

Garnish with chopped parsley and serve!

Close-up of crispy sweet potato wedges in an air fryer basket.

Substitutions

  • Sweet Potatoes: Substitute with regular potatoes, carrots, parsnips, or butternut squash for a different texture and flavor.
  • Garlic Powder: Replace with onion powder or fresh minced garlic for a similar savory taste.
  • Pepper: Swap with white pepper or red pepper flakes to adjust the type and level of heat.

Variations

  • Spicy Sweet Potato Wedges: Add cayenne pepper, chili powder, or smoked paprika for an extra kick of heat.
  • Herbed Wedges: Sprinkle dried rosemary, thyme, or Italian seasoning for a fragrant, aromatic twist.
  • Cheesy Wedges: Top with grated Parmesan or nutritional yeast after cooking for a cheesy flavor. Use nutritional yeast for a vegan-friendly option.
  • Smoky BBQ Wedges: Season with a sprinkle of BBQ seasoning or drizzle BBQ sauce before or after air frying, just like in my Air Fryer BBQ Chicken recipe.

These substitutions and variations allow you to customize the dish to suit your taste and dietary needs.

Easy air fryer recipe for sweet potato wedges with spices, served warm on a white marble table.

Equipment

  • Air Fryer - Essential for cooking the sweet potato wedges to crispy perfection with minimal oil.
  • Cutting Board - For safely slicing the sweet potatoes into uniform wedges.
  • Sharp Knife - To easily cut through the dense sweet potatoes for even-sized wedges.
  • Mixing Bowl - To toss the wedges with olive oil and seasonings for even coating.
  • Measuring Spoons - To measure out the seasonings and oil accurately.

Storing Your Sweet Potato Wedges

Once your sweet potatoes have cooled, place them in an airtight container and refrigerate them for up to four days. To reheat them, transfer them to a baking sheet and preheat your oven to 375 degrees. Bake them for approximately 5 minutes while flipping them once.

The sweet potato wedges can also be frozen in an airtight container for 3 months. Be sure to thaw them before you reheat them.

Close-up of crispy sweet potato wedges with fresh parsley garnish, perfect for snacks or side dishes.

Top Tips for Preparing Perfect Sweet Potato Wedges in Air Fryer

  1. Cut your wedges uniformly. This allows them to fry evenly. 
  2. Do not overcrowd the air fryer basket as this can result in uneven frying.
  3. Serve them immediately. They taste best hot and just fried.
  4. Pat the sweet potato wedges dry before frying to ensure ultimate crispiness

FAQ

Can I use regular potatoes instead of sweet potatoes?

Yes, of course ! You can substitute sweet potatoes with regular potatoes. Adjust the cooking time slightly as needed, depending on the size and type of potato.

Do I need to peel the skin of sweet potatoes?

No, peeling is optional. The skin adds extra nutrients and a slightly crispy texture, but you can peel them if you prefer a smoother bite. But I like mine with the skin!

Why my sweet potato wedges are not crispy?

Ensure the wedges are spread out in a single layer in the air fryer basket to avoid steaming (avoid overcrowding ). Also, pat the sweet potatoes dry before seasoning to remove excess moisture. And then season them as per the recipe.

Can I make these wedges ahead of time?

Yes, you can partially cook them and reheat in the air fryer at 375°F for 3-5 minutes to restore crispiness before serving.

What dipping sauces go well with sweet potato wedges?

Trust me, these sweet potato wedges are so tasty and flavorful that you can enjoy them on their own! However, popular dipping options include garlic aioli, ketchup, sriracha mayo, ranch dressing, honey mustard, and sweet chili sauce.

Related

Looking for other recipes like this? Try these:

  • Plated air fryer chicken parmesan in a white oval plate with gold rim.
    Air Fryer Chicken Parmesan (Crispy & Ready in 20 Minutes)
  • Chocolate covered strawberries arranged on a white platter.
    Easy Chocolate Covered Strawberries (3 Ingredients)
  • Overhead shot of flaky puff pastry filled with Nutella, dusted with powdered sugar on a marble tray.
    Nutella Puff Pastry Twists (Easy 4-Ingredient Recipe)
  • Festive bowl of Christmas Crunch mix surrounded by ornaments and candy canes — ideal for holiday parties and gift ideas.
    Christmas Crunch Recipe (Easy Holiday Snack Mix)

Pairing

These are my favorite dishes to serve with Air Fryer Sweet Potato Wedges:

  • Close-up of Strawberry Santas made with fresh strawberries, cream cheese frosting, and mini chocolate chip eyes — cute and festive Christmas dessert.
    Strawberry Santas (Easy No-Bake Christmas Dessert)
  • No-bake Biscoff truffles on a white bowl, coated in dark chocolate and drizzled with melted chocolate for a festive look. One truffle being cut opened.
    Biscoff Truffles Recipe (Easy No Bake Cookie Truffles)
  • A collage image of best thanksgiving side dishes image
    10+ Easy Thanksgiving Side Dishes for the Holiday Season
  • Frosted funfetti birthday cookie on marble top with extra sprinkles scattered.
    Funfetti Birthday Cake Cookies with sprinkles recipe
Crispy air fryer sweet potato wedges served with ketchup in a white plate.

Air Fryer Sweet Potato Wedges

Abi Guna
These crispy and flavorful Air Fryer Sweet Potato Wedges are a healthy and delicious snack or side dish. They’re quick to make, perfectly seasoned, and have a satisfying crunch!
5 from 2 votes
Print Recipe Pin Recipe
Prep Time 5 minutes mins
Cook Time 15 minutes mins
Total Time 20 minutes mins
Course Appetizer
Cuisine American
Servings 4
Calories 223 kcal

Equipment

  • Air Fryer
  • Sharp Knife
  • Mixing Bowl
  • Measuring Spoons

Ingredients
  

  • 3 medium sweet potatoes
  • 2 tablespoons olive oil
  • 1 teaspoon salt
  • ½ teaspoon paprika
  • ½ teaspoon garlic powder
  • ½ teaspoon ground cumin
  • ½ teaspoon ground pepper
  • ¼ teaspoon ground cinnamon
  • ¼ teaspoon ground black pepper
  • Chopped parsley to garnish

Instructions
 

  • Preheat the air fryer to 380 degrees F for about 5 minutes.
  • Meanwhile, wash and scrub the sweet potatoes well. Cut the sweet potatoes into wedges with uniform thickness to ensure even cooking.
  • In a large bowl, toss the wedges with olive oil until evenly coated.
  • Sprinkle paprika, garlic powder, cumin, pepper, cinnamon, salt, and pepper over the wedges. Toss again to coat evenly with the spices.
  • Arrange the seasoned wedges in a single layer in the air fryer basket. Avoid overcrowding; cook in batches.
  • Air fry for 13-15 minutes, shaking the basket halfway through until the wedges are golden brown and crispy on the outside and tender on the inside.
  • Remove the wedges from the air fryer and garnish with chopped parsley. Serve immediately. Pair with your favorite dipping sauces ranch or ketchup.

Notes

  1. To achieve crispy sweet potato wedges, pat the sweet potatoes dry with a paper towel before seasoning to remove excess moisture and enhance crispiness.
  2. Shake the air fryer basket halfway through cooking to ensure even browning on all sides.
Keyword Air fryer recipes, Appetizers, side dish, snacks, Sweet Potato

Roasted Cauliflower and Carrots (Easy Oven Recipe) 

December 8, 2024 by Abi Guna 9 Comments

Are you wondering what to make for a weeknight dinner with minimal preparation? Look no further! Roasted Cauliflower and Carrots is a simple yet delicious recipe that transforms these vegetables into a flavorful, caramelized delight through the magic of oven roasting. These roasted veggies make the perfect side dish for my Chicken and Dumpling Casserole, a creamy baked dinner that’s always a hit.

Healthy oven-roasted vegetables on a baking sheet.

Perfect as a side dish or a light meal, this dish is not only healthy but also incredibly versatile and easy to prepare. A squeeze of fresh lemon juice and a garnish of chopped parsley elevate the flavors, adding a vibrant and refreshing touch to this wholesome dish. Serve this roasted veggies with cheesy mashed potatoes for a complete meal!

Packed with nutrients like fiber, vitamins, and antioxidants, Roasted Cauliflower and Carrots is a guilt-free addition to your table. It’s naturally gluten-free, vegan, and customizable with your favorite seasonings or garnishes. Perfect for weeknight dinners, meal prep, or entertaining guests, this recipe is a true crowd-pleaser. Once you try it, it’s bound to become a go-to favorite for its unbeatable combination of flavor, nutrition, and ease.

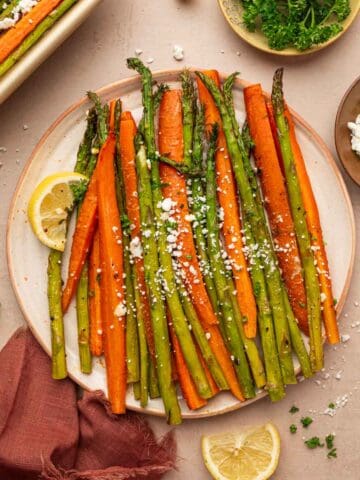
Still searching for more side dish recipes? Have you tried my Hot Honey Brussels Sprouts , Roasted Carrots and Aspragus, Roasted Mini Peppers recipe?

[feast_advanced_jump_to]

Why You Will Love This Recipe

  • Simple and Quick: This roasted cauliflower and carrots recipe requires minimal preparation and uses simple, pantry-friendly ingredients.
  • Healthy and Nutritious: Packed with vitamins, fiber, and antioxidants, it's a wholesome addition to any meal.
  • Versatile: It can be served as a side, a snack, or even as part of a main dish like a grain bowl or salad.
  • Customizable Flavors: The recipe allows for endless variations with different spices, herbs, and toppings to suit your taste.
  • Crowd-Pleasing: This dish is vegan, gluten-free, and loved by all, making it perfect for gatherings or potlucks.
Garlic and paprika roasted cauliflower and carrots side dish

How to Serve Roasted Cauliflower and Carrots

While roasted cauliflower and carrots are typically served as a side dish, they can easily be turned into a main dish or used creatively in various meals:

  • Pair with Lemon Pepper Chicken : Serve alongside lemon pepper chicken to create a complete and flavorful meal.
  • Build a Buddha Bowl: Layer roasted cauliflower and carrots with grains, greens, and a protein like chickpeas or tofu for a wholesome bowl.
  • Top Pizza or Flatbread: Use the roasted vegetables as a topping for pizza or flatbread, finished with a sprinkle of mozzarella or goat cheese.
  • Serve with Dips: Pair them with carrot hummus, tzatziki, or a spicy yogurt dip to make a delicious party appetizer or snack.
  • Enjoy as a Snack: Eat them straight out of the oven for a healthy and satisfying snack—just like I always do!

These versatile roasted vegetables can complement a variety of dishes or stand on their own as a flavorful option.

What Makes Healthy Roasted Cauliflower and Carrots Special

Roasting two favorite vegetables such as cauliflower and carrots together makes for a perfect eating experience. Top this healthy side dish recipe with special spices, and you end up with an award-winning, low-carb vegetable recipe that if impossible to resist. 

Close-up of roasted cauliflower and carrots seasoned with herbs

This roasted carrots and cauliflower recipe is easy to prepare by roasting the veggies on a baking sheet. However, just because a dish is simple doesn’t imply it is boring. On the contrary, this easy roasted vegetable recipe is bursting with flavors. It is also flexible when it comes to herbs and spices used, allowing you to customize it to your own preference. 

Like most vegetable and gluten-free side dishes, roasted cauliflower and carrots provide not only an abundance of flavor, but they also allow you to enjoy a variety of health benefits. Carrots are good for their beta-carotene, potassium, vitamins, and antioxidants. Cauliflowers, another superpower veggie, can help reduce the risk of heart problems and other chronic illnesses.

How to Roast Cauliflower and Carrots

Most people realize that there is a considerable taste difference between boiling and roasting vegetables. The primary reason for that is that roasting provides a higher temperature, up to 425 degrees, and it is the higher temperature that creates a gentle sweetness by caramelizing the vegetables’ natural sugars and offering a crisp texture. Add seasoning, and you end up with a little piece of roasted heaven. To ensure that your vegetables roast evenly, don’t overcrowd the baking sheet and ensure that they are cut the same size. This will help create your ultimate Whole30 vegetable recipe.

Of course, fresh vegetables will always be best, but there will be emergency times when you want to serve your beloved roasted cauliflower and roasted carrots but don’t have any fresh ones at hand. That’s when you can use frozen veggies – although they should not be your first choice. Place the cauliflower and carrots on a baking sheet while they are still frozen and drizzle them with seasoning and oil. Roast them for 20 minutes (keep an eye on them), and you will have browned, crispy, roasted veggies.

Healthy oven-roasted vegetables on a baking sheet

Tricks to Making Roasted Vegetables

Magical roasted vegetables don’t just happen. Here are a few helpful tricks:

  1. You can save time by purchasing your vegetables pre-chopped at the store. If your veggies aren’t pre-chopped, chop them before you prepare your meal for an easier time.
  2. Adding chopped opinion provides great depth of flavor and intensifies the taste of a vegetable dish such as roasted cauliflower and carrots.
  3. You decide whether to peel your carrots but be sure to wash them very thoroughly. 
  4. For crisp vegetables, roast at a high temperature of around 400 degrees.
  5. Place your chopped vegetables on a baking sheet in a single layer. If you need more room, use a second baking sheet instead of overcrowding them. 
  6. Drizzle your vegetables with oil to achieve that delightful crispness. Otherwise, they can burn and become dry.
  7. For an even crispness throughout, rotate your baking sheet(s) 180 degrees.
  8. Seasoning your roasted vegetables is important, and don’t be afraid to experiment. You can add heat with some chili powder, curry, or cayenne pepper. Drizzling your vegetables with a hint of acidity, such as lemon juice, will bring them to life.

Ingredients

Ingredients for roasted cauliflower and carrots
  • Cauliflower - Cauliflower serves as the main ingredient with its mild, nutty flavor, roasting beautifully to develop crispy edges.
  • Carrots - Carrots add natural sweetness and a vibrant color to the dish, balancing the savory spices with their caramelized flavor when roasted.
  • Olive Oil - Ensures the vegetables roast evenly.
  • Salt - Enhances the natural flavors of the vegetables.
  • Ground Pepper - Adds a mild heat and depth of flavor.
  • Garlic Powder - Infuses the dish with a subtle, savory garlic flavor without the moisture of fresh garlic.
  • Paprika - Adds a mild smokiness and a hint of sweetness.
  • Cumin Powder - An earthy, warm spice that pairs beautifully with roasted vegetables.
  • Lemon Juice - Provides a bright, tangy finish, balancing the richness of the olive oil and the sweetness of the roasted carrots.

See recipe card for quantities.

Preparing Your Roasted Carrots and Cauliflower Recipe

This fabulous side dish couldn’t be easier to prepare, and it can be customized with ease. The true beauty is it pairs with most meats and fish and is a vegetarian treat.

  1. You can either purchase pre-cut cauliflower florets or cut them yourself. Buying pre-cut is a time-saver.
  2. You have several options when it comes to the carrots. You can purchase regular carrots, as we have done here, and peel and slice them. It is even easier to use pre-cut and pre-peeled baby carrots. And if you are in a mischievous mood, use multi-colored carrots for a lovely effect. Actually, each different colored carrot has been bred for specific health benefits, so they may be an excellent bet. 
  3. Olive oil is a healthy fat that your body wants and needs.
  4. You make the dish your own with the spices you use, and there is a chance you have been underestimating the power of spices. Paprika is a great source of vitamins A and C, as well as iron and potassium. Garlic powder is filled with vitamins, manganese and antioxidants to help with blood pressure and heart health. Cumin is another popular spice with antioxidants that can improve heart problems, blood sugar, and may offer protection from cancer. 

Step By Step Instructions

Add the veggies and spices together

To a large bowl add the veggies, spices and oil. Toss well.

Spreaded vegetable layer in a roasting pan

Spread the seasoned veggies to the prepared baking tray and bake.

The addition of a drizzle of lemon juice will brighten the entire dish.

Garlic and paprika roasted cauliflower and carrots side dish

Substitutions

  • Garlic powder can be substituted with fresh minced garlic, onion powder, or roasted garlic paste.
  • Cauliflower can be substituted with broccoli, Brussels sprouts, or cubed butternut squash.
  • Carrots can be substituted with sweet potatoes, parsnips, or zucchini.

Variations

  • Spicy Variation: For those who enjoy a kick of heat, add ½ teaspoon of chili powder or cayenne pepper. This variation introduces bold, spicy flavors to the dish.
  • Herb-Infused Variation: Add fresh rosemary, thyme, or oregano sprigs to the vegetables before roasting to enhance the overall flavor of the dish.
  • Cheesy Variation: Sprinkle grated Parmesan or crumbled feta cheese over the vegetables during the last 5 minutes of roasting for a savory, cheesy finish.

Equipment

  • Large Mixing Bowl - To toss the vegetables with olive oil and seasonings.
  • Baking Sheet - A flat surface to roast the vegetables evenly.
  • Parchment Paper  - To line the baking sheet for easy cleanup and prevent sticking.
  • Measuring Spoons - To measure the seasonings and oil accurately.
Close shot of roasted veggies

How to Store Roasted Cauliflower and Carrots

Place your roasted vegetables in an airtight container and refrigerate for up to four days.

Freezing them is not recommended as they will lose their crispness.

To reheat, place them in a pan, drizzle them with a few drops of oil, and cook on low for four to five minutes.

Top Tip

Stir or flip the vegetables halfway through cooking to ensure even browning on all sides.

FAQ

Can I use frozen vegetables for this recipe?

Yes, Of course you can use frozen cauliflower and carrots, but they may release more moisture, so roast them at a slightly higher temperature (425°F) and spread them out well to prevent steaming.

How do I know when the vegetables are done?

The vegetables are done when they are tender and slightly caramelized with crispy edges. You can test tenderness by piercing them with a fork.

Can I make this recipe ahead of time?

Yes, you can roast the vegetables ahead of time and reheat them in the oven at 350°F for about 10 minutes to restore their crispness.

What other vegetables can I add to this dish?

You can add other sturdy vegetables like sweet potatoes, Brussels sprouts, or parsnips. Just make sure they are cut to similar sizes for even cooking.

Related

Looking for other recipes like this? Try these:

  • Freshly baked biscoff blondies cooling on parchment paper with nice golden edges.
    Biscoff Blondies with White Chocolate & Cookie Butter
  • Creamy mashed potatoes topped with melted butter, garnished with fresh chives in a rustic green bowl.
    Cheesy Mashed Potatoes with Garlic & Sour Cream (Easy)
  • Holiday cheesy green bean casserole with golden brown top, perfect for Thanksgiving dinner.
    Cheesy Green Bean Casserole Recipe Without Mushroom Soup
  • Easy oven roasted chicken and potatoes, perfectly browned and ready to serve for dinner.
    Oven roasted chicken and potatoes with garlic & herbs

Pairing

These are my favorite dishes to serve with Roasted Carrots and Cauliflower recipe:

  • Festive cranberry sauce with dried cranberries, ideal for Christmas dinner or any holiday meal.
    Cranberry Sauce From Dried Cranberries - Easy Holiday Recipe
  • Comfort food chicken and dumpling casserole baked until golden brown and bubbling.
    Easy Chicken and Dumpling Casserole with Biscuit Dough
  • Healthy Brussels sprouts salad with maple Dijon vinaigrette, cranberries, and shallots.
    Shaved brussels sprouts salad with maple dijon dressing
  • Close-up of turkey melt sandwich with cranberry relish and melted cheese, air-fried to crispy perfection.
    Turkey Melt Sandwich with Cranberry Relish (Airfryer)
Healthy oven-roasted vegetables on a white bowl

Roasted Cauliflower and Carrots

Abi Guna
Easy to make Oven Roasted Cauliflower and Carrots is a delightful way to enjoy the earthy flavors of fresh produce, perfect for weeknight dinners, meal prepping, or festive gatherings.
5 from 5 votes
Print Recipe Pin Recipe
Prep Time 10 minutes mins
Cook Time 30 minutes mins
Total Time 40 minutes mins
Course Side Dish
Cuisine American
Servings 4
Calories 167 kcal

Equipment

  • Mixing Bowl
  • Baking Pan
  • Measuring Spoons

Ingredients
  

  • 1 medium head of cauliflower cut into florets
  • 4 medium carrots peeled and sliced
  • 3 tablespoons olive oil
  • 1 teaspoon salt
  • ½ teaspoon ground pepper
  • ½ teaspoon garlic powder
  • ½ teaspoon paprika
  • ½ teaspoon cumin powder
  • 1 tablespoon fresh lemon juice
  • Chopped parsley for garnish
  • Lemon wedges to serve

Instructions
 

  • Preheat your oven to 400°F . Line a baking sheet with parchment paper or lightly grease it.
  • Place the cauliflower and carrots in a large bowl.
  • Drizzle with olive oil and sprinkle with garlic powder, paprika, cumin, salt, and pepper. Toss until the vegetables are evenly coated.
  • Spread the vegetables in a single layer on the prepared baking sheet. Avoid overcrowding to ensure proper roasting.
  • Roast in the preheated oven for 30-32 minutes, flipping halfway through, until the vegetables are golden brown and tender. The edges should be slightly crispy.
  • After removing from the oven, drizzle with lemon juice for a bright flavor.
  • Garnish with chopped parsley and serve warm as a side dish, or enjoy as a light meal with a dip like hummus.

Notes

  1. Ensure the cauliflower florets and carrot slices are similar in size for even cooking and uniform texture.
  2. Spread the vegetables in a single layer with some space between them. Overcrowding can cause steaming instead of roasting, resulting in less crispy edges.
Keyword carrots, CAULIFLOWER, roasted vegetables, side dish

If you try this recipe, please leave a STAR rating in the comment section below! Your feedback helps a small blogger like me stay motivated in creating content for my readers. Also, feel free to follow me at Food Exit on Instagram, TikTok, and Pinterest for the latest recipe updates!

Hot Honey Brussels Sprouts (Crispy Oven-Roasted Recipe)

December 5, 2024 by Abi Guna 20 Comments

Is your family tired of the same old side dishes? Shake things up with these crispy hot honey Brussels sprouts! Roasted in the oven until golden and caramelized, then coated in a sweet, spicy, and savory glaze, this easy side dish transforms simple Brussels sprouts into an irresistible favorite. You can make them in the oven or air fryer, but either way, they come out perfectly crispy every time.

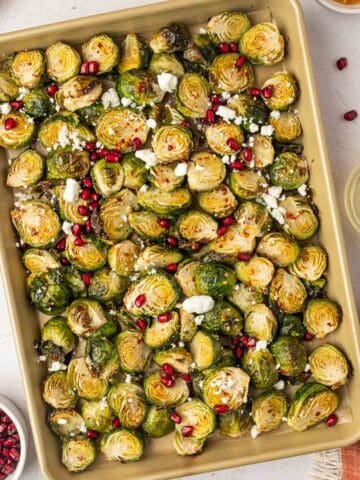
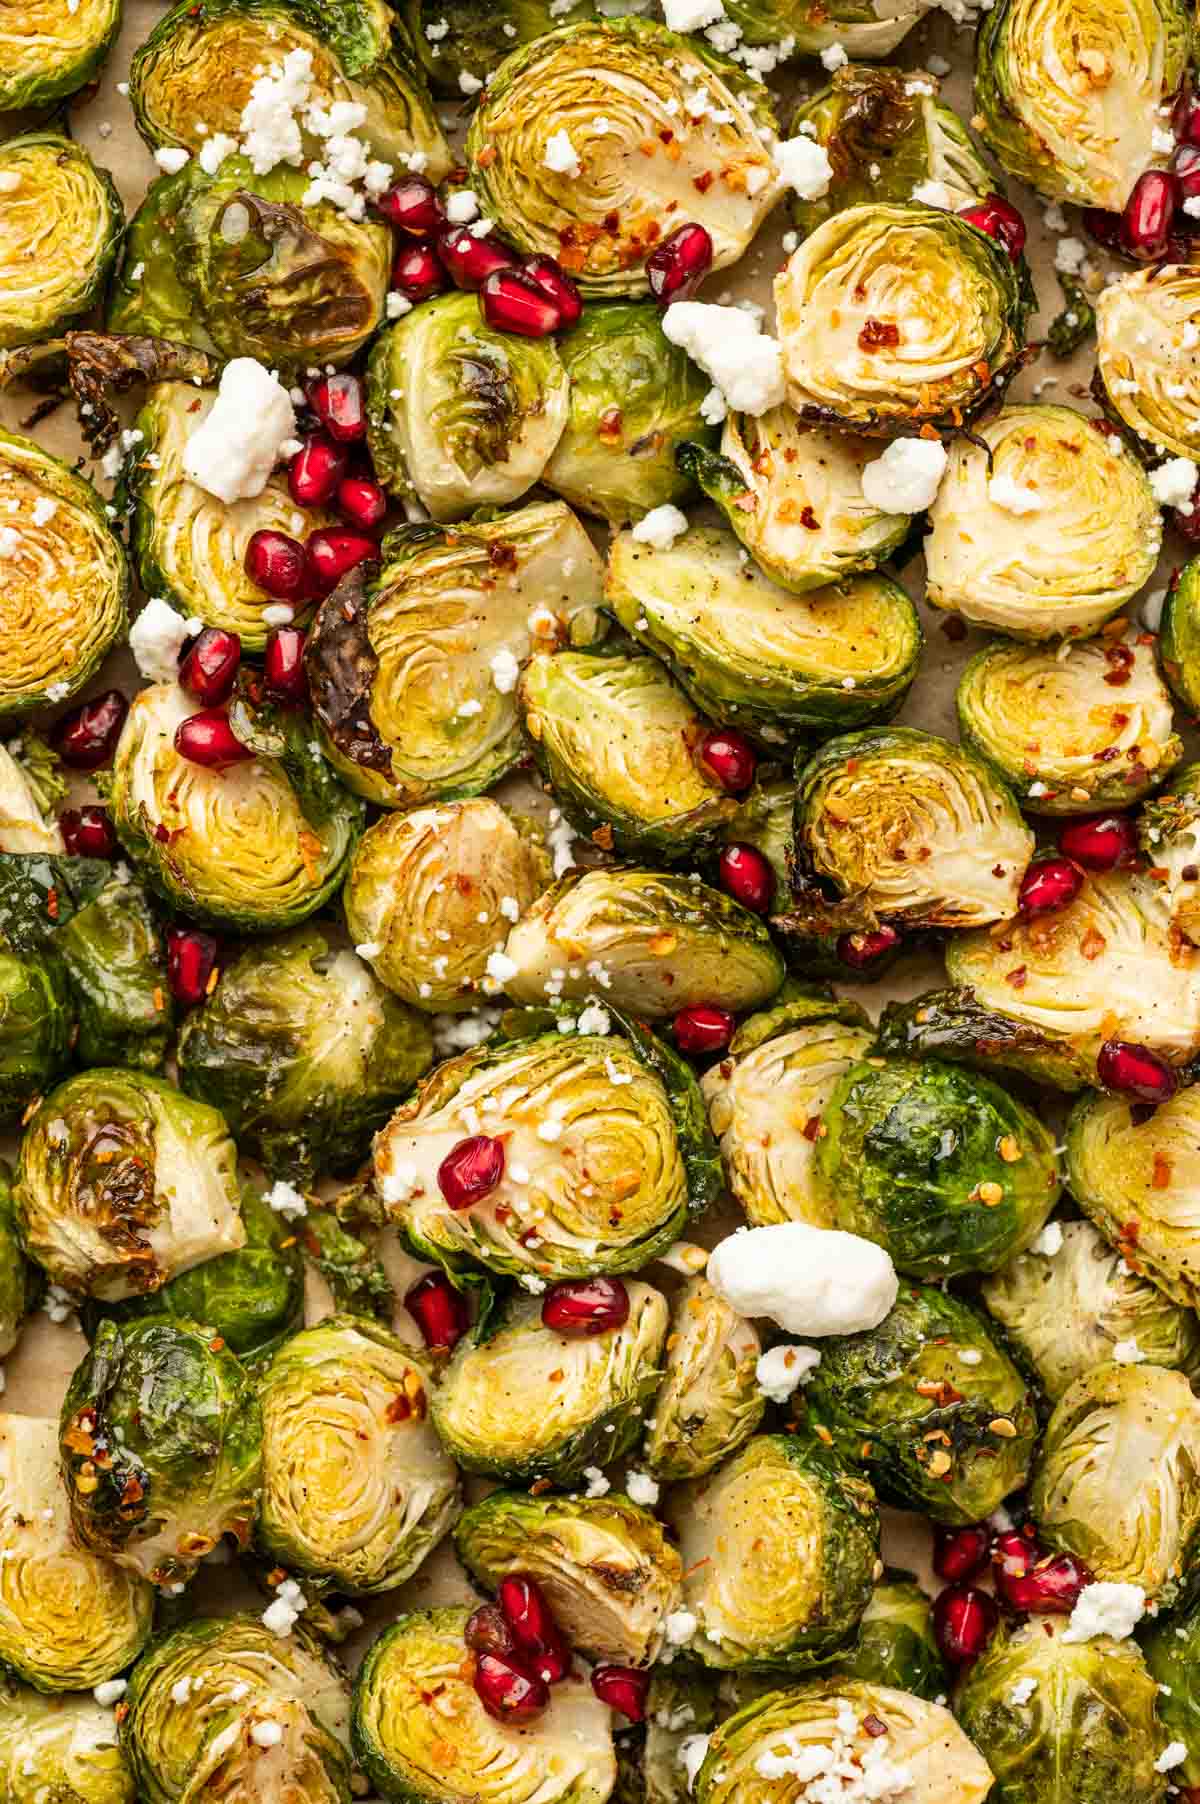
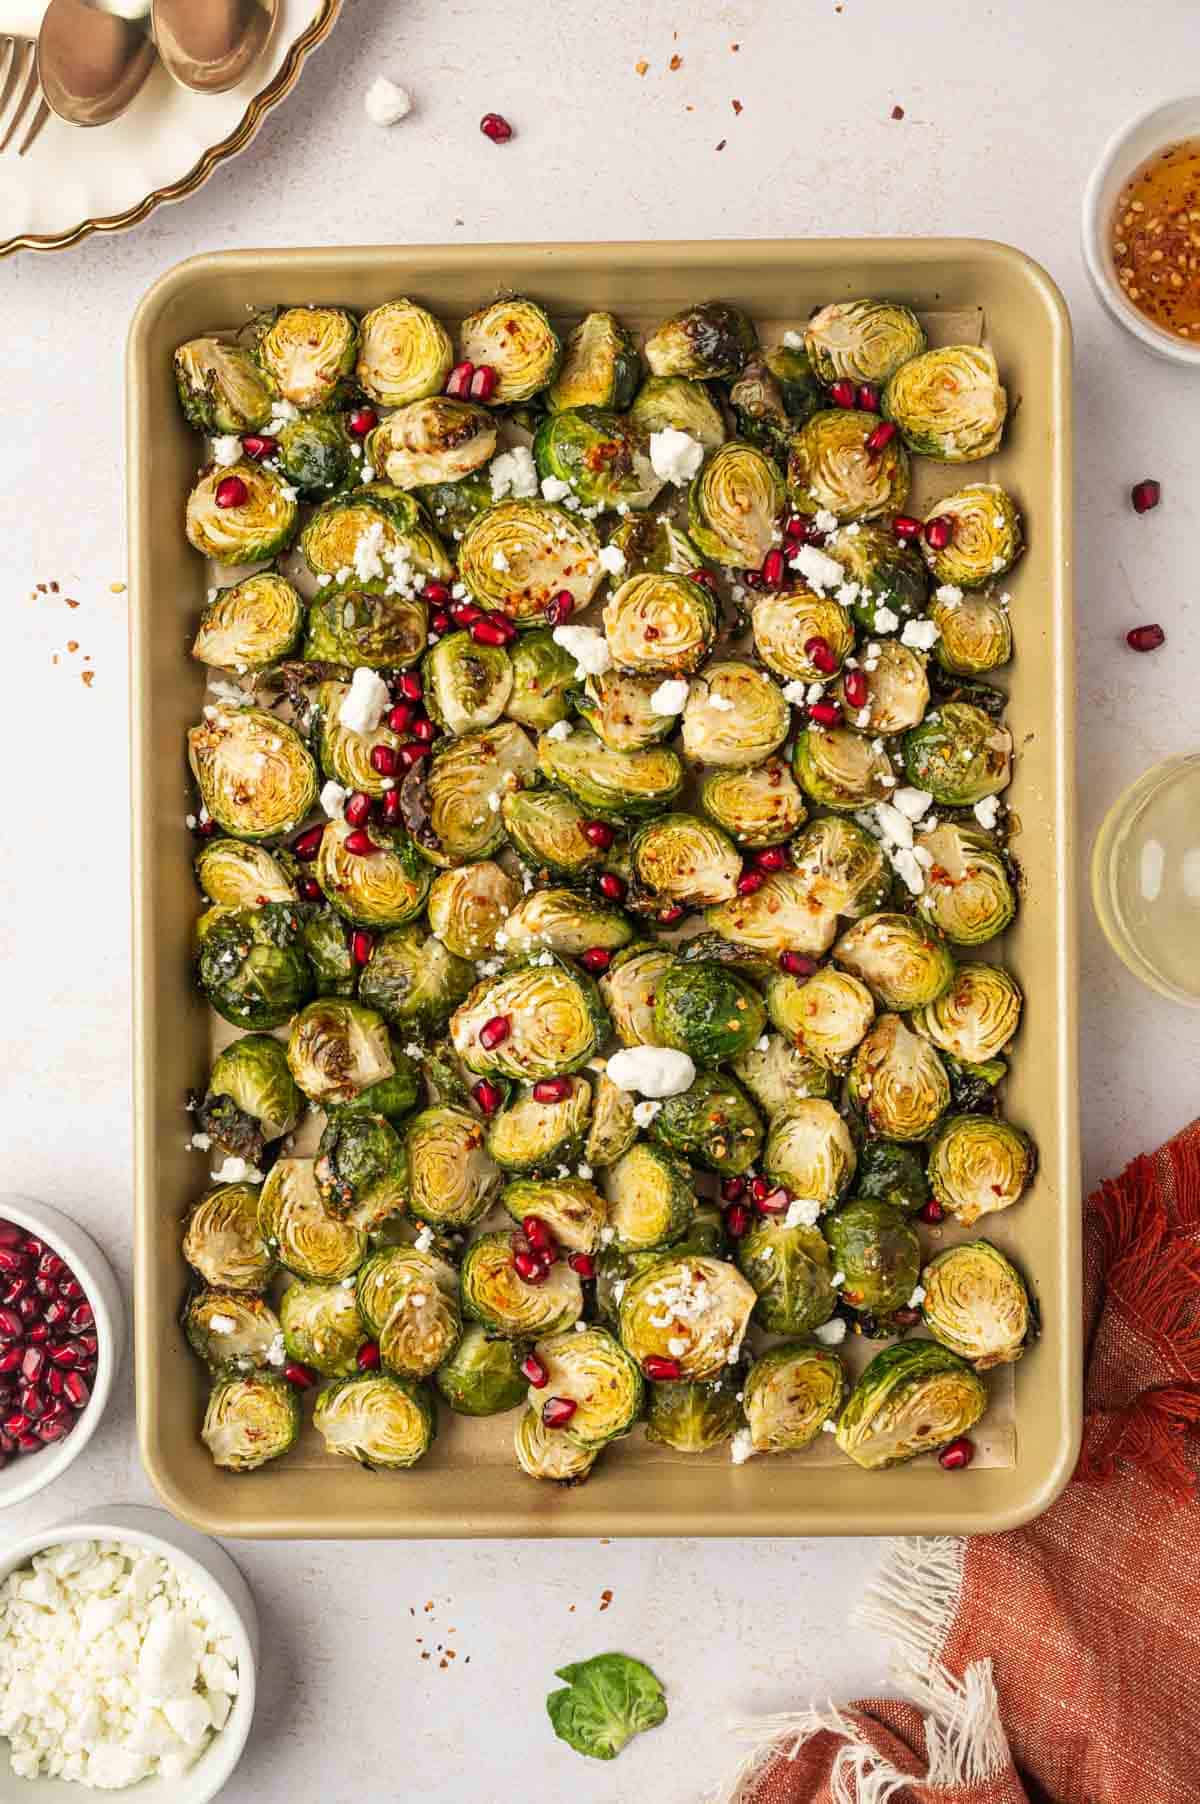
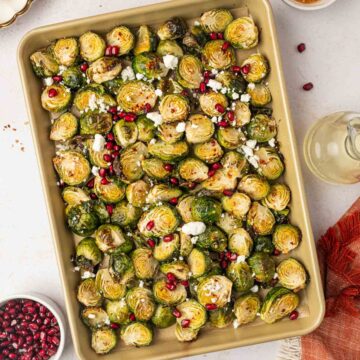
Hot honey Brussels sprouts garnished with pomegranate seeds and goat cheese

These sprouts are roasted until golden and crispy, bringing out their natural sweetness and nutty flavor. They're then drizzled with a homemade hot honey sauce, a delightful blend of honey and crushed red pepper flakes, which adds a perfect balance of heat and sweetness. The dish is topped with creamy crumbled goat cheese for richness and tang, and pomegranate seeds for a pop of color and a burst of juicy freshness. It's a crowd-pleasing side dish similar to shaved brussels sprouts salad that's perfect for holidays, dinner parties, or a flavorful weeknight meal!

Complement the spicy sweetness of the Brussels sprouts with a simple herb-seasoned chicken, such as lemon pepper chicken thighs, oven baked shrimp skewers or Blackened salmon bites are perfect for pairing with this flavorful side dish! For a comforting meal, serve it alongside a light soup like tomato bisque or spicy vegetable soup. Add a creamy element like Parmesan Ranch Dip on the side to balance the heat. You can even round out the meal with a cozy option like a Chicken Salad Melt Sandwich for a satisfying combination of flavors and textures.

[feast_advanced_jump_to]

Why You’ll Love These Hot Honey Brussels Sprouts

These Hot Honey Brussels Sprouts, topped with crumbled goat cheese and vibrant pomegranate seeds, are a true showstopper on any table. But there’s more to love about this amazing side dish:

  • Easy to Make: With simple ingredients and minimal prep, this recipe is quick and hassle-free—perfect for busy weeknights or festive holiday feasts.
  • Versatile Side Dish: Pairs wonderfully with a variety of mains like roasted chicken, grilled salmon, or vegetarian dishes.
  • Nutritious and Delicious: Packed with fiber, vitamins, and antioxidants, these Brussels sprouts are both healthy and flavorful.
  • Crowd-Pleaser: The bold, sweet, and spicy hot honey glaze is sure to win over even the most skeptical eaters.

This recipe combines ease, nutrition, and bold flavors for a side dish you’ll want to make again and again!

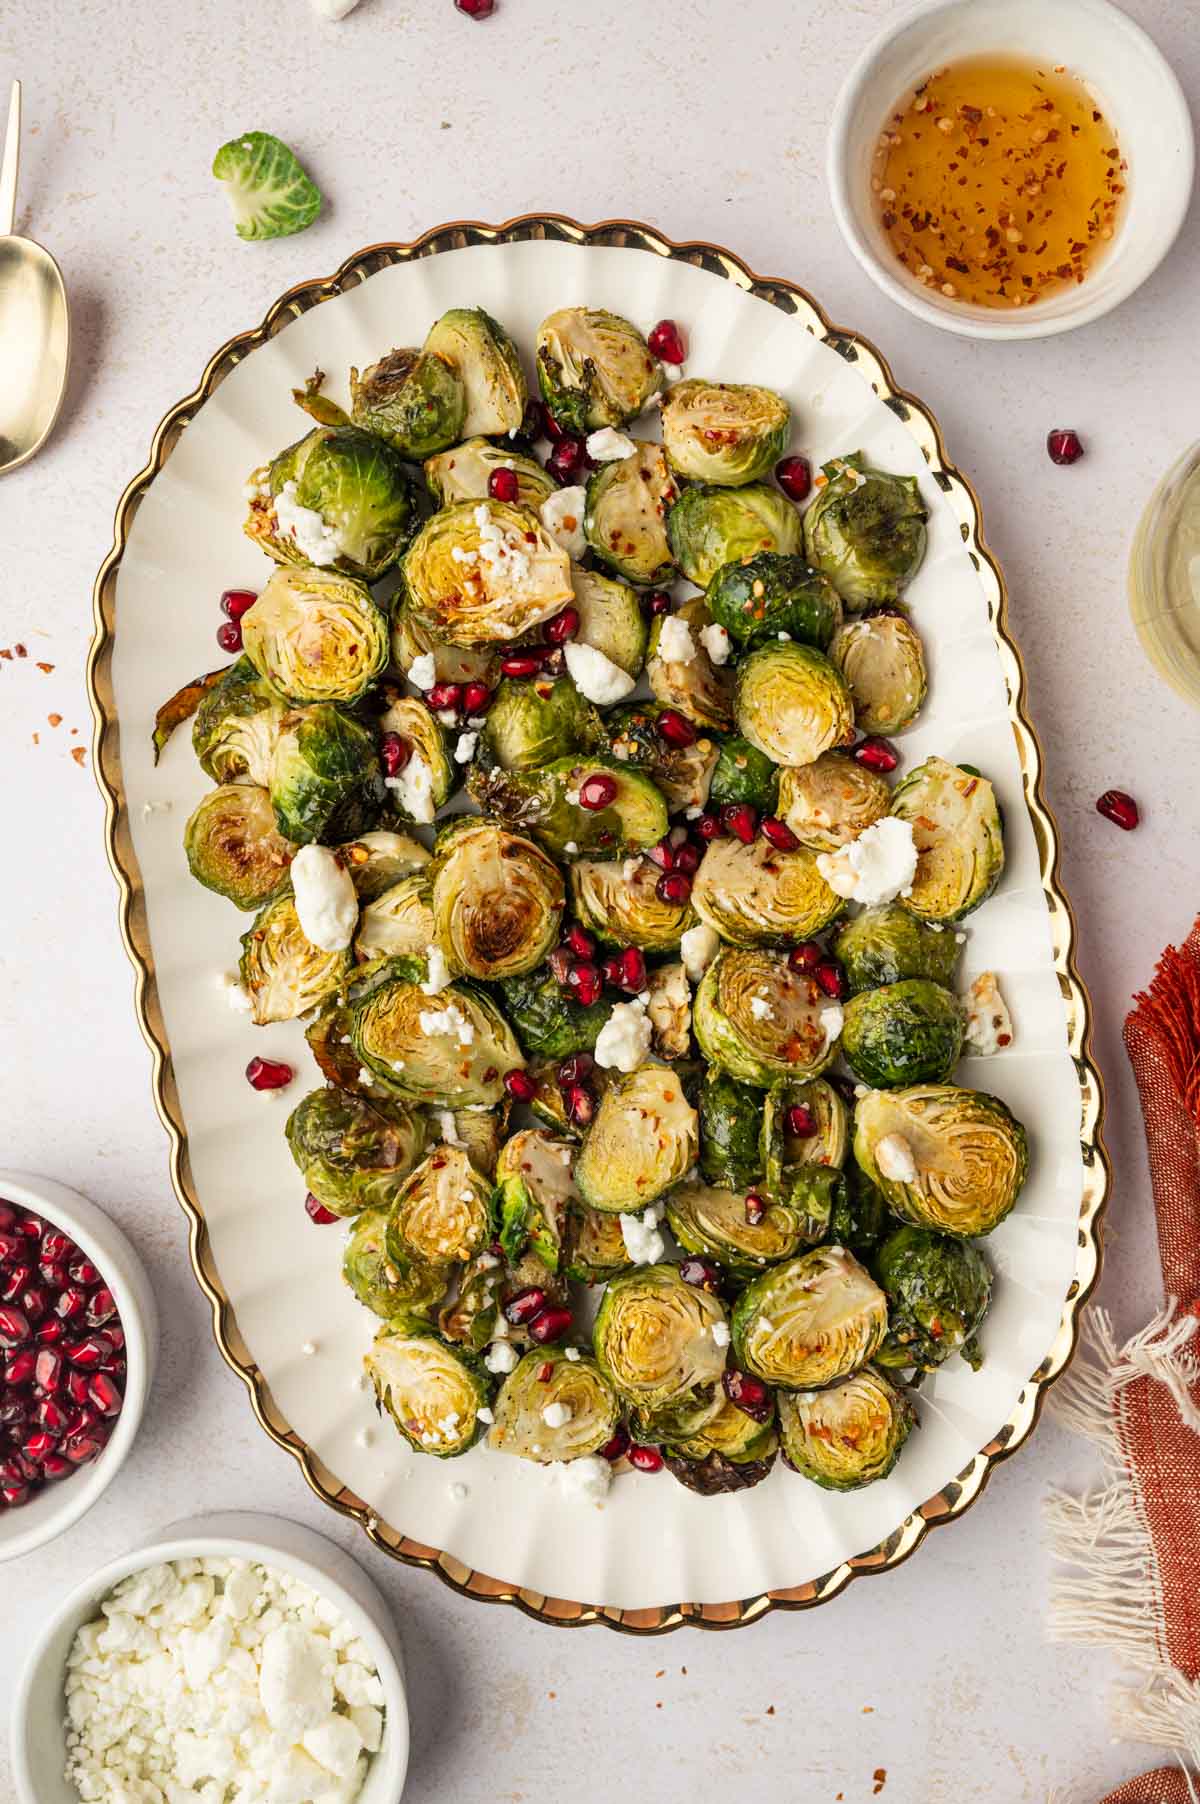
Hot honey Brussels sprouts garnished with pomegranate seeds and goat cheese placed in a white platter with gold rim

Why Brussels Sprouts

Let’s talk facts. Brussel sprouts don’t top many children’s favorite food list. This green mini-cabbage has even made it into a horror movie, “Ernest Scared Stupid,” as Ernest proclaims, “Pretty soon, the kids won't have to worry about eating their Brussel sprouts because the Brussel sprouts will be eating them!” Ernest has been proven wrong. It’s time we looked at the real facts and see how deliciously mouthwatering oven-roasted Brussel sprouts with hot honey can be.

How to Make Hot Honey Sauce

These hot honey Brussel sprouts are a flavor eruption in your mouth with a combination of the heat and the sweet that makes up the hot honey. You can make your own sauce or purchase the Hot Honey at the store.

Making hot honey sauce at home is quick, easy, and adds the perfect sweet and spicy kick to these hot honey Brussels sprouts. All you need is honey and a touch of heat to create a simple glaze that’s packed with flavor.

To make it, gently warm honey in a small saucepan over low heat, then stir in red pepper flakes or hot sauce depending on your spice preference. Let it simmer for a minute or two to infuse the heat, then remove from heat and allow it to cool slightly. The result is a smooth, slightly sticky sauce with a balanced sweet and spicy flavor.

You can easily adjust the heat level, add more chili flakes for extra spice or keep it mild for a more family-friendly version. This homemade hot honey sauce isn’t just perfect for roasted Brussels sprouts, but also works great drizzled over chicken, oven baked shrimp, pizza, or even sandwiches.

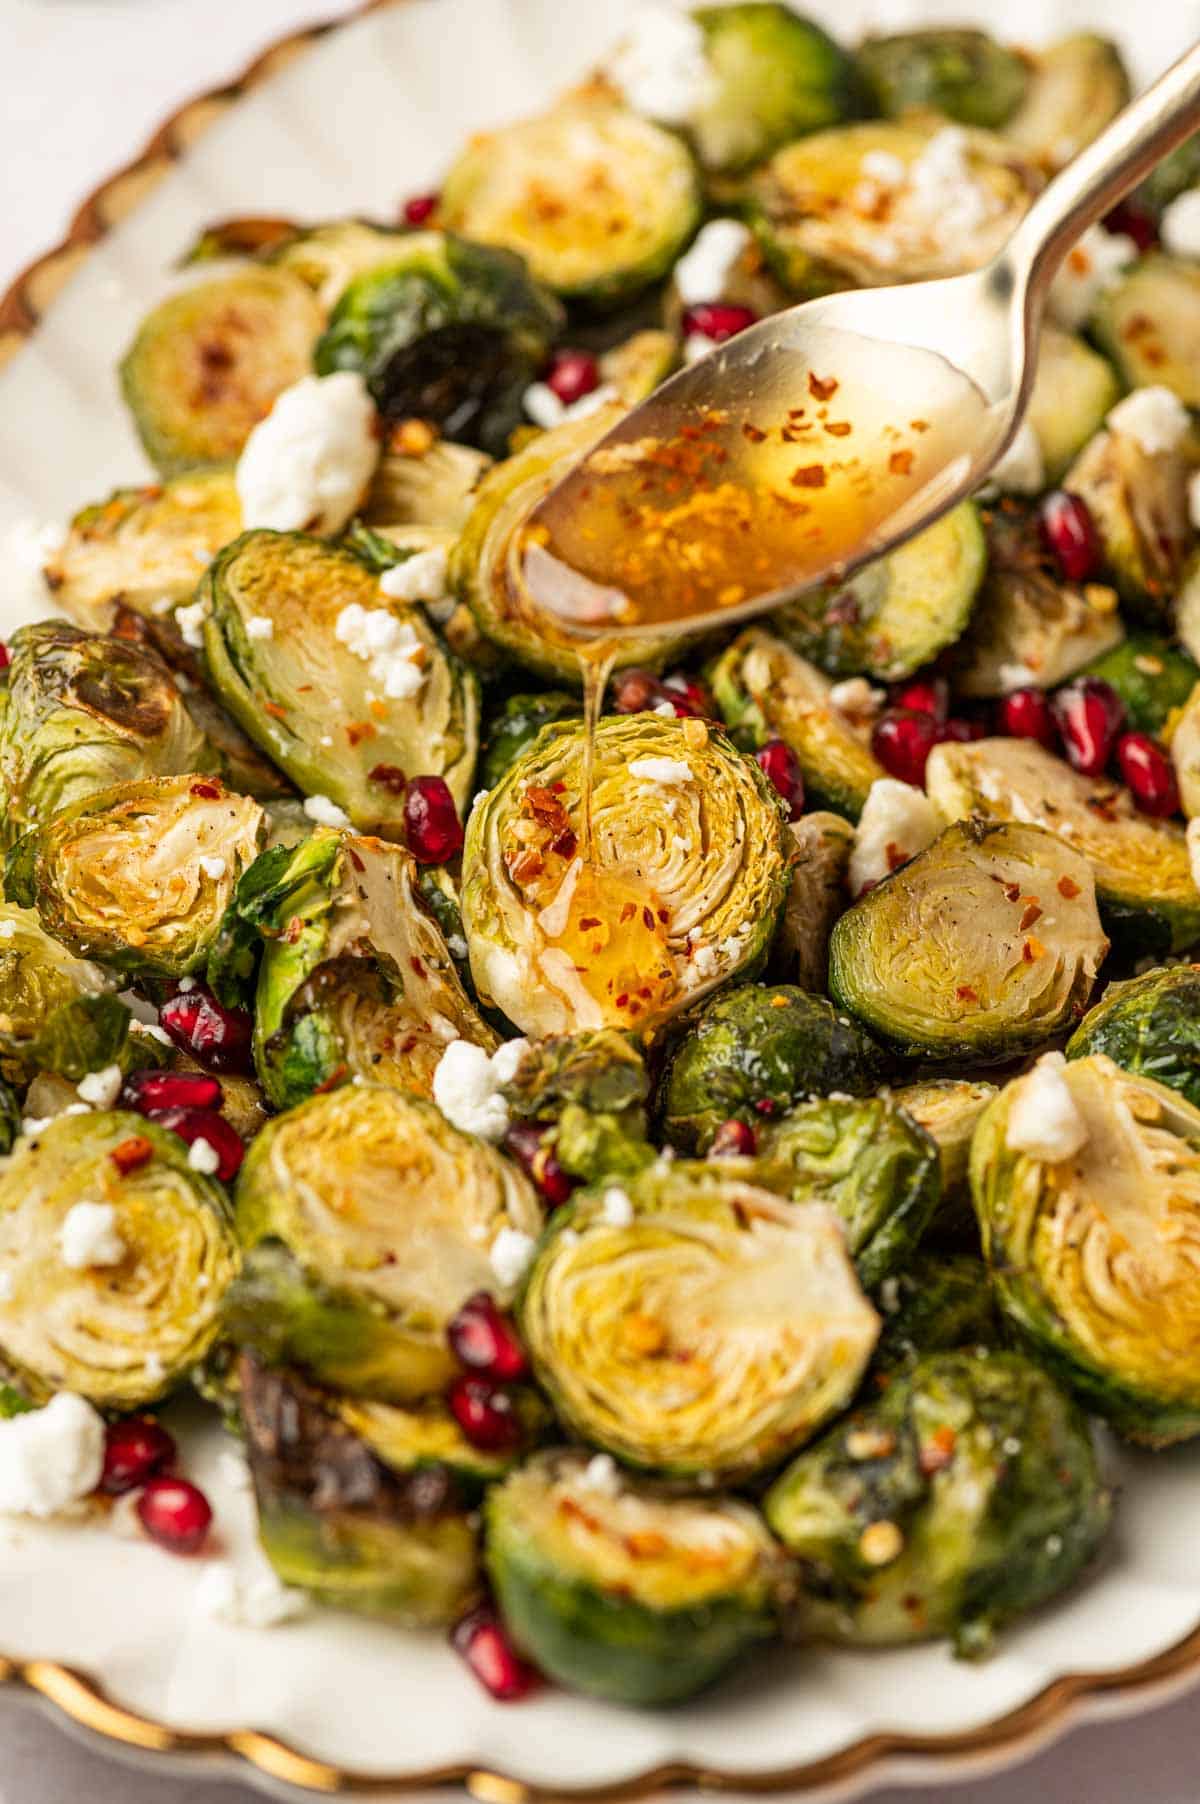
Hot honey drizzle over roasted Brussels sprouts

Hot honey can be used in a variety of ways, such as drizzled over other vegetables (be daring and try it!) and on toast for a bit of a bite. It is healthier than sugar and might help lower blood pressure and cholesterol. 

If you are wondering how to make hot honey, it is remarkably easy. Combine your basic honey with your choice of heat, such as red pepper flakes, then add a light slash of apple cider vinegar. 

What Makes Hot Honey Brussels Sprouts Special

Crisp honey glazed Brussels sprouts are a holiday must-have as they make the perfect side dish. Brussel sprouts are a rare winter vegetable and at the peak of their flavor in December. Serving these tiny cabbages during the holidays is simply excellent timing. It is also good to know that during the season of overeating, Brussel sprouts provide us with Vitamins A and B, manganese, as well as iron, without an abundance of calories. Roasted Brussels sprouts are a powerhouse vegetable. Toss them with goat cheese and they become a showpiece. 

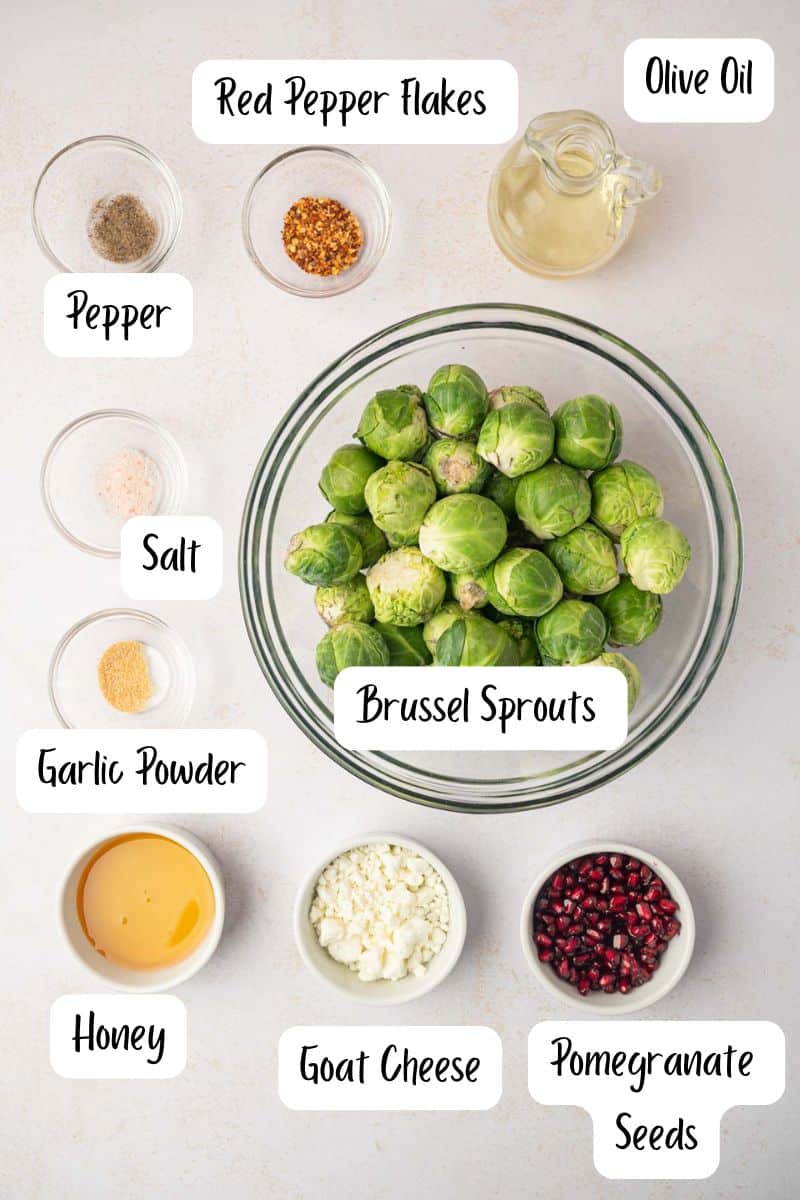
Ingredients You’ll Need

Ingredients laid out for making oven roasted brussels sprouts; a bowl of brussels, pomegranate, honey, red chili flakes, etc.,
  • Brussels sprouts: Take a pound and a half of Brussels sprouts and cut them in half. This recipe is flexible, but please use fresh Brussels sprouts instead of frozen.
  • Olive oil: Olive oil helps the Brussels sprouts crisp up in the oven while adding a rich, smooth flavor. 
  • Honey: Honey provides a natural sweetness and sticky consistency for the glaze, which contrasts beautifully with the roasted Brussels sprouts and complements the heat from the red pepper flakes.
  • Red pepper flakes: Red pepper flakes are a good choice, but so is sriracha or a touch of chili paste. Feel free to experiment.
  • Seaonings: To elevate the dish and flavors you need garlic powder, salt and pepper.
  • Goat Cheese: This healthy side dish recipe is topped with crumbled goat cheese, offering a rich and smooth texture to the dish.
  • Pomegranate seeds: An interesting and healthful addition to these Brussel sprouts. They are full of antioxidants to help with heart problems, lower cholesterol, joint pain, and they contain fiber. A pomegranate Brussel sprout dish can genuinely elevate your health.

See recipe card for quantities.

How to Make Hot Honey Brussels Sprouts (Oven Method)

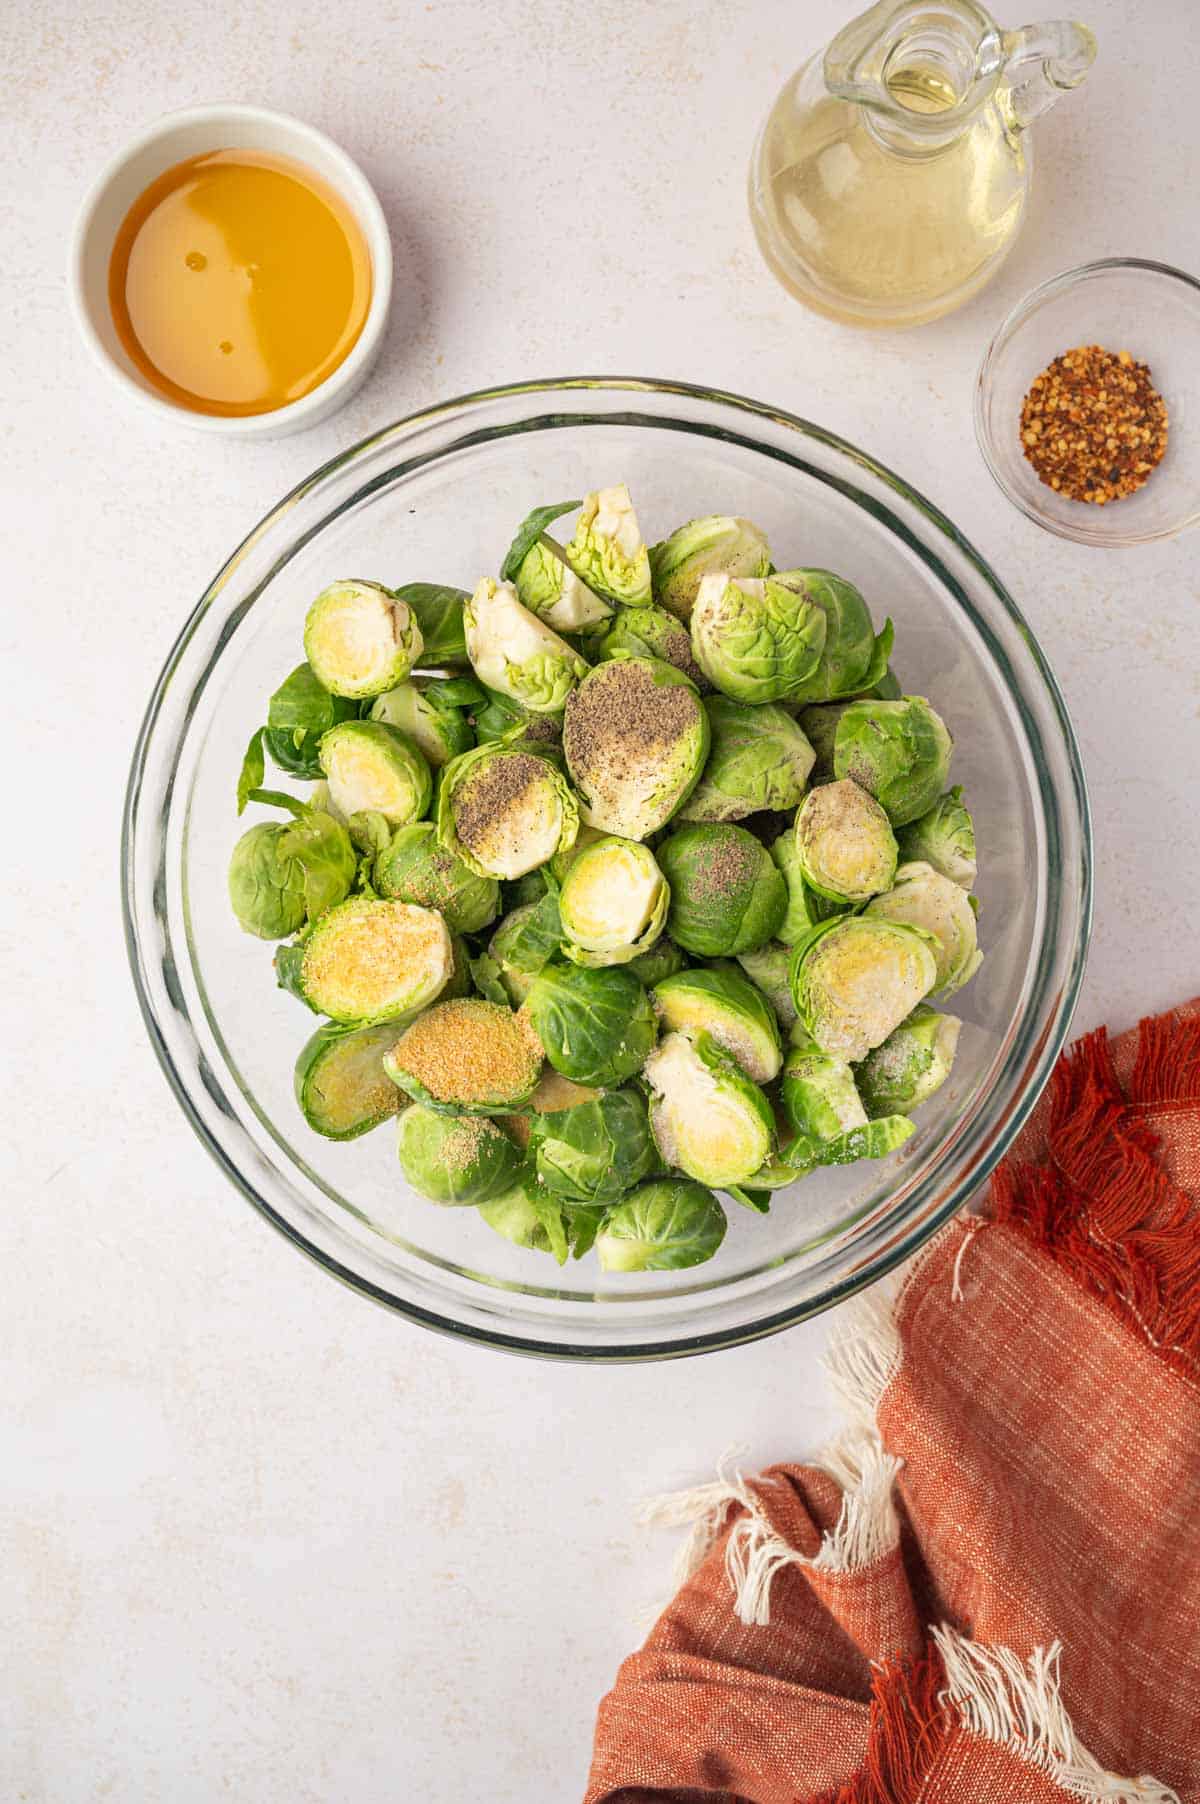
Seasonings on top of the brussels sprouts

Add the Brussel sprouts and the seasonings into a bowl. Mix well.

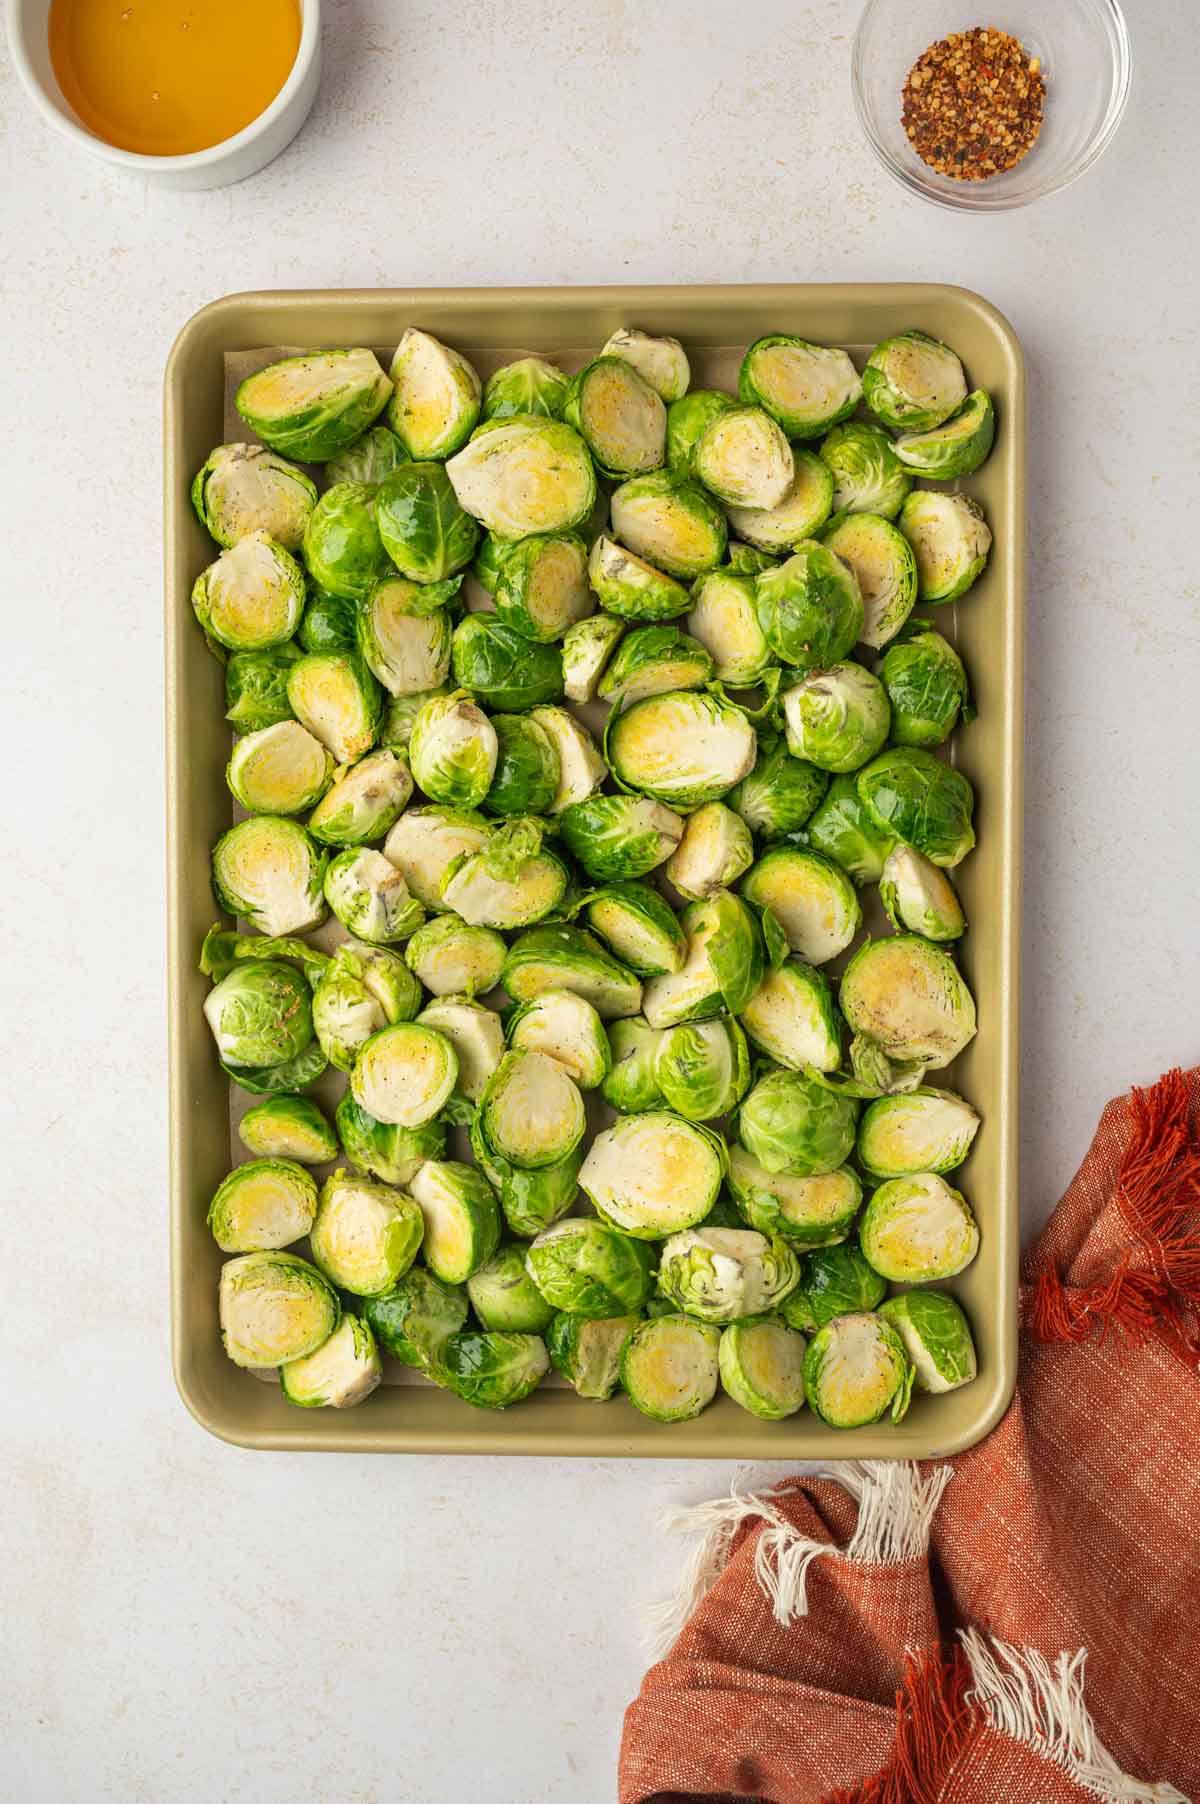
Brussel sprouts spreaded on the baking tray

Spread the seasoned Brussel sprouts in a single layer. Bake.

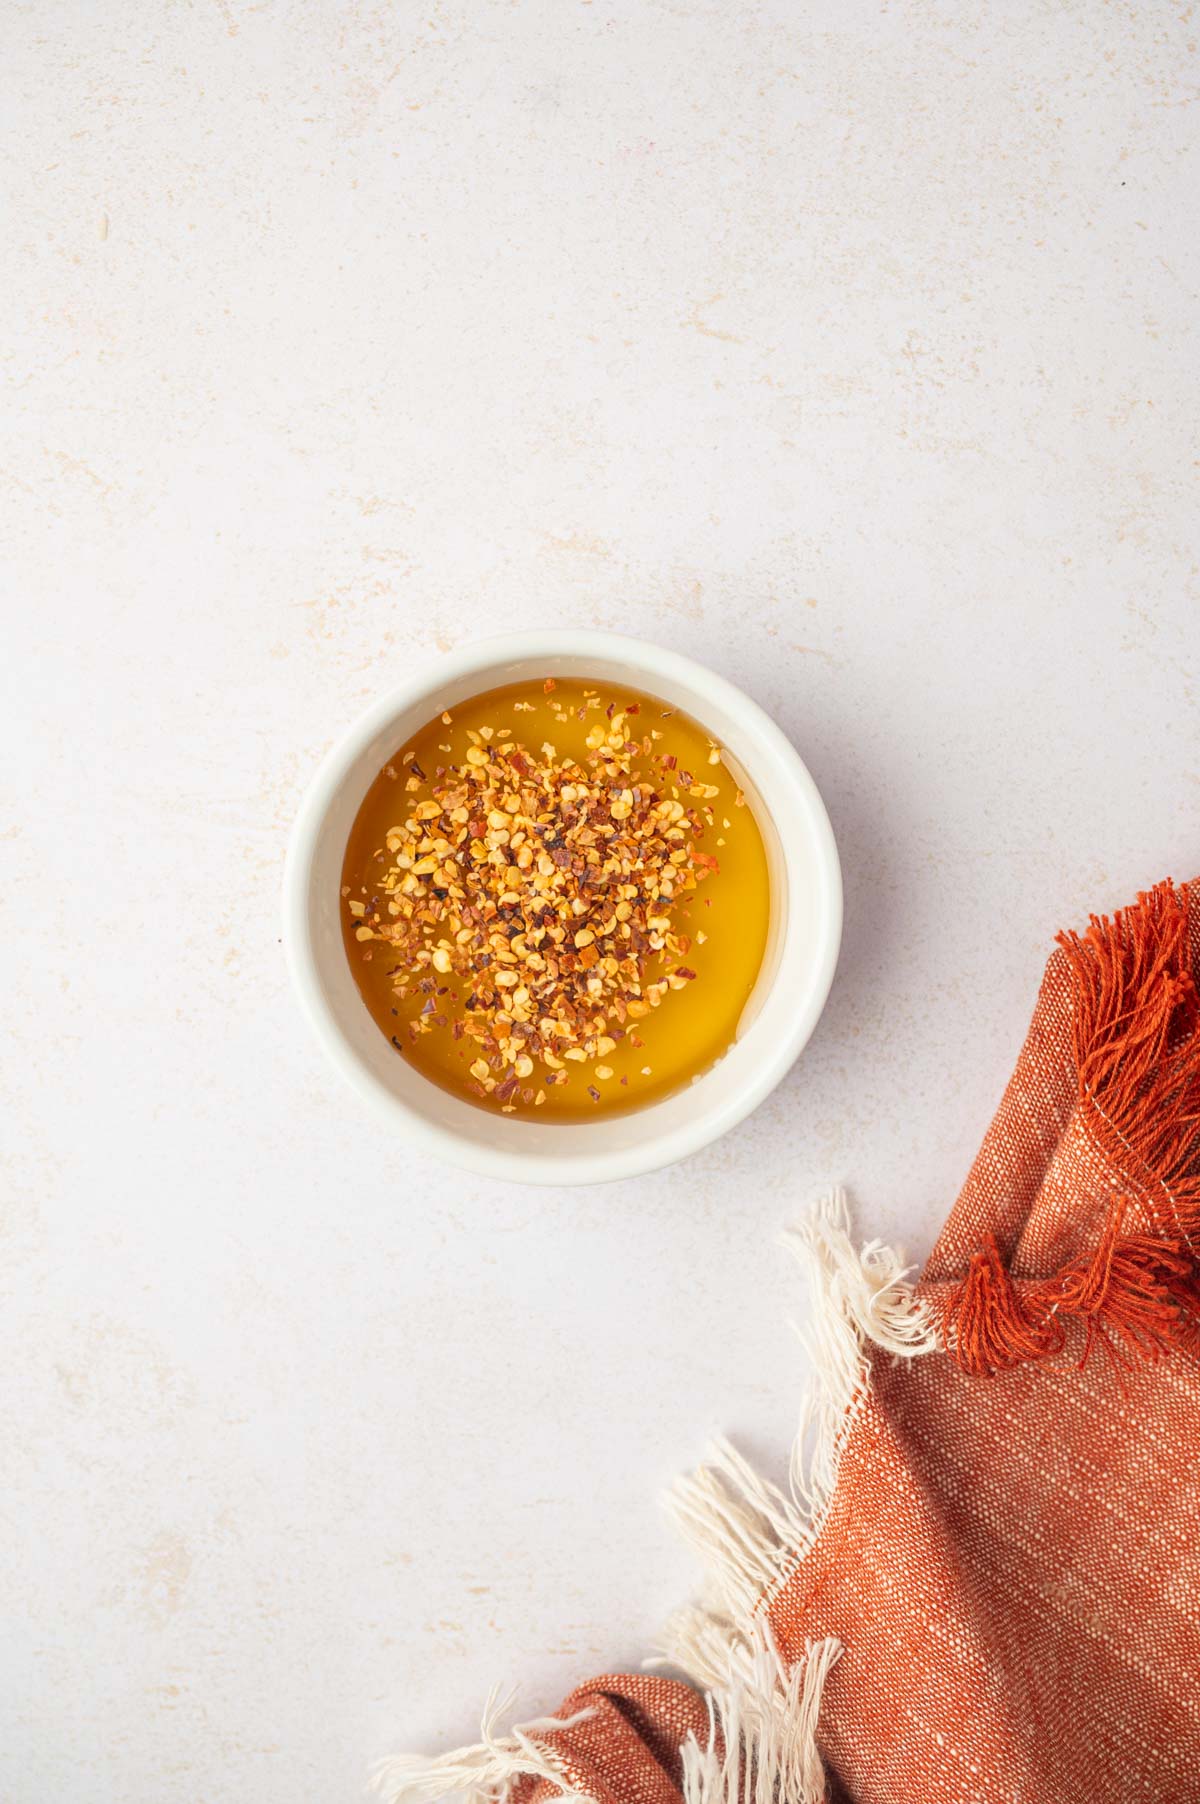
honey and red pepper flakes in a bowl

In a microwave-safe bowl, combine the honey and crushed red pepper flakes. 

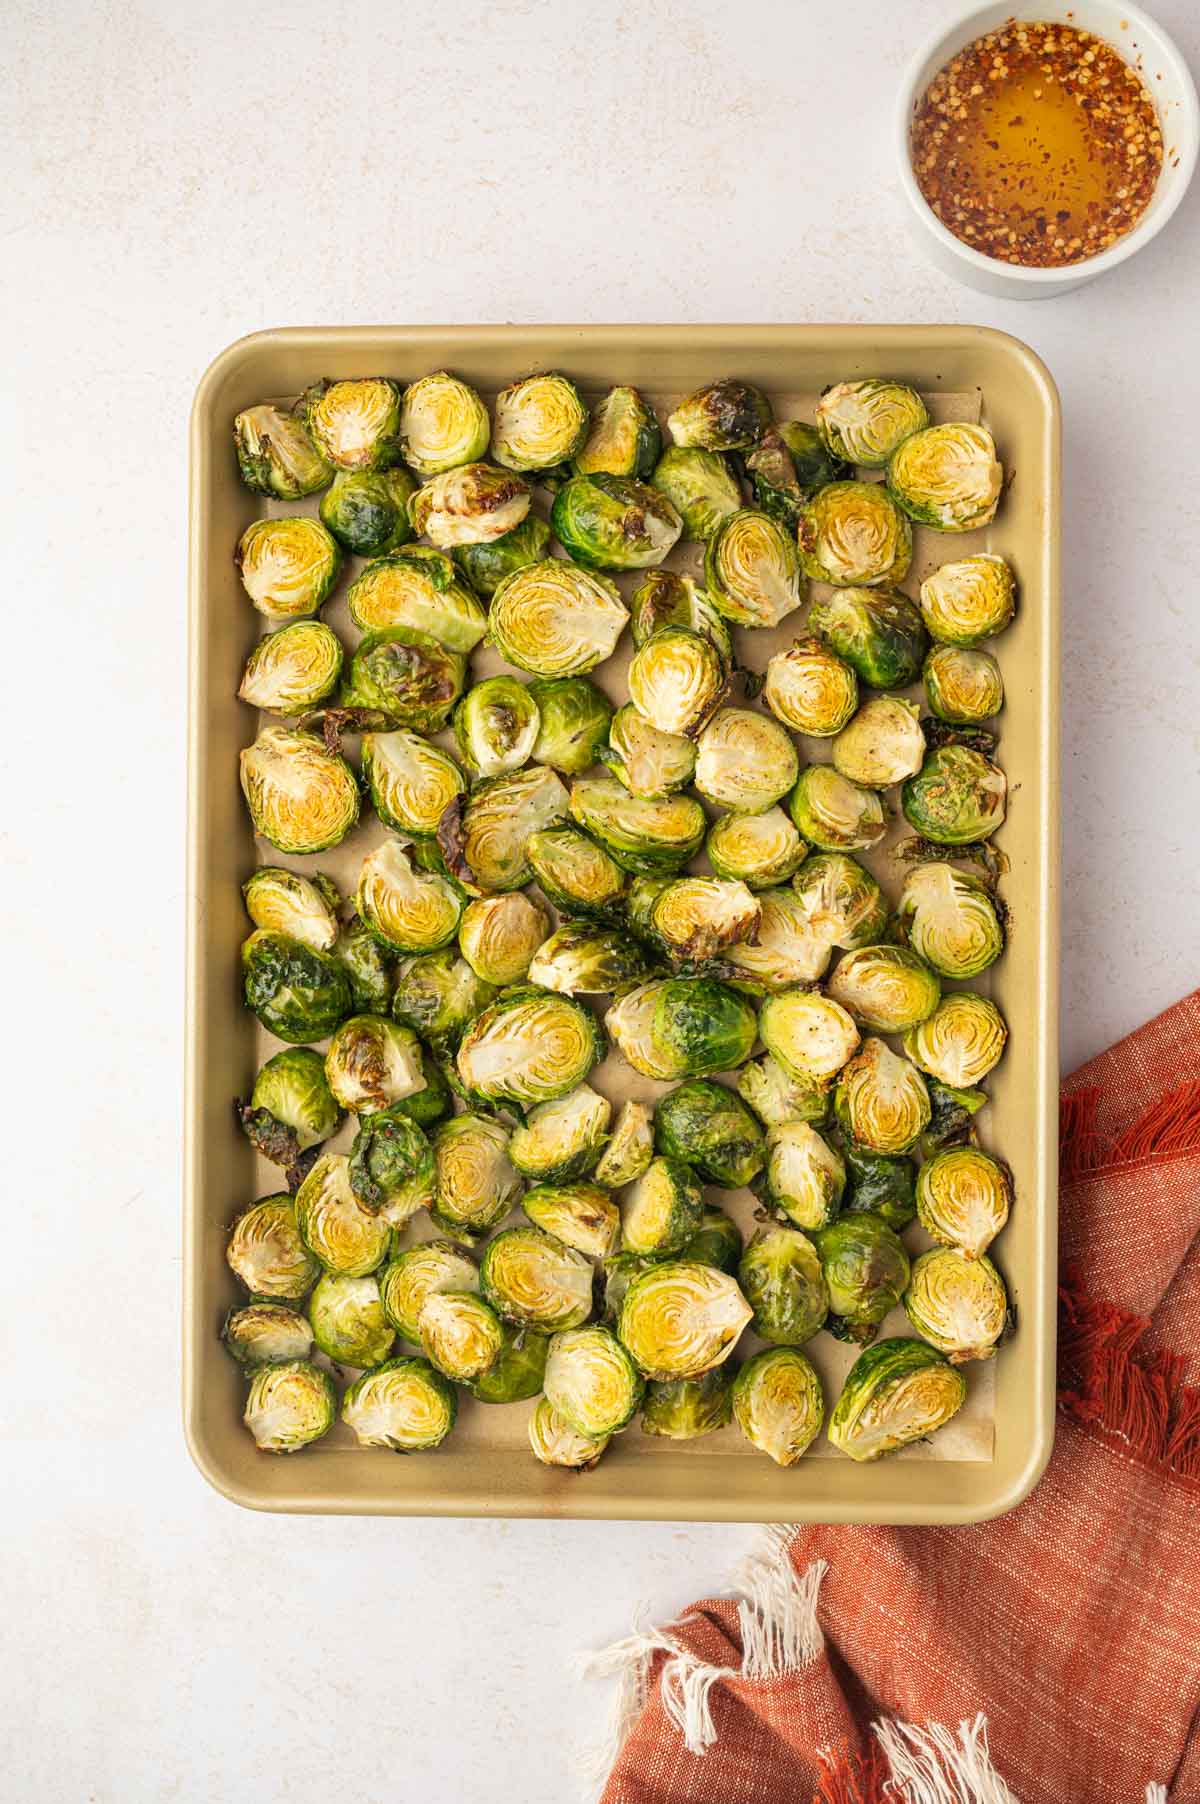
Roasted brussel sprouts

Drizzle the hot honey over the sprouts and toss to coat.

Sprinkle the roasted sprouts with crumbled goat cheese and pomegranate seeds. Serve immediately and enjoy!

A baking tray just out from the oven with crispy roasted brussels sprouts garnished with feta, pomegranate, etc.,

Substitutions

  • Goat Cheese: Swap with feta cheese, blue cheese, or parmesan for a different flavor profile.
  • Honey: Use maple syrup or agave nectar for a vegan-friendly or slightly different sweetness.
  • Pomegranate Seeds: Replace with dried cranberries or chopped candied pecans for a similar burst of flavor and texture.
  • Red Pepper Flakes: Use cayenne pepper or chili powder for heat if red pepper flakes aren’t available.

Variations

  • Crunchy Version: Sprinkle toasted almonds, walnuts, or pine nuts for extra crunch.
  • Bacon Version: Add crispy bacon bits for a smoky, savory twist.
  • Vegan Version: Use vegan cheese or skip the cheese altogether and substitute honey with maple syrup or agave nectar.
  • For Spicy Version: Add a pinch of smoked paprika or cumin to the seasoning mix for added depth.
  • Air Fryer Version: Roast the Brussels sprouts in an air fryer for a quicker and crispier alternative.

Equipment

  • Baking Tray - To roast the Brussels sprouts evenly.
  • Parchment Paper - For easy cleanup and to prevent sticking.
  • Mixing Bowl - To toss the Brussels sprouts with seasonings.
  • Microwave-Safe Bowl - To prepare the hot honey glaze.
  • Measuring Spoons - For precise measurement of ingredients like olive oil, honey, and spices.
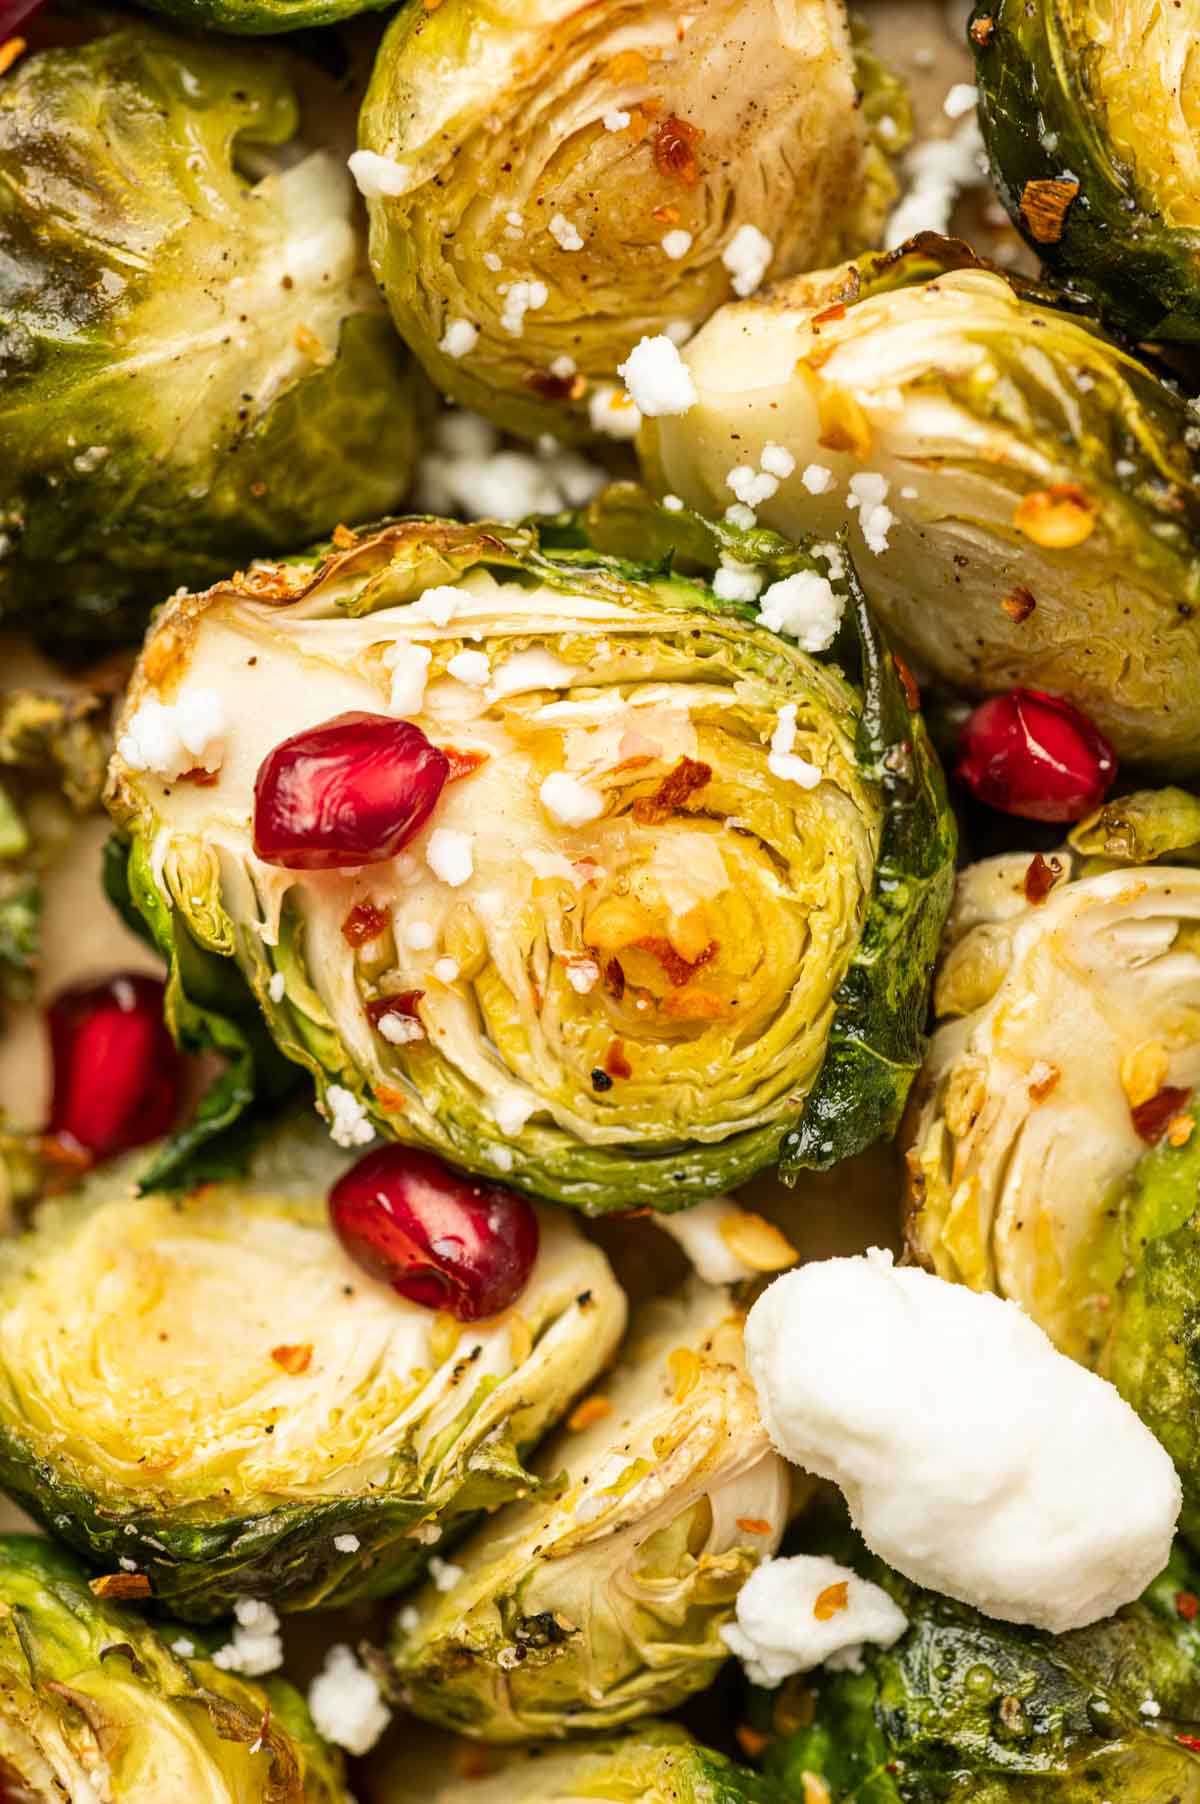
Close up shot of hot honey brussel sprouts

How to Store Hot Honey Brussel Sprouts

Your Hot Honey Brussels Sprouts will keep in the refrigerator for up to four days when stored in an airtight container. This makes them a great option for meal prepping or enjoying leftovers. However, freezing the sprouts is not recommended, as the freezing process may cause the Brussels sprouts to become mushy upon reheating, losing their crisp texture.

For the best results when reheating, place the leftover Brussels sprouts in a baking dish and cover them loosely with foil. Bake at 350°F (175°C) for about 10 minutes, or until they are heated through. If you want to restore some of the crispiness, remove the foil during the last 3 minutes of reheating. Alternatively, you can reheat them in an air fryer for a few minutes at 375°F (190°C) for a crispier finish.

Tips for Crispy Roasted Brussels Sprouts

  • Roast at 425°F to help the Brussels sprouts caramelize and crisp up instead of steaming.
  • Spread them in a single layer with space between each piece. Overcrowding traps moisture and prevents crispiness.
  • Place the flat, cut side of the Brussels sprouts directly on the pan, this helps create that golden, crispy surface.
  • After washing, make sure the Brussels sprouts are completely dry. Excess moisture leads to soggy results.
  • A light coating of olive oil helps them roast evenly and develop crispy edges.
  • Toss or flip the Brussels sprouts halfway through roasting for even browning.

What to Serve with Hot Honey Brussels Sprouts

These hot honey Brussels sprouts are the perfect balance of sweet, spicy, and crispy, making them a versatile side dish that pairs well with a variety of meals.

For a quick and flavorful meal, serve them alongside Oven Baked Shrimp Skewers or Blackened Salmon Bites—the bold, savory flavors pair perfectly with the sweet heat of the Brussels sprouts. They also make a great side for a cozy lunch with a Chicken Salad Melt Sandwich or even a veggie-forward option like a Hummus Bagel Veggie Sandwich.

If you’re building a full spread, don’t forget to add a creamy element like Parmesan Ranch Dip on the side—it balances the spice and adds a rich, tangy contrast.

Air Fryer Hot Honey Brussels Sprouts (Optional Method)

Follow the same preparation steps, but instead of using a baking tray, toss the seasoned Brussels sprouts into the air fryer. Air fry at 375°F (190°C) for 12–15 minutes, shaking the basket halfway through for even cooking. Once crispy and golden, drizzle with the hot honey glaze and serve!

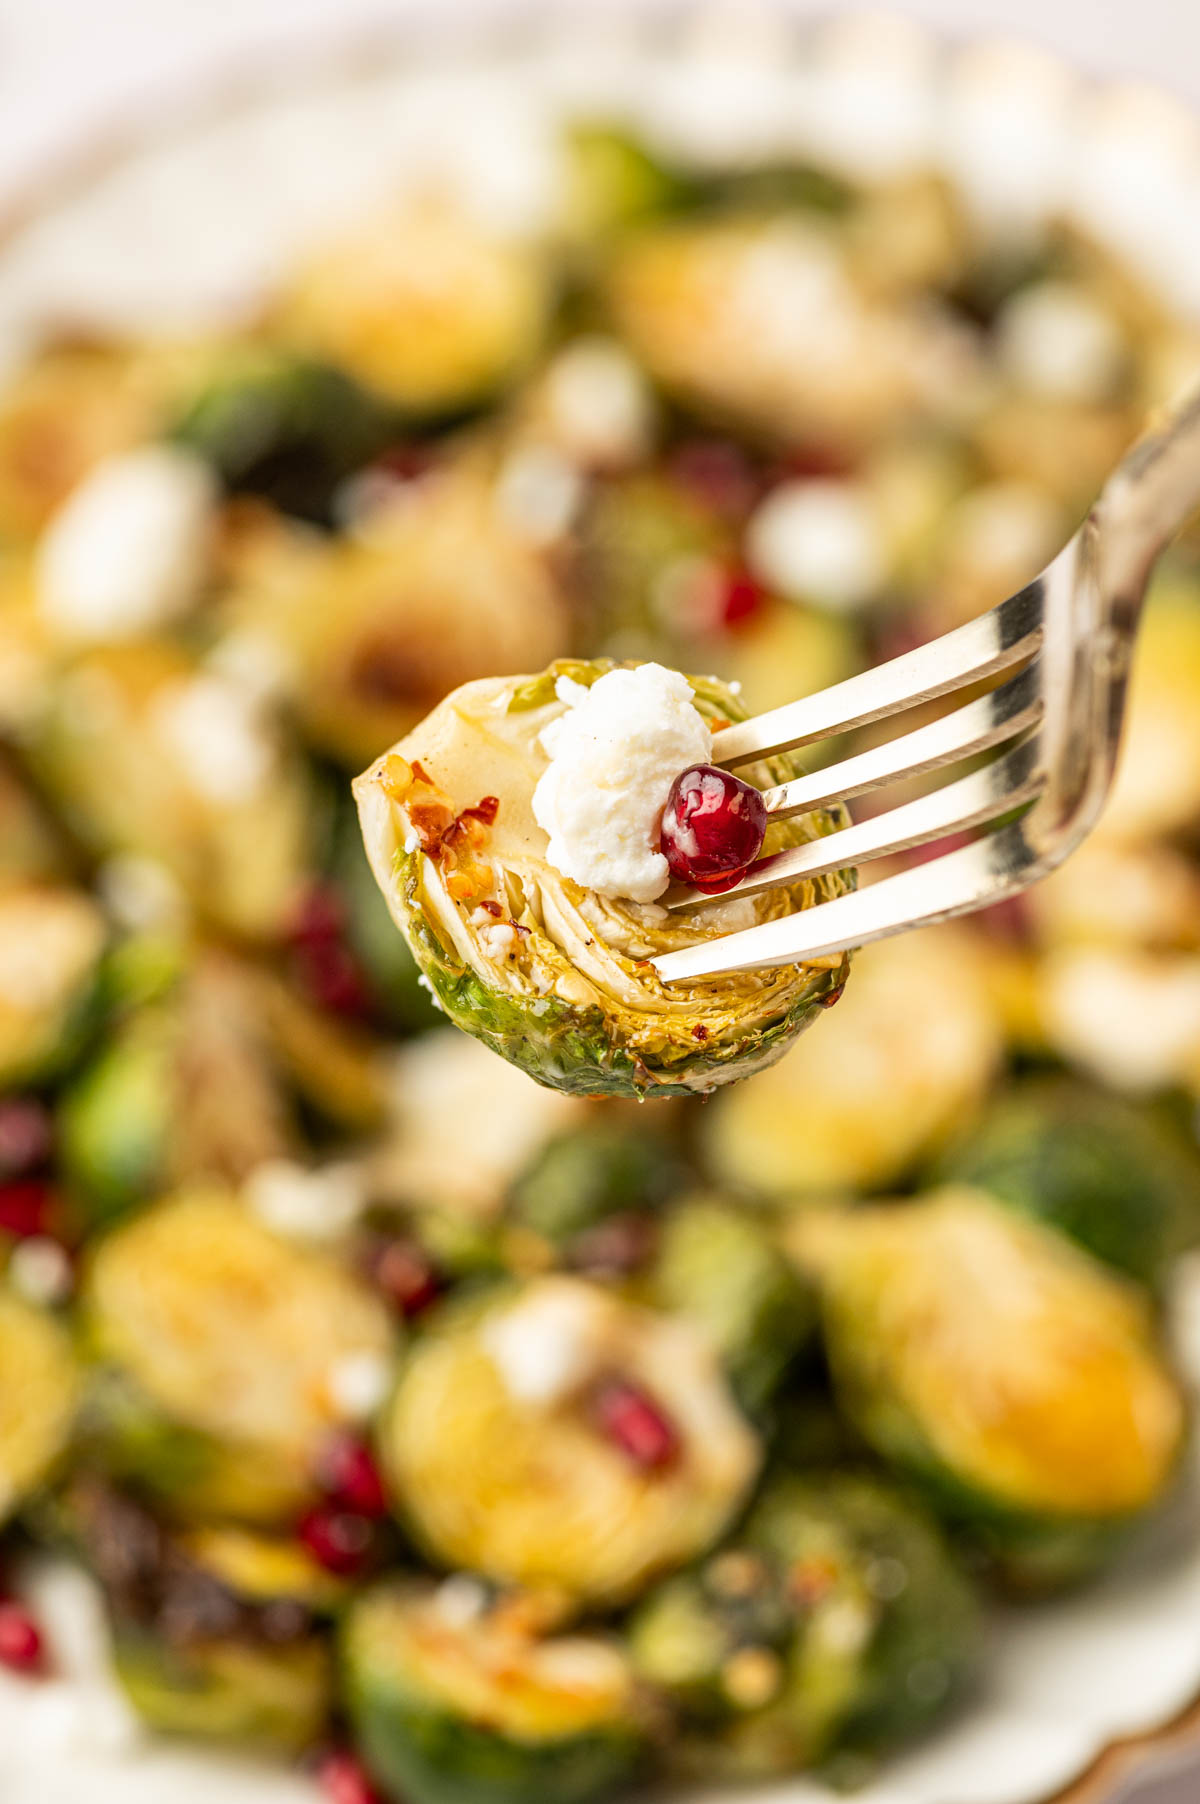
In a fork hot honey brussel sprouts

FAQ

Can I make this Brussel sprouts recipe vegan?

Absolutely! Simply replace honey with maple syrup or agave nectar and skip the goat cheese or use a plant-based alternative.

Can I prepare this dish ahead of time?

Yes! Roast the Brussels sprouts in advance and prepare the hot honey glaze separately. Before serving, reheat the sprouts and drizzle them with the warmed glaze.

Can I use frozen Brussels sprouts?

While fresh Brussels sprouts yield the best results, you can use frozen ones. Just make sure to thaw and pat them dry before roasting to avoid sogginess.

Can I use other vegetables in this recipe?

Yes! Try adding carrots, cauliflower, or sweet potatoes for a colorful veggie mix. Adjust roasting time based on the vegetables you use.

What is hot honey Brussels sprouts?

Hot honey Brussels sprouts are oven-roasted Brussels sprouts tossed in a sweet and spicy glaze made with honey and chili flakes or hot sauce.

How do you make Brussels sprouts crispy in the oven?

To get crispy oven-roasted Brussels sprouts, spread them in a single layer, use enough oil, and roast at high heat (around 425°F) without overcrowding the pan.

Are hot honey Brussels sprouts spicy?

They have a mild to moderate heat, depending on how much chili or hot sauce you use. You can easily adjust the spice level to your taste.

How do I keep Brussels sprouts from getting soggy?

Avoid overcrowding the pan and roast at high heat. Moisture is the enemy of crispiness!

Related

Looking for other recipes like this? Try these:

  • Pumpkin mug cake topped with melted chocolate chips in a white mug, quick fall dessert recipe
    Easy Pumpkin Mug Cake Recipe with chocolate chips
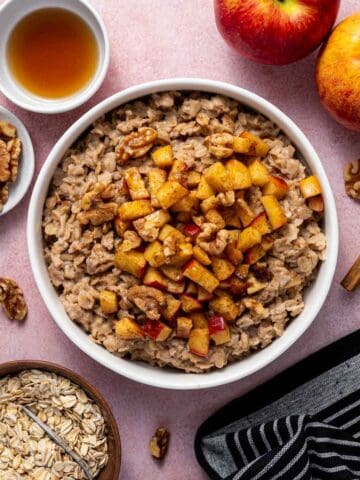
  • Overhead shot of apple cinnamon oatmeal with maple drizzle, walnuts, apples, etc.,
    Apple Cinnamon Oatmeal Recipe (Stovetop, 10 Minutes)
  • Crispy toasted bread sandwich filled with melted cream cheese and diced bell peppers.
    Grilled Cream Cheese Sandwich With Bell Peppers
  • A festive pumpkin-shaped cheese ball coated in cheddar cheese, served on a platter with crackers.
    Pumpkin Cheese Ball Best Appetizer (Pumpkin-Shaped)

Pairing

These are my favorite dishes to serve with Hot Honey Brussels Sprouts:

  • Several Halloween brownies topped with marshmallow ghosts, chocolate drizzle, and black eyes on a rustic marble tray.
    Halloween Brownies (Easy Ghost Brownies)
  • Brownie cake pops with festive drizzle and sprinkles displayed upright with sticks.
    Brownie Cake Pops Recipe (Easy chocolate treat)
  • Close-up of Halloween Rice Krispie Treats decorated with candy eyes and drizzled with orange and black chocolate.
    Halloween Rice Krispie Treats (Easy Homemade Treat)
  • Mini pumpkin-shaped hand pies with a golden crust, arranged on a marble plate.
    Pumpkin Hand Pies with pumpkin cream cheese filling
Hot honey Brussels sprouts in a baking tray

Hot Honey Brussel Sprouts

Abi Guna
Shake things up with Crispy Hot Honey Brussels Sprouts! This sweet, spicy, and savory side dish transforms ordinary roasted Brussels sprouts into an irresistible treat everyone will love. This recipe works both in air fryer and oven!
5 from 11 votes
Print Recipe Pin Recipe
Prep Time 10 minutes mins
Cook Time 20 minutes mins
Total Time 30 minutes mins
Course Side Dish
Cuisine American
Servings 4
Calories 159 kcal

Equipment

  • Baking Tray 
  • Mixing Bowls
  • Measuring Spoons

Ingredients
  

  • 1 ½ lb. fresh Brussel sprouts
  • 2 tablespoons olive oil
  • ½ teaspoon garlic powder
  • ½ teaspoon salt
  • ½ teaspoon ground pepper
  • 3 tablespoons honey
  • 2 teaspoon crushed red pepper flakes
  • ¼ cup crumbled goat cheese
  • ¼ cup pomegranate seeds

Instructions
 

  • Preheat the oven to 425°F. Line a baking tray with parchment paper and set it aside.
  • Cut the sprouts in half and transfer them to a bowl.
  • Add olive oil, garlic powder, salt, and pepper. Mix well until evenly coated.
  • Spread the seasoned Brussels sprouts onto the prepared baking tray in a single layer. Bake for 20–25 minutes, or until they are golden and crispy.
  • In a microwave-safe bowl, combine the honey and crushed red pepper flakes. Microwave for 10 seconds, just until the honey becomes slightly runny and infused with the pepper flakes' flavor.
  • Once the Brussels sprouts are roasted, remove the tray from the oven. Drizzle the hot honey over the sprouts and toss to coat.
  • Sprinkle the roasted sprouts with crumbled goat cheese and pomegranate seeds. Serve immediately and enjoy!

Notes

  1. Roasting times may vary depending on the size of your Brussels sprouts and the oven’s heat, so check for crispy edges. You want them golden and slightly charred for the best texture.
  2. Make sure the hot honey glaze is warmed slightly before drizzling over the Brussels sprouts. This helps it spread evenly and coat them better.
  3. Sprinkle the crumbled goat cheese over the Brussels sprouts right before serving to keep it fresh and creamy. If you add it too early, it may melt too much and lose its texture.
Keyword Brussel sprouts, roasted, side dish, vegetables

If you try this recipe, please leave a STAR rating in the comment section below! Your feedback helps a small blogger like me stay motivated in creating content for my readers. Also, feel free to follow me at Food Exit on Instagram, TikTok, and Pinterest for the latest recipe updates!

Pesto Ricotta Pasta (Creamy, Easy 20-Minute Dinner)

November 26, 2024 by Abi Guna 11 Comments

Weeknights call for simplicity, and this Pesto Ricotta Pasta is the ultimate creamy, dreamy comfort food! With velvety ricotta, homemade basil pesto, and perfectly al dente pasta, this dish is an irresistible combination of rich flavors and satisfying textures. Whether you're whipping up a quick weeknight dinner or impressing guests, this pasta dish is sure to become your new favorite! 

Easy Pesto Ricotta Pasta in a white skillet

If you’ve never tried pesto with ricotta, now’s the time to explore this delicious twist on a classic recipe - it’s a crowd-pleaser for any occasion! For the best results, I highly recommend using my homemade Pesto sauce without pine nuts, which is rich, flavorful, and budget-friendly if you want to know substitute for pine nuts in pesto I have updated the detailed substitutions as well. Plus, you can use the leftover pesto to make this quick Pesto Butter Salmon recipe for an easy and delicious dinner on another day! Serve it alongside Oven Baked Shrimp Skewers.

Are you a fan of quick, 30-minute pasta dinners like my family? Then you should definitely try these easy and delicious pasta recipes: Ground Chicken Spaghetti and Shrimp Scampi Fettuccine—two of my most popular dishes! You can also add a simple veggie side like Sautéed Broccoletti or Hot Honey Brussels Sprouts to round out a complete and satisfying dinner.

[feast_advanced_jump_to]


Finding the perfect pesto to pasta ratio is key to achieving a flavorful and balanced dish. For a creamy twist, try a pasta sauce with ricotta, blending the richness of ricotta cheese with the bold flavors of pesto. This combination creates a velvety texture that coats the pasta beautifully. Whether you're making pesto pasta with ricotta for a quick weeknight dinner or a special occasion, this dish is sure to impress with its simple yet elevated flavor profile!

If you're following a vegan diet, don’t worry—this dish is easily adaptable! Simply swap the ricotta for your favorite vegan Velvet rsion, and you’ll still get that creamy, dreamy texture. Whether you’re feeding a family or just treating yourself, this recipe is a perfect balance of ease, nutrition, and indulgence. Serve it alongside a fresh green salad or some crusty bread, and you’ve got yourself a winner.

Pesto and Ricotta pasta in a white bowl

Why You’ll Love This Pesto Ricotta Pasta

  • Effortless : This dish is the epitome of comfort food, combining creamy ricotta with fresh, herbaceous pesto for a luxurious yet simple meal.
  • Quick and Easy: With a no-cook sauce that can be prepared ahead of time, this recipe comes together in under 30 minutes, perfect for busy weeknights.
  • Versatile: Use any type of pasta you love, including gluten-free options, making it adaptable to various dietary needs.
  • One-Pot Convenience: Minimal cleanup is required, as everything comes together in one pot for hassle-free cooking.
  • Perfect for Any Occasion: Whether it’s a quick family dinner or a dish to impress guests, this recipe is guaranteed to be a crowd-pleaser!
Pesto and ricotta pasta in a white bowl and a skillet

What to Serve with Pesto Ricotta Pasta

  • In Shallow Bowls: Serve the pasta in shallow bowls for easy eating. Pair with warm, crusty bread or garlic bread to complete the meal.
  • With a Crisp Salad: Balance the richness of the pasta by serving it alongside a fresh salad. Consider a simple kale or mixed greens salad with a light lemon vinaigrette. Speaking of salads, have you tried my Kale Quinoa Salad?
  • Alongside Protein: For a more filling meal, serve smaller portions of the pasta alongside a protein, such as grilled chicken or chicken parmesan or baked salmon. By the way, have you tried my Baked Lemon Pepper Chicken recipe?
  • With Soup: For a cozy, comforting meal, pair the pasta with a light soup, like my Spicy Vegetable Soup.

Ingredients You’ll Need

My favorite part of this recipe is that it requires just 5 main ingredients and 2 optional ones. I love how hassle-free it is to make this insanely delicious Ricotta and Pesto Pasta!

Pesto Ricotta Pasta Ingredients
  • Pasta, of course, is your prime ingredient. This recipe calls for penne, but you can be flexible. Spaghetti works as well.
  • Pesto – this sauce is made with basil, garlic, parmesan cheese, quality olive oil, with a bit of lemon juice for a touch of acidity. My homemade sauce uses walnuts instead of the more standard pine nuts for a heartier flavor. It truly elevates this pesto ricotta pasta into something exceptional. 
  • Creamy Ricotta cheese that imbues this pesto ricotta pasta with incredible richness. 
  • Garlic powder and red pepper flakes provide a bit of a welcome kick to counter the creaminess.
  • Parmesan cheese helps to enhance the sharp flavor of the dish

See recipe card for quantities.

How to make Pasta with Ricotta and Pesto

Start by bringing a large pot of salted water to a boil—this is key to enhancing the flavor of the pasta. Add the penne and cook according to the package instructions until it's perfectly al dente—firm to the bite yet tender. Before draining, carefully reserve about ¾ cup of the pasta cooking water. This starchy water will play a crucial role in achieving a silky, cohesive sauce.

In a large skillet set over low heat, add the pesto sauce. Gently warm it for about a minute, stirring to prevent it from sticking or losing its vibrant flavor. This step intensifies the aroma of the herbs and garlic in the pesto.

Pesto sauce in a spoon

Add the ricotta cheese to the skillet and mix until the pesto and ricotta come together in a smooth, luscious sauce. The ricotta adds a rich, creamy texture that complements the boldness of the pesto.

Gradually stir in the reserved pasta cooking water, one splash at a time. This not only loosens the sauce but also creates a silky emulsion that clings beautifully to the pasta. Adjust the consistency to your preference—whether you like it thicker or slightly more fluid.

Stir in the seasonings—salt, garlic powder, crushed red pepper flakes, lemon zest, and lemon juice. These ingredients add layers of flavor, from zesty brightness to a subtle, spicy kick. Be sure to taste and tweak the seasoning as needed.

Add the cooked penne directly to the skillet with the sauce. Toss gently but thoroughly, ensuring each piece of pasta is coated in the creamy, flavorful sauce.

Divide the pasta into serving bowls or plates. Top with a generous sprinkle of shredded Parmesan cheese for extra umami, and garnish with fresh basil leaves for a pop of color and freshness. Serve immediately while the pasta is hot, so you can fully enjoy the dish's vibrant flavors and creamy textures.

How to Make Pesto Ricotta Pasta (Step-by-Step Instructions)

Boiled pasta to make pesto ricotta pasta

Cook the pasta according to the package instructions.

Ricotta cheese and Pesto in a white skillet

Add Pesto sauce and Ricotta cheese, mix it and heat it up.

Pesto Ricotta Sauce in a white skillet

Stir in the seasonings, pasta water and lemon juice.

Pasta added to the pesto ricotta sauce

Add the pasta to the sauce and toss well.

Top your creamy ricotta pasta with parmesan cheese and fresh basil. The pesto ricotta pasta goes with virtually everything but is especially nice with a refreshing salad. Sit back and enjoy collecting compliments.

Hint: If possible, grate your parmesan cheese fresh from a fresh block of parmesan instead of using pre-grated. You’ll taste the difference.

In a fork pesto ricotta pasta

Substitutions

  • Pesto Sauce: Instead of homemade pesto you can use store-bought pesto if short on time. And also you can swap basil pesto with spinach, arugula, or kale pesto for a unique twist.
  • Ricotta Cheese: Replace with mascarpone or cream cheese for a richer, creamier texture. Use vegan ricotta or blended tofu for a plant-based alternative.
  • Pasta: Any pasta works—try spaghetti, fusilli, or bowties for variety. For a gluten-free version, use your favorite gluten-free pasta.
  • Parmesan Cheese: Swap with Pecorino Romano for a sharper flavor. Use nutritional yeast or vegan Parmesan for a dairy-free option.

Variations

  • Chicken Pesto Ricotta Pasta - Toss in grilled chicken for a heartier meal.
  • Vegetable Pesto and Ricotta Pasta - Mix in roasted cherry tomatoes, zucchini, or bell peppers for added color and flavor. Stir in spinach, kale, or arugula for a leafy green twist.
  • Spicy - Add a pinch of cayenne or an extra dash of crushed red pepper flakes for a spicier kick.
  • Chessy - Add shredded mozzarella or burrata for an extra creamy, cheesy layer.

Equipment

Large Pot: For boiling the pasta and reserving the starchy cooking water.

Colander: To drain the cooked pasta while keeping some pasta water aside.

Large Skillet or Pan: For preparing and mixing the pesto ricotta sauce with the pasta.

Measuring Cups and Spoons: To measure ingredients like ricotta, pesto, and pasta water accurately.

Peto pasta with ricotta in a white bowl

Storing Pesto Ricotta Pasta

The pasta will keep in the refrigerator for up to three days when placed in a sealed container. If reheating the dish on the stovetop, add a bit of water to help it retain moisture.

You can freeze your pesto ricotta pasta but be aware that the texture is likely to change. Due to ricotta’s moisture content, the moisture turns to ice, which changes the smoothness of the ricotta, and it will become drier and crumbly. Store the pesto ricotta sauce in a freezer-safe container for up to 2 months. Thaw in the refrigerator and reheat before tossing with fresh pasta.

Tips for Creamy Pesto Ricotta Pasta

  1. Reserving pasta water is important for the sauce. The starch in the water thickens the sauce to elevate the creaminess.
  2. Be sure to add salt to your water when preparing the pasta.
  3. Don’t disregard the lemon zest. It adds a lot to the dish. 
  4. Don't overcook the pasta : Overcooking can make it mushy

FAQ

Can I make the sauce ahead of time?

Yes! The pesto ricotta sauce can be prepared in advance and stored in an airtight container in the refrigerator for up to 3 days. Just reheat gently and thin with pasta water when ready to use.

What type of pasta works best for this recipe?

While penne is a classic choice, you can use any pasta, such as spaghetti, fettuccine, penne, fusilli, rigatoni, or even gluten-free varieties. Choose a shape that holds the sauce well.

Can I make this dish vegan?

Absolutely! Substitute ricotta with vegan ricotta or blended tofu, use a dairy-free pesto, and replace Parmesan with nutritional yeast or vegan Parmesan.

What if I forget to save pasta water?

You can use warm vegetable or chicken broth as a substitute, though pasta water is ideal for its starchiness.

What is pesto ricotta pasta?

Pesto ricotta pasta is a creamy pasta dish made by combining basil pesto with ricotta cheese to create a rich, smooth sauce that coats the pasta perfectly.

How do you make pesto ricotta pasta creamy?

The creaminess comes from mixing ricotta cheese with pesto. You can also add a splash of pasta water to create a silky, smooth sauce.

Can I use store-bought pesto for this recipe?

Yes! Store-bought pesto works well for pesto ricotta pasta, but homemade pesto will give a fresher and more vibrant flavor.

Is pesto ricotta pasta healthy?

It can be a balanced meal when made with fresh ingredients and portioned properly. You can also use whole wheat pasta or add vegetables for extra nutrition.

How do you store and reheat pesto ricotta pasta?

Store leftovers in an airtight container in the refrigerator for up to 3 days. Reheat gently with a splash of water or milk to loosen the sauce.

Related

Looking for other recipes like this? Try these:

  • Homemade apple pie filling with cinnamon and brown sugar in a bowl.
    Homemade apple pie filling with brown sugar recipe
  • Flaky and crispy apple turnovers using storebought puff pastry.
    Puff pastry apple turnovers with apple pie filling
  • Overhead shot of pumpkin pecan waffles topped with maple syrup and pecans.
    Pumpkin Pecan Waffles (Homemade waffle recipe)
  • Freshly made apple cinnamon waffles with maple syrup drizzle.
    Apple Cinnamon Waffles (Easy Homemade Waffle Recipe)

Pairing

These are my favorite dishes to serve with Pesto Ricotta Pasta:

  • Sautéed broccoletti with garlic in a white cast iron skillet
    Sautéed Broccoletti (How to Cook Broccolini in 10 Minutes)
  • Overhead shot of homemade blackberry oatmeal cookies with fresh berries
    Blackberry Oatmeal Cookies recipe with fresh berries
  • Easy roasted sweet peppers on a platter garnished with parsley in a white plate.
    Roasted Mini Peppers with Balsamic and Garlic (Oven-Baked)
  • Overhead view of creamy scrambled eggs with red chili and chives garnish.
    Chili Scrambled Eggs Recipe (quick, easy & spicy)
Ricotta Pesto Pasta in a white cast iron skillet

Pesto Ricotta Pasta

Abi Guna
Weeknights call for simplicity, and this Pesto and Ricotta Pasta delivers on all fronts. It’s a no-fuss recipe that packs a punch with bold, complex flavors and a generous helping of protein to keep you satisfied.
5 from 5 votes
Print Recipe Pin Recipe
Prep Time 5 minutes mins
Cook Time 15 minutes mins
Total Time 20 minutes mins
Course Main Course
Cuisine American, Italian
Servings 4
Calories 492 kcal

Equipment

  • Large Pot
  • Colander
  • Large Skillet
  • Measuring cups and spoons

Ingredients
  

  • 8 ounces dry penne pasta
  • ½ cup pesto sauce homemade without pine nuts
  • ½ cup full-fat ricotta cheese
  • ¾ cup pasta cooking water
  • ½ teaspoon salt
  • ½ teaspoon garlic powder
  • ½ teaspoon crushed red pepper flakes
  • 1 teaspoon fresh lemon zest
  • 1 tablespoon fresh lemon juice
  • ¼ cup shredded Parmesan cheese for serving
  • Fresh basil for garnish

Instructions
 

  • Bring a large pot of salted water to a boil. Add the penne pasta and cook according to the package instructions until al dente. Reserve ¾ cup of the pasta cooking water before draining the pasta.
  • Heat a large skillet over low heat. Add the pesto sauce and warm it for about a minute, stirring gently.
  • Add the ricotta cheese to the skillet and stir until the mixture is smooth and well combined.
  • Gradually add the reserved pasta cooking water, a little at a time, stirring until the sauce reaches your desired consistency.
  • Stir in the salt, garlic powder, crushed red pepper flakes, lemon zest, and lemon juice. Taste and adjust the seasoning if needed.
  • Add the cooked penne pasta to the skillet with the sauce. Toss until the pasta is evenly coated.
  • Divide the pasta among serving plates or bowls. Sprinkle with shredded Parmesan cheese and garnish with fresh basil leaves. Serve them while it's still hot to enjoy!

Notes

Cooking pasta to the perfect texture, known as al dente, is crucial for this dish. Overcooking pasta not only makes it mushy and unappealing but also impacts the overall texture of the recipe. The pasta needs to have a slight firmness to hold up against the creamy pesto and ricotta sauce.
Keyword Dinner, Main Dish, Pasta, Pesto

If you try this recipe, please leave a STAR rating in the comment section below! Your feedback helps a small blogger like me stay motivated in creating content for my readers. Also, feel free to follow me at Food Exit on Instagram, TikTok, and Pinterest for the latest recipe updates!

Pesto Without Pine Nuts (Easy Walnut Pesto Recipe in 5 Minutes)

November 26, 2024 by Abi Guna 5 Comments

I'm not a fan of store-bought pesto, as I prefer the freshness of a homemade version. This Pesto Without Pine Nuts recipe offers a simple and flavorful alternative, using walnuts (best substitute) or sunflower seeds instead of traditional pine nuts. This makes it a budget-friendly and allergy-friendly option.

Pesto without pine nuts in a bowl

This pine nut free pesto is packed with fresh basil, garlic, Parmesan cheese, and rich olive oil, it delivers all the creamy, herbaceous goodness you love in a classic pesto. Whether tossed with pasta, spread on sandwiches, or used as a dip, this versatile recipe is quick to make and perfect for weeknight meals or meal prep. No pine nuts? No problem—this pesto is still bursting with flavor!

Speaking of pasta, this pesto without pine nuts is absolutely perfect tossed with creamy ricotta, just like in my Pesto Ricotta Pasta for a quick, comforting meal. If you have leftovers, don’t miss turning it into a flavorful dinner with my Pesto Butter Salmon.. You can also pair this walnut pesto with something savory like the Chicken Salad Melt Sandwich or keep things sweet after your meal with bite-sized Brownie Cake Pops or a cozy Oatmeal Mug Cake.

You can still enjoy a delicious pesto recipe with no pine nuts! Making basil pesto without pine nuts is a great way to save money and experiment with different flavors. Wondering what to use as a pine nut substitute for pesto? Try walnuts, almonds, sunflower seeds, or even cashews for a creamy and flavorful twist. If you’ve ever asked, “Can you make pesto without pine nuts?”, the answer is absolutely yes! With just basil, olive oil, garlic, Parmesan, and your preferred nut or seed substitute, you can whip up a versatile and budget-friendly pesto in no time.

[feast_advanced_jump_to]

What is Pesto?

Pesto is invariably associated with bright green herbs. It is an Italian sauce frequently served over pasta, but it works like a charm on sandwiches, eggs and with salads and vegetables. If ever there was a flavor-booster, it is pesto. Power to the green!

Pesto sauce in a spoon

What Makes Pesto Special?

Pesto sauce can be purchased by the jar at your local market, but it will be sorely lacking. This homemade, easy pesto recipe takes only minutes to prepare with fresh herbs and healthy olive oil. This version of pesto sauce recipe uses walnuts instead of the usual pine nuts, which gives an extra robustness to the sauce.

Walnuts versus Pine Nuts

The standard ingredient for pesto sauce is pine nuts. This pesto sauce recipe without pine nuts uses walnuts, instead. There are several reasons for this tasty switch. The first and logical reason is that pine nuts cost twice as much as walnuts without providing twice the benefits. As a matter of fact, toasted walnuts provide a genuine stronger flavor. In other ways, they are very similar and quite interchangeable.

Both are high-caloric nuts, and both are valued as high-nutrient sources. They contain approximately the same amount of carbohydrates – 13 grams per 100 grams of nuts. The walnut is a greater source of fiber, yet both offer about 3 grams of sugar.

The pine nut wins the saturated fat war – 20 percent less than the walnut. 

The two nuts are very similar and offer excellent nutritional benefits, but as a consumer, you save money and gain added flavor by using walnuts. It’s always good to have options, isn’t it?

No worries for anyone with nut allergies. You can prepare a nut-free pesto that is smooth and creamy by adding an extra half a cup of cheese. 

Ingredients

Ingredients shown in the picture for Pesto Sauce without pinenuts
  • Garlic – Adds a bold, savory flavor and aromatic depth to the pesto.
  • Walnuts - Provides a rich, nutty taste and a creamy texture when blended.
  • Basil leaves - The main ingredient, offering a fragrant, herbal aroma and vibrant green color.
  • Parmesan cheese – Adds a salty, umami-rich flavor that enhances the overall taste.
  • Extra-virgin olive oil – Brings a smooth, velvety consistency and rich flavor to the sauce.
  • Salt – Balances the flavors and enhances the taste of all the ingredients.
  • Black pepper – Adds a mild spiciness to complement the savory notes.
  • Lemon juice – Provides a bright, tangy acidity that lifts and balances the richness of the pesto.

See recipe card for quantities.

The Magic of Basil

Basil is the basis for pesto. While basil is famed for its Italian flavor, who knew about its magical properties?

Basil gained fame thousands of years ago for its antioxidants that help cells develop. The Egyptians mummified their dead using basil for its antibacterial action – even mummies worry about bacteria. The Egyptians may not have understood about bacteria, but they knew that basil was a positive addition.

India has considered the basil plant sacred and blessed with positive energy (no arguments). It also regarded basil as an icon of chastity as well as a love declaration. We won’t even consider the possible contraction here.

All the above, and we haven’t even discussed how much flavor basil adds to your easy pesto sauce. It is unarguably a mighty powerful sauce.

Backlight shot of homemade pesto without pine nuts

How do you make pesto without pine nuts?

Chop the nuts and garlic in a food processor to get them very fine. Add the basil and chop for another minute.

Next to be chopped for 30 seconds is the parmesan cheese. Finely chopping your ingredients will create the basis of a very fine sauce. The older your parmesan cheese, by the way, the better it will substitute for the missing pine nuts.

For flavor, pour in the olive oil and lemon sauce and season with salt and pepper.

Be sure to taste the sauce and make any necessary adjustments.

Instructions for no pine nut pesto

Walnuts and garlic in a food processor

To a food add chopped walnuts and garlic. Give a pulse.

Add the basil leaves to the food processor

Add the basil leaves and pulse again.

Add Parmesan cheese to the food processor for the pesto sauce.

After a minute of pulsing, add Parmesan cheese, lemon juice, salt and pepper.

Blended pesto sauce in a food processor

Finally add olive oil and blend until smooth.

An easy and delicious budget-friendly homemade pesto sauce that comes together in no time—it takes just 5 minutes to prepare! This is the perfect meal prep sauce for those chaotic evenings when you need a stress-free dinner.

Close up shot for pesto sauce without nuts in a food processor

The Many Uses for Basil Pesto Sauce

There are many ways to enjoy a classic pesto sauce.

  1. Combine pesto sauce with your favorite pasta.  Check out my Pesto Ricotta Pasta for ideas on how to make it even more delicious!
  2. Top your pizza with some pesto sauce.
  3. Pesto will enhance the flavor of soups, especially those of Mexican origin.
  4. Create a great salad topped with pesto sauce.
  5. Serve roasted vegetables with pesto or stir it into mashed potatoes. It also elevates the taste of vegetable casseroles.
  6. Scrambled eggs lose their ordinariness with a dollop of pesto sauce.
  7. Spread pesto on your sandwich
  8. Use pesto sauce as a dip for raw vegetables.

Substitutions & Variations

  • Substitute for pine nuts in pesto sauce – Use blanched almonds for a mild, nutty flavor, or cashews for a slightly sweet and creamy pesto. Pistachios bring a unique, earthy taste, while sunflower seeds are an excellent nut-free option, ideal for those with allergies.
  • Cheese Substitutions – Pecorino Romano offers a sharper, saltier flavor compared to Parmesan. For a vegan alternative, use nutritional yeast to achieve a cheesy, umami flavor.
  • Oil Substitutions – Instead of olive oil, try avocado oil for a neutral, heart-healthy alternative.
  • Spicy Pesto – Add a teaspoon of crushed red pepper flakes to give your pesto a spicy kick.
  • Roasted Garlic Pesto – Swap fresh garlic for roasted garlic to add a mellow, sweet depth to the sauce.
Texture of bail pesto without pine nuts

Equipment

Food Processor – To blend the ingredients into a smooth pesto sauce.

Measuring Cups and Spoons – To accurately measure the basil, walnuts, olive oil, and other ingredients.

Airtight Container or Jar – For storing the pesto sauce.

How to Store and Freeze Pesto Sauce

Pesto sauce is very versatile, so you’ll want to keep some on hand whenever possible. Store pesto in an airtight container in the refrigerator for up to 5 days. To prevent browning, add a thin layer of olive oil on top. You can also freeze it in ice cube trays for up to 3 months.

Special Hints for Making Great Pesto Without Pine Nuts

  • Try adding just a touch of heat by adding half a red chili. This will liven up the basil and gentle parmesan cheese. 
  • Toss some additional greens, such as spinach, parsley, or cilantro into the mix and create a more complex green flavor base.
  • Make sure your basil is young and fresh. 
Basil pesto suace without pine nuts in a spoon

FAQ

What can I use if I’m allergic to any nuts?

Sunflower seeds, pumpkin seeds, or even hemp seeds are great nut-free alternatives. They provide a similar texture and mild flavor.

Can I make this pesto vegan?

Yes! Substitute Parmesan cheese with nutritional yeast or vegan Parmesan for a plant-based version.

Can I use a blender instead of a food processor?

Absolutely! A blender works well, though you may need to stop and scrape the sides more frequently to ensure everything blends evenly.

How do I adjust the pesto consistency?

If the pesto is too thick, add a bit more olive oil or a splash of water. For a thicker consistency, use less liquid or add more nuts or cheese.

What pasta works best with this pesto?

Pesto pairs beautifully with long pasta like spaghetti or linguine, as well as short shapes like penne or fusilli that hold the sauce well.

What can I use instead of pine nuts in pesto?

You can easily substitute pine nuts with walnuts, almonds, cashews, or even sunflower seeds. Walnuts are one of the best alternatives because they add a rich, slightly earthy flavor that works perfectly in pesto.

Does pesto taste good without pine nuts?

Yes! Pesto without pine nuts still tastes delicious. Using walnuts gives the pesto a slightly deeper and nuttier flavor while keeping the classic basil and garlic taste.

Can I make pesto without pine nuts and still keep it traditional?

While traditional pesto (like Pesto alla Genovese) uses pine nuts, many homemade versions skip them or use substitutes like walnuts. It’s still considered pesto as long as it includes basil, garlic, olive oil, and cheese.

Can I make this walnut pesto dairy-free?

Yes! Simply skip the Parmesan cheese or replace it with a dairy-free alternative or nutritional yeast for a similar savory flavor.

How long does pesto without pine nuts last?

Homemade pesto can be stored in an airtight container in the refrigerator for up to 4–5 days. Adding a thin layer of olive oil on top helps keep it fresh longer.

Can you freeze pesto without pine nuts?

Absolutely! Freeze pesto in ice cube trays for easy portions. Once frozen, transfer to a freezer-safe bag and store for up to 3 months.

Why is my walnut pesto bitter?

Walnuts can sometimes taste slightly bitter, especially if the skins are strong. To reduce bitterness, use fresh walnuts or lightly toast them before blending.

What can I use pesto without pine nuts for?

You can use it for pasta like pesto ricotta pasta, sandwiches like hummus sandwich as a spread, pizza or naan, roasted vegetables, or as a dip. It’s a versatile sauce that works in many quick meals.

Related

Looking for other recipes like this? Try these:

  • Stack of strawberry muffins with chocolate chips and fresh strawberries on the side.
    Strawberry Chocolate Chip Muffins Recipe (EASY)
  • Easy homemade blueberry mojito mocktail served with ice and seltzer water in three. glasses.
    Blueberry Mojito Mocktail (Virgin Mocktail Recipe)
  • Golden roasted shrimp skewers fresh out of the oven, served with dipping sauce and herbs arranged beautifully on a green platter.
    Oven-Baked Shrimp Skewers ( Easy Shrimp Kabobs In The Oven)
  • Parmesan ranch dip in a green bowl surrounded by veggies like broccoli, carrots, cherry tomatoes and cucumber.
    Parmesan Ranch Dip Recipe (Creamy Garlic ranch dressing)

Pairing

These are my favorite dishes to serve with Pesto without Pine Nuts Recipe:

  • A hand is taking a slice of cheese naan and the cheese is melting and stretching.
    Cheese Naan bread Recipe (Stuffed with cheese)
  • Flatlay of butter chicken with naan, rice, and Indian-style salad.
    Butter Chicken with Naan (Creamy, Easy & Better Than Takeout)
  • A vibrant veggie hummus bagel sandwich topped with creamy hummus, fresh avocado slices, crisp cucumber, juicy tomatoes, and mixed greens, served on a toasted everything bagel.
    Hummus Bagel Recipe (Veggie Bagel Sandwich)
  • Delicious and smooth hummus without garlic, artfully styled on a bowl with vibrant veggies and , perfect for dipping.
    Creamy Hummus Without Garlic (Easy Garlic-Free Recipe)
Easy Pesto without Pine nuts feature image in a gray white bowl

Pesto Without Pine Nuts (5 minutes)

Abi Guna
This simple and flavorful pesto recipe without pine nuts for a more budget-friendly or allergy-friendly option, it delivers all the creamy, herbaceous goodness you love in a classic pesto. 
5 from 3 votes
Print Recipe Pin Recipe
Prep Time 5 minutes mins
Total Time 5 minutes mins
Course Main Course
Cuisine American, Italian
Servings 4 peoples
Calories 244 kcal

Equipment

  • Food Processor
  • Measuring cups & spoons
  • Air Tight Container

Ingredients
  

  • 3 cloves garlic
  • ½ cup walnuts chopped
  • 2 cups fresh basil leaves packed
  • ½ cup Parmesan cheese grated
  • ½ cup extra-virgin olive oil
  • ½ teaspoon salt
  • ¼ teaspoon black pepper
  • 1-2 tablespoons fresh lemon juice

Instructions
 

  • In a food processor, combine garlic and chopped walnuts, then pulse a few times until coarsely chopped.
  • Add the basil leaves and pulse again for about 30 seconds.
  • Next, add Parmesan cheese and pulse for another 30 seconds until the mixture is coarsely combined.
  • While the processor is running, slowly drizzle in the olive oil and blend until the pesto reaches your desired consistency, either smooth or slightly chunky.
  • Season with salt, pepper, and a splash of lemon juice for added freshness.
  • Use immediately with pasta, sandwiches, or as a dip. Alternatively, transfer to an airtight container, cover the surface with a thin layer of olive oil, and refrigerate for up to a week, or freeze for longer storage.

Notes

  1. Make sure your basil is young and fresh. Avoid using dried basil.
Keyword Condiments, Dinner, Dips, Pasta, Pesto, sauces

If you try this recipe, please leave a STAR rating in the comment section below! Your feedback helps a small blogger like me stay motivated in creating content for my readers. Also, feel free to follow me at Food Exit on Instagram, TikTok, and Pinterest for the latest recipe updates!

Ground Chicken Spaghetti with Vegetables (Easy High-Protein Dinner)

November 21, 2024 by Abi Guna 9 Comments

I first started making this ground chicken spaghetti as a quick weeknight meal on busy school nights. It began as a simple way to use up leftover ground chicken and pasta, but it quickly became a family favorite, especially once I added sautéed veggies and a rich, garlicky tomato spaghetti sauce. Now, it’s a regular part of our weekly dinner ideas because it’s comforting, budget-friendly, and comes together in under 30 minutes!

Ground Chicken Spaghetti in a skillet

Every mom’s dream is to get kids to finish their dinner without any fuss; I’ve got you covered! Try this Ground Chicken Spaghetti, and you’ll be amazed at how much kids love it. This hearty and comforting pasta dish combines tender spaghetti with a flavorful sauce made from ground chicken and fresh vegetables like carrots and celery.

This chicken vegetable spaghetti is a flavorful and wholesome twist on classic pasta dishes. Made with a savory tomato-based sauce infused with garlic, onion, and Italian herbs, it delivers a rich and satisfying taste while keeping it light and healthy. The ground chicken with pasta makes for a leaner alternative to traditional beef or pork sauces, while carrots and celery add a natural sweetness and a slight crunch. This ground chicken and pasta recipe is perfect for quick weeknight dinners or meal prepping, offering a hearty, nutritious meal that the whole family will love. Whether you're looking for an easy chicken mince spaghetti dish or a healthy pasta option, this recipe is sure to become a go-to favorite! 

If your family loves pasta recipes like mine does, you must try this Shrimp Scampi Fettuccine recipe—it’s another perfect dinner option! And also I have a huge collection of chicken recipes in my blog, don't forget to check them out 🙂

Looking for more ground chicken recipes? Try these Ground Chicken Stir Fry and Ground Chicken Meatballs recipe!

More recipes using chicken? How about trying a flavorful Chicken Noodles Stir Fry and Lemon Pepper Chicken Thighs for a weeknight dinner?

[feast_advanced_jump_to]

Why You’ll Love This Ground Chicken Pasta Recipe

Quick and Easy: Perfect for busy weeknights, this spaghetti recipe comes together in under 30 minutes.

Healthy and Wholesome: Made with lean ground chicken and packed with fresh vegetables for a balanced meal.

Rich and Flavorful: The savory sauce clings to the pasta, creating a deliciously hearty dish that’s satisfying and comforting.

Customizable: Easily swap in your favorite pasta or veggies to suit your taste and pantry staples.

Kid-Friendly: A hit with the whole family— even picky eaters will love this flavorful pasta! Trust me, my daughter finished her entire bowl without a single complaint (every mom’s dream!)

Ground Chicken Spaghetti in a white bowl

What Is Ground Chicken Spaghetti?

Quite simply, on a busy day, when you arrive home late, are so tired you can barely stand,  and the kids complain about being deliberately starved, ground chicken spaghetti is your friend and lifesaver. It is healthy and delicious and can be on the table in less than half an hour. As a bonus, it is a very affordable dinner recipe.

This easy family dinner combines generously seasoned ground chicken with a tasty marinara sauce that kids love. Ground chicken can dry easily, but the delicious sauce, high in flavor and low in calories, keeps the chicken moist. It is truly one of the best weeknight dinner ideas that will bring everyone to the table. 

Ground Chicken versus Ground Beef

This affordable dinner recipe can easily be prepared with ground chicken or ground beef. Why is ground chicken the preferred choice? The main reason is that the chicken is just as flavorful but is healthier with fewer calories. 

Ground chicken is considered a superior protein source because of its lower saturated fat content. Of course, very lean ground beef is low in fat, but it will also be dry and low in flavor. Per normal serving, ground chicken has more protein than ground beef. Ground chicken also has more of the important vitamins we need, although ground beef provides more vitamin B12. Ground chicken should be your kitchen staple.

Ground Chicken Spaghetti Pasta in a fork

What Makes This Ground Chicken and Pasta Special?

This quick ground chicken spaghetti recipe is perfect for weeknights. The entire family – from adults to toddlers – will devour it. Its ease of preparation is enhanced by using a jarred sauce that imbues the pasta and ground chicken with flavor. Keep in mind you can also substitute ground turkey for the meat. Italian seasoning adds a touch of special love.

In addition to everything else, this easy ground chicken spaghetti can be made gluten-free. If you are using gluten-free pasta, be sure to salt the pasta water properly to add needed taste. Gluten-free pasta does not store well, so make only as much as you need.

Finally, let the gluten-free pasta soak up the sauce for a few minutes before serving.

Ingredients

Lets see the simple ingredients needed to create this amazingly delicious recipe!

Ground Chicken Spaghetti Ingredient list iteams placed in a marble table
  • Spaghetti: The base of the dish, spaghetti provides a hearty and satisfying foundation for the flavorful sauce to coat.
  • Olive oil: Used to sauté the vegetables and garlic, adding richness and helping to develop the flavors of the dish.
  • Garlic: Enhances the aroma and provides a savory flavor to the sauce.
  • Onions: Sweet and savory depth to the dish, forming the flavor base for the sauce.
  • Carrots: Contributes a touch of natural sweetness and texture while boosting the nutritional value.
  • Celery: Adds crunch and a subtle earthy flavor, balancing the sweetness of the carrots.
  • Ground chicken: Provides a lean protein option that absorbs the seasoning and enriches the dish.
  • Spices (Italian seasoning, garlic powder, onion powder, salt and pepper): Boosts the depth of flavor and enhances the whole dish.
  • Low-sodium chicken broth: Keeps the sauce moist and ties the flavors together.
  • Marinara sauce: Forms the primary sauce for the dish, bringing a rich, tangy tomato flavor.
  • Parmesan cheese, for garnish: Adds a nutty, salty finish that enhances the flavors of the pasta.
  • Fresh basil, for garnish: Provides a fresh and aromatic touch.

See recipe card for quantities.

In a skilllet Ground Chicken Spaghetti -15

How to Prepare One-pot Ground Chicken Spaghetti 

Start by preparing your pasta in a pot of salted boiling water. This should take about 12 minutes. Drain the pasta and keep a cup or so of the pasta water. Set the pasta aside.

Sautéing the vegetables in olive oil is next. Keep in mind that olive oil is the healthiest oil to use. Start with the onion and garlic, then add the carrots and celery. There is no reason you can’t add additional vegetables, such as bell peppers if desired. Sauteing your vegetables helps elevate their flavor, and the sauteing process should fill your kitchen with an amazing aroma.

Crumble the ground chicken and add it to your skillet with the vegetables. Brown the chicken for 5 minutes. Then season everything according to taste with basic Italian seasonings, salt, and pepper.

The delectable sauce comes next. Pour your marinara sauce and chicken broth into the skillet and bring the liquid to a boil. Then simmer the ground chicken and vegetables in the sauce for a delightful flavor boost. If you need more liquid, use the reserved pasta water.

Taste test and adjust your seasoning and serve the ground chicken pasta topped with grated parmesan cheese.

The tomatoes in the marinara sauce provide plenty of needed vitamins, and the ground chicken and parmesan cheeses are filled with protein. This dish is easy to prepare and healthy.

Step By Step Instructions

Lets see how to make this low carb ground chicken spaghetti (with substitute) under 30 minutes in one-pot!

Cooked spaghetti in a plate
  1. Step 1: Cook the spaghetti according to the package instructions.
Onions, Carrots and celery in a skillet
  1. Step 2: Add the veggies and cook for 3-5 minutes.
Added ground chicken in a skillet
  1. Step 3: Push the vegetables to one side of the skillet. Add the ground chicken and cook.
Cooked ground chicken in a skillet
  1. Step 4: Breaking it apart with a spatula and cook until it is no longer pink.
Marinara sauce is added to the veggies
  1. Step 5: Stir in the chicken broth and marinara sauce.
Simmered marinara sauce in a skillet for Ground Chicken Spaghetti
  1. Step 6: Let the sauce simmer for 10 minutes.
Cooked spaghetti added to the marinara sauce
  1. Step 7: Add the cooked spaghetti to the skillet and toss to coat the pasta evenly in the sauce.
Cooked ground chicken spaghetti in a stainless steel skillet
  1. Step 8: Sprinkle grated Parmesan cheese and garnish with fresh basil.

Substitutions

  • Protein Swap: Substitute ground chicken with ground turkey, beef, pork, or even plant-based meat for a different flavor profile.
  • Low-Carb Option: Replace spaghetti with zucchini noodles, spaghetti squash, or a high-protein pasta alternative.
  • Gluten-Free: Use gluten-free spaghetti or pasta to make the dish suitable for those with gluten sensitivities.
  • Broth Substitution: Replace chicken broth with vegetable broth or white wine for a slightly different depth of flavor.

Variations

  • Vegetable-Loaded Ground Chicken Spaghetti: Add zucchini, bell peppers, mushrooms, or spinach to boost nutrients and enhance texture. Simply incorporate these veggies into the recipe for a flavorful, veggie-packed variation!
  • Cheesy Ground Chicken Spaghetti: Stir in a handful of shredded mozzarella or grated Parmesan into the sauce for a creamy, cheesy twist.
  • Spicy Ground Chicken Spaghetti: Add a pinch of red pepper flakes or a dash of hot sauce for some heat.

Serving Ideas for Ground Chicken Spaghetti

  • This ground chicken spaghetti with vegetables is a complete meal on its own, but pairing it with a few easy sides can turn weeknight dinner into something special. Add a refreshing salad like our Shaved Brussels Sprouts Salad for a crisp, tangy contrast, or go with kale quinoa salad or go with cozy roasted sides such as Roasted Carrots and Asparagus or Roasted Cauliflower and Carrots to round out the plate.
  • If you’re planning a bigger family meal, serve this pasta with a classic protein like Herb-Roasted Chicken or Air Fryer Chicken Parmesan or keep things light with a fresh, crunchy Crispy Chicken Caesar Salad. And for dessert, nothing beats a sweet bite of Dark Chocolate Fudge with Almonds to finish the meal on a high note.
Ground Chicken Spaghetti in a white bowl and skillet

Equipment

Large Pot – To cook the spaghetti.

Colander – For draining the cooked pasta.

Large Skillet or Sauté Pan – To cook the ground chicken and prepare the sauce.

Wooden Spoon or Spatula – To stir and cook the sauce ingredients.

Measuring Cups and Spoons – For accurately measuring ingredients.

Tongs – For mixing the pasta with the sauce.

How to Store family kid-friendly ground chicken pasta

Let the sauce cool and store it in a sealed container separately from the pasta for up to three days in the refrigerator. Store the pasta in a different container for the same length of time. Refrigerating them apart provides you with more options when you reheat.

You can freeze the easy ground chicken spaghetti for three months. Again, it’s a good idea to freeze the sauce separately from the pasta.

The best way to reheat the ground chicken spaghetti is to thaw the leftovers and warm them in a skillet on low heat. Add a bit of extra broth or marina sauce to help the dish retain its moistness.

Easy spaghetti with ground chicken and tomato sauce in a skillet garnished with basil and parmesan cheese.

Tips for the Best Ground Chicken Spaghetti Sauce

  • Your ground chicken can dry out easily, so don’t overdo the browning process. Brown to the point where the meat is no longer pink (and no longer) and then add the sauce.
  • Young children can get picky about things like onions and garlic, even as those vegetables boost the flavor. The trick is to chop them as finely as possible to keep the kids unaware of their presence. Using a chopper works well.
  • Prepare your pasta al dente. Undercooked pasta will be too chewy, and overcooked pasta turns limp. The best pasta for this healthy ground chicken recipe is “firm.”

Meal Prep Options for healthy ground chicken spaghetti

This recipe is an excellent option for meal prep!

  • Prepare a large batch of the ground chicken sauce and cook the spaghetti.
  • Store them separately to preserve the texture and flavor when reheated.
  • Divide the cooked spaghetti and sauce into individual airtight containers for convenient grab-and-go meals.
  • Refrigerate for up to 4 days or freeze for up to 3 months for longer storage.

FAQ

Can I use ground beef instead of chicken?  

Absolutely , you can use ground beef instead of chicken! Ground beef will add a richer, heartier flavor to the dish. Be sure to drain any excess fat after browning the beef before continuing with the recipe.

Can I use homemade marinara sauce?

Yes, homemade marinara works wonderfully and allows you to customize the flavor even more. If you have in handy please feel free to use it!

 Can I make this recipe ahead of time?

Yes, you can prepare till the sauce steps in advance and store it in the refrigerator for up to 3 days. Reheat and combine it with freshly cooked pasta before serving. Its a best meal prep option for those busy days.

Can I use a different type of pasta to the same recipe?

Yes, you can use any type of pasta, such as penne, fettuccine, or even gluten-free pasta, depending on your preference or dietary needs.

Related

Looking for other recipes like this? Try these:

  • A stack of warm Nutella waffles served with a side of whipped cream, fresh strawberries, and a rich chocolate-hazelnut drizzle, creating a decadent and mouthwatering brunch treat.
    Nutella Waffles (Crispy, Easy & Ready in 15 Minutes)
  • Close-up of a crispy chicken salad melt sandwich with golden toasted bread, melted cheese, and creamy chicken salad filling stacked one above the other.
    Easy Cheesy Chicken Salad Melt Sandwich Recipe
  • Perfectly crispy sweet potato cubes sprinkled with parsley and sea salt in a white bowl along with dipping sauce, lemon wedges in the sides.
    Air Fryer Sweet Potato Cubes (Crispy, Easy & Ready in 15 Minutes)
  • Nutella mousse piped into fancy serving cups, garnished with whipped cream and chocolate curls for a luxurious look.
    Nutella Mousse (Easy 4-Ingredient No-Bake Dessert)

Pairing

These are my favorite dishes to serve with Ground Chicken Spaghetti:

  • Homemade vanilla bean latte in a beautiful glass mug accompanied by vanilla beans on the side.
    Vanilla Bean Latte Recipe (Starbucks Copycat in 5 Minutes)
  • Easter Rocky Road stacked one above the other with easter decorations around on a pink background.
    Easter Rocky Road With Easter Eggs And Chocolate
  • Beautifully decorated homeade baked easter donuts with patel colored donut glaze topped with Easter festive sprinkles, mini eggs. The Easter are placed in a pink plate with blue napkin underneath on a pink backgorund with festive sprinkles, mini eggs around.
    Easter Donuts (Baked, Easy & Perfect with Pastel Glaze)
  • The BESt homemade vanilla bean syrup for coffee is stored in an airtight container with fresh vanilla beans along the sides.
    Vanilla Bean Coffee Syrup (Easy Homemade Starbucks Copycat)
Finished Ground chicken spaghetti dish in a skillet

Easy Ground Chicken Spaghetti

Abi Guna
Ground Chicken Spaghetti is a hearty and comforting pasta dish combines tender spaghetti with a flavorful sauce made from ground chicken and fresh vegetables like carrots and celery.
5 from 5 votes
Print Recipe Pin Recipe
Prep Time 10 minutes mins
Cook Time 20 minutes mins
Total Time 30 minutes mins
Course Main Course
Cuisine American, Italian
Servings 4
Calories 420 kcal

Equipment

  • Large Pot
  • Colander
  • Large Skillet
  • Wooden Spoon
  • Measuring cups and spoons

Ingredients
  

  • 8 ounces dry spaghetti
  • 2 tablespoon olive oil
  • 1 teaspoon minced garlic
  • 1 medium onion diced
  • 2 medium carrots diced
  • 2 celery stalks diced
  • 1 lb. ground chicken
  • 1 teaspoon Italian seasoning
  • ½ teaspoon garlic powder
  • ½ teaspoon onion powder
  • ½ teaspoon salt
  • ½ teaspoon ground pepper
  • ½ cup low-sodium chicken broth
  • 2 cups (16 ounces) marinara sauce Store-bought
  • Parmesan cheese for garnish
  • Fresh basil for garnish

Instructions
 

  • Bring a large pot of salted water to a boil. Cook the spaghetti according to package instructions until al dente. Reserve ½ cup of pasta water, then drain and set aside.
  • Heat olive oil in a large skillet over medium heat.
  • Add the minced garlic and onion, sautéing until fragrant and softened.
  • Add the diced carrots and celery to the skillet. Cook for 3-5 minutes, stirring occasionally, until softened.
  • Push the vegetables to one side of the skillet. Add the ground chicken to the empty space and cook, breaking it apart with a spatula, until it is no longer pink (about 5 minutes).
  • Add in the seasonings such as Italian seasonings, garlic powder, onion powder, salt, and pepper.
  • Stir in the chicken broth and marinara sauce, bring to boil, reduce the heat, and let the sauce simmer for 10 minutes, allowing the flavors to meld.
  • Add the cooked spaghetti to the skillet and toss to coat the pasta evenly in the sauce. If needed, use the reserved pasta water to adjust the sauce consistency.
  • Divide the spaghetti into serving bowls. Sprinkle grated Parmesan cheese and garnish with fresh basil.

Notes

  1. Be sure to cook the spaghetti according to package instructions until al dente, as it will absorb some sauce when combined, preventing it from becoming mushy.
  2. Avoid dry chicken: Don’t overcook the ground chicken , sauté just until no longer pink. Overcooking makes it rubbery and less flavorful.
  3. Control sauce thickness: If the sauce is too thin, let it simmer uncovered for 5–7 minutes to reduce. If too thick, add a splash of chicken broth or pasta water to loosen it.
  4. Mix the pasta right into the sauce before serving. This coats every strand and helps the flavors meld together.
  5. Add more veggies like zucchini, spinach, or bell peppers to pack in extra fiber and vitamins without extra prep time to boost the nutrition!
Keyword Chicken, Dinner, Main Dish, Pasta, Spaghetti

Easy Shrimp Scampi Fettuccine

November 12, 2024 by Abi Guna 9 Comments

If you're a fan of seafood and pasta, then you should try this quick and easy Shrimp Scampi Fettuccine - Ready in 20 Minutes! This delicious shrimp scampi fettuccine pasta is a perfect weeknight dinner recipe, ready in mere minutes. With tender shrimp, a garlicky lemon-butter sauce, and al dente fettuccine, this easy pasta recipe delivers restaurant-quality flavor right at home.

Easy shrimp scampi fettuccine in a large skillet

The shrimp cook quickly, allowing them to stay tender and juicy, locking in all their natural sweetness and delicate texture. Meanwhile, the pasta absorbs the rich, savory sauce, infused with garlic, lemon, and a hint of spice from the crushed red pepper flakes. Each bite is loaded with vibrant flavors, ensuring a delicious and satisfying experience from start to finish! Serve with Classsic Chicken Parmesan to enjoy !

Are you a fan of pasta? If so, you should definitely try this recipe: Ground Chicken Spaghetti .

[feast_advanced_jump_to]

Why You Will Love This Shrimp Scampi With Fettuccine Pasta

I am sure you will love exploring the variety of fettuccine recipes with shrimp available to try. Whether you prefer creamy sauces, garlicky butter flavors, or spicy tomato bases, there's a perfect recipe waiting for you.

  • Quick and Easy: This recipe comes together in just about 30 minutes, making it perfect for a weeknight dinner or special occasion.
  • Rich and Flavorful Sauce: The creamy, garlicky sauce made with chicken broth and lemon juice creates a deliciously rich flavor that perfectly complements the shrimp and pasta.
  • Versatile: You can easily adjust the seasonings, add extra veggies like spinach or tomatoes, or swap the shrimp for chicken or another protein, making this dish adaptable to your preferences.
  • Better Than Restaurants: With its restaurant-style flavor and presentation, this dish makes you feel like you're dining out, but it's made right in your own kitchen with simple, everyday ingredients.
Easy shrimp scampi fettuccine in a fork

Why is Shrimp Scampi Fettuccine So Popular?

Shrimp and fettuccine recipes are not only delicious but also quick to prepare, making them ideal for busy weeknights or special occasions. From classic fettuccine with shrimp in Alfredo sauce to lighter lemon-garlic variations, these dishes are sure to impress your family or guests with their rich, satisfying flavors.

Aside from the luscious, delectable taste, shrimp scampi fettuccine is easy to prepare in less than half an hour using just a few staple ingredients. It is so easy that even novice cooks can serve up a mouthwatering culinary masterpiece to impress friends and in-laws. 

The ideal  garlic butter shrimp pasta blends succulent shrimp, tart lemon, and creamy butter and cheese sauce to create a delightful taste sensation. 

Fettuccine is the most prevalent pasta used for this dish; however, capellini and angel hair also work with the delicious garlic butter sauce that is the heart and soul of shrimp scampi. Add garlic bread and a nice white wine, and it is elevated to a flavorsome treat while remaining pure comfort food. Since it contains seafood, you can add healthy, as well.

In a bowl shrimp scampi fettuccine with a fork

History of Shrimp Scampi and Fettuccine

Shrimp Scampi has been an Italian favorite since the 14th century and made its first appearance in a British cookbook in 1747. It gained its current popularity in the mid-twentieth century, when restaurants began taking advantage of its cooking simplicity – no master chef needed. From there, it was a logical step for enthusiastic food lovers to prepare this classic one-pot shrimp pasta dish in their own home. 

Dry or Fresh for Your Shrimp Scampi Pasta 

The general perception is that Italian food lovers prefer fresh pasta. Food snobs would be mistaken here. While fresh pasta cooks much quicker – within one to three minutes – dry pasta consistently provides a better al dente texture with a superior “bite.”

Foodies who expect Italian cupboards to be filled with fresh pasta are in for a surprise. Many Italian cooks use dry pasta. Keep in mind not all dry pasta is created equal. Find the best dry pasta suited to your needs and use it to create a bit of heaven.

Ingredients

Shrimp scampi fettuccine ingredients  in the marble backdrop
  • Pasta: The long, flat shape of fettuccine is perfect for picking up the rich, garlicky sauce, giving the dish a hearty and satisfying feel.
  • Olive oil: Adds richness and helps cook the shrimp to a golden color.
  • Shrimp: The main protein in this dish, providing a tender, sweet flavor.
  • Salt: Enhances and balances the flavors of all ingredients.
  • Black pepper: Adds a bit of spice and depth to the dish.
  • Garlic powder: Provides a mild garlic flavor to the shrimp.
  • Butter: Adds creaminess to the sauce, balancing the olive oil.
  • Garlic: Infuses a bold garlic flavor throughout the dish.
  • Low-sodium chicken broth: Adds a savory depth to the sauce without overpowering it.
  • Parsley: Brings freshness to the dish.
  • Lemon juice: Adds brightness and a tangy contrast to the dish.
  • Red pepper flakes: Adds a hint of heat to balance the dish's richness.
  • Parmesan cheese: Adds a salty, nutty finish, enhancing the sauce and pasta.

See recipe card for the detailed quantities.

How To Prepare Your Easy Shrimp Scampi Fettuccine Pasta Recipe

  1. Prepare your fettuccine in a pot of salted water according to directions. Reserve some pasta water.
  2. Heat olive oil in a skillet and add the shrimp and seasonings. The type of olive oil you use will make a difference, so use the best you can afford. Toss the shrimp and olive oil well for about 2 minutes – don’t overcook the shrimp. Set it aside. 
  3. Add the garlic (you honestly can’t have too much garlic in your shrimp scampi fettuccini). 
  4. When your garlic is sauteed in the creamy butter, pour in the broth, lemon juice, and additional seasoning. The wine adds an element of sweetness that counteracts the garlic to perfection. That is your wonderful garlic butter sauce. For a thicker sauce, consider adding a bit of cream.
  5. Toss the sauce with the shrimp and fettuccine. Add some of the reserved pasta water if you need more liquid.
  6. Add the parmesan and toss again.
  7. Garnish your garlic butter shrimp scampi with parsley and lemon.

Instructions

In a skillet add the seasonings and shrimp
  1. Step 1: In a skillet add oil followed by shrimp, salt, pepper and garlic powder.
Sautéed shrimp in a skillet.
  1. Step 2: Cook for about 2 minutes.
Chicken broth in a skillet for shrimp scampi
  1. Step 3: Add butter, once butter is melted add garlic, chicken broth, lemon juice, broth and seasonings. Simmer for 4-5 minutes.
Cooked fettuccine pasta and cooked shrimp in a skillet
  1. Step 4:Add the drained fettuccine pasta and cooked shrimp to the skillet. Toss it with the sauce.

Once everything is well-coated, sprinkle the shrimp scampi with freshly grated Parmesan cheese and toss again to combine. Garnish with freshly chopped parsley and lemon wedges for an extra burst of freshness.

Hint: For more saucy pasta, add ½ cup more chicken broth than the mentioned quantity.

In a white skillet shrimp scampi fettuccine

What to Serve with Fettuccine Shrimp Scampi

Fettuccine Shrimp Scampi is already a complete and satisfying meal, but pairing it with a few delicious side dishes can elevate it to the next level. Here are some of my favorite sides to serve with Fettuccine Shrimp Scampi:

  • Garlic Bread: A classic choice that’s perfect for soaking up the extra sauce.
  • Salad: A light salad with mixed greens, arugula, or spinach, topped with a simple vinaigrette, balances the richness of the scampi. Speaking of salads, have you tried my Salmon Kale Quinoa Salad recipe?

Substitutions

Shrimp: Swap shrimp with chicken breast, chicken thighs, or scallops for a different protein.

Fettuccine: Use any other pasta, like spaghetti, linguine, or penne.

Gluten-Free Option: Use gluten-free pasta or zucchini noodles as a substitute.

Vegan Option: Use tofu as a vegetarian protein option instead of shrimp. Substitute chicken broth with vegetable broth or white wine for extra depth of flavor. For Parmesan cheese, use vegan Parmesan or nutritional yeast.

CLose up shot of shrimp scampi fettuccine

Variations

Spicy Shrimp Scampi: Add more crushed red pepper flakes or a dash of cayenne pepper to the sauce for a spicier kick. 

Creamy Shrimp Scampi: Stir in heavy cream or half-and-half into the sauce to make it creamy, creating a rich, luxurious texture.

Garlic Butter Shrimp Scampi: For a more intense garlic flavor, increase the amount of garlic and use a little more butter in place of the chicken broth. This will create a rich, buttery sauce.

Shrimp Scampi with Pesto: Add a couple of tablespoons of pesto sauce to the dish for a unique twist that adds a fresh, herby flavor.

Equipment

Large Pot: For boiling the fettuccine pasta.

Strainer or Colander: To drain the pasta once it’s cooked.

Large Skillet: For cooking the shrimp and making the sauce.

Measuring Cups and Spoons: For accurate measurements of liquids like broth and lemon juice and seasonings.

In a white bowl shrimp scampi fettuccine

Storage

Refrigerate: Place leftovers in an airtight container within 2 hours of cooking. Store in the refrigerator for up to 3 days.

Freeze: If you’d like to freeze it, transfer the fettuccine and shrimp to a freezer-safe container. The pasta can be frozen for up to 2 months, but keep in mind that freezing may slightly alter the texture of the shrimp and pasta.

Reheating Your Shrimp Scampi Fettuccine Recipes

It’s nice to make enough shrimp scampi fettuccine for a second meal. The dish can be reheated without effort.

Oven Reheating: If you are using the oven, preheat it to 275 degrees. Transfer the shrimp to a baking dish and cover the dish with aluminum foil. Heat for 15 minutes. As always with seafood, be careful not to overcook.

Stovetop Reheating: If you are reheating on the stovetop, add the dish to a small pan or skillet and simmer for 4 to 5 minutes while gently stirring, being careful not to overcook the shrimp. You may want to add a few extra tablespoons of broth to keep the shrimp scampi moist. 

In a fork shrimp scampi fettuccine

Tips for Creating the Perfect Shrimp Scampi Fettuccine

Whether to use fresh or frozen shrimp is a good question. If you use fresh, give it a sniff and make sure it smells of the ocean rather than fishy. If it has a fishy odor, it has been around for a bit.

Frozen shrimp, if frozen immediately, can be fresher than the thawed “fresh” shrimp available in most markets.  It is also more difficult to overcook frozen shrimp, which will help make it more tender.

As for your pasta and olive oil, it is worth splurging on the best quality products. Quality ingredients go far in raising the value of your meal. Likewise, grating your parmesan cheese freshly over your pasta instead of using pre-grated cheese will add the last bit of magic to your shrimp scampi. 

FAQ

Can I use frozen shrimp for this recipe?

Yes, you can definitely use frozen shrimp for this Shrimp Scampi Fettuccine recipe! It's best to thaw the shrimp before cooking, then pat them dry with a paper towel to remove excess moisture. Follow the same cooking steps as you would for fresh shrimp—just note that frozen shrimp may take an extra minute or two to cook, so keep an eye on them to avoid overcooking.

Whats the best pasta to use it for shrimp scampi?

Aside from fettuccine, you can use linguine, a classic choice for shrimp scampi. Spaghetti and angel hair also pair well, offering a balanced, light texture that complements the shrimp and sauce beautifully.

Can I add veggies to the same recipe?

Adding veggies enhances both the flavor and nutritional value of the dish, pairing wonderfully with the shrimp and pasta. Some of my favorites to add are spinach, cherry tomatoes, asparagus, and zucchini.

Related

Looking for other recipes like this? Try these:

  • Crispy chicken caesar salad in a white bowl accompanied by a bowl homemade caesar salad dressing.
    Crispy Chicken Caesar Salad (Easy Restaurant-Style Recipe)
  • Chicken and shrimp fried rice is placed in a serving bowl, the skillet the fried rice is peeking. Soy sauce is placed in a dipping saucer along with the green onions in a wooden bowl.
    Chicken and Shrimp Fried Rice (Easy Better-Than-Takeout Dinner)
  • Square image of Single banana blackberry oatmeal muffin placed in a plate with fresh blackberries arround and banana is the behind.
    Banana Blackberry Oatmeal Muffins
  • Banana chocolate chunk muffins stacked one above the other.
    Banana Chocolate Chunk Muffins (Bakery style Recipe)

Pairing

These are my favorite dishes to serve with Shrimp Scampi Fettuccine:

  • CLose up shot of pesto butter salmon garnished with basil and lemon wedges.
    Pesto Butter Salmon (Easy 20-Minute Dinner Recipe)
  • Blackened salmon bites in a oval platter arranged beautifully and garnished with parsley and lemon wedges in the side.
    Blackened Salmon Bites (Crispy, Spicy & Easy Recipe)
  • Roasted carrots and asparagus with goat cheese plated in a off white plate served with lemon wedges in the sides and garnished with parsley.
    Roasted Carrots and Asparagus – Easy Oven-Baked Side Dish
  • Stacked red velvet ake waffles , whipped cream topped with pecans and chocolate chips. Cream cheese drizzled over.
    Red Velvet Cake Waffles Recipe (With Cake Mix)
Easy shrimp scampi fettuccine in a white skillet and garnished with parsley

Easy Shrimp Scampi Fettuccine

Abi Guna
Quick and easy Shrimp Scampi Fettuccine - Ready in 20 Minutes! This delicious shrimp scampi fettuccine pasta is a perfect weeknight dinner, ready in mere minutes. With tender shrimp, a garlicky lemon-butter sauce, and al dente fettuccine, this easy pasta recipe delivers restaurant-quality flavor right at home.
5 from 5 votes
Print Recipe Pin Recipe
Prep Time 5 minutes mins
Cook Time 15 minutes mins
Total Time 20 minutes mins
Course Main Course
Cuisine American
Servings 4

Equipment

  • Large Pot
  • Strainer
  • Large Skillet
  • Measuring cups & spoons

Ingredients
  

  • 16 ounce fettuccine
  • 2 tablespoons olive oil
  • 1 ½ lb. large fresh shrimp peeled and deveined
  • ½ teaspoon salt
  • ½ teaspoon ground black pepper
  • ½ teaspoon garlic powder
  • 2 tablespoons unsalted butter
  • 1 teaspoon minced garlic
  • ½ cup low sodium chicken broth
  • ¼ cup fresh parsley chopped
  • ¼ cup fresh lemon juice
  • ½ teaspoon crushed red pepper flakes
  • ¼ cup parmesan cheese grated
  • ½ cup pasta cooked water or as needed
  • Lemon wedges to garnish

Instructions
 

  • In a large pot, bring salted water to a boil. Add the fettuccine pasta and cook according to the package instructions, usually about 9-11 minutes, until the pasta is al dente. Once done, reserve ½ cup of pasta water and set it aside. Then, drain the pasta and set it aside, keeping it warm.
  • While the pasta is cooking, heat a large skillet over medium heat and add oil. Once the oil is hot and shimmering, add the shrimp in a single layer. Season with salt, pepper, and garlic powder. Cook for about 2 minutes, turning the shrimp once they begin to turn pink and opaque. Once cooked, transfer the shrimp to a plate and set it aside.
  • In the same skillet you used for the shrimp, add the butter and allow it to melt. Once melted, add the minced garlic and sauté for about 1 minute until fragrant and golden, being careful not to burn the garlic.
  • Next, pour in the chicken broth to deglaze the skillet, scraping up any brown bits from the bottom of the pan. Bring the mixture to a simmer and cook for about 2 minutes, letting the broth reduce slightly.
  • Add the fresh lemon juice, crushed red pepper flakes, chopped parsley, and a pinch of salt and pepper to the skillet. Stir well to combine and let the sauce simmer for 4-5 minutes, allowing the flavors to meld together and the sauce to slightly thicken.
  • Add the drained fettuccine pasta to the skillet with the sauce, tossing gently to coat the pasta in the flavorful mixture. Add the cooked shrimp back into the skillet, stirring to combine. If the sauce looks too thick, add a bit of the reserved pasta water, a tablespoon at a time, until the desired sauce consistency is reached.
  • Once everything is well-coated, sprinkle the shrimp scampi with freshly grated Parmesan cheese and toss again to combine. Garnish with freshly chopped parsley and lemon wedges for an extra burst of freshness.
  • Serve the shrimp scampi fettuccine immediately while hot, and enjoy this delicious, flavorful dish.

Notes

  1. To keep your pasta perfect and prevent sticking, toss it lightly with a teaspoon of olive oil.
  2. You can spice up the recipe by adding ⅛ teaspoon of cayenne pepper.
Keyword Main Dish, Pasta, Shrimp

If you try this recipe, please leave a STAR rating in the comment section below! Your feedback helps a small blogger like me stay motivated in creating content for my readers. Also, feel free to follow me at Food Exit on Instagram, TikTok, and Pinterest for the latest recipe updates!

Easy Christmas Cake Pops with Cake Mix - Holiday Treat

November 9, 2024 by Abi Guna 12 Comments

A Showstopper on the Dessert Table - Christmas cake pops, also known as holiday cake pops, are festive, bite-sized treats made from crumbled cake mixed with creamy cream cheese frosting, shaped into balls, and coated in a smooth layer of almond bark (candy melts or white chocolate).

CHRISTMAS cake pops in a glass jar.

These holiday cake pops are then decorated with seasonal sprinkles, making them a perfect, easy-to-make dessert for the holiday season and one of my favorite christmas desserts. Loved by kids and adults alike, these delicious treats require just a few ingredients: cake mix, candy melts, cream cheese frosting, and holiday sprinkles. With less than five ingredients, Christmas cake pops are simple yet irresistible – an ideal addition to your holiday dessert table and parties! If you’ve tried my other cake pop recipes, you’ll love this one too. These easy cake pops are made the same way as my Valentines Cake Pops, Brownie Cake Pops and Birthday Cake Pops.

 You might also like these BEST holiday treats Andes Chocolate Mint Brownies, Christmas Crunch, Strawberry Santas and Dark Chocolate Almond Fudge.

If you love eassy desserts using cake mix then try these recipes: Red Velvet Cake Mix Waffles and holiday inspired dessert collection too!

Cake pops were invented in the early 2000s by a popular blogger and cake designer. The idea originated from using leftover cake scraps, which were crumbled, mixed with frosting, and shaped into small balls on sticks. Today, cake pops are a beloved treat for all occasions, with endless variations in flavors, coatings, and decorations. Like those creations, these Christmas cake pops are a delightful treat to enjoy with minimal effort and simple ingredients! I promise you won’t want to buy cake pops from the store anymore!

[feast_advanced_jump_to]

Why should I make this Christmas cake pops recipe

Easy to Make - With just a few simple ingredients (cake mix, frosting, candy melts), this recipe is incredibly easy and quick to make, even for beginners. You don’t need advanced baking skills to create these delicious treats.

No special tools needed - Unlike many baked goods that require special tools, this recipe doesn’t require anything beyond basic kitchen equipment. 

Perfect for the Holiday Season - Christmas cake pops are a festive and fun treat that captures the spirit of the season. Their bite-sized shape and holiday-themed decorations make them ideal for holiday parties, gift-giving, or as a sweet treat during family gatherings.

Great for Gift Giving - These christmas cake pops are perfect for wrapping up and giving as homemade gifts. Package them in a festive box or plastic wrap or cellophane bag, and they make thoughtful, personalized gifts for friends,family and neighbors for a christmas party.

Christmas Cake Pops layed in a marble tray

A Showstopper on the Dessert Table – Christmas Cake Pops!

With their colorful decorations and fun shapes, Christmas cake pops are sure to be the star of any holiday dessert spread. Their eye-catching presentation adds a festive touch to your holiday table.

These Christmas cake pops offer a delightful textural experience. The outer coating of candy melts provides a crisp and slightly crunchy bite, while the soft, moist cake center is perfectly balanced with the sweetness of the frosting. Each bite delivers a perfect blend of textures and flavors, making these holiday cake pops an irresistible treat.

It's our family tradition to make these cake pops with my daughter every year during the holiday season 🙂

Three CHRISTMAS cake pops stagged

BEST to make with leftover cakes

Leftover cake usually has a rich, moist texture that works well when combined with frosting to create the perfect consistency for cake pops. The beauty of using leftovers is that you don’t need to bake a new cake.

Simply crumble the leftover cake, mix it with frosting, and proceed with the cake pop steps. This saves time and makes the process easier during busy times like the holiday season. Leftover cakes of any flavor—chocolate, vanilla, red velvet, etc., can be used, so you can create a variety of cake pops with different flavors based on what you have leftover.

What’s in this Holiday Cake Pops Recipe?

All you need is less than 5 ingredients to make this recipe!

ingredients nneed to make CHRISTMAS cake pops
  • Yellow cake mix - This pre-packaged cake mix serves as the base for the cake pops, providing a soft, moist texture and a delicious vanilla flavor.
  • Eggs -  Add structure, moisture, and richness to the cake mix, helping it bake up fluffy and soft.
  • Oil - Oil keeps the cake moist and tender.
  • Cream cheese frosting - Creamy, tangy frosting binds the cake crumbs together to create the ideal consistency for shaping the cake pops.
  • Vanilla almond bark - A coating that melts smoothly and hardens quickly, ideal for covering the cake pops.
  • Holiday sprinkles -  Decorative toppings that add a festive touch, enhancing both the look and texture of the cake pops.
  • Popsicle sticks - To hold the cake pops in a stick.

See recipe card for quantities.

How to make this Best holiday cake pops recipe with cake mix

It all starts by making the cake using the instructions on the cake mix box. Once you prepare the batter according to the package instructions, pour it into the pan and bake for 25-28 minutes, or until a toothpick inserted into the center comes out clean. Let the cake cool—this step is important. Then, trim the edges and crumble the cake into pieces. Add cream cheese frosting and mix until well combined. I like to use a spatula for a mess-free mix.

Shape the mixture into golf ball-sized portions (I use a 1-tablespoon ice cream scoop) and refrigerate for 10 minutes. Melt white chocolate or almond bark in a microwave-safe bowl. Dip the tip of the cake pop sticks into the melted coating and insert them halfway into each cake ball—don’t go all the way through.

Freeze the cake pops for another 10 minutes. Dip the cake pops into the melted coating, tap to remove excess, and immediately decorate with holiday sprinkles. You can make 30 cake pops using 1 cake box mix. Once the coating has set, enjoy your festive holiday cake pops with friends and family!

Instructions

Step-by-step guide for making these delicious holiday cake pops.

Add the ingredients to make cake batter for cake mix.
  1. Step 1: Add the cake mix ingredients and mix well.
Cake batter in a sheet pan
  1. Step 2: Pour the cake batter into the prepared sheet pan and bake.
Baked cake mix yellow cake.
  1. Step 3: Once done, allow the cake to cool down.
Crumbled cake and frosting
  1. Step 4: Mix crumbled cake and cream cheese frosting.
  1. Step 5: Roll the mixture into round cake balls.
Dip the pop sticks in white chocolate
  1. Step 6: Dip the pop sticks with melted white chocolate.
Pop sticks inserted into the Cake Balls.
  1. Step 7: Insert the pop sticks into the Cake Balls and refrigerate.
Dip the cake pops in white chocolate.
  1. Step 8: Dip the cake pops in melted white chocolate.

Decorate the cake pops with festive holiday sprinkles immediately after coating. Once decorated, place the cake pops vertically, sticking the end of the stick into a foam block or a tall glass.

Once set, enjoy these delicious and festive holiday treats!

Hint: If the cake crumbs seem too dry or aren’t sticking together, you can add a little more frosting. The mixture should have a dough-like consistency that holds together well but isn’t overly sticky.

One CHRISTMAS cake pop

Tips for successful outer chocolate coating

  1. If using almond bark or candy melts, melt them in short bursts (20-30 seconds) in the microwave, stirring between intervals to prevent burning. If you're using white chocolate chips, you can add a small amount of vegetable oil or coconut oil to thin the coating and make it smoother for dipping.
  2. Tap the cake pops gently on the side of the bowl after dipping to remove any excess coating, which helps prevent drips and gives a cleaner finish.
  3. Be careful not to insert the cake pop stick too far into the cake ball, as it can cause the cake to crumble or break. Inserting it halfway helps keep the cake pop secure while still being easy to eat.

Substitutions

Vegan Version: Use a vegan cake mix and substitute the frosting with dairy-free options, such as coconut or almond-based frosting, to make vegan holiday cake pops.

Gluten-Free Version: Use a gluten-free cake mix and ensure that your frosting and coatings are also gluten-free for making gluten-free holiday cake pops.

Cream Cheese Frosting: If you prefer not to use cream cheese frosting, you can substitute with buttercream frosting for a sweeter, lighter filling.

Chocolate Coating Substitutions: Instead of almond bark or chocolate, you can use candy melts, which come in various colors and are easy to work with. If you prefer not to use white chocolate, substitute with dark or milk chocolate, ensuring it is melted properly.

Pop Sticks: If you don’t have cake pop sticks, you can use lollipop sticks, wooden skewers, or even drinking straws as alternatives.

Showing the texture of holiday cake pops

Variations

Here are some variations you can try for your holiday cake pops:

Red Velvet Cake Pops: Swap the yellow cake mix for red velvet cake mix for a festive, vibrant twist.

Chocolate Cake Pops: Use chocolate cake mix instead of yellow for a rich, indulgent flavor.

Spiced Cake Pops: Add cinnamon, nutmeg, and cloves to the cake batter for a warm, spiced flavor perfect for the holidays.

Candy Melts: Use different colored candy melts (like red, green, or gold) for a more personalized or themed look.

Sprinkles: Use different sprinkles like edible glitter, crushed candy canes, or themed confetti for a festive touch.

Equipment

Mixing Bowls: For combining the cake mix ingredients.

Hand Mixer: To blend the cake batter smoothly.

Sheet Pan: Used for baking the cake.

Ice Cream Scoop or Tablespoon: Helps scoop the mixture evenly for rolling the cake balls.

CHRISTMAS cake pops with sprinkles in the side

Storage

Room Temperature: Store the cake pops in an airtight container at room temperature for up to 3-4 days. 

Refrigerate: If you need to store them for longer, you can refrigerate them for up to a week.

Freezer: You can also freeze the cake pops for up to 2-3 months.

Thawing: If frozen, allow the cake pops to thaw in the fridge or at room temperature for about 30 minutes before serving.

FAQ

Why my cake pops are falling out from the sticks?

If your cake pops are falling off the sticks, it's usually because the stick wasn’t properly dipped in the coating. Before inserting the cake pop stick into the cake ball, dip the tip of the stick into the melted coating. This helps anchor the stick inside the cake pop, creating a 'glue' effect that prevents it from sliding out.

Can I make these cake pops using a homemade cake from the scratch?

Yes, you can definitely make cake pops using a homemade cake from scratch! I used cake mix because it’s easy to make and hassle-free, especially during the holiday season.

Can I make this cake pop ahead?

Yes, you can make these holiday cake pops ahead of time. Preparing them in advance is a great way to save time, especially during busy seasons like the holidays. Check the storage notes above for easy guideline.

Can I use a different type of frosting?

Yes, you can absolutely use different frostings in cake pops! Here are some of my recommendations; buttercream frosting, chocolate frosting, or even ganache will work in this recipe.

Related

Looking for other recipes like this? Try these:

  • Nutella covered strawberries in a pink plate with Nutella jar and fresh strawberries behind.
    Nutella Covered Strawberries
  • Easy , quick and easy oatmeal mug cake with chocolate and raspberries .
    Oatmeal Mug Cake Recipe (Ready in 2 Minutes!)
  • mini lemon bundt cake in a white plate.
    Moist Lemon Mini Bundt Cakes with Lemon Icing
  • Close up shot of chocolate mini bundt cake with chocolate drizzle on it.
    Mini Chocolate Bundt Cakes With Chocolate Ganache

Pairing

These are my favorite dishes to serve with [this recipe]:

  • Homemade Valentine cake pops with cake mix arranged in a glass jar filled with sprinkles.
    Easy Valentine Cake Pops with Cake Mix (No Cracks)
  • Juicy Chicken Meatballs in a white plate with marinara sauce on the sides.
    Juicy Air Fryer Chicken Meatballs In 20 Minutes
  • Healthy ground chicken stir fry in a skillet.
    Ground Chicken Stir Fry (Easy 20-Minute Dinner Recipe)
  • Creamy and delicious homemade salted caramel latte recipe in a glass mug.
    Salted Caramel Latte (Better Than Starbucks, Ready in 5 Min)
CHRISTMAS cake pops in a glass

Christmas Cake Pops with Cake Mix

Abi Guna
A Showstopper on the Dessert Table - Christmas cake pops are festive, bite-sized treats made from crumbled cake mixed with creamy cream cheese frosting, shaped into balls, and coated in a smooth layer of almond bark.
5 from 6 votes
Print Recipe Pin Recipe
Prep Time 30 minutes mins
Cook Time 25 minutes mins
Chilling Time 30 minutes mins
Total Time 1 hour hr 25 minutes mins
Course Dessert
Cuisine American
Servings 30 Cake Pops
Calories 165 kcal

Equipment

  • Mixing Bowls
  • Hand Mixer
  • Sheet Pan
  • Cooling rack
  • Meansuring cup

Ingredients
  

  • 1 13.25 oz box super moist yellow cake mix (such as Betty Crocker)
  • 3 large eggs at room temperature
  • ⅓ cup unflavored oil such as vegetable oil
  • 1 cup water
  • ½ cup cream cheese frosting such as Betty Crocker Rich and Creamy
  • 12 oz vanilla almond bark or substitute white chocolate or candy melts
  • 15 Cake pop sticks
  • Holiday sprinkles for decorating

Instructions
 

  • Preheat your oven to 350°F (175°C). Grease a 9x13-inch baking sheet pan with cooking spray or parchment paper and set it aside.
  • In a large bowl, combine the yellow cake mix, eggs, oil, and water. Use a hand mixer or whisk to blend everything together until the cake batter is smooth and well-combined, about 2 minutes.
  • Transfer the cake batter to the prepared pan and spread it out evenly. Bake for 25-28 minutes, or until a toothpick inserted into the center of the cake comes out clean.
  • Once baked, allow the cake to cool completely. After cooling, trim off the brown edges of the cake to create a clean surface. Then, break the cake into 4-5 large pieces and crumble them into fine crumbs in a bowl.
  • Add the cream cheese frosting to the crumbled cake in the bowl. Mix it well until the frosting is evenly distributed, and the mixture becomes dough-like.
  • Using an ice cream scoop, take a portion of the cake mixture about the size of a golf ball and roll it into a smooth ball. Place the formed cake balls on a plate. Refrigerate them for about 10 minutes to help them firm up.
  • Meanwhile, in a microwave-safe bowl, melt the white chocolate or almond bark in short intervals (20-30 seconds), stirring after each interval until smooth and fully melted.
  • Dip the tip of each cake pop stick into the melted chocolate, then insert it halfway into each cake pop to help it stay in place. Return the cake pops to the plate and refrigerate again for 10 minutes to set the sticks.
  • After the cake pops have chilled, dip each one into the melted white chocolate or almond bark until completely coated. Gently tap the stick to remove any excess chocolate and ensure an even coating.
  • Decorate the cake pops with festive holiday sprinkles immediately after coating. Once decorated, place the cake pops vertically, sticking the end of the stick into a foam block or a similar surface to keep them upright.
  • Allow the cake pops to come to room temperature and let the chocolate coating fully set. Once set, enjoy these delicious and festive holiday treats!

Notes

  1. Make sure to cool the cake completely before crumbling. This ensures the cake is firm enough to shape into pops and prevents the frosting from melting too much. I recommend leaving the cake on a wire rack at room temperature for at least 30 minutes before working with it.
  2. Chill the cake balls before inserting the sticks and after dipping them in chocolate. This helps them hold their shape and prevents the cake from falling off the stick when dipped.
Keyword Cake Mix, Cake Pops, Holiday Desserts

Easy Spicy Vegetable Soup with Fire Roasted Tomatoes

November 6, 2024 by Abi Guna 7 Comments

This spicy vegetable soup is loaded with wholesome veggies like potatoes, carrots, spinach, and green beans, all simmered in a rich base of fire roasted tomatoes that bring smoky depth and bold flavor. Unlike ordinary vegetable soups, this one is hearty, comforting, and has just the right kick of spice to warm you up on chilly days. 

Spicy vegetable soup in a dutch ove with a soup ladle

Warm up with this Spicy Vegetable Soup, a delicious blend of fresh and frozen veggies that’s perfect for a cozy meal. This recipe is packed with wholesome ingredients, making it one of the best choices for healthy soup recipes. If you love spicy vegetable recipes but prefer a less spicy version, this recipe for spicy vegetable soup is easy to adjust! For another comforting dinner, try my Chicken and Dumpling Casserole, creamy, hearty, and baked with fluffy biscuit topping.

Whether you're looking for vegan soup recipes, vegetarian soup recipes, or simply an easy soup recipe to enjoy, this dish fits the bill! With a touch of spice and hearty vegetables, it’s the ideal winter soup recipe for comfort and warmth. This homemade, nutritious soup is a go-to for spicy food lovers seeking comfort food with a healthy twist.

If you are not a soup person than you might like this Salmon Kale Quinoa Salad recipe! Are you looking to try some pasta dishes for dinner? Here you go: Ground Chicken Spaghetti and Shrimp Scampi Fettuccine most popular recipe in my blog!

[feast_advanced_jump_to]

What Makes Spicy Vegetable Soup Special?

This Quick Spicy Vegetable Soup is filling yet light and vegan-friendly. There is no better way to empty out the vegetable bin in the fridge than to prepare this soup which is loaded with vegetables. The remarkable aspect of this healthy one-pot spicy soup is that while it is vegan and perfect as is, it can be personalized to anyone’s standards.

The soup will remain tasty and healthy for anyone who adds some beans, rice, pasta, or even a bit of ground meat. This will add some protein, but the goodness and comfort of the spiced vegetables will remain.

Spicy vegetable soup in a bowl with spoon

Most people don’t eat enough vegetables. That small helping of broccoli florets at dinner hardly qualifies. This easy spicy vegetable soup fills us with a blast of colorful vegetables. Even kids will eagerly dig in (just watch the spice level for the young ones). Serve them in a bowl with their favorite grilled cheese sandwich.

How to Personalize Your Spices

It’s called spicy vegetable soup for a reason. The spices play a big part in putting the soup together. The great news is that you can personalize the level of heat to your desire. We believe the spices we have included in our soup work well to create an ideal flavor harmony. However, tastes can vary. For a deeper flavor, add some cayenne sparingly. 

How to Personalize Your Vegetables

It would be difficult to have a vegetable soup without the basics such as potatoes, carrots, and onions. However, there are many more vegetables available. Stroll through the produce section at your market and notice the great abundance: green beans, sweet potatoes, cauliflower, broccoli florets, zucchini, and squash. Feel free to try them, as well. Greens can run the gamut of spinach, kale chard, and more.

Spincy vegetable soup in a soup laddle

Frozen vs. Fresh Vegetables: Perfect Options for a Healthy, Spicy Vegetable Soup

We highly recommend using the freshest vegetables possible. As a matter of fact, you can visit a farmer’s market where the veggies were probably picked earlier in the day for your best options. Vegetables are tastiest at the height of their season and when freshly picked. 

However, fresh is not always gospel. A vegetable’s “season” may last for only a few months. For out-of-season vegetables, opting for frozen can be the way to go. Frozen may have more nutrients than out-of-season veggies that have been shipped around the world and have been sitting for a long time.

You need not disparage frozen vegetables but go with seasonable ones whenever possible. Think of fresh asparagus bursting with flavor in the spring. Would you really settle for frozen ones? Corn is at its sweetest during the summer, from May to September. It would be a shame to lose that sweetness by using frozen corn during those months.

Ingredients

This Spicy Vegetable Soup combines vibrant fresh and frozen vegetables with aromatic spices, hearty vegetable broth, and a touch of heat, creating a nourishing and flavorful dish that’s both comforting and energizing.

Ingredients for spicy vegetable soup
  • Olive Oil: Olive oil is used for sautéing the vegetables, providing a healthy fat base and rich flavor.
  • Celery: Celery adds a crisp, slightly peppery flavor and contributes to the soup’s overall texture and depth.
  • Yellow onion: Onions bring sweetness and savory flavor when cooked, serving as a foundational base for the soup.
  • Garlic: Garlic enhances the soup with a fragrant, savory depth and a slight pungency that complements the other ingredients.
  • Carrots: Carrots provide natural sweetness and vibrant color, balancing the savory flavors in the soup.
  • Green Beans: Green beans add a fresh, slightly earthy flavor and a satisfying crunch to the soup.
  • Potato: Potatoes give the soup a creamy texture and help make the dish more hearty and filling.
  • Spices: Chili powder brings mild heat and smoky flavor, elevating the spiciness of the soup, Curry powder adds warmth and complexity, infusing the soup with a rich, slightly earthy taste. Cumin contributes a warm, earthy, and slightly nutty flavor, deepening the soup’s spiciness and depth. Ground black pepper adds a subtle heat and sharpness to balance the richness of the other spices.
  • Fire-roasted diced tomatoes: Fire-roasted tomatoes give the soup a smoky, charred flavor that adds depth and sweetness to the broth.
  • Diced tomatoes with green chilies: These tomatoes provide a tangy, mildly spicy kick, enhancing the soup with both acidity and heat.
  • Vegetable broth: Vegetable broth serves as the liquid base for the soup, providing a savory foundation with a lighter, healthier sodium content.
  • Worcestershire sauce: Worcestershire sauce adds umami and a slight tang, helping to round out the flavor profile.
  • Yellow Corn: Corn adds natural sweetness and a pop of color, contrasting nicely with the spiciness of the soup.
  • Spinach: Spinach provides a burst of green, contributing both flavor and essential nutrients while adding freshness to the soup.
  • Parsley: Fresh parsley adds a vibrant, slightly peppery finish, enhancing the soup's visual appeal and providing a burst of fresh flavor.

See recipe card for quantities.

Close up shot of spicy vegetable soup

How to Make the Quick Easy and Spicy Vegetable Soup

Begin by sauteing your basic vegetables in a large pot for a few minutes. This helps bring out their deep flavors. 

Add your seasoning of choice. We are convinced that the curry powder adds a small flavor miracle. Soooo good. Just a little bit goes a long way.

Next, it is time for your fire-roasted tomatoes, diced tomatoes and chilies, and vegetable broth. You can add your diced tomatoes and chilies, or you can use Rotel tomatoes, which are a combination of tomatoes and chilies in one can. Let your vegetable soup with spice simmer to incorporate all the fabulous flavors.

The corn and spinach require the least cooking, so they are added last and are cooked for 5 minutes – a bit more if the corn is fresh,

Before serving, taste test your soup to ensure your spices are perfect. Keep in mind that you can always add, but you can’t subtract. That is why you should taste test at the end of cooking.

Instructions

onion and celery in a dutch oven
  1. Step 1: Once the oil is hot, add the chopped celery, onion, and minced garlic.
carrots, beans and potato in a dutch oven cooking
  1. Step 2: After 5 minutes, add the chopped carrots, beans, and diced potatoes to the pot.
Adding the spices to the veggies
  1. Step 3: Adding the spices.
roased and diced tomatoes added to the pot
  1. Step 4:Add both the fire-roasted and regular diced tomatoes to the pot, along with the vegetable broth and Worcestershire sauce.
Simmering soup in a dutch oven
  1. Step 5: Allow the soup to simmer for 20 minutes.
Corn and spinach added to the soup
  1. Step 6: Stir in the corn and spinach. Let these cook for an additional 4–5 minutes

Turn off the heat and give the soup a taste, adjusting the seasoning if needed. Ladle the soup into bowls and garnish each serving with a sprinkle of freshly chopped parsley. Serve the soup warm and enjoy!

Vegetable soup in a dutch pot

Substitutions

  • Oil: Use olive oil, avocado oil, or coconut oil for sautéing, depending on your flavor preference or what you have on hand.
  • Veggies: You can use bell peppers or zucchini instead of carrots and celery. These will add a different flavor but work well in soups. 
  • Potatoes: Sweet potatoes, parsnips, or even cauliflower florets can be used as alternatives to regular potatoes.
  • Fire-Roasted Tomatoes: If fire-roasted tomatoes aren’t available, use regular diced tomatoes with a pinch of smoked paprika or a dash of hot sauce for a hint of smoky flavor.
  • Vegetable Broth: Chicken broth or beef broth (if not vegan or vegetarian) can be substituted.
  • Spinach: Replace with kale or Swiss chard for a different leafy green.
  • Corn: Frozen peas can be replaced for corn to get that similar pop of color and sweetness.

These substitutions allow you to adapt the soup based on dietary needs or what you have in your pantry.

Variations

Here are some tasty variations to add a new twist to this hearty spicy vegetable soup recipe!

  • Creamy Vegetable Soup: For a creamier texture, blend half the soup once cooked using a blender , then mix it back in. You could also stir in a splash of coconut milk or heavy cream at the end for added richness.
  • Lentil and Vegetable Soup: Add ½ cup of red or green lentils for extra protein and heartiness. Increase the broth by 1-2 cups as lentils absorb liquid, and cook until the lentils are tender.
  • Hearty Beef and Vegetable Soup: Brown ground beef or sausage before adding the vegetables for a more filling soup. Use beef broth instead of vegetable broth, and add a bay leaf for flavor.

Equipment

  1. Dutch Oven or Large Pot with Lid : Ideal for evenly cooking and simmering the soup.
  2. Measuring Cups and Spoons: For accurately measuring spices, seasonings and broth.
  3. Ladle: To serve the soup easily from the pot.
  4. Serving Bowls: To enjoy the soup once it's ready.

With these tools, you’ll be set up to make the recipe smoothly from start to finish!

spicy vegetable soup in a spoon

How to Store This Quick and Easy Spicy Vegetable Soup

Prepare plenty of soup because vegetable soup is easy to store. Let the soup cool before transferring it to airtight containers or Ziplock bags that will keep for up to four days in the refrigerator.

You can freeze the soup for up to three months by placing it in airtight containers or Ziplock bags. To thaw the soup, keep in the refrigerator for a day, then reheat. 

Here’s a little but useful trick. Freeze the soup using small, individualized Ziplock bags. That way, you can conveniently remove a single serving at any time. 

Tips for Prepare a Magical Hearty Vegetable Soup with Spice

Our quick and easy spicy vegetable soup is as magical as it gets. However, don’t skip sauteing your basic vegetables at the beginning. That truly helps release their flavor.

FAQ

Can I use frozen vegetables instead of fresh?

Yes, you can absolutely use frozen vegetables instead of fresh in this spicy vegetable soup! Frozen vegetables are convenient, often just as nutritious as fresh ones, and work perfectly in soups. Just be sure to thaw the frozen vegetables, particularly the corn, before adding them to the soup to maintain the right texture and consistency.

How can I thicken soup?

This spicy vegetable soup is on the thinner side, but if you'd like to thicken it, feel free to add thickening agents like a cornstarch slurry or potato starch for a gluten-free option.

Can I add noodles or rice to this soup recipe?

Yes, you can add noodles or rice to this spicy vegetable soup. For noodles, add them 5-10 minutes before the soup finishes simmering. For rice, add cooked rice at the end or uncooked rice earlier to cook in the broth. Just be mindful to add extra liquid if needed, as rice absorbs broth. Both will make the soup more hearty and filling!

Related

Looking for other recipes like this? Try these:

  • Air Fryer Teriyaki Chicken Thighs (Easy Better-Than-Takeout Dinner)
  • Juicy and crispy air fryer BBQ chicken thighs coated with a caramelized smoky barbecue glaze on a serving plate.
    Air Fryer BBQ Chicken Thighs (Juicy, Crispy & Easy Dinner)
  • Crispy air fryer sweet potato wedges served with ketchup in a white plate.
    Air Fryer Sweet Potato Wedges
  • Healthy oven-roasted vegetables on a white bowl
    Roasted Cauliflower and Carrots (Easy Oven Recipe) 

Pairing

These are my favorite dishes to serve with [this recipe]:

  • Hot honey Brussels sprouts in a baking tray
    Hot Honey Brussels Sprouts (Crispy Oven-Roasted Recipe)
  • Ricotta Pesto Pasta in a white cast iron skillet
    Pesto Ricotta Pasta (Creamy, Easy 20-Minute Dinner)
  • Easy Pesto without Pine nuts feature image in a gray white bowl
    Pesto Without Pine Nuts (Easy Walnut Pesto Recipe in 5 Minutes)
  • Finished Ground chicken spaghetti dish in a skillet
    Ground Chicken Spaghetti with Vegetables (Easy High-Protein Dinner)
Easy spicy vegetable soup feature shot in dutch oven

Quick and Easy Spicy Vegetable Soup

Abi Guna
Quick and Easy Spicy Vegetable Soup for Cozy Nights! This hearty, fiber-packed spicy vegetable soup is perfect for chilly weather. Loaded with nutritious vegetables and a kick of spice, this comforting soup makes an ideal dinner option to warm you and keep you full.
5 from 4 votes
Print Recipe Pin Recipe
Prep Time 15 minutes mins
Cook Time 30 minutes mins
Total Time 45 minutes mins
Course Soup
Cuisine American
Servings 5 peoples
Calories 190 kcal

Equipment

  • Dutch Oven
  • Measuring cups and spoons
  • Ladle
  • Serving Bowls

Ingredients
  

  • 2 tablespoons olive oil
  • 1 stalk celery chopped
  • 1 cup yellow onion chopped
  • 1 teaspoon garlic minced
  • 1 cup carrot chopped
  • 1 cup green beans chopped
  • 1 cup potato chopped
  • 1 teaspoon salt
  • 1 teaspoon chili powder
  • 1 teaspoon curry powder
  • ½ teaspoon ground cumin
  • ½ teaspoon ground pepper
  • 1 (14.5 ounces) Fire roasted diced tomatoes
  • 1 (10 ounces) canned diced tomatoes with green chilies
  • 3 cups low sodium vegetable broth
  • 1 teaspoon Worcestershire sauce
  • 1 cup frozen yellow corn thawed
  • 2 cups fresh spinach
  • Chopped parsley to garnish

Instructions
 

  • Place a Dutch oven on the stove over medium heat and add a drizzle of oil. Allow the oil to heat up until it shimmers slightly.
  • Once the oil is hot, add the chopped celery, onion, and minced garlic to the pot. Stir occasionally and cook for about 4–5 minutes, or until the onion becomes soft and translucent. This step helps release the flavors of the aromatics, forming a tasty base for the soup.
  • Next, add the chopped carrots, beans, and diced potatoes to the pot. Stir everything together and cook for another 2–3 minutes to give the vegetables a head start in softening.
  • Sprinkle in your spices: salt, chili powder, cumin, curry powder and a pinch of black pepper. Stir well to coat the vegetables in the spices, which will deepen the flavor as the soup cooks.
  • Add both the fire-roasted and regular diced tomatoes to the pot, along with the vegetable broth and Worcestershire sauce. Stir everything together. Turn up the heat slightly to bring the soup to a rolling boil.
  • Once boiling, cover the Dutch oven with a lid, reduce the heat to low, and let the soup simmer for about 20 minutes. This will allow the vegetables to become tender and the flavors to meld.
  • After 20 minutes, remove the lid and stir in the corn and spinach. Let these cook for an additional 4–5 minutes, just until the spinach wilts and the corn is heated through.
  • Turn off the heat and give the soup a taste, adjusting the seasoning if needed. Ladle the soup into bowls and garnish each serving with a sprinkle of freshly chopped parsley. Serve the soup warm and enjoy!

Notes

Add a bit of acidity, such as Worcestershire sauce, to your soup for a taste boost.
 
Keyword comfort food, soup, spicy, vegetable

If you try this recipe, please leave a STAR rating in the comment section below! Your feedback helps a small blogger like me stay motivated in creating content for my readers. Also, feel free to follow me at Food Exit on Instagram, TikTok, and Pinterest for the latest recipe updates!

Oatmeal Butterscotch Chocolate Chip Cookies

November 5, 2024 by Abi Guna 5 Comments

These Oatmeal Butterscotch Chocolate Chip Cookies combine chewy oats with rich chocolate and caramelized butterscotch for a cookie that's perfectly balanced in sweetness and texture. Made with classic pantry ingredients and easy steps, these cookies bring a comforting twist to traditional oatmeal treats.

Butterscotch chocolate chip oatmeal cookies arranged in a marble table

If you're craving a sweet and chewy treat, this oatmeal butterscotch cookie recipe is just what you need. Whether you're baking for a family gathering or holiday baking or just want a cozy homemade dessert, this recipe for butterscotch oatmeal cookies will quickly become a favorite.The warm, nutty oatmeal pairs perfectly with the sweet, buttery butterscotch and the rich, dark chocolate.You should definitely try this combination—I'm sure you'll love it!

Are you looking for a single-serving oatmeal recipe? Try my 2-Minute Oatmeal Mug Cake—you’ll be amazed! Banana Blackberry Oatmeal Muffins are  perfect for breakfast or a quick snack!

Looking for holiday desserts? Try these Christmas Cake Pops, Andes Mint Chocolate Brownies and Dark Chocolate Almond Fudge

[feast_advanced_jump_to]

Why You’ll Love These chocolate chip and butterscotch cookies

Oatmeal Butterscotch Chocolate Chip Cookies are a delightful treat, offering the perfect blend of flavors and textures. Very simple and easy to make recipe! Here’s why they’re a must-try:

1. Easy to Make: This recipe is simple and straightforward, perfect for everyone—from experienced bakers to beginners with no baking experience.

2. Versatile: These cookies are delicious on their own or paired with a glass of milk. They’re a fantastic addition to cookie platters, gift baskets, or holiday treats like Christmas goodies or office potluck desserts.

3. Perfect Texture: You’ll love the chewy texture! With crispy edges and a slightly soft center, these cookies may look underbaked in the middle but cool to the perfect consistency.

4. Amazing Flavor Combination: The blend of oatmeal, butterscotch chips, and chocolate chips creates a flavor and texture experience that’s truly irresistible.

Overall, Oatmeal Butterscotch Chocolate Chip Cookies are a delicious, satisfying treat that’s sure to be a hit with everyone!

Butterscotch chocolate chip oatmeal cookies in a white plate

What Makes Oatmeal Butterscotch Chocolate Chip Cookies So Special?

Cookies, especially chocolate chip cookies, are always a treat. So, what sets these chewy oatmeal butterscotch cookies apart from the crowd? It’s the butterscotch, a unique blend of brown sugar, molasses, and salt to enhance and balance the sweetness, that ultimately makes these soft cookies irresistible, especially when they are warm and fresh from the oven.

They are chewy morsels of perfection with a gratifying intricate flavor. Consider butterscotch and oatmeal together a match made in heaven. Combining oatmeal and butterscotch is the cookie equivalent of a Cleopatra-Marc Anthony romance. It’s love at first bite.

These unique Butterscotch Chocolate Chip Oatmeal Cookies are ideal for holiday baking and turn into a surprise treat for your guests. Their complexity makes them a welcome cookie recipe for holidays that people can look forward to each year.

Ingredients for Butterscotch Chocolate Chip Oatmeal Cookies

Ingredients for Butterscotch Chocolate Chip Oatmeal Cookies
  • Flour: The main ingredient that provides structure to the cookies.
  • Baking Soda: Helps the cookies rise slightly for a light texture.
  • Salt: Enhances the flavors; a dash of salt is essential in desserts.
  • Cinnamon and nutmeg: For a warm, spiced twist in cookies.
  • Butter: Use softened butter for the ideal texture in baking.
  • Sugars: This recipe calls for both brown sugar and granulated sugar for depth of flavor and the perfect chewy-crisp balance.
  • Eggs: Requires 1 whole egg and an extra egg yolk for richness and softness.
  • Vanilla Extract: Adds a warm, aromatic flavor that enhances the cookies.
  • Oats: Use old-fashioned whole grain rolled oats to achieve a chewy texture.
  • Butterscotch Morsels: For a sweet, caramel-like flavor that pairs beautifully with the oats.
  • Chocolate Chips: Dark chocolate chips add a rich contrast to the sweetness—highly recommended!

See recipe card for quantities.

Preparing Your Oatmeal Cookies with Butterscotch and Chocolate Chips

If you're in the mood for something extra indulgent, try butterscotch chocolate cookies, where butterscotch and chocolate flavors shine together in a soft, chewy cookie.

Despite their deliciousness, these copies are surprisingly easy to prepare. No muss no fuss with incredible results. Your main ingredients will be unsalted butter, eggs, flour, brown and white sugar, semi-sweet chocolate chips, and, of course, butterscotch chips. The addition of salt is very important to counterbalance the caramel-like sweetness of the butterscotch.

Measure your flour carefully. Use a level cupful, no more no less. 

Combining your butter and sugar (called creaming) is best done with a hand mixer to achieve a good paste.

melted chocolate oozing out from the oatmeal cookies

As mentioned, salt is a critical component for achieving the best balance between sweetness and savoriness. Use good sea salt if possible as it has a milder taste than regular salt.

Feel free to use either light brown sugar or dark brown sugar, depending on your taste preference. Dark brown sugar will add a special richness to your easy butterscotch cookies and make them chewier.

Don’t overbake your scotchies – as fans refer to these delectable treats. They will continue to cook for a bit after you remove them from the oven.

Get creative. If you love nuts, add half a cup of chopped walnuts or pecans.

The type of oats you use matters. Use old-fashioned rolled oats and skip the quick-cook oats. The quick-cook kind absorbs too much liquid and will keep your oatmeal butterscotch chocolate chip cookies flat. 

The best chocolate chips for your cookies are semi-sweet, as they work best with the caramel flavor of the butterscotch and the salt. It will create the best possible blend of sweetness, so be prepared to have people fight over them.

Everyone loves a bargain but avoid cheaper or store-brand butterscotch chips, as they don’t always melt as well as the better brands. Be picky and go for the high-quality butterscotch. You’ll be glad you did.

You will find that cinnamon and nutmeg add just the right flavors to the scotchies.

One point to remember, no matter which variation you choose, these butterscotch and oatmeal cookies are easy to make and packed with flavor. Whether you're baking for a holiday, a potluck, or just because you love homemade cookies, this oatmeal butterscotch cookie recipe will satisfy your sweet tooth and become a go-to dessert in your kitchen!

Instructions

If you’re a fan of chocolate, these oatmeal chocolate chip butterscotch cookies offer the best of both worlds—sweet, buttery butterscotch blended with smooth chocolate for a decadent bite every time. Follow the step by step instructions to create this amaizng recipe!

Combining the dry ingredients for making the oatmeal chocolate chip cookies
  1. Step 1: Combine the ingredients; flour, baking soda, salt, cinnamon and nutmeg in a bowl.
Combine butter, brown sugar and butter for Oatmeal butterscotch chocolate chip cookies
  1. Step 2: In another bowl combine brown sugar, white suagr and soften butter.
Add the eggs to the cookie batter
  1. Step 3: Beat until light and fluffy and then add the egg, egg yolk and vanilla.
Combine dry and wet mixture for oatmeal  cookies
  1. Step 4: Fold the flour mixture into the wet ingredients until just combined.
Add oats, chocolate chips and butterscotch chips to the oatmeal cookie dough
  1. Step 5: Add oats, chocolate chips and butterscotch chips.
Combine the chocolate chips and oats
  1. Step 6: Gently fold in the chocolate chips and oats with the spatula.
Oatmeal butterscotch chocolate chip cookie dough in a baking tray
  1. Step 7: Scoop 2 tablespoons of dough onto the baking tray and bake.
butterscotch chocolate chip Oatmeal cookies in a cooling rack
  1. Step 8: Let the cookies cool on cooling rack.

Serve warm with a glass of milk for a cozy treat!

Hint: For extra chewy oatmeal cookies, chill the prepared cookie dough for at least 30 minutes before baking.

single Oatmeal butterscotch chocolate chip cookies

Substitutions

Here are some substitutions for ingredients in Butterscotch and chocolate chip cookies:

  • Rolled Oats: The recipe calls for old-fashioned rolled oats, you can use quick oats instead, though they may result in a softer texture.
  • Flour: All-purpose flour can be replaced by 1:1 gluten-free baking blend for gluten-free version of cookies.
  • For a dairy-free option, replace butter with an equal amount of coconut oil, adding a hint of coconut flavor, or use vegan butter as a 1:1 substitute. To reduce fat, substitute half the butter with applesauce, though the cookies will be softer and chewier. 
  • Butter scotch chips can be replaced by caramel chips and dark chocolate chips can be replaced by different types of chocolate chips for varied flavor profiles.
  • For egg replacement, Mix 1 tablespoon of ground flaxseed or chia seeds with 3 tablespoons of water for each egg, then let it sit for 5 minutes until gel-like and then you can use it in the recipe

Variations

Here are some delicious variations I would love to try using my same Oatmeal Butterscotch Chocolate Chip Cookies recipe:

  • Oatmeal Scotchies with Nuts: Add ½ cup of chopped walnuts, pecans, or almonds for extra crunchy flavor.
  • White Chocolate & Cranberry: Swap the dark chocolate chips with white chocolate and add ½ cup of dried cranberries for a festive, fruity version.
  • Peanut Butter Twist: Replace ¼ cup of butter with peanut butter to add a nutty, creamy flavor that complements the butterscotch.
  • Salted Caramel: Add a sprinkle of flaky sea salt on top before baking for a salted caramel vibe.
Stacked Oatmeal butterscotch chocolate chip cookies in a white plate

Equipment

  • Mixing Bowls: For combining wet and dry ingredients.
  • Electric Mixer (stand mixer or hand mixer): Helps cream the butter and sugars together for the right texture. I have used hand mixer for this recipe.
  • Measuring Cups and Spoons: For accurately measuring flour, sugar, and other ingredients.
  • Spatula : Useful for folding in the oats, chocolate chips, and butterscotch chips.
  • Baking Sheet: A sturdy, nonstick baking sheet ensures even baking.
  • Parchment Paper: Prevents cookies from sticking and makes cleanup easier.
  • Cookie Scoop: For evenly sized cookies that bake consistently. I have used 2 tablespoon sized ice cream scoop.
  • Wire Cooling Rack: Allows cookies to cool properly.

How to Store Your Leftover Chewy and Easy Oatmeal Butterscotch Cookies

While your oatmeal butterscotch chocolate chip cookies taste best warm, they retain their deliciousness at room temperature when stored in an airtight container for up to five days.

They also freeze very well for three months. Place them in a single layer in an airtight Ziplock bag. 

Oatmeal butterscotch chocolate chip cookies served with a glass of milk

Top Tip

For a delicious twist, try this chocolate chip butterscotch oatmeal cookies, where the sweetness of butterscotch chips meets the rich, melty goodness of chocolate chips. The below tips will help you to nail the recipe! 

  1. Don’t use butter that is too soft as that will result in a thinner cookie dough. Chill the butter for at least half an hour if it has been left out too long. Aim for solid room temperature.
  2. Want to know how to keep your cookies fresher longer? A baker’s trick is to include a slice of white bread in the container. Bread contains lots of moisture which the cookies absorb while in the container. It’s a nice trick to know. 
  3. Ensure that your eggs are at room temperature. If you forgot to take them out of the refrigerator in time, simply place them in a pan of warm water for five minutes.
  4. Blend your oatmeal butterscotch chocolate chip cookies well but keep from overmixing. Just stir and blend. Your scotchies can become tough if overmixed.

FAQ

Why my oatmeal cookies spread so much?

If your oatmeal cookies are spreading too much, it could be due to a few common reasons. Overmixing can incorporate too much air, causing the cookies to spread more, so mix just until the ingredients are combined. Additionally, if the butter is too soft or melted when you mix the dough, it can also lead to excessive spreading.

Can I make the oatmeal cookie dough ahead and refrigerate it?

Yes, you can definitely make oatmeal cookie dough ahead and refrigerate it! Chilling the dough not only makes it convenient for baking later but also enhances the cookies' flavor and texture. When you're ready to bake, let the dough sit at room temperature for a few minutes, then scoop and bake.

Whats is the secret of making soft and chewy oatmeal cookies?

The secret to making soft and chewy oatmeal cookies lies in a few key techniques, such as using brown sugar, which has more moisture than white sugar and adds chewiness to the cookies. Another tip is to bake the cookies just until the edges are set while the center remains soft; this helps maintain a chewy interior as they cool down.

Why there is an additional egg yolk in the recipe?

The addition of an extra egg yolk in Butterscotch Chocolate Chip Oatmeal Cookies helps enhance the texture and richness of the cookies. The yolk adds more fat, which makes the cookies softer, chewier, and more tender.

Related

Looking for other recipes like this? Try these:

  • Easy shrimp scampi fettuccine in a white skillet and garnished with parsley
    Easy Shrimp Scampi Fettuccine
  • CHRISTMAS cake pops in a glass
    Easy Christmas Cake Pops with Cake Mix - Holiday Treat
  • Easy spicy vegetable soup feature shot in dutch oven
    Easy Spicy Vegetable Soup with Fire Roasted Tomatoes
  • butterscotch chocolate chip Oatmeal cookies featuring cookies
    Oatmeal Butterscotch Chocolate Chip Cookies

Pairing

These are my favorite dishes to serve with these butterscotch chocolate chip oatmeal cookies:

  • Glass noodles stir fry in a skillet
    Glass Noodles Stir Fry with Chicken (Easy Korean Japchae)
  • Lemon pepper chicken in a plate garnished with parsley
    Crispy Baked Lemon Pepper Chicken Thighs – Easy Dinner Recipe
  • Berry Chia Seed Pudding in two jars
    Overnight Berry Chia Seed Pudding (Greek Yogurt)
  • Andes Mint Brownies (Best Fudgy Chocolate Brownies)
butterscotch chocolate chip Oatmeal cookies featuring cookies

Butterscotch Chocolate Chip Oatmeal Cookies

Abi Guna
These Butterscotch Chocolate Chip Oatmeal Cookies bring together chewy oats, rich chocolate chips, and caramelized butterscotch morsels for a deliciously balanced cookie. With the perfect mix of sweetness, texture, and flavor, these oatmeal cookies are a must-try for any cookie lover!
5 from 3 votes
Print Recipe Pin Recipe
Prep Time 15 minutes mins
Cook Time 10 minutes mins
Total Time 25 minutes mins
Course Dessert
Cuisine American
Servings 20 Cookies
Calories 220 kcal

Equipment

  • Mixing Bowl
  • Hand Mixer
  • Baking Sheet
  • Cooling rack
  • Measuring cups and spoons

Ingredients
  

  • 1 ½ cups all-purpose flour
  • ½ teaspoon baking soda
  • ½ teaspoon salt
  • ½ teaspoon ground cinnamon
  • ¼ teaspoon nutmeg powder
  • ¾ cup unsalted butter
  • ¾ cup brown sugar
  • ¼ cup granulated white sugar
  • 1 large egg at room temperature
  • 1 egg yolk at room temperature
  • 1 tablespoon vanilla extract
  • 1 ½ cups whole grain rolled oats
  • ½ cup plus 2 tablespoons butterscotch chips divided
  • ½ cup plus 2 tablespoons bittersweet dark chocolate chips divided

Instructions
 

  • Preheat the oven to 350°F and line a baking tray with parchment paper.
  • In a medium bowl, whisk together the flour, baking soda, cinnamon, nutmeg, and salt; set aside.
  • In a large mixing bowl, beat the butter, white sugar, and brown sugar until light and fluffy, about 3-4 minutes. Add the whole egg and egg yolk, followed by the vanilla, mixing until the mixture is pale and light.
  • Gradually fold the flour mixture into the wet ingredients until just combined (don’t overmix).
  • Gently fold in the oats, ½ cup butterscotch chips, and ½ cup chocolate chips with a spatula.
  • Using an ice cream scoop, scoop 2 tablespoons of dough onto the baking tray, spacing each 2 inches apart.
  • Press the remaining chocolate chips and butterscotch chips onto the tops of the cookies.
  • Bake for 9-12 minutes, until the edges are golden, and the centers are just set. Let the cookies cool on the tray for 10 minutes before transferring to a rack.
  • Serve warm with a glass of milk for a cozy treat.

Notes

  • For extra chewy oatmeal cookies, chill the prepared cookie dough for at least 30 minutes before baking.
  • To store, place cooled butterscotch oatmeal cookies in an airtight container at room temperature.
Keyword Butterscotch, cookies, easy desserts, holiday baking, oatmeal cookies

If you try this recipe, please leave a STAR rating in the comment section below! Your feedback helps a small blogger like me stay motivated in creating content for my readers. Also, feel free to follow me at Food Exit on Instagram, TikTok, and Pinterest for the latest recipe updates!

Glass Noodles Stir Fry with Chicken (Easy Korean Japchae)

October 28, 2024 by Abi Guna 9 Comments

Glass Noodles Stir Fry is a quick and easy, vibrant dish that combines tender chicken strips, colorful vegetables, and chewy glass noodles, all coated in a delicious savory stir-fry sauce. This flavorful recipe is perfect for busy weeknights, offering a nutritious meal that’s both satisfying and easy to prepare.

chicken glass noodles stir fry in a skillet

The star of the dish, the glass noodles - made from sweet potato, these noodles provide a delightful texture that perfectly absorbs the sauce's flavors. Serve it warm, garnished with sesame seeds and green onions, for a satisfying and nutritious dinner that everyone will love!

In this recipe, you'll sauté chicken thighs until golden and juicy, then toss in a medley of fresh vegetables like bell peppers, carrots, onions, and cabbage for crunch and color. The quick stir-fry technique ensures that everything is cooked evenly while retaining the vegetables' freshness. With the addition of garlic and a delicious sauce made from soy sauce, chicken broth, and oyster sauce, each bite is packed with savory goodness. I bet you will be creating this recipe often for your dinner!

If you enjoy quick and flavorful meals like this, be sure to explore my easy chicken recipes collection for more family-friendly dinner ideas. This recipe also pairs perfectly with fresh sides like my Classic Caesar Salad, or you can keep the takeout-inspired theme going with my Orange Chicken and Rice,  Chicken and Shrimp Fried Rice or Air Fryer Teriyaki Chicken Thighs. For another quick and satisfying noodle-style meal, don’t miss my Ground Chicken Stir Fry, which is packed with flavor and perfect for busy weeknights.

[feast_advanced_jump_to]

Why You Should Try this Glass Noodles Stir Fry Recipe

There is more to this chicken stir fry with glass noodles than just scrumptious flavor, although it would do any stir-fry connoisseur proud. A huge advantage to preparing this dish is that it is a timesaver, ready in just minutes.

This is what people hope for when they come home from work. No waiting. Dinner. Now. You do not need to be an experienced chef. All you need is a love of good food.

Glass chicken noodles stir fry in a bowl

Even better, this is a dish you can personalize to your and your family’s taste. Don’t like chicken? Try those leftover strips of beef. Carrots fail to thrill you? Add broccoli florets instead. This is a glass noodles stir fry you can turn into your own creation with just a few minor adjustments.

All the ingredients are standard in your cupboard, and they are economical and easy on your food budget. It’s much less expensive than dining out at your local Asian restaurant.

What Makes a Chicken Stir Fry with Glass Noodles Special?

This Asian-inspired chicken stir fry with glass noodles, which combines meat protein, vegetables and a savory sauce is the answer to any weeknight dinner. The ingredients are simple (they may quite well consist of leftovers), easy to prepare, and very affordable. The blend of protein, vegetables, and healthy fats makes this a nourishing culinary experience.

If you're a fan of flavorful and hearty meals, this chicken japchae recipe is a must-try! Made with tender chicken, colorful vegetables, and sweet potato glass noodles, it’s one of the best cellophane noodle recipes you can whip up at home. Known as Korean stir-fried noodles, japchae is a versatile dish that’s easy to customize with your favorite proteins and veggies. Whether you're preparing it for a weeknight dinner or a special gathering, this recipe is sure to impress with its savory-sweet flavors and satisfying texture.

What Are Glass Noodles aka mung bean vermicelli?

Glass noodles, also called Cellophane noodles, are sticky and gluten-free noodles used mostly in Asian cooking and loved for their chewiness. They are a reliable carbohydrate without much fat and sugar.

stir from noodles in a chopsticks

Contrary to what the name implies, most glass noodles are not see-through but are transparent white or light brown and made from mung beans or sweet potato starch. The success of your glass noodles can depend on what they are used for. They are relatively flavorless on their own and pick up the subtle nuances of the food with which it is cooked, which enhances and brings out the best in them.

How to Prepare Glass Noodles (Korean Japchae)

Simply soak the glass noodles in warm water for a few minutes. When they become more pliable, cut them in half and continue to soak them until you need them. These gentle noodles do not tolerate overly hot temperatures, so keep them in a cool place.

Close up shot of glass noodles stir fry

Tips for the Perfect Glass Noodles Stir Fry

  1. If possible, use a wok instead of a skillet.
  2. Be sure to soak your glass noodles in warm water instead of boiling water.
  3. Slice your vegetables and meat into thin strips to incorporate them better with the thin glass noodles.
  4. Don’t waste time chopping while you are stir frying. Have your veggies and meat prepared before you begin your stir fry.
  5. Don’t overcook or overfry the delicate glass noodles. Once they have absorbed the sauce, remove your wok from the heat.

Ingredients

The main ingredients for this tasty Asian noodle stir fry recipe is explained below.

Ingredients for glass noodles stir fy
  • Glass Noodles: These translucent noodles, made from sweet potato starch, offer a chewy texture and absorb flavors well, making them a perfect base for stir-fry dishes.
  • Chicken Thighs: Boneless, skinless chicken thighs add a juicy, tender protein to the dish, enhancing its heartiness and flavor.
  • Vegetables (Onion, Bell Pepper, Carrot, Cabbage, Green Onions): A colorful mix of vegetables contributes both crunch and nutrition, balancing the dish with freshness and flavor.
  • Stir Fry Sauce: A savory blend of soy sauce, chicken broth, oyster sauce, sesame oil, brown sugar, cornstarch, and pepper creates a rich, flavorful coating that ties all the ingredients together.
  • Sesame Seeds: These add a delightful crunch and nutty flavor as a finishing touch, enhancing both the taste and presentation of the dish.

See recipe card for quantities.

How to Cook Your Stir Fry with Glass Noodles

Begin your culinary journey by chopping the meat into thin strips. Then consider your vegetables – not all will be cooked for the same length of time. In this easy glass noodles stir fry, the cabbage takes a few minutes less to cook than the bell pepper and the carrots.

  • Begin by either soaking the glass noodles and setting them aside, or heating a saucepan with water and cooking the noodles according to the package instructions.
  • While you definitely need glass noodles for this stir fry dish, preparing this dish provides tremendous flexibility. If you have the basics for a glass noodle stir-fry, you probably don’t have to make a special trip to the market. As noted above, this stir fry is extremely flexible.
  • Next, combine your sauce ingredients for the perfect chicken stir fry. The oyster sauce and brown sugar give this sauce a lovely complexity, and the cornstarch thickens it nicely. Combine well and set the sauce aside.
  • Chicken, a popular low-fat protein, is the next ingredient. Shrimp and tofu can be common substitutes. Adding tofu will turn this into a vegetarian dish. Heat the oil in the skillet and brown the meat for about 5 minutes. The smaller you cut your protein, the quicker it will cook. The chicken, when done, also gets set aside.
  • Use the same skillet to sauté the colorful vegetables and stir for 5 minutes.
  • Add the chicken and the sauce back into the skillet.
  • Stir for a few minutes until the ingredients combine and the sauce thickens.
  • As a last step, add the glass noodles and toss the dish well.

Instructions

Boiled glass noodles
  1. Step 1: Cook the glass noodles according to the pacakage instructions.
in a bowl sit fry sauces are combined
  1. Step 2: Combine the stir-fry sauce ingredients in a bowl.
in a skillet chicken strips
  1. Step 3: In a skillet add the chicken strips, salt and pepper.
Cooked chicken strips in a skillet
  1. Step 4: Cook the chicken for 4-5 minutes.
Veggies in the skillet
  1. Step 5: Add the carrots, bell pepper, garlic and onions to the skillet.
Cooked veggies for stir fry in a skillet
  1. Step 6: Cook the veggies for 4-5 minutes.
chicken and cooked veggies in a skillet
  1. Step 7: Add the cooked chicken and prepared stir fry sauce mixture.
Stir fry sauce mixture and glass noodles
  1. Step 8: Add the cooked glass noodles and toss it.

Stir-fry for an additional 2 minutes. Garnish with sesame seeds and chopped green onions. Serve the stir-fried glass noodles warm for the best flavor.

Hint: If you're someone like me who loves saucy noodles, try adding an extra ¼ cup of chicken broth to achieve those juicy, saucy glass noodles!

Glass noodles stir fry in a skillet

Substitutions For Glass Noodles Recipe

Feel free to mix and match based on your taste preferences and dietary needs.

  • Swap out chicken thighs for other proteins like shrimp, beef, or tofu for a vegetarian version.
  • Use other vegetables such as broccoli, snow peas, bell peppers, or zucchini.
  • Replace soy sauce with tamari for a gluten-free option or coconut aminos for a soy-free alternative.
  • Instead of brown sugar, use honey, maple syrup, or agave nectar for sweetness.

Variations For Glass Noodles Recipe

This dish is not only easy to prepare but also customizable; you can swap in your favorite proteins and veggies, making it a perfect weeknight meal or a showstopper for gatherings.

  • Add scrambled eggs for extra protein and a different texture.
  • You can try incorporating leafy greens like spinach or kale for added nutrients.
  • Add sriracha or chili paste for some extra heat.

Equipment

To make a glass noodles stir fry, you’ll need the following equipment:

  1. Large Saucepan or Pot – for boiling the glass noodles.
  2. Strainer or Colander – to drain and rinse the cooked noodles.
  3. Large Skillet or Wok – ideal for stir-frying the chicken, vegetables, and noodles.
  4. Mixing Bowls  and serving bowls– to prepare and mix the stir-fry sauce and to serve the noodles.
Flat lay image of chicken stir fry glass noodles

How To Store this Gluten-free glass noodle stir fry

Uncooked glass noodles can be stored in a jar or sealed bag and kept in cool place for up to a year.

Once you have prepared your glass noodles dish, such as this stir-fried glass noodles with chicken, place any leftovers in an airtight container and refrigerate. They will last for up to four days and will reheat in the microwave and get their “chew” back.

Avoid freezing glass noodles Korean as they have a tendency to get mushy.

Top Tip For Perfect Stir Fry Glass Noodles

To keep your glass noodles perfectly chewy and avoid sticking, rinse them under cold water after cooking, then toss them lightly with sesame oil. This will stop the cooking process and prevent clumping, making it easier to mix them with your stir-fry ingredients and sauce.

FAQ

Are glass noodles healthy?

Glass noodles can be part of a healthy diet when combined with wholesome ingredients and prepared mindfully, as they are low in calories, making them a good choice for those looking to manage their weight.
Since the noodles are made from sweet potato starch, glass noodles are naturally gluten-free, making them suitable for people with gluten intolerance or celiac disease.

How to avoid glass noodles from sticking?

After cooking the glass noodles, rinse them under cold water to stop the cooking process and remove excess starch that can cause sticking. Then, toss the cooked noodles with a small amount of oil to create a barrier that prevents them from sticking together.

Is glass noodles and rice noodles are same?

No, glass noodles and rice noodles are not the same, although they may appear similar and are both used in Asian cuisine. Glass noodles, are typically made from starches like sweet potato, mung bean, or tapioca starch. Whereas rice noodles are made from rice flour and water, these noodles come in various widths and shapes,.

What Are Glass Noodles Made Of?

Glass noodles are a type of transparent noodle made from starch and water. For this Korean glass noodle recipe, I’ve used Sweet Potato Starch Noodles. Made from sweet potato starch, these noodles are commonly used in Korean dishes like japchae. They are naturally gluten-free and have a soft, chewy texture, making them perfect for absorbing flavorful sauces.

How to Cook Glass Noodles?

Bring a pot of water to a boil. Add the sweet potato starch noodles and boil for 6-8 minutes. Drain the noodles and rinse under cold water to stop cooking and prevent sticking. These noodles are perfect for stir-fries, soups, spring rolls, or dishes like japchae!

Close up shot of stir fry glass noodles

Related

Looking for other recipes like this? Try these:

  • Red velvet cookie cake sliced and kept in a white plate
    Valentine’s Cookie Cake (Red Velvet Cookie Cake Recipe)
  • In a bowl salmon kale quinoa salad
    Salmon Kale Quinoa Salad
  • Wide shot of dark chocolate fudge with almonds
    Easy Dark Chocolate Fudge with Almonds (No Bake)
  • Roasted carrot hummus with canned chickpeas feature image
    Roasted Carrot Hummus with Canned Chickpeas (Easy)

Pairing

These are my favorite dishes to serve with [this recipe]:

Glass noodles stir fry in a skillet

Glass Noodles Stir Fry

Abi Guna
Glass Noodles Stir Fry is a quick and easy vibrant and flavorful dish that brings together tender chicken strips, colorful vegetables, and chewy glass noodles, all coated in a savory stir fry sauce.
5 from 5 votes
Print Recipe Pin Recipe
Prep Time 15 minutes mins
Cook Time 15 minutes mins
Total Time 30 minutes mins
Course Main Course
Cuisine Asian, Korean
Servings 2
Calories 439 kcal

Equipment

  • Large Skillet
  • Large Saucepan
  • Mixing Bowls
  • Serving Bowls

Ingredients
  

  • 2 3.5 oz pack Glass noodles (Korean style sweet potato glass noodles)
  • 2 tablespoons oil divided
  • 1 lb. boneless skinless chicken thighs cut into strips
  • ½ teaspoon salt
  • ½ teaspoon ground pepper
  • 1 teaspoon garlic minced
  • 1 cup yellow onion sliced
  • 1 cup red bell pepper sliced
  • 1 cup carrot cut into matchstick size
  • 1 cup cabbage sliced
  • ½ cup green onions cut into 2-inch size
  • 1 tablespoon white sesame seeds

For the stir fry sauce

  • ¼ cup soy sauce
  • ¼ cup chicken broth
  • 2 tablespoons oyster sauce
  • 1 tablespoon sesame oil
  • 1 tablespoon brown sugar
  • 2 teaspoon cornstarch
  • ½ teaspoon ground pepper
  • Chopped green onions to garnish

Instructions
 

  • Cook the glass noodles according to the package instructions. In a large saucepan, bring water to a boil, then add the glass noodles and cook for exactly 6 minutes. Once cooked, drain the noodles, rinse with cold water, and set them aside. (Optional: Toss the noodles with a teaspoon of sesame oil to prevent them from drying out or sticking, but this step can be skipped if you plan to stir-fry them immediately.)
  • In a small bowl, combine the stir-fry sauce ingredients: soy sauce, chicken broth, oyster sauce, sesame oil, brown sugar, cornstarch, and pepper. Mix well and set aside.
  • Heat a tablespoon of oil in a large skillet. Once hot, add the chicken strips and season with salt and pepper. Cook for 4-5 minutes until the chicken is fully cooked, then transfer to a plate and set aside.
  • In the same skillet, add the remaining tablespoon of oil. Add the onion, red bell pepper, carrots, and garlic, and stir-fry on high heat for 2-3 minutes. Add the cabbage and green onions, cooking for another 2 minutes.
  • Return the cooked chicken to the skillet and pour in the stir-fry sauce. Cook for about 2 minutes until the sauce thickens. Do a taste test and adjust any flavor issues.
  • Finally, add the cooked glass noodles and toss everything together until well coated in the sauce. Stir-fry for an additional 2 minutes.
  • Garnish with sesame seeds and chopped green onions. Serve the stir-fried glass noodles warm for the best flavor.

Notes

  1. Don’t overcook or overfry the delicate glass noodles. Once they have absorbed the sauce, remove your wok from the heat.
  2. Do a taste test on the sauce before adding since the soy sauce might have some salt already added.
Keyword Chicken, Dinner, Main Dish, Noodles

Crispy Baked Lemon Pepper Chicken Thighs – Easy Dinner Recipe

October 24, 2024 by Abi Guna 14 Comments

Baked lemon pepper chicken thighs come out juicy with shatter-crisp skin using simple pantry staples. Pat the thighs dry, season, and bake at 400°F on a wire rack until the thickest part hits 165°F, a quick broil at the end makes the skin extra crackly. Done in about 40 minutes, great for weeknights or meal prep.

Drizzle over the baked lemon pepper chicken thighs

Perfect for a quick weeknight dinner, these chicken thighs pair beautifully with cheesy green beans and cheesy mashed potatoes , with rice, roasted vegetables like Hot Honey Brussel Sprouts , or a fresh green salad. The crispy skin and juicy meat make this a satisfying, crowd-pleasing meal that’s easy to prepare and full of bold flavors. If you’re craving more cozy chicken dinners, try my creamy Chicken and Dumpling Casserole, it’s the ultimate comfort food. The bright flavor of this cranberry sauce cuts through the richness of lemon pepper chicken perfectly. These lemon pepper baked chicken thighs are not only simple to prepare but also perfect for a family dinner or meal prep.

Are you looking for more chicken recipes? If so, you should definitely try these recipes: Ground Chicken Spaghetti and Chicken Glass Noodles Stir Fry. You may also like this easy weeknight dinner recipe Salmon Kale Quinoa Salad. If you enjoy quick and flavorful meals like this, be sure to explore my easy chicken recipes collection for more family-friendly dinner ideas. 

[feast_advanced_jump_to]

Why you will love this zesty chicken thighs

Simple and Quick: With minimal prep and just a handful of pantry ingredients, this chicken thigh recipe is perfect for busy weeknights.

Flavorful and Zesty: The combination of fresh lemon juice, pepper, and spices creates a bright and tangy flavor that perfectly complements the juicy chicken thighs.

Crispy Skin: Baking at the right temperature gives you irresistibly crispy skin while keeping the meat tender and moist.

Healthy and Versatile: It’s a healthy, protein-packed dish that pairs well with a variety of sides like roasted veggies, rice, or a fresh salad.

Great for Leftovers: The leftovers taste just as good, making it a convenient meal prep option for the week ahead.

oven baked chicken thighs plated in decorative plate with lemon wedges on the side

What You Need to Prepare Your Baked Lemon Pepper Chicken Thighs

Want to know how to make lemon pepper chicken? Your chicken thighs should have skin and bones to elevate the flavors to unexpected levels. Chicken breasts are great, but they can lack the juiciness of thighs.

Lemon pepper is the prime seasoning for your lemon pepper chicken thighs. Lemon is a wonderful source of Vitamin C, and black pepper contains important antioxidants to help with digestion. 

Additional herbs and spices help bring out the best in your baked lemon pepper chicken. 

How to Make Oven-Baked Chicken Thighs

If you’re looking for a flavorful and easy dinner idea, this recipe for lemon chicken thighs is a must-try!  The seasoning is critical, so season those thighs with the recommended herbs and spices. Marinating your healthy baked chicken thighs helps boost the already delectable flavor. Don’t skip this step. Even a short marinating period is better than no marinating at all.

Pat skin dry, season with lemon-pepper, garlic, and oil. Bake 400°F 35–45 min (or Air Fryer 390°F 18–22 min) to 165°F; finish with fresh zest and a quick broil for extra crisp.

Ingredients

Ingredient shot of baked lemon pepper chicken thighs recipe
  • Chicken thighs (skin-on and bone-in): Keeping the skin on and bones in ensures the chicken stays juicy and flavorful.
  • Lemon pepper seasoning: A key ingredient that adds the signature tangy and peppery flavor. It’s a blend of dried lemon zest, cracked black pepper.
  • Garlic powder: Provides a savory, earthy depth to the seasoning mix, enhancing the overall flavor of the chicken.
  • Onion powder: Adds a mild onion flavor without the texture of actual onions, giving a subtle sweetness to balance the tang of the lemon.
  • Dried parsley: Adds a pop of color and a slightly herbaceous note to complement the other seasonings.
  • Paprika: Adds a mild smokiness and a touch of warmth, as well as a subtle red hue to the chicken.
  • Fresh lemon zest: Freshly grated lemon zest boosts the citrusy flavor, making the dish more vibrant and refreshing.
  • Fresh lemon juice: Adds acidity and brightens the dish, enhancing the lemony flavor of the seasoning.
  • Olive oil: Used to coat the chicken and help it roast to perfection, keeping it moist and adding richness to the dish.

See recipe card for quantities.

Instructions

Easy baked chicken thighs are a delicious and flavorful dish that features tender, juicy chicken thighs seasoned with a zesty blend of lemon pepper, garlic, paprika, and herbs. Step wise instructions are below for better understanding.

Lemon pepper seasoning mixture in a bowl
  1. Step 1: Combine all the spices into a small bowl.
Lemon pepper seasoning mixture mixed  in a bowl
  1. Step 2: Mix thoroughly.
Lemon pepper marinade mixture
  1. Step 3: Add oil and lemon juice to the lemon pepper seasoning mixture.
Chicken thigh marinade in a ziploc bag
  1. Step 4: Marinade chicken thighs using the prepared marination mixture.
Arranged chicken thighs in a baking sheet
  1. Step 5: Arrange the marinated chicken thighs in a prepared baking sheet.
Baked Lemon pepper chicken Thighs is just out from the oven
  1. Step 6: Bake at 375 dgrees F for 35-40 minutes.

Hint:To get your baked chicken thighs especially crispy, bake for around 30 minutes (their internal temperature should read 165 degrees). Then raise the oven temperature to 400 degrees for a few minutes to crisp up that skin. 

Baked lemon pepper chicken thighs served with rice and broccoli

Substitutions for lemon pepper chicken thighs recipe

Chicken - You can substitute the chicken thighs with chicken breasts or drumsticks if preferred. Keep in mind that breasts may cook faster, so adjust the cooking time accordingly.

Lemon Pepper Seasoning - If you don't have lemon pepper seasoning, you can create your own by combining lemon zest, freshly ground black pepper, and a pinch of salt.

Olive Oil - Replace olive oil with avocado oil, grapeseed oil, or any neutral oil you prefer.

Paprika - If you don't have paprika, you can use smoked paprika for a deeper, smoky flavor or substitute with chili powder for some added heat.

Vegetarian protein option - Replace the chicken thighs with tofu or cauliflower steaks. Marinate and bake them using the same seasoning mix for a flavorful plant-based dish. Like here

Variations

  • Add fresh herbs like rosemary, thyme, or basil to the marinade for an extra burst of herbal flavor. These herbs pair beautifully with the lemon and pepper.
  • If you love a bit of heat, add some crushed red pepper flakes or cayenne pepper.
  • Drizzle a little honey over the chicken thighs before baking or during the last few minutes in the oven. This adds a touch of sweetness and caramelizes the skin beautifully.
CLose up shot of baked lemon pepper chicken thighs

Equipment

Here’s the equipment you'll need for making Oven roasted lemon pepper chicken thighs:

Baking tray or sheet pan: Used to place the chicken thighs for baking. Lining it with aluminum foil or parchment paper makes for easier cleanup.

Aluminum foil or parchment paper: To line the baking tray for easy cleanup and prevent sticking.

Small bowl: To prepare the seasoning mixture before coating the chicken.

Large mixing bowl: For mixing the seasoning and tossing the chicken thighs with the marinade.

How To Air Fry Lemon Pepper Chicken Thighs

You can follow the same exact recipe for this Air fryer method too. Place the marinated chicken thighs in the preheated air fryer basket and air Fryer 385–390°F, 18–22 minutes, flip once, rest 5 minutes. (Don't forget to grease your air fryer basket).

Storing Your Lemon Pepper Chicken Thighs

It is easy to make more crispy lemon pepper chicken than you need and store it for another time. Just reheat when needed. Before you transfer the chicken into airtight containers, let it cool. It will keep in the refrigerator for up to four days. When you are ready, warm it through (don’t dry it out) in the oven or microwave.

The lemon pepper chicken thighs will last in the freezer for up to four months. Wrap the individual thighs in plastic, then transfer all of them to a freezer bag. Label the freezer bag with the proper date. It gives you something delicious to look forward to.

Baked Lemon pepper chicken Thighs in a plate with rice and broccoli

Serving suggestions for Lemon Peper Chicken

These baked lemon pepper chicken thighs pair beautifully with a variety of comforting sides to complete your meal. Serve them with creamy classics like our Cheesy Mashed Potatoes or a fresh, Cheesy green beans, crunchy Shaved Brussels Sprouts Salad for a lighter option.

For a cozy family-style dinner, add a side of Green Bean Casserole or roasted seasonal veggies like Carrots and Asparagus. And if you’re planning a holiday meal, a spoonful of Cranberry Sauce with Dried Cranberries brings a sweet-tart contrast that elevates the bright lemon flavor of the chicken even more.

Things You Can Do with Leftover Baked Lemon Pepper Chicken Thighs

Fortunately, there is no shortage of how you can use leftover chicken:

  1. Shred the chicken meat and use it to create a tasty chicken salad for lunch. Add mayonnaise, sliced grapes, and nuts.
  2. Use the chicken for sandwiches and wraps.
  3. The leftover chicken is the ideal filling for tacos and enchiladas. Simply heat the chicken and add any additional needed spices. 
  4. Make a chicken stir fry with your favorite vegetables.
  5. Cook up some chicken fried rice for your next Chinese dinner.

Tips for oven baked lemon pepper chicken thighs

Here are some expert tips to make your Baked Lemon Pepper Chicken Thighs turn out perfectly:

  1. Thaw the chicken: Don’t cook the chicken straight out of the refrigerator. Let the thighs sit at room temperature for approximately 15 minutes. This  will prevent a cooked outside and an uncooked inside. 
  2. Pat the chicken dry: Ensure the chicken thighs are completely dry before seasoning to help the skin crisp up nicely in the oven.
  3. Marinate for extra flavor: If you have time, let the chicken marinate in the seasoning mixture for at least 30 minutes or up to a few hours in the fridge. This allows the flavors to penetrate deeper into the meat.
  4. Don’t overcrowd the pan: Space out the chicken thighs on the baking sheet to ensure even cooking and crispier skin. Overcrowding can cause steaming instead of roasting.
  5. Cook skin-side up: Bake the chicken with the skin facing up so it gets crispy and golden. You can also broil the chicken for the last 2-3 minutes to enhance crispiness. And also place the thighs on a rack over a sheet pan for better rendering and even browning.
  6. Check for salt: Many lemon-pepper mixes are already salty, so taste the seasonings before adding the salt and reduce added salt.
  7. Use a meat thermometer: For perfectly cooked chicken, use a meat thermometer to ensure the internal temperature reaches 165°F (75°C).
  8. Rest the chicken: Let the chicken rest for 5-10 minutes after baking to allow the juices to redistribute, keeping the meat moist and tender.
close up shot of lemon pepper chicken

FAQ

Can I grill lemon pepper chicken thighs?

Yes of course, instead of baking, you can grill the chicken thighs on a barbecue for a smoky flavor. The grilling method also crisps up the skin nicely.

What Are the Benefits of Marinating Chicken with Lemon Juice?

While marinating your easy baked chicken thighs in lemon juice, herbs, and spices is not an absolute necessity, it does infuse your chicken with incredible flavor inside and out, helping the meat retain needed moisture. Incidentally, marinating works the same magic for chicken breasts, as well.

Can I use the same lemon pepper marinade to any other recipes?

Of course you can! The lemon pepper seasoning marinade is versatile and can be used on chicken, fish, vegetables, and more for a fresh and zesty flavor!

Can I use boneless, skinless thighs?

Yes you can. Reduce the cook time. Roast at 400°F (204°C) for 18–25 minutes (size varies) until the thickest part hits 165°F/74°C. Add 1 teaspoon oil to the seasoning so they don’t dry out.

Why did mine taste too salty?

Many lemon-pepper blends already contain salt. Taste your blend first and add extra salt only if needed.

How do I get extra-crispy skin?

Pat dry, use a wire rack over a sheet pan, don’t crowd, and finish with a 2–3 minute broil.

Related

Looking for other recipes like this? Try these:

Pairing

These are my favorite dishes to serve with Baked Lemon Pepper Chicken Thighs:

Baked Lemon Pepper Chicken Thighs

Abi Guna
Easy oven baked lemon pepper chicken thighs are a delicious and flavorful dish that features tender, juicy chicken thighs seasoned with a zesty blend of lemon pepper, garlic, paprika, and herbs. Perfect for a quick weeknight dinner!
5 from 5 votes
Print Recipe Pin Recipe
Prep Time 15 minutes mins
Cook Time 35 minutes mins
Total Time 50 minutes mins
Course Main Course
Cuisine American
Servings 6
Calories 227 kcal

Equipment

  • Baking sheet pan
  • Mixing Bowls

Ingredients
  

  • 6 Chicken thighs Skin on and bone in
  • 1 tablespoon lemon pepper seasonings
  • 1 teaspoon garlic powder
  • 1 teaspoon onion powder
  • 1 teaspoon dried parsley
  • 1 teaspoon salt
  • ½ teaspoon paprika
  • ½ teaspoon fresh lemon zest
  • 2 tablespoons fresh lemon juice
  • 3 tablespoons olive oil
  • Fresh parsley to garnish
  • Lemon slices to garnish

Instructions
 

  • Preheat the oven to 400°F (204°C). Line a baking tray with aluminum foil and set it aside.
  • Pat dry the chicken thighs with a kitchen towel and set them aside.
  • In a small bowl, combine the seasonings: lemon pepper, garlic powder, onion powder, parsley, salt, paprika, and lemon zest. Mix well.
  • Add the lemon juice and olive oil to the seasoning mixture and stir until well combined.
  • Place the chicken thighs and the seasoning mixture into a large Ziplock bag. Massage the chicken to ensure it's thoroughly coated with the marinade. If desired, marinate the chicken for a couple of hours for enhanced flavor, or proceed to bake immediately.
  • Arrange the chicken thighs on the prepared baking tray over a rack (if possible) and bake for 40-45 minutes, until the thickest part hits 165°F/74°C and broil 2–3 minutes for extra-crisp skin.
  • Garnish with chopped parsley and serve with rice and vegetables on the side.

Notes

  1. Let the thighs sit at room temperature for 15 minutes before cooking to ensure even cooking and prevent the outside from overcooking while the inside remains undercooked.
  2. Adjust the pepper and salt levels according to your taste. You can add more pepper if you like it spicier or more salt if you prefer a saltier seasoning because many blends include salt. Add extra salt only if needed.
  3. For Air Fryer Method: Place the marinated chicken thighs in the preheated air fryer basket and air Fryer 385–390°F, 18–22 min, flip once, rest 5 minutes. (Don't forget to grease your air fryer basket).
  4. For grill: Place the chicken thighs in medium-high, skin-side down 6–8 min to render, flip/cover 6–10 min to 165°F, brush with lemon-butter off heat.
Keyword Baked, Chicken, Dinner, Main Dish

If you try this recipe, please leave a STAR rating in the comment section below! Your feedback helps a small blogger like me stay motivated in creating content for my readers. Also, feel free to follow me at Food Exit on Instagram, TikTok, and Pinterest for the latest recipe updates!


Overnight Berry Chia Seed Pudding (Greek Yogurt)

October 21, 2024 by Abi Guna 5 Comments

Berry Chia Seed Pudding is a delicious, healthy, and easy-to-make breakfast or snack option that's packed with nutrients. So just whisk milk, chia seeds, vanilla, and maple syrup, then chill overnight until thick. Stir, top with fresh berries, and serve or pack for meal prep.

Honey drizzle on berry chia pudding

Looking for a quick and easy meal prep breakfast idea? This berry chia seed pudding is creamy, lightly sweet, and breakfast-ready straight from the fridge. Mix it in 5 minutes, chill overnight, then finish with your favorite berries. Use almond milk or coconut milk, keep it dairy-free/vegan, or add Greek yogurt for extra protein.

Don’t have much time? No problem! It only takes 5 minutes to prepare the night before, giving you a hassle-free breakfast in the morning. It's perfect for meal prep and can be customized with any of your favorite berries. Whether you prefer a classic chia pudding with fruit or a creamy yogurt chia seed pudding, these easy recipes make the perfect chia pudding for breakfast. Layer your pudding with fresh or frozen fruits like berries, mango, or kiwi for a vibrant, flavorful twist. Packed with protein, fiber, and antioxidants, it’s a satisfying option that fuels your morning and keeps you energized throughout the day! For extra protein, you can add a scoop of your favourite protein powder too.

For quick breakfast options under 15 minutes, try my Nutella Waffles, Red Velvet Waffles, Apple Cinnamon Waffles and Pecan Pumpkin Waffles.

Are you a fan of meal prepping? If so, you should definitely try these high-protein recipes—they’re perfect for meal prep : Lemon Pepper Chicken Thighs and Salmon Kale Quinoa Salad

[feast_advanced_jump_to]

Why I love this recipe

I love this recipe for many reasons, but most importantly:

  • Simple to prepare and packed with nutrition and better than overnight oats.
  • Takes just a few minutes to make, yet full of wholesome ingredients.
  • Leaves me feeling energized and satisfied.
  • Highly versatile – can be customized with favorite berries, toppings, or flavors.
  • Perfect for meal prep, making breakfast or snacks quick and easy.
  • A delicious, guilt-free treat that fits effortlessly into my routine.
close up shot of berries in the pudding jar

Chia seed pudding with berries

This easy-to-make chia pudding recipe is ideal for meal prep and can be customized with your favorite fresh berries, such as blueberries, strawberries, or raspberries, for a burst of natural sweetness.

Whether you're looking for a vegan chia pudding recipe or a gluten-free breakfast idea, this mixed berry chia seed pudding offers a quick, satisfying, and nutrient-rich option. Loaded with fiber, omega-3 fatty acids, and antioxidants from the berries, it’s a great way to start your day or enjoy a midday snack.

Mixed berry chia pudding ingredients

  • Berries - Fresh or frozen berries, such as fresh blueberries, strawberries, raspberries, or blackberries. I have used all the four berries for the recipe.
  • Milk - You can use any type of milk, including dairy milk (whole, skim, or low-fat) or plant-based alternatives like almond milk, coconut milk, or oat milk.
Ingredients for berry chia seed pudding
  • Chia seeds - The main ingredient of the recipe and I called it a powerhouse of nutrients.
  • Vanilla - Pure vanilla extract or vanilla bean paste, which adds a warm, sweet flavor to the pudding.
  • Maple syrup - A natural sweetener to sweeten the pudding.
  • Greek yogurt - A thick, creamy plain yogurt does wonders here. 
  • Sliced almonds - Thinly sliced almonds that serve as a crunchy topping for the pudding.

See recipe card for quantities.

HOW TO MAKE HEALTHY BERRY CHIA SEED PUDDING WITH YOGURT

In a blender, combine ½ cup of mixed berries (such as blueberries, raspberries, or strawberries) with your milk of choice, maple syrup for sweetness, and a splash of vanilla extract. Blend everything together for about 1 minute, or until the mixture is smooth and creamy with no chunks of fruit left. This will give the chia pudding a delicious berry flavor and a vibrant color.
Pour the blended berry mixture into a medium-sized bowl. Sprinkle the chia seeds evenly over the mixture. Stir the chia seeds well, ensuring they are fully incorporated without clumping. Let the mixture rest for about 10 minutes. This allows the chia seeds to start absorbing the liquid and begin thickening. After 10 minutes, stir again to break up any lumps that may have formed and ensure an even consistency.

chia seed pudding garnished with mixed berries


Cover the bowl with a lid or plastic wrap and refrigerate the chia seed pudding for at least 1 hour to let it fully set. For a thicker, creamier texture, it's ideal to refrigerate it overnight. The chia seeds will absorb the liquid, creating a gel-like consistency that makes the pudding rich and smooth.
When you’re ready to serve, take a glass or jar for layering. Start by spooning 2 tablespoons of the prepared berry chia seed pudding into the bottom of the glass. Add 2 tablespoons of Greek yogurt on top of the pudding layer. Repeat this process—another layer of chia pudding followed by Greek yogurt—until you have beautiful alternating layers of pudding and yogurt.

To finish, top your layered pudding with fresh berries and a handful of sliced almonds for a bit of crunch. If you want an extra touch of sweetness, drizzle a little more maple syrup over the top. Your delicious, healthy, and beautifully layered chia berry pudding is now ready to serve!

Step by step Instructions

Added the mixed berries to the blender
  1. Step 1: Add the berries to the blender.
Adding milk to the jar
  1. Step 2: Add the milk, vanilla extract and maple syrup.
Blended berries
  1. Step 3: Blend everything together for about 1 minute.
Chia seeds added to the mixture
  1. Step 4: Chia seeds added to the berry mixture.
Berry chia seed pudding in a glass bowl
  1. Step 5: Let it sit for 10 minutes, then stir again to ensure no lumps.
Berry chia seed pudding added to the glass jar
  1. Step 6: Add a layer of berry chia seed pudding mixture.
Greek yogurt layer and berry chia pudding layer
  1. Step 7: Add a layer of Greek yogurt.
Berry chia pudding layers topped with berries
  1. Step 8: Repeat to create beautiful layers and top with berries.

Drizzle a bit more maple syrup on top and garnish with almonds for extra crunch to enjoy!

Hint: Mix the chia seeds thoroughly and let them sit for 10 minutes. Stir again to break up any lumps, then refrigerate to allow the pudding to gel. This ensures a smooth, flowing consistency instead of a lumpy texture in any chia seed pudding recipe.

Close up shot of berry chia seed pudding with a maple syrup drizzle

Chia seed pudding troubleshooting steps

Start your day with a delicious and nutritious fruit chia pudding that’s as beautiful as it is healthy! The below tips would help to create achieve that.

Chia Seed Soaking Time:

  • Allow the chia seeds to soak for at least 1 hour or overnight. This is crucial for achieving the right gel-like consistency. If you don’t let them soak long enough, the pudding may be runny and not set properly.

Mix Thoroughly:

  • When adding chia seeds to the blended mixture, make sure to mix thoroughly to prevent clumping. Stirring well ensures that the seeds are evenly distributed and can absorb the liquid effectively.

Check for Lumps:

  • After the resting period, check for any lumps in the chia pudding. If lumps form, simply whisk or stir vigorously to break them apart before serving.

Berry chia pudding serving suggestions

I personally love to serve it by layering it like a parfait. Create beautiful layers in a clear glass by alternating berry chia pudding with Greek yogurt and fresh berries. Top with your choice of nuts for added crunch. You can also serve it by:

  • Adding a dollop of whipped cream on top
  • Sprinkling granola over the pudding
  • Drizzling peanut butter or almond butter on top
two jars of berry pudding

Substitutions

Berries - If you don’t have fresh or frozen berries, you can use other fruits like diced peaches, mango, or even apples. 

Milk - Instead of dairy milk, you can use plant-based alternatives like almond milk, coconut milk, oat milk, or soy milk. 

Vanilla - If you don’t have vanilla extract, you can use almond extract or omit it altogether. For a different flavor, consider using a pinch of cinnamon or nutmeg.

Maple Syrup - You can substitute maple syrup with honey, agave syrup, or coconut sugar.

Greek Yogurt - If you want a dairy-free option, use coconut yogurt, almond yogurt, or any other plant-based yogurt.

Sliced Almonds - Instead of sliced almonds, you can use any other nuts like walnuts, pecans, or hazelnuts.

Variations

Feel free to customize the recipe by adding spices like cinnamon or nutmeg, or by mixing in other fruits, nuts, or seeds. This will not only enhance the flavor but also increase the nutritional value.  My favorite variations are:

Lemon Blueberry Chia Pudding: Add lemon juice and lemon zest to the blended mixture for a refreshing citrus flavor. This pairs well with blueberries for a bright, zesty pudding.

Cinnamon Apple Chia Pudding: Use diced apples instead of berries and add a sprinkle of cinnamon and nutmeg. Sweeten with maple syrup and top with chopped walnuts for added crunch.

Tropical Chia Pudding: Replace mixed berries with tropical fruits like mango, pineapple, and coconut milk. Top with shredded coconut and chopped nuts for a refreshing twist.

Spoon scoping out of chia seed pudding

Equipment

Blender - To blend the berries, milk, maple syrup, and vanilla for a smooth and consistent mixture.

Mixing Bowl - For combining the blended berry mixture with chia seeds.

Serving Glasses or jars - To create beautiful layered servings of chia pudding with yogurt, fresh berries, and toppings.

Storage

Air tight containers: Store the chia pudding in airtight containers or mason jars to keep it fresh.

Refrigeration: Keep the pudding in the refrigerator. It can last for up to 3-5 days. The chia seeds will continue to absorb moisture, so the texture may thicken slightly over time. At the time of serving you can add a tablespoon of milk to slightly thin it up if you desire. Best for meal prep breakfast.

Top Tip

Chia Seed to Liquid Ratio: The standard ratio for chia pudding is about ¼ cup of chia seeds to 1 cup of liquid. If you used too much liquid compared to the chia seeds, the pudding may remain runny.

Close up shot of berry chia seed pudding

FAQ

Is chia pudding good for your health?

Yes, chia pudding is beneficial for health for many reasons. Incorporating chia pudding into your diet can be a nutritious choice that provides a variety of health benefits. This Berry chia pudding recipe is healthy, wholesome and fiber loaded with low carb.

Are chia seeds good for weight loss?

Yes, adding chia seeds to smoothies, salads, or overnight oats to boost fiber and protein intake, which may help with weight loss; however, they are not a magic solution on their own. Combining chia seeds with a balanced diet and regular physical activity is essential for effective weight management.

How long should chia seeds soak for this pudding recipe?

For the berry chia seed pudding recipe, chia seeds should soak for at least 1 hour to allow them to absorb the liquid and form a gel-like consistency. However, for the best results, soaking them overnight is ideal, as this gives the seeds ample time to swell fully and create a smooth, creamy texture. If you're short on time, a minimum soak time of 10-15 minutes can work, but the pudding may be less thick and may require a bit of stirring to eliminate lumps.

Can I use frozen berries in the recipe?

Yes, of course, you can use frozen berries in this pudding recipe. If you choose to use frozen berries, allow them to thaw before blending, as this will help achieve a smoother consistency. A thick creamy chia pudding with frozen fruit will be a quick, healthy, and flavorful option.

Can you freeze chia pudding?

Yes, you can freeze chia pudding! Freezing is a great option if you want to prepare it in advance and enjoy it later. Chia pudding can be frozen for up to 1 month without compromising texture or flavor when you keep it in an airtight container.

Why is my chia pudding runny?

Add 1–2 teaspoons chia, rest 10 minutes, and stir; thickness depends on milk type and chia freshness.

Can I blend it smooth?

Yes, blend the set pudding for a silky texture (great for kids).

Is this chia pudding with mixed berries is vegan?

To make it vegan use plant based milk, yogurt and maple syrup.

Related

Looking for other recipes like this? Try these:

Berry Chia Seed Pudding Recipe

If you try this recipe, please leave a STAR rating in the comment section below! Your feedback helps a small blogger like me stay motivated in creating content for my readers. Also, feel free to follow me at Food Exit on Instagram, TikTok, and Pinterest for the latest recipe updates!

Berry Chia Seed Pudding in two jars

Berry Chia Seed Pudding

Abi Guna
Berry Chia Seed Pudding is a delicious, healthy, and easy-to-make breakfast or snack option that's packed with nutrients.
5 from 3 votes
Print Recipe Pin Recipe
Prep Time 10 minutes mins
Chilling Time 1 hour hr
Total Time 1 hour hr 10 minutes mins
Course Breakfast, Dessert
Cuisine American
Servings 2
Calories 211 kcal

Equipment

  • Blender
  • Mixing Bowls
  • Mason jar or serving glasses

Ingredients
  

  • 1 cup fresh mixed berries strawberries, raspberries, blackberries and blueberries, divided
  • 1 cup whole milk
  • 1 tablespoon maple syrup
  • ½ teaspoon vanilla extract
  • 3 tablespoons chia seeds
  • ½ cup Greek yogurt
  • 2 tablespoons sliced almonds

Instructions
 

  • In a blender, add ½ cup of mixed berries, milk, maple syrup, and vanilla. Blend for about 1 minute until smooth.
  • Pour the blended mixture into a medium bowl. Sprinkle the chia seeds over it and mix well. Let it sit for 10 minutes, then stir again to ensure no lumps.
  • Cover the bowl and refrigerate the chia pudding for at least 1 hour, or overnight for the best texture.
  • When ready to serve, layer the pudding and Greek yogurt in a glass. Start with 2 tablespoons of the berry chia pudding, followed by 2 tablespoons of Greek yogurt, and repeat to create beautiful layers.
  • Top with fresh berries and sliced almonds. If you like, drizzle a bit more maple syrup on top and enjoy!

Notes

  1. Allow the chia seeds to soak for at least 1 hour or overnight. This is crucial for achieving the right gel-like consistency. If you don’t let them soak long enough, the pudding may be runny and not set properly. 
  2. When adding chia seeds to the blended mixture, make sure to mix thoroughly to prevent clumping. Stirring well ensures that the seeds are evenly distributed and can absorb the liquid effectively.
  3. When layering the pudding with Greek yogurt, use clear glasses or jars to showcase the beautiful layers. This makes for an appealing presentation and can be a fun way to serve it at gatherings.
Keyword breakfast, pudding, snacks

Andes Mint Brownies (Best Fudgy Chocolate Brownies)

October 18, 2024 by Abi Guna 16 Comments

These Andes Mint Brownies are irresistibly fudgy and packed with rich chocolate flavor. Each bite offers the perfect balance of dense, chewy brownie and refreshing mint from the chopped Andes chocolate.

Center part of fudgy chocolate mint brownie

The gooey chocolate center and slight crisp on the edges make these brownies a chocolate lover's dream. Perfect for holidays, parties, or whenever you're craving a decadent, homemade dessert, these mint brownies are sure to impress!

If you like more chocolate desserts like me try this Dark Chocolate Fudge with Almonds recipe! Want to explore more Holiday desserts? Try these Christmas Cake Pops and Butterscotch Chocolate Chip Oatmeal Cookies .

[feast_advanced_jump_to]

Why you will love this Andes Mint Brownie recipe

They're the perfect balance of decadent chocolate and refreshing mint, guaranteed to leave you wanting more! Here's why I highly recommend making these Andes Chocolate Mint Brownies:

  • Quick & Simple: The steps are easy to follow, making it a breeze to whip up a batch of these brownies whenever you’re craving something sweet.
  • Rich, Fudgy Texture: These brownies are rich, fudgy, and have that ideal chewy center—every chocolate lover’s dream! Trust me, brownies are meant to be fudgy, and this recipe nails it.
  • Minty Twist: The burst of refreshing Andes mint chocolate adds a delicious twist to the classic brownie. You won’t believe how amazing they taste until you try them!
  • Easy to Make: With simple ingredients and easy-to-follow steps, this recipe is perfect for bakers of all levels. No need to wait for the holidays to enjoy these!
  • Crowd-Pleaser: Whether it’s for a holiday, party, or just a special treat, these brownies are always a hit! Be prepared for everyone to ask you for the recipe!
Shiny top mint chocolate brownies.

Two key steps for achieving a shiny, crackly top on Brownies

  1. Melting the butter and sugar together: Dissolving the sugar in warm butter helps form that glossy, crackly top layer everyone loves. As the sugar recrystallizes during baking, it creates the signature shiny crust.
  2. Whisking the eggs and sugar: Beating the eggs and sugar until the mixture is pale and frothy ensures the sugar dissolves properly. This step is key to achieving that beautiful, glossy finish on top as the brownies bake.

What’s the secret to fudgy brownies?

The key is adding oil to the brownie batter, which keeps them moist and gives them that delicious fudgy texture. Another important factor is baking time—be sure not to bake the brownies for more than 30 minutes!

After that, they start to lose their fudginess and can turn cakey, so keeping an eye on the clock is crucial for achieving that perfect fudgy brownie. If you follow the exact steps you can achieve the perfect fudgy Andes mint brownies!

Stacked mint chocolate brownies shot.

Serving Options for Andes Mint Brownies

Serve the brownies as they are to let the rich chocolate and mint flavors shine. For a delightful contrast in temperature and texture, top warm brownies with a scoop of vanilla, mint, or chocolate ice cream—it's my favorite way to enjoy them!

If you’re looking for a lighter option, serve them with a dollop of mint-flavored or regular whipped cream for a refreshing touch. And if you want to indulge a little more, drizzle warm brownies with chocolate sauce or fudge—kids absolutely love this option!

Ingredients

This delicious recipe combines a variety of dry and wet ingredients to create a rich and chocolatey treat.

Ingredient list for mint Chocolate brownies
  • Flour: You'll need all-purpose flour; I haven't tried any substitutes, so I recommend sticking with this for the best results.
  • Cocoa Powder: For a deep chocolate flavor, I highly recommend using unsweetened Dutch-processed cocoa powder. The quality of your cocoa powder is crucial for making great brownies!
  • Espresso Powder: This helps enhance the chocolate flavor. If you're not a fan of coffee, you can skip this ingredient, but trust me—you won’t taste the coffee in the final product!
  • Salt: A little salt goes a long way in baking; it helps bring out all the flavors.
  • Butter: Use good quality unsalted butter for the base of the brownies.
  • Eggs: Always use room temperature eggs for the best results. If you forget to take them out ahead of time, you can place them in warm water for about 10 minutes to bring them to room temperature.
  • Oil: Any flavorless oil will work here; I personally use avocado oil.
  • Sugar: This recipe calls for both brown sugar and white granulated sugar to achieve the perfect sweetness and texture.
  • Vanilla Extract: Adds a lovely flavor to the brownies.
  • Dark Chocolate Chips: These provide a rich and decadent flavor.
  • Andes Mint Chocolates: They add a delightful twist, making each bite a perfect blend of chocolate and mint!

See recipe card for quantities.

How to make Andes Mint Brownies Recipe

Step by step process of making Andes Chocolate Mint Brownies:

Chopped Andes Mint Chocolate for brownies recipe
  1. Step 1: Unwrap and roughly chop the Andes mint chocolate; set aside.
Mixing flour, cocoa and dry ingreidents for brownies
  1. Step 2: In a medium bowl, whisk together the dry ingredients: flour, cocoa powder, espresso powder, and salt; set aside.
In a bowl butter, suagar for making mint chocolate brownies
  1. Step 3: In a separate microwave-safe bowl, combine the butter, oil, brown sugar, and ½ cup of granulated sugar.
Melted butter and sugar for Andes chocolate mint brownies
  1. Step 4: Microwave for 30 seconds, stir, then microwave for another minute, stirring every 30 seconds, until the butter is fully melted and the sugar dissolves.
Eggs and white sugar combined for Andes Chocolate Mint Brownies
  1. Step 5: In another bowl, beat the eggs, egg yolk, and the remaining ½ cup of granulated sugar on medium speed using a hand mixer.
Egg mixture for Andes Chocolate Mint Brownies
  1. Step 6: Add the cooled butter mixture to the egg mixture and mix until just combined.
Dry ingredients added to  Andes Chocolate Mint Brownies
  1. Step 7: Add in the dry ingredients in batches and fold.
Dark chocolate chips and andes mint chocolate added to the brownie batter
  1. Step 8: Fold in the dark chocolate chips and most of the chopped Andes mint chocolate.
Andes Chocolate Mint Brownie batter in a square tin
  1. Step 9: Pour the brownie batter into the prepared pan.
Andes Chocolate Mint Brownie batter topped with mint chocolate before baking.
  1. Step 10:Sprinkle the reserved Andes mint chocolate on top

Bake for 27-30 minutes, until a toothpick inserted in the center comes out with moist crumbs for that perfect fudgy texture. Once fully cooled, slice into 8 or 12 squares and enjoy!

Hint: Place the brownie pan on the top rack of the oven for slow cooking, as the middle rack tends to cook faster.

Andes Chocolate Mint Brownies flat lay shot after slicing.

Substitutions

  • Flour: You can use gluten-free all-purpose flour for a gluten-free version. Just make sure it contains xanthan gum for the best texture. But I haven’t tried it though.
  • Butter: Unsalted butter works perfectly for this recipe! Just remember to omit the salt from the ingredients list if you choose to use unsalted butter.
  • Chocolate Chips: Feel free to substitute milk chocolate or semi-sweet chocolate for the dark chocolate chips if you prefer a sweeter flavor.
  • Sugar: This recipe calls for both light brown sugar and white granulated sugar to achieve the ideal texture in the brownies. You can also use dark brown sugar instead of light brown sugar if that’s what you have on hand!
  • Espresso Powder: You can substitute with instant coffee granules if you don't have espresso powder. Just use a little less, as it can be more potent.

Variations

Here are some fun variations you can try with Andes Mint Chocolate Brownies to mix things up. I always love to explore more flavor combinations!

Mint Chocolate Swirl:

  • Instead of mixing the Andes Mints into the batter, try swirling melted mint chocolate on top for a decorative touch.

Nutty Brownies:

  • Add chopped nuts like walnuts or pecans to the batter for added crunch and flavor. You can mix them in or sprinkle them on top before baking.

Sea Salt Topping:

  • Sprinkle a little flaky sea salt on top of the brownies after they come out of the oven for a sweet and salty flavor contrast.

Marshmallow Topping:

  • Add mini marshmallows on top of the brownies during the last few minutes of baking. They’ll melt slightly and create a gooey, sweet topping.

Raspberry Mint Brownies:

  • Add fresh or frozen raspberries to the brownie batter for a fruity twist that pairs well with the mint flavor.
Andes Chocolate Mint Brownies. half biten shot.

Equipment

Mixing Bowls:
Use one or two mixing bowls for combining the wet and dry ingredients.

Whisk or Electric Mixer:
A whisk can be used for mixing by hand, while an electric mixer can help you achieve a smoother batter more quickly.

Baking Pan:
A square (typically 9x9 inches) or rectangular baking pan is ideal for brownies. Glass or metal pans work well; just adjust baking times accordingly.

Cooling Rack:
Allows the brownies to cool evenly after baking, which helps maintain their texture.

How to store these Andes mint brownies

At Room Temperature:

  • Store brownies in an airtight container at room temperature for up to 3 days. This keeps them moist and chewy.

Refrigerator:

  • If you want to extend their shelf life, you can refrigerate brownies in an airtight container for up to a week. Just note that refrigeration can slightly change their texture, making them firmer. So before serving just heat it up in the microwave for 30 seconds.

Freezer:

  • For long-term storage, brownies can be frozen. Wrap individual pieces tightly in plastic wrap, then place them in an airtight container or a freezer bag. They can last for up to 3 months in the freezer. You can also warm them in the microwave for a few seconds for a freshly-baked taste after thawing the brownies for 30 minutes.
Melty Andes Chocolate Mint Brownies shot close up.

Top Tips for making Andes Mint Brownies

An important tip to remember while making these brownies is not to overmix the batter after adding the dry ingredients. Overmixing can cause the brownies to become dense and lose that fudgy texture. Gently fold the ingredients until just combined to maintain the perfect chewy, rich consistency!

FAQ

How to get the perfect slice in brownies?

To achieve the perfect slice of brownies, allow them to cool completely in the pan before cutting. This helps the brownies set, making it much easier to slice without them falling apart.
Use a sharp knife, and for even cleaner cuts, run it under hot water and dry it thoroughly before slicing. After each cut, wipe the knife with a paper towel to remove any residue. This will help ensure you get clean, beautiful slices every time!

How to know when brownies are done?

Before inserting a toothpick, look for a shiny, crackled top and edges that are slightly pulling away from the sides of the pan. The center should appear set but may still look a bit soft. Now try to insert a toothpick or a thin knife into the center of the brownies. If it comes out with a few moist crumbs, they are done or if it comes out wet with batter, they need more time. If it comes out completely clean, they may be overbaked.

Why is my brownie cakey and not fudgy?

Using too much flour can lead to a drier, cakey texture. Make sure to measure your flour accurately, using the spoon-and-level method instead of scooping directly from the bag. Mixing the batter too much can incorporate excess air, resulting in a lighter, cakey texture and also overbaking your brownies can also lead to a cakey texture. So keep an eye on the timing when it comes to baking brownies.

Related

Looking for other recipes like this? Try these:

Andes Chocolate Mint Brownies - Rich , chewy and Fudgy Recipe!

Andes Mint Brownies

Abi Guna
Andes Mint Brownies are irresistibly fudgy brownies and packed with rich chocolate flavor. Each bite offers the perfect balance of dense, chewy brownie and refreshing mint from the chopped Andes chocolate. The gooey chocolate center and slight crisp on the edges make these brownies a chocolate lover's dream.
5 from 7 votes
Print Recipe Pin Recipe
Prep Time 15 minutes mins
Cook Time 30 minutes mins
Total Time 45 minutes mins
Course Dessert
Cuisine American
Servings 16 Brownies
Calories 280 kcal

Equipment

  • Mixing Bowl
  • Hand Mixer
  • Square Baking pan (8X8)
  • Cooling rack

Ingredients
  

  • ¾ cup all-purpose flour
  • ¾ cup Dutch processed cocoa powder Unsweetened
  • 1 teaspoon espresso powder
  • ¼ teaspoon salt
  • 10 tablespoons unsalted butter at room temperature
  • 2 tablespoon oil any flavorless oil
  • ½ cup light brown sugar
  • 1 cup granulated sugar divided
  • 2 whole eggs at room temperature
  • 1 egg yolk
  • 1 tablespoon vanilla extract
  • ½ cup dark chocolate chips
  • 1 pack Andes Mint (Creme de Menthe Chocolate Thin) 4.67 ounce (28 counts)

Instructions
 

  • Preheat the oven to 350°F. Grease an 8x8-inch square pan with cooking spray, and line it with parchment paper, leaving extra over the sides for easy removal of the brownies.
  • Unwrap and roughly chop the Andes mint chocolate; set aside.
  • In a medium bowl, whisk together the dry ingredients: flour, cocoa powder, espresso powder, and salt. Set aside.
  • In a separate microwave-safe bowl, combine the butter, oil, brown sugar, and ½ cup of granulated sugar. Microwave for 30 seconds, stir, then microwave for another minute, stirring every 30 seconds, until the butter is fully melted and the sugar dissolves. Let it cool to room temperature.
  • In another bowl, beat the eggs, egg yolk, and the remaining ½ cup of granulated sugar on medium speed using a hand mixer or whisk for 4-5 minutes, until the sugar is dissolved and the mixture turns pale.
  • Add the cooled butter mixture to the egg mixture and mix until just combined.
  • Using a spatula, fold in the dry ingredients in batches, mixing until just incorporated. Be careful not to overmix. Gently fold in the dark chocolate chips and most of the chopped Andes mint chocolate, reserving some for the top.
  • Pour the brownie batter into the prepared pan, tapping it on the counter to ensure even spreading. Sprinkle the reserved Andes mint chocolate on top.
  • Place the pan on the top rack of the oven and bake for 27-30 minutes, until a toothpick inserted in the center comes out with moist crumbs for that perfect fudgy texture.
  • Let the brownies cool in the pan for 10 minutes, then use the parchment overhang to lift them out onto a cooling rack. Once fully cooled, slice into 8 or 12 squares and enjoy!

Notes

  1. Make sure your eggs and butter are at room temperature for better mixing and texture. If you forget, place the eggs in warm water for 10 minutes.
  2. Mix the batter just until the ingredients are combined. Overmixing can lead to tough brownies. Allow the brownies to cool completely in the pan before cutting. This helps them set and makes for cleaner edges.
  3. Oven temperatures can vary from home to home, so keep a close eye on the brownies after 20 minutes of baking.
Keyword Brownies, chocolate, easy desserts, Holiday Desserts

If you try this recipe, please leave a STAR rating in the comment section below! Your feedback helps a small blogger like me stay motivated in creating content for my readers. Also, feel free to follow me at Food Exit on Instagram, TikTok, and Pinterest for the latest recipe updates!
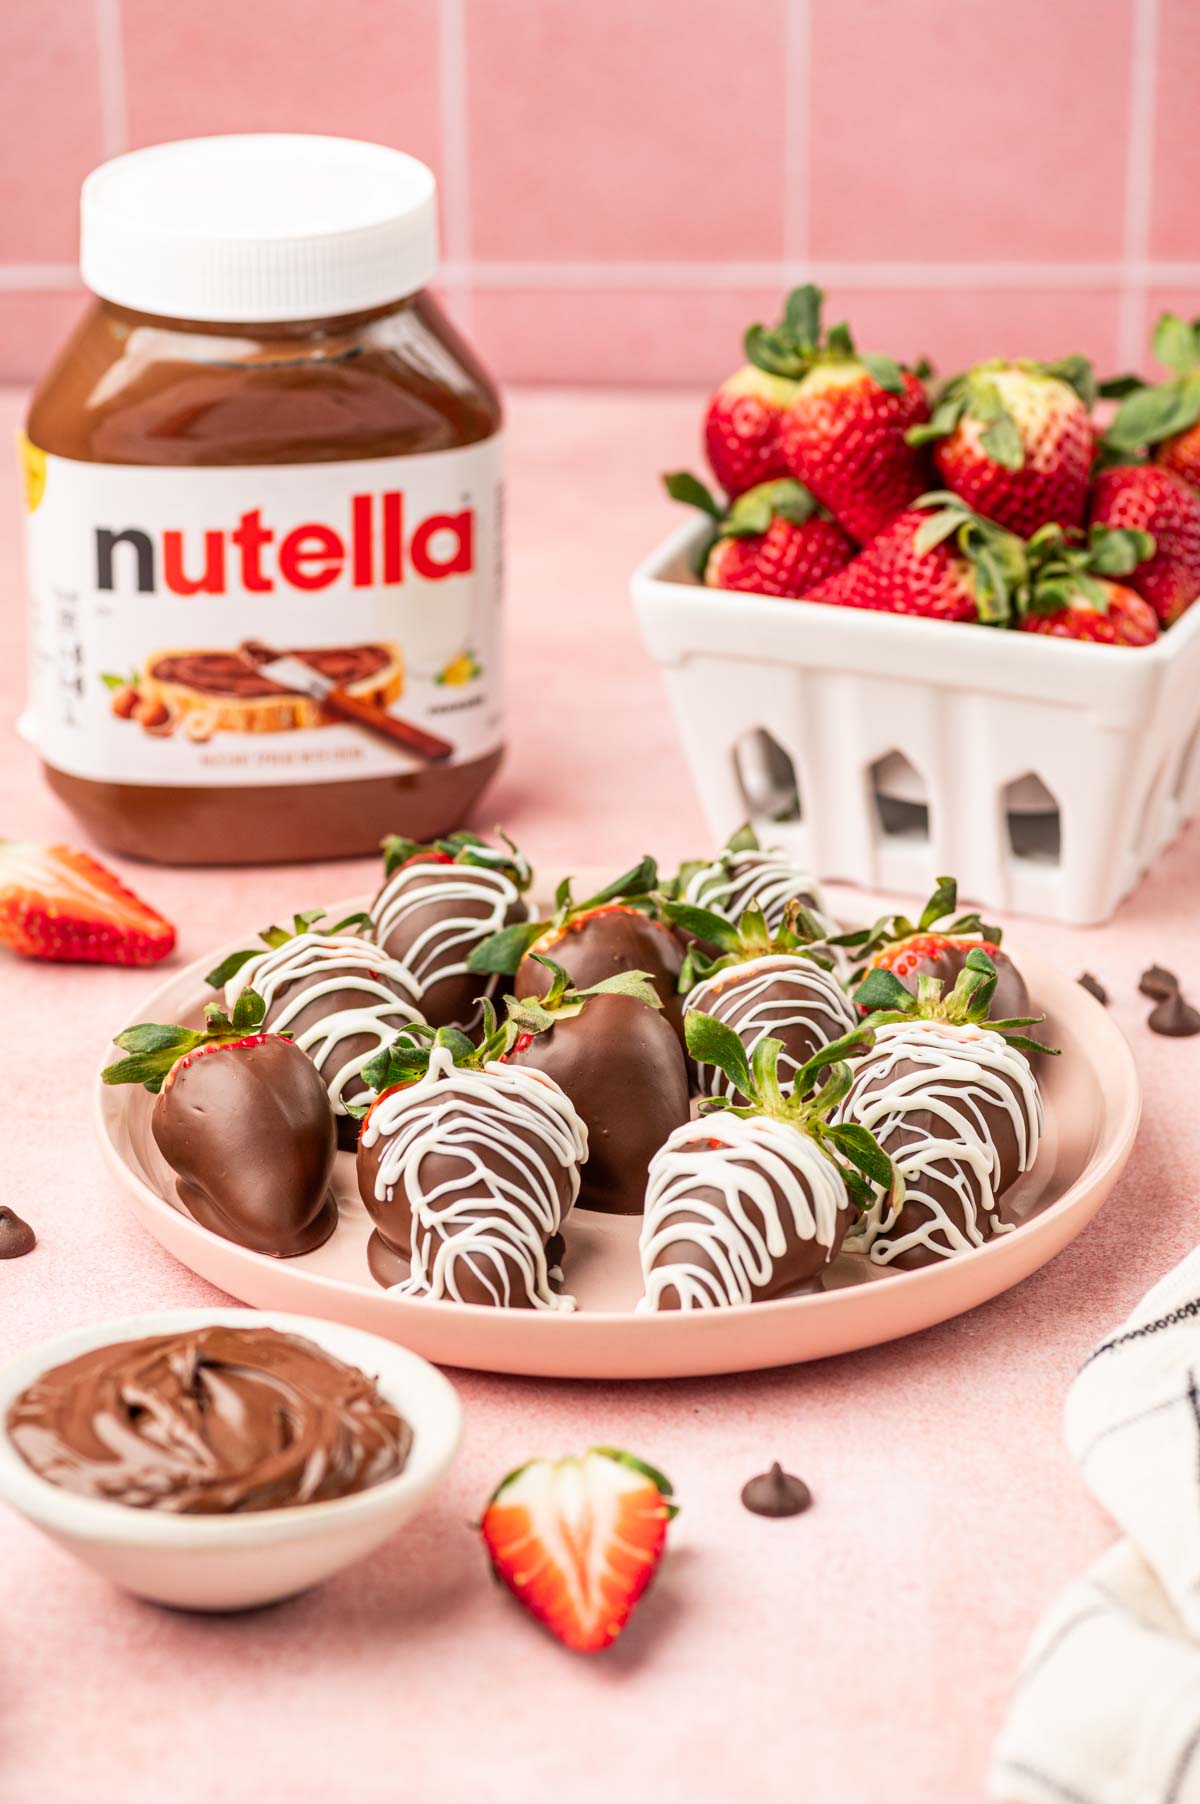
Valentine’s Cookie Cake (Red Velvet Cookie Cake Recipe)

October 13, 2024 by Abi Guna 2 Comments

The BEST Valentine’s Cookie Cake with Cream Cheese Frosting is a delectable and visually stunning dessert that blends the flavors of a classic red velvet cake with the texture of a cookie. It's adorned with bursts of white chocolate chips in every bite. The addition of velvety cream cheese frosting makes it an ideal choice for special occasions, such as Valentine's Day!

Valentines cookie cake in a white plate

A red velvet valentine's cookie cake is a decadent pleasure you can enjoy to your heart’s content, especially on Valentine’s Day. It is virtually impossible to resist. If you’re feeling creative, explore unique red velvet cake designs to impress your loved ones. From classic white chocolate red velvet cakes to modern red velvet chocolate chip cakes, there’s a recipe for every style and taste. Pair your red velvet creations with other Valentine’s Day cake recipes, such as heart-shaped cakes or cupcakes, for a festive and romantic touch. These cakes and cookies not only taste divine but also add a pop of color and elegance to your celebration.

You may also like this easy and simple dessert recipe : Chocolate Covered Strawberries, Nutella Covered Strawberries, Dark Chocolate Almond Fudge , Mint Chocolate Brownies and Butterscotch Chocolate Oatmeal Cookies .

[feast_advanced_jump_to]

Why Is Red Velvet So Special for Valentine's Day?

Are you searching for the perfect treat to make this Valentine’s Day unforgettable? Red velvet offers endless options to make your celebration extra special! Red velvet cake cookies are always a crowd-pleaser with their soft, chewy texture and vibrant red hue. Whether you fill them with traditional cream cheese frosting or transform them into a decadent red velvet cookie pie, these treats are a delightful addition to your Valentine’s dessert table. For those who love baking from scratch, red velvet cookie recipes from scratch are the perfect way to achieve the ideal balance of sweetness and tanginess.

For those searching for inspiration, our curated list of Valentine's cakes recipes features everything from red velvet cookies from scratch to luxurious red velvet cookie pies. Whether you’re a beginner or a seasoned baker, these recipes are simple, fun, and perfect for sharing with loved ones. Make this Valentine’s Day unforgettable with a dessert table filled with your favorite red velvet treats!

MORE VALENTINE’S DAY DESSERT IDEAS YOU’LL LOVE

  • Nutella Covered Strawberries
  • Chocolate Covered Strawberries
  • Valentine Cake Pops
  • Puff Pastry Hearts
  • Nutella Puff Pastry
  • Red Velvet Cake Waffles
  • Mini Chocolate Bundt Cake
  • Dark Chocolate Almond Fudge

The Magic of a Red Velvet Valentines Cookie Cake

The popularity of the visually beautiful red velvet cake grew tremendously during the 20th century and became a familiar household item when it appeared as a red velvet wedding cake in the movie Steel Magnolias. Everyone saw the movie; everyone wanted the cake. It has become especially popular for Valentine’s Day.

Red velvet cakes are cocoa cakes made with Dutch-processed cocoa powder which gives them a darker color than conventional chocolate cakes.  

Why Choose a Cookie Cake Over a Regular Cake?

Cookies have always been popular, but turning the cookie into a cookie cake helps create a classic, celebratory dessert. The standard cream cheese frosting contains just the right amount of sweetness. The red velvet cookie cake (Valentine's cookie cake)is chewy with subtle flavors. No mixer is needed when preparing this special cookie cake. (If you insist on a hand mixer, please avoid overmixing as that will make the texture more cake-like.

a piece of red velevt cookie cake in a white plate

Ingredients for Your Valentines Cookie Cake Recipe

  1. The cake gets its velvety smoothness from butter. Be sure it is unsalted butter and at room temperature before you begin baking.
  2. If you desire, you can combine white and brown sugar.
  3. You will need eggs for your cake. Freshness can make a difference, so get the freshest eggs available. A farmer’s market is ideal.
  4. You can use any all-purpose flour you have on hand.
  5. The cocoa powder is critical, and high-quality cocoa is highly recommended.
  6. Red and pink sprinkles will best color-coordinate with your cake.

See recipe card for quantities.

Ingredients for valentines cookie cake

Instructions

The step-by-step instructions provide a clearer understanding of the cookie cake recipe.

Combining the dry ingredients
  1. Step 1: In a medium bowl, combine flour, cocoa powder, cornstarch, baking soda, and salt. Mix well and set aside.
Combine butter and sugar for cookie cake
  1. Step 2: In another bowl, beat the butter, brown sugar, and granulated sugar for about 3-5 minutes until light.
Adding eggs to the cookie cake batter
  1. Step 3: Add the egg and egg yolk one at a time to the butter mixture, beating for 3 minutes until pale and fluffy. Then add the vanilla extract and red food color.
Combine wet and dry for red velvet cookie cake
  1. Step 4: Slowly add the flour mixture to the wet mixture, combining until everything is well incorporated.
White Chocolate chips added to the cookie cake batter
  1. Step 5: Gently fold the white chocolate chips into the cookie batter using a spatula.
transfer valentines cookie cake batter to the round pan
  1. Step 6: Transfer the batter to the prepared pan and smooth the top with a spatula. Sprinkle the remaining 2 tablespoons of chocolate chips over the top.
Baked cookie cake
  1. Step 7: Bake for 28-30 minutes or until the cookie cake turns a light golden brown color.

cream cheese frosting process
  1. Step 8: Prepare the cream cheese frosting by beating cream cheese and butter together using a hand mixer. 
cream cheese frosting in a bowl
  1. Step 9: Slowly add the confectioners' sugar and beat until smooth and creamy for 3-5 minutes. Add vanilla extract and milk if needed.
Piping the frosting on a valentines cookie cake
  1. Step 10: Pipe the cream cheese frosting around the edge of the cookie cake and sprinkle Valentine's Day sprinkles on top.

Once done, slice the red velvet cookie cake and serve.

Slice of valentines cookie cake red velvet

Tips on Preparing the Best Valentine Cookie Cake Recipe

Using high-quality chocolate will ensure the best flavor. It’s a special cake – don’t settle for ordinary and artificial chocolate.

Take care not to overbake your cake, as this will make it drier and less tasty. In addition, do not overmix the ingredients; simply incorporate them gently.

Using a springform pan as herein suggested makes it easier to get the cake out. However, let the cake cool completely to ensure it does not break. The cooling period should not take longer than half an hour.

Why Cream Cheese Frosting is Critical?

The awesome cream cheese frosting is an integral part of this cake. Its rich thickness can be sinful, but that is perfectly acceptable on Valentine’s Day.

Cream cheese frosting always adds a rich flavor, and the texture makes spreading or piping the frosting easy. Most cream cheese frostings can be customized to individual tastes.

It is highly recommended that you use full-fat cream cheese instead of a low-fat one to capture the full flavor. Please store your frosting in the refrigerator before you use it instead of leaving it out at room temperature.

You can make your cake a day ahead but keep the cream cheese frosting refrigerated until you are ready to serve the cake.

cream cheese frosting on a cake

Substitution ideas for a Valentine's Red Velvet Cookie Cake Recipe:

1. Flour Substitute:

  • Gluten-Free Flour: Swap regular all-purpose flour with a 1:1 gluten-free flour blend to make it gluten-free.

2. Butter Substitute:

  • Coconut Oil or Vegan Butter: For a dairy-free or vegan option, replace butter with coconut oil or plant-based butter.

3. Red Food Coloring Substitute:

  • Beetroot Powder: For a natural red hue, use beetroot powder instead of artificial red food coloring.

4. Egg Substitute:

  • Flaxseed or Chia Egg: Mix 1 tablespoon of ground flaxseed or chia seeds with 3 tablespoons of water per egg for a vegan option.
  • Applesauce: Use ¼ cup of unsweetened applesauce per egg to add moisture and keep the cake soft.

5. Cream Cheese Frosting Substitute:

  • Vegan Cream Cheese: Replace traditional cream cheese with a plant-based option to make the frosting dairy-free.

These substitutions allow you to adjust the Red Velvet Cookie Cake to dietary preferences without losing its delicious Valentine’s charm!

Variations

Peanut Butter Swirl Cookie Cake: Add a few spoonfuls of peanut butter to the dough and swirl it in for a rich, nutty flavor.

Double Chocolate Cookie Cake: Use cocoa powder in the batter to create a chocolate cookie base, and add white or dark chocolate chips.

Funfetti Cookie Cake: Mix in colorful sprinkles for a fun and festive twist, perfect for celebrations.

Cookie cake slices of Valentines red velvet cake

Equipment

Electric Mixer or Whisk: To cream the butter and sugar until light and fluffy. A stand mixer or hand mixer works best, but a whisk can be used if necessary.

9-Inch Cake Pan: A round pan to bake the cookie cake in. You can also use a springform pan for easier removal like I did in this recipe.

Cooling Rack: To allow the cookie cake to cool evenly once it’s out of the oven.

Mixing Bowls: For combining the wet and dry ingredients separately before mixing them together.

How to Store Your Valentines Cookie Cake

Wrap the valentines cookie cake securely with a plastic wrap. It will remain fresh without refrigeration for up to three days, but only without frosting.

A valentines cake with frosting, such as this, can be refrigerated in an airtight container for up to five days. For a longer shelf life, the cake, when well-wrapped, will last up to three months in the freezer. 

Top Tip

Instead of white chocolate chips, you can use regular milk chocolate chips or opt for dark chocolate chips (70% cocoa or higher) for a healthier and richer flavor with added chopped walnuts, pecans, or almonds for a crunchy texture.

A piece of valentines red velvet cookie cake

FAQ

What is the texture of the Valentines cookie cake?

A cookie cake typically has a texture that falls somewhere between a traditional cookie and a cake. The center of the cookie cake is often soft and chewy, similar to a regular chocolate chip cookie, while the edges tend to be slightly crispy and golden brown, creating a pleasant contrast to the soft center.

Is a cookie cake a cake or a cookie?

Cookie cakes are made using cookie dough, which is baked in a manner similar to a batch of regular-sized cookies and is typically decorated with frosting.

Can I replace the white chocolate chips with any other option?

Certainly! You can replace the white chocolate chips with other options such as regular milk chocolate chips, dark chocolate chips, semi-sweet chocolate chips, or even nuts like walnuts or pecans, based on your preference.

Related

Looking for other recipes like this? Try these:

If you try this recipe, please leave a STAR rating in the comment section below! Your feedback helps a small blogger like me stay motivated in creating content for my readers. Also, feel free to follow me at Food Exit on Instagram, TikTok, and Pinterest for the latest recipe updates!
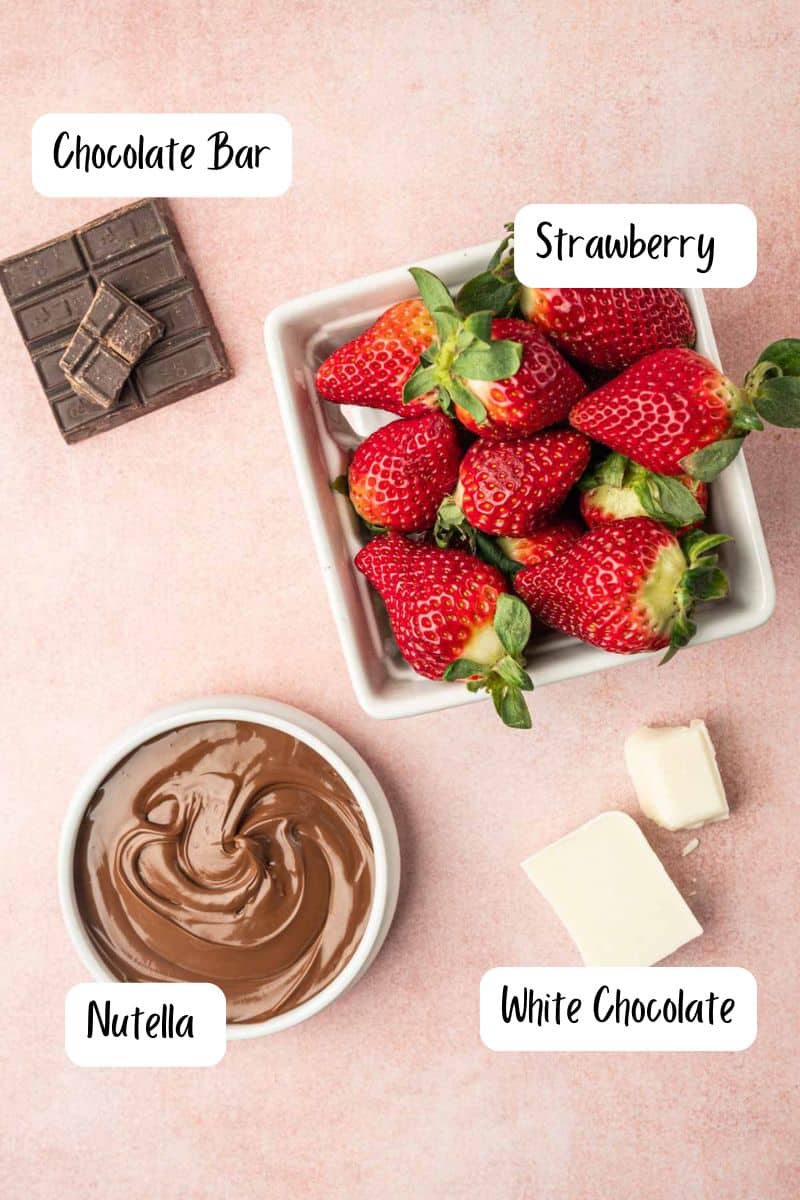
Red velvet cookie cake sliced and kept in a white plate

Valentine’s Cookie Cake

Abi Guna
Valentine’s Cookie Cake with Cream Cheese Frosting is a delectable and visually stunning dessert that harmoniously blends the flavors of a classic red velvet cake with the texture of a cookie. 
5 from 1 vote
Print Recipe Pin Recipe
Prep Time 20 minutes mins
Cook Time 30 minutes mins
Total Time 29 minutes mins
Course Dessert
Cuisine American
Servings 10 Slices
Calories 336 kcal

Equipment

  • Electric mixer or stand mixer
  • 9-Inch Cake Pan

Ingredients
  

For Valentine Cookie Cake (Red velvet)

  • 2 cups all-purpose flour
  • 2 tablespoons Dutch Processed cocoa powder
  • 1 tablespoon cornstarch
  • ¾ teaspoon baking soda
  • ½ teaspoon salt
  • ¾ cup unsalted butter at room temperature
  • ¾ cup packed light brown sugar
  • ¼ cup granulated white sugar
  • 1 egg at room temperature
  • 1 egg yolk at room temperature
  • 2 teaspoons pure vanilla extract
  • 5-6 drops red gel food coloring
  • 1 cup plus 2 tablespoons white chocolate chips divided
  • Cooking spray

For Cream Cheese Frosting

  • 4- ounce cream cheese at room temperature
  • 3 tablespoons unsalted butter at room temperature
  • 2 cups confectioners’ sugar
  • ½ teaspoon vanilla extract
  • 1-2 tablespoons milk
  • 2 tablespoons valentine's day sprinkles for decoration

Instructions
 

  • Preheat your oven to 350°F (175°C). Grease a 9-inch springform pan with cooking spray and line the bottom with parchment paper. Set it aside.
  • In a medium bowl, combine flour, cocoa powder, cornstarch, baking soda, and salt. Mix well and set aside.
  • In another bowl, beat the butter, brown sugar, and granulated sugar for about 3-5 minutes until light.
  • Add the egg and egg yolk one at a time to the butter mixture, beating for 3 minutes until pale and fluffy. Then add the vanilla extract and red food color.
  • Slowly add the flour mixture to the wet mixture, combining until everything is well incorporated.
  • Gently fold the white chocolate chips into the cookie batter using a spatula.
  • Transfer the batter to the prepared pan and smooth the top with a spatula. Sprinkle the remaining 2 tablespoons of chocolate chips over the top.
  • Bake for 28-30 minutes or until the cookie cake turns a light golden brown color.
  • Once done, remove the cookie cake from the oven and let it cool for 10 minutes. Run a butter knife around the sides, then slowly release the springform pan and transfer it to a cooling rack.
  • Meanwhile, prepare the cream cheese frosting by beating cream cheese and butter together using a hand mixer. Slowly add the confectioners' sugar and beat until smooth and creamy for 3-5 minutes. Add vanilla extract and milk if needed. Transfer the cream cheese frosting to a piping bag with a star nozzle.
  • Pipe the cream cheese frosting around the edge of the cookie cake and sprinkle Valentine's Day sprinkles on top.
  • Once done, slice the red velvet cookie cake and serve.

Notes

  1. If you're looking to make a gluten-free version of the red velvet cookie cake, you can adapt the recipe by using gluten-free flour instead of all-purpose flour.
  2. To store, place the Valentines cookie cake in an airtight container and can be stored at room temperature for up to 4-5 days.
Keyword cake, cookies, easy desserts

Salmon Kale Quinoa Salad

October 13, 2024 by Abi Guna 7 Comments

Looking for delicious and nutritious quinoa bowl recipes? This Salmon Kale Quinoa Salad is a nutrient-rich, flavorful dish featuring tender massaged kale, fluffy quinoa, and perfectly seared salmon. Tossed with fresh veggies and drizzled with a tangy lemon Dijon dressing, it's a light yet satisfying meal that's both healthy and delicious!

Close up shot for Salmon Kale Quinoa Salad

This Salmon Kale Quinoa Salad is a culinary powerhouse matched by few other recipes. Whether you’re following a specific diet or just looking for a nutritious meal, this salmon quinoa recipe is versatile and easy to customize with your favorite vegetables, dressings, and toppings for a dish that’s as delicious as it is healthy.

It is clean, healthy eating at its finest. And healthy does not mean dull or bland. This delectable salad is bursting with flavor and tossed with an incredible lemony dressing. For a plant-based option, a Kale Quinoa Bowl is the perfect choice, combining tender kale, hearty quinoa, and your favorite toppings like roasted chickpeas or avocado. These bowls are not only versatile but also ideal for meal prep, making healthy eating easier and more enjoyable!

Are you a fan of meal prepping? If so, you should definitely try this high-protein recipe, they’re perfect for meal prep Lemon Pepper Chicken Thighs .

If you’re looking for a flavorful and easy way to enjoy salmon, try my Blackened Salmon Bites and Pesto Butter Salmon —it’s perfect for meal prep too!

[feast_advanced_jump_to]

Why You’ll Love This Salmon With Quinoa Salad Recipe

  • Simple & Quick: This salad is perfect for meal prep. You can easily make the kale quinoa salad ahead of time and refrigerate it. When you're ready to eat, simply cook the salmon and serve it fresh.
  • Nutrient-Packed: This healthy and easy recipe is ideal for lunch or dinner, packed with protein, fiber, wholesome carbohydrates, and plenty of nutrients.
  • Fresh & Flavorful: The lemon Dijon dressing adds a zesty kick that perfectly complements the rich salmon and hearty quinoa.
  • Protein-Packed: This salad provides over 25 grams of protein, making it a fantastic option for meeting your protein goals in a single meal.

Try this Salmon Quinoa Bowl, packed with protein-rich salmon, fluffy quinoa for your next lunch, I am sure you will love this flavorful meal.

Lemon Dijon dressing drizzle on a salmon kale quinoa salad

Why Add Salmon to Any Salad?

Salmon is not a natural salad ingredient. It is, however, a nutrient-dense source of health and body fuel. In this Salmon and Kale Salad, salmon is truly the reigning star. Not every food qualifies as both highly nutritious and a confirmed taste treat. Salmon raises the “yummy level” to new heights. A Salmon Power Bowl is a great way to fuel your day, combining the health benefits of omega-3-rich salmon with the hearty goodness of quinoa.

Also, consider the cost savings. Serving individual salmon filets can be expensive. By adding salmon to your salad, you get the great taste and benefits without the staggering cost. Adding salmon to your salad is a win-win proposition.

How to Cook Perfect Quinoa for a Salad

Cooking quinoa is simple! I used the stovetop method to achieve perfectly fluffy quinoa. The water ratio is key—always remember 1:2, meaning one part dry quinoa to two parts water.

Before cooking, rinse the quinoa 2-3 times until the water runs clear. In a saucepan, bring 1 cup of water to a rolling boil over medium heat. You don’t need to add salt here, as we'll be adding salt in the dressing.

Add the rinsed quinoa to the boiling water, cover with a lid, and reduce the heat to low. Let it simmer for 10 minutes. After 10 minutes, check to see if any water remains—if so, cook for a few more minutes until the water is fully absorbed. Once done, fluff the quinoa with a fork, and it’s ready for salads or other dishes.

Salmon Kale Quinoa Salad platter with lemon Dijon dressing in the side

Main Ingredients for Your Salmon Kale Quinoa Salad

Salmon, of course, is the ruling ingredient in this salad that stands on top of the nutritional pyramid. It is difficult not to appreciate all that salmon has to offer. It is high in protein and very high in critical omaga-3 fatty acids (which your body needs but is unable to create on its own).

In addition, salmon is loaded with vitamins and minerals, especially Vitamin B and potassium. It is a trusted source for decreasing inflammation and hearth disease as well as supporting cognitive health. 

Salmon kale quinoa salad ingredient shot

Gluten-free Quinoa has been gaining popularity due to its nutritional value. It offers protein, fiber, and needed vitamins such as Vitamin C and K. Quinoa is a great substitute for rice.

Kale is a nutty-tasting leafy green filled with antioxidants, beta-carotene, and vitamins. This green wonder also supports heart health and weight management – an entire cup of kale is just 7 calories. 

The humble cucumber is not to be underestimated. It is high in nutrients, certain vitamins, and fiber, and they are very low in calories. Cucumbers are mostly water, so they help hydrate the body and keep joints healthy.

Red Bell Peppers deliver needed antioxidants, Vitamin A, and Vitamin C; they also help protect against heart disease. In addition, the red color adds a flair to the salad.  

The above superior ingredients are tied together with added seasoning, a tinge of lemon, and healthy olive oil.

See recipe card for quantities.

Instructions for Quinoa with Salmon recipe

This quinoa protein bowl is not only satisfying but also a fantastic source of energy, perfect for lunch or dinner.  The instructions below clearly explain, with images, how to prep the salmon, cook the quinoa, prepare the dressing, and assemble the salad step-by-step for easy understanding.

Preping the salmon for Salmon kale quinoa salad
  1. Step 1: Season the salmon generously with Italian seasoning, salt, and pepper. Rub the seasonings on both sides to ensure the filets are evenly coated.
Pan seared salmon for salmon kale quinoa salad
  1. Step 2: Cook the salmon for 4-5 minutes on each side, or until the salmon turns opaque.
Prepare the lemon Dijon dressing for salmon kale quinoa salad
  1. Step 3: In a mason jar add the mentioned ingredients under "Lemon Dijon Dressing" and shake it vigorously for about 2 minutes until all the ingredients are well combined.
Flufffy quinoa for salmon kale quinoa salad
  1. Step 4: In a small saucepan, add water and quinoa. Bring it to a boil, then reduce the heat to low, cover, and simmer until the water is absorbed, about 12-15 minutes. Once cooked, fluff the quinoa with a fork and set it aside to cool slightly.
Massage the kale for Salmon Kale Quinoa Salad
  1. Step 5: Place the chopped kale into a large mixing bowl. Drizzle ½ tablespoon of olive oil over the kale and gently massage the leaves with your hands for about 2 minutes. 
Assemble the salad ingredients for Salmon Kale Quinoa Salad
  1. Step 6: To the massaged kale, add the cooked quinoa, diced red bell pepper, sliced cucumber, and diced red onion.
Mix the salad ingredient's for Salmon Kale Quinoa Salad
  1. Step 7: Pour 2-3 tablespoons of the prepared Lemon Dijon dressing over the salad and toss everything together until well mixed. 
Salmon arranged in a platter for Salmon Kale Quinoa Salad
  1. Step 8: Transfer the kale and quinoa salad onto a serving platter. Arrange the cooked salmon filets on top of the salad. Drizzle the remaining Lemon Dijon dressing over the salmon and serve immediately.

You can serve the salad with salmon fillets on top, as shown in the photos, or cut the fillets into bite-sized pieces before cooking for easier serving. The option is yours.

How to Serve a Salad as a Main Meal

A very common debate is whether a salad is a side dish or a main meal. The fact is that a salad such as this salmon, kale, and quinoa has all the ingredients to be a meal on its own instead of “just a salad" or just a "healthy quinoa bowl" to enjoy!

The superfood salmon adds protein and nutrition for the entire family. Why is it ideal in a salad? It is a little-known fact that salmon actually tastes better cold than warm.

Close up shot of Salmon Kale Quinoa Salad

To turn a salad into a main-mail extravaganza, think clean and fresh. Your kale should be as freshly-picked as possible. Never use a limp green. Your salmon should have a bright color without the edges beginning to darken and it should smell fresh instead of fishy. If possible, check the texture; when pressed, the salmon meat should spring back.

Think colors. Your main-meal salad can be presented as a colorful work of art. The salmon, red peppers, red onions, and green kale offer colorful textures. Dress everything up with a special dressing to enjoy this Salmon and kale recipe!

Substitutions for Salmon Quinoa Salad Recipe

  1. Swap the Protein: Instead of salmon, you can opt for grilled chicken, shrimp, or tofu for a different twist.
  2. Change the Grains: Replace quinoa with couscous, or brown rice for a hearty grain alternative.

Variations

  1. Add Fruit: Incorporate fresh or dried fruits like avocado, pomegranate seeds, or dried cranberries for a sweet contrast.
  2. Try Different Greens: Mix kale with spinach, arugula, or mixed greens for a more diverse salad base.
  3. For Extra Crunch: Add roasted nuts or seeds like almonds, walnuts, or pumpkin seeds for extra texture in the salad.
Salmon Kale Quinoa Salad is served in a white bowl

Equipment

Saucepan: For cooking the quinoa.

Skillet: For cooking the salmon.

Mixing Bowl: For combining the salad ingredients and dressing.

Mason Jar or Whisk: For mixing the lemon Dijon dressing.

Serving Platter: To present the assembled salad.

Kale Quinoa Salad with Salmon - Easy Prep Salad

This salmon kale quinoa salad is an easy meal prep. You can use leftover quinoa. While most salads do not have a lengthy shelf life, this special salad can be kept in the refrigerator for up to 4 days. That means a tasty dinner and lunches throughout the week. It is best if you keep the dressing in a separate container and use as needed just prior to serving.

For leftovers, you can enjoy the salad cold or gently reheat the salmon before adding it to the salad for a warm meal.

flaky salmon in Salmon Kale Quinoa Salad

Top Tip

Massage the chopped kale with olive oil for 2-3 minutes, then let it sit for at least 30 minutes. This helps soften the raw kale and enhances its flavor, making it perfect for any salad.

FAQ

What kind of salmon varieties do you recommend for this recipe?

For the Salmon Kale Quinoa Salad recipe, here are my recommended types of salmon:
Atlantic Salmon (This is what I used in the recipe)
Sockeye Salmon
King Salmon

Is the Salmon and Quinoa Salad healthy?

Yes, the Salmon Kale Quinoa Salad is a healthy option! Salmon is rich in omega-3 fatty acids, which are beneficial for heart health. Quinoa is a complete protein, containing all nine essential amino acids, and is also high in fiber. Kale is packed with vitamins A, C, and K, along with minerals like calcium and iron. Overall, this Salmon Kale Quinoa Salad is a balanced meal that is low in carbs and good for heart health.

Can I use canned salmon for the recipe?

Yes, you can use canned salmon for the Salmon Kale Quinoa Salad recipe! Using canned salmon can be a great way to make the recipe quicker and more accessible without compromising on nutrition!

Related

Looking for other recipes like this? Try these:

If you try this kale quinoa salad recipe, please leave a STAR rating in the comment section below! Your feedback helps a small blogger like me stay motivated in creating content for my readers. Also, feel free to follow me at Food Exit on Instagram, TikTok, and Pinterest for the latest recipe updates!
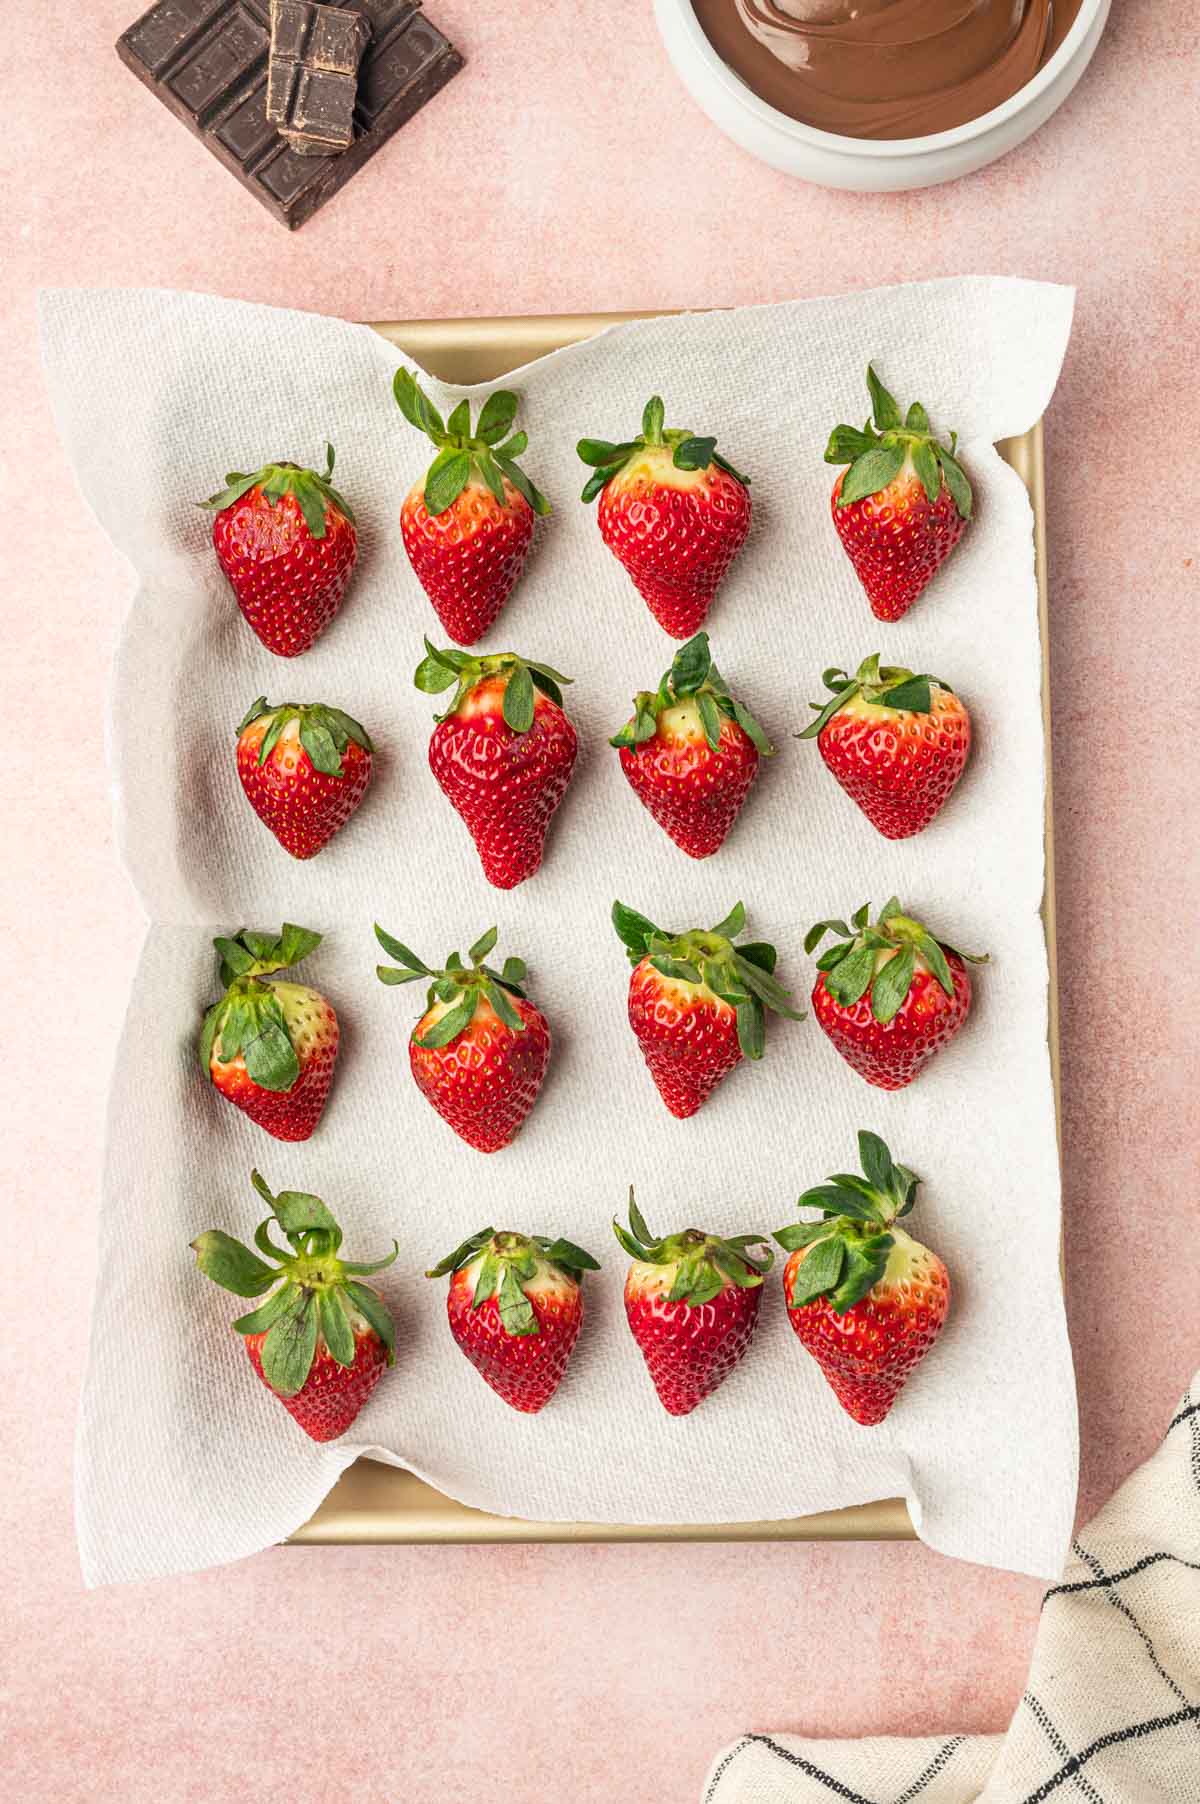
In a bowl salmon kale quinoa salad

Salmon Kale Quinoa Salad

Abi Guna
The Salmon Kale Quinoa Salad is a nutrient-rich, flavorful dish featuring tender massaged kale, fluffy quinoa, and perfectly seared salmon. Tossed with fresh veggies and drizzled with a tangy lemon Dijon dressing, it's a light yet satisfying meal that's both healthy and delicious!
5 from 3 votes
Print Recipe Pin Recipe
Prep Time 20 minutes mins
Cook Time 20 minutes mins
Total Time 40 minutes mins
Course Main Course, Salad
Cuisine American
Servings 4
Calories 389 kcal

Equipment

  • Saucepan For cooking the quinoa
  • Skillet For cooking the salmon

Ingredients
  

For the Salmon:

  • 1 lb. salmon cut into 4 filets
  • 1 teaspoon Italian seasoning
  • ½ teaspoon salt
  • ½ teaspoon ground black pepper
  • 2 tablespoons olive oil

For the Salad:

  • ½ cup dry quinoa
  • 1 cup water
  • 3 cups fresh kale chopped
  • ½ tablespoon olive oil
  • 1 medium red bell pepper deseeded and diced
  • ½ cup cucumber sliced and quartered
  • ¼ cup red onion diced

For the Lemon Dijon Dressing:

  • 3 tablespoons olive oil
  • 2 tablespoons fresh lemon juice
  • 1 teaspoon rice vinegar
  • 1 teaspoon Dijon mustard
  • 1 teaspoon minced garlic
  • ½ teaspoon dried Italian seasoning
  • ½ teaspoon salt
  • ½ teaspoon ground black pepper

Instructions
 

Prepare the Salmon:

  • Pat dry the salmon filets with paper towels to remove any excess moisture. This helps achieve a nice sear.
  • Season the salmon generously with Italian seasoning, salt, and pepper. Rub the seasonings on both sides to ensure the filets are evenly coated.

Cook the Salmon:

  • Heat a large skillet over medium heat. Add 2 tablespoons of olive oil and let it heat up.
  • Once the oil is hot, carefully place the salmon filets in the skillet. Cook for 4-5 minutes on each side, or until the salmon turns opaque and flakes easily with a fork. The internal temperature should reach 145°F (63°C).
  • Once cooked, transfer the salmon to a plate, cover it loosely with foil, and set aside to keep warm.

Prepare the Lemon Dijon Dressing:

  • In a mason jar or small bowl, combine 3 tablespoons of olive oil, 2 tablespoons of fresh lemon juice, 1 teaspoon of rice vinegar, 1 teaspoon of Dijon mustard, 1 teaspoon of minced garlic, ½ teaspoon of dried Italian seasoning, ½ teaspoon of salt, and ½ teaspoon of ground black pepper.
  • Close the jar tightly and shake it vigorously for about 2 minutes until all the ingredients are well combined. If using a bowl, whisk everything together until emulsified. Set the dressing aside.

Cook the Quinoa:

  • In a small saucepan, add ½ cup of dry quinoa and 1 cup of water. Bring it to a boil, then reduce the heat to low, cover, and simmer until the water is absorbed, about 12-15 minutes.
  • Once cooked, fluff the quinoa with a fork and set it aside to cool slightly.

Massage the Kale:

  • Place the chopped kale into a large mixing bowl. Drizzle ½ tablespoon of olive oil over the kale and gently massage the leaves with your hands for about 2 minutes. This softens the kale, making it more tender and reducing its bitterness.

Assemble the Salad:

  • To the massaged kale, add the cooked quinoa, diced red bell pepper, sliced cucumber, and diced red onion.
  • Pour 2-3 tablespoons of the prepared Lemon Dijon dressing over the salad and toss everything together until well mixed. Reserve the remaining dressing for later.

Serve:

  • Transfer the kale and quinoa salad onto a serving platter. Arrange the cooked salmon filets on top of the salad.
  • Drizzle the remaining Lemon Dijon dressing over the salmon and serve immediately.
  • You can serve the salad with salmon fillets on top, as shown in the photos, or cut the fillets into bite-sized pieces before cooking for easier serving. The option is yours.

Notes

1. Feel free to substitute the kale with other greens like spinach or arugula, and switch out the quinoa for other grains such as brown rice, depending on your taste.
2. Cooking times for salmon may vary based on thickness. The salmon is done when it flakes easily with a fork and has an opaque appearance.
3. Store any leftovers in an airtight container in the refrigerator for up to 3-4 days. Reheat the salmon gently, if desired, or enjoy the salad cold.
Keyword Main Dish, Salads, Salmon

Easy Dark Chocolate Fudge with Almonds (No Bake)

October 11, 2024 by Abi Guna 14 Comments

This Easy Dark Chocolate Fudge with Almonds is rich, silky, and irresistibly smooth, made with just a handful of ingredients and absolutely no baking required! Each bite melts in your mouth with deep chocolate flavor and a satisfying almond crunch. 

Close up shot of dark chocolate fudge with almonds

Whether you’re craving a quick homemade treat, need a last-minute holiday dessert, or want a giftable sweet that looks impressive with minimal effort, this no-bake chocolate fudge is your new go-to recipe. Simple, foolproof, and ready in minutes, it’s pure chocolate bliss in every square. 

Are you looking for holiday desserts? If so, you should definitely try these fun recipes!
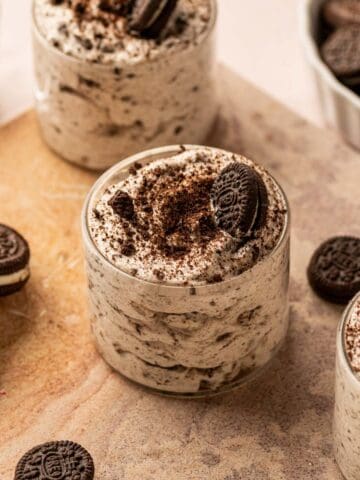
Andes Chocolate Mint Brownies

Christmas Cake Pops

Butterscotch Chocolate Chip Oatmeal Cookies

Biscoff Truffles

Easy to make dark chocolate fudge with almonds

This homemade chocolate fudge is so simple to make that you won’t even need a candy thermometer, just melt, mix, and set! Line your pan with aluminum foil for easy removal and clean-up, then pour in the rich, glossy chocolate mixture to chill. It’s the kind of easy fudge recipe that delivers perfect results every time, smooth, creamy, and full of deep chocolate flavor. Cut it into bite-sized squares, wrap them in festive paper, and you’ve got the most irresistible edible gift for friends, family, or holiday treat boxes.

Flat lay image of Dark Chocolate Fudge with Almonds
[feast_advanced_jump_to]

How to make this easy dark chocolate fudge recipe?

Dark Chocolate Fudge with Almonds is a decadent treat that combines the rich, intense flavor of dark chocolate with the delightful crunch of toasted almonds.

This easy-to-make fudge requires just a few simple ingredients, including dark chocolate, sweetened condensed milk, and sliced almonds, making it perfect for both novice and experienced bakers.

The process involves melting the chocolate and mixing it with the condensed milk, then folding in the almonds for added texture and nuttiness.

Once poured into a pan and allowed to set, you’re left with a creamy, luxurious fudge that is sure to impress at any gathering.

What sets this fudge apart is not only its incredible flavor but also its versatility. You can easily customize the recipe by incorporating your favorite nuts, adding a sprinkle of sea salt, or even infusing it with flavors like espresso or orange zest.

Perfect for holidays, special occasions, or simply as a sweet indulgence, this Dark Chocolate Fudge with Almonds is an irresistible dessert that will satisfy your chocolate cravings.

Serve it cut into bite-sized squares, and watch as it becomes a beloved favorite among family and friends!

Ingredients

You only need five simple ingredients to make this Chocolate Almond Fudge. The key ingredients include dark chocolate chips, semi-sweet chocolate chips, and toasted sliced almonds, creating the perfect balance of rich chocolate flavor and nutty crunch.

Ingredients for making dark chocolate almond fudge
  • Dark chocolate chips - These give the fudge its deep, rich chocolate flavor and velvety texture. Choose good-quality dark chocolate chips (60–70% cocoa) for the perfect balance of sweetness and intensity.
  • Semi-sweet chocolate chips - Adding semi-sweet chocolate chips helps mellow the bitterness of dark chocolate and creates a smooth, balanced flavor that’s sweet but not overpowering.
  • Sweetened condensed milk - The key to this easy fudge recipe, sweetened condensed milk gives the fudge its creamy texture and natural sweetness while helping it set without needing a candy thermometer.
  • Unsalted butter - A small amount of butter adds richness and enhances the chocolate’s smooth, melt-in-your-mouth finish. It also gives the fudge that signature glossy look.
  • Vanilla extract - A splash of vanilla extract rounds out the chocolate flavor and adds a warm, aromatic note.
  • Almond extract (optional) - Just a drop of almond extract intensifies the nutty aroma and pairs beautifully with the sliced almonds.
  • Sliced almonds - Toasted sliced almonds add crunch and texture, balancing the creamy chocolate base.

See recipe card for quantities.

Instructions

Start with good quality chocolate, High-quality chocolate will give your fudge a rich, smooth texture and deep flavor.

Lined a parchment paper, Dark chocolate Fudge with almonds
  1. Step 1: Start by lining an 8x8 inch square baking pan with parchment paper; any square pan will work too! Leave some overhang for easy removal, and lightly grease it with non-stick spray.

Dark chocolate chips, semi sweet chocolate chips and butter.
  1. Step 2: Next, in a saucepan or nonstick skillet, melt the dark chocolate chips, semi-sweet chocolate chips and butter.
Dark chocolate fudge with almonds
  1. Step 3: Add in the sweetened condensed milk.
Dark chocolate ALmond fudge - mixing the chocolate
  1. Step 4: Stirring continuously until smooth on a medium heat.
Dark Chocolate Almond Fudge
  1. Step 5: Remove from heat and stir in the vanilla and almond extracts, then fold in the sliced almonds, reserving a few for topping.
Dark Chocolate Almond Fudge
  1. Step 6: Fold in the almonds
Dark Chocolate fudge with almonds
  1. Step 7: Pour the mixture into the prepared pan.
Dark Chocolate fudge with almonds
  1. Step 8: Gently press the reserved almonds into the surface for a decorative touch.
Dark chocolate fudge with almonds
  1. Step 9: Chill in the refrigerator for at least 2 hours until set.
Dark chocolate fudge with almonds
  1. Step 10: Once firm, lift the fudge out using the parchment paper and cut it into squares using a sharpe knife to enjoy.

Why have I used Dark chocolate in this fudge recipe?

Using dark chocolate in this fudge recipe not only boosts its flavor and texture but also makes it a more health-conscious dessert option.

  • Rich Flavor: Dark chocolate delivers a deep, intense flavor that elevates the overall taste of the fudge, making each bite a delightful experience.
  • Health Benefits: Often viewed as a healthier choice compared to milk chocolate, dark chocolate is rich in antioxidants, fiber, and essential minerals like iron and magnesium. These nutrients can offer various health benefits when enjoyed in moderation.
  • Lower Sugar Content: Dark chocolate typically contains less sugar than its milk counterpart, making it a better choice for those looking to cut back on their sugar intake.
  • Luxurious Texture: Dark chocolate melts smoothly, creating a creamy and indulgent texture in the fudge. This contributes to a satisfying mouthfeel that enhances your overall enjoyment of the treat.
Dark Chocolate Fudge with Almonds

Variations for easy chocolate fudge recipe

Here are some delicious variations for dark chocolate almond fudge to try:

  1. Nutty Fudge Delight - Add a mix of nuts, such as walnuts, pecans, or hazelnuts, along with the almonds for extra crunch and flavor.
  2. Sea Salt Caramel Fudge - Drizzle some caramel sauce over the fudge before it sets, then sprinkle with sea salt for a sweet and salty combination.
  3. Coffee Infused Fudge - Add instant coffee granules to the fudge mixture for a rich coffee flavor that complements the chocolate.
  4. Coconut Almond Fudge - Mix in unsweetened shredded coconut along with the almonds for a tropical twist.
  5. Dried Fruit Fudge - Add chopped dried fruits like cranberries, cherries, or apricots to the fudge for added sweetness and texture.
  6. Chocolate peanut butter fudge - Drizzle peanut butter over the fudge and make a swirl pattern and refrigerate.

Storage

By following the below three storage options, you can enjoy your Dark Chocolate Almond Fudge for an extended period while maintaining its delicious flavor and texture!

  1. Room Temperature: If you plan to consume the fudge within a week, you can store it at room temperature by placing the fudge in an airtight container.
  2. Refrigerator: For longer storage, keep the fudge in the refrigerator. Store it in an airtight container or wrap it tightly in plastic wrap to maintain its freshness. The fudge can last up to 2-3 weeks when refrigerated.
  3. Freezer: For even longer storage, you can freeze the fudge. Cut it into squares as shown in the video, and place them in a single layer in a freezer-safe container or bag, separating layers with parchment paper to prevent sticking. The fudge can be stored in the freezer for up to 3 months.

FAQ

What is the secret of good chocolate fudge?

The secret to good chocolate fudge starts with high-quality chocolate, which provides a rich, smooth texture and deep flavor. Adding butter or cream enhances the creamy, melt-in-your-mouth consistency. Allowing the fudge to set properly is crucial for the right texture—refrigerate it for at least 2 hours or until firm.

Why sometimes the fudge turns grainy?

Grainy fudge can result from overcooking or not mixing the ingredients properly. I recommend stirring the chocolate continuously while melting and avoiding overmixing once it’s removed from the heat.

What kind of dark chocolate is best to make this dark chocolate almond fudge recipe?

I highly recommend using high-quality dark chocolate chips with at least 60-70% cocoa content for a rich, intense chocolate flavor. I also include a portion of semi-sweet chocolate to create a perfectly balanced sweetness.

How to Make This Fudge Recipe Vegan?

To make this fudge recipe vegan, substitute sweetened condensed milk with vegan coconut milk, and replace the chocolate chips with vegan chocolate chips and the butter with vegan butter.

Close up shot of Dark Chocolate Fudge with Almonds

Ultimate Dark Chocolate Fudge with Almonds

Close up shot of dark chocolate almond fudge

Dark Chocolate Fudge with Almonds

Abi Guna
Indulge in this rich and decadent Ultimate Dark Chocolate Fudge, packed with the crunch of toasted almonds. With just five simple ingredients, this Chocolate Almond Fudge combines dark chocolate chips, semi-sweet chocolate chips, and toasted sliced almonds for the perfect balance of rich chocolate flavor and nutty texture.
5 from 7 votes
Print Recipe Pin Recipe
Prep Time 10 minutes mins
Cook Time 15 minutes mins
Chilling Time 2 hours hrs
Total Time 2 hours hrs 30 minutes mins
Course Dessert
Cuisine American
Servings 16 pieces

Ingredients
  

  • 2 cups Dark chocolate chips 60% cacao
  • 1 cup Semi chocolate chips
  • 1 can Sweetened condensed milk
  • 2 tablespoon Unsalted butter at room temperature
  • 1 teaspoon Vanilla extract
  • ½ teaspoon Almond extract optional
  • 1 cup Sliced almonds toasted for extra flavor

Instructions
 

  • Line an 8x8 inch square baking pan with parchment paper, leaving some overhang for easy removal. Lightly grease with butter or non-stick spray.
  • In a saucepan or nonstick skillet, melt the dark chocolate chips, semi-sweet chocolate chips, sweetened condensed milk, and butter over low heat. Stir continuously with a spatula or wooden spoon until smooth.
  • Remove from heat and stir in the vanilla extract and almond extract (if using) in the melted chocolate mixture.
  • Fold in the sliced almonds, reserving a few to sprinkle on top.
  • Pour the mixture into the prepared pan and smooth the top with a rubber spatula.
  • Sprinkle the reserved almonds on top and gently press them into the fudge.
  • Chill in the refrigerator for at least 2 hours until set.
  • Once firm, lift the fudge out of the pan using the parchment paper and cut it into squares using a sharp knife. Serve immediately or store in an airtight container.

Video

Notes

  1. Heating should be done gently over low heat to prevent burning of chocolate.
  2. Store the  fudge in an airtight container at room temperature for up to one week. For longer storage, keep it in the refrigerator for up to two weeks or freeze it for up to three months.
  3. You can use either full-fat or low-fat condensed milk for this recipe; both work just fine.
Keyword chocolate, easy desserts

If you enjoyed making this Ultimate dark chocolate fudge recipe with almonds, please show some love and let me know in the comments!

Roasted Carrot Hummus with Canned Chickpeas (Easy)

October 11, 2024 by Abi Guna 10 Comments

Looking for a fresh and flavorful twist on your snack game? Meet my Roasted Carrot Hummus is an easy-to-make recipe using canned chickpeas that offers a delightful twist on traditional hummus. It incorporates the earthy sweetness and subtle caramelized flavors of roasted carrots into the creamy chickpea base.

Roasted carrot hummus with canned chickpeas-backlighting shot

This carrot hummus dip blends roast carrots and classic hummus flavors for a creamy dip with a subtle sweetness that stands out at any gathering (perfect for Easter, too). Made with little olive oil and finished with a drizzle of olive oil, it’s delicious with fresh vegetables or warm pita bread, and it also works great as a sandwich spread or bruschetta topping.

Looking for more cozy recipes with carrots? If so, you should definitely try this Spicy Vegetable Soup . Add this carrot hummus to a snack board with my Hummus Without Garlic for a milder, classic option, then round it out with something warm and hearty like my Cheese Naan Bread (it’s so good for scooping!). If you want a full meal vibe, pair this dip with my Crispy Chicken Caesar Salad or serve it as a side with Air Fryer Sweet Potato Wedges for the perfect dip-and-crunch combo.

Roasted carrot hummus with canned chickpeas- served in a platter with veggies and pita chips
[feast_advanced_jump_to]

Easy Recipes with roasted carrots

  • Roasted Carrots and Asparagus
  • Roasted Carrots and Cauliflower

How to make the BEST roasted carrot hummus recipe

You begin this culinary journey by roasting your carrots. Drizzle the carrots with olive oil and roast on a baking sheet for 30 minutes. Let cool, give 15 minutes to rest.

Now, for the fun part. Place the roasted carrots, garlic, salt, pepper, chickpeas, tahini, lemon juice, chickpea liquid, cumin, and paprika in a blender and process on high for half a minute. Make sure all ingredients are well incorporated. If you need more moisture, use more chickpea liquid or water.

Roasted carrot hummus with canned chickpeas-flat lay shot.

Ingredients for Your Roasted Carrot Hummus 

You only need a few simple ingredients to blend together and create a delicious, creamy hummus with a hint of sweetness from the roasted carrots.

Ingredient shot of roasted carrot hummus with canned chickpeas
  • Fresh carrots - It all starts with freshly roasted carrots and garlic. You can peel the carrots or leave them unpeeled. Leaving them unpeeled will be a nutritional boost.  
  • Canned chickpeas (drained and rinsed) -
    Any hummus has chickpeas as the primary ingredient. Canned chickpeas are fine, but you can use dried ones, as well. Either way, they are a great source of fiber. Keep the chickpea liquid for added moisture. 
  • Tahini - Tahini adds plenty of earthiness to the sweet carrots as the lemon juice lends a nice tang of flavor.
  • Olive oil - Olive oil is a healthy fat that you should not shy away from. Half a tablespoon of olive oil a day can be beneficial to cardiovascular health. 
  • Lemon juice - For that citrus kick to boost the hummus flavor.
  • Garlic, Ground cumin, Paprika, Salt and pepper - The blend of seasoning and spices works perfectly: salt, pepper, cumin, and paprika. Smokey paprika adds a hint of smokiness. 

See recipe card for quantities.

Instructions

Roasted carrot hummus with canned chickpeas-peeling carrots
  1. Step 1: You can peel the carrots or leave them unpeeled. But for this recipe I have peeled the fresh carrots.
Roasted carrot hummus with canned chickpeas-roasting pan
  1. Step 2: Drizzle the carrots with olive oil, salt and pepper.
Roasted carrot hummus with canned chickpeas-Roasted carrots in the pan
  1. Step 3: Roast on a baking sheet for 30 minutes. 
Roasted carrot hummus with canned chickpeas- add the ingredients to the food processor.
  1. Step 4: Place the roasted carrots, garlic, salt, pepper, chickpeas, tahini, lemon juice, chickpea liquid, cumin, and paprika in a blender.
  1. Step 5: Process on high for 2-3 minutes. Make sure all ingredients are well incorporated. If you need more moisture, use more chickpea liquid or water.
Roasted carrot hummus with canned chickpeas-flat lay shot.
  1. Step 6: Enjoy your roasted carrot hummus.

How to Enjoy Your Roasted Carrots and Hummus

  • Serve as a carrot hummus dip with fresh vegetables (cucumbers, bell peppers, snap peas, cherry tomatoes).
  • Pair with warm pita bread, pita chips, or naan for easy scooping.
  • Add a drizzle of olive oil on top and finish with sesame seeds, chili flakes, or fresh herbs.
  • Spread on sandwiches, wraps, or toast with greens and feta.
  • Use as a base for a Mediterranean bowl (rice/quinoa, veggies, olives, chickpeas).

How To Store Your Carrot Hummus

Refrigerate: Store carrot hummus in an airtight container for 3–4 days. Smooth the top and add a thin drizzle of olive oil to prevent it from drying out.

Freezer: Yes, you can freeze homemade hummus. Freeze in a sealed container for up to 4 months (best used within that time for the creamiest texture).

Roasted carrot hummus with canned chickpeas-on a kitchen backgrounds

What Makes Carrots with Hummus Special?

Carrots and chickpeas create a unique blend of flavors and colors. It is tasty year-round but becomes extraordinary in the fall. As you work with the combination of carrots, chickpeas, tahini, and lemon juice, do not hesitate to play and experiment with the spices to create your own special dish. You can add curry for a taste variation, or red chili flakes or sriracha for a bit of heat. 

Variations of Roasted Carrots Hummus with Canned Chickpeas/Garbanzo Beans

These variations allow you to customize the classic roasted carrot hummus to suit different tastes or occasions!

  • Spicy Roasted Carrot Hummus – Add a pinch of cayenne pepper to the carrots before roasting for a spicy kick.
  • Curried Carrot Hummus – Toss the carrots with curry powder before roasting, and add a tablespoon of coconut milk to the hummus for a creamy, rich flavor.
  • Smoky Carrot Hummus – Roast the carrots with smoked paprika for a deep, smoky taste. You can also add a dash of liquid smoke to the hummus for an even bolder smoky flavor.

Equipment

Baking sheet – for roasting the carrots.

Blender or food processor – to blend the hummus ingredients into a smooth consistency

Top Tip

To enhance the flavor, roast the carrots until they are slightly caramelized and tender. This will bring out their natural sweetness and add depth to the hummus. 

Roasted carrot hummus with canned chickpeas-close up shot with pita chips

FAQ

What if I don’t want to use canned chickpeas for the recipe?

If you don't want to use the canned chickpeas and want to make it from scratch. Then please follow the below steps
Rinse the dried chickpeas under cold water, then transfer them to a large bowl.
Cover the chickpeas with several inches of water and let them soak overnight, or for at least 8 hours.
After soaking, drain and rinse the chickpeas again. Transfer them to a large pot and cover them with fresh water.
Bring the water to a boil, then reduce the heat to low and let the chickpeas simmer for about 1 to 1.5 hours, or until they are tender. 
To ensure the chickpeas are cooked through, you can test them by squeezing one between your fingers. It should mash easily without any resistance.
Once the chickpeas are cooked, drain them and rinse them with cold water to stop the cooking process. Let them cool completely before using them in the hummus recipe.

What vegetables to serve with hummus?

Yes, you can skip the tahini if you don’t have it or don’t like the taste. You can substitute it with Greek yogurt or avocado for a lighter, creamier texture.

Is it possible to use another bean, like Cannelinni or white bean instead of chickpeas in this recipe?

Yes, you can absolutely substitute chickpeas with cannellini beans or white beans in your roasted carrot hummus! These beans have a mild flavor and creamy texture, making them a great alternative. The result will still be smooth and delicious, though slightly lighter and silkier compared to traditional chickpea-based hummus.

Roasted carrot hummus with canned chickpeas feature image

Roasted Carrot Hummus with Canned Chickpeas

Abi Guna
Roasted carrot hummus is an easy-to-make recipe using canned chickpeas that offers a delightful twist on traditional hummus. It incorporates the earthy sweetness and subtle caramelized flavors of roasted carrots into the creamy chickpea base. This versatile dip pairs well with a variety of accompaniments and is sure to be a hit at any gathering.
5 from 5 votes
Print Recipe Pin Recipe
Prep Time 15 minutes mins
Cook Time 30 minutes mins
Total Time 45 minutes mins
Course Appetizer
Cuisine Mediterranean
Servings 4
Calories 95 kcal

Equipment

  • Food Processor
  • Baking sheet pan

Ingredients
  

  • 1 lb fresh carrots
  • 4 tablespoons olive oil divided
  • 1 teaspoon salt divided
  • ½ teaspoon ground pepper
  • 15 ounce canned garbanzo/chickpeas drained and rinsed
  • 2 garlic cloves skin peeled
  • 3 tablespoons tahini
  • 3 tablespoons fresh lemon juice
  • 3 tablespoons water or aquafaba liquid from canned chickpeas
  • 1 teaspoon ground cumin
  • ½ teaspoon paprika
  • Fresh chopped cilantro to garnish
  • Veggies to serve
  • Pita chips to serve

Instructions
 

  • Preheat the oven to 400 degrees F.
  • Wash and peel the carrots, then place them on a baking tray. Drizzle with a tablespoon of oil, ½ teaspoon of salt, and pepper.
  • Gently massage the carrots with the oil and seasonings, then place them in the oven. Roast for 25-30 minutes until the carrots are very tender.
  • Transfer the roasted carrots to a cutting board and roughly chop them. Add them to a food processor.
  • To the food processor, add chickpeas, garlic, tahini, lemon juice, water, ground cumin, and paprika. Blend on high speed for a minute, then slowly add the remaining 3 tablespoons of olive oil.
  • Blend until smooth and creamy. If needed, add another tablespoon of water to achieve the desired creamy texture.
  • Transfer the prepared hummus dip to a serving bowl. Garnish with chopped cilantro and serve with veggies and pita chips to enjoy.

Notes

  1. I have used water to blend the chickpeas and carrots. Alternatively, you can use aquafaba (liquid from canned chickpeas) instead.
  2. You can either chop the carrots and roast them, or use whole carrots to roast and then chop them, as I did here.
  3. To spice up the hummus, you can also add additional spices like ground coriander, cayenne pepper, etc.
  4. In addition to a food processor, you can also use a high-speed blender to achieve the desired texture.
  5. Fan of recipes with roasted carrots? Try my roasted carrots and asparagus and roasted carrots and cauliflower recipe!
Keyword Appetizers, Dips

If you enjoyed making this roasted carrot hummus recipe with canned chickpeas, please show some love and let me know in the comments

  • « Previous Page
  • 1
  • 2
  • 3

Hey, I'm Abi

Your next 'Food Exit' is just 5 minutes away—don’t miss it! Buckle up and enjoy the delicious recipes!
About Me

Popular

Footer

↑ back to top

About

  • Privacy Policy

Newsletter

  • Sign Up! for emails and updates
Contact

  • Contact

As an Amazon Associate I earn from qualifying purchases.

Copyright © 2025 Food Exit Recipes